【AI实战】微小目标检测模型MMDet-RFLA--训练环境搭建
- RFLA介绍
- 环境搭建
- 安装依赖
- 参考
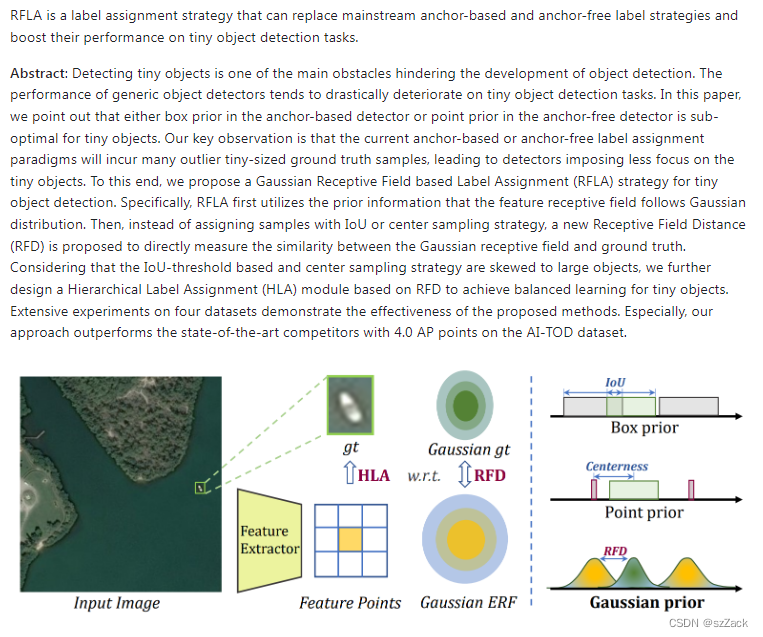
RFLA介绍
- 官方连接
https://github.com/Chasel-Tsui/mmdet-rfla - arxiv
https://arxiv.org/abs/2208.08738
环境搭建
我的机器的cuda是10.2,根据自己的cuda版本到 https://hub.docker.com/ 拉取对应的镜像
一定要拉取带 devel 的版本镜像
- 拉取gpu镜像
docker pull aegis1/cuda10.2-cudnn8-devel-ubuntu18.04:pcl
- 创建容器
nvidia-docker run -it -d \
    --name rfla \
    -v /bee/abc/test_model/:/notebooks \
    -e TZ='Asia/Shanghai' \
    --shm-size 16G \
    -d aegis1/cuda10.2-cudnn8-devel-ubuntu18.04:pcl
- 进入容器
docker exec -it rfla env LANG=C.UTF-8 /bin/bash
安装依赖
- 安装Anaconda
curl -O https://repo.anaconda.com/miniconda/Miniconda3-latest-Linux-x86_64.sh
sh Miniconda3-latest-Linux-x86_64.sh
ln -s /root/miniconda3/bin/conda /usr/bin/conda
- 创建py3.8环境
conda create --name openmmlab python=3.8 -y
conda init
退出终端
再进入终端
会出现下面的内容:
(base) root@1212:/#
- 进入我们的环境 openmmlab
conda deactivate
conda activate openmmlab
如下面的内容;
(openmmlab) root@1212:
- 安装torch
我的cuda是10.02
conda install pytorch==1.9.1 torchvision==0.10.1 torchaudio==0.9.1 cudatoolkit=10.2 -c pytorch
其他cuda版本可以按照
https://pytorch.org/get-started/previous-versions/
来进行安装
- 安装mim
pip install openmim
- 安装 mmcv-full
mim install mmcv-full==1.3.9
- 安装cv2的依赖
apt update
apt install libgl1-mesa-glx  -y
- 安装cocoapi
pip install "git+https://github.com/jwwangchn/cocoapi-aitod.git#subdirectory=aitodpycocotools"
- 安装mmdet-rfla
git clone https://github.com/Chasel-Tsui/mmdet-rfla.git
cd mmdet-rfla
pip install -r requirements/build.txt
python setup.py develop
【】按照上面的过程一步一步的安装,就能正常跑模型了
参考
- https://github.com/Chasel-Tsui/mmdet-rfla
- https://mmcv.readthedocs.io/en/latest/get_started/installation.html#install-mmcv
- https://mmdetection.readthedocs.io/zh_CN/latest/get_started.html
- https://github.com/open-mmlab/mim


