前言
我们前端开发过程中,编写测试代码,有以下这些好处:
更快的发现bug,让绝大多数bug在开发阶段发现解决,提高产品质量
比起写注释,单元测试可能是更好的选择,通过运行测试代码,观察输入和输出,
有时会比注释更能让别人理解你的代码(当然,重要的注释还是要写的。。。)

有利于重构,如果一个项目的测试代码写的比较完善,重构过程中改动时可以迅速的通过测试代码是否通过来检查重构是否正确,大大提高重构效率
编写测试代码的过程,往往可以让我们深入思考业务流程,让我们的代码写的更完善和规范。
基础的配置和使用可参考Vue3 + ts + jest 单元测试 配置以及使用
1. 如何创建一个测试用例
import { mount, shallowMount } from '@vue/test-utils';
import InputNumberGroup from '@/components/Common/InputNumberGroup/index.vue';
import ElementPlus from 'element-plus';
const wrapper = mount(InputNumberGroup, {
  global: {
    plugins: [ElementPlus]
  }
});

describe('测试组件 in input-number-group',   () => {
  it('测试class 是否具有相应的类名', () => {
    expect(wrapper.classes('input-number-group')).toBe(true);
  });
});
mount()与shallowMount()关键字
const wrapper = mount(InputNumberGroup)
深层渲染mount 可以将父组件下面的子组件全部渲染
const wrapper = mountshallow(InputNumberGroup)
而mountshallow只会渲染父组件,不会去渲染子组件
global将element ui 组件 挂在到wrapper上 类似 createApp.use(elemeent)
describe()
创建一个分组,可以在这里面编写相应的测试计划。
It()关键字
It 断言 他有两个参数 第一个是字符串 一般用于说明测试组件的那个内容 ,
第二个参数为一个函数 里面用于编写判断,当判断错误时可以精准的查找到错误位置
expect()
Jest为我们提供了expect函数用来包装被测试的方法并返回一个对象,
该对象中包含一系列的匹配器来让我们更方便的进行断言,上面的toBe函数即为一个匹配器
匹配器
toBe() 精准匹配
toBeNull只匹配null
toBeUndefined只匹配undefined
toBeDefine与toBeUndefined相反
toBeTruthy匹配任何if语句为真
toBeFalsy匹配任何if语句为假
expect(fn).toHaveBeenCalled() // 判断函数是否被调用expect(fn).toHaveBeenCalledTimes(number)
 // 判断函数被调用次数
expect(['one','two']).toContain('one'); // 含有某个元素
数字匹配器
大于。toBeGreaterThan()
大于或者等于。toBeGreaterThanOrEqual()
小于。toBeLessThan()
小于或等于。toBeLessThanOrEqual()

toBe和toEqual同样适用于数字。
使用toMatch()测试字符串,传递的参数是正则表达式。
如何检测数组中是否包含特定某一项,可以使用toContain()
运行多个测试
只需要在 describe() 作用域中增加多个 it() 声明即可。*
2. 单元测试-ui测试
2.1 首先判断dom元素是否存在
import { mount, shallowMount } from '@vue/test-utils';
import InputNumberGroup from '@/components/Common/InputNumberGroup/index.vue'; //子组件
import ElementPlus from 'element-plus';
const wrapper = mount(InputNumberGroup, {
  global: {
    plugins: [ElementPlus]
  }
});

describe('测试组件 in input-number-group',   () => {
  it('测试dom元素 是否存在', () => {
    expect(wrapper.classes('input-number-group')).toBe(true);
  }),
  })
Classes()
Wrapper.classes('is-active')
Wrapper.classes:参数为想要获取的class名 返回是否拥有该class的dom或者类名数组。
2.2 判断dom元素是否存在相应的class样式
  it('测试dom元素 身上是否存在其他class样式', () => {
    const dom = wrapper.find('.el-input-number'); // 获取dom元素
    console.log(dom.attributes('class')); //打印dom身上的元素
    expect(dom.attributes('class')).toContain("el-input-number--small"); //判断该dom元素上是否存在el-input-number--small 样式
  }),
样式选择器find() 和 findAll()方法
这两个方法接收一个选择器作为参数,比如CSS选择器或者Vue实例都可以。

let el = wrapper.find('.message').find('span').element返回第一个满足条件的dom
let el = wrapper.findAll('.message').findAll('span').element返回所有满足条件dom ,但是返回值为一个数组
let el = wrapper.findAll('.message').findAll('span').at(0) 去获取元素的第一个
wrapper.find({ ref: 'my-button' })根据ref获取元素
wrapper.find({ name: 'MyCounter' })根据name获取元素
attributes() 属性
可以获取dom结构上的,所有属性,可以用来判断某些样式是否存在dom上面
2.3 判断dom元素,HTML标签中包含什么
  it('测试dom元素,HTML标签包含什么', () => {
    expect(wrapper.find('.input-number-group').html()).toContain("div");
  }),
2.4 判断dom元素文本内容
  it('测试dom元素 内容', async() => {
     console.log(wrapper.find(".is-active").text()); //输出文本内容
    expect(wrapper.find(".is-active").text()).toBe("布局");  //判断文本内容是否正确
  });
2.5 判断插槽
import { mount, shallowMount  } from '@vue/test-utils';
import inktankButton from '@/components/base/inktank-button.vue'; //子组件
import ElementPlus from 'element-plus';
const columnWrapper =`<div>hello</div>`;
const wrapper = mount(inktankButton, {
  global: {
    plugins: [ElementPlus],
  },
  slots: {
    default:`<div>hello</div>`,   //会自动匹配默认插槽
    slotName: `<div>slot具名插槽</div>`, // 将会匹配 `<slot name="slotName" />`
  },
});
exports[`测试组件 in inktankButton 测试class 是否具有相应的类名 1`] = `
<button
  class="el-button"
  type="button">
  <span class="" >
    <div>
      hello
    </div>
    <div>
      slot具名插槽
    </div>
  </span>
</button>
Slots插槽参数
首先在mount / mountshallow函数内设置slots参数,该参数用于定义组件内的插槽
default 设置默认插槽内容
Slotname 插槽名字 用于设置具名插槽内容
2.6 快照功能
  it('layout toMatchSnapshot', async() => {
    const wrapper = mount(treeView);
      const {vm} =wrapper;
      await vm.$nextTick();
     expect(wrapper.element).toMatchSnapshot(); //生成快照
  });
toMatchSnapshot()
首先在快照之前 使用nextTick是为了防有些dom元素没有渲染完成,就生成快照,会导致样式有问题
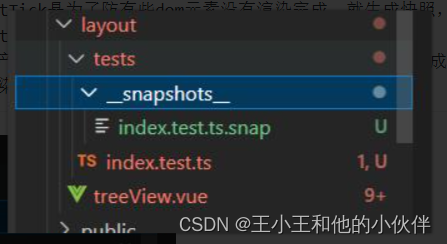
使用快照功能 可以在tests文件下生成__snapshots__文件夹,
在__snapshots__目录中产生一个xxx.test.js.snap文件 会将所测试的组件生成html结构,
方便观察元素是否成功渲染
3. 单元测试-事件测试
3.1触发点击事件
  it("layout tree 点击事件" , async () => {
    const wrapper = mount(treeView); //组件实例
    const {vm} =wrapper;
    await wrapper.vm.$nextTick(); // 同步获取dom元素渲染
    expect(wrapper.element).toMatchSnapshot(); // 快照渲染
    const firstNodeContentWrapper = wrapper.find('.el-tree-node__content'); //获取触发事件的元素
    const firstNodeWrapper = wrapper.find('.el-tree-node');
    await firstNodeContentWrapper.trigger('click'); //触发事件
    await vm.$nextTick();
    expect(wrapper.element).toMatchSnapshot(); //再次快照
    expect(firstNodeWrapper.classes('is-expanded')).toBe(true);//元素判断
    expect(firstNodeWrapper.classes('is-current')).toBe(false);
  });
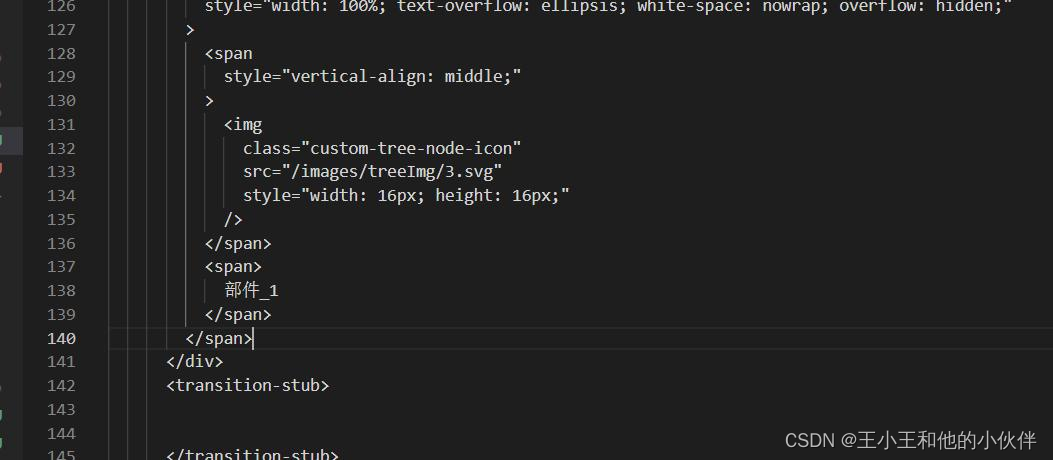
事件点击之前,快照渲染的页面
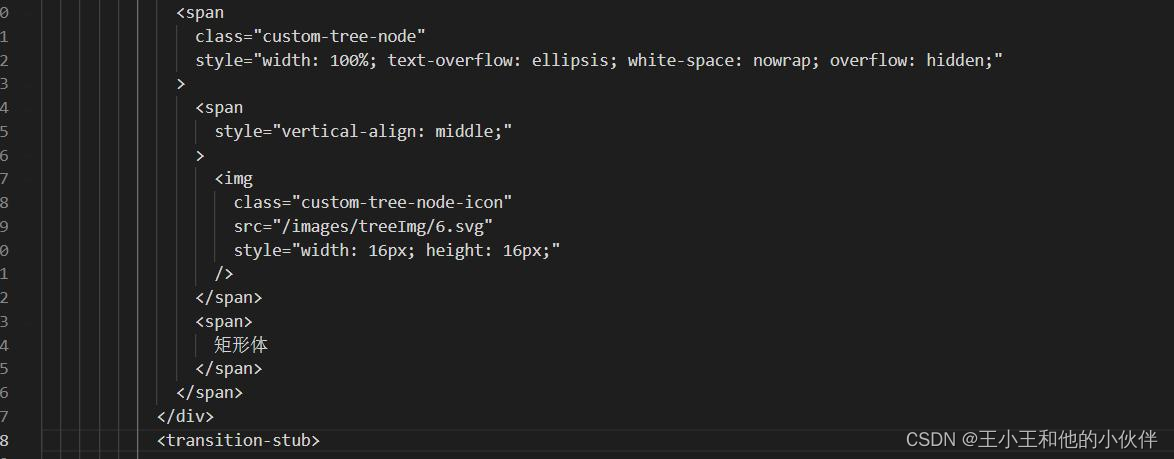
事件点击之后,页面重新渲染
Trigger()
首先获取到dom,然后使用trigger去触发想要测试的事件,在此使用await 是为了确保在断言之前 你的dom操作会执行完成
注意,trigger接受第二个参数会将选项传递给触发的事件
3.2 触发emit
import { mount, shallowMount } from '@vue/test-utils';
import InputNumberGroup from '@/components/Common/InputNumberGroup/index.vue'; //子组件
import ElementPlus from 'element-plus';
const wrapper = mount(InputNumberGroup, {
  global: {
    plugins: [ElementPlus]
  }
});
describe('测试组件 in input-number-group',   () => {
  it('正常click 触发事件', async () => {
    await wrapper.trigger('click'); //触发点击事件
    expect(wrapper.emitted().click).toBeTruthy();
  });
  it('正常change 触发事件', () => {
    wrapper.trigger('change', { keyCode: 65 });// 触发change事件
    console.log(wrapper.emitted().change);
    expect(wrapper.emitted().change).toBeTruthy();// 判断emit 提交change事件是否触发
    expect(wrapper.emitted().change).toHaveLength(1); // 判断emit 提交change事件次数
    expect(wrapper.emitted().change[0].keyCode).toEqual(65);// 判断emit 提交change事件参数
    expect(wrapper.emitted().change.length).toBe(1); // 判断emit 提交change事件次数
  });
  it('正常blur 触发事件', () => {
    wrapper.trigger('blur');
    expect(wrapper.emitted().blur).toBeTruthy();
  });
});
emitted()
可以监听到emit事件的触发,参数存储在一个数组中,因此可以验证哪些参数与每个事件一起发出。
判断是否触发相应事件
	expect(wrapper.emitted()).toHaveProperty('change')
可以判断发射的是什么事件
	 expect(wrapper.emitted().change).toHaveLength(1)
判断发射事件的次数
4. 单元测试-方法测试
import { isValidKey  }  from "../../../../utils/index";
describe('测试 isValidKey', () => {
  it("test isValidKey 对象里面是否存在",()=>{
    const i = isValidKey('obj' ,{obj:11 ,obj2 :22}); //添加虚拟数据,调用方法
    expect(i).toBe(true); //判断返回值
  });
});
import { strMapToObj, objToStrMap, mapToJson, jsonToMap } from '@/utils/mapUtil'
describe('测试 map相关方法', () => {
    let mapA = new Map();
    mapA.set('1', 'num1');
    mapA.set('true', 'bool1');

    it('map转化为对象', () => {
        const map = [
            ['1', 'str1'],
            [1, 'num1'],
            [true, 'bool1']
        ]
        const data = strMapToObj(map);
        expect(data).toEqual({ "1": "num1", "true": "bool1", });
    }),
        it('对象转换为Map', () => {
            const obj = { "1": "num1", "true": "bool1" }
            const data = objToStrMap(obj);
            expect(data).toEqual(mapA);
        })
        ,
        it(' map转换为json', () => {
            const map = new Map();
            map.set('1', 'true');
            map.set('2', 'false');
            const data = mapToJson(map);
            expect(data).toEqual("{\"1\":\"true\",\"2\":\"false\"}");
        }),
        it('json转换为map', () => {
            const jsonStr = "{\"1\":\"num1\",\"true\":\"bool1\"}"
            const data = jsonToMap(jsonStr);
            expect(data).toEqual(mapA);
        })
})
import  {isUUID ,generateUuid}   from "../../../../utils/uuid";
describe('测试 uuid', () => {
  it("test uuid 方法isUUID", async()=>{
      const testContent = isUUID('Layout');
      console.log(testContent);
      expect(testContent).toBe(false);
  });
  it("test uuid 方法generateUuid", async()=>{
    const testContent = generateUuid();
    console.log(testContent);
    expect(testContent).toEqual(/^[0-9a-f]{8}-[0-9a-f]{4}-[0-9a-f]{4}-[0-9a-f]{4}-[0-9a-f]{12}$/i);
 });
});
5. 测试总结
    %stmts是语句覆盖率(statement coverage):是不是每个语句都执行了
    %Branch分支覆盖率(branch coverage):是不是每个if代码块都执行了
    %Funcs函数覆盖率(function coverage):是不是每个函数都调用了
    %Lines行覆盖率(line coverage):是不是每一行都执行了
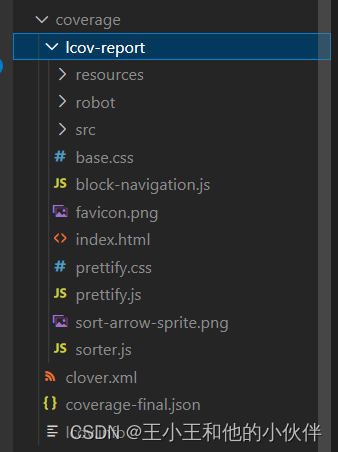
执行yarn test-utils之后 会在目录下生成一个coverage文件,
在index.html文件中右键选择 在浏览器中打开(快捷键 option + B)就可以看到测试报告。


![[附源码]计算机毕业设计springboot“小世界”私人空间](https://img-blog.csdnimg.cn/0583fc8fe3e64ba29b334b92de7d5136.png)

