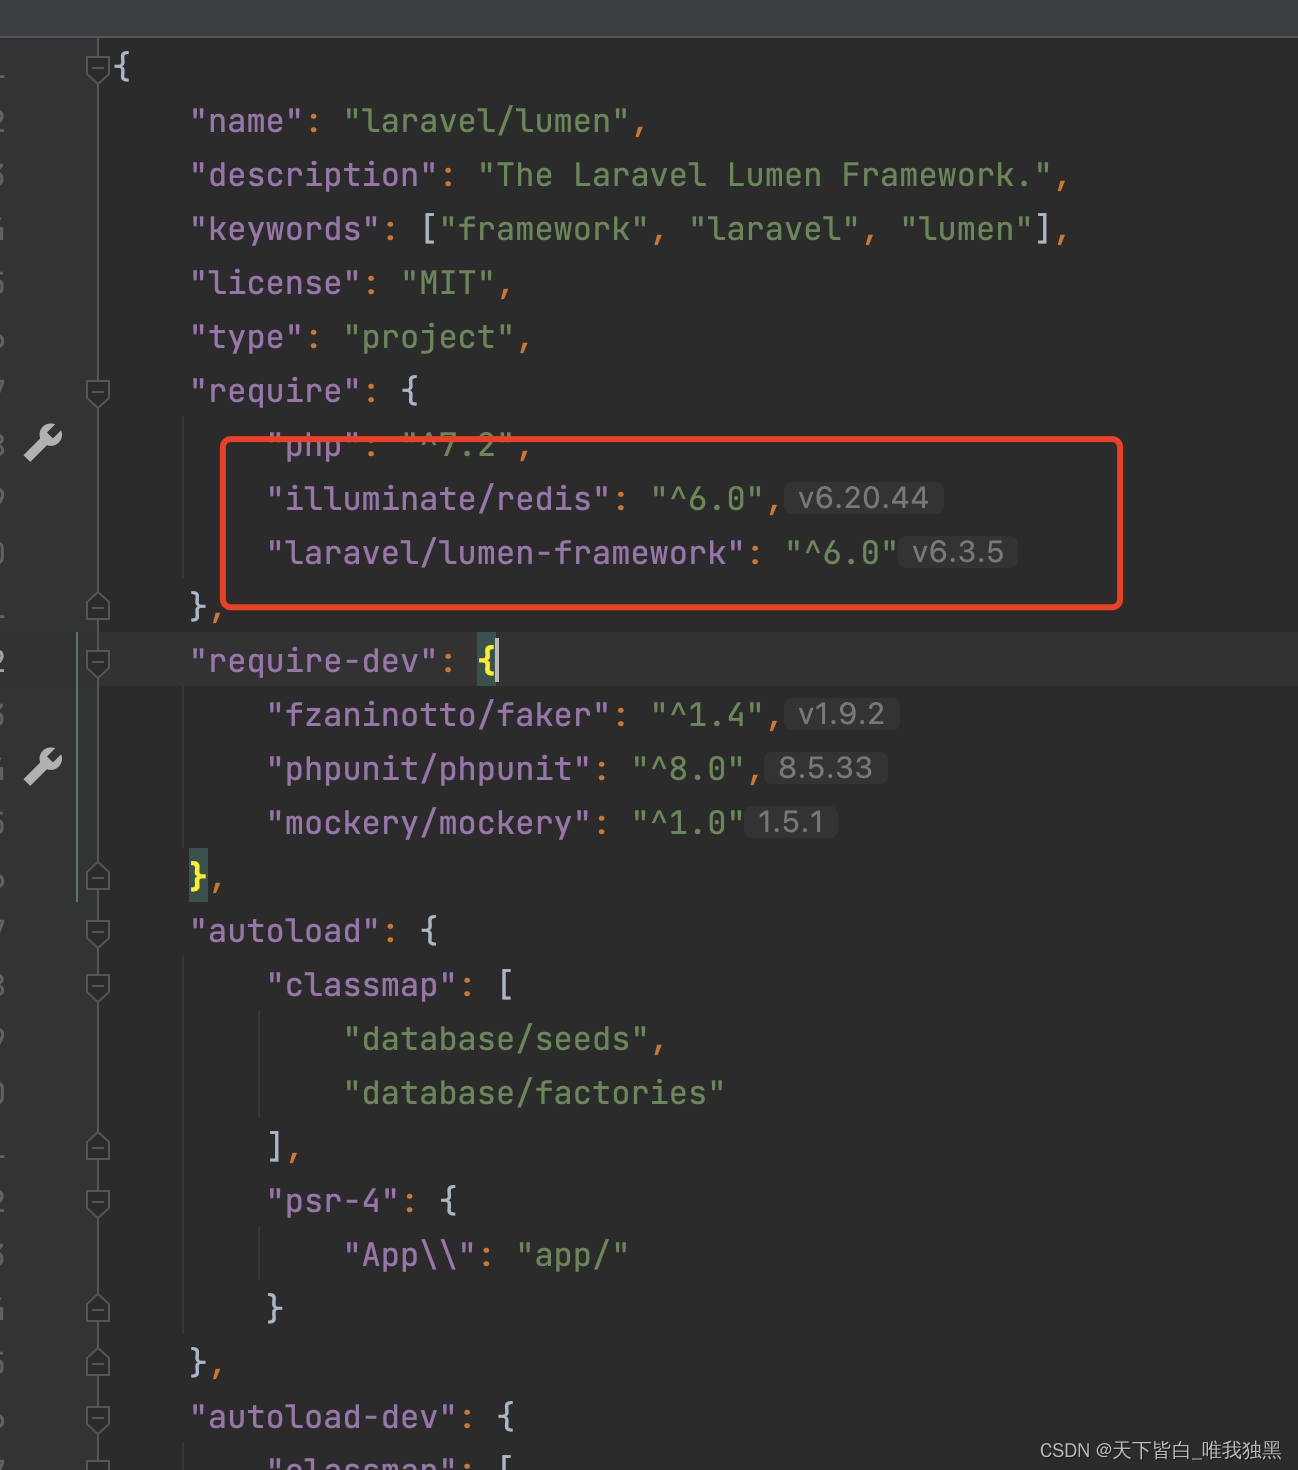
版本
Lumen6.0
中文文档:https://learnku.com/docs/lumen/5.7/cache/2411
实现功能效果
1、使用缓存存储用户token
2、从请求头head 中获取用户token
3、返回指定的认证失败结构体
4、对指定的接口路由做身份验证
第一步:解除注释
注意:
在使用 Lumen 的认证功能前,
1、取消
bootstrap/app.php文件中的AuthServiceProvider调用代码的注释。2、去掉
bootstrap/app.php文件中$app->withFacades()方法调用的注释。3、去掉
bootstrap/app.php文件中 $app->routeMiddleware([
'auth' => App\Http\Middleware\Authenticate::class,
]); 注释
第二步:接口路由验证身份 routes/web.php
<?php
$router->post('/user/login', 'UserController@login'); //登录

/**
 * 需要登录的路由 使用 Auth 中间件
 */
$router->group(['middleware' => ['auth']], function () use ($router) {

    $router->get('/user/info', 'UserController@user_info'); //获取用户信息
});
第三步:修改验证器方法 App\Providers\AuthServiceProvider.php
<?php

namespace App\Providers;

use App\Models\UserToken;
use App\Services\Cache\AuthCache;
use App\User;
use Illuminate\Support\ServiceProvider;

class AuthServiceProvider extends ServiceProvider
{
    /**
     * Register any application services.
     *
     * @return void
     */
    public function register()
    {
        //
    }

    /**
     * Boot the authentication services for the application.
     *
     * @return void
     */
    public function boot()
    {
        // Here you may define how you wish users to be authenticated for your Lumen
        // application. The callback which receives the incoming request instance
        // should return either a User instance or null. You're free to obtain
        // the User instance via an API token or any other method necessary.

//        $this->app['auth']->viaRequest('api', function ($request) {
//            if ($request->input('api_token')) {
//                return User::where('api_token', $request->input('api_token'))->first();
//            }
//        });

        $this->app['auth']->viaRequest('api', function ($request) {

            /**
             * 下面验证内容是自定义的
             * 下面是用了两个表一个存token,一个存用户
             * 从请求头中获取token
             * 去用户user_token表中验证,存在则查出来用户信息返回到模型中
             */
            //从消息头获取传入的token
            $token = $request->headers->get('Authorization');
            $a = explode(" ", $token);
            if (isset($a[1]) && $a[1]) {
                $token = $a[1];
            }

            //token验证通过返回当前认证用户
//            $token = UserToken::where('token',$token)->first();

            //从缓存中获取用户id
            $user_id = AuthCache::get_token_user_id($token);

            if($user_id){
                //返回user模型
                return User::where('id',$user_id)->first();
            }
            return null;
        });
    }
}
以上方式是通过缓存中查询token的,此处也可以改成数据库中查询,或者使用jwt解析
原理就是通过请求接口传输过来的token信息,通过token查询到关联的用户id,然后再查询用户信息,返回整个用户模型,之后就可以使用Auth::user() 拿到用户数据
第四步:查看user model模型下的内容,正常安装后是不需要改动的,这里我继承了一个自己写的BaseModel父类。
<?php
namespace App\Models;


use Illuminate\Auth\Authenticatable;
use Illuminate\Contracts\Auth\Access\Authorizable as AuthorizableContract;
use Illuminate\Contracts\Auth\Authenticatable as AuthenticatableContract;
use Laravel\Lumen\Auth\Authorizable;

class User extends BaseModel implements AuthenticatableContract, AuthorizableContract
{
    protected string $title = '用户表';
    protected $guarded = ['id'];
    protected $table = 'users';

    /**
     * 复用下面两个trait类
     */
    use Authenticatable, Authorizable;

//    /**
//     * The attributes that are mass assignable.
//     *
//     * @var array
//     */
//    protected $fillable = [
//        'name', 'email',
//    ];

    /**
     * The attributes excluded from the model's JSON form.
     *
     * @var array
     */
    protected $hidden = [
        'password',
    ];

}
第五步:修改认证失败后的,返回结构App/Http/Middleware/Authenticate.php
看一下默认返回结构
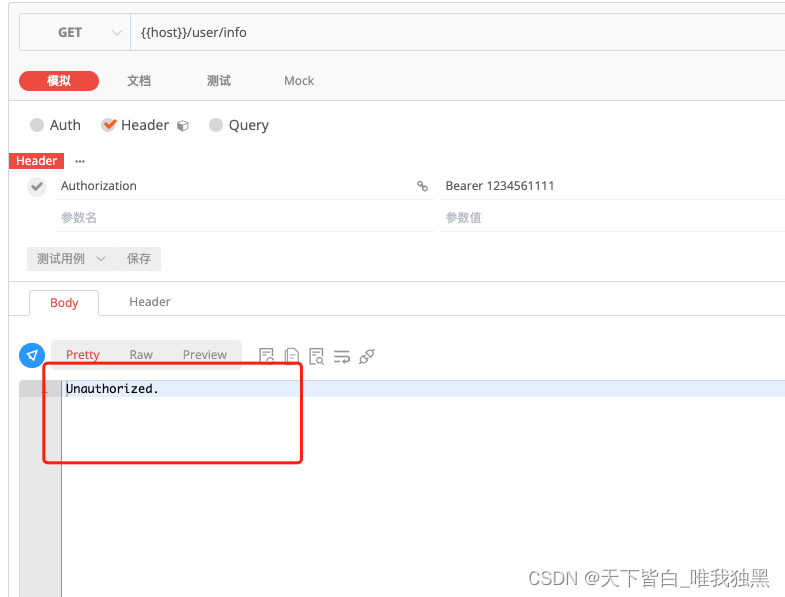
修改后返回结构,这里可以自定义,正常情况我们应在项目定义一个全局的返回结构体方法提供使用。

<?php

namespace App\Http\Middleware;

use App\Common\Common;
use App\Common\StatusConstants;
use Closure;
use Illuminate\Contracts\Auth\Factory as Auth;

class Authenticate
{
    /**
     * The authentication guard factory instance.
     *
     * @var \Illuminate\Contracts\Auth\Factory
     */
    protected $auth;

    /**
     * Create a new middleware instance.
     *
     * @param  \Illuminate\Contracts\Auth\Factory  $auth
     * @return void
     */
    public function __construct(Auth $auth)
    {
        $this->auth = $auth;
    }

    /**
     * Handle an incoming request.
     *
     * @param  \Illuminate\Http\Request  $request
     * @param  \Closure  $next
     * @param  string|null  $guard
     * @return mixed
     */
    public function handle($request, Closure $next, $guard = null)
    {

        if ($this->auth->guard($guard)->guest()) {

            //这是默认的返回结构
//            return response('Unauthorized.', 401);

            //修改返回结构
            return response()->json([
                'code'=>404,
                'msg'=>'无效的token',
                'data'=>[]
            ]);

//            Common::response_result(StatusConstants::ERROR_UNAUTHORIZED_TOKEN,'无效的token');
        }

        //验证通过
        return $next($request);
    }
}

