前言
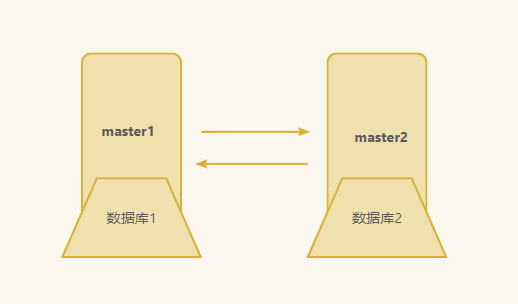
MySQL主主同步实际上是在主从同步的基础上将从数据库也提升成主数据库,让它们可以互相读写数据库,从数据库变成主数据库;主从相互授权连接,读取对方binlog日志并更新到本地数据库的过程,只要对方数据改变,自己就跟着改变。
1. 主主同步的优与劣
事实上每个技术都有它的优劣势,我们要在功能之间选择更适合自己使用的技术服务。
主主同步的优势
- 提高数据可用性:MySQL主主同步可以将多个MySQL服务器之间的数据同步,当其中一个服务器出现故障时,其他服务器可以继续提供服务,从而提高了数据的可用性。
- 增强数据的安全性:MySQL主主同步可以实现数据的备份和复制,当其中一个服务器出现数据丢失或损坏时,其他服务器可以提供备份数据,从而增强了数据的安全性。
- 支持读写分离:MySQL主主同步可以实现读写分离,即将读请求和写请求分发到不同的MySQL服务器上,从而提高了数据库的读写性能。
主主同步的劣势
- 数据同步延迟:MySQL主主同步存在数据同步延迟的问题,即在数据同步过程中,可能会出现数据不一致的情况。当一个MySQL服务器修改了数据后,其他服务器需要一定的时间才能完成数据同步,因此可能会出现数据同步延迟的问题。
- 需要协调多个MySQL服务器:MySQL主主同步需要协调多个MySQL服务器之间的数据同步,因此需要更多的管理和维护工作,包括配置、监控和故障处理等。
- 数据库性能下降:MySQL主主同步可能会降低数据库的性能,特别是在数据同步过程中,可能会占用过多的系统资源,从而影响数据库的性能。
综上所述,MySQL主主同步具有提高数据可用性、增强数据安全性、支持读写分离等优点,但也存在数据同步延迟、需要协调多个MySQL服务器和数据库性能下降等缺点。因此,在选择数据库同步方式时,需要根据实际情况综合考虑。
一. 部署MySQL数据库
还是一样需要先将两台服务器同时都安装上MySQL8.0数据库,这里就快速的演示一下。
1.1 前期准备
为了整个实验步骤比较顺利,需要先将防火墙和selinux提前关闭。
iptables -F
systemctl stop firewalld.service
setenforce 0
这里第二台服务器不在作为从,而是两台都是作为主数据库。
| 系统 | IP | 数据库版本 |
|---|---|---|
| CentOS7.9 | 192.168.116.166(master1) | mysql8.0 |
| CentOS7.9 | 192.168.116.128(master2) | mysql8.0 |
1.2 安装数据库
两台服务器都需要安装好数据库,这个是前提,也是必须安装的。
详细步骤可参考《安装部署MySQL8.0》
#备份源
[root@localhost yum.repos.d]# mv CentOS-Base.repo CentOS-Base.repo.bak

#下载网络源
[root@localhost yum.repos.d]# wget -O /etc/yum.repos.d/CentOS-Base.repo https://mirrors.aliyun.com/repo/Centos-7.repo

#清空现有的文件和软件包
[root@localhost yum.repos.d]# rpm -qa | grep mysql
[root@localhost yum.repos.d]# rpm -qa | grep mariadb
mariadb-libs-5.5.68-1.el7.x86_64
[root@localhost yum.repos.d]# rpm -e mariadb-libs --nodeps

[root@localhost yum.repos.d]# find / -name mysql
/etc/selinux/targeted/active/modules/100/mysql
/usr/lib64/mysql
[root@localhost yum.repos.d]# rm -rf /etc/selinux/targeted/active/modules/100/mysql /usr/lib64/mysql

#下载安装MySQL8.0
[root@localhost yum.repos.d]# rpm -ivh https://repo.mysql.com/mysql80-community-release-el7.rpm
[root@localhost yum.repos.d]# yum install mysql-community-server -y
[root@localhost yum.repos.d]# systemctl restart mysqld

#找到初始化密码,为下一步登录修改密码做准备
[root@localhost yum.repos.d]# grep -iwa "Password" /var/log/mysqld.log
2023-03-07T06:56:53.564861Z 6 [Note] [MY-010454] [Server] A temporary password is generated for root@localhost: h-Ijft/b/9W*

#修改数据库密码
[root@localhost yum.repos.d]# mysql -uroot -p
Enter password:
Welcome to the MySQL monitor.  Commands end with ; or \g.
Your MySQL connection id is 8
Server version: 8.0.32

Copyright (c) 2000, 2023, Oracle and/or its affiliates.

Oracle is a registered trademark of Oracle Corporation and/or its
affiliates. Other names may be trademarks of their respective
owners.

Type 'help;' or '\h' for help. Type '\c' to clear the current input statement.

mysql> alter user 'root'@'localhost' identified by 'Admin#123';
Query OK, 0 rows affected (0.00 sec)

mysql> exit
安装好之后,就可以开始配置主主同步了。
1.3 思路
将第一台服务器设定为主master1,第二台服务器设定为主master2
主master1与主master2先做一遍主从同步,让它们互为主从关系,第二遍反过来,让主作从,让从作主。
在这个基础上,肯定是需要修改配置文件的,那么我们就先修改master1的。
二. 配置主master1
增加辨识度,提前先将第一台服务器修改主机名
[root@localhost ~]# hostname master1
[root@localhost ~]# bash
[root@master1 ~]#
2.1 修改配置文件
[root@master1 ~]# vim /etc/my.cnf
[root@master1 ~]# sed 4,+5p -n /etc/my.cnf
[mysqld]
server-id=11
log-bin=mysql-bin
auto_increment_increment=2
auto_increment_offset=1
replicate-do-db=demo_db
- server-id=11 #数据库的唯一ID
- log-bin=mysql-bin #存放日志文件位置
- auto_increment_increment=2 #控制主键自增的步长,几台服务器就设置几
- auto_increment_offset=1 #设置自增起始值。这个是第1台,那么为1,下一台则为2。
- replicate-do-db=demo_db #选择要同步的数据库。
修改好配置文件后,记得记得一定要重启服务,因为修改配置文件等于重新给变量赋值;不重启服务,文件的inode值不会同步到内核中,因此重启服务就是让新的inode值让内核知道的一个过程。
[root@master1 ~]# systemctl restart mysqld
2.2 创建用户master1
在数据库中创建一个master1的用户
[root@master1 ~]# mysql -uroot -p'Admin#123'
mysql: [Warning] Using a password on the command line interface can be insecure.
Welcome to the MySQL monitor.  Commands end with ; or \g.
Your MySQL connection id is 8
Server version: 8.0.32 MySQL Community Server - GPL

Copyright (c) 2000, 2023, Oracle and/or its affiliates.

Oracle is a registered trademark of Oracle Corporation and/or its
affiliates. Other names may be trademarks of their respective
owners.

Type 'help;' or '\h' for help. Type '\c' to clear the current input statement.

mysql> create user 'master1'@'%' identified with mysql_native_password by '#Master1';
Query OK, 0 rows affected (0.01 sec)

mysql>  grant replication slave on *.* to 'master1'@'%';
Query OK, 0 rows affected (0.00 sec)

mysql> flush privileges;
Query OK, 0 rows affected (0.00 sec)

mysql> show grants for 'master1'@'%';
+-------------------------------------------------+
| Grants for master1@%                            |
+-------------------------------------------------+
| GRANT REPLICATION SLAVE ON *.* TO `master1`@`%` |
+-------------------------------------------------+
1 row in set (0.00 sec)
create user 'master1'@'%' identified with mysql_native_password by '#Master1';
- 这一条语句的意思就是创建一个master1这个用户,用户的名称是可以自己定义的;@'%'表示可以远程登录数据库,identified with mysql_native_password by这个语句则是MySQL8.0的固定写法,表示就是给他设置密码。
grant replication slave on *.* to 'master'@'%';
- 这条语句则是表示给这个用户授权数据库的权限,*.基本上就是给所有权限,第一个表示所有数据库,第二个是表示数据库表。
flush privileges;
- 这条语句表示刷新数据库,让之前设置的内容可以同步到数据库中。
show grants for 'master1'@'%';
- 查看之前设置的权限是否已经写入到数据库中,有显示内容表示已经写入成功了。
接下来继续查看master1的状态
mysql> show master status;
+------------------+----------+--------------+------------------+-------------------+
| File             | Position | Binlog_Do_DB | Binlog_Ignore_DB | Executed_Gtid_Set |
+------------------+----------+--------------+------------------+-------------------+
| mysql-bin.000002 |      157 |              |                  |                   |
+------------------+----------+--------------+------------------+-------------------+
1 row in set (0.00 sec)
- File 就是我们刚刚设置的log-bin的存放文件,用来记录mysql操作的日志文件。
- Position 表示是偏移量
- Binlog_Do_DB 需要进行同步的数据库
- Binlog_Ignore_DB 不进行同步的数据库
每操作一步数据库,这个偏移量的值都会发生变化,因此查看状态后,master1数据库最好就不要继续再操作任何内容了。
那么接下来就开始修改第二台数据库。
三. 配置slave1从数据库
此配置在第二台服务器上进行操作
修改主机名
[root@localhost ~]# hostname master2
[root@localhost ~]# bash
[root@master2 ~]#
3.1 修改配置文件
修改配置文件/etc/my.cnf,这个是第二台服务器,因此id和auto_increment_offset都需要调整为2。
[root@master2 ~]# vim /etc/my.cnf
[root@master2 ~]# sed 4,+5p -n /etc/my.cnf
[mysqld]
server-id=12
log-bin=mysql-bin
auto_increment_increment=2
auto_increment_offset=2
replicate-do-db=demo_db
还是一样,修改好配置文件一定要重启服务
[root@master2 ~]# systemctl restart mysqld
3.2 绑定主master1数据库
mysql> change master to master_host='192.168.116.166',
    -> master_user='master1',
    -> master_password='#Master1',
    -> master_log_file='mysql-bin.000002',
    -> master_log_pos=157;
Query OK, 0 rows affected, 8 warnings (0.00 sec)

mysql> start slave;
Query OK, 0 rows affected, 1 warning (0.01 sec)

mysql> show slave status \G
*************************** 1. row ***************************
               Slave_IO_State: Waiting for source to send event
                  Master_Host: 192.168.116.166
                  Master_User: master1
                  Master_Port: 3306
                Connect_Retry: 60
              Master_Log_File: mysql-bin.000002
          Read_Master_Log_Pos: 157
               Relay_Log_File: master2-relay-bin.000002
                Relay_Log_Pos: 326
        Relay_Master_Log_File: mysql-bin.000002
             Slave_IO_Running: Yes
            Slave_SQL_Running: Yes
              Replicate_Do_DB: demo_db
          Replicate_Ignore_DB:
           Replicate_Do_Table:
......
1 row in set, 1 warning (0.00 sec)
以上的语句内容实际上只有几句是需要执行的,一起来看下。
这一条信息的模板可以直接复制,需要在等号后面将IP,自己定义的用户名,密码,日志文件,偏移量进行修改。
change master to master_host='192.168.116.166',  #填写您自己的IP
master_user='master1', 		#填写您自己在第一台服务器上创建的用户名称
master_password='#Master1',   #填写在第一台服务器上创建的用户密码
master_log_file='mysql-bin.000002',  #填写第一台服务器上master的日志信息
master_log_pos=157;  			#填写在第一台服务器上master的偏移量
使用这条语句查看从数据库的状态;
show slave status \G

看到这两个值为yes表示是已经同步成功了。
四. 配置master2数据库
接下来在现在这台master2服务器继续配置
4.1 创建用户master2
创建一个名为master2的用户
mysql> create user 'master2'@'%' identified with mysql_native_password by '#Master2';
Query OK, 0 rows affected (0.01 sec)

mysql>  grant replication slave on *.* to 'master2'@'%';
Query OK, 0 rows affected (0.00 sec)

mysql> flush privileges;
Query OK, 0 rows affected (0.00 sec)
查看master2的状态
mysql> show master status;
+------------------+----------+--------------+------------------+-------------------+
| File             | Position | Binlog_Do_DB | Binlog_Ignore_DB | Executed_Gtid_Set |
+------------------+----------+--------------+------------------+-------------------+
| mysql-bin.000004 |      157 |              |                  |                   |
+------------------+----------+--------------+------------------+-------------------+
1 row in set (0.00 sec)
到这里就可以不用继续操作了,也可以直接退出mysql管理系统。
再回到第一台服务器上继续同步第二台的数据库用户
五. 配置slave2数据库
其实slave2也就是master1,还是使用相同的方式进行绑定。
5.1 绑定同步主master2数据库
mysql> change master to master_host='192.168.116.128', master_user='master2',
    -> master_password='#Master2',master_log_file='mysql-bin.000004',
    -> master_log_pos=157;
Query OK, 0 rows affected, 8 warnings (0.00 sec)

mysql> start slave;
Query OK, 0 rows affected, 1 warning (0.02 sec)

mysql> show slave status \G
*************************** 1. row ***************************
               Slave_IO_State: Connecting to source
                  Master_Host: 192.168.116.128
                  Master_User: master2
                  Master_Port: 3306
                Connect_Retry: 60
              Master_Log_File: mysql-bin.000004
          Read_Master_Log_Pos: 157
               Relay_Log_File: master1-relay-bin.000001
                Relay_Log_Pos: 4
        Relay_Master_Log_File: mysql-bin.000004
             Slave_IO_Running: Connecting
            Slave_SQL_Running: Yes
              Replicate_Do_DB: demo_db
          Replicate_Ignore_DB:
           Replicate_Do_Table:
       Replicate_Ignore_Table:
      Replicate_Wild_Do_Table:
  Replicate_Wild_Ignore_Table:
                   Last_Errno: 0
                   Last_Error:
                 Skip_Counter: 0
          Exec_Master_Log_Pos: 157
              Relay_Log_Space: 157
              Until_Condition: None
               Until_Log_File:
                Until_Log_Pos: 0
           Master_SSL_Allowed: No
           Master_SSL_CA_File:
           Master_SSL_CA_Path:
              Master_SSL_Cert:
            Master_SSL_Cipher:
               Master_SSL_Key:
        Seconds_Behind_Master: NULL
Master_SSL_Verify_Server_Cert: No
                Last_IO_Errno: 2003
                Last_IO_Error: error connecting to master 'master2@192.168.116.128:3306' - retry-time: 60 retries: 1 message: Can't connect to MySQL server on '192.168.116.128:3306' (113)
               Last_SQL_Errno: 0
               Last_SQL_Error:
  Replicate_Ignore_Server_Ids:
......
1 row in set, 1 warning (0.00 sec)
可以看到,在查看slave状态时,有个值并不是yes。
Slave_IO_Running: Connecting
Slave_SQL_Running: Yes

这里可以看到错误的原因,当然影响到IO的值是Connecting的原因很多,我们逐一进行排查。
5.2 解决方案
遇到错误不可怕,可以思考一下之前执行的步骤,先返回查看上一步步骤执行是否正确,若正确,在看看是否是selinux,防火墙,网络等问题。
配置失败的原因:
- 网络不通–可以尝试ping下网站域名
- 防火墙,selinux没有关–重新执行关闭的操作
- 用户密码输错–重新再配置一遍,确认清楚再输入
- IP错误–确认是否是本地服务器的IP
- 偏移量和日志文件错误–重启服务后再重新配置一遍
两台服务器都需要做下排查
[root@master1 ~]# hostname -I
192.168.116.166 192.168.122.1
[root@master1 ~]# systemctl status firewalld
● firewalld.service - firewalld - dynamic firewall daemon
   Loaded: loaded (/usr/lib/systemd/system/firewalld.service; enabled; vendor preset: enabled)
   Active: inactive (dead) since 五 2023-02-10 10:52:45 CST; 1 months 12 days ago
     Docs: man:firewalld(1)
 Main PID: 804 (code=exited, status=0/SUCCESS)

2月 10 10:51:06 localhost.localdomain systemd[1]: Starting firewalld - dynamic f....
2月 10 10:51:10 localhost.localdomain systemd[1]: Started firewalld - dynamic fi....
2月 10 10:51:11 localhost.localdomain firewalld[804]: WARNING: AllowZoneDrifting ...
2月 10 10:52:44 localhost.localdomain systemd[1]: Stopping firewalld - dynamic f....
2月 10 10:52:45 localhost.localdomain systemd[1]: Stopped firewalld - dynamic fi....
Hint: Some lines were ellipsized, use -l to show in full.
[root@master1 ~]# ping -c 1 www.baidu.com
PING www.a.shifen.com (14.215.177.38) 56(84) bytes of data.
64 bytes from 14.215.177.38 (14.215.177.38): icmp_seq=1 ttl=53 time=37.8 ms

--- www.a.shifen.com ping statistics ---
1 packets transmitted, 1 received, 0% packet loss, time 0ms
rtt min/avg/max/mdev = 37.807/37.807/37.807/0.000 ms
[root@master1 ~]# getenforce
Permissive
[root@master1 ~]# iptables -L
Chain INPUT (policy ACCEPT)
target     prot opt source               destination

Chain FORWARD (policy ACCEPT)
target     prot opt source               destination

Chain OUTPUT (policy ACCEPT)
target     prot opt source               destination
第一台服务器测试正常
接下来测试第二台服务器
[root@master2 ~]# hostname -I
192.168.116.128 192.168.122.1

[root@master2 ~]# systemctl status firewalld
● firewalld.service - firewalld - dynamic firewall daemon
   Loaded: loaded (/usr/lib/systemd/system/firewalld.service; enabled; vendor preset: enabled)
   Active: active (running) since 六 2023-03-25 15:28:38 CST; 2s ago
     Docs: man:firewalld(1)
 Main PID: 70425 (firewalld)
    Tasks: 2
   CGroup: /system.slice/firewalld.service
           └─70425 /usr/bin/python2 -Es /usr/sbin/firewalld --nofork --nopid

3月 25 15:28:39 master2 firewalld[70425]: WARNING: COMMAND_FAILED: '/usr/sbin/ipt...).
3月 25 15:28:39 master2 firewalld[70425]: WARNING: COMMAND_FAILED: '/usr/sbin/ipt...).
3月 25 15:28:39 master2 firewalld[70425]: WARNING: COMMAND_FAILED: '/usr/sbin/ipt...).
3月 25 15:28:39 master2 firewalld[70425]: WARNING: COMMAND_FAILED: '/usr/sbin/ipt...e.
3月 25 15:28:39 master2 firewalld[70425]: WARNING: COMMAND_FAILED: '/usr/sbin/ipt...e.
3月 25 15:28:39 master2 firewalld[70425]: WARNING: COMMAND_FAILED: '/usr/sbin/ipt...).
3月 25 15:28:39 master2 firewalld[70425]: WARNING: COMMAND_FAILED: '/usr/sbin/ipt...).
3月 25 15:28:39 master2 firewalld[70425]: WARNING: COMMAND_FAILED: '/usr/sbin/ipt...).
3月 25 15:28:39 master2 firewalld[70425]: WARNING: COMMAND_FAILED: '/usr/sbin/ipt...).
3月 25 15:28:39 master2 firewalld[70425]: WARNING: COMMAND_FAILED: '/usr/sbin/ipt...).
Hint: Some lines were ellipsized, use -l to show in full.
发现是第二台服务器防火墙没有关闭,大概率是这些的问题影响的,接下来将防火墙给关了。
[root@master2 ~]# systemctl stop firewalld.service
关闭之后,在第一台服务器上继续绑定服务器。
是防火墙的问题就比较好办,先将slave给关闭了,重新设置一下,再开启。
stop slave;
reset slave;
start slave;
mysql> stop slave;
Query OK, 0 rows affected, 1 warning (0.00 sec)

mysql> reset slave;
Query OK, 0 rows affected, 1 warning (0.00 sec)

mysql> start slave;
Query OK, 0 rows affected, 1 warning (0.04 sec)

mysql> show slave status \G
*************************** 1. row ***************************
               Slave_IO_State: Waiting for source to send event
                  Master_Host: 192.168.116.128
                  Master_User: master2
                  Master_Port: 3306
                Connect_Retry: 60
              Master_Log_File: mysql-bin.000004
          Read_Master_Log_Pos: 157
               Relay_Log_File: master1-relay-bin.000006
                Relay_Log_Pos: 373
        Relay_Master_Log_File: mysql-bin.000004
             Slave_IO_Running: Yes
            Slave_SQL_Running: Yes
              Replicate_Do_DB: demo_db
          Replicate_Ignore_DB:
......
1 row in set, 1 warning (0.00 sec)
查看两个值都为yes表示已经同步成功。
六. 测试结果
以上就是主主同步的全部内容了,到这里是时候该验证一下是否已经完全成功。
我们在第一台master1上创建之前选择同步的数据库,接下来给这个数据库创建表,再给表内插入几行信息。
6.1 第一台数据库测试
[root@master1 ~]# mysql -uroot -pAdmin#123
mysql: [Warning] Using a password on the command line interface can be insecure.
Welcome to the MySQL monitor.  Commands end with ; or \g.
Your MySQL connection id is 32
Server version: 8.0.32 MySQL Community Server - GPL

Copyright (c) 2000, 2023, Oracle and/or its affiliates.

Oracle is a registered trademark of Oracle Corporation and/or its
affiliates. Other names may be trademarks of their respective
owners.

Type 'help;' or '\h' for help. Type '\c' to clear the current input statement.

mysql> create database demo_db;
Query OK, 1 row affected (0.01 sec)

mysql> use demo_db
Database changed
mysql> create table demo_tb(id int not null,name varchar(20) default 'username');
Query OK, 0 rows affected (0.02 sec)

mysql> insert into demo_tb values(1,'zhangsan'), (2,'lisi'), (3,'kunkun');
Query OK, 3 rows affected (0.00 sec)
Records: 3  Duplicates: 0  Warnings: 0
6.2 第二台数据库测试
[root@master2 ~]# mysql -uroot -p
Enter password:
Welcome to the MySQL monitor.  Commands end with ; or \g.
Your MySQL connection id is 16
Server version: 8.0.32 MySQL Community Server - GPL

Copyright (c) 2000, 2023, Oracle and/or its affiliates.

Oracle is a registered trademark of Oracle Corporation and/or its
affiliates. Other names may be trademarks of their respective
owners.

Type 'help;' or '\h' for help. Type '\c' to clear the current input statement.

mysql> show databases;
+--------------------+
| Database           |
+--------------------+
| demo_db            |
| information_schema |
| mysql              |
| performance_schema |
| sys                |
+--------------------+
5 rows in set (0.00 sec)

mysql> select * from demo_db.demo_tb;
+----+----------+
| id | name     |
+----+----------+
|  1 | zhangsan |
|  2 | lisi     |
|  3 | kunkun   |
+----+----------+
3 rows in set (0.01 sec)

mysql> use demo_db
Reading table information for completion of table and column names
You can turn off this feature to get a quicker startup with -A

Database changed
mysql> insert into demo_tb values(4,'liao'),
    -> (5,'chengpi'),
    -> (6,'mahua');
Query OK, 3 rows affected (0.01 sec)
Records: 3  Duplicates: 0  Warnings: 0
在第一台数据库上看看第二台插入的内容是否也能成功写入。
mysql> select * from demo_tb;
+----+----------+
| id | name     |
+----+----------+
|  1 | zhangsan |
|  2 | lisi     |
|  3 | kunkun   |
|  4 | liao     |
|  5 | chengpi  |
|  6 | mahua    |
+----+----------+
6 rows in set (0.00 sec)
查看第二台数据库输入的内容,也能同步到第一台上,说明已经成功。
总结
以上就是本文的全部内容了,如果有看过昨天那篇《MySQL数据库实现主从同步》就会发现主主同步,也只是在主从同步上再反过来操作一次主从同步。若觉得以上内容还行的,可以点赞支持一下!