一,WebView的用法
活动布局的代码:
<LinearLayout xmlns:android="http://schemas.android.com/apk/res/android"
    android:layout_width="match_parent"
    android:layout_height="match_parent">
    <WebView
        android:id="@+id/web_view"
        android:layout_width="match_parent"
        android:layout_height="match_parent" />
</LinearLayout>
然后在活动页中修改代码:
public class MainActivity extends AppCompatActivity {
    @Override
    protected void onCreate(Bundle savedInstanceState) {
        super.onCreate(savedInstanceState);
        setContentView(R.layout.activity_main);
        WebView webView=(WebView) findViewById(R.id.web_view);
        webView.getSettings().setJavaScriptEnabled(true);
        webView.setWebViewClient(
                new WebViewClient()
        );
        webView.loadUrl("https://www.baidu.com");
    }
}
menifest文件中增加权限控制
<uses-permission android:name="android.permission.INTERNET"/>
二,使用http协议访问网络
1,使用OkHttpClient
第一步:在app/build.gradle文件中引入库
    implementation 'com.squareup.okhttp3:okhttp:3.14.7'
    implementation 'com.squareup.okio:okio:1.17.5'
第二步:在menifest文件中申请网络权限
    <uses-permission android:name="android.permission.INTERNET" />
    <uses-permission android:name="android.permission.WRITE_EXTERNAL_STORAGE" />
    <uses-permission android:name="android.permission.READ_EXTERNAL_STORAGE" />
第三步:布局修改
<LinearLayout xmlns:android="http://schemas.android.com/apk/res/android"
    android:layout_width="match_parent"
    android:layout_height="match_parent">
    <ScrollView
        android:layout_width="match_parent"
        android:layout_height="match_parent">
        <TextView
            android:id="@+id/test_text"
            android:layout_width="match_parent"
            android:layout_height="match_parent"/>
    </ScrollView>
</LinearLayout>
第四步:活动页中修改发起get请求
public class MainActivity extends AppCompatActivity {
    TextView responseText;
    @Override
    protected void onCreate(Bundle savedInstanceState) {
        super.onCreate(savedInstanceState);
        setContentView(R.layout.activity_main);
         responseText=(TextView) findViewById(R.id.test_text);
        //创建一个OkHttpClient实例
        OkHttpClient httpClient = new OkHttpClient();
        String url = "https://www.baidu.com/";
        //构建一个request对象
        Request getRequest = new Request.Builder()
                .url(url)
                .get()
                .build();
        //调用OkHttpClient创建一个Call对象
        Call call = httpClient.newCall(getRequest);
        new Thread(new Runnable() {
            @Override
            public void run() {
                try {
                    //同步请求,要放到子线程执行,调用它的execute方法发送请求
                    Response response = call.execute();
                   //将内容显示到桌面上
                    showResponse(response.body().string());
                } catch (IOException e) {
                    e.printStackTrace();
                }
            }
        }).start();
    }
    private void showResponse(final String response){
        runOnUiThread(new Runnable() {
            @Override
            public void run() {
                responseText.setText(response);
            }
        });
    }
}
2,如果是post请求的话,就需要是这样:
        //创建一个OkHttpClient实例
        OkHttpClient httpClient = new OkHttpClient();
        RequestBody requestBody=new FormBody.Builder()
                .add("username","admin")
                .add("password","123456")
                .build();
        Request request=new Request.Builder()
                .url("http://www.baidu.com")
                .post(requestBody)
                .build();
        //调用OkHttpClient创建一个Call对象
        Call call = httpClient.newCall(request);
        new Thread(new Runnable() {
            @Override
            public void run() {
                try {
                    //同步请求,要放到子线程执行,调用它的execute方法发送请求
                    Response response = call.execute();
                   //将内容显示到桌面上
                    showResponse(response.body().string());
                } catch (IOException e) {
                    e.printStackTrace();
                }
            }
        }).start();
三,解析XML格式文件
在网络上传输的数据通常是有两种格式XML和JSON.
1,数据从哪里来
我们可以搭建一个web服务器,然后在这个服务器上提供一段XML格式的数据。接着在我们的程序里面取访问这个服务器,再对得到的XML文本进行解析。
新建一个get_data.xml文件:
<apps>
    <app>
        <id>1</id>
        <name>Google maps</name>
        <version>1.0</version>
    </app>
    <app>
        <id>2</id>
        <name>Chrome</name>
        <version>2.1</version>
    </app>
    <app>
        <id>3</id>
        <name>Google Play</name>
        <version>2.3</version>
    </app>
</apps>
放置到nginx文件中(nginx下载使用参考:https://blog.csdn.net/weixin_42349568/article/details/129245335?spm=1001.2014.3001.5501):
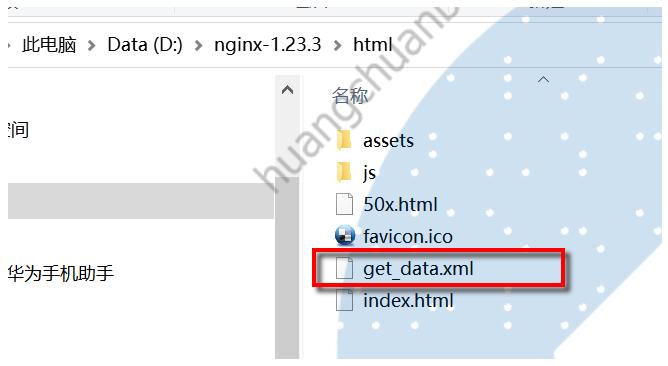
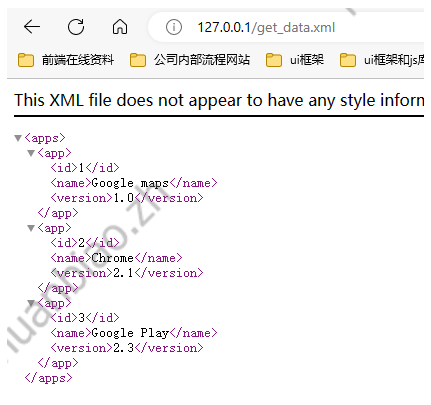
然后浏览器访问即可得到这个:
2,Pull解析xml
public class MainActivity extends AppCompatActivity {
    TextView responseText;
    @Override
    protected void onCreate(Bundle savedInstanceState) {
        super.onCreate(savedInstanceState);
        setContentView(R.layout.activity_main);
        responseText=(TextView) findViewById(R.id.test_text);
        new Thread(new Runnable() {
            @Override
            public void run() {
                try {
                    //创建一个OkHttpClient实例
                    OkHttpClient httpClient = new OkHttpClient();
                    Request request=new Request.Builder()
                            .url("http://172.20.10.8/get_data.xml")
                            .build();
                    //同步请求,要放到子线程执行,调用它的execute方法发送请求
                    Response response = httpClient.newCall(request).execute();
                    String responseData=response.body().string();
                    Log.d("TAG", responseData);
                    parseXMLWithPull(responseData);
                } catch (IOException e) {
                    e.printStackTrace();
                }
            }
        }).start();
    }
    private String parseXMLWithPull( String xmlData){
        StringBuilder stringBuilder = new StringBuilder();
        try {
            //创建工厂
            XmlPullParserFactory factory = XmlPullParserFactory.newInstance();
            //获取实例
            XmlPullParser xmlPullParser = factory.newPullParser();
            //向解析器添加xml数据
            xmlPullParser.setInput(new StringReader(xmlData));
            int eventType = xmlPullParser.getEventType();
            String id = "";
            String name = "";
            String version = "";
            while (eventType != XmlPullParser.END_DOCUMENT) {
                String nodeName = xmlPullParser.getName();
                switch (eventType) {
                    case XmlPullParser.START_TAG: {
                        if ("id".equals(nodeName)) {
                            id = xmlPullParser.nextText();
                            stringBuilder.append("id:" + id + "  ");
                        } else if ("name".equals(nodeName)) {
                            name = xmlPullParser.nextText();
                            stringBuilder.append("name:" + name + "  ");
                        } else if("version".equals(nodeName)){
                            version = xmlPullParser.nextText();
                            stringBuilder.append("version:" + version + "  ");
                        }
                        break;
                    }
                    case XmlPullParser.END_TAG: {
                        stringBuilder.append("\n");
                        break;
                    }
                    default:
                }
                try {
                    eventType = xmlPullParser.next();
                } catch (IOException e) {
                    e.printStackTrace();
                }
            }
        } catch (Exception e) {
            e.printStackTrace();
        }
        System.out.println("result:\n" + stringBuilder.toString());
        return stringBuilder.toString();
    }
}
中间如果遇到了网络访问有问题的情况,可以参考这篇博客:https://blog.csdn.net/java558/article/details/111357872。
实现的效果:

四,解析JSON格式文件
1,创建json文件
[{"id":"5","version":"5.5","name":"clash of class"},
{"id":"6","version":"7.2","name":"clash of class"},
{"id":"7","version":"8.3","name":"clash of class"}]
2,使用GSON来解析json
第一步:引入依赖:
implementation 'com.google.code.gson:gson:2.7'
第二步:创建app类
public class App {
    private String id;
    private String name;
    private String version;

    public String getId() {
        return id;
    }

    public String getName() {
        return name;
    }

    public String getVersion() {
        return version;
    }

    public void setId(String id) {
        this.id = id;
    }

    public void setName(String name) {
        this.name = name;
    }

    public void setVersion(String version) {
        this.version = version;
    }
}
第三步:实现解析
public class MainActivity extends AppCompatActivity {
    @Override
    protected void onCreate(Bundle savedInstanceState) {
        super.onCreate(savedInstanceState);
        setContentView(R.layout.activity_main);
        new Thread(new Runnable() {
            @Override
            public void run() {
                try {
                    //创建一个OkHttpClient实例
                    OkHttpClient httpClient = new OkHttpClient();
                    Request request=new Request.Builder()
                            .url("http://172.20.10.8/get_data.json")
                            .build();
                    //同步请求,要放到子线程执行,调用它的execute方法发送请求
                    Response response = httpClient.newCall(request).execute();
                    String responseData=response.body().string();
                    parseJSONWithGSON(responseData);
                } catch (IOException e) {
                    e.printStackTrace();
                }
            }
        }).start();
    }
    private void parseJSONWithGSON(String jsonData){
        Gson gson=new Gson();
        List<App> appList=gson.fromJson(jsonData,new TypeToken<List<App>>(){}.getType());
        for (int i=0;i<appList.size();i++){
            App app=appList.get(i);
            String name = app.getName();

            Log.d("TAG", name);
        }
    }
}

