0、项目介绍
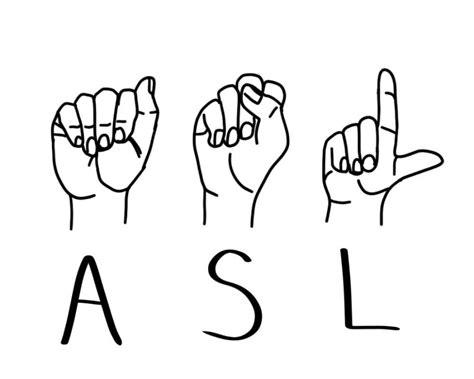
首先,我可以保证在这里,你并不需要多么了解深的机器学习算法,我的初衷是通过本项目,激发大家学习机器学习的动力。选择这种手势原因是因为只有24个字母,你的电脑足以带的动,虽然我只训练A、B、C、D等字母的手势识别,但只要掌握了方法,你可以全部弄完24个字母的手势(我觉得没这必要)。

如果你的思维足够的发散,相信你一定会有其他的好点子。
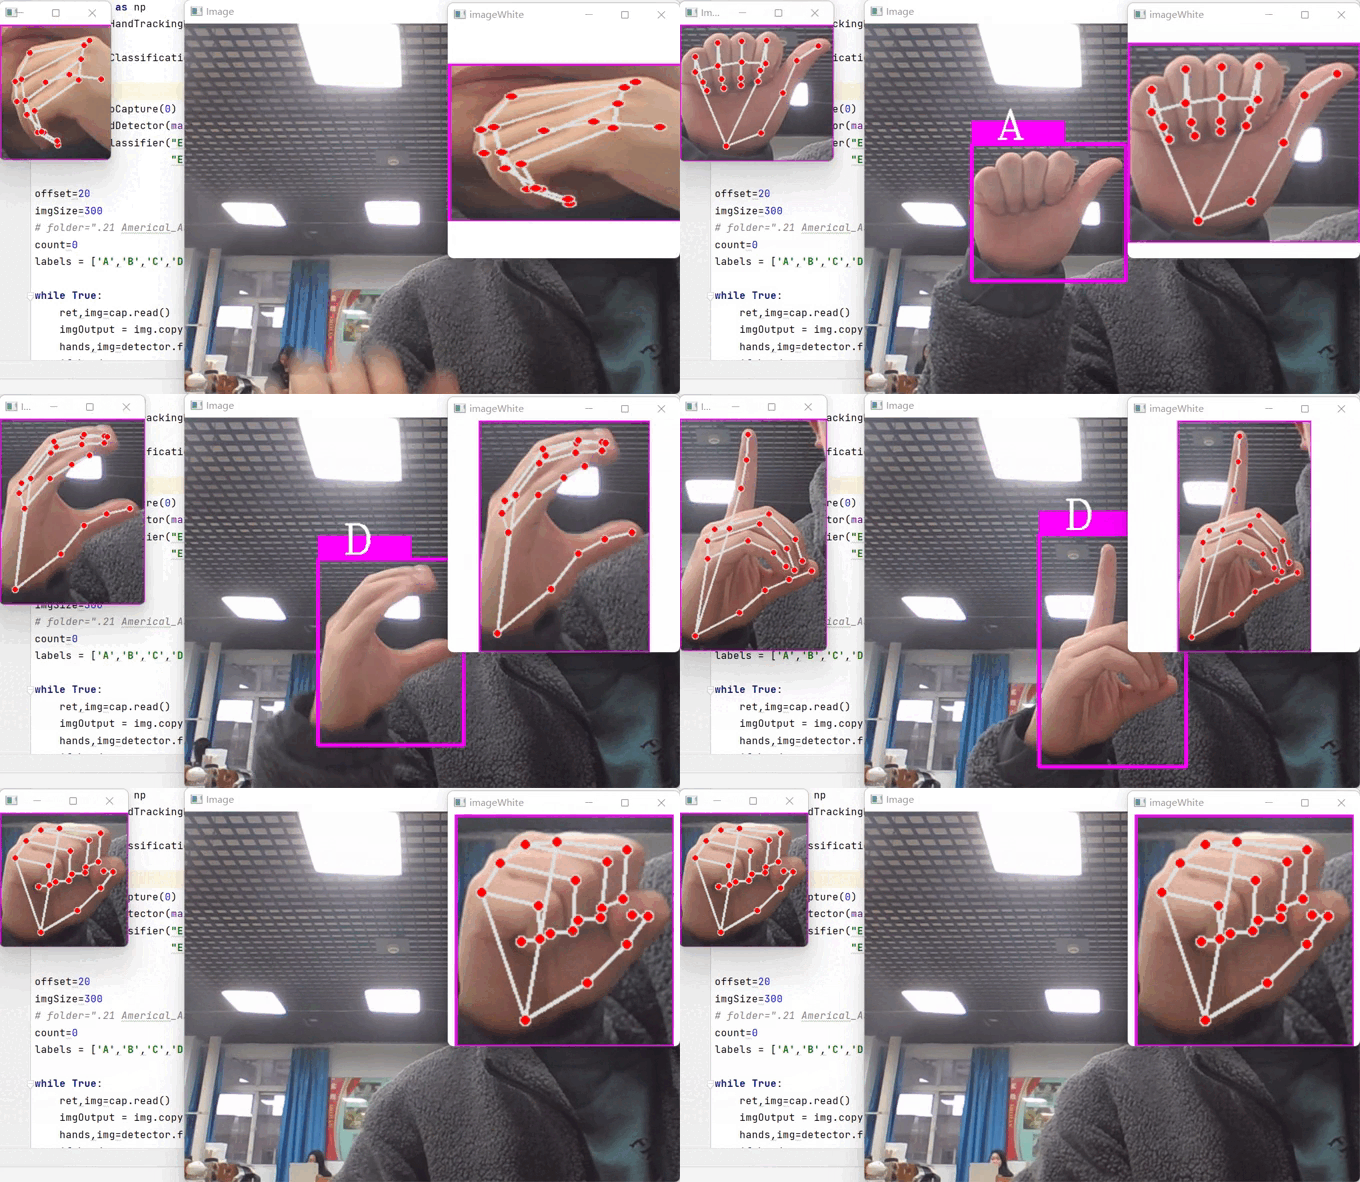
1、效果展示
2、项目搭建
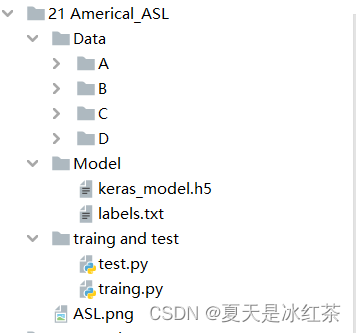
这个地方依赖的包有些多:{cv2、numpy、cvzone、tensorflow}
tensorflow的下载用pip下载不了,找了很多办法,本人有效解决的是:
pip install --index-url https://pypi.douban.com/simple tensorflow3、代码的展示与讲解
# traing.py

import cv2
import numpy as np
from cvzone.HandTrackingModule import HandDetector
import math
import time


cap=cv2.VideoCapture(0)
detector=HandDetector(maxHands=1)

offset=20
imgSize=300
folder=".21 Americal_ASL/Data/D"
count=0

while True:
    ret,img=cap.read()
    hands,img=detector.findHands(img)
    if hands:
        hand = hands[0]
        x,y,w,h=hand['bbox']
        imgWhite=np.ones((imgSize,imgSize,3),np.uint8)*255
        imgCrop = img[y-offset:y+h+offset,x-offset:x+w+offset]

        imgCropShape = imgCrop.shape

        aspectRatio = h/w
        if aspectRatio>1:
            k=imgSize/h
            wCal=math.ceil(k*w)
            imgResize=cv2.resize(imgCrop,(wCal,imgSize))
            imgResizeShape=imgResize.shape
            wGap=math.ceil((imgSize-wCal)/2)
            imgWhite[:,wGap:wGap+wCal]=imgResize

        else:
            k = imgSize / w
            hCal = math.ceil(k * h)
            imgResize = cv2.resize(imgCrop, (imgSize,hCal))
            imgResizeShape = imgResize.shape
            hGap = math.ceil((imgSize - hCal) / 2)
            imgWhite[hGap:hGap + hCal,:] = imgResize

        cv2.imshow("ImageCrop",imgCrop)
        cv2.imshow("imageWhite",imgWhite)

    cv2.imshow("Image",img)
    k=cv2.waitKey(1)
    if k==ord('s'):
        count+=1
        cv2.imwrite(f"{folder}/Image_{time.time()}.jpg",imgWhite)
        print(count)
    elif k==27:
        break
首先,在这里先运行这个文件,它会出现下面这样的窗口:

接下来,就按照美国ASL手势,对数据进行收集,你只需要在成功识别后,不断的点击键盘"s"键,对图片进行保存,一定要记住修改保存的文件位置,也就是变量folder,我收集的数量大概在300张左右,多一点少一些也无所谓,识别的效果还是相当不错的。
Teachable Machine 是一个基于 Web 的工具,为每个人创造快速、简明、易用的机器学习模型。
进入这个网站Teachable Machine,将文件{A、B、C、D}拖进去,可能需要一点时间,耐心等等就行,获得了keras_model.h5和labels.txt文件,我在得到labels.txt文件时,出现了点问题,不过你也可以手动添加一下,毕竟不是很多。
0 A 1
1 B 2
2 C 3
3 D 4
这个网站需要"KX"上网,当时做完没有保存图片,现在流量也已经用完了,所以这个地方大家就自己琢磨一下吧。
# test.py
import cv2
import numpy as np
from cvzone.HandTrackingModule import HandDetector
import math
from cvzone.ClassificationModule import Classifier


cap=cv2.VideoCapture(0)
detector=HandDetector(maxHands=1)
classifier=Classifier("E:\pythonProject1\Opencv project training//21 Americal_ASL\Model\keras_model.h5",
                      "E:\pythonProject1\Opencv project training//21 Americal_ASL\Model\labels.txt")

offset=20
imgSize=300
# folder=".21 Americal_ASL/Data/D"
count=0
labels = ['A','B','C','D']

while True:
    ret,img=cap.read()
    imgOutput = img.copy()
    hands,img=detector.findHands(img)
    if hands:
        hand = hands[0]
        x,y,w,h=hand['bbox']
        imgWhite=np.ones((imgSize,imgSize,3),np.uint8)*255
        imgCrop = img[y-offset:y+h+offset,x-offset:x+w+offset]

        imgCropShape = imgCrop.shape
        aspectRatio = h/w

        if aspectRatio>1:
            k=imgSize/h
            wCal=math.ceil(k*w)
            imgResize=cv2.resize(imgCrop,(wCal,imgSize))
            imgResizeShape=imgResize.shape
            wGap=math.ceil((imgSize-wCal)/2)
            imgWhite[:,wGap:wGap+wCal]=imgResize
            prediction, index =  classifier.getPrediction(imgWhite,draw=False)
            print(prediction,index)

        else:
            k = imgSize / w
            hCal = math.ceil(k * h)
            imgResize = cv2.resize(imgCrop, (imgSize,hCal))
            imgResizeShape = imgResize.shape
            hGap = math.ceil((imgSize - hCal) / 2)
            imgWhite[hGap:hGap + hCal,:] = imgResize
            prediction, index = classifier.getPrediction(imgWhite, draw=False)

        cv2.rectangle(imgOutput, (x - offset, y - 50),
                      (x - offset+120, y - offset), (255, 0,  255), cv2.FILLED)
        cv2.putText(imgOutput,labels[index],(x+12,y-27),cv2.FONT_HERSHEY_COMPLEX,1.8,(255,255,255),2)
        cv2.rectangle(imgOutput,(x-offset,y-offset),
                      (x+w+offset,y+h+offset),(255,0,255),4)

        cv2.imshow("ImageCrop",imgCrop)
        cv2.imshow("imageWhite",imgWhite)

    cv2.imshow("Image",imgOutput)
    k=cv2.waitKey(1)
    if k==27:
        break
这是用于测试的代码,运行之后,就可以展现我们本项目的效果了。
4、项目资源
GitHub:21 美国ASL手势识别
5、项目总结
顺利完成,因为这个是很早之前做的,一直没空写,而且因为之前python环境出现了问题,重新装了一次,下载的那些包都没了,有很多空缺,这几天装Tensorflow,也是把我搞得心态爆炸,但基础的效果总算是可以展现了。虽然teachable machine可能你进不去,但如果你只是抱着学习的态度,那么在GitHub里面我也提供了我做的A、B、C、D的文件。
