Vue3快速入门
- 一、传值
- 父传子,子传父
- v-model
- 二、插槽
- 2.1、匿名插槽
- 2.2、具名插槽
- 2.3、插槽作用域
- 2.4、插槽作用域案例
- 2.4.1、初始布局
- 2.4.2、插槽使用
- 2.4.3、点击编辑按钮获取本行数据(插槽作用域的使用)
- 2.4.4、类型书写优化
- 2.4.5、全局接口抽取和ts全局配置
- 三、teleport传送门
- 四、类型增强
- 五、第三方类型声明
- 六、配置项目路径别名
一、传值
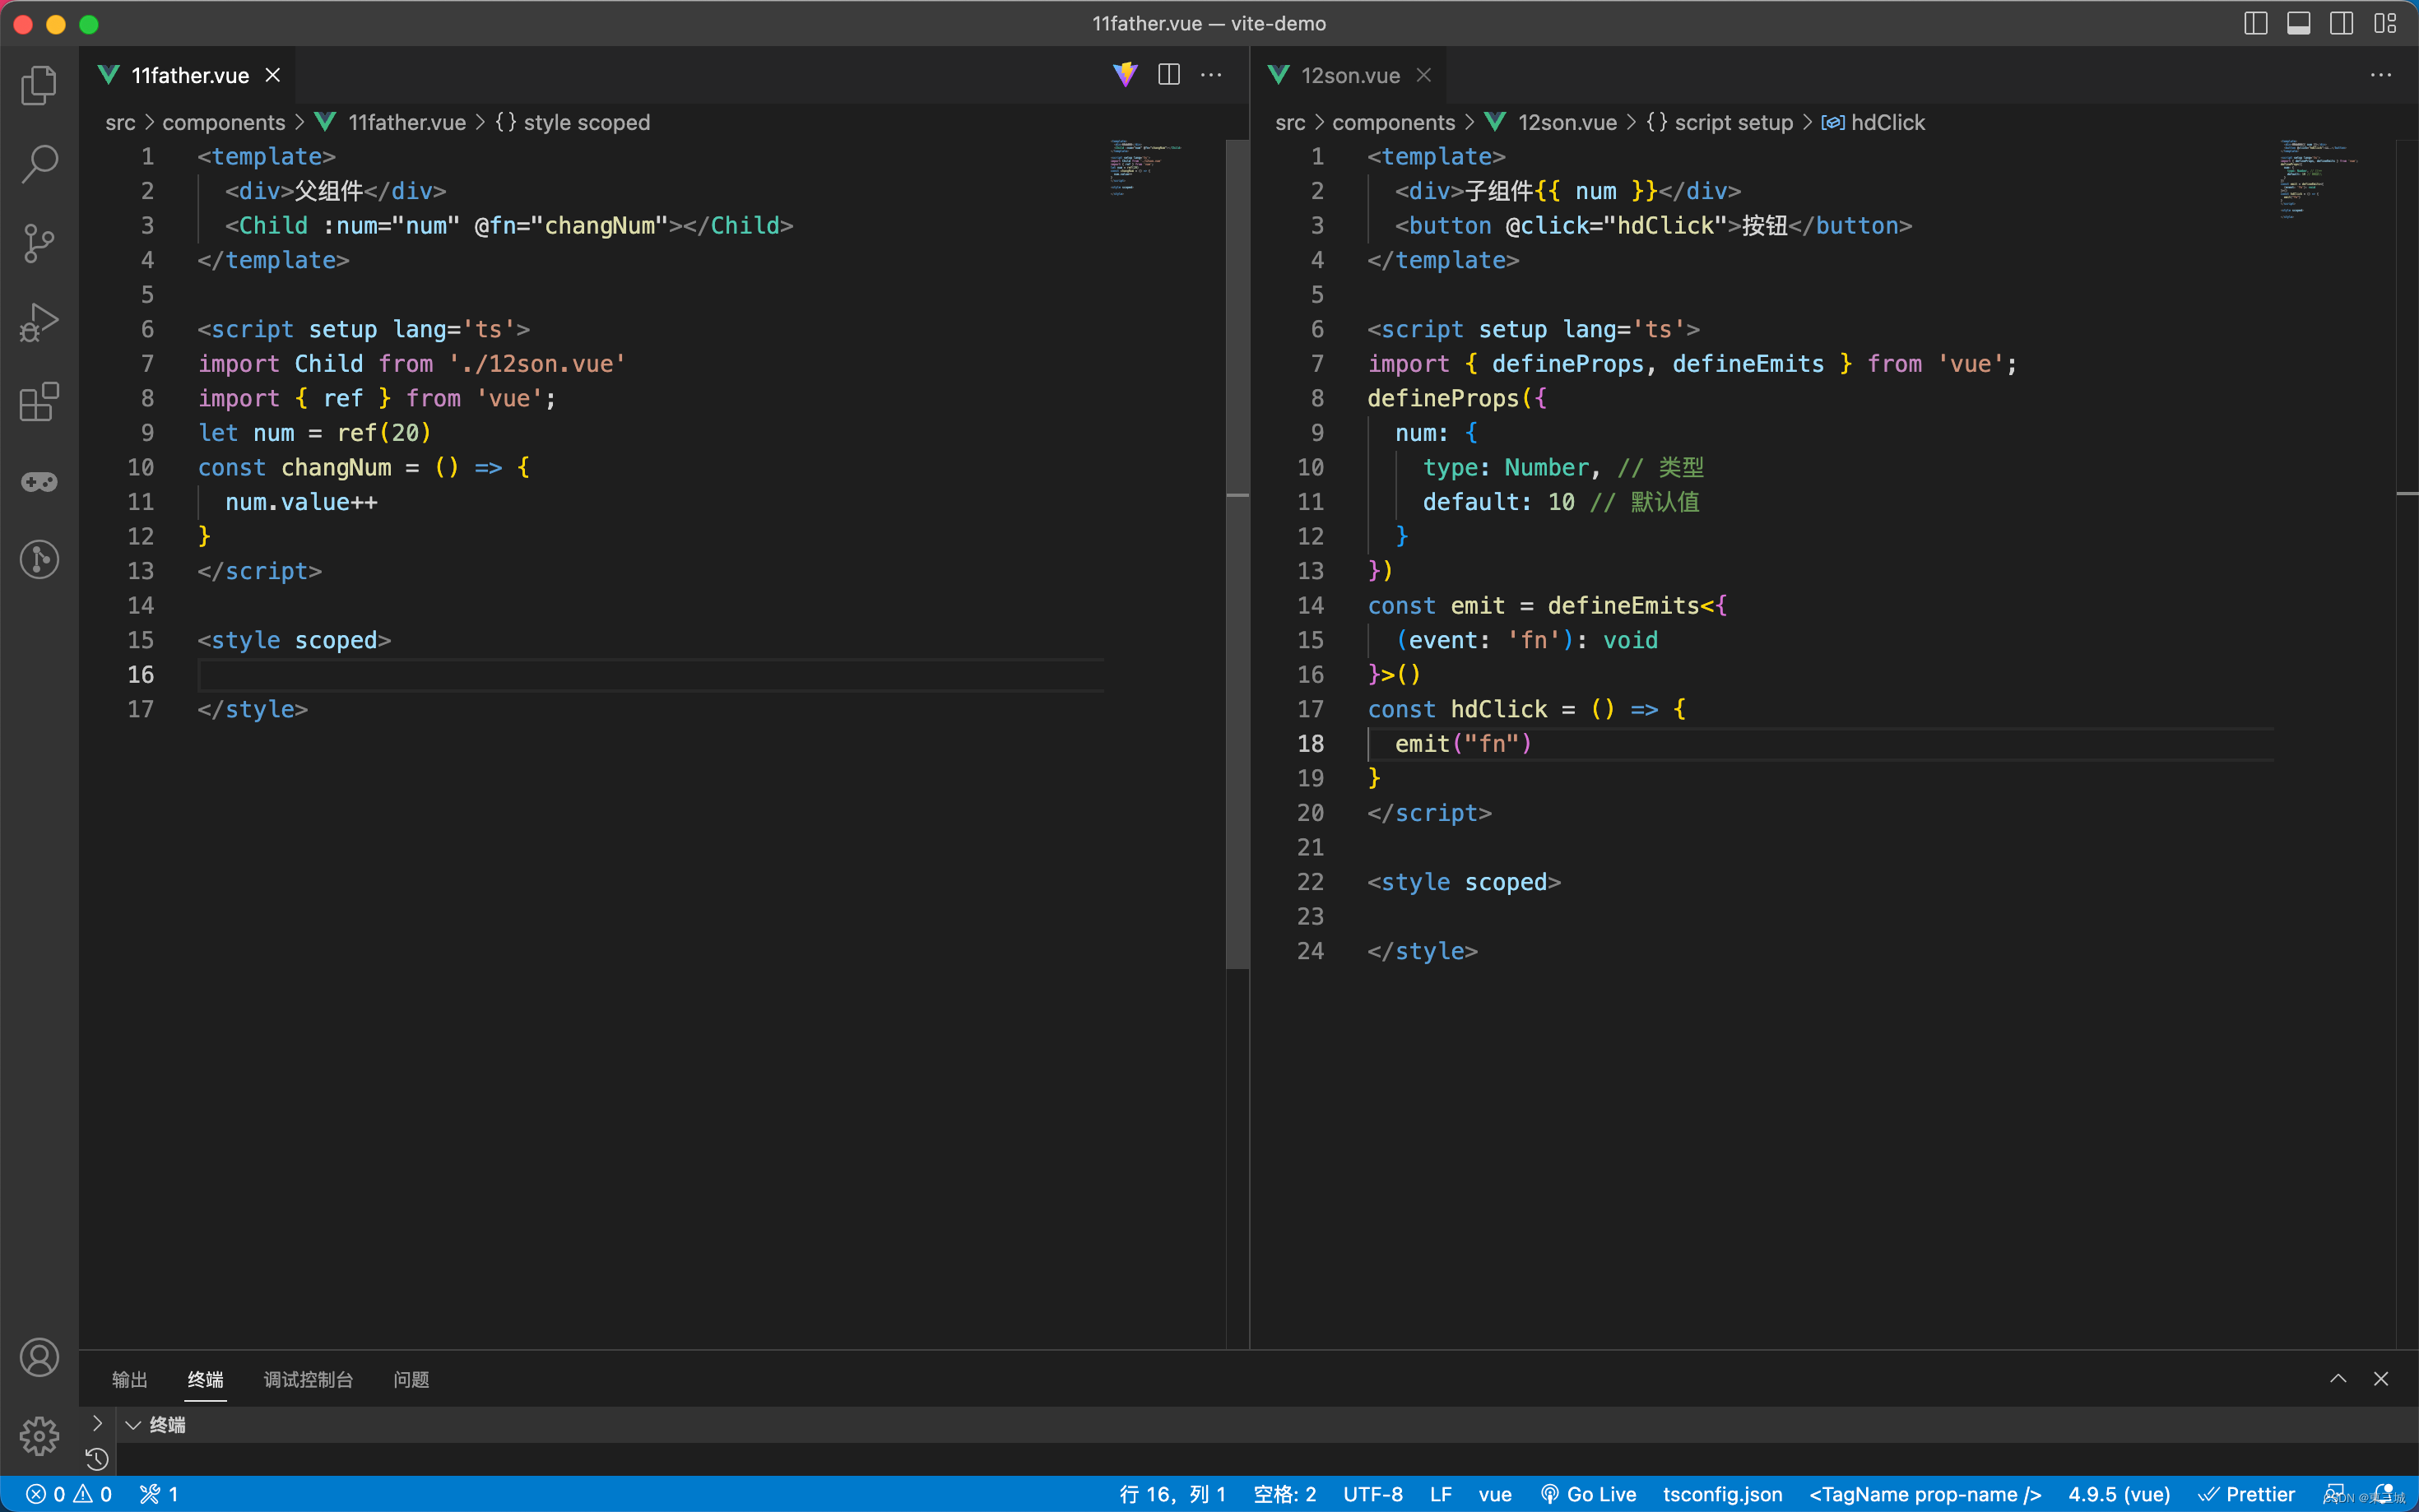
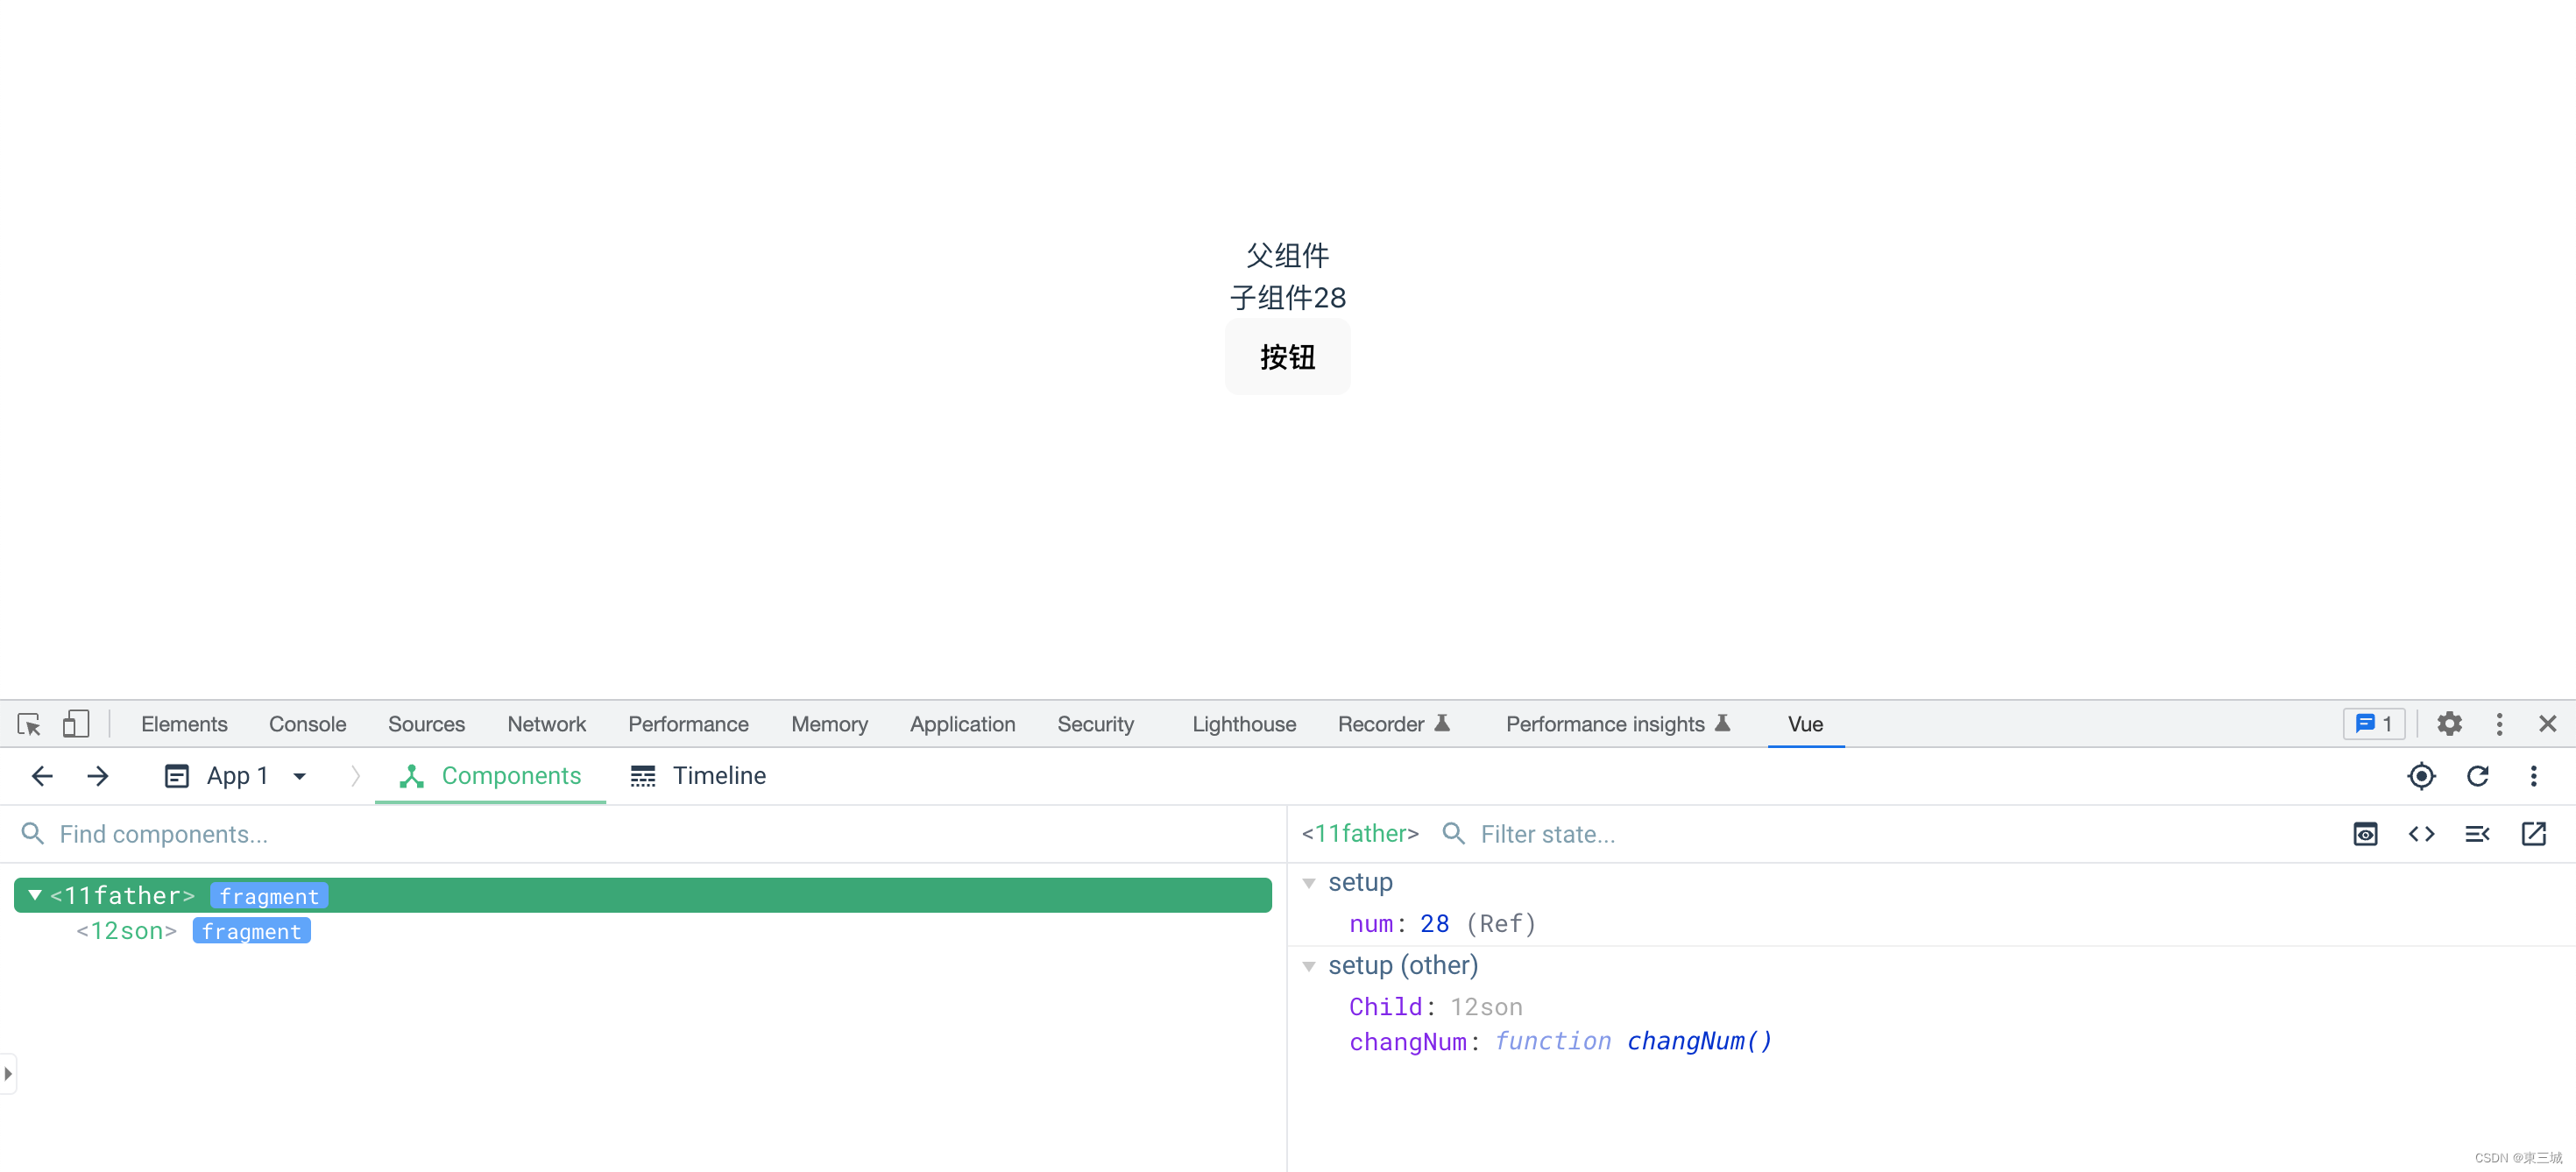
父传子,子传父
父组件:
<template>
  <div>父组件</div>
  <Child :num="num" @fn="changNum"></Child>
</template>

<script setup lang='ts'>
import Child from './12son.vue'
import { ref } from 'vue';
let num = ref(20)
const changNum = () => {
  num.value++
}
</script>

<style scoped>

</style>
子组件:
<template>
  <div>子组件{{ num }}</div>
  <button @click="hdClick">按钮</button>
</template>

<script setup lang='ts'>
import { defineProps, defineEmits } from 'vue';
defineProps({
  num: {
    type: Number, // 类型
    default: 10 // 默认值
  }
})
const emit = defineEmits<{
  (event: 'fn'): void
}>()
const hdClick = () => {
  emit("fn")
}
</script>

<style scoped>

</style>
v-model
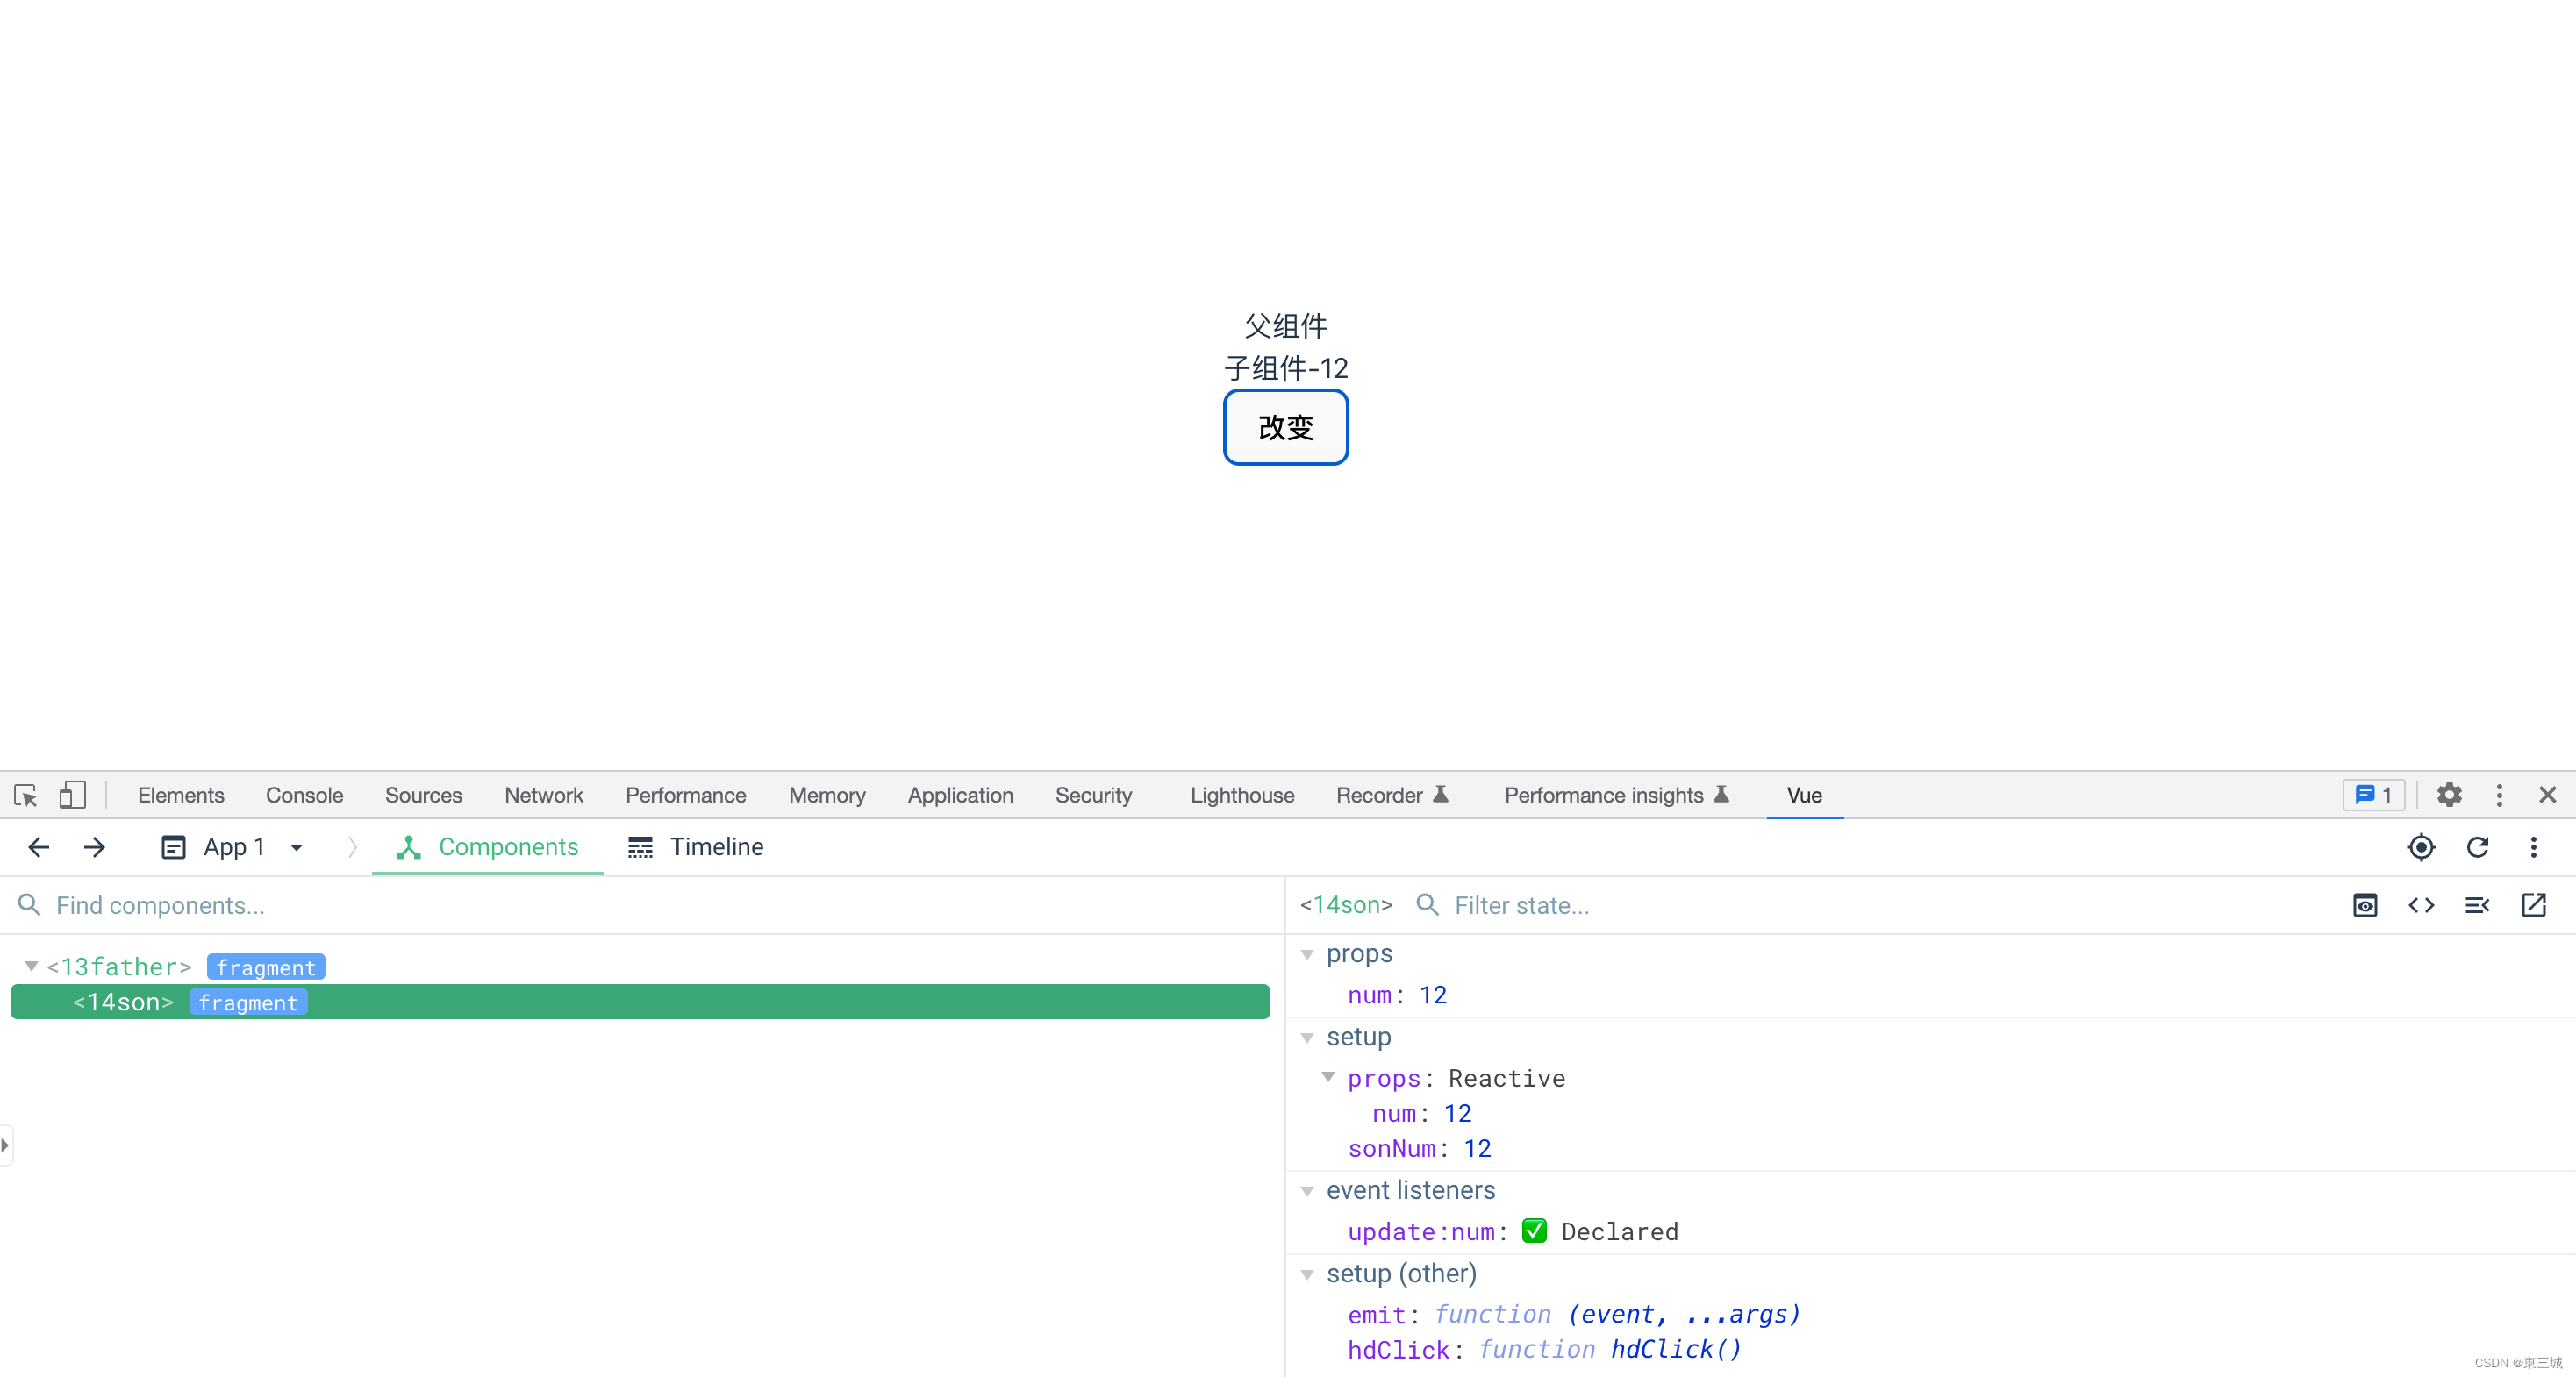
父组件:
<template>
  <div>父组件</div>
  <Son v-model:num="num"></Son>
</template>

<script setup lang='ts'>
import Son from "./14son.vue"
import { ref } from 'vue';

let num = ref(10)

</script>

<style scoped>

</style>
子组件:
<template>
  <div>子组件-{{ num }}</div>
  <button @click="hdClick">改变</button>
</template>

<script setup lang='ts'>
import { } from 'vue';
let props = defineProps({
  num: {
    type: Number,
    default: 100
  }
})

let sonNum = props.num
const emit = defineEmits<{
  // update固定写法 后面的变量是父组件中v-model:后面的变量
  (event: 'update:num', n: number): void
}>()
const hdClick = () => {
  // 上面event的值,要改变的值
  emit("update:num", ++sonNum)
}

</script>

<style scoped>

</style>

二、插槽
2.1、匿名插槽
父组件:
<template>
  <div></div>
  <Child>
    <a href="#">a标签</a>
    <p>层楼终究误少年 自由早晚乱余生</p>
  </Child>
</template>

<script setup lang='ts'>
import Child from "./16son.vue"
import { } from 'vue';

</script>

<style scoped>

</style>
子组件:
<template>
  <div></div>
  <slot></slot>
</template>

<script setup lang='ts'>
import { } from 'vue';

</script>

<style scoped>

</style>
2.2、具名插槽
父组件:
<template>
  <div></div>
  <Child>
    <!-- <template v-slot:link> -->
    <!-- 简写#link -->
    <template #link>
      <a href="#">a标签</a>
    </template>
    <template v-slot:paragraph>
      <p>可春色不过宛若江南</p>
    </template>

  </Child>
</template>

<script setup lang='ts'>
import Child from "./16son.vue"
import { } from 'vue';

</script>

<style scoped>

</style>
子组件:
<template>
  <div></div>
  <slot name="paragraph"></slot>
  <slot name="link"></slot>
</template>

<script setup lang='ts'>
import { } from 'vue';

</script>

<style scoped>

</style>
2.3、插槽作用域
父组件:
<template>
  <div></div>
  <Child>
    <!-- <template v-slot:link> -->
    <!-- 简写#link -->
    <template #link>
      <a href="#">a标签</a>
    </template>
    <template #paragraph="scope">
      <p>可春色不过宛若江南</p>
      <p>{{ scope.title }}</p>
    </template>

  </Child>
</template>

<script setup lang='ts'>
import Child from "./16son.vue"
import { } from 'vue';

</script>

<style scoped>

</style>
子组件:
<template>
  <div></div>
  <slot name="paragraph" title="空港曲"></slot>
  <slot name="link"></slot>
</template>

<script setup lang='ts'>
import { } from 'vue';

</script>

<style scoped>

</style>
2.4、插槽作用域案例
![[外链图片转存失败,源站可能有防盗链机制,建议将图片保存下来直接上传(img-h1sS1OkS-1675953382900)(Vue3-day02.assets/1644863300382.png)]](https://img-blog.csdnimg.cn/857e7eeb5b8a4fa19f43959fe4175593.png)
2.4.1、初始布局
父组件:
<template>
  <MyTable :arr="state.arr">

  </MyTable>
</template>

<script lang='ts' setup>
import MyTable from "./18son.vue"
import { reactive } from "Vue"
let state = reactive({
  arr: [{
    name: "许巍",
    age: 18
  }, {
    name: "朴树",
    age: 20
  }]
})
</script>
子组件:
<template>
  <table>
    <tr>
      <th>姓名</th>
      <th>年龄</th>
      <th>操作</th>
    </tr>
    <tr v-for="item, index in arr" :key="index">
      <td>{{ item.name }}</td>
      <td>{{ item.age }}</td>
      <td>
        <button>编辑</button>
        <button>删除</button>
      </td>
    </tr>
  </table>
</template>

<script lang='ts' setup>

let props = defineProps({
  arr: {
    type: Array,
    default: []
  }
})
</script>

<style scoped>
table {
  border-collapse: collapse;
}

table,
th,
td {
  border: 1px solid #000;
}

th,
td {
  padding: 10px
}
</style>
2.4.2、插槽使用
需求:第一个表格只有编辑按钮,第二个表格有编辑和删除按钮
![[外链图片转存失败,源站可能有防盗链机制,建议将图片保存下来直接上传(img-38f0fPgQ-1675953382901)(Vue3-day02.assets/1644863481486.png)]](https://img-blog.csdnimg.cn/4546c29f17c143148506cbd8c4de5724.png)
父组件:
<template>
  <MyTable :arr="state.arr">
    <template #btns>
      <button>编辑</button>
    </template>
    <button>删除</button>
  </MyTable>
  <MyTable :arr="state.arr">
    <template #btns>
      <button>编辑</button>
      <button>删除</button>
    </template>
  </MyTable>
</template>
子组件:
      <td>
        <slot name="btns"></slot>
      </td>
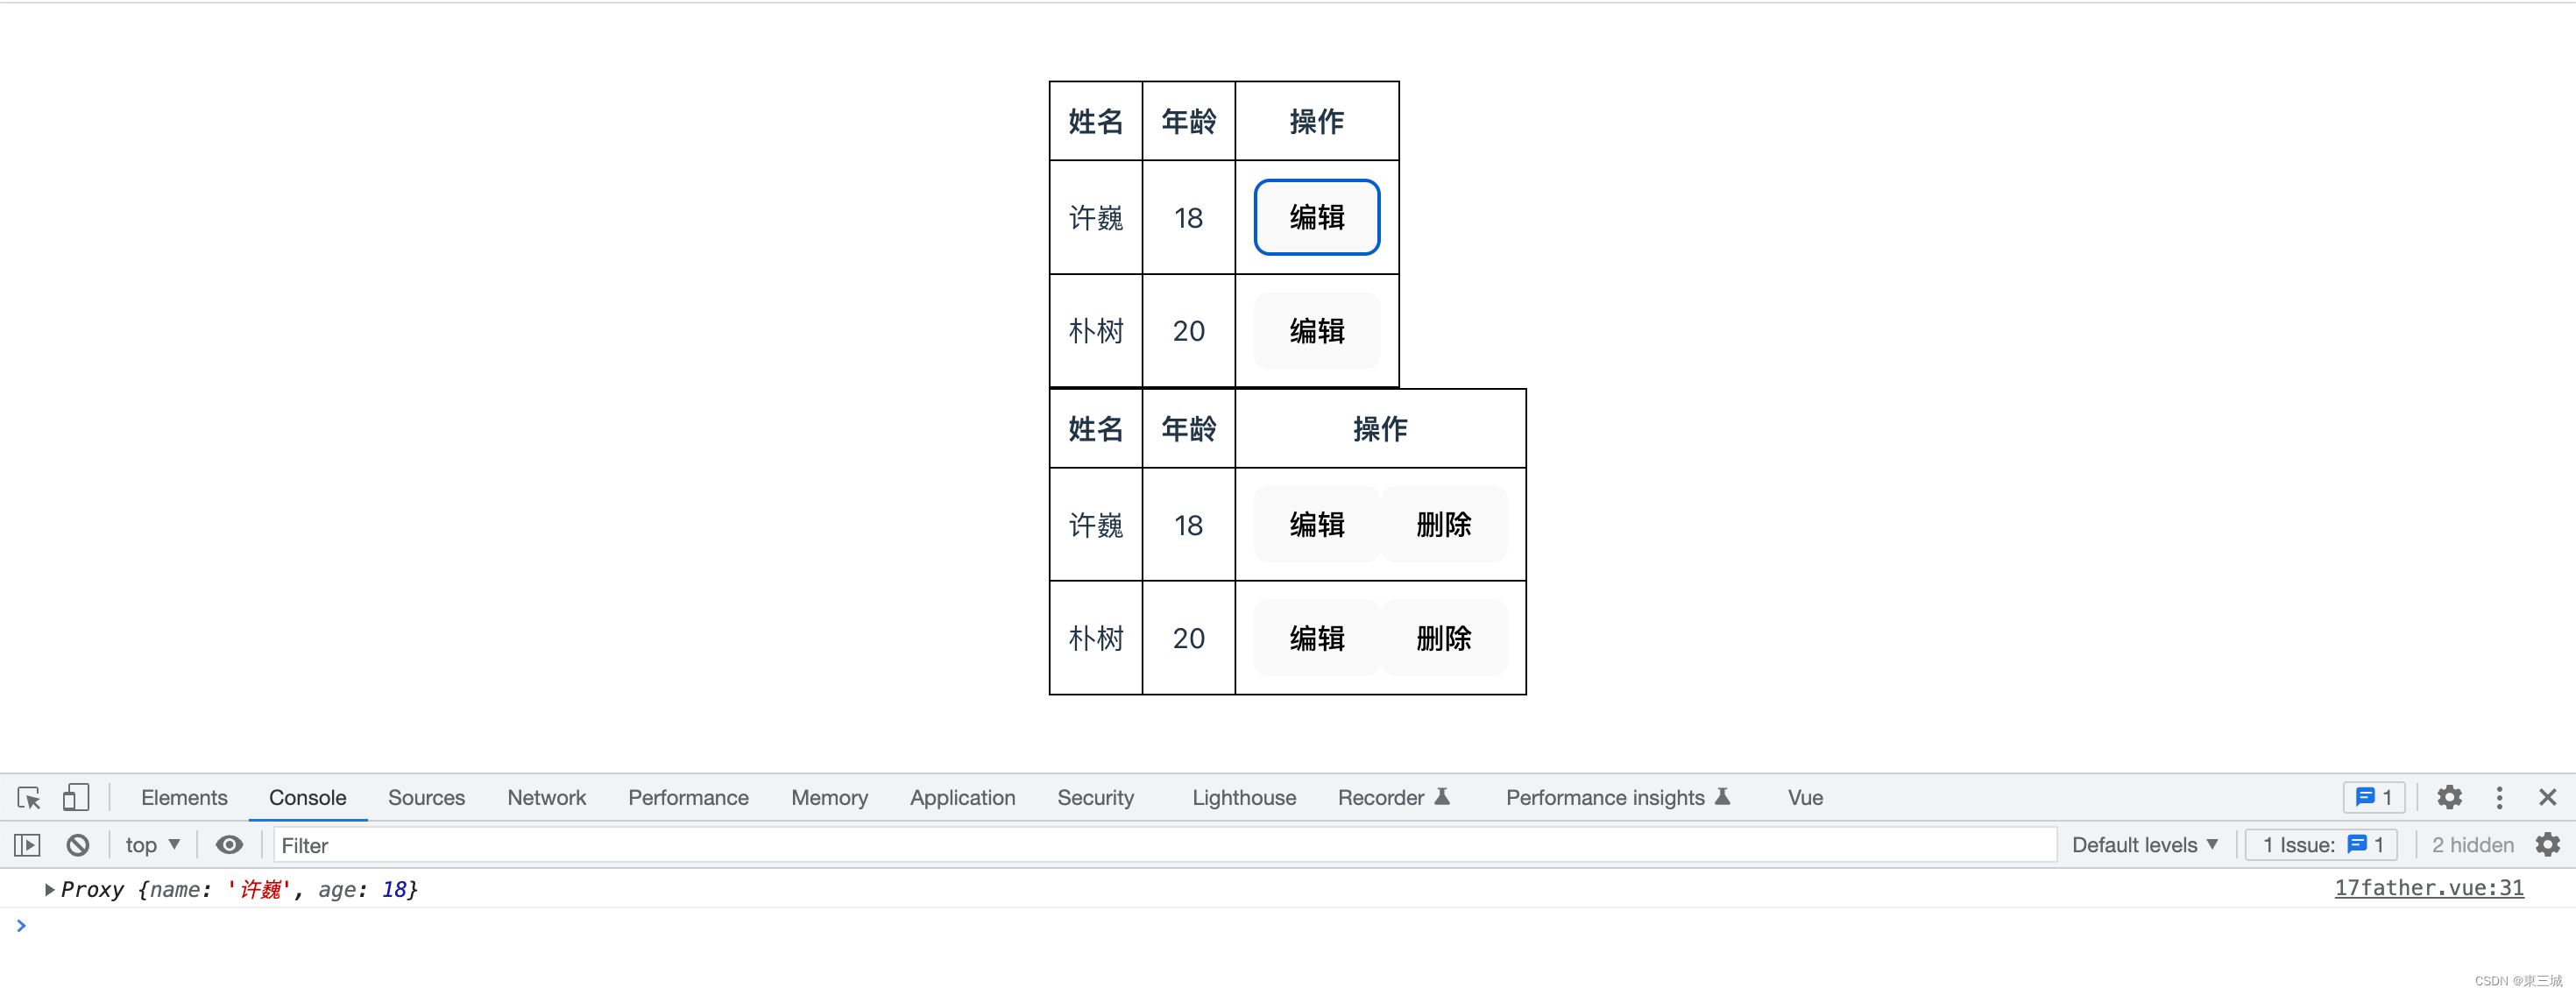
2.4.3、点击编辑按钮获取本行数据(插槽作用域的使用)
父组件:
<template>
  <MyTable :arr="state.arr">
    <template #btns="scoped">
      <button @click="hdClick(scoped.index)">编辑</button>
    </template>
    <!-- 相当于let {index} = scope -->
    <!-- <template #btns="{index}">
      <button @click="hdClick(index)">编辑</button>
    </template> -->
    <button>删除</button>
  </MyTable>
  <MyTable :arr="state.arr">
    <template #btns>
      <button>编辑</button>
      <button>删除</button>
    </template>


  </MyTable>
</template>

<script lang='ts' setup>
import MyTable from "./18son.vue"
import { reactive } from "Vue"
let state = reactive({
  arr: [{
    name: "许巍",
    age: 18
  }, {
    name: "朴树",
    age: 20
  }]
})
const hdClick = (index: number) => {
  console.log(state.arr[index])
}
</script>
子组件:
<template>
  <table>
    <tr>
      <th>姓名</th>
      <th>年龄</th>
      <th>操作</th>
    </tr>
    <tr v-for="item, index in arr" :key="index">
      <td>{{ item.name }}</td>
      <td>{{ item.age }}</td>
      <td>
        <slot name="btns" :index="index"></slot>
      </td>
    </tr>
  </table>
</template>

<script lang='ts' setup>

let props = defineProps({
  arr: {
    type: Array,
    default: []
  }
})
</script>

<style scoped>
table {
  border-collapse: collapse;
}

table,
th,
td {
  border: 1px solid #000;
}

th,
td {
  padding: 10px
}
</style>
2.4.4、类型书写优化
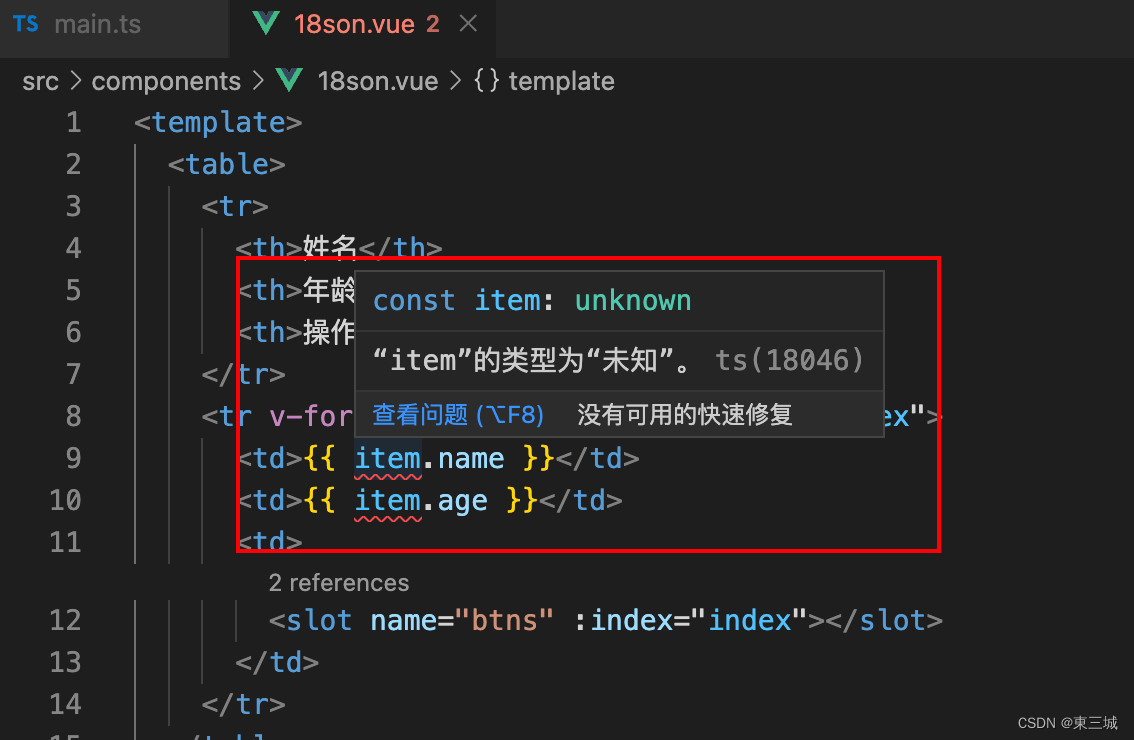
子组件中上面的代码模板里面报错。所以可以做如下优化,
子组件中:
<template>
  <table>
    <tr>
      <th>姓名</th>
      <th>年龄</th>
      <th>操作</th>
    </tr>
    <tr v-for="item, index in arr2" :key="index">
      <td>{{ item.name }}</td>
      <td>{{ item.age }}</td>
      <td>
        <slot name="btns" :index="index"></slot>
      </td>
    </tr>
  </table>
</template>

<script lang='ts' setup>

let props = defineProps({
  arr: {
    type: Array,
    default: []
  }
})

interface UserType {
  name: string,
  age: number
}
let arr2 = props.arr as UserType[]
</script>

<style scoped>
table {
  border-collapse: collapse;
}

table,
th,
td {
  border: 1px solid #000;
}

th,
td {
  padding: 10px
}
</style>
2.4.5、全局接口抽取和ts全局配置
项目目录下,新建types文件夹,其中新建table.d.ts文件:
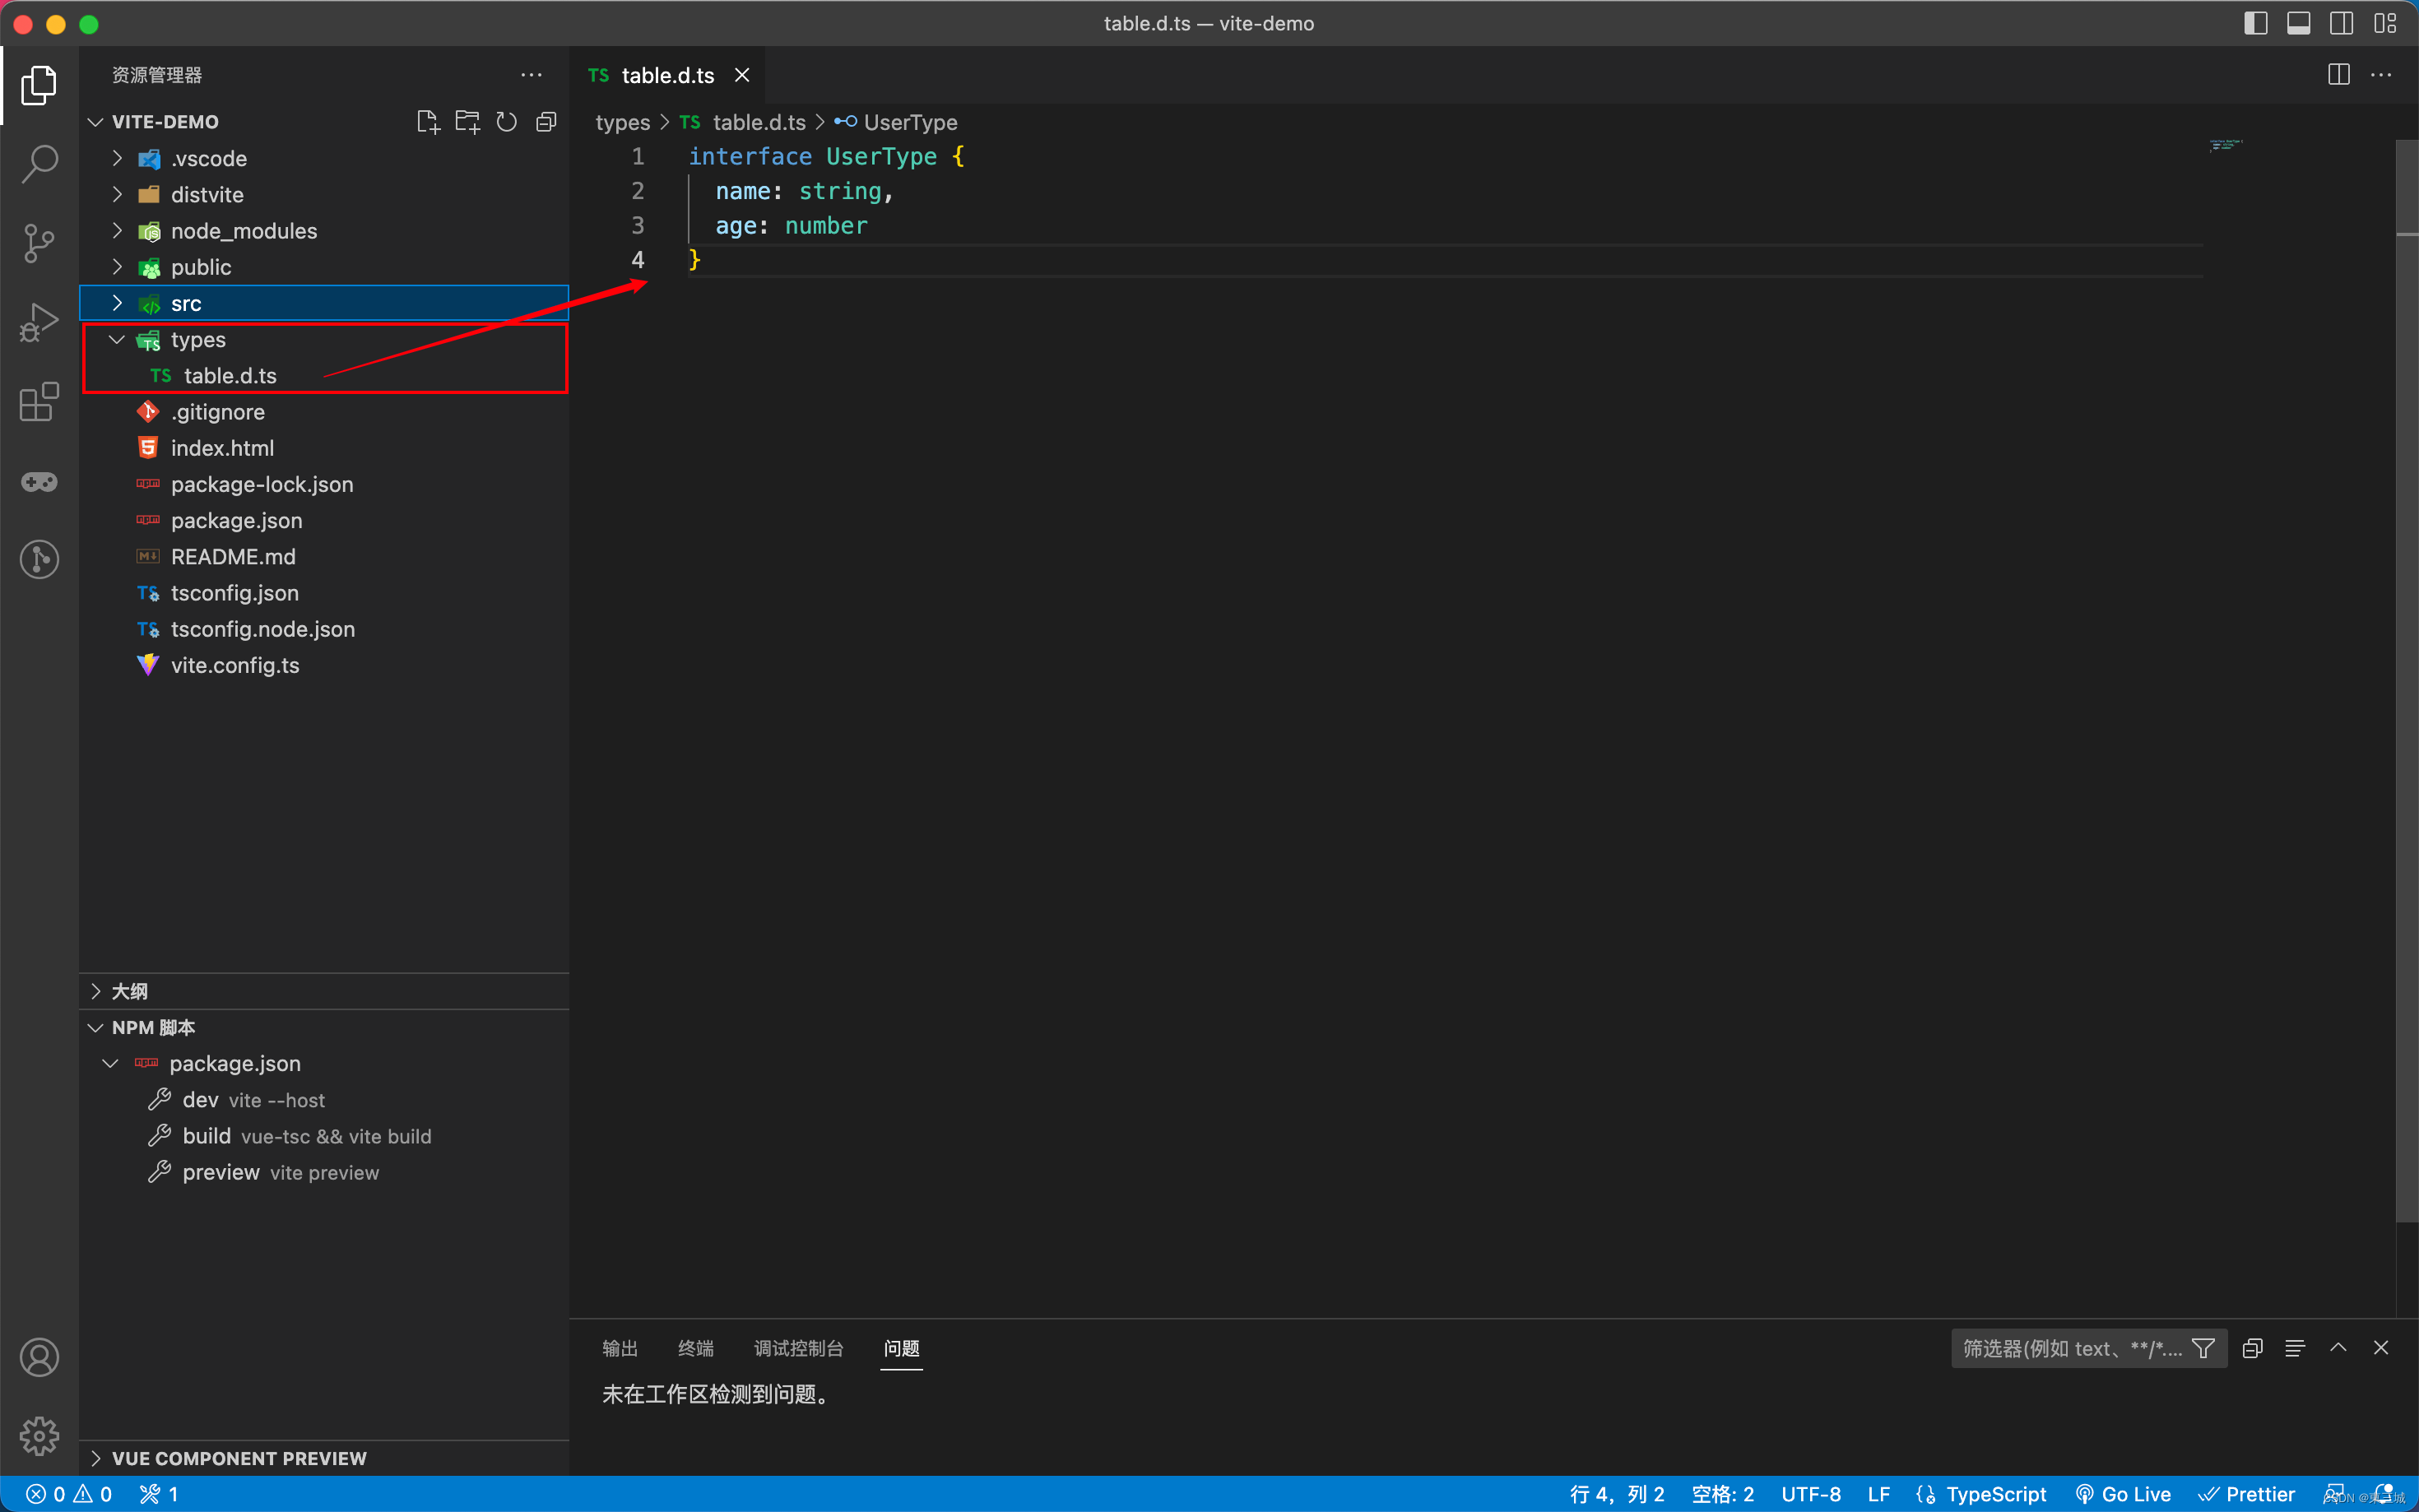
interface UserType{
    name:string;
    age:number;
}
在tsconfig.json中补充:
  "include": [
    ...,
    "types/**/*.d.ts"
  ],
在你的项目中,如果table.d.ts文件中已经export,例如:
export interface UserType{
    name:string;
    age:number;
}
则需要在组件中引入之后,才可以使用这个接口:
import {UserType} from "../../types/table"
三、teleport传送门
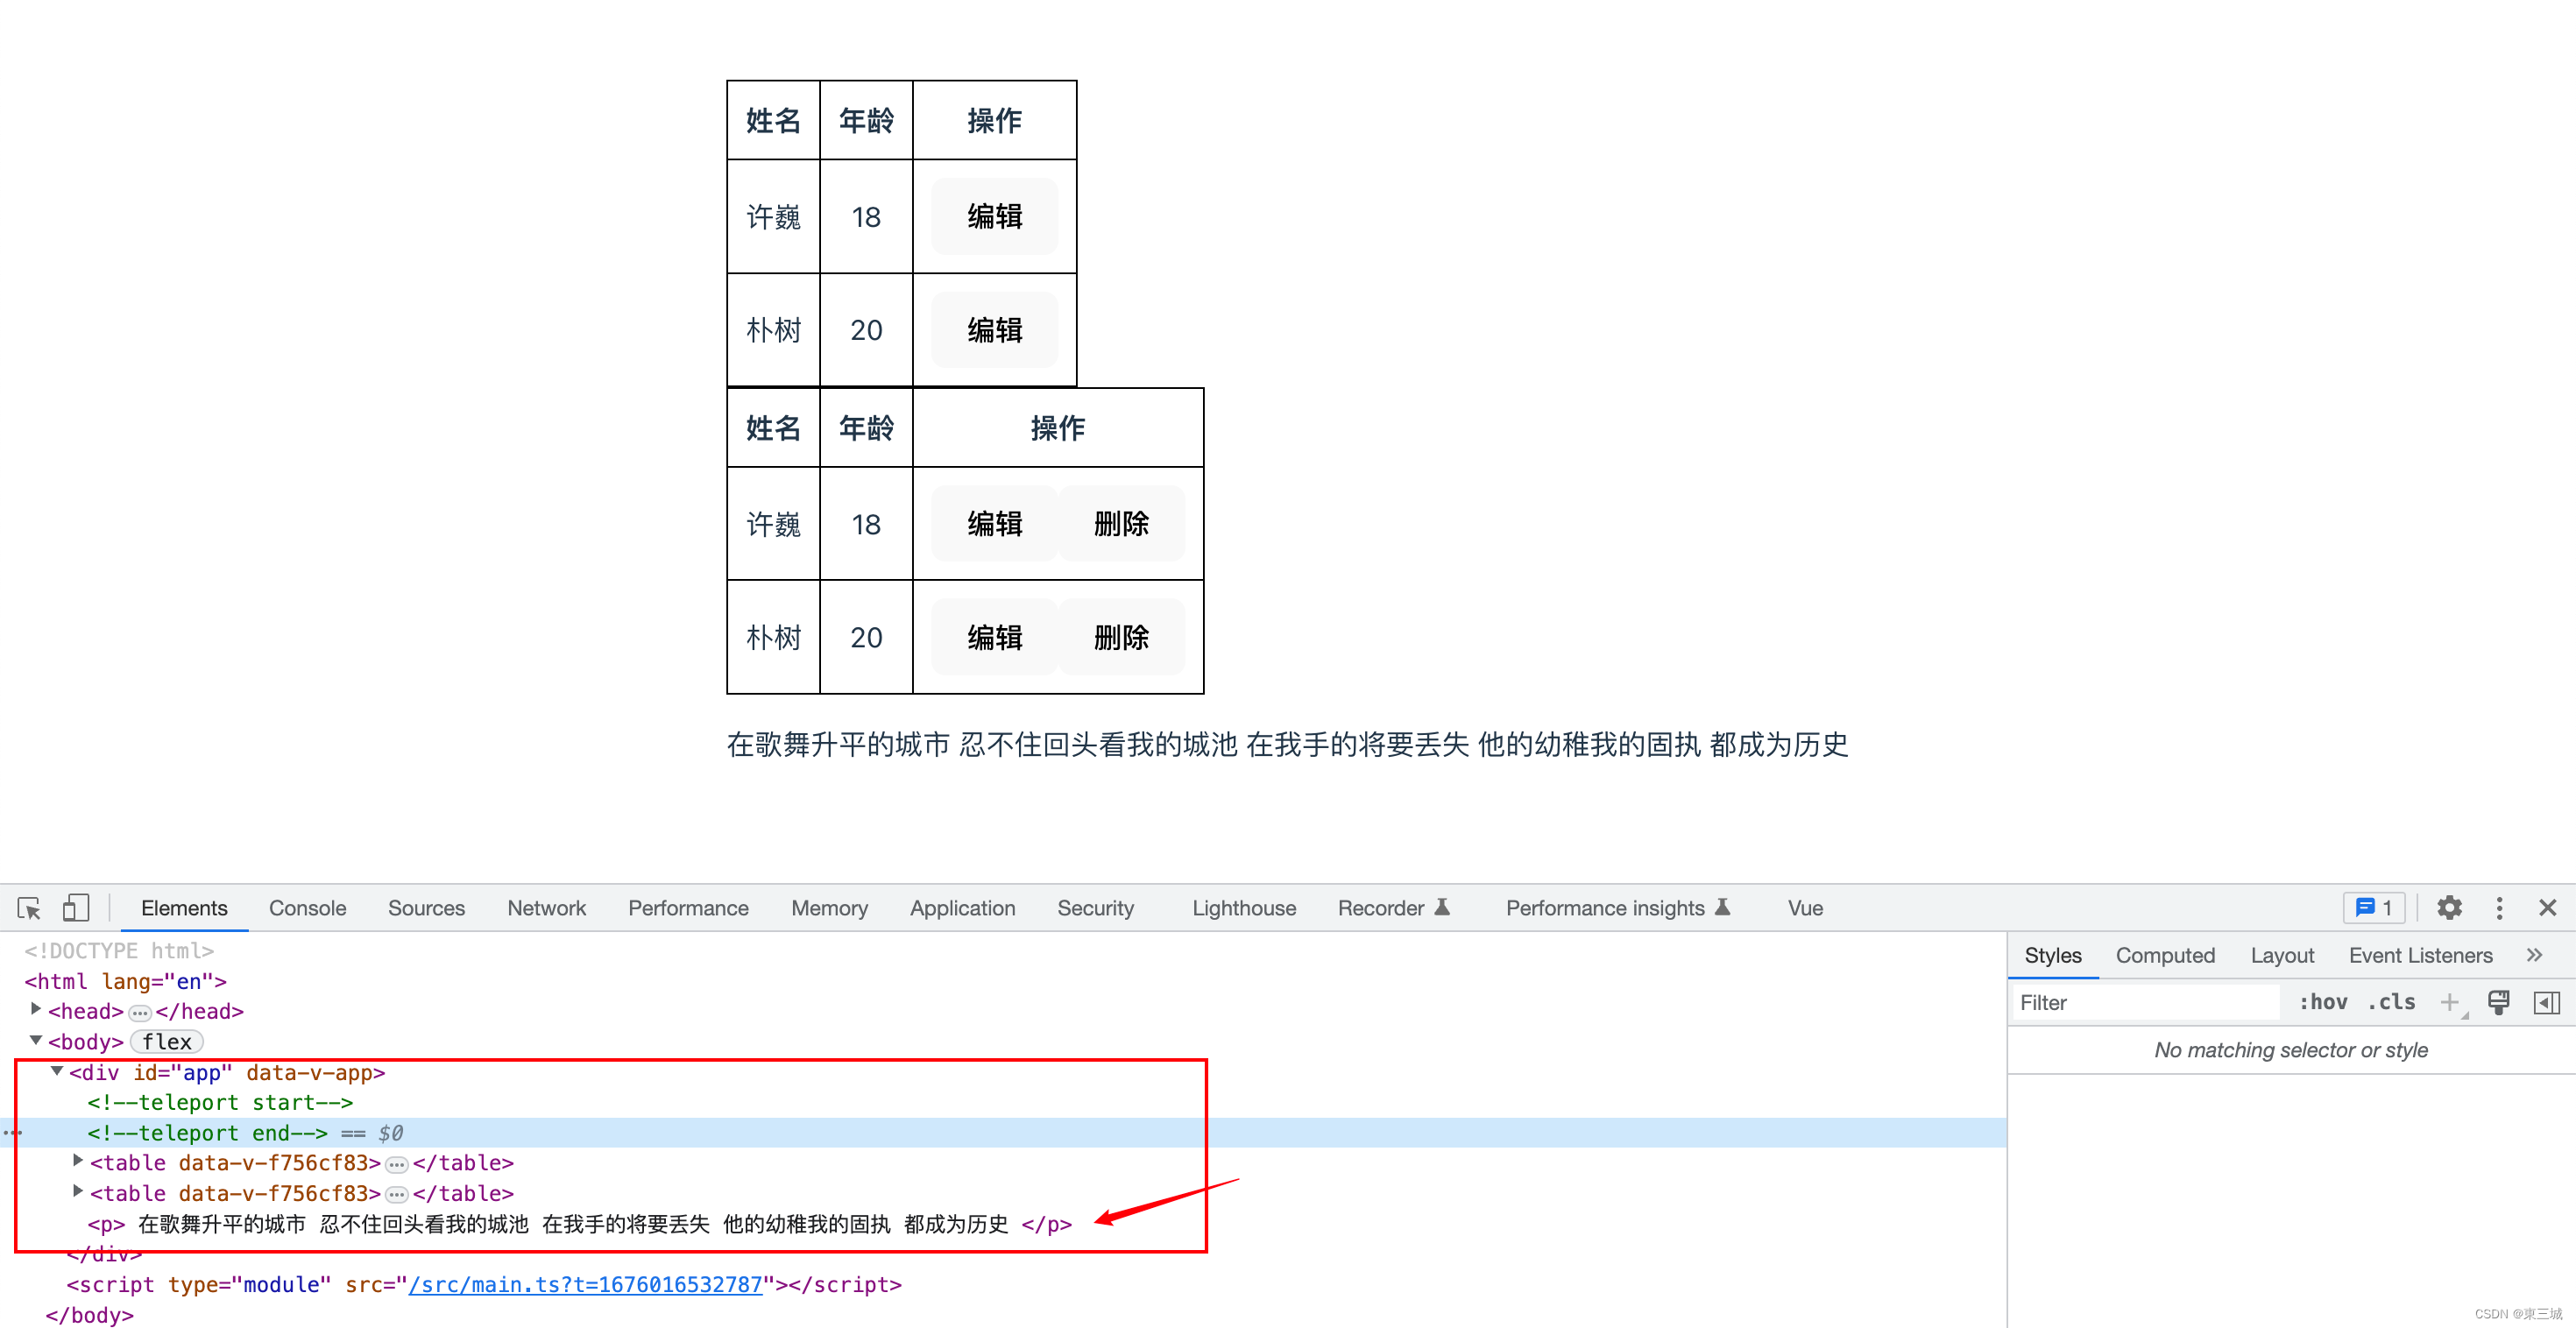
Vue3提供的新组件,它可以把组件传送到指定位置(传送到指定标签内部的最后)
<template>
  <Teleport to="#app">
    <p>
      在歌舞升平的城市
      忍不住回头看我的城池
      在我手的将要丢失
      他的幼稚我的固执
      都成为历史
    </p>
  </Teleport>

  <MyTable :arr="state.arr">
    <template #btns="scoped">
      <button @click="hdClick(scoped.index)">编辑</button>
    </template>

    <button>删除</button>
  </MyTable>
  <MyTable :arr="state.arr">
    <template #btns>
      <button>编辑</button>
      <button>删除</button>
    </template>


  </MyTable>
</template>

<script lang='ts' setup>
import MyTable from "./18son.vue"
import { reactive } from "Vue"
let state = reactive({
  arr: [{
    name: "许巍",
    age: 18
  }, {
    name: "朴树",
    age: 20
  }]
})
const hdClick = (index: number) => {
  console.log(state.arr[index])
}
</script>
四、类型增强
index.html
<script>
    var globalVar = 'globalVar变量';
    var globalObj = { name: '', age: 20 };
    function fn(str) {
      console.log('fn函数' + str);
    }
</script>
组件中:
console.log(globalVar, globalObj);
fn("")
如果上面几个变量和函数没有在全局做声明,会报红线,所以我们在types文件夹中创建common.d.ts文件:
declare var globalVar: string;
type ObjType = { name: string; age: number }
declare var globalObj: ObjType;
// 声明函数fn类型
declare function fn(s?: string): void;
五、第三方类型声明
在index.html中做jquery全局引入:
<script src="http://libs.baidu.com/jquery/2.0.0/jquery.min.js"></script>
在组件中使用:
console.log($("#app"));
$.ajax()
此时没有在全局声明的话,上面的写法也会报红线,在types文件夹中创建jquery.d.ts文件:
declare function $(n: string):any;
/* declare let $: object;   重复报红*/
declare namespace $ {
    function ajax():void;
}
拓展关于namespace:
// 全局变量的声明文件主要有以下几种语法:
declare var 声明全局变量
declare function 声明全局方法
declare class 声明全局类
declare enum 声明全局枚举类型
declare namespace 声明(含有某方法的)全局对象
interface 和 type 声明全局类型
六、配置项目路径别名
目前ts对@指向src目录的提示是不支持的,vite默认也是不支持的。
所以需要手动配置@符号的指向
tsconfig.json中:添加两项配置
"compilerOptions": {
    ...
    "baseUrl": "./",
    "paths": {
      "@/*": [
        "src/*"
      ],
      "#/*": [
         "types/*"
      ]
    }
},
添加完后就有提示了import MyTable from "@/components/03-AppChild.vue",但这仅仅是ts的提示支持,去运行案例还会报错。这是因为vite默认不认识@符号的意思。
这时候就需要在vite.config.ts中添加配置(参考网址https://vitejs.cn/config/#resolve-alias)
import path from 'path';

export default defineConfig({
  plugins: [vue()],
  resolve: {
    alias: {
      "@": path.join(__dirname, 'src'),
      "#": path.join(__dirname, 'types')
    }
  }
})
这时候引入的会path模块报红,但其实我们已经有node,所以就已经有path模块,只是缺少ts的一些声明配置。
所以需要安装关于node这个库的ts声明配置
npm i -D @types/node
安装成功就没有报红了,如果import后面的path报红,就把引入换成 import * as path from 'path';
如有不足,请多指教,
未完待续,持续更新!
大家一起进步!

