Profinet Driver(PNDriver)从V2.3开始支持IO设备(IOD)功能,支持通用网络接口和Linux操作系统,最小支持2ms的通讯周期。本文介绍如何编译PNDriver并运行在IOT2050上。
1. 编译PNDriver
因为PNDriver只支持32位模式,因此需要安装32位交叉编译环境。准备虚拟机(笔者的环境是VMWare + Ubuntu18.04),在虚拟机运行:
sudo apt-get install gcc-arm-linux-gnueabihf
sudo apt-get install g++-arm-linux-gnueabihf
在命令行中输入:arm-linux-gnueabihf-gcc --version 检查一下是否安装成功

将PNDriver源代码拷贝到虚拟机。
1)修改
/pn_driver/src/source/pnd/src/pnio_user_core/base/pnd_ValueHelper.cpp
将1279 行修改为:va_list argList, tmpList; //=LSA_NULL;
2)修改pn_driver/src/examples/lib/linux32_native/build/Makefile
将 gcc 修改为arm-linux-gnueabihf-gcc
将 g++ 修改为arm-linux-gnueabihf-g++
并且删除 -m32的编译选项如下:
CCFLAGS = -c -pthread $(REMOVE_WARNINGS) -O2 -Wall -fmessage-length=0 -fno-strict-aliasing -ffunction-sections -fdata-sections -Wl,--gc-sections -MMD
CXXFLAGS = -c -pthread $(REMOVE_WARNINGS) -O2 -Wall -fmessage-length=0 -fno-strict-aliasing -ffunction-sections -fdata-sections -Wl,--gc-sections -MMD -std=c++11
CCLINK = -pthread $(REMOVE_WARNINGS) -O2 -Wall -fmessage-length=0 -fno-strict-aliasing -ffunction-sections -fdata-sections -Wl,--gc-sections -MD -MP
3)在pn_driver/src/examples/lib/linux32_native/build/路径下运行make
4)修改pn_driver/src/examples/iod/test_app_iod/linux32_native/build/Makefile
将 gcc 修改为arm-linux-gnueabihf-gcc
将 g++ 修改为arm-linux-gnueabihf-g++
并且删除 -m32的编译选项如下:
CCFLAGS = -c -pthread $(REMOVE_WARNINGS) -O2 -Wall -fmessage-length=0 -MMD
CCLINK = -pthread $(REMOVE_WARNINGS) -O2 -Wall -fmessage-length=0 -MD -MP
5)在pn_driver/src/examples/iod/test_app_iod/linux32_native/build/路径下运行make
6)将pn_driver/src/examples/iod/test_app_iod/linux32_native/路径下的test_app_iod和PND_IOD.xml拷贝到IOT2050,例如/opt路径下
2. 准备运行环境
在IOT2050连接互联网的前提下,在IOT2050的命令行,依次输入如下命令:
apt-get update
dpkg --add-architecture armhf
apt-get update
apt-get install libc6:armhf
apt-get install libstdc++6:armhf
cd /opt
chmod +x test_app_iod
修改配置文件
vi /etc/sysctl.conf
在末尾添加:
net.ipv4.ip_local_port_range = 49152 59000
保存后运行:
sysctl -p /etc/sysctl.conf
3. 连接PLC
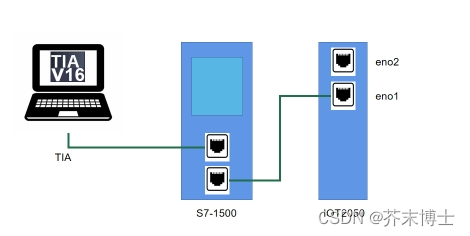
按照如下方式连接PLC,eno1作为PN接口,eno2作为普通以太网接口
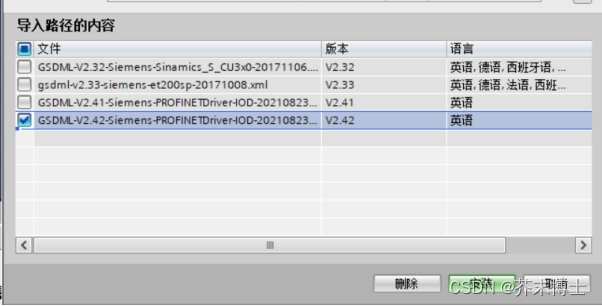
在TIA中添加GSDML文件,位于pn_driver\src\engineering\GSDML,安装如下图所示的GSDML文件
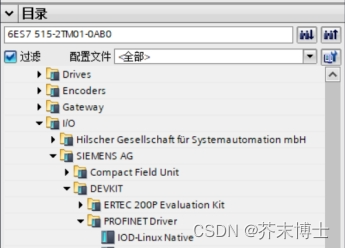
在态中添加设备IOD-Linux native
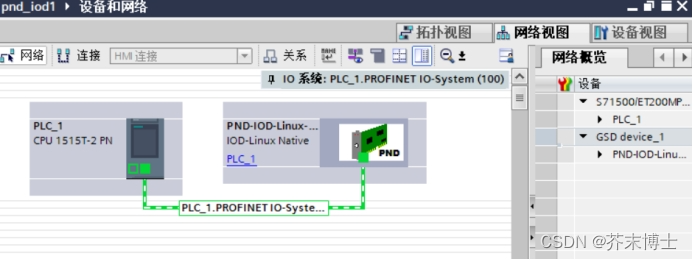
分配控制器后如下图所示:
打开设备配置,添加如下模块:
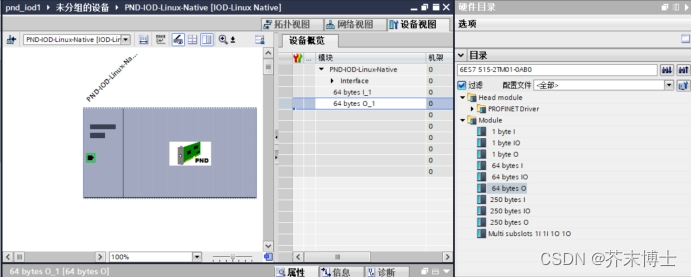
默认的设备名称为:pnd-iod-linux-native
编译下载组态到PLC
在IOT2050的终端,在保存test_app_iod的路径下(例如 /opt)运行:
./test_app_iod
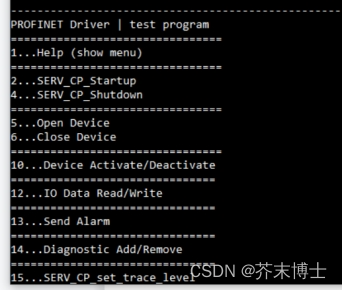
输入2:并选择eno1
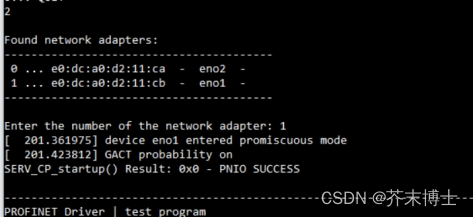
输入5 (Open Device)
输入10,再选择 1(Activate Device)
这样IO设备就启动起来了
通过TIA分配设备名称。
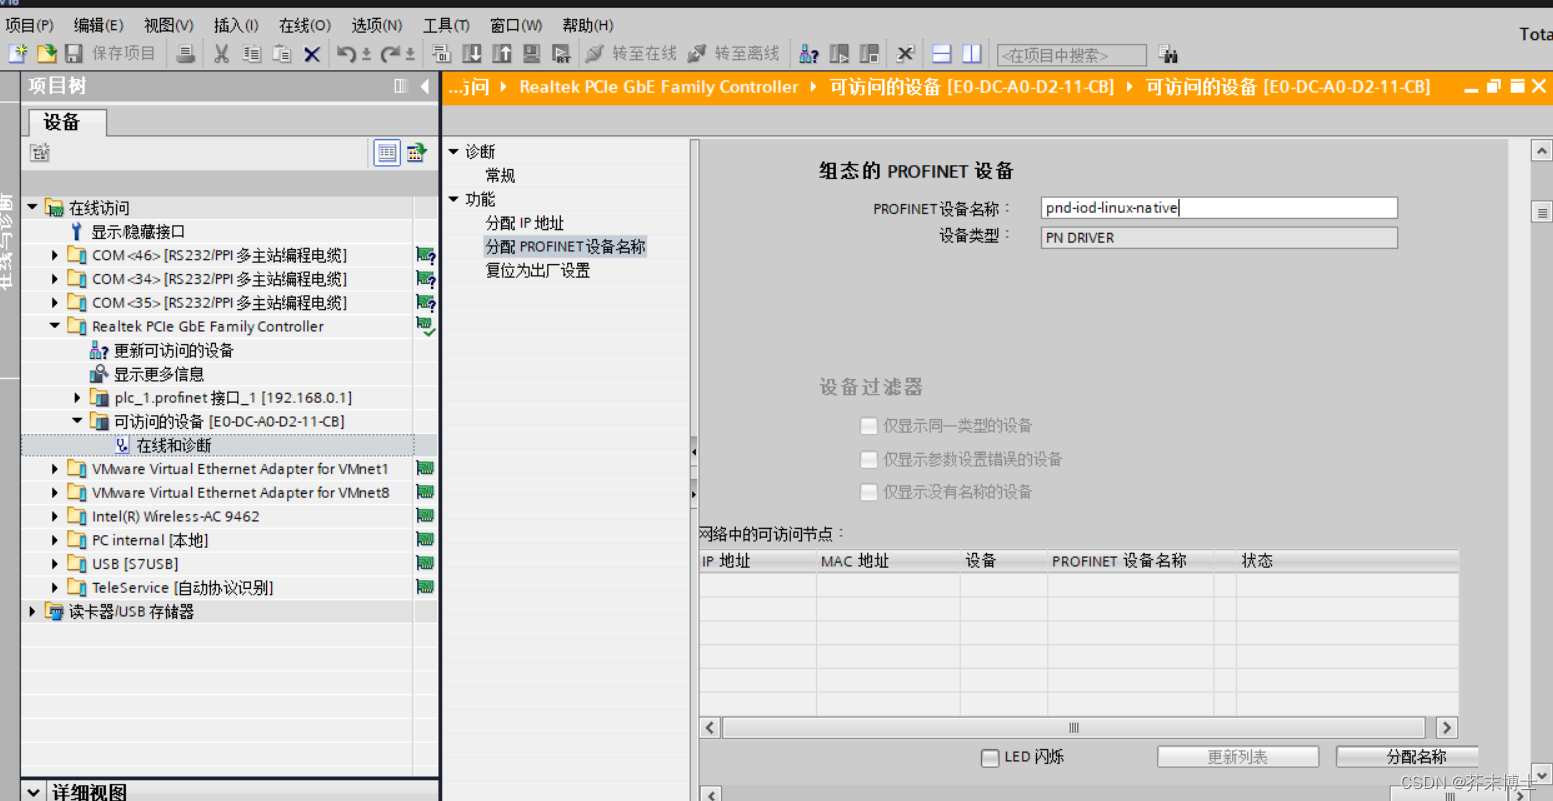
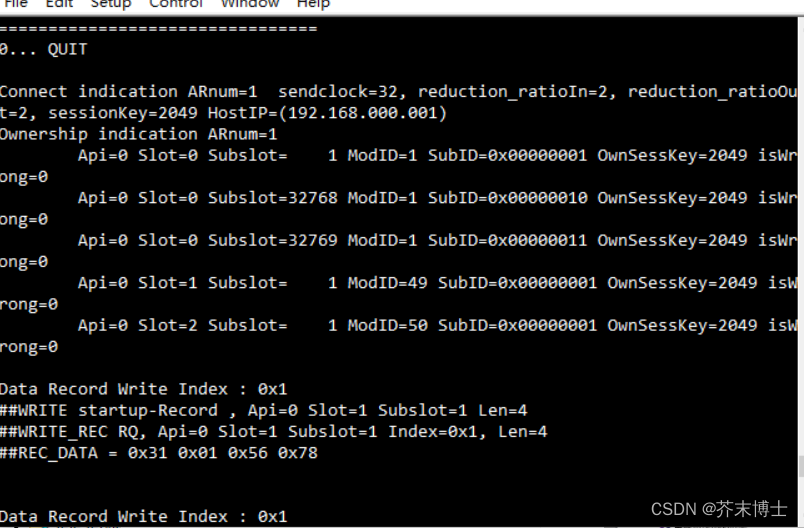
在IOT2050的终端可以看到PLC建立连接的信息
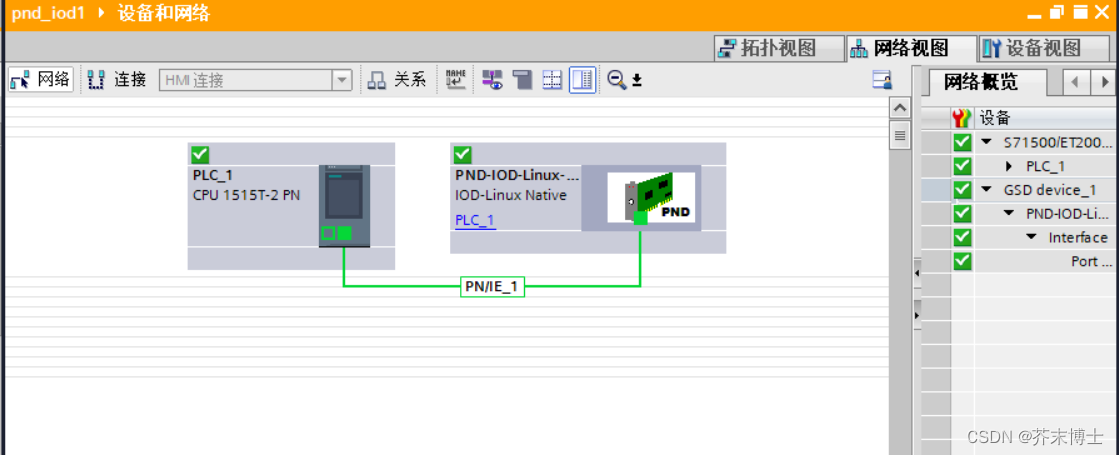
在线看一下,PN设备正常连接上了



![[附源码]Python计算机毕业设计宠物寄养管理系统](https://img-blog.csdnimg.cn/36f3e846a56747219e1dfbf07cdf9914.png)
