网站需求:
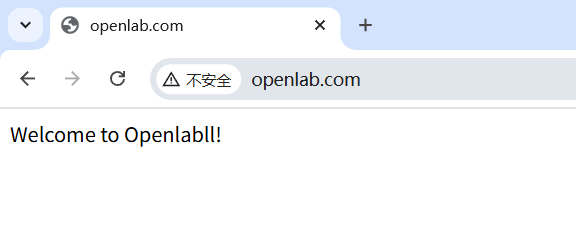
一、基于域名[www.openlab.com](http://www.openlab.com)可以访问网站内容为 welcome to openlab
二、给该公司创建三个子界面分别显示学生信息,教学资料和缴费网站,基于[www.openlab.com/student](http://www.openlab.com/student) 网站访问学生信息,[www.openlab.com/data](http://www.openlab.com/data)网站访问教学资料
[www.openlab.com/money网站访问缴费网站](http://www.openlab.com/money网站访问缴费网站)。
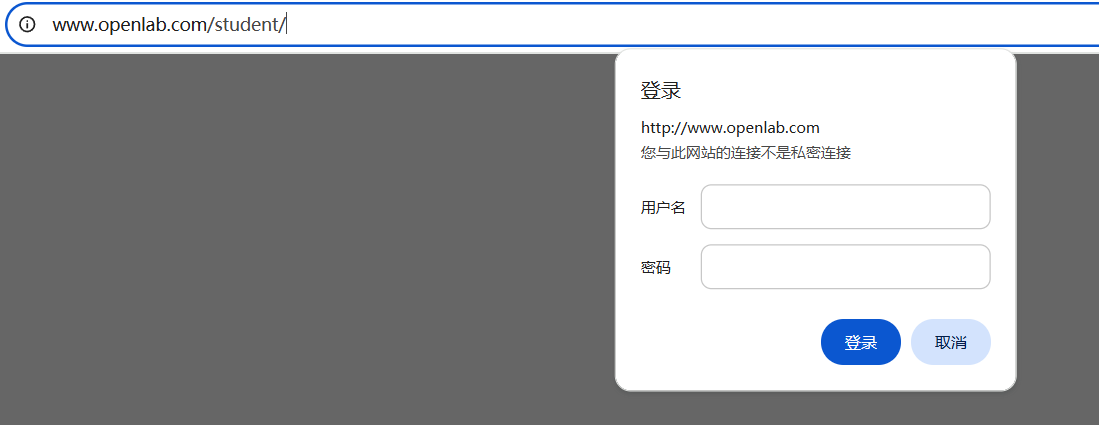
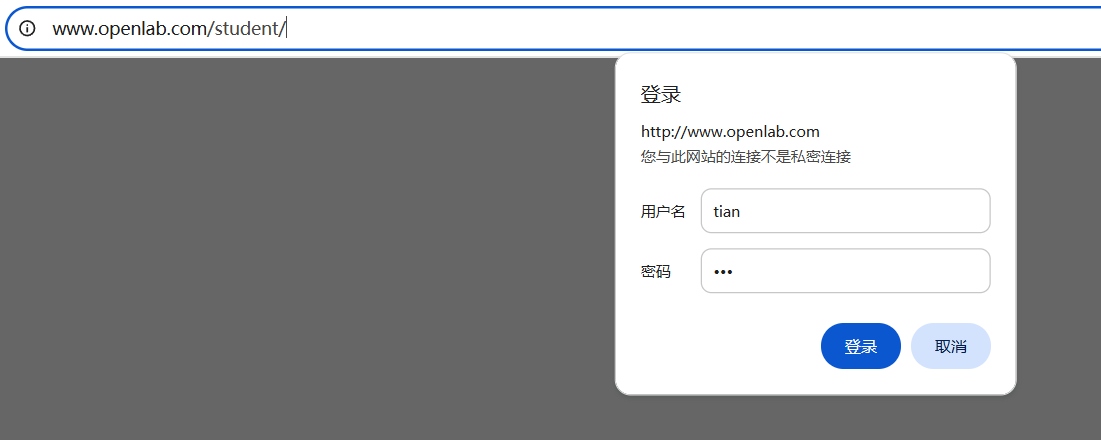
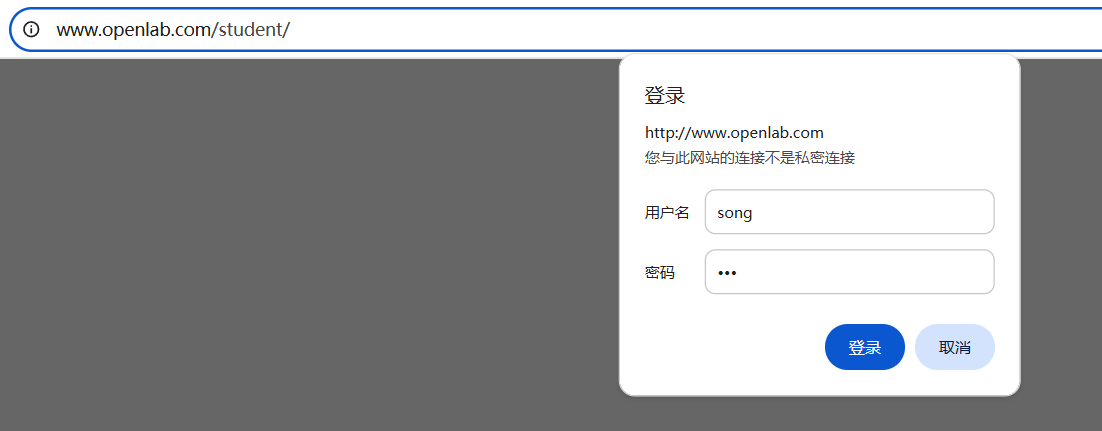
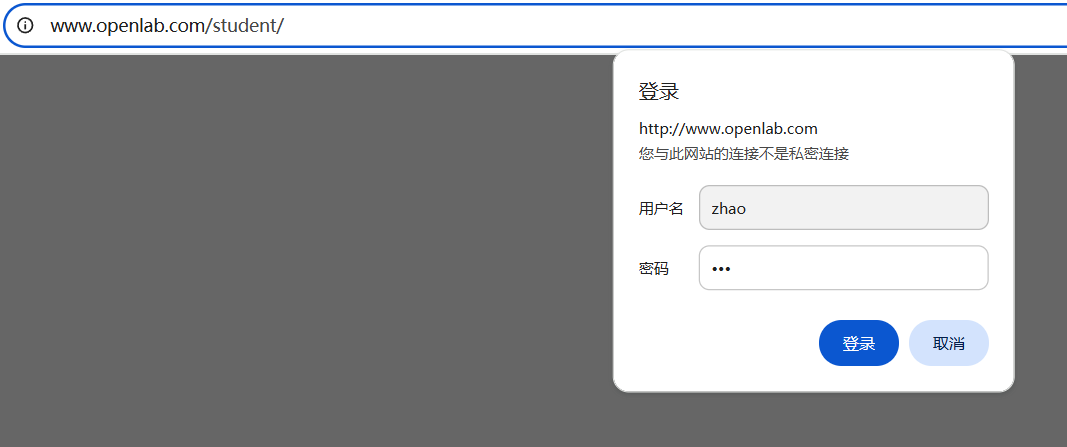
三、(1)学生信息网站只有song和tian两人可以访问,其他用户不能访问。
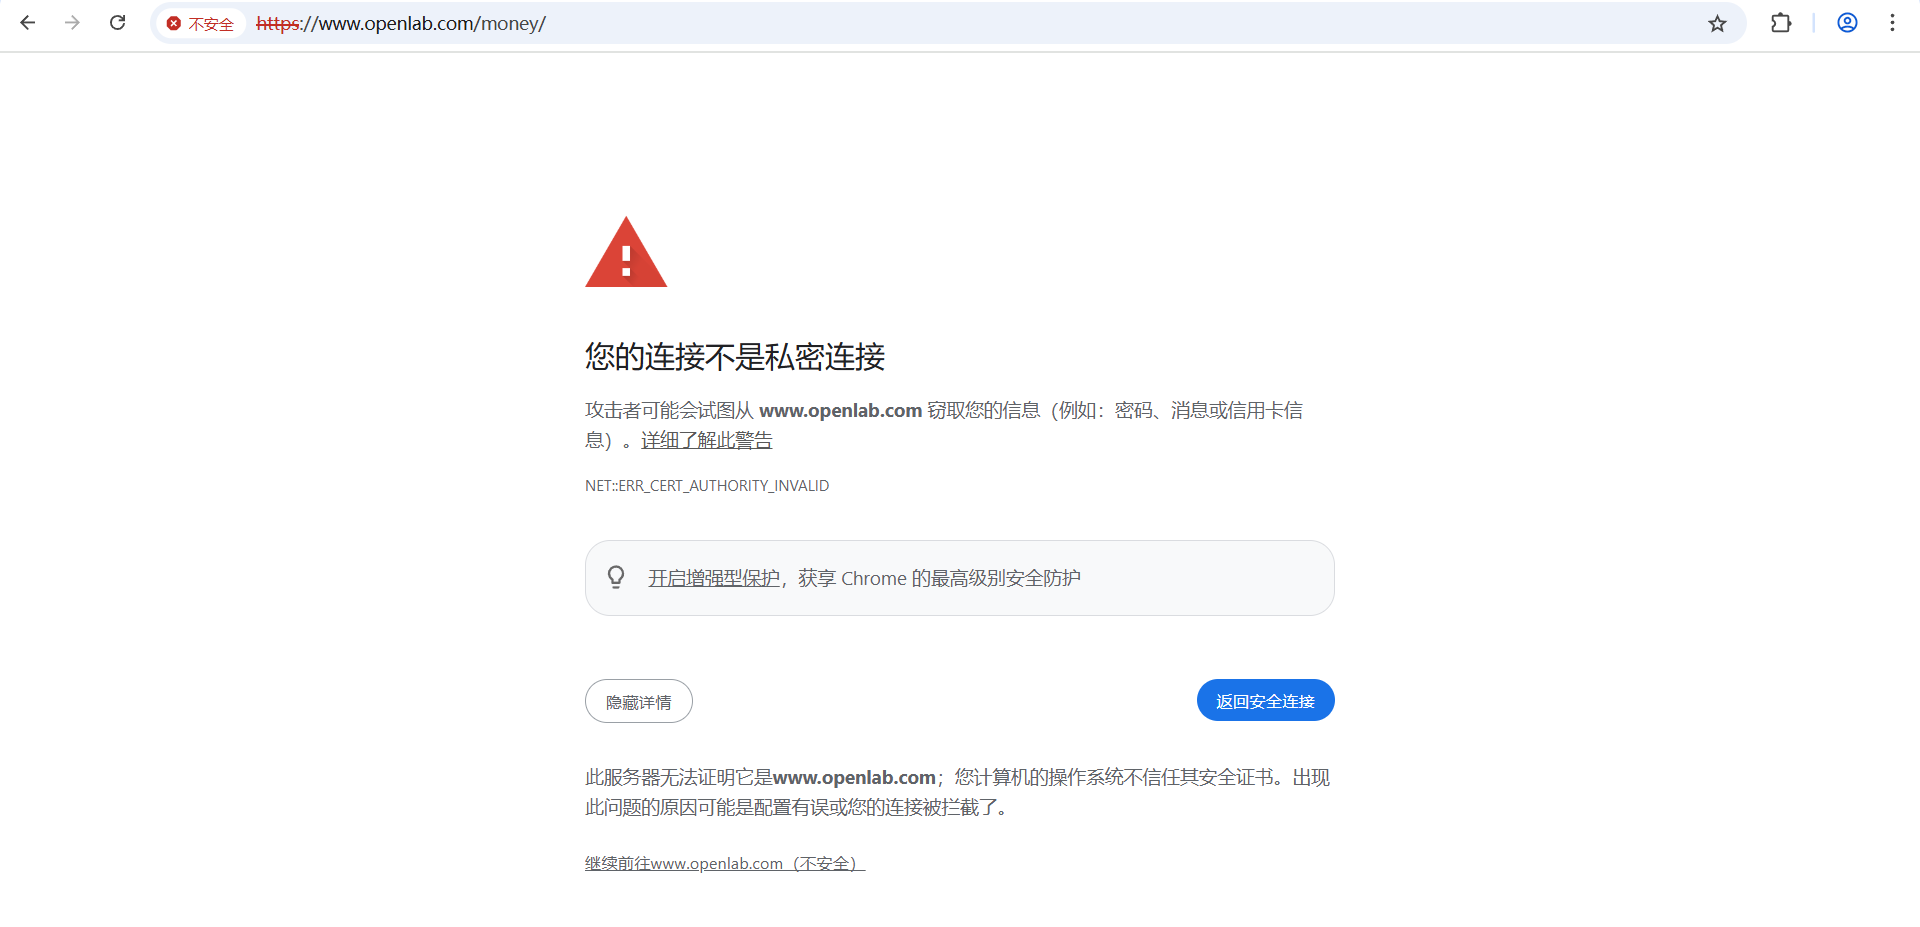
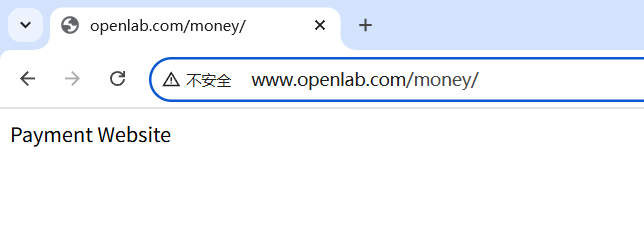
(2)访问缴费网站实现数据加密基于https访问
服务端工作:
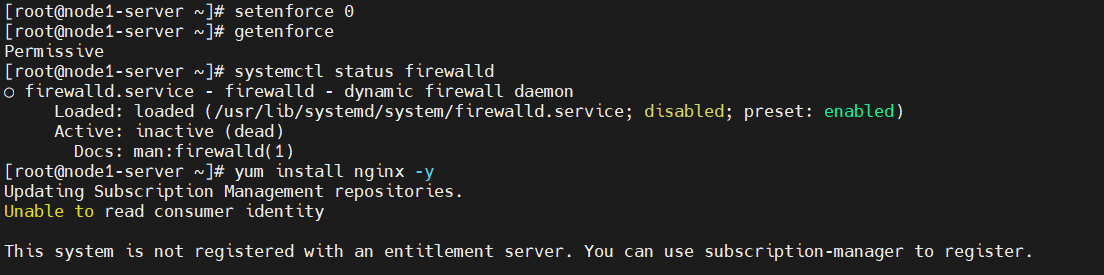
1.关闭防火墙,selinux调整至宽容模式,安装nginx并设置开机自启
[root@node1-server ~]# setenforce 0
[root@node1-server ~]# getenforce
Permissive
[root@node1-server ~]# systemctl stop firewalld # 已做,省略
[root@node1-server ~]# systemctl disable firewalld # 已做,省略
[root@node1-server ~]# systemctl status firewalld
[root@node1-server ~]# yum install nginx -y
[root@node1-server ~]# nginx -V # 查看版本
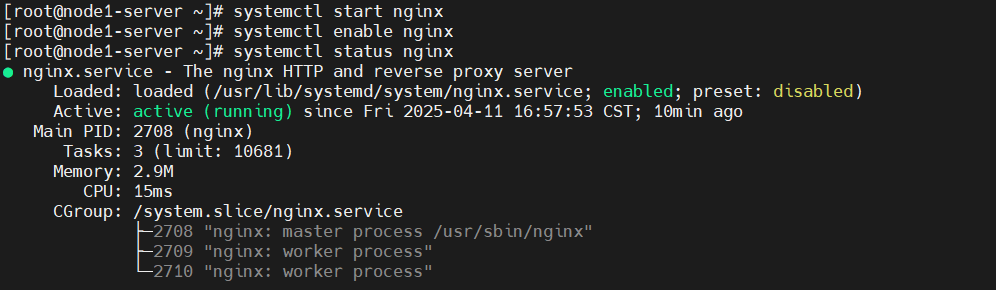
[root@node1-server ~]# systemctl start nginx
[root@node1-server ~]# systemctl enable nginx
[root@node1-server ~]# systemctl status nginx

一、基于域名[www.openlab.com](http://www.openlab.com)可以访问网站内容为 welcome to openlab
1.进入 /etc/nginx/nginx.conf 主配置文件并找到定义网站文件的根目录
[root@node1-server ~]# vim /etc/nginx/nginx.conf
41 server_name www.openlab.com; # 定义当前服务器块对应的域名
42 root /usr/share/nginx/html; # 定义网站文件的根目录,Nginx 会从该目录读取网页文件

2.进入定义网站文件的根目录cd /usr/share/nginx/html/
[root@node1-server ~]# cd /usr/share/nginx/html/ # Nginx 会从该目录读取网页文件
[root@node1-server html]# ll
total 12
-rw-r--r--. 1 root root 3971 Feb 13 20:22 404.html
-rw-r--r--. 1 root root 4020 Feb 13 20:22 50x.html
drwxr-xr-x. 2 root root 27 Apr 11 10:13 icons
lrwxrwxrwx. 1 root root 25 Feb 13 20:23 index.html -> ../../testpage/index.html
-rw-r--r--. 1 root root 368 Feb 13 20:22 nginx-logo.png
lrwxrwxrwx. 1 root root 14 Feb 13 20:23 poweredby.png -> nginx-logo.png
lrwxrwxrwx. 1 root root 37 Feb 13 20:23 system_noindex_logo.png -> ../../pixmaps/system-noindex-logo.png

3.将原初始网页文件备份
[root@node1-server html]# cp index.html index.html.bak

4.将新内容写入 /usr/share/nginx/html/index.html 文件中
[root@node1-server html]# echo "Welcome to Openlab!!!" > index.html
echo "Welcome to Openlabll!" > index.html
[root@node1-server html]# nginx -t # 检查配置文件的语法错误,无错返回ok
nginx: the configuration file /etc/nginx/nginx.conf syntax is ok
nginx: configuration file /etc/nginx/nginx.conf test is successful
[root@node1-server html]# cat index.html
Welcome to Openlabll!

- nginx # 启动nginx
- nginx restart # 重启服务
- nginx -s reload # 重新加载配置文件
- nginx -s stop # 强行停止服务
- nginx -s quit # 优雅停止服务,即所有请求处理完后退出服务
- nginx -v # 查看版本号
- nginx -t # 检查配置文件的语法错误,无错返回ok
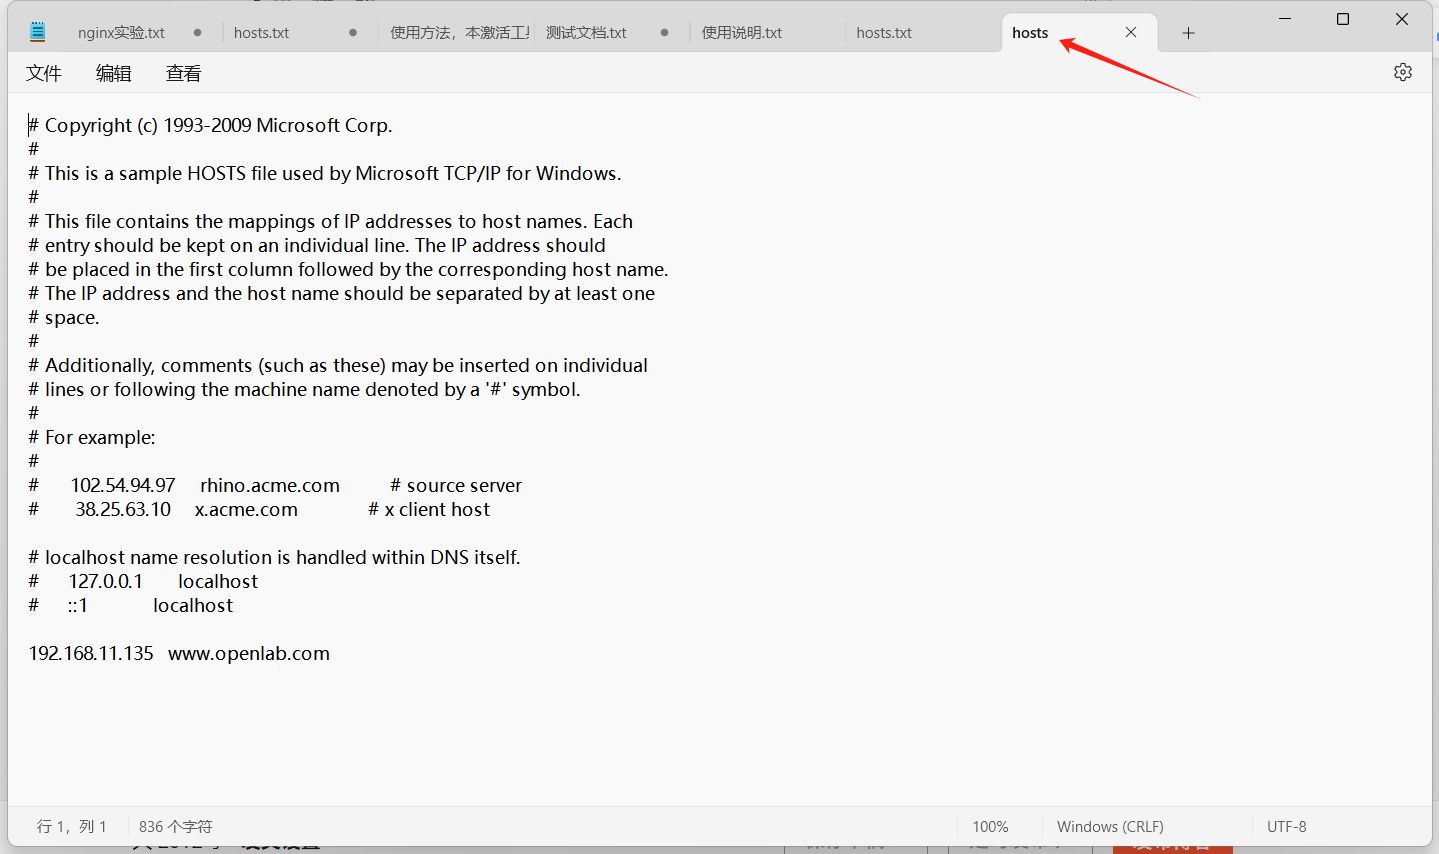
5.向Windows中C:\Windows\System32\drivers\etc\hosts文件中写入域名,重启nginx并测试
192.168.11.135 www.openlab.com # 此处文件不能保存为文本文档(文件后缀为.txt)!
[root@node1-server html]# systemctl restart nginx.service
# 浏览器直接访问 http://www.openlab.com
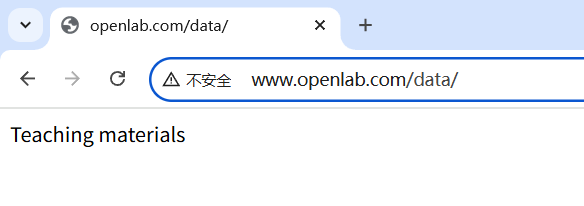
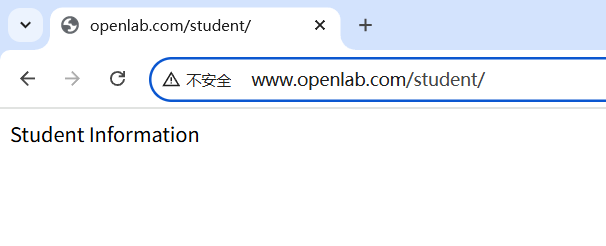
二、给该公司创建三个子界面分别显示学生信息,教学资料和缴费网站,基于[www.openlab.com/student](http://www.openlab.com/student) 网站访问学生信息,[www.openlab.com/data](http://www.openlab.com/data)网站访问教学资料
[www.openlab.com/money网站访问缴费网站](http://www.openlab.com/money网站访问缴费网站)。
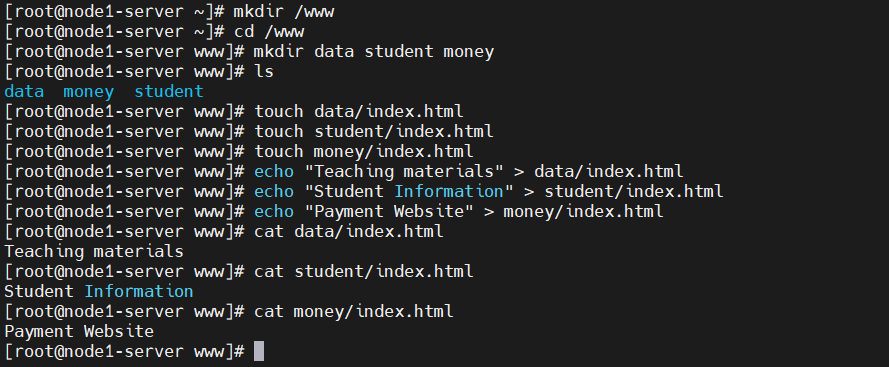
1.创建三个子界面分别显示学生信息,教学资料和缴费网站
[root@node1-server ~]# mkdir /www
[root@node1-server ~]# cd /www
[root@node1-server www]# mkdir data student money
[root@node1-server www]# ls
data money student
[root@node1-server www]# touch data/index.html
[root@node1-server www]# touch student/index.html
[root@node1-server www]# touch money/index.html
[root@node1-server www]# echo "Teaching materials" > data/index.html
[root@node1-server www]# echo "Student Information" > student/index.html
[root@node1-server www]# echo "Payment Website" > money/index.html
[root@node1-server www]# cat data/index.html
Teaching materials
[root@node1-server www]# cat student/index.html
Student Information
[root@node1-server www]# cat money/index.html
Payment Website
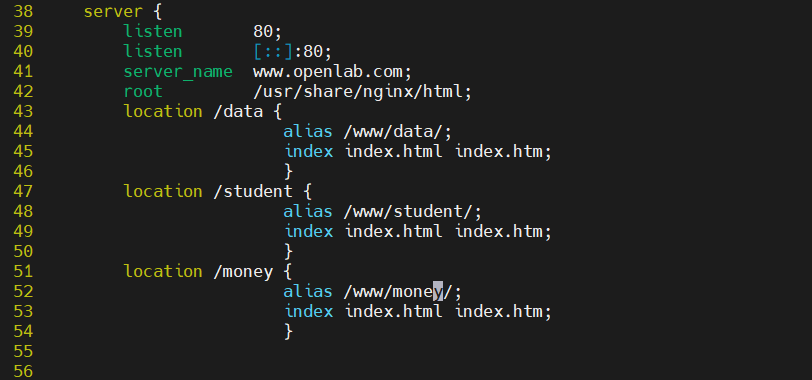
2./etc/nginx/nginx.conf文件中增添子网页内容
[root@node1-server ~]# vim /etc/nginx/nginx.conf
38 server {
39 listen 80; # 监听 IPv4 地址的 80 端口
40 listen [::]:80; # 监听 IPv6 地址的 80 端口([::] 表示所有 IPv6 地址)
41 server_name www.openlab.com; # 定义当前服务器块对应的域名
42 root /usr/share/nginx/html;
43 location /data {
44 alias /www/data/; # 将 URL 路径 /data/ 映射到本地目录 /www/data/
45 index index.html index.htm; # 定义该目录的默认索引文件(访问目录时优先查找的文件)
46 }
47 location /student {
48 alias /www/student/; # 将 URL 路径 /student/ 映射到本地目录 /www/student/
49 index index.html index.htm;
50 }
51 location /money {
52 alias /www/money/; # 将 URL 路径 /money/ 映射到本地目录 /www/money/
53 index index.html index.htm;
54 }
3.测试语法是否有误,无误则重启nginx服务
[root@node1-server ~]# nginx -t
nginx: the configuration file /etc/nginx/nginx.conf syntax is ok
nginx: configuration file /etc/nginx/nginx.conf test is successful
[root@node1-server ~]# systemctl restart nginx.service

4.Windows测试
三、(1)学生信息网站只有song和tian两人可以访问,其他用户不能访问。
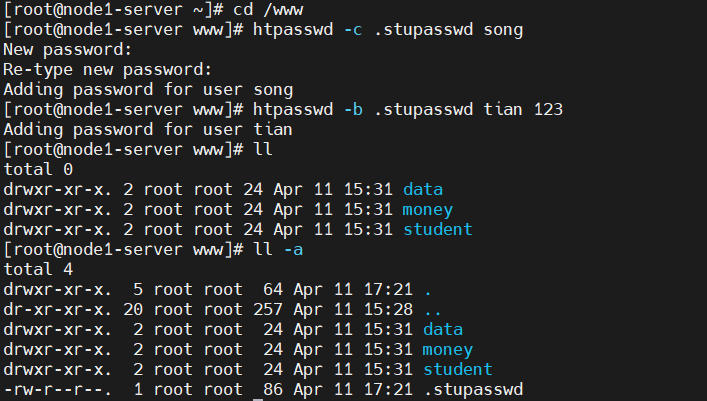
1.安装httpd-tools,创建song、tian两位用户
[root@node1-server ~]# yum install httpd-tools -y
[root@node1-server ~]# cd /www
[root@node1-server www]# htpasswd -c .stupasswd song # 创建一个名为 .stupasswd 的密码文件,并在其中添加一个名为 song 的用户,同时为该用户设置登录密码(通过交互式输入),常用于 HTTP 基本认证(如 Nginx、Apache 服务器的权限控制),确保只有授权用户能访问特定资源。
New password: # 123,此处隐藏
Re-type new password: # 123,此处隐藏
Adding password for user song
[root@node1-server www]# htpasswd -b .stupasswd tian 123 # 向名为 .stupasswd 的密码文件中添加一个名为 tian 的用户,并设置其密码为 123,无需手动输入密码,直接在命令中指定
Adding password for user tian
[root@node1-server www]# ll -a
total 4
drwxr-xr-x. 5 root root 64 Apr 11 17:21 .
dr-xr-xr-x. 20 root root 257 Apr 11 15:28 ..
drwxr-xr-x. 2 root root 24 Apr 11 15:31 data
drwxr-xr-x. 2 root root 24 Apr 11 15:31 money
drwxr-xr-x. 2 root root 24 Apr 11 15:31 student
-rw-r--r--. 1 root root 86 Apr 11 17:21 .stupasswd
1. htpasswd
- 工具名称:Apache 自带的密码文件管理工具,用于生成和管理认证用户的密码文件。
- 适用场景:配置服务器(如 Apache、Nginx)的访问权限时,通过密码文件验证用户身份。
- 命令格式:htpasswd <选项> <密码文件> <用户名>
2. 选项 -c
- 作用:-c 是 create 的缩写,表示创建一个新的密码文件。
- 如果指定的密码文件(.stupasswd)不存在,会创建新文件;
- 如果文件已存在,会提示是否覆盖(需谨慎,避免删除已有用户)。
- 首次创建密码文件时必须使用 -c,后续添加用户时无需再加(否则会覆盖原有文件)。
3. 选项 -b
- 作用:用于非交互方式设置用户密码,允许在命令行中直接指定用户名和密码,而无需手动输入,适用于脚本自动化或批量处理。
4. 密码文件路径 .stupasswd
- 文件名称:.stupasswd(隐藏文件)。
- 存储内容:加密后的用户名和密码。
- 存储位置:当前命令执行的目录(可通过绝对路径指定其他位置,如 /etc/nginx/.stupasswd)。
2.更新/etc/nginx/nginx.conf文件配置,判断语法,重启服务,Windows进行测试
[root@node1-server ~]# vim /etc/nginx/nginx.conf
47 location /student {
48 alias /www/student/;
49 index index.html index.htm;
50 auth_basic "Restricted"; # 启用 HTTP 基本认证,提示用户输入用户名和密码;"Restricted" 是显示给用户的认证提示信息(浏览器弹出的登录框会显示此文本)
51 auth_basic_user_file /www/.stupasswd; # 指定存储认证用户和密码的文件路径
[root@node1-server www]# nginx -t
nginx: the configuration file /etc/nginx/nginx.conf syntax is ok
nginx: configuration file /etc/nginx/nginx.conf test is successful
[root@node1-server www]# systemctl restart nginx.service


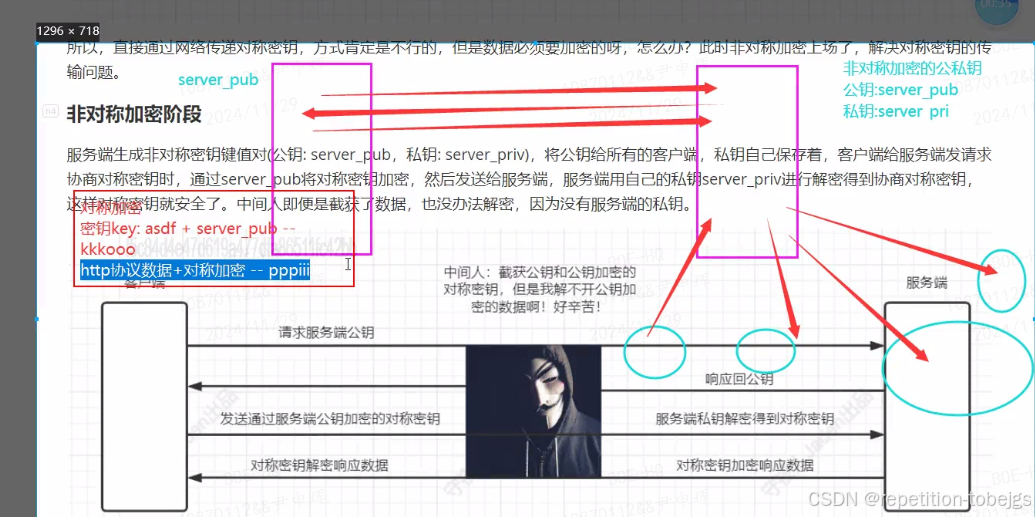
(2)访问缴费网站实现数据加密基于https访问
1.创建私钥
[root@node1-server ~]# openssl genrsa -aes128 2048 > /etc/nginx/money.key
# 作用:生成一个 2048 位的 RSA 私钥,并使用 AES-128 算法对私钥进行加密保护,最终将私钥保存到文件 /etc/nginx/money.key 中。
# 核心目的:为 HTTPS 服务器(如 Nginx)创建私钥,用于加密通信数据,同时通过 AES 加密私钥本身,防止未经授权的访问。
Enter PEM pass phrase: # 123456,此处隐藏
Verifying - Enter PEM pass phrase: # 123456,此处隐藏

1. openssl
工具名称:OpenSSL 是一个开源的密码学工具包,用于实现安全通信所需的加密、解密、证书管理等功能。
应用场景:生成私钥、证书签名请求(CSR)、创建自签名证书等。2. genrsa
子命令:genrsa 用于生成 RSA 私钥(RSA 是一种非对称加密算法,用于密钥交换和数字签名)。3. -aes128
加密算法与密钥长度:-aes128 表示使用 AES-128 对称加密算法对生成的私钥进行加密。
AES是目前广泛使用的安全加密算法,128 表示密钥长度为 128 位(安全性与性能的平衡选择,也可使用 -aes256 增强安全性)。
关键作用:私钥本身会被加密存储,后续使用时需输入密码解锁,防止私钥文件泄露后被直接利用。4. 2048
RSA 密钥长度:指定生成的 RSA 私钥位数为 2048 位。
安全标准:2048 位是目前推荐的最小长度(2016 年后,1024 位被认为不够安全)。
更高位数(如 4096 位)安全性更强,但会增加计算开销。5. > /etc/nginx/money.key
输出路径:将生成的私钥重定向到文件 /etc/nginx/money.key。
目录选择:/etc/nginx/ 是 Nginx 的配置目录,用于存放证书和私钥(需确保 Nginx 服务有读取该文件的权限)。文件名 money.key 可自定义,但建议包含业务相关名称(如 server.key)。
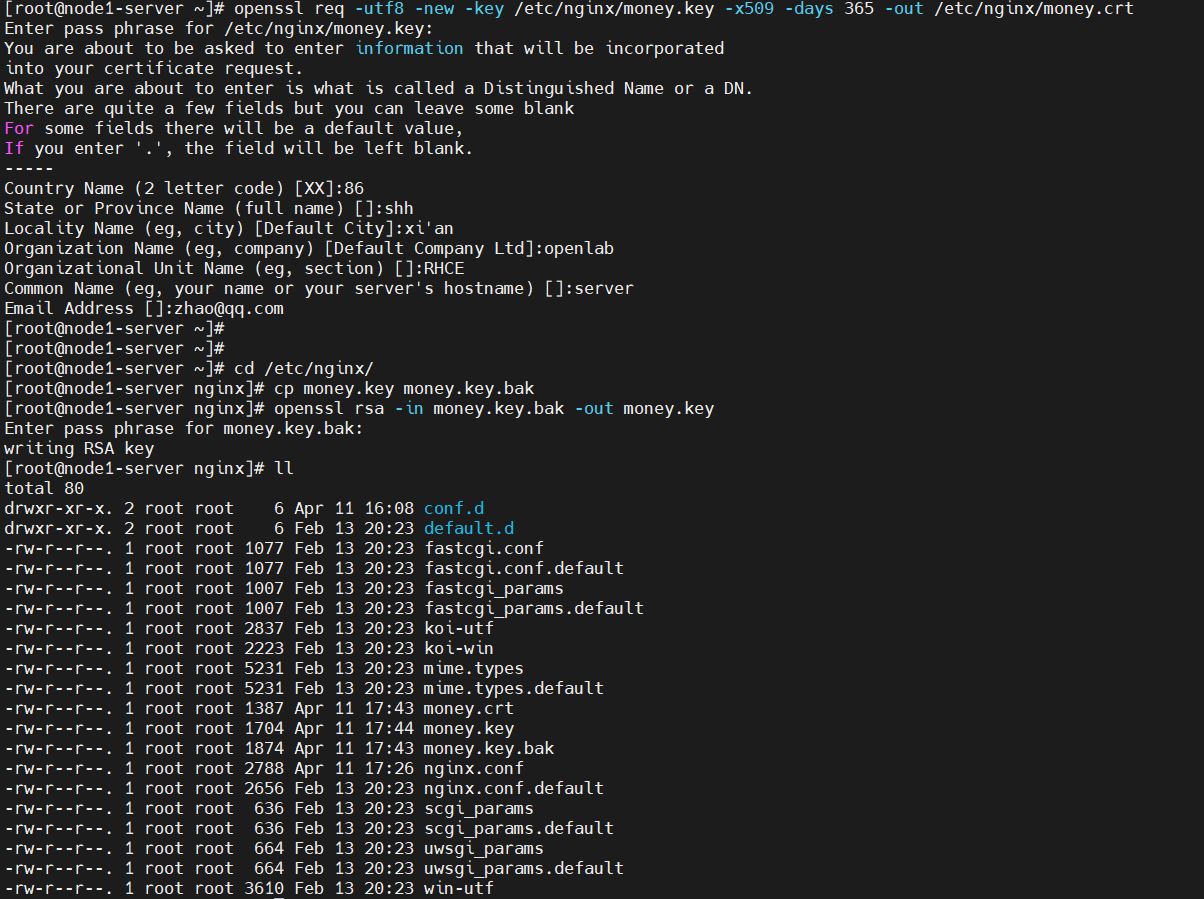
2.制作证书
[root@node1-server ~]# openssl req -utf8 -new -key /etc/nginx/money.key -x509 -days 365 -out /etc/nginx/money.crt
# 作用:利用已有的 RSA 私钥(/etc/nginx/money.key)生成一个 自签名的 X.509 证书,有效期为 365 天,并保存到文件 /etc/nginx/money.crt 中。
# 核心目的:为 HTTPS 服务器(Nginx)提供证书文件,实现加密通信(TLS/SSL 协议),同时通过自签名方式(无需 CA 机构)快速生成证书(适用于测试环境或内部系统)。
Enter pass phrase for /etc/nginx/money.key: # 123456,私钥密码,此处隐藏
You are about to be asked to enter information that will be incorporated
into your certificate request.
What you are about to enter is what is called a Distinguished Name or a DN.
There are quite a few fields but you can leave some blank
For some fields there will be a default value,
If you enter '.', the field will be left blank.
-----
Country Name (2 letter code) [XX]:86 # 国家代码(如 CN)
State or Province Name (full name) []:shh # 省/州
Locality Name (eg, city) [Default City]:xi'an # 城市
Organization Name (eg, company) [Default Company Ltd]:openlab # 组织名称
Organizational Unit Name (eg, section) []:RHCE # 部门
Common Name (eg, your name or your server's hostname) []:server # 域名(必须与 server_name 一致)或填写服务器的hostname,此处server为主机名;将 Common Name 填写为服务器主机名仅适用于内网测试环境
Email Address []:zhao@qq.com # 邮箱(可选)
[root@node1-server ~]# cd /etc/nginx/
[root@node1-server nginx]# cp money.key money.key.bak # 备份私钥
[root@node1-server nginx]# openssl rsa -in money.key.bak -out money.key # 将加密的私钥转换为未加密的私钥(或直接复制私钥内容),主要用于简化测试环境中的私钥使用或恢复备份。
Enter pass phrase for money.key.bak: # 123456,私钥密码,此处隐藏
writing RSA key
1. openssl req
子命令:
req:用于处理证书签名请求(CSR)和自签名证书生成。2. 选项 -utf8
作用:确保命令执行过程中的输入输出使用 UTF-8 编码,支持中文等多字节字符(如证书中的组织名称包含中文时必需)。
示例:若证书申请信息(如组织名称)包含中文,不加此选项可能导致乱码。3. 选项 -new
作用:创建一个 新的证书签名请求(CSR) 或自签名证书(结合 -x509 时为自签名)。
核心逻辑:基于私钥生成公钥,并生成证书所需的元数据(如组织信息、域名等)。4. 选项 -key /etc/nginx/money.key
作用:指定用于生成证书的 私钥文件路径(本例中为之前生成的 money.key)。
依赖关系:
私钥必须提前存在(如通过 openssl genrsa 生成)。
证书与私钥需匹配(即证书由该私钥对应的公钥生成)。5. 选项 -x509
作用:生成 自签名的 X.509 证书(而非 CSR)。
关键区别:
自签名证书:由服务器自身生成,无需 CA 机构签名(浏览器会显示安全警告,适用于测试)。
CSR:需提交给 CA 机构签名,生成受信任的证书(用于生产环境)。6. 选项 -days 365
作用:指定证书的有效期(天数)
安全建议:
生产环境建议设置更短的有效期(如 90 天),遵循现代安全实践(如 Let's Encrypt 的证书有效期为 90 天)。
过期后需重新生成证书并更新服务器配置。7. 选项 -out /etc/nginx/money.crt
作用:指定生成的证书文件的输出路径和名称。
文件格式:PEM 格式(文本形式,包含证书内容和元数据)。8. 选项 -in money.key.bak
作用:指定 输入文件路径,即待处理的私钥文件(本例中为备份文件 money.key.bak)。9. 选项 -out money.key
作用:指定 输出文件路径,即处理后的私钥保存位置(本例中为 money.key)。10. openssl rsa
子命令:
rsa:专门用于处理 RSA 私钥(如转换格式、去除密码保护、提取公钥等)。
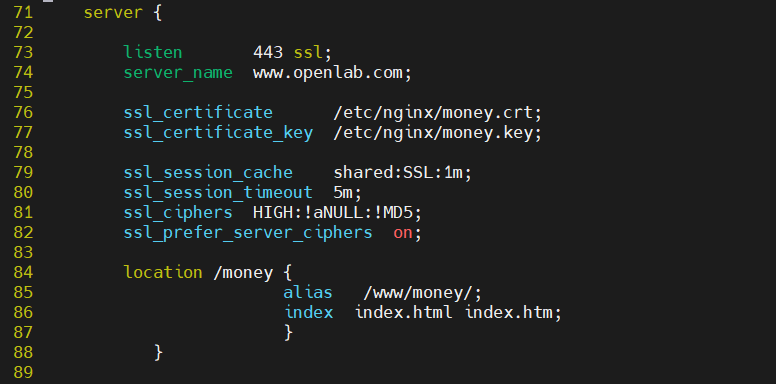
3./etc/nginx/nginx.conf中增添新的server,启用https
[root@node1-server nginx]# vim /etc/nginx/nginx.conf # 通过 server_name 和 listen 443 ssl 提供 HTTPS 服务,需要删除监听80端口部分的 location /money
71 server {
72
73 listen 443 ssl; # 声明服务器监听 443 端口(HTTPS 协议默认端口);ssl 标志表示启用 SSL/TLS 加密,确保客户端与服务器之间的通信数据加密传输。
74 server_name www.openlab.com; # 定义当前 server 块对应的域名
75
76 ssl_certificate /etc/nginx/money.crt; # SSL 证书文件路径(公钥证书)
77 ssl_certificate_key /etc/nginx/money.key; # 私钥文件路径(与证书匹配的 RSA 私钥)
78
79 ssl_session_cache shared:SSL:1m; # SSL 会话缓存(共享内存,容量 1MB)
80 ssl_session_timeout 5m; # 会话缓存超时时间(5 分钟)
81 ssl_ciphers HIGH:!aNULL:!MD5; # 允许的加密算法(高强度,排除不安全选项)
82 ssl_prefer_server_ciphers on; # 优先使用服务器端的加密算法列表
83
84 location /money { # 匹配以 /money 开头的 URL(https://www.openlab.com/money/)
85 alias /www/money/; # 将 URL 路径 /money/ 映射到本地目录 /www/money/
86 index index.html index.htm; # 定义目录的默认索引文件
87 }
88 }
4.判断语句是否无误,重启服务
[root@node1-server nginx]# nginx -t
nginx: the configuration file /etc/nginx/nginx.conf syntax is ok
nginx: configuration file /etc/nginx/nginx.conf test is successful
[root@node1-server nginx]# systemctl restart nginx.service

5.Windows测试
通过 https://www.openlab.com/money/ 访问