你好!游戏世界!
- 简介
- 环境配置
- 前期准备
- 好文章介绍
- 创建头像
- 小功能组件
- 安装本地中文字库
- HSV颜色空间
- 音频生成
- 空白的音频
- 游戏UI开发
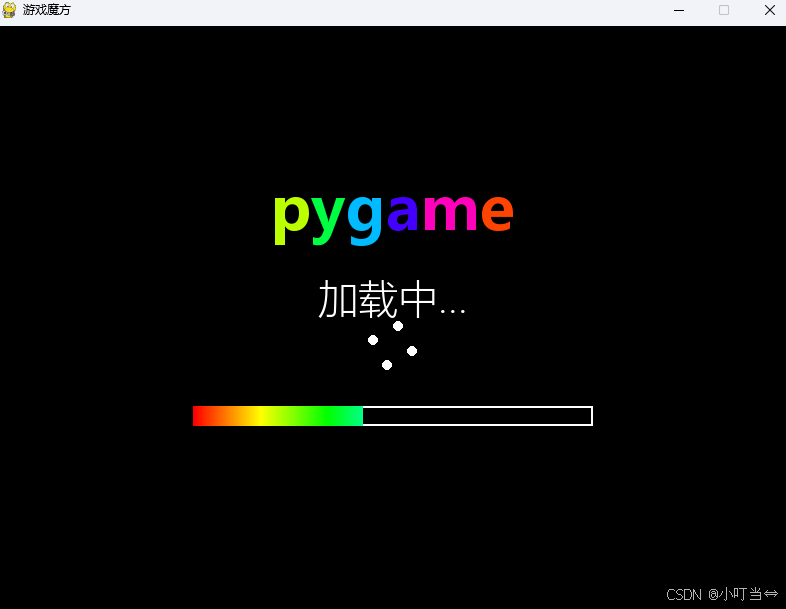
- 加载动画
- 注册登录界面
- UI界面
- 第一版
- 第二版
- 第一个游戏(贪吃蛇)
- 第二个游戏(俄罗斯方块)
- 第二版(支持中文)
- 安装引导程序(Install the bootloader)
简介
作者手中有一台树莓派4B,想用来做一些好玩意。
正好前几天看到了一本书,
并给出具体修改的位置,精确到代码行位
根据你提供的代码和错误信息,以下是修正后的完整代码:
逻辑错误
环境配置
前期准备
好文章介绍
pyQt5中 样式设置
PyQt5样式表
详细学习PyQt5的样式表与界面美化
PyQt5新手教程(七万字)
创建头像
创建一张图片用于管理员用户
from PIL import Image, ImageDraw, ImageFont
import os

# ===================== 可调整参数 =====================
IMAGE_SIZE = (800, 600)  # 图片尺寸 (宽度, 高度)
BACKGROUND_COLOR = (0, 0, 0)  # 背景颜色 (R, G, B) 黑色
TEXT_COLOR = (255, 255, 255)  # 文字颜色 (R, G, B) 白色
FONT_SIZE = 120  # 字体大小(单位:像素)
TEXT_CONTENT = "ROOT"  # 显示文字内容
OUTPUT_FILE = "output.png"  # 输出文件名


# =====================================================

def create_text_image():
    # 创建新图像
    img = Image.new("RGB", IMAGE_SIZE, color=BACKGROUND_COLOR)

    # 初始化绘图对象
    draw = ImageDraw.Draw(img)

    try:
        # 尝试加载系统字体(Windows系统使用arial.ttf,Linux使用DejaVuSans.ttf)
        font = ImageFont.truetype("arial.ttf", FONT_SIZE)
    except:
        # 如果系统字体加载失败,使用Pillow默认字体
        font = ImageFont.load_default()
        print("警告:系统字体未找到,已使用默认字体")

    # 计算文字位置(居中显示)
    # 获取文本边界框
    text_bbox = draw.textbbox((0, 0), TEXT_CONTENT, font=font)
    text_width = text_bbox[2] - text_bbox[0]
    text_height = text_bbox[3] - text_bbox[1]

    # 计算居中坐标
    x = (IMAGE_SIZE[0] - text_width) / 2
    y = (IMAGE_SIZE[1] - text_height) / 2

    # 绘制文字
    draw.text((x, y), TEXT_CONTENT, fill=TEXT_COLOR, font=font)

    # 保存图片
    img.save(OUTPUT_FILE)
    print(f"图片已生成:{os.path.abspath(OUTPUT_FILE)}")


if __name__ == "__main__":
    create_text_image()

小功能组件
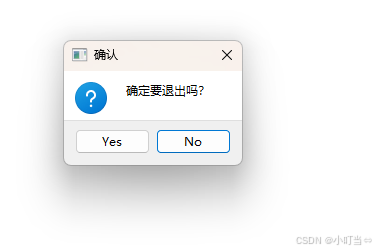
关闭窗口提示
    def closeEvent(self, event):
        reply = QMessageBox.question(
            self, '确认', '确定要退出吗?',
            QMessageBox.Yes | QMessageBox.No, QMessageBox.No
        )
        if reply == QMessageBox.Yes:
            event.accept()
        else:
            event.ignore()
安装本地中文字库
SysFont是使用系统英文字体库
字体Arial只支持英文,最好是在程序里面放一个中文字体调用
# 在类初始化方法__init__中添加字体加载
def __init__(self):

    # 添加字体加载(路径根据实际位置调整)
    self.font = pygame.font.Font('微软雅黑.ttf', 30)         # 普通字体
    self.large_font = pygame.font.Font('微软雅黑.ttf', 50)   # 大号字体

# 修改draw_ui方法中的字体引用
def draw_ui(self):
    text = self.font.render(f"Next:", True, (255, 255, 255))

font = self.large_font
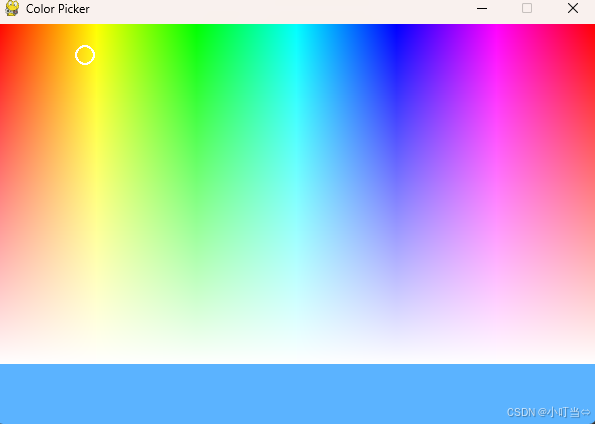
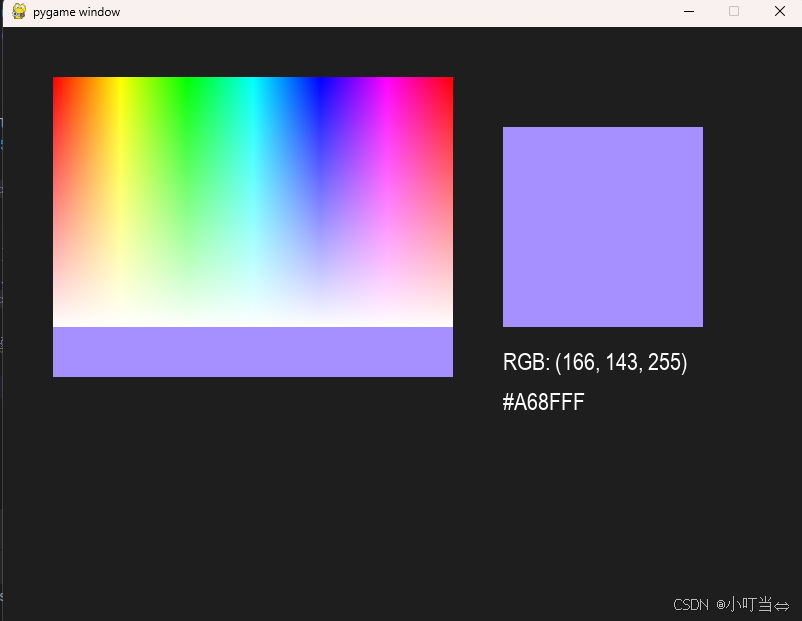
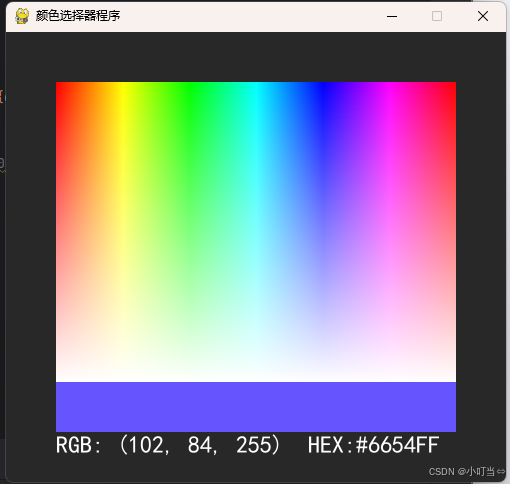
HSV颜色空间
无极调色功能
水平方向控制色相(Hue)
垂直方向控制饱和度(Saturation)
固定亮度值(Value=1.0)
交互优化
支持鼠标拖拽实时选色
添加白色圆形选择标记
实时预览颜色变化
最终决定使用3.0版本
"""
颜色选择器模块
功能说明:
1. 单窗口设计,上方为无极调色板,下方为颜色显示条
2. 支持鼠标实时拖拽选择颜色
3. 提供外部访问当前颜色的接口
"""

import pygame
import colorsys

class ColorPicker:
    def __init__(self, width=600, height=400, default_color=(255, 255, 255)):
        """
        初始化颜色选择器
        :param width: 窗口宽度
        :param height: 窗口高度
        :param default_color: 默认颜色,格式为(R, G, B)
        """
        pygame.init()

        # 窗口设置
        self.screen = pygame.display.set_mode((width, height))
        pygame.display.set_caption("Color Picker")

        # 颜色相关属性
        self.current_color = default_color
        self.picker_rect = pygame.Rect(0, 0, width, height-60)  # 调色板区域
        self.preview_rect = pygame.Rect(0, height-60, width, 60)  # 预览区域

        # 创建调色板表面
        self.color_palette = self.create_color_palette(self.picker_rect.size)

        # 控制变量
        self.dragging = False
        self.running = True

    def create_color_palette(self, size):
        """创建无极颜色调色板"""
        surface = pygame.Surface(size)

        # 生成HSV颜色空间(水平方向色相,垂直方向饱和度)
        for x in range(size[0]):
            hue = x / size[0]  # 0.0~1.0
            for y in range(size[1]):
                saturation = 1.0 - y / size[1]
                rgb = colorsys.hsv_to_rgb(hue, saturation, 1.0)
                color = tuple(int(c*255) for c in rgb)
                surface.set_at((x, y), color)
        return surface

    def update_color(self, pos):
        """根据鼠标位置更新当前颜色"""
        if self.picker_rect.collidepoint(pos):
            # 获取调色板颜色
            x = max(0, min(pos[0], self.picker_rect.width-1))
            y = max(0, min(pos[1], self.picker_rect.height-1))
            self.current_color = self.color_palette.get_at((x, y))[:3]

    def draw_interface(self):
        """绘制整个界面"""
        # 绘制调色板
        self.screen.blit(self.color_palette, (0, 0))

        # 绘制当前颜色预览
        pygame.draw.rect(self.screen, self.current_color, self.preview_rect)

        # 绘制选择标记
        mouse_pos = pygame.mouse.get_pos()
        if self.picker_rect.collidepoint(mouse_pos):
            pygame.draw.circle(self.screen, (255, 255, 255), mouse_pos, 10, 2)

    def get_current_color(self):
        """获取当前颜色 (R, G, B)"""
        return self.current_color

    def run(self):
        """运行主循环"""
        clock = pygame.time.Clock()
        while self.running:
            clock.tick(60)

            # 处理事件
            for event in pygame.event.get():
                if event.type == pygame.QUIT:
                    self.running = False
                elif event.type == pygame.MOUSEBUTTONDOWN:
                    if event.button == 1:
                        self.dragging = True
                        self.update_color(event.pos)
                elif event.type == pygame.MOUSEBUTTONUP:
                    if event.button == 1:
                        self.dragging = False
                elif event.type == pygame.MOUSEMOTION:
                    if self.dragging:
                        self.update_color(event.pos)

            # 绘制界面
            self.draw_interface()
            pygame.display.flip()

        pygame.quit()

# 使用示例
if __name__ == "__main__":
    picker = ColorPicker(default_color=(0, 128, 255))
    picker.run()
音频生成
会在程序运行的位置,新建一个文件夹,将生成的文件放进去
#空白音频
from pydub import AudioSegment
import os

# 创建输出目录
output_dir = "音频生成"
os.makedirs(output_dir, exist_ok=True)

try:
    # 1. 生成单声道静音片段
    silent_audio = AudioSegment.silent(
        duration=1000,  # 1000ms = 1秒
        frame_rate=44100,  # 44.1kHz

    )

    # 2. 强制设置为双声道
    silent_audio = silent_audio.set_channels(2)

    # 3. 导出文件
    output_path = os.path.join(output_dir, "move.wav")
    silent_audio.export(output_path, format="wav")
    print(f"文件已生成: {output_path}")

except Exception as e:
    print(f"错误: {str(e)}")
空白的音频
游戏UI开发
QMainWindow是PyQt5中的一个核心类,它是大多数复杂应用的基础,提供了一个框架,可以添加菜单栏、工具栏、状态栏以及 dockable widgets。当你需要在一个主窗口中切换不同的工作区时,QMainWindow可以作为容器,包含并切换不同的子窗口或小部件。
QStackedWidget是另一个关键的组件,它允许你在一组widgets中进行切换,每个widget对应一个界面。你可以将所有界面的实例添加到QStackedWidget中,然后通过setCurrentIndex()方法或者setCurrentWidget()方法来改变当前显示的界面。这种方式非常适合用于简单的界面切换,比如在登录界面和主界面之间的切换。
此外,QWizard则适用于创建向导式应用,即一系列步骤引导用户完成某个任务。每个步骤都是一个单独的页面,用户按顺序前进或后退。QWizard自动处理页面间的导航,提供了预定义的样式和元素,如“下一步”、“上一步”按钮,以及可自定义的标题和页脚。
项目结构介绍
game_Cube/
├── main/ # 主程序
│ ├── open.py #引导动画
│ └── loge.py #登录界面
│ └── game_UI.py #游戏主系统
├── utils/ # 功能模块文件夹
│ ├── .py
│ └── .py
├── config/ # 配置文件
│ ├── dengue.png# 背景图片
│ └── # 数据
└── game_save/ # 保存数据
│ ├── JSON/ #用户数据
│ │ ├── root_login_data.json # root用户登录数据
│ │ └── root_game_data.json # root用户游戏数据
│ │ ├── users_login_data.json # 用户登录数据
│ │ └── users_game_data.json # 用户游戏数据
│ ├── USERS/ #用户头像
│ ├── music/ #音频文件
│ └── time/ #临时文件
加载动画
import sys
import json
import os
from datetime import datetime, timedelta
from PyQt5.QtWidgets import (QApplication, QWidget, QVBoxLayout, QHBoxLayout, QFormLayout,
QLineEdit, QPushButton, QComboBox, QMessageBox, QDialog,
QFileDialog, QLabel, QTextEdit, QTableWidget, QTableWidgetItem,
QDateTimeEdit, QHeaderView)
from PyQt5.QtCore import Qt, QSize, QDateTime
from PyQt5.QtGui import QPixmap, QPainter, QColor, QPen
# 常量定义
DEFAULT_AVATAR = "default_avatar.png" # 默认头像路径
AVATAR_DIR = "avatars" # 头像存储目录
ROOT_ACCOUNT = "root" # 超级用户账号
ROOT_PASSWORD = "root" # 超级用户密码
class EditTimeDialog(QDialog):
"""注册时间修改对话框"""
def __init__(self, timestamp, parent=None):
super().__init__(parent)
self.setWindowTitle("修改注册时间")
self.setFixedSize(300, 150)
self.datetime_edit = QDateTimeEdit()
self.datetime_edit.setDateTime(datetime.fromtimestamp(timestamp))
self.datetime_edit.setCalendarPopup(True)
layout = QVBoxLayout()
layout.addWidget(QLabel("选择新的注册时间:"))
layout.addWidget(self.datetime_edit)
btn = QPushButton("确认修改")
btn.clicked.connect(self.accept)
layout.addWidget(btn)
self.setLayout(layout)
def get_time(self):
"""获取修改后的时间戳"""
return int(self.datetime_edit.dateTime().toSecsSinceEpoch())
class SuperUserDialog(QDialog):
"""超级用户管理对话框"""
def __init__(self, user_data, parent=None):
super().__init__(parent)
self.parent = parent
self.user_data = user_data
self.setWindowTitle("超级用户管理")
self.setFixedSize(800, 600)
self.init_ui()
def init_ui(self):
layout = QVBoxLayout()
# 用户信息表格
self.table = QTableWidget()
self.table.setColumnCount(4)
self.table.setHorizontalHeaderLabels(['账户', '密码', '注册时间', '操作'])
self.table.horizontalHeader().setSectionResizeMode(QHeaderView.Stretch)
self.table.horizontalHeader().setStretchLastSection(True)
self.refresh_table()
# 按钮区域
btn_layout = QHBoxLayout()
self.clear_btn = QPushButton("清除所有账户")
self.clear_btn.setFixedSize(150, 40)
self.clear_btn.clicked.connect(self.show_clear_verify)
self.download_btn = QPushButton("下载数据")
self.download_btn.setFixedSize(150, 40)
self.download_btn.clicked.connect(self.download_data)
btn_layout.addWidget(self.clear_btn)
btn_layout.addWidget(self.download_btn)
layout.addWidget(self.table)
layout.addLayout(btn_layout)
self.setLayout(layout)
def refresh_table(self):
"""刷新表格数据"""
self.table.setRowCount(0)
for username, info in self.user_data.items():
if username == ROOT_ACCOUNT:
continue
row = self.table.rowCount()
self.table.insertRow(row)
# 账户信息
self.table.setItem(row, 0, QTableWidgetItem(username))
self.table.setItem(row, 1, QTableWidgetItem(info['password']))
reg_time = datetime.fromtimestamp(info['reg_time']).strftime('%Y-%m-%d %H:%M:%S')
self.table.setItem(row, 2, QTableWidgetItem(reg_time))
# 操作按钮
edit_btn = QPushButton("修改时间")
edit_btn.clicked.connect(lambda _, u=username: self.edit_reg_time(u))
self.table.setCellWidget(row, 3, edit_btn)
def edit_reg_time(self, username):
"""修改注册时间"""
dialog = EditTimeDialog(self.user_data[username]['reg_time'], self)
if dialog.exec_():
new_time = dialog.get_time()
self.user_data[username]['reg_time'] = new_time
self.parent.save_users()
self.refresh_table()
def show_clear_verify(self):
"""显示清除验证对话框"""
dialog = ClearVerifyDialog(self)
if dialog.exec_():
self.parent.clear_all_accounts()
self.refresh_table()
def download_data(self):
"""下载用户数据为TXT文件"""
file_path, _ = QFileDialog.getSaveFileName(
self, "保存用户数据", "用户管理.txt", "文本文件 (*.txt)")
if file_path:
try:
content = "账户\t密码\t注册时间\n" + "-" * 40 + "\n"
for username, info in self.user_data.items():
if username == ROOT_ACCOUNT:
continue
reg_time = datetime.fromtimestamp(info['reg_time']).strftime('%Y-%m-%d %H:%M:%S')
content += f"{username}\t{info['password']}\t{reg_time}\n"
with open(file_path, 'w', encoding='utf-8') as f:
f.write(content)
QMessageBox.information(self, "成功", "数据保存成功!")
except Exception as e:
QMessageBox.critical(self, "错误", f"保存失败:{str(e)}")
class ClearVerifyDialog(QDialog):
"""清除账户验证对话框"""
def __init__(self, parent=None):
super().__init__(parent)
self.setWindowTitle("验证清除操作")
self.setFixedSize(300, 200)
self.init_ui()
def init_ui(self):
layout = QVBoxLayout()
today = datetime.now().strftime("%Y%m%d")
self.code_edit = QLineEdit()
self.code_edit.setPlaceholderText(f"示例:{today}")
verify_btn = QPushButton("验证")
verify_btn.setFixedSize(150, 40)
verify_btn.clicked.connect(self.verify)
layout.addWidget(QLabel("请输入当日八位日期:"))
layout.addWidget(self.code_edit)
layout.addWidget(verify_btn, alignment=Qt.AlignCenter)
self.setLayout(layout)
def verify(self):
current_date = datetime.now().strftime("%Y%m%d")
if self.code_edit.text() == current_date:
self.accept()
else:
QMessageBox.warning(self, "错误", "验证失败,请输入正确的日期!")
class AvatarLabel(QLabel):
"""自定义头像显示控件(带边框)"""
def __init__(self, parent=None):
super().__init__(parent)
self.border_color = QColor(Qt.white)
def paintEvent(self, event):
super().paintEvent(event)
if self.border_color:
painter = QPainter(self)
painter.setPen(QPen(self.border_color, 3))
painter.drawRect(0, 0, self.width() - 1, self.height() - 1)
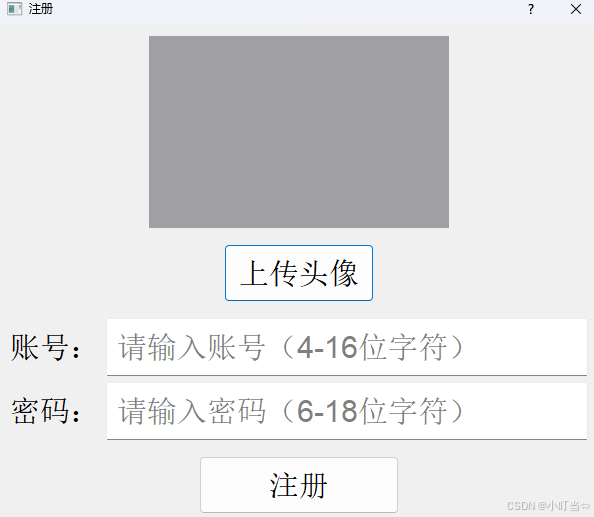
class RegisterDialog(QDialog):
"""用户注册对话框"""
def __init__(self, parent=None):
super().__init__(parent)
self.setWindowTitle("注册")
self.setFixedSize(600, 420)
self.avatar_path = DEFAULT_AVATAR
self.init_ui()
def init_ui(self):
layout = QVBoxLayout()
# 头像显示区域
self.avatar_label = QLabel()
self.avatar_label.setFixedSize(100, 100)
self.avatar_label.setAlignment(Qt.AlignCenter)
self.update_avatar(DEFAULT_AVATAR)
# 头像上传按钮
upload_btn = QPushButton("上传头像")
upload_btn.clicked.connect(self.upload_avatar)
# 注册表单
form = QFormLayout()
self.username_edit = QLineEdit()
self.password_edit = QLineEdit()
self.password_edit.setEchoMode(QLineEdit.Password)
form.addRow("账号:", self.username_edit)
form.addRow("密码:", self.password_edit)
# 注册按钮
self.register_btn = QPushButton("注册")
self.register_btn.setFixedSize(200, 50)
self.register_btn.clicked.connect(self.validate)
layout.addWidget(self.avatar_label, alignment=Qt.AlignCenter)
layout.addWidget(upload_btn, alignment=Qt.AlignCenter)
layout.addLayout(form)
layout.addWidget(self.register_btn, alignment=Qt.AlignCenter)
self.setLayout(layout)
def upload_avatar(self):
file_path, _ = QFileDialog.getOpenFileName(
self, "选择头像", "", "图片文件 (*.png *.jpg *.jpeg)")
if file_path:
self.avatar_path = file_path
self.update_avatar(file_path)
def update_avatar(self, path):
pixmap = QPixmap(path)
if pixmap.isNull():
pixmap = QPixmap(DEFAULT_AVATAR)
pixmap = pixmap.scaled(100, 100, Qt.KeepAspectRatio, Qt.SmoothTransformation)
self.avatar_label.setPixmap(pixmap)
def validate(self):
username = self.username_edit.text().strip()
password = self.password_edit.text().strip()
if not username or not password:
QMessageBox.warning(self, "错误", "账号密码不能为空!")
return
if username == ROOT_ACCOUNT:
QMessageBox.warning(self, "错误", "不能注册系统保留账号!")
return
if username in self.parent().users:
QMessageBox.warning(self, "错误", "账号已存在!")
return
try:
avatar_filename = f"{username}_avatar{os.path.splitext(self.avatar_path)[1]}"
save_path = os.path.join(AVATAR_DIR, avatar_filename)
os.makedirs(AVATAR_DIR, exist_ok=True)
QPixmap(self.avatar_path).save(save_path)
self.parent().users[username] = {
"password": password,
"avatar": save_path,
"reg_time": datetime.now().timestamp()
}
self.parent().save_users()
self.parent().update_ui(username)
QMessageBox.information(self, "成功", "注册成功!")
self.accept()
except Exception as e:
QMessageBox.critical(self, "错误", f"保存失败:{str(e)}")
class RetrieveDialog(QDialog):
"""密码找回对话框"""
def __init__(self, parent=None):
super().__init__(parent)
self.setWindowTitle("找回密码")
self.setFixedSize(350, 200)
self.init_ui()
def init_ui(self):
layout = QVBoxLayout()
form = QFormLayout()
self.username_edit = QLineEdit()
self.code_edit = QLineEdit()
form.addRow("账号:", self.username_edit)
form.addRow("验证码:", self.code_edit)
self.confirm_btn = QPushButton("确定")
self.confirm_btn.setFixedSize(150, 40)
self.confirm_btn.clicked.connect(self.verify)
layout.addLayout(form)
layout.addWidget(self.confirm_btn, alignment=Qt.AlignCenter)
self.setLayout(layout)
def verify(self):
username = self.username_edit.text().strip()
code = self.code_edit.text().strip()
if code != "123456":
QMessageBox.warning(self, "错误", "验证码错误!")
return
if username not in self.parent().users:
QMessageBox.warning(self, "错误", "账号不存在!")
return
password = self.parent().users[username]["password"]
QMessageBox.information(self, "密码", f"您的密码是:{password}")
self.accept()
class MyWindow(QWidget):
"""主窗口"""
def __init__(self):
super().__init__()
self.users = {}
self.current_avatar = DEFAULT_AVATAR
self.init_data()
self.init_ui()
def init_data(self):
self.load_users()
self.ensure_root_account()
self.create_default_avatar()
def create_default_avatar(self):
if not os.path.exists(DEFAULT_AVATAR):
pixmap = QPixmap(100, 100)
pixmap.fill(Qt.gray)
pixmap.save(DEFAULT_AVATAR)
def ensure_root_account(self):
if ROOT_ACCOUNT not in self.users:
self.users[ROOT_ACCOUNT] = {
"password": ROOT_PASSWORD,
"avatar": DEFAULT_AVATAR,
"reg_time": datetime.now().timestamp()
}
self.save_users()
def load_users(self):
if os.path.exists("users.json"):
with open("users.json", "r") as f:
try:
self.users = json.load(f)
for user in self.users.values():
if 'reg_time' not in user:
user['reg_time'] = datetime.now().timestamp()
except json.JSONDecodeError:
self.users = {}
def save_users(self):
root_data = self.users.pop(ROOT_ACCOUNT, None)
try:
with open("users.json", "w") as f:
json.dump(self.users, f)
finally:
if root_data:
self.users[ROOT_ACCOUNT] = root_data
def init_ui(self):
self.setWindowTitle("登录系统")
self.setFixedSize(1000, 800)
main_layout = QVBoxLayout()
# 头像显示区域(200x200)
self.avatar_display = AvatarLabel()
self.avatar_display.setFixedSize(200, 200)
self.avatar_display.setAlignment(Qt.AlignCenter)
self.update_avatar_display(DEFAULT_AVATAR, "")
main_layout.addWidget(self.avatar_display, alignment=Qt.AlignCenter)
# 登录表单
form = QFormLayout()
self.username_combo = QComboBox()
self.username_combo.setEditable(True)
self.username_combo.addItems([u for u in self.users if u != ROOT_ACCOUNT])
self.username_combo.currentTextChanged.connect(self.on_account_changed)
self.password = QLineEdit()
self.password.setEchoMode(QLineEdit.Password)
form.addRow("账号:", self.username_combo)
form.addRow("密码:", self.password)
main_layout.addLayout(form)
# 按钮区域
btn_layout = QHBoxLayout()
self.register_btn = QPushButton("注册")
self.register_btn.setFixedSize(200, 100)
self.register_btn.clicked.connect(self.show_register)
self.login_btn = QPushButton("登录")
self.login_btn.setFixedSize(200, 100)
self.login_btn.clicked.connect(self.login)
self.retrieve_btn = QPushButton("找回密码")
self.retrieve_btn.setFixedSize(200, 100)
self.retrieve_btn.clicked.connect(self.show_retrieve)
btn_layout.addWidget(self.register_btn)
btn_layout.addWidget(self.login_btn)
btn_layout.addWidget(self.retrieve_btn)
main_layout.addLayout(btn_layout)
self.setLayout(main_layout)
def update_ui(self, username):
if username not in [self.username_combo.itemText(i) for i in range(self.username_combo.count())]:
self.username_combo.addItem(username)
self.username_combo.setCurrentText(username)
self.on_account_changed(username)
def on_account_changed(self, username):
if username in self.users:
avatar_path = self.users[username].get("avatar", DEFAULT_AVATAR)
self.update_avatar_display(avatar_path, username)
else:
self.update_avatar_display(DEFAULT_AVATAR, "")
def update_avatar_display(self, path, username):
pixmap = QPixmap(path)
if pixmap.isNull():
pixmap = QPixmap(DEFAULT_AVATAR)
pixmap = pixmap.scaled(200, 200, Qt.KeepAspectRatio, Qt.SmoothTransformation)
if username in self.users:
reg_time = datetime.fromtimestamp(self.users[username].get('reg_time', 0))
days = (datetime.now() - reg_time).days
if days <= 7:
color = QColor(Qt.green)
elif 7 < days <= 10:
color = QColor(Qt.white)
else:
color = QColor(Qt.black)
self.avatar_display.border_color = color
else:
self.avatar_display.border_color = QColor(Qt.white)
self.avatar_display.setPixmap(pixmap)
self.avatar_display.update()
def show_register(self):
dialog = RegisterDialog(self)
dialog.exec_()
def show_retrieve(self):
dialog = RetrieveDialog(self)
dialog.exec_()
def login(self):
username = self.username_combo.currentText().strip()
password = self.password.text().strip()
if username == ROOT_ACCOUNT:
if password == ROOT_PASSWORD:
dialog = SuperUserDialog(self.users, self)
dialog.exec_()
return
else:
QMessageBox.warning(self, "错误", "账号或密码错误!")
return
if username in self.users and self.users[username]["password"] == password:
QMessageBox.information(self, "成功", "登录成功!")
else:
QMessageBox.warning(self, "错误", "账号或密码错误!")
def clear_all_accounts(self):
self.users = {k: v for k, v in self.users.items() if k == ROOT_ACCOUNT}
self.save_users()
self.username_combo.clear()
self.username_combo.addItems([u for u in self.users if u != ROOT_ACCOUNT])
self.update_avatar_display(DEFAULT_AVATAR, "")
if __name__ == "__main__":
os.makedirs(AVATAR_DIR, exist_ok=True)
app = QApplication(sys.argv)
window = MyWindow()
window.show()
sys.exit(app.exec_())
注册登录界面
root账户系统初始化以后自动创建
目前root账户有以下功能
1.查看所有账户名、密码、创建时间
2.可以对注册时间进行修改(不同的创建时间会显示不同的头像边框色)
3.清除所有账户的信息
4.对目前所有账号的数据进行下载(下载文件为:用户管理.txt)
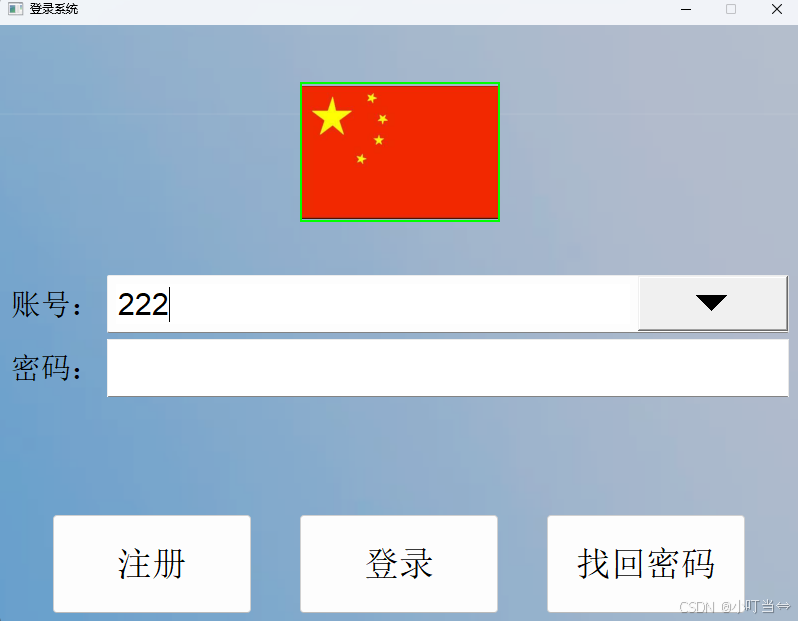
目前登录界面已经比较满意了,将停止登录界面的开发
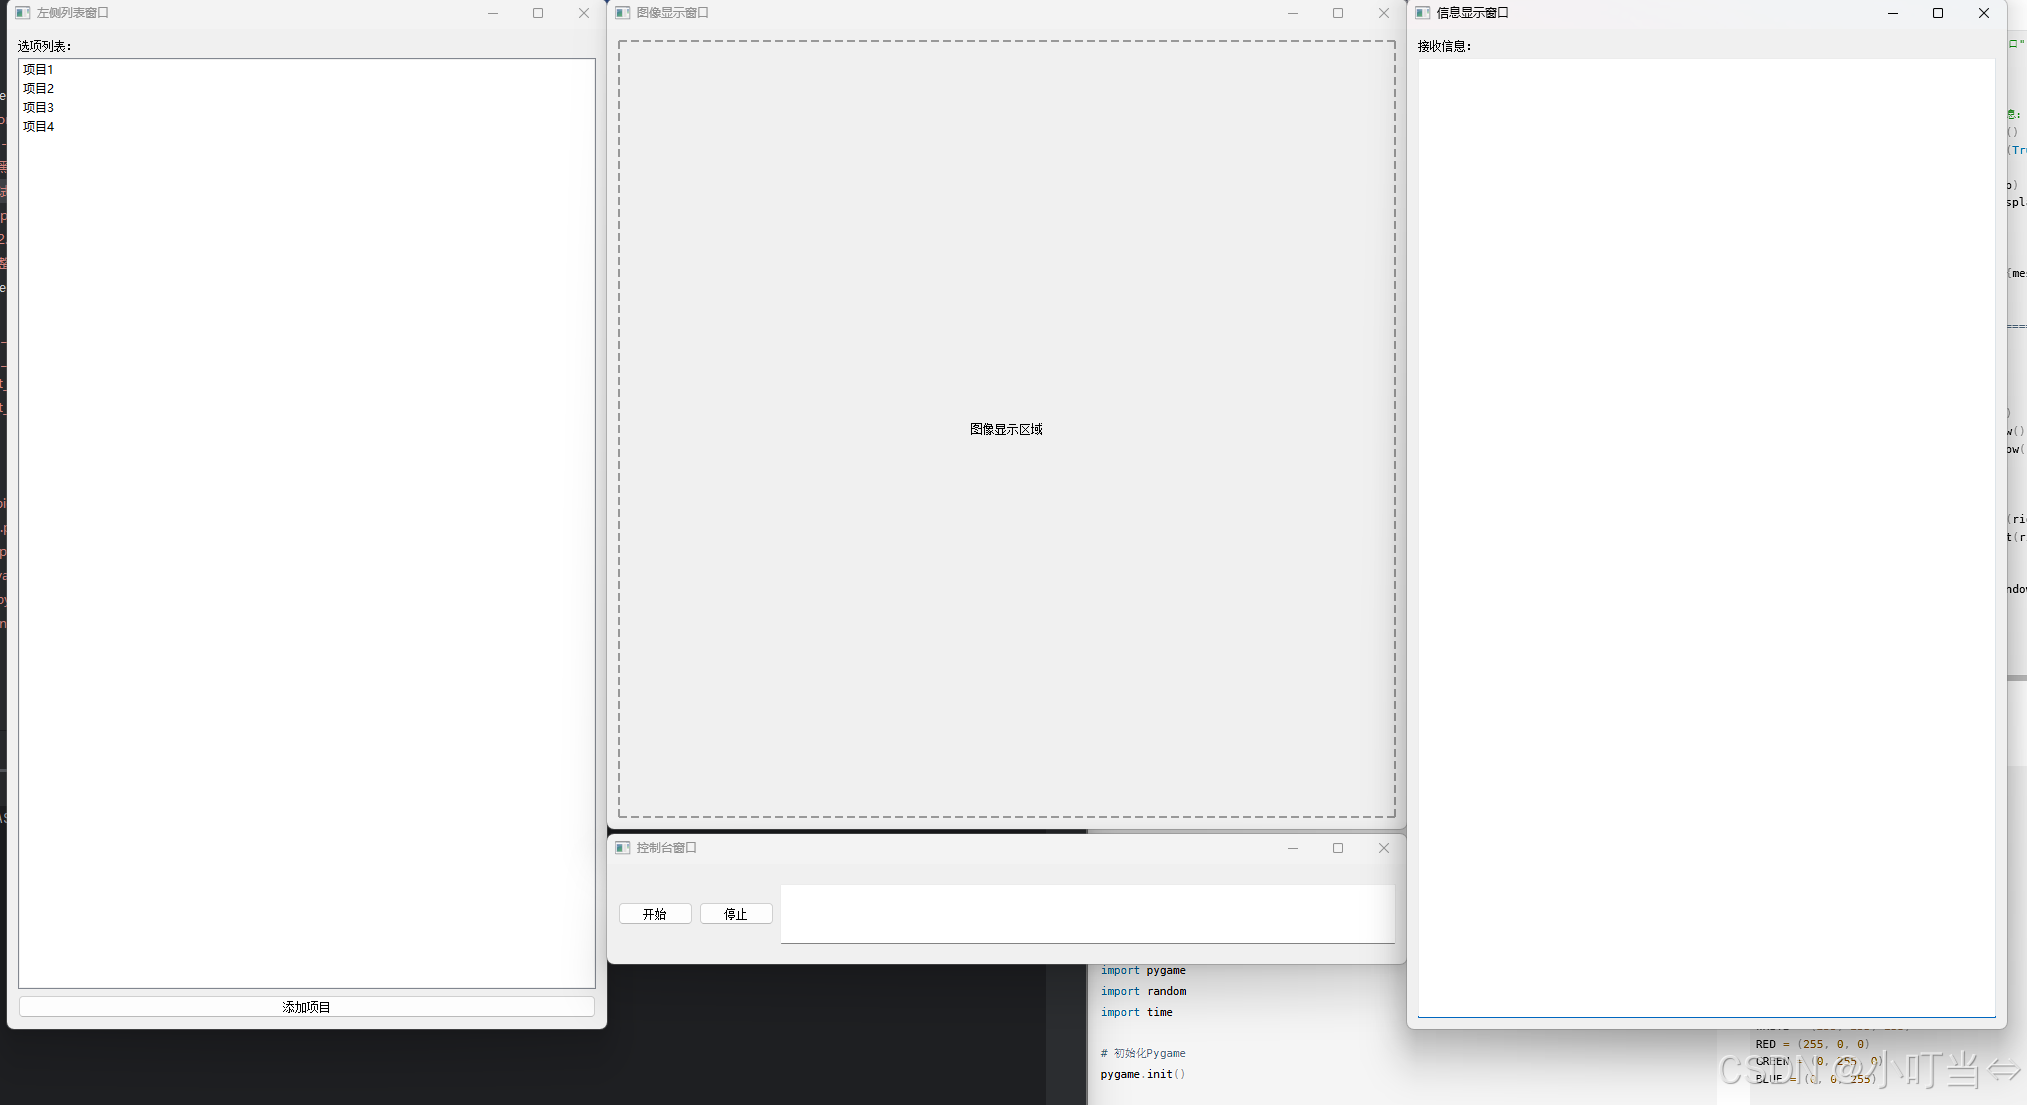
UI界面

功能太为复杂所以拆分成多个功能代码并有最终的程序调用实现
utils文件夹下包含的模块:
工具栏
搜索功能,并更新过滤后的游戏;
硬件信息,获取设备的处理器型号、显卡型号、显示器型号、内存型号;
设置功能,可以更改界面背景图,保存在gave_save下的timi文件中;
快捷键配置,可以配置按键对应的功能。
程序运行顺序:
初始化(界面居中,自由缩放)
第一版
第二版
import sys
from PyQt5.QtWidgets import (QApplication, QWidget, QVBoxLayout, QHBoxLayout,
                             QLabel, QListWidget, QPushButton, QTextEdit)
from PyQt5.QtCore import Qt, pyqtSignal


# ==================== 左侧竖向列表窗口 ====================
class LeftVerticalWindow(QWidget):
    item_selected = pyqtSignal(str)  # 自定义信号

    def __init__(self):
        super().__init__()
        self.init_ui()
        self.setGeometry(200, 200, 600, 1000)
        self.setWindowTitle("左侧列表窗口")

    def init_ui(self):
        layout = QVBoxLayout()

        # 列表控件
        self.list_widget = QListWidget()
        self.list_widget.addItems(["项目1", "项目2", "项目3", "项目4"])
        self.list_widget.itemClicked.connect(self.on_item_clicked)

        # 添加按钮
        self.btn_add = QPushButton("添加项目")
        self.btn_add.clicked.connect(self.add_item)

        layout.addWidget(QLabel("选项列表:"))
        layout.addWidget(self.list_widget)
        layout.addWidget(self.btn_add)
        self.setLayout(layout)

    def on_item_clicked(self, item):
        self.item_selected.emit(item.text())

    def add_item(self):
        self.list_widget.addItem(f"项目{self.list_widget.count() + 1}")


# ==================== 中间正方形图像窗口 ====================
class CenterSquareWindow(QWidget):
    def __init__(self):
        super().__init__()
        self.init_ui()
        self.setGeometry(800, 200, 800, 800)
        self.setWindowTitle("图像显示窗口")

    def init_ui(self):
        layout = QVBoxLayout()
        self.lbl_image = QLabel("图像显示区域")
        self.lbl_image.setAlignment(Qt.AlignCenter)
        self.lbl_image.setStyleSheet("background-color: #F0F0F0; border: 2px dashed #999")
        layout.addWidget(self.lbl_image)
        self.setLayout(layout)


# ==================== 下方横向控制台窗口 ====================
class BottomControlWindow(QWidget):
    command_sent = pyqtSignal(str)

    def __init__(self):
        super().__init__()
        self.init_ui()
        self.setGeometry(800, 1035, 800, 100)
        self.setWindowTitle("控制台窗口")

    def init_ui(self):
        layout = QHBoxLayout()

        self.btn_start = QPushButton("开始")
        self.btn_stop = QPushButton("停止")
        self.text_input = QTextEdit()
        self.text_input.setMaximumHeight(60)

        self.btn_start.clicked.connect(lambda: self.send_command("START"))
        self.btn_stop.clicked.connect(lambda: self.send_command("STOP"))

        layout.addWidget(self.btn_start)
        layout.addWidget(self.btn_stop)
        layout.addWidget(self.text_input)
        self.setLayout(layout)

    def send_command(self, cmd):
        text = self.text_input.toPlainText()
        self.command_sent.emit(f"{cmd}: {text}")


# ==================== 右侧竖向信息窗口 ====================
class RightInfoWindow(QWidget):
    def __init__(self):
        super().__init__()
        self.init_ui()
        self.setGeometry(1600, 200, 600, 1000)
        self.setWindowTitle("信息显示窗口")

    def init_ui(self):
        layout = QVBoxLayout()
        self.lbl_info = QLabel("接收信息:")
        self.info_display = QTextEdit()
        self.info_display.setReadOnly(True)

        layout.addWidget(self.lbl_info)
        layout.addWidget(self.info_display)
        self.setLayout(layout)

    def update_info(self, message):
        self.info_display.append(f"> {message}")


# ==================== 主程序 ====================
if __name__ == "__main__":
    app = QApplication(sys.argv)

    # 创建窗口实例
    left_window = LeftVerticalWindow()
    center_window = CenterSquareWindow()
    bottom_window = BottomControlWindow()
    right_window = RightInfoWindow()

    # 连接信号与槽
    left_window.item_selected.connect(right_window.update_info)
    bottom_window.command_sent.connect(right_window.update_info)

    # 显示窗口
    windows = [left_window, center_window, bottom_window, right_window]
    for window in windows:
        window.show()

    sys.exit(app.exec_())
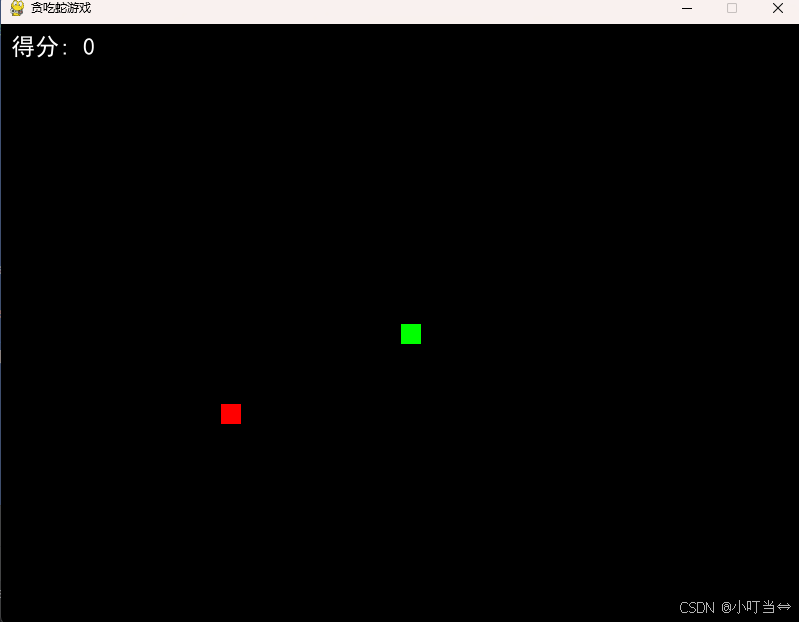
第一个游戏(贪吃蛇)
贪吃蛇1.0
# -*- coding: utf-8 -*-
import pygame
import random
import time

# 初始化Pygame
pygame.init()

# 窗口尺寸常量
WINDOW_WIDTH = 800
WINDOW_HEIGHT = 600

# 颜色常量 (RGB)
BLACK = (0, 0, 0)
WHITE = (255, 255, 255)
RED = (255, 0, 0)
GREEN = (0, 255, 0)
BLUE = (0, 0, 255)

# 游戏参数
BLOCK_SIZE = 20  # 蛇和食物的方块尺寸
INITIAL_SPEED = 5  # 初始游戏速度(帧率)

# 创建游戏窗口
screen = pygame.display.set_mode((WINDOW_WIDTH, WINDOW_HEIGHT))
pygame.display.set_caption("贪吃蛇游戏")

# 使用系统自带字体(如果找不到则使用默认字体)
try:
    # 尝试使用微软雅黑或系统默认中文字体
    font = pygame.font.SysFont("simhei", 24)
except:
    font = pygame.font.Font(None, 24)

# 初始化游戏时钟
clock = pygame.time.Clock()


def draw_snake(snake_body):
    """绘制贪吃蛇"""
    for index, segment in enumerate(snake_body):
        # 蛇头使用绿色,身体使用白色
        color = GREEN if index == 0 else WHITE
        pygame.draw.rect(screen, color,
                         (segment[0], segment[1], BLOCK_SIZE, BLOCK_SIZE))


def generate_food(snake_body):
    """生成新的食物位置"""
    while True:
        # 确保食物生成在网格线上且不与蛇身重叠
        x = random.randrange(0, WINDOW_WIDTH - BLOCK_SIZE, BLOCK_SIZE)
        y = random.randrange(0, WINDOW_HEIGHT - BLOCK_SIZE, BLOCK_SIZE)
        if [x, y] not in snake_body:
            return x, y


def show_message(text, color, y_offset=0):
    """在屏幕中央显示文字信息"""
    text_surface = font.render(text, True, color)
    text_rect = text_surface.get_rect(center=(WINDOW_WIDTH / 2, WINDOW_HEIGHT / 2 + y_offset))
    screen.blit(text_surface, text_rect)


def game_loop():
    """游戏主循环"""
    # 游戏状态控制变量
    game_active = True  # 游戏是否正在进行
    game_paused = False  # 游戏是否暂停
    game_over = False  # 游戏是否结束

    # 初始化蛇的位置和速度
    snake_head = [WINDOW_WIDTH // 2, WINDOW_HEIGHT // 2]
    snake_body = [snake_head.copy()]
    dx, dy = 0, 0  # 移动方向

    # 生成第一个食物
    food_pos = generate_food(snake_body)

    while True:
        # 事件处理循环
        for event in pygame.event.get():
            if event.type == pygame.QUIT:
                pygame.quit()
                return

            # 处理键盘输入
            if event.type == pygame.KEYDOWN:
                if game_over:
                    # 游戏结束后的按键处理
                    if event.key == pygame.K_c:  # 按C重新开始
                        game_loop()
                        return
                    elif event.key == pygame.K_q:  # 按Q退出
                        pygame.quit()
                        return
                else:
                    # 游戏进行中的按键处理
                    if event.key == pygame.K_SPACE:  # 空格键暂停/继续
                        game_paused = not game_paused
                    elif not game_paused:
                        # 方向键处理(防止180度转向)
                        if event.key == pygame.K_LEFT and dx != BLOCK_SIZE:
                            dx, dy = -BLOCK_SIZE, 0
                        elif event.key == pygame.K_RIGHT and dx != -BLOCK_SIZE:
                            dx, dy = BLOCK_SIZE, 0
                        elif event.key == pygame.K_UP and dy != BLOCK_SIZE:
                            dx, dy = 0, -BLOCK_SIZE
                        elif event.key == pygame.K_DOWN and dy != -BLOCK_SIZE:
                            dx, dy = 0, BLOCK_SIZE

        if game_over:
            # 游戏结束显示界面
            screen.fill(BLACK)
            show_message("游戏结束!按 C 重新开始 或 Q 退出", RED)
            show_message(f"最终得分: {len(snake_body) - 1}", WHITE, 40)
            pygame.display.update()
            continue

        if game_paused:
            # 游戏暂停显示界面
            screen.fill(BLACK)
            show_message("游戏暂停,按空格键继续", BLUE)
            pygame.display.update()
            continue

        # 更新蛇头位置
        snake_head[0] += dx
        snake_head[1] += dy

        # 边界碰撞检测
        if (snake_head[0] >= WINDOW_WIDTH or snake_head[0] < 0 or
                snake_head[1] >= WINDOW_HEIGHT or snake_head[1] < 0):
            game_over = True

        # 自我碰撞检测
        if snake_head in snake_body[:-1]:
            game_over = True

        # 添加新蛇头
        snake_body.append(snake_head.copy())

        # 吃食物检测
        if snake_head[0] == food_pos[0] and snake_head[1] == food_pos[1]:
            food_pos = generate_food(snake_body)
        else:
            # 如果没有吃到食物,移除蛇尾
            del snake_body[0]

        # 绘制游戏画面
        screen.fill(BLACK)

        # 绘制食物
        pygame.draw.rect(screen, RED,
                         (food_pos[0], food_pos[1], BLOCK_SIZE, BLOCK_SIZE))

        # 绘制贪吃蛇
        draw_snake(snake_body)

        # 显示当前得分
        score_text = font.render(f"得分: {len(snake_body) - 1}", True, WHITE)
        screen.blit(score_text, (10, 10))

        # 更新显示
        pygame.display.update()

        # 控制游戏速度
        clock.tick(INITIAL_SPEED)


if __name__ == "__main__":
    game_loop()
    pygame.quit()
贪吃蛇2.0
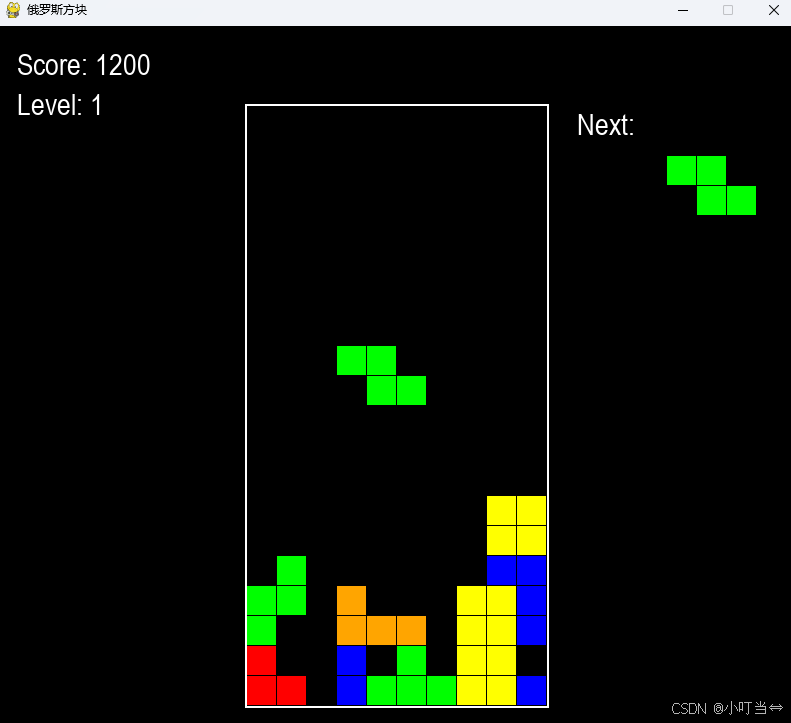
第二个游戏(俄罗斯方块)
需要准备几个音频文件(没有的话文件名称和后缀一直的文件就行)
‘move’: # 移动音效
‘rotate’: # 旋转音效
‘drop’: # 下落音效
‘clear’: # 消除音效
‘gameover’: # 游戏结束音效
import pygame
import random
import time

# 初始化pygame游戏引擎和声音子系统
pygame.init()
pygame.mixer.init()

# 游戏窗口配置
SCREEN_WIDTH = 800    # 屏幕宽度
SCREEN_HEIGHT = 700   # 屏幕高度
PLAY_WIDTH = 300      # 游戏区域宽度(10列 x 30像素)
PLAY_HEIGHT = 600     # 游戏区域高度(20行 x 30像素)
BLOCK_SIZE = 30       # 每个方块的像素大小

# 计算游戏区域在屏幕中的左上角坐标
TOP_LEFT_X = (SCREEN_WIDTH - PLAY_WIDTH) // 2
TOP_LEFT_Y = SCREEN_HEIGHT - PLAY_HEIGHT - 20

# 方块颜色定义(RGB格式)
COLORS = [
    (0, 255, 255),   # I型 - 青色
    (255, 165, 0),   # L型 - 橙色
    (0, 0, 255),     # J型 - 蓝色
    (255, 255, 0),   # O型 - 黄色
    (128, 0, 128),   # T型 - 紫色
    (255, 0, 0),     # S型 - 红色
    (0, 255, 0)      # Z型 - 绿色
]

# 方块形状定义(使用1表示方块存在)
SHAPES = {
    'I': [[1, 1, 1, 1]],          # I型(长条)
    'L': [[1, 0, 0], [1, 1, 1]],  # L型
    'J': [[0, 0, 1], [1, 1, 1]],  # J型
    'O': [[1, 1], [1, 1]],        # O型(正方形)
    'T': [[0, 1, 0], [1, 1, 1]],  # T型
    'S': [[0, 1, 1], [1, 1, 0]],  # S型
    'Z': [[1, 1, 0], [0, 1, 1]]   # Z型
}

# 音效加载
SOUNDS = {
    'move': pygame.mixer.Sound('move.wav'),    # 移动音效
    'rotate': pygame.mixer.Sound('rotate.wav'),# 旋转音效
    'drop': pygame.mixer.Sound('drop.wav'),    # 下落音效
    'clear': pygame.mixer.Sound('clear.wav'),  # 消除音效
    'gameover': pygame.mixer.Sound('gameover.wav') # 游戏结束音效
}

class Tetris:
    def __init__(self):
        # 初始化游戏窗口
        self.screen = pygame.display.set_mode((SCREEN_WIDTH, SCREEN_HEIGHT))
        pygame.display.set_caption("俄罗斯方块")

        # 游戏时钟
        self.clock = pygame.time.Clock()

        # 初始化游戏网格(20行x10列)
        self.grid = [[(0, 0, 0) for _ in range(10)] for _ in range(20)]

        # 游戏状态变量
        self.score = 0           # 当前得分
        self.level = 1           # 当前等级
        self.current_piece = self.new_piece()  # 当前控制的方块
        self.next_piece = self.new_piece()     # 下一个方块
        self.fall_speed = 500    # 下落速度(毫秒)
        self.last_fall = pygame.time.get_ticks() # 上次下落时间
        self.game_over = False   # 游戏结束标志
        self.paused = False      # 暂停状态

    def new_piece(self):
        """生成新方块"""
        shape = random.choice(list(SHAPES.keys()))
        return {
            'shape': SHAPES[shape],  # 形状数据
            'color': COLORS[list(SHAPES.keys()).index(shape)],  # 对应颜色
            'x': 3,  # 初始x坐标(第4列)
            'y': 0   # 初始y坐标(第1行)
        }

    def check_collision(self, piece, dx=0, dy=0):
        """检测碰撞"""
        shape = piece['shape']
        for y, row in enumerate(shape):
            for x, cell in enumerate(row):
                if cell:  # 只检查有方块的位置
                    new_x = piece['x'] + x + dx
                    new_y = piece['y'] + y + dy
                    # 边界检查
                    if new_x < 0 or new_x >= 10 or new_y >= 20:
                        return True
                    # 已有方块检查
                    if new_y >= 0 and self.grid[new_y][new_x] != (0, 0, 0):
                        return True
        return False

    def rotate_piece(self):
        """旋转方块"""
        original = self.current_piece['shape']
        # 使用矩阵转置和反转实现旋转
        rotated = list(zip(*original[::-1]))
        # 创建临时对象进行碰撞检测
        temp_piece = {
            'shape': rotated,
            'x': self.current_piece['x'],
            'y': self.current_piece['y']
        }
        if not self.check_collision(temp_piece):
            self.current_piece['shape'] = rotated
            SOUNDS['rotate'].play()

    def lock_piece(self):
        """锁定当前方块到网格"""
        shape = self.current_piece['shape']
        for y, row in enumerate(shape):
            for x, cell in enumerate(row):
                if cell:
                    # 将方块颜色写入网格
                    self.grid[self.current_piece['y'] + y][self.current_piece['x'] + x] = self.current_piece['color']
        # 消除完整行并更新分数
        lines_cleared = self.clear_lines()
        self.update_score(lines_cleared)
        # 生成新方块
        self.current_piece = self.next_piece
        self.next_piece = self.new_piece()
        # 检查游戏结束
        if self.check_collision(self.current_piece):
            self.game_over = True
            SOUNDS['gameover'].play()

    def clear_lines(self):
        """消除完整行"""
        lines_cleared = 0
        # 从下往上检查每一行
        for i in range(len(self.grid)-1, -1, -1):
            row = self.grid[i]
            # 检查是否整行都有方块
            if all(cell != (0, 0, 0) for cell in row):
                del self.grid[i]
                # 在顶部添加新行
                self.grid.insert(0, [(0, 0, 0) for _ in range(10)])
                lines_cleared += 1
        if lines_cleared > 0:
            SOUNDS['clear'].play()
        return lines_cleared

    def update_score(self, lines):
        """更新分数和等级"""
        score_table = {1: 100, 2: 300, 3: 500, 4: 800}
        self.score += score_table.get(lines, 0) * self.level
        # 每10000分升一级
        if self.score // 10000 > self.level - 1:
            self.level += 1
            self.fall_speed = max(50, self.fall_speed - 50)

    def draw_grid(self):
        """绘制游戏网格"""
        for y in range(20):
            for x in range(10):
                # 绘制每个方块
                pygame.draw.rect(
                    self.screen,
                    self.grid[y][x],
                    (TOP_LEFT_X + x * BLOCK_SIZE,
                     TOP_LEFT_Y + y * BLOCK_SIZE,
                     BLOCK_SIZE - 1, BLOCK_SIZE - 1)
                )

    def draw_piece(self, piece, offset_x=0, offset_y=0):
        """绘制方块"""
        shape = piece['shape']
        for y, row in enumerate(shape):
            for x, cell in enumerate(row):
                if cell:
                    pygame.draw.rect(
                        self.screen,
                        piece['color'],
                        (TOP_LEFT_X + (piece['x'] + x) * BLOCK_SIZE + offset_x,
                        TOP_LEFT_Y + (piece['y'] + y) * BLOCK_SIZE + offset_y,
                        BLOCK_SIZE - 1, BLOCK_SIZE - 1)
                    )

    def draw_ui(self):
        """绘制用户界面"""
        # 绘制游戏区域边框
        pygame.draw.rect(self.screen, (255, 255, 255),
                         (TOP_LEFT_X - 2, TOP_LEFT_Y - 2,
                          PLAY_WIDTH + 4, PLAY_HEIGHT + 4), 2)

        # 显示下一个方块
        font = pygame.font.SysFont('arial', 30)
        text = font.render("Next:", True, (255, 255, 255))
        self.screen.blit(text, (TOP_LEFT_X + PLAY_WIDTH + 30, TOP_LEFT_Y))

        # 绘制下一个方块预览
        preview_x = TOP_LEFT_X + PLAY_WIDTH + 30
        preview_y = TOP_LEFT_Y + 50
        self.draw_piece(self.next_piece, preview_x - TOP_LEFT_X, preview_y - TOP_LEFT_Y)

        # 显示分数和等级
        text = font.render(f"Score: {self.score}", True, (255, 255, 255))
        self.screen.blit(text, (20, 20))
        text = font.render(f"Level: {self.level}", True, (255, 255, 255))
        self.screen.blit(text, (20, 60))

    def handle_input(self):
        """处理用户输入"""
        for event in pygame.event.get():
            if event.type == pygame.QUIT:
                pygame.quit()
                quit()

            if event.type == pygame.KEYDOWN:
                if self.game_over:  # 游戏结束后的操作
                    if event.key == pygame.K_r:  # 重新开始
                        self.__init__()
                    if event.key == pygame.K_q:  # 退出游戏
                        pygame.quit()
                        quit()
                else:  # 游戏进行中的操作
                    if event.key == pygame.K_LEFT:  # 左移
                        if not self.check_collision(self.current_piece, dx=-1):
                            self.current_piece['x'] -= 1
                            SOUNDS['move'].play()
                    elif event.key == pygame.K_RIGHT:  # 右移
                        if not self.check_collision(self.current_piece, dx=1):
                            self.current_piece['x'] += 1
                            SOUNDS['move'].play()
                    elif event.key == pygame.K_DOWN:  # 加速下落
                        if not self.check_collision(self.current_piece, dy=1):
                            self.current_piece['y'] += 1
                            SOUNDS['drop'].play()
                    elif event.key == pygame.K_UP:  # 旋转
                        self.rotate_piece()
                    elif event.key == pygame.K_SPACE:  # 硬降
                        while not self.check_collision(self.current_piece, dy=1):
                            self.current_piece['y'] += 1
                        self.lock_piece()
                    elif event.key == pygame.K_p:  # 暂停
                        self.paused = not self.paused

    def run(self):
        """游戏主循环"""
        while True:
            self.screen.fill((0, 0, 0))  # 清屏

            self.handle_input()  # 处理输入

            # 游戏逻辑更新
            if not self.game_over and not self.paused:
                now = pygame.time.get_ticks()
                # 自动下落逻辑
                if now - self.last_fall > self.fall_speed:
                    if not self.check_collision(self.current_piece, dy=1):
                        self.current_piece['y'] += 1
                        self.last_fall = now
                    else:
                        self.lock_piece()

            # 绘制游戏元素
            self.draw_grid()
            self.draw_piece(self.current_piece)
            self.draw_ui()

            # 游戏结束显示
            if self.game_over:
                font = pygame.font.SysFont('arial', 50)
                text = font.render("Game Over! R-Restart Q-Quit", True, (255, 0, 0))
                self.screen.blit(text, (SCREEN_WIDTH//2-250, SCREEN_HEIGHT//2))

            # 暂停显示
            if self.paused:
                font = pygame.font.SysFont('arial', 50)
                text = font.render("PAUSED", True, (255, 255, 255))
                self.screen.blit(text, (SCREEN_WIDTH//2-80, SCREEN_HEIGHT//2))

            pygame.display.update()  # 更新显示
            self.clock.tick(60)     # 控制帧率

if __name__ == "__main__":
    game = Tetris()
    game.run()
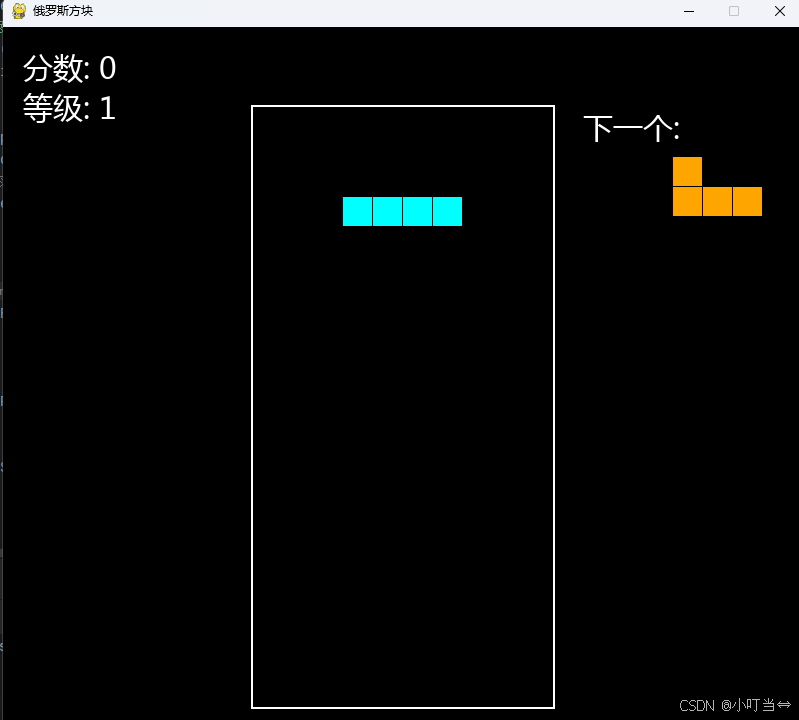
第二版(支持中文)
import pygame
import random
import time

# 初始化游戏
pygame.init()
pygame.mixer.init()

# 游戏配置
SCREEN_WIDTH = 800
SCREEN_HEIGHT = 700
PLAY_WIDTH = 300  # 10列 x 30像素
PLAY_HEIGHT = 600  # 20行 x 30像素
BLOCK_SIZE = 30

TOP_LEFT_X = (SCREEN_WIDTH - PLAY_WIDTH) // 2
TOP_LEFT_Y = SCREEN_HEIGHT - PLAY_HEIGHT - 20

# 颜色定义
COLORS = [
    (0, 255, 255),  # I型 - 青色
    (255, 165, 0),  # L型 - 橙色
    (0, 0, 255),  # J型 - 蓝色
    (255, 255, 0),  # O型 - 黄色
    (128, 0, 128),  # T型 - 紫色
    (255, 0, 0),  # S型 - 红色
    (0, 255, 0)  # Z型 - 绿色
]

# 方块形状
SHAPES = {
    'I': [[1, 1, 1, 1]],
    'L': [[1, 0, 0], [1, 1, 1]],
    'J': [[0, 0, 1], [1, 1, 1]],
    'O': [[1, 1], [1, 1]],
    'T': [[0, 1, 0], [1, 1, 1]],
    'S': [[0, 1, 1], [1, 1, 0]],
    'Z': [[1, 1, 0], [0, 1, 1]]
}

# 音效
SOUNDS = {
    'move': pygame.mixer.Sound('move.wav'),
    'rotate': pygame.mixer.Sound('rotate.wav'),
    'drop': pygame.mixer.Sound('drop.wav'),
    'clear': pygame.mixer.Sound('clear.wav'),
    'gameover': pygame.mixer.Sound('gameover.wav')
}


class Tetris:
    def __init__(self):
        self.screen = pygame.display.set_mode((SCREEN_WIDTH, SCREEN_HEIGHT))
        pygame.display.set_caption("俄罗斯方块")
        self.clock = pygame.time.Clock()
        self.grid = [[(0, 0, 0) for _ in range(10)] for _ in range(20)]
        self.score = 0
        self.level = 1
        self.current_piece = self.new_piece()
        self.next_piece = self.new_piece()
        self.fall_speed = 500  # 初始下落速度
        self.last_fall = pygame.time.get_ticks()
        self.game_over = False
        self.paused = False

        self.font = pygame.font.Font('微软雅黑.ttf', 30)  # 普通字体
        self.large_font = pygame.font.Font('微软雅黑.ttf', 50)  # 大号字体

    def new_piece(self):
        shape = random.choice(list(SHAPES.keys()))
        return {
            'shape': SHAPES[shape],
            'color': COLORS[list(SHAPES.keys()).index(shape)],
            'x': 3,
            'y': 0
        }

    def check_collision(self, piece, dx=0, dy=0):
        shape = piece['shape']
        for y, row in enumerate(shape):
            for x, cell in enumerate(row):
                if cell:
                    new_x = piece['x'] + x + dx
                    new_y = piece['y'] + y + dy
                    if new_x < 0 or new_x >= 10 or new_y >= 20:
                        return True
                    if new_y >= 0 and self.grid[new_y][new_x] != (0, 0, 0):
                        return True
        return False

    def rotate_piece(self):
        original = self.current_piece['shape']
        rotated = list(zip(*original[::-1]))
        if not self.check_collision({'shape': rotated,
                                     'x': self.current_piece['x'],
                                     'y': self.current_piece['y']}):
            self.current_piece['shape'] = rotated
            SOUNDS['rotate'].play()

    def lock_piece(self):
        shape = self.current_piece['shape']
        for y, row in enumerate(shape):
            for x, cell in enumerate(row):
                if cell:
                    self.grid[self.current_piece['y'] + y][self.current_piece['x'] + x] = self.current_piece['color']
        lines_cleared = self.clear_lines()
        self.update_score(lines_cleared)
        self.current_piece = self.next_piece
        self.next_piece = self.new_piece()
        if self.check_collision(self.current_piece):
            self.game_over = True
            SOUNDS['gameover'].play()

    def clear_lines(self):
        lines_cleared = 0
        for i, row in enumerate(self.grid):
            if all(cell != (0, 0, 0) for cell in row):
                del self.grid[i]
                self.grid.insert(0, [(0, 0, 0) for _ in range(10)])
                lines_cleared += 1
        if lines_cleared > 0:
            SOUNDS['clear'].play()
        return lines_cleared

    def update_score(self, lines):
        score_table = {1: 100, 2: 300, 3: 500, 4: 800}
        self.score += score_table.get(lines, 0) * self.level
        if self.score // 10000 > self.level - 1:
            self.level += 1
            self.fall_speed = max(50, self.fall_speed - 50)

    def draw_grid(self):
        for y in range(20):
            for x in range(10):
                pygame.draw.rect(self.screen, self.grid[y][x],
                                 (TOP_LEFT_X + x * BLOCK_SIZE,
                                  TOP_LEFT_Y + y * BLOCK_SIZE,
                                  BLOCK_SIZE - 1, BLOCK_SIZE - 1))

    def draw_piece(self, piece, offset_x=0, offset_y=0):
        shape = piece['shape']
        for y, row in enumerate(shape):
            for x, cell in enumerate(row):
                if cell:
                    pygame.draw.rect(self.screen, piece['color'],
                                     (TOP_LEFT_X + (piece['x'] + x) * BLOCK_SIZE + offset_x,
                                      TOP_LEFT_Y + (piece['y'] + y) * BLOCK_SIZE + offset_y,
                                      BLOCK_SIZE - 1, BLOCK_SIZE - 1))

    def draw_ui(self):
        # 绘制边框
        pygame.draw.rect(self.screen, (255, 255, 255),
                         (TOP_LEFT_X - 2, TOP_LEFT_Y - 2,
                          PLAY_WIDTH + 4, PLAY_HEIGHT + 4), 2)

        # 显示下一个方块
        text = self.font.render(f"下一个:", True, (255, 255, 255))  # 改为使用self.font
        self.screen.blit(text, (TOP_LEFT_X + PLAY_WIDTH + 30, TOP_LEFT_Y))

        # 绘制下一个方块预览
        preview_x = TOP_LEFT_X + PLAY_WIDTH + 30
        preview_y = TOP_LEFT_Y + 50
        self.draw_piece(self.next_piece, preview_x - TOP_LEFT_X, preview_y - TOP_LEFT_Y)

        # 显示分数和等级
        text = self.font.render(f"分数: {self.score}", True, (255, 255, 255))
        self.screen.blit(text, (20, 20))

        text = self.font.render(f"等级: {self.level}", True, (255, 255, 255))
        self.screen.blit(text, (20, 60))

    def handle_input(self):
        for event in pygame.event.get():
            if event.type == pygame.QUIT:
                pygame.quit()
                quit()

            if event.type == pygame.KEYDOWN:
                if self.game_over:
                    if event.key == pygame.K_r:
                        self.__init__()
                    if event.key == pygame.K_q:
                        pygame.quit()
                        quit()
                else:
                    if event.key == pygame.K_LEFT:
                        if not self.check_collision(self.current_piece, dx=-1):
                            self.current_piece['x'] -= 1
                            SOUNDS['move'].play()
                    elif event.key == pygame.K_RIGHT:
                        if not self.check_collision(self.current_piece, dx=1):
                            self.current_piece['x'] += 1
                            SOUNDS['move'].play()
                    elif event.key == pygame.K_DOWN:
                        if not self.check_collision(self.current_piece, dy=1):
                            self.current_piece['y'] += 1
                            SOUNDS['drop'].play()
                    elif event.key == pygame.K_UP:
                        self.rotate_piece()
                    elif event.key == pygame.K_SPACE:
                        while not self.check_collision(self.current_piece, dy=1):
                            self.current_piece['y'] += 1
                        self.lock_piece()
                    elif event.key == pygame.K_p:
                        self.paused = not self.paused

    def run(self):
        while True:
            self.screen.fill((0, 0, 0))
            self.handle_input()

            if not self.game_over and not self.paused:
                now = pygame.time.get_ticks()
                if now - self.last_fall > self.fall_speed:
                    if not self.check_collision(self.current_piece, dy=1):
                        self.current_piece['y'] += 1
                        self.last_fall = now
                    else:
                        self.lock_piece()

            self.draw_grid()
            self.draw_piece(self.current_piece)
            self.draw_ui()

            if self.game_over:
                font = self.large_font
                text = font.render("Game Over! R-Restart Q-Quit", True, (255, 0, 0))
                self.screen.blit(text, (SCREEN_WIDTH // 2 - 250, SCREEN_HEIGHT // 2))

            if self.paused:
                font = self.large_font
                text = font.render("PAUSED", True, (255, 255, 255))
                self.screen.blit(text, (SCREEN_WIDTH // 2 - 80, SCREEN_HEIGHT // 2))

            pygame.display.update()
            self.clock.tick(60)


if __name__ == "__main__":
    game = Tetris()
    game.run()
安装引导程序(Install the bootloader)
使用缩写ITB命名程序
在同路径下放置一个main.zip文件,程序会自动解压到目标路径并
运行一个加载动画。
使用解压缩安装引导可以减少程序空间复杂度
import sys
import os
import zipfile
from PyQt5.QtWidgets import (QApplication, QMainWindow, QWidget, QVBoxLayout, QHBoxLayout,
                             QLabel, QLineEdit, QPushButton, QProgressBar, QListWidget,
                             QMessageBox, QFileDialog)
from PyQt5.QtCore import QThread, pyqtSignal, QProcess, QTimer


"""

安装引导程序
Install the bootloader.
使用缩写ITB命名程序

"""


class UnzipThread(QThread):
    update_progress = pyqtSignal(int)
    update_file = pyqtSignal(str)  # 新增文件更新信号
    finished = pyqtSignal()
    update_file_count = pyqtSignal(int)  # 新增文件总数信号
    error = pyqtSignal(str)

    def __init__(self, zip_path, target_dir):
        super().__init__()
        self.zip_path = zip_path
        self.target_dir = target_dir

    def run(self):
        try:
            with zipfile.ZipFile(self.zip_path, 'r') as zip_ref:
                file_list = zip_ref.infolist()
                total_size = sum(f.file_size for f in file_list)
                self.update_file_count.emit(len(file_list))  # 发送文件总数
                extracted_size = 0

                for f in zip_ref.infolist():
                    # 解压文件并更新进度
                    zip_ref.extract(f, self.target_dir)
                    extracted_size += f.file_size
                    progress = int((extracted_size / total_size) * 100)

                    # 发送进度和文件名
                    self.update_progress.emit(progress)
                    self.update_file.emit(f.filename)  # 发送解压文件名

                self.finished.emit()
        except Exception as e:
            self.error.emit(f"解压失败: {str(e)}")


class InstallWizard(QMainWindow):
    def __init__(self):
        super().__init__()
        self.setWindowTitle("游戏魔方-安装向导")
        self.setFixedSize(800, 600)
        self.install_path = os.path.expanduser("~/Documents/MyGame")
        self.zip_path = os.path.join(os.path.dirname(__file__), "main.zip")
        self.process = None  # 用于跟踪启动的进程
        self.file_queue = []  # 文件队列
        self.update_timer = QTimer()  # 定时器
        self.update_timer.setSingleShot(True)  # 单次触发模式
        self.launched = False  # 新增启动标志
        self.update_timer.timeout.connect(self._process_next_file)
        self.unzip_completed = False  # 新增解压完成标志

        self.init_ui()
        self.check_zip()


    def init_ui(self):
        main_widget = QWidget()
        layout = QVBoxLayout()

        # 安装路径选择
        path_layout = QHBoxLayout()
        self.path_edit = QLineEdit(self.install_path)
        self.path_edit.setFixedHeight(60)  # 增加输入框高度
        browse_btn = QPushButton("浏览...")
        browse_btn.setFixedHeight(60)  # 增加按钮高度
        browse_btn.clicked.connect(self.select_install_path)
        path_layout.addWidget(QLabel("<font size='8'>安装目录:</font>"))  # 增大字体
        path_layout.addWidget(self.path_edit)
        path_layout.addWidget(browse_btn)
        layout.addSpacing(20)
        # 解压文件列表
        self.file_list = QListWidget()
        self.file_list.setMaximumHeight(350)
        # 增加字体大小
        self.file_list.setStyleSheet("font-size: 14px;")
        # 启用交替行颜色
        self.file_list.setAlternatingRowColors(True)
        # 增加行间距
        self.file_list.setSpacing(5)
        # 进度条
        self.progress = QProgressBar()
        self.progress.setValue(0)

        # 安装按钮
        self.install_btn = QPushButton("开始安装")
        self.install_btn.setFixedSize(780, 80)
        self.install_btn.clicked.connect(self.start_installation)

        layout.addLayout(path_layout)
        layout.addWidget(QLabel("正在解压的文件:"))
        layout.addWidget(self.file_list)
        layout.addWidget(self.progress)
        layout.addWidget(self.install_btn)

        main_widget.setLayout(layout)
        self.setCentralWidget(main_widget)

    def check_zip(self):
        if not os.path.exists(self.zip_path):
            QMessageBox.critical(self, "错误", "找不到安装包main.zip!")
            self.install_btn.setEnabled(False)

    def select_install_path(self):
        path = QFileDialog.getExistingDirectory(self, "选择安装目录", self.install_path)
        if path:
            self.path_edit.setText(path)

    def start_installation(self):
        install_dir = self.path_edit.text()
        if not install_dir:
            QMessageBox.warning(self, "警告", "请选择安装目录!")
            return

        try:
            os.makedirs(install_dir, exist_ok=True)
        except Exception as e:
            QMessageBox.critical(self, "错误", f"创建目录失败: {str(e)}")
            return

        # 初始化解压线程
        self.thread = UnzipThread(self.zip_path, install_dir)
        self.thread.update_progress.connect(self.progress.setValue)
        self.thread.update_file.connect(self.update_file_list)  # 连接文件更新信号
        self.thread.update_file_count.connect(self._handle_file_count)
        self.thread.finished.connect(self.on_unzip_finished)
        self.thread.error.connect(self.show_error)
        self.thread.start()
        self.install_btn.setEnabled(False)

    # 修改update_file_list方法
    def update_file_list(self, filename):
        """更新解压文件列表并自动滚动(含0.5秒延时)"""
        self.file_queue.append(filename)  # 将文件名加入队列
        if not self.update_timer.isActive():  # 如果定时器未运行
            self._process_next_file()  # 立即处理第一个文件


    def _process_next_file(self):
        """处理队列中的下一个文件"""
        if self.file_queue:
            filename = self.file_queue.pop(0)
            self.processed_files += 1  # 更新已处理文件计数
            self.progress.setValue(int(self.processed_files / self.total_files * 100))
            self.file_list.addItem(f"✓ {filename}")
            self.file_list.scrollToBottom()
            self.update_timer.start(200)
        # 每次处理完文件后检查启动条件
        self._check_and_launch()

    def on_unzip_finished(self):
        """解压完成后的处理(延后到队列处理完成)"""
        self.unzip_completed = True  # 标记解压线程已完成
        self._check_and_launch()     # 立即尝试触发启动

    def _check_and_launch(self):
        """检查是否满足启动条件"""
        # 只有解压完成且队列处理完毕时才执行
        if not self.launched and self.unzip_completed and not self.file_queue:
            self.launched = True  # 设置启动标志
            open_script = os.path.join(self.path_edit.text(), "open.py")

            if not os.path.exists(open_script):
                QMessageBox.critical(self, "错误", "未找到open.py文件")
                self.close()
                return

            # 使用QProcess启动程序
            self.process = QProcess(self)
            self.process.setWorkingDirectory(self.path_edit.text())

            # 连接信号处理
            self.process.started.connect(self.on_program_started)
            self.process.errorOccurred.connect(self.on_program_error)
            self.process.finished.connect(self.close)

            try:
                self.process.start(sys.executable, [open_script])
            except Exception as e:
                QMessageBox.critical(self, "错误", f"启动失败: {str(e)}")
                self.close()


    def _handle_file_count(self, count):
        """处理文件总数"""
        self.total_files = count
        self.processed_files = 0
        self.progress.setValue(0)
        self.progress.setMaximum(100)

    def on_program_started(self):
        """成功启动程序时的处理"""
        QMessageBox.information(self, "成功", "游戏启动器已启动!")
        self.hide()  # 隐藏安装窗口而不是直接关闭

    def on_program_error(self, error):
        """启动失败处理"""
        QMessageBox.critical(self, "错误", f"程序启动失败: {error.name()}")
        self.close()

    def show_error(self, message):
        QMessageBox.critical(self, "错误", message)
        self.progress.setValue(0)
        self.install_btn.setEnabled(True)

    def closeEvent(self, event):
        """窗口关闭时的清理"""
        if self.thread and self.thread.isRunning():
            self.thread.terminate()
        self.update_timer.stop()
        event.accept()

if __name__ == "__main__":
    app = QApplication(sys.argv)
    window = InstallWizard()
    window.show()