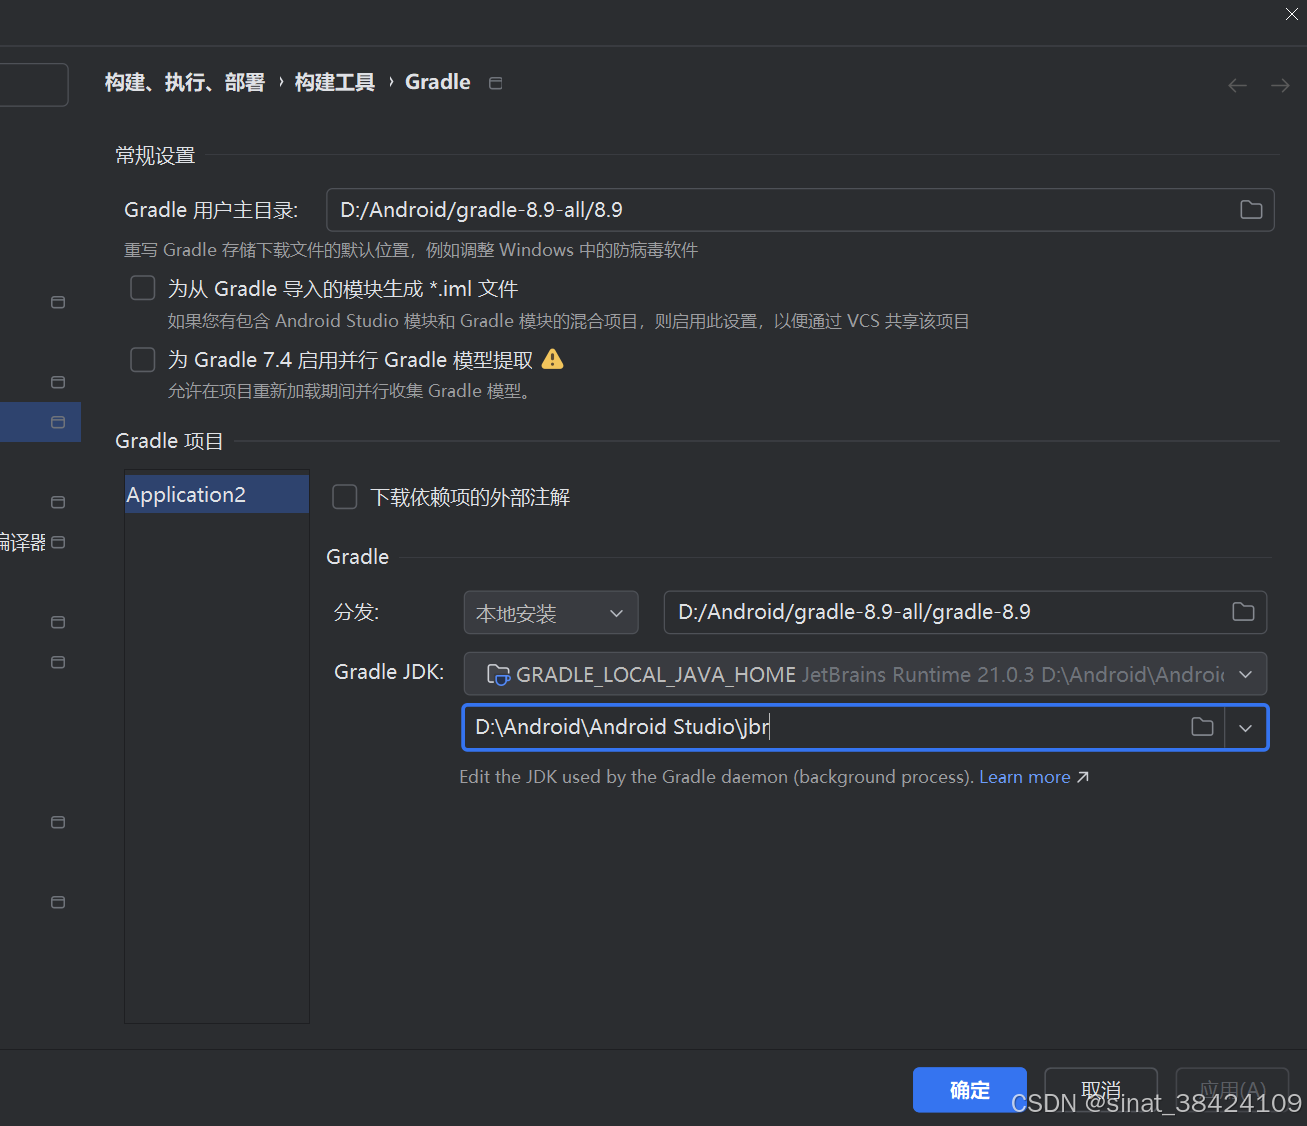
android api29
gradle 8.9
要求
-
布局文件 (
floating_window_layout.xml):- 增加、删除、关闭按钮默认隐藏。
- 使用“开始”按钮来控制这些按钮的显示和隐藏。
-
服务类 (
FloatingWindowService.kt):- 实现“开始”按钮的功能,点击时切换增加、删除、关闭按钮的可见性。
- 处理增加、删除、关闭按钮的点击事件。
- 使浮动窗口可拖动。
-
主活动 (
MainActivity.kt):- 检查并请求悬浮窗权限。
- 启动和停止悬浮窗服务。
-
清单文件 (
AndroidManifest.xml):- 添加必要的权限声明。
floating_window_layout.xml
<?xml version="1.0" encoding="utf-8"?>
<LinearLayout xmlns:android="http://schemas.android.com/apk/res/android"
    android:id="@+id/root_layout"
    android:layout_width="wrap_content"
    android:layout_height="wrap_content"
    android:orientation="vertical"
    android:background="#CCFFFFFF"
    android:padding="16dp">

    <Button
        android:id="@+id/start_button"
        android:layout_width="match_parent"
        android:layout_height="wrap_content"
        android:text="开始" />

    <LinearLayout
        android:id="@+id/control_buttons_layout"
        android:layout_width="match_parent"
        android:layout_height="wrap_content"
        android:orientation="vertical"
        android:visibility="gone">

        <Button
            android:id="@+id/add_button"
            android:layout_width="match_parent"
            android:layout_height="wrap_content"
            android:text="增加" />

        <Button
            android:id="@+id/delete_button"
            android:layout_width="match_parent"
            android:layout_height="wrap_content"
            android:text="删除" />

        <Button
            android:id="@+id/close_button"
            android:layout_width="match_parent"
            android:layout_height="wrap_content"
            android:text="关闭" />
    </LinearLayout>
</LinearLayout>
FloatingWindowService.kt
package com.example.application

import android.app.Service
import android.content.Intent
import android.graphics.PixelFormat
import android.os.Build
import android.os.IBinder
import android.view.Gravity
import android.view.LayoutInflater
import android.view.MotionEvent
import android.view.View
import android.view.WindowManager
import android.widget.Button
import android.widget.LinearLayout
import android.widget.Toast

class FloatingWindowService : Service() {

    private var windowManager: WindowManager? = null
    private var floatingView: View? = null
    private var controlButtonsLayout: LinearLayout? = null

    override fun onBind(intent: Intent?): IBinder? {
        return null
    }

    override fun onCreate() {
        super.onCreate()

        // 加载浮动窗口布局
        floatingView = LayoutInflater.from(this).inflate(R.layout.floating_window_layout, null)

        // 设置浮动窗口的布局参数
        val params = if (Build.VERSION.SDK_INT >= Build.VERSION_CODES.O) {
            WindowManager.LayoutParams(
                WindowManager.LayoutParams.WRAP_CONTENT,
                WindowManager.LayoutParams.WRAP_CONTENT,
                WindowManager.LayoutParams.TYPE_APPLICATION_OVERLAY,
                WindowManager.LayoutParams.FLAG_NOT_FOCUSABLE,
                PixelFormat.TRANSLUCENT
            )
        } else {
            WindowManager.LayoutParams(
                WindowManager.LayoutParams.WRAP_CONTENT,
                WindowManager.LayoutParams.WRAP_CONTENT,
                WindowManager.LayoutParams.TYPE_PHONE,
                WindowManager.LayoutParams.FLAG_NOT_FOCUSABLE,
                PixelFormat.TRANSLUCENT
            )
        }

        params.gravity = Gravity.TOP or Gravity.START
        params.x = 0
        params.y = 100

        windowManager = getSystemService(WINDOW_SERVICE) as WindowManager?
        windowManager?.addView(floatingView, params)

        // 查找按钮并设置点击监听器
        val startButton = floatingView?.findViewById<Button>(R.id.start_button)
        val addButton = floatingView?.findViewById<Button>(R.id.add_button)
        val deleteButton = floatingView?.findViewById<Button>(R.id.delete_button)
        val closeButton = floatingView?.findViewById<Button>(R.id.close_button)
        controlButtonsLayout = floatingView?.findViewById(R.id.control_buttons_layout)

        startButton?.setOnClickListener {
            if (controlButtonsLayout?.visibility == View.VISIBLE) {
                controlButtonsLayout?.visibility = View.GONE
                startButton.text = "开始"
            } else {
                controlButtonsLayout?.visibility = View.VISIBLE
                startButton.text = "收起"
            }
        }

        addButton?.setOnClickListener {
            Toast.makeText(applicationContext, "增加", Toast.LENGTH_SHORT).show()
        }

        deleteButton?.setOnClickListener {
            Toast.makeText(applicationContext, "删除", Toast.LENGTH_SHORT).show()
        }

        closeButton?.setOnClickListener {
            stopSelf()
        }

        // 使浮动窗口可拖动
        val rootLayout = floatingView?.findViewById<LinearLayout>(R.id.root_layout)
        var initialX = 0
        var initialY = 0
        var initialTouchX = 0f
        var initialTouchY = 0f

        rootLayout?.setOnTouchListener(object : View.OnTouchListener {
            override fun onTouch(v: View?, event: MotionEvent?): Boolean {
                when (event?.action) {
                    MotionEvent.ACTION_DOWN -> {
                        initialX = params.x
                        initialY = params.y
                        initialTouchX = event.rawX
                        initialTouchY = event.rawY
                    }
                    MotionEvent.ACTION_MOVE -> {
                        params.x = initialX + (event.rawX - initialTouchX).toInt()
                        params.y = initialY + (event.rawY - initialTouchY).toInt()
                        windowManager?.updateViewLayout(floatingView, params)
                    }
                }
                return false
            }
        })
    }

    override fun onDestroy() {
        super.onDestroy()
        if (floatingView != null) {
            windowManager?.removeView(floatingView)
        }
    }
}
MainActivity.kt
package com.example.application

import android.content.Context
import android.content.Intent
import android.net.Uri
import android.os.Build
import android.os.Bundle
import android.provider.Settings
import androidx.activity.ComponentActivity
import androidx.activity.compose.setContent
import androidx.activity.enableEdgeToEdge
import androidx.compose.foundation.layout.*
import androidx.compose.material3.Button
import androidx.compose.material3.Scaffold
import androidx.compose.material3.Text
import androidx.compose.runtime.Composable
import androidx.compose.runtime.mutableStateOf
import androidx.compose.runtime.remember
import androidx.compose.ui.Alignment
import androidx.compose.ui.Modifier
import androidx.compose.ui.platform.LocalContext
import androidx.compose.ui.tooling.preview.Preview
import androidx.compose.ui.unit.dp
import androidx.core.app.ActivityCompat
import com.example.application.ui.theme.ApplicationTheme

class MainActivity : ComponentActivity() {
    val REQUEST_CODE = 1001

    override fun onCreate(savedInstanceState: Bundle?) {
        super.onCreate(savedInstanceState)
        enableEdgeToEdge()
        setContent {
            ApplicationTheme {
                Scaffold(modifier = Modifier.fillMaxSize()) { padding ->
                    MainScreen(padding, LocalContext.current)
                }
            }
        }

        // 检查应用是否有权限显示悬浮窗
        if (Build.VERSION.SDK_INT >= Build.VERSION_CODES.M && !Settings.canDrawOverlays(this)) {
            // 请求权限以显示悬浮窗
            val intent = Intent(Settings.ACTION_MANAGE_OVERLAY_PERMISSION, Uri.parse("package:$packageName"))
            startActivityForResult(intent, REQUEST_CODE)
        }
    }

    override fun onActivityResult(requestCode: Int, resultCode: Int, data: Intent?) {
        super.onActivityResult(requestCode, resultCode, data)
        if (requestCode == REQUEST_CODE) {
            // 检查用户是否授予了权限
            if (Build.VERSION.SDK_INT >= Build.VERSION_CODES.M && Settings.canDrawOverlays(this)) {
                // 权限已授予,可以启动服务
            } else {
                // 权限未授予,显示消息或进行其他处理
            }
        }
    }
}

@Composable
fun MainScreen(padding: PaddingValues, context: Context) {
    val isFloatingWindowRunning = remember { mutableStateOf(false) }

    Column(
        modifier = Modifier
            .fillMaxSize()
            .padding(padding)
            .padding(16.dp),
        verticalArrangement = Arrangement.Center,
        horizontalAlignment = Alignment.CenterHorizontally
    ) {
        Greeting(name = "Android")
        Spacer(modifier = Modifier.height(16.dp))
        ToggleFloatingWindowButton(
            context = context,
            isFloatingWindowRunning = isFloatingWindowRunning.value,
            onToggle = {
                if (it) {
                    startFloatingWindow(context)
                } else {
                    stopFloatingWindow(context)
                }
                isFloatingWindowRunning.value = it
            }
        )
    }
}

@Composable
fun Greeting(name: String, modifier: Modifier = Modifier) {
    Text(
        text = "你好 $name!",
        modifier = modifier
    )
}

@Preview(showBackground = true)
@Composable
fun GreetingPreview() {
    ApplicationTheme {
        Greeting("Android")
    }
}

@Composable
fun ToggleFloatingWindowButton(
    context: Context,
    isFloatingWindowRunning: Boolean,
    onToggle: (Boolean) -> Unit
) {
    Button(onClick = {
        onToggle(!isFloatingWindowRunning)
    }) {
        Text(text = if (isFloatingWindowRunning) "停止悬浮窗" else "启动悬浮窗")
    }
}

private fun startFloatingWindow(context: Context) {
    if (Build.VERSION.SDK_INT >= Build.VERSION_CODES.M && !Settings.canDrawOverlays(context)) {
        // 权限未授予,再次请求
        val intent = Intent(Settings.ACTION_MANAGE_OVERLAY_PERMISSION, Uri.parse("package:${context.packageName}"))
        ActivityCompat.startActivityForResult(context as MainActivity, intent, MainActivity().REQUEST_CODE, null)
    } else {
        val intent = Intent(context, FloatingWindowService::class.java)
        context.startService(intent)
    }
}

private fun stopFloatingWindow(context: Context) {
    val intent = Intent(context, FloatingWindowService::class.java)
    context.stopService(intent)
}
AndroidManifest.xml
<?xml version="1.0" encoding="utf-8"?>
<manifest xmlns:android="http://schemas.android.com/apk/res/android"
    xmlns:tools="http://schemas.android.com/tools">

    <uses-permission android:name="android.permission.SYSTEM_ALERT_WINDOW"/>

    <application
        android:allowBackup="true"
        android:dataExtractionRules="@xml/data_extraction_rules"
        android:fullBackupContent="@xml/backup_rules"
        android:icon="@mipmap/ic_launcher"
        android:label="@string/app_name"
        android:roundIcon="@mipmap/ic_launcher_round"
        android:supportsRtl="true"
        android:theme="@style/Theme.Application"
        tools:targetApi="31">
        <activity
            android:name=".MainActivity"
            android:exported="true"
            android:label="@string/app_name"
            android:theme="@style/Theme.Application">
            <intent-filter>
                <action android:name="android.intent.action.MAIN" />

                <category android:name="android.intent.category.LAUNCHER" />
            </intent-filter>
        </activity>

        <service android:name=".FloatingWindowService" />
    </application>

</manifest>
AndroidManifest.xml
<?xml version="1.0" encoding="utf-8"?>
<manifest xmlns:android="http://schemas.android.com/apk/res/android"
    xmlns:tools="http://schemas.android.com/tools">

    <uses-permission android:name="android.permission.SYSTEM_ALERT_WINDOW"/>

    <application
        android:allowBackup="true"
        android:dataExtractionRules="@xml/data_extraction_rules"
        android:fullBackupContent="@xml/backup_rules"
        android:icon="@mipmap/ic_launcher"
        android:label="@string/app_name"
        android:roundIcon="@mipmap/ic_launcher_round"
        android:supportsRtl="true"
        android:theme="@style/Theme.Application"
        tools:targetApi="31">
        <activity
            android:name=".MainActivity"
            android:exported="true"
            android:label="@string/app_name"
            android:theme="@style/Theme.Application">
            <intent-filter>
                <action android:name="android.intent.action.MAIN" />

                <category android:name="android.intent.category.LAUNCHER" />
            </intent-filter>
        </activity>

        <service android:name=".FloatingWindowService" />
    </application>

</manifest>
实现了你所描述的功能:增加、删除、关闭按钮默认隐藏,并通过“开始”按钮来控制它们的显示和隐藏


