DCGAN原理
DCGAN(深度卷积对抗生成网络,Deep Convolutional Generative Adversarial Networks)是GAN的直接扩展。不同之处在于,DCGAN会分别在判别器和生成器中使用卷积和转置卷积层。
它最早由Radford等人在论文Unsupervised Representation Learning With Deep Convolutional Generative Adversarial Networks中进行描述。判别器由分层的卷积层、BatchNorm层和LeakyReLU激活层组成。输入是3x64x64的图像,输出是该图像为真图像的概率。生成器则是由转置卷积层、BatchNorm层和ReLU激活层组成。输入是标准正态分布中提取出的隐向量𝑧z,输出是3x64x64的RGB图像。
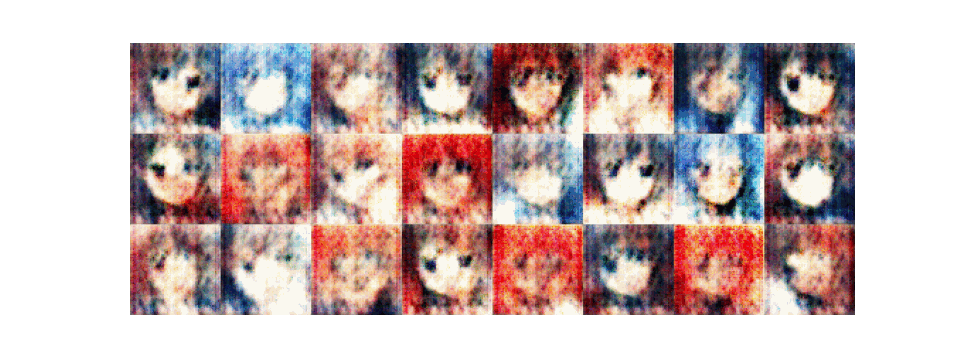
本教程将使用动漫头像数据集来训练一个生成式对抗网络,接着使用该网络生成动漫头像图片。
数据准备
from download import download

url = "https://download.mindspore.cn/dataset/Faces/faces.zip"

path = download(url, "./faces", kind="zip", replace=True)
数据处理
略
构造网络
当处理完数据后,就可以来进行网络的搭建了。按照DCGAN论文中的描述,所有模型权重均应从mean为0,sigma为0.02的正态分布中随机初始化。
生成器
生成器G的功能是将隐向量z映射到数据空间。由于数据是图像,这一过程也会创建与真实图像大小相同的 RGB 图像。在实践场景中,该功能是通过一系列Conv2dTranspose转置卷积层来完成的,每个层都与BatchNorm2d层和ReLu激活层配对,输出数据会经过tanh函数,使其返回[-1,1]的数据范围内。
DCGAN论文生成图像如下所示:

import mindspore as ms
from mindspore import nn, ops
from mindspore.common.initializer import Normal

weight_init = Normal(mean=0, sigma=0.02)
gamma_init = Normal(mean=1, sigma=0.02)

class Generator(nn.Cell):
    """DCGAN网络生成器"""

    def __init__(self):
        super(Generator, self).__init__()
        self.generator = nn.SequentialCell(
            nn.Conv2dTranspose(nz, ngf * 8, 4, 1, 'valid', weight_init=weight_init),
            nn.BatchNorm2d(ngf * 8, gamma_init=gamma_init),
            nn.ReLU(),
            nn.Conv2dTranspose(ngf * 8, ngf * 4, 4, 2, 'pad', 1, weight_init=weight_init),
            nn.BatchNorm2d(ngf * 4, gamma_init=gamma_init),
            nn.ReLU(),
            nn.Conv2dTranspose(ngf * 4, ngf * 2, 4, 2, 'pad', 1, weight_init=weight_init),
            nn.BatchNorm2d(ngf * 2, gamma_init=gamma_init),
            nn.ReLU(),
            nn.Conv2dTranspose(ngf * 2, ngf, 4, 2, 'pad', 1, weight_init=weight_init),
            nn.BatchNorm2d(ngf, gamma_init=gamma_init),
            nn.ReLU(),
            nn.Conv2dTranspose(ngf, nc, 4, 2, 'pad', 1, weight_init=weight_init),
            nn.Tanh()
            )

    def construct(self, x):
        return self.generator(x)

generator = Generator()
判别器
如前所述,判别器D是一个二分类网络模型,输出判定该图像为真实图的概率。通过一系列的Conv2d、BatchNorm2d和LeakyReLU层对其进行处理,最后通过Sigmoid激活函数得到最终概率。
DCGAN论文提到,使用卷积而不是通过池化来进行下采样是一个好方法,因为它可以让网络学习自己的池化特征。
判别器的代码实现如下:
class Discriminator(nn.Cell):
    """DCGAN网络判别器"""

    def __init__(self):
        super(Discriminator, self).__init__()
        self.discriminator = nn.SequentialCell(
            nn.Conv2d(nc, ndf, 4, 2, 'pad', 1, weight_init=weight_init),
            nn.LeakyReLU(0.2),
            nn.Conv2d(ndf, ndf * 2, 4, 2, 'pad', 1, weight_init=weight_init),
            nn.BatchNorm2d(ngf * 2, gamma_init=gamma_init),
            nn.LeakyReLU(0.2),
            nn.Conv2d(ndf * 2, ndf * 4, 4, 2, 'pad', 1, weight_init=weight_init),
            nn.BatchNorm2d(ngf * 4, gamma_init=gamma_init),
            nn.LeakyReLU(0.2),
            nn.Conv2d(ndf * 4, ndf * 8, 4, 2, 'pad', 1, weight_init=weight_init),
            nn.BatchNorm2d(ngf * 8, gamma_init=gamma_init),
            nn.LeakyReLU(0.2),
            nn.Conv2d(ndf * 8, 1, 4, 1, 'valid', weight_init=weight_init),
            )
        self.adv_layer = nn.Sigmoid()

    def construct(self, x):
        out = self.discriminator(x)
        out = out.reshape(out.shape[0], -1)
        return self.adv_layer(out)

discriminator = Discriminator()
生成效果
实训实践
按照提示,运行实训代码
进入实训平台:https://xihe.mindspore.cn/projects
选择“jupyter 在线编辑器”
启动“Ascend开发环境” :Ascend开发环境需要申请,大家可以申请试试看
启动开发环境后,在左边的文件夹中,选择“应用实践”-“生成式”-“DCGAN生成漫画头像.ipynb”
打开这个ipynb文件后,选择“运行全部”