前言
本文将引导开发者从零基础开始,运用vite、react、react-router、react-redux、Ant Design、less、tailwindcss、axios等前沿技术栈,构建一个高效、响应式的后台管理系统。通过详细的步骤和实践指导,文章旨在为开发者揭示如何利用这些技术工具,从项目构思到最终实现的全过程,提供清晰的开发思路和实用的技术应用技巧。
项目gitee地址:lbking666666/enqi-admin
本系列文章:
- 使用vite+react+ts+Ant Design开发后台管理项目(一)
- 使用vite+react+ts+Ant Design开发后台管理项目(二)
- 使用vite+react+ts+Ant Design开发后台管理项目(三)
- 使用vite+react+ts+Ant Design开发后台管理项目(四)
添加配置
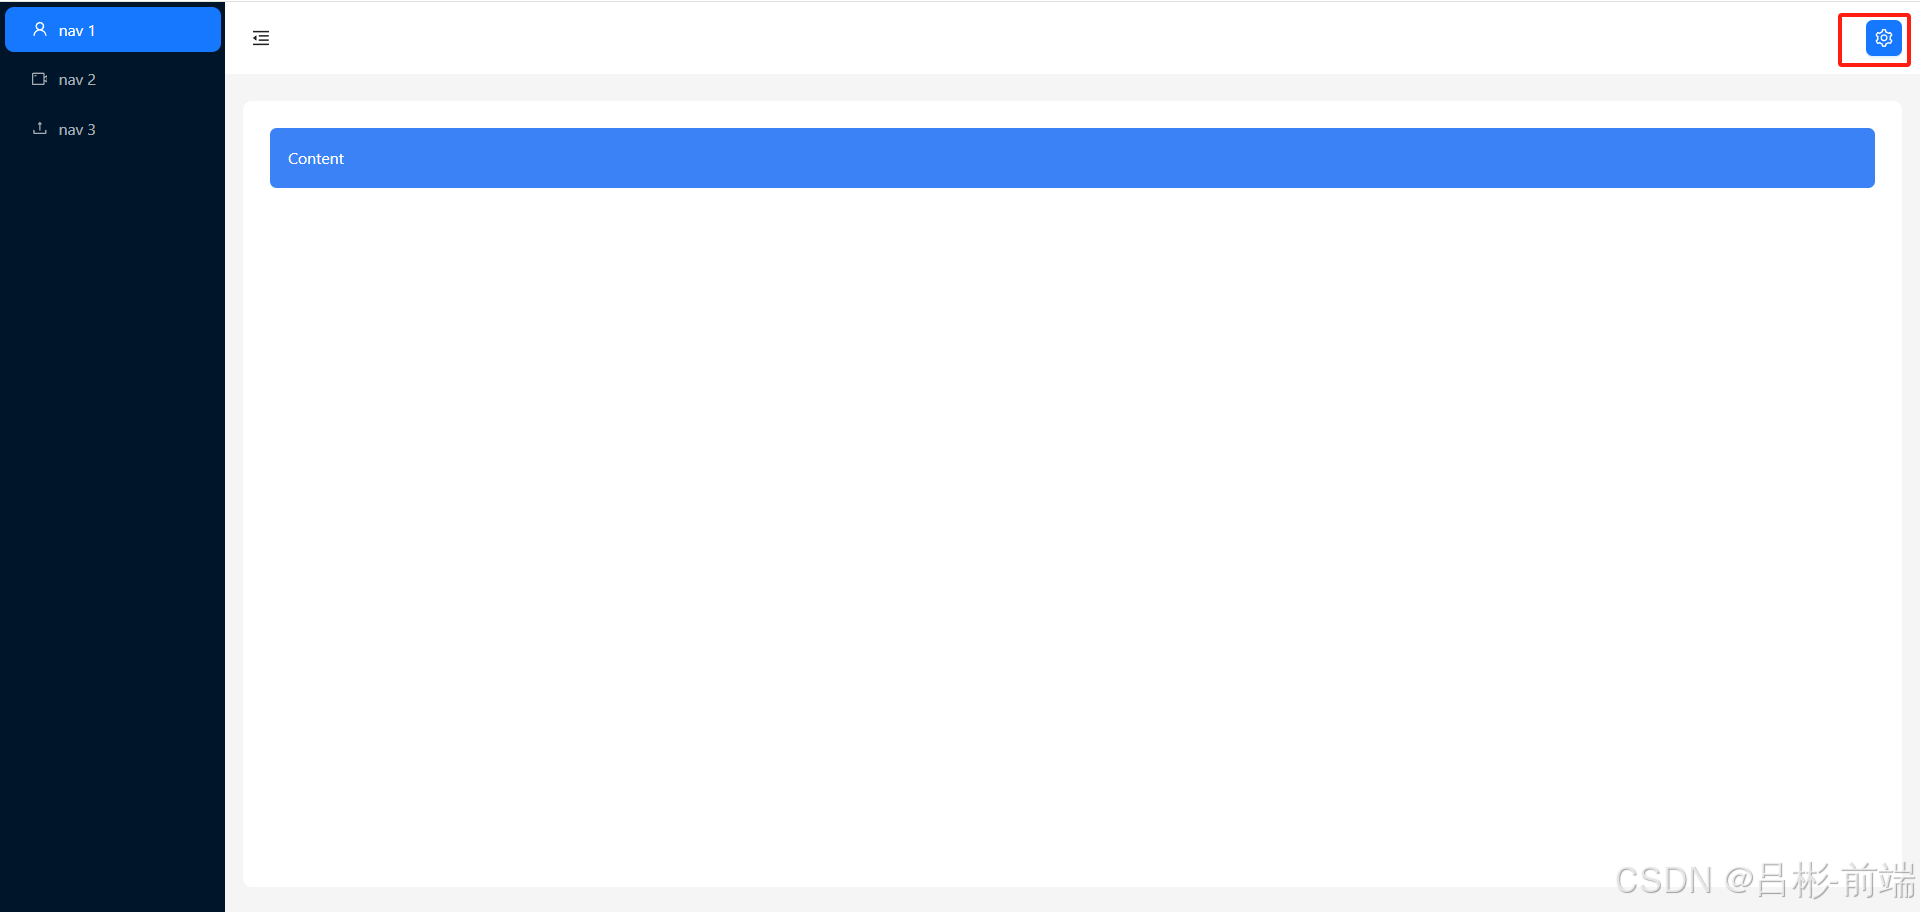
添加设置按钮
目前头部只有一个控制左侧菜单的按钮,需要在右侧添加一个按钮可以设置整体的一些配置。修改layout文件夹下的header.tsx文件
//layout/header.tsx
import React from "react";
import { Button, Layout, theme } from "antd";
import { MenuFoldOutlined, MenuUnfoldOutlined,SettingOutlined } from "@ant-design/icons";
const { Header } = Layout;
interface AppSiderProps {
  collapsed: boolean;
}
const AppHeader: React.FC<AppSiderProps> = ({ collapsed }) => {
  const {
    token: { colorBgContainer },
  } = theme.useToken();

  return (
    <Header style={{ padding: 0, background: colorBgContainer }}>
     <Flex gap="middle" justify="space-between" align="center">
        <Button
          type="text"
          icon={collapsed ? <MenuUnfoldOutlined /> : <MenuFoldOutlined />}
          style={{
            fontSize: "16px",
            width: 64,
            height: 64,
          }}
          onClick={handleCollapsed}
        />
        <Button
          type="primary"
          className="mr-4"
          icon={<SettingOutlined />}
        />
      </Flex>
    </Header>
  );
};
export default AppHeader;
添加Drawer抽屉
从Ant Design选择抽屉组件截图如下
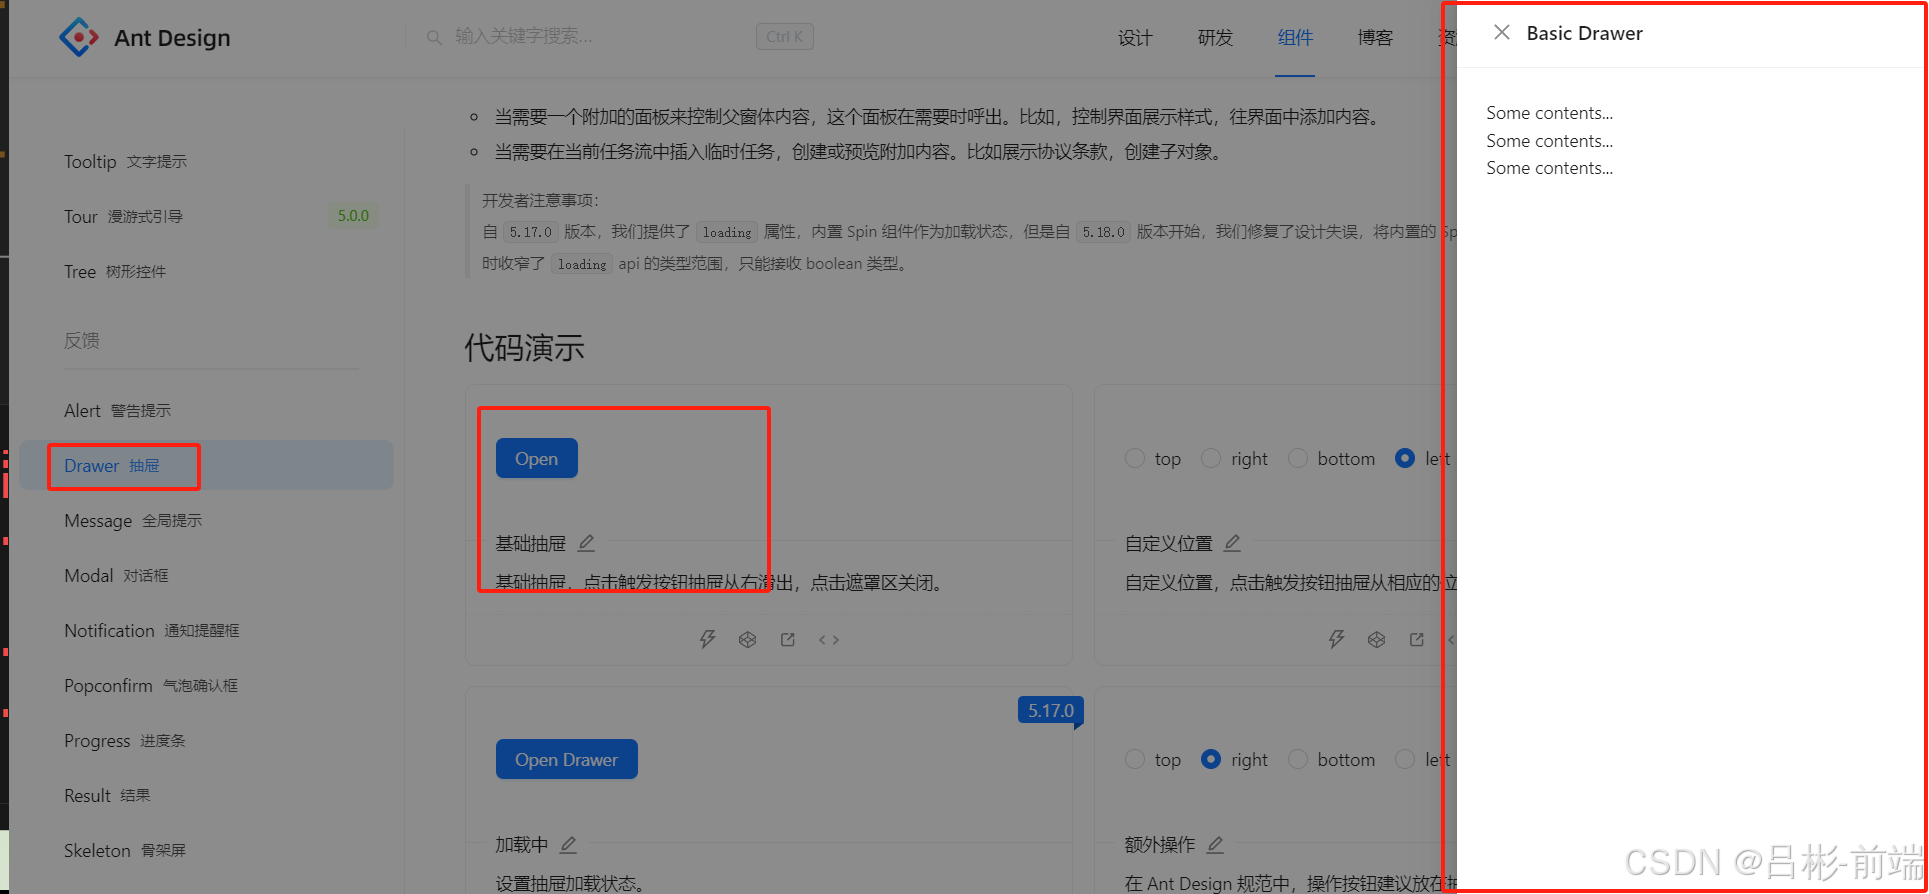
把这里的代码拿到layout文件夹下的header.tsx文件中
//layout/header.tsx

import React, { useState } from "react";
import { Button, Layout, theme, Flex, Drawer } from "antd";
import {
  MenuFoldOutlined,
  MenuUnfoldOutlined,
  SettingOutlined,
} from "@ant-design/icons";
import { useAppDispatch } from "@/hooks/UseGlobal.hooks";
import { setCollapsed } from "@/store/reducers/global";
const { Header } = Layout;
interface AppSiderProps {
  collapsed: boolean;
}

const AppHeader: React.FC<AppSiderProps> = ({ collapsed }) => {
  const {
    token: { colorBgContainer },
  } = theme.useToken();

  const [showPoup, setShowPoup] = useState(false);
  const dispatch = useAppDispatch();
  //收缩事件
  const handleCollapsed = () => {
    //更新全局状态  collapsed
    dispatch(setCollapsed());
  };
  //设置按钮点击事件
  const handleShowPoup = () => {
    console.log("点击了按钮");
    setShowPoup(true);
  };
  const onClose = () => {
    setShowPoup(false);
  };
  return (
    <Header style={{ padding: 0, background: colorBgContainer }}>
      <Flex gap="middle" justify="space-between" align="center">
        <Button
          type="text"
          icon={collapsed ? <MenuUnfoldOutlined /> : <MenuFoldOutlined />}
          style={{
            fontSize: "16px",
            width: 64,
            height: 64,
          }}
          onClick={handleCollapsed}
        />
        <Button
          type="primary"
          className="mr-4"
          icon={<SettingOutlined />}
          onClick={handleShowPoup}
        />
      </Flex>
      <Drawer title="Basic Drawer" onClose={onClose} open={showPoup}>
        <p>Some contents...</p>
        <p>Some contents...</p>
        <p>Some contents...</p>
      </Drawer>
    </Header>
  );
};
export default AppHeader;
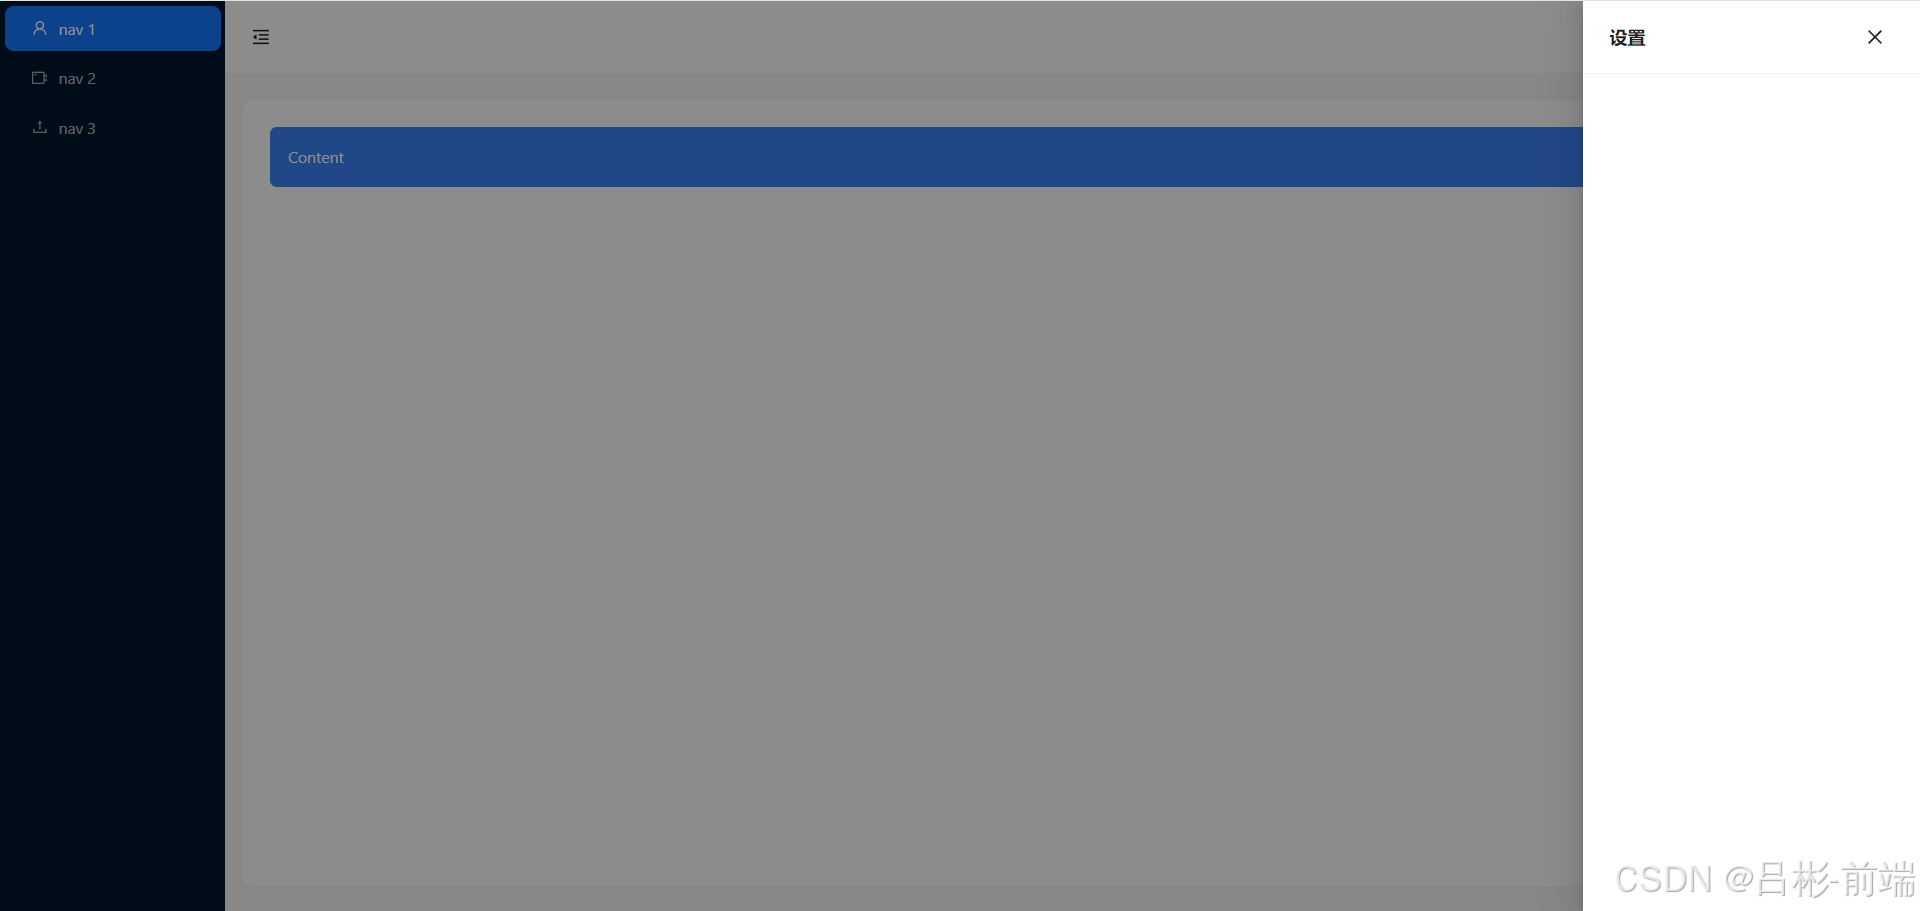
查看效果发现关闭按钮在左侧一般我们习惯把关闭按钮放到右侧根据Ant Design的Drawer的api我们可以设置closeIcon和extra这两个
//layout/header.tsx
import React, { useState } from "react";
import { Button, Layout, theme, Flex, Drawer,Space } from "antd";
import {
  MenuFoldOutlined,
  MenuUnfoldOutlined,
  SettingOutlined,
  CloseOutlined
} from "@ant-design/icons";
import { useAppDispatch } from "@/hooks/UseGlobal.hooks";
import { setCollapsed } from "@/store/reducers/global";
const { Header } = Layout;
interface AppSiderProps {
  collapsed: boolean;
}

const AppHeader: React.FC<AppSiderProps> = ({ collapsed }) => {
  const {
    token: { colorBgContainer },
  } = theme.useToken();

  const [showPoup, setShowPoup] = useState(false);
  const dispatch = useAppDispatch();
  //收缩事件
  const handleCollapsed = () => {
    //更新全局状态  collapsed
    dispatch(setCollapsed());
  };
  //设置按钮点击事件
  const handleShowPoup = () => {
    console.log("点击了按钮");
    setShowPoup(true);
  };
  const onClose = () => {
    setShowPoup(false);
  };
  return (
    <Header style={{ padding: 0, background: colorBgContainer }}>
      <Flex gap="middle" justify="space-between" align="center">
        <Button
          type="text"
          icon={collapsed ? <MenuUnfoldOutlined /> : <MenuFoldOutlined />}
          style={{
            fontSize: "16px",
            width: 64,
            height: 64,
          }}
          onClick={handleCollapsed}
        />
        <Button
          type="primary"
          className="mr-4"
          icon={<SettingOutlined />}
          onClick={handleShowPoup}
        />
      </Flex>
      <Drawer
        title="设置"
        closeIcon={false}
        open={showPoup}
        extra={
          <Space>
            <Button type="link" onClick={onClose} icon={<CloseOutlined />}></Button>
          </Space>
        }
      ></Drawer>
    </Header>
  );
};
export default AppHeader;
效果如下图这里关闭按钮在右侧了
添加设置项
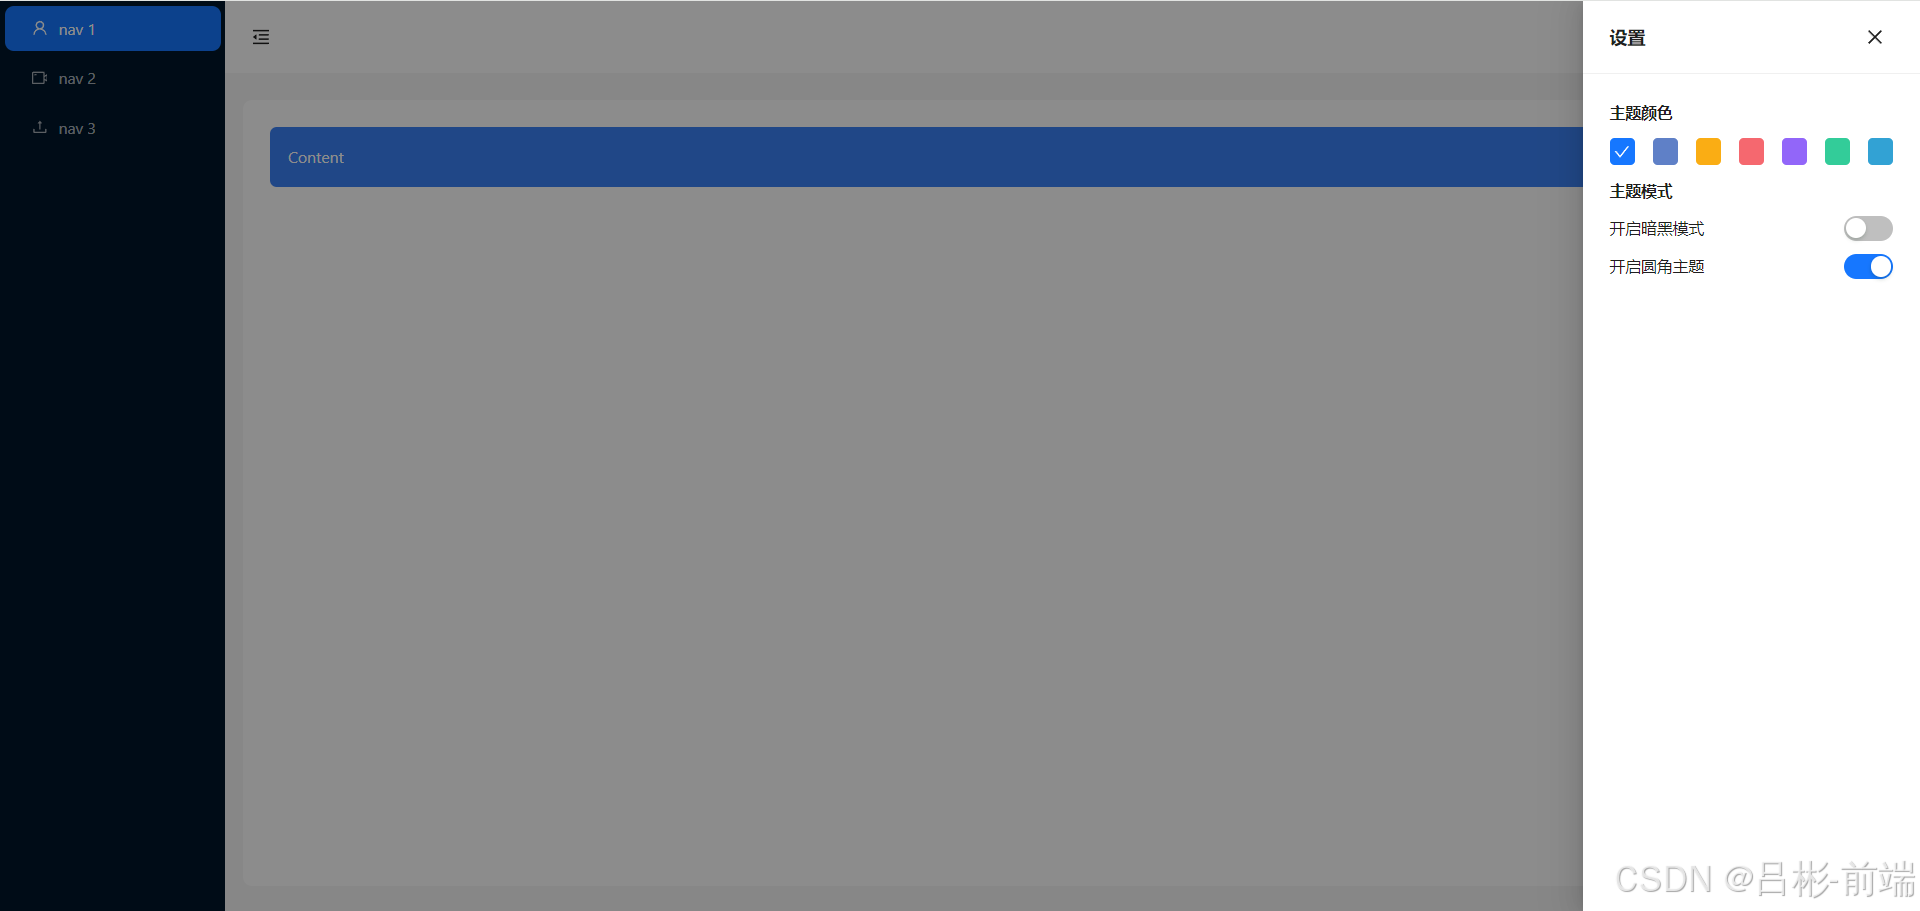
这里的查看Ant Design官网后,选择了三项设置,主题颜色的配置,暗黑模式、圆角模式
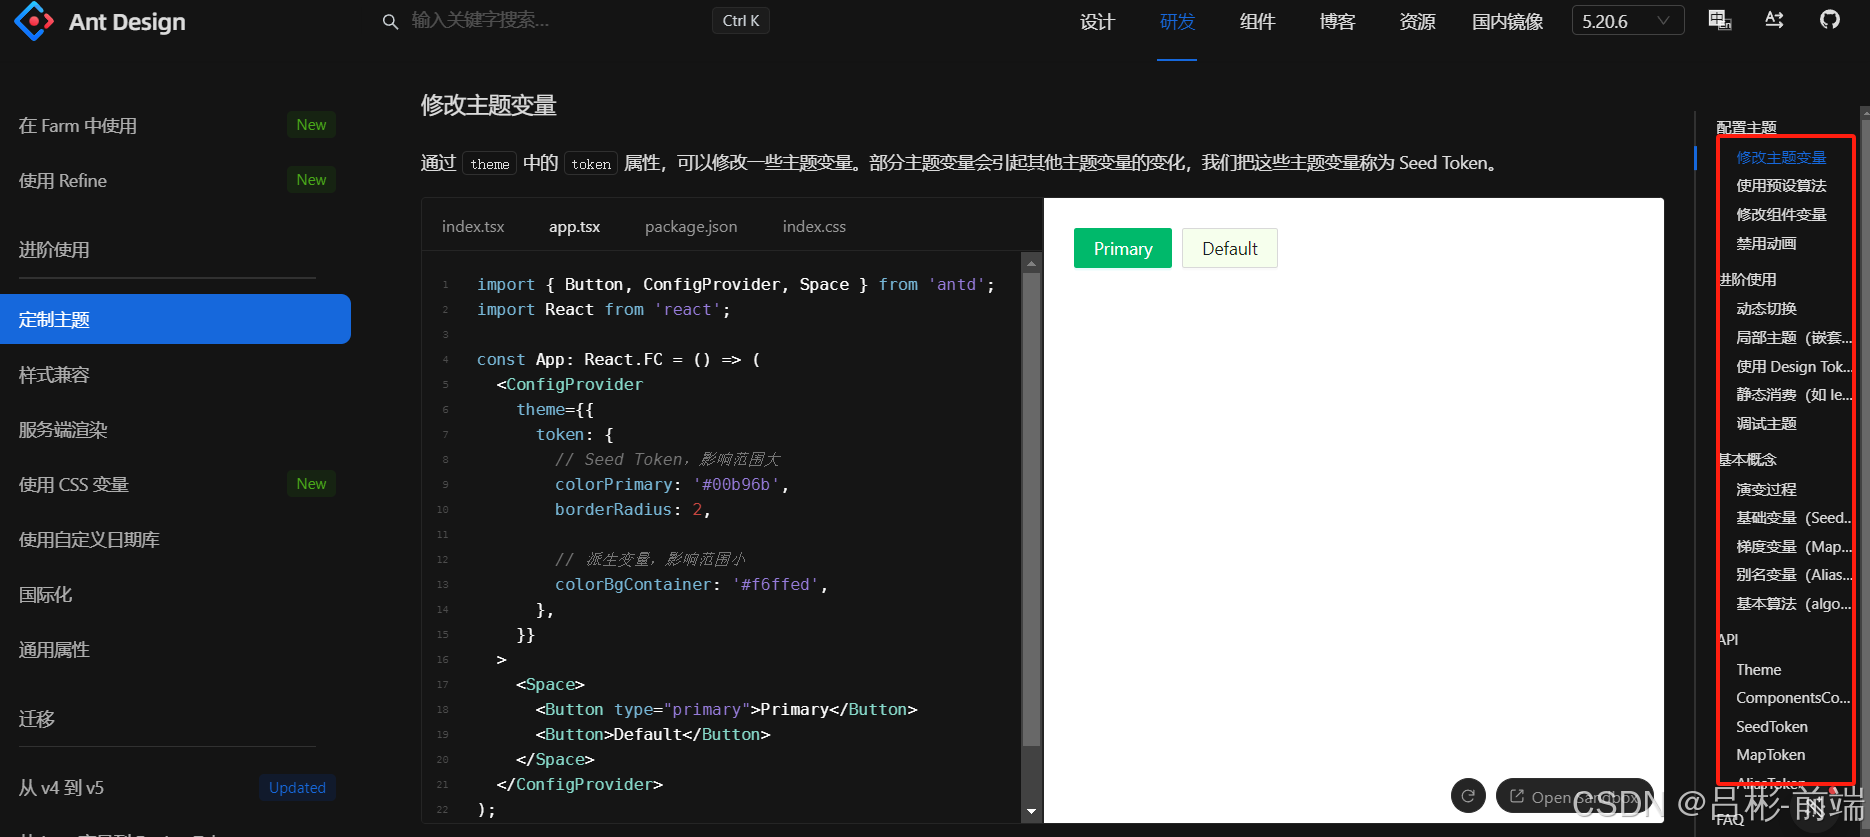
先把这三个内容添加进来,控制这三个的响应式变量先使用useState在头部组件中定义出来等调试好之后再更换为redux状态管理
//layout/header.tsx
import React, { useState } from "react";
import { Button, Layout, theme, Flex, Drawer, Space, Switch } from "antd";
import {
  MenuFoldOutlined,
  MenuUnfoldOutlined,
  SettingOutlined,
  CloseOutlined,
  CheckOutlined,
} from "@ant-design/icons";
import { useAppDispatch } from "@/hooks/UseGlobal.hooks";
import { setCollapsed } from "@/store/reducers/global";
const { Header } = Layout;
interface AppSiderProps {
  collapsed: boolean;
}
const colors = [
  {
    name: "拂晓蓝",
    value: "#1677ff",
  },
  {
    name: "薄暮",
    value: "#5f80c7",
  },
  {
    name: "日暮",
    value: "#faad14",
  },
  {
    name: "火山",
    value: "#f5686f",
  },
  {
    name: "酱紫",
    value: "#9266f9",
  },
  {
    name: "极光绿",
    value: "#3c9",
  },
  {
    name: "极客蓝",
    value: "#32a2d4",
  },
];

const AppHeader: React.FC<AppSiderProps> = ({ collapsed }) => {
  const {
    token: { colorBgContainer },
  } = theme.useToken();

  //抽屉弹出
  const [showPoup, setShowPoup] = useState(false);
  const [curColor, setCurColor] = useState("#1677ff");
  const [isSelectdDark, setIsSelectdDark] = useState(false);
  const [isSelectdRadius, setIsSelectdRadius] = useState(false);
  const onChangeDark = (checked: boolean) => {
    setIsSelectdDark(checked);
  };
  const onChangeRadius = (checked: boolean) => {
    setIsSelectdRadius(checked);
  };
  const handlesetCurColor = (color: string) => {
    setCurColor(color);
  };
  const ColorItem: React.FC<{ color: string; isSelectd: boolean }> = ({
    color,
    isSelectd,
  }) => {
    if (isSelectd) {
      return (
        <div
          className="w-6 h-6 flex justify-center items-center  rounded cursor-pointer items"
          style={{ background: color }}
        >
          <CheckOutlined style={{ color: "#fff" }} />
        </div>
      );
    } else {
      return (
        <div
          className="w-6 h-6 flex justify-center items-center  rounded cursor-pointer items"
          style={{ background: color }}
          onClick={() => handlesetCurColor(color)}
        ></div>
      );
    }
  };
  const dispatch = useAppDispatch();
  //收缩事件
  const handleCollapsed = () => {
    //更新全局状态  collapsed
    dispatch(setCollapsed());
  };
  //设置按钮点击事件
  const handleShowPoup = () => {
    setShowPoup(true);
  };
  const onClose = () => {
    setShowPoup(false);
  };
  return (
    <Header style={{ padding: 0, background: colorBgContainer }}>
      <Flex gap="middle" justify="space-between" align="center">
        <Button
          type="text"
          icon={collapsed ? <MenuUnfoldOutlined /> : <MenuFoldOutlined />}
          style={{
            fontSize: "16px",
            width: 64,
            height: 64,
          }}
          onClick={handleCollapsed}
        />
        <Button
          type="primary"
          className="mr-4"
          icon={<SettingOutlined />}
          onClick={handleShowPoup}
        />
      </Flex>
      <Drawer
        title="设置"
        width={300}
        closeIcon={false}
        open={showPoup}
        extra={
          <Space>
            <Button
              type="text"
              onClick={onClose}
              icon={<CloseOutlined />}
            ></Button>
          </Space>
        }
      >
        <div className="mb-3 font-bold">主题颜色</div>
        <Flex gap="middle" justify="space-between" align="center">
          {colors.map((item) => (
            <ColorItem
              key={item.value}
              color={item.value}
              isSelectd={curColor == item.value}
            />
          ))}
        </Flex>
        <div className="mb-3 mt-3 font-bold">主题模式</div>
        <div className="flex justify-between">
          <div className="flex gap-2">
            <span>开启暗黑模式</span>
          </div>
          <div className="flex gap-2">
            <Switch defaultChecked checked={isSelectdDark} onChange={onChangeDark} />
          </div>

        </div>
        <div className="flex justify-between">
          <div className="flex gap-2">
            <span>开启圆角主题</span>
          </div>
          <div className="flex gap-2">
            <Switch defaultChecked checked={isSelectdRadius} onChange={onChangeRadius} />
          </div>

        </div>
      </Drawer>
    </Header>
  );
};
export default AppHeader;
此时查看效果如下图,修改主题颜色、暗黑模式、圆角模式都可以得到对应的效果
改造global.ts
把三个设置项和设置drawer显隐状态抽离到之前的global.ts文件中
//store/reducers/global.ts
import { createSlice } from "@reduxjs/toolkit";
import type { RootState } from "@/store/index.ts";

// 定义初始 state 的类型
interface GlobalState {
  collapsed: boolean;//是否折叠
  showSetting: boolean;//是否显示设置
  colorPrimary: string;//主题颜色
  isDark: boolean;//是否暗黑模式
  isRadius:boolean;//是否圆角
}
// 使用该类型定义初始 state
const initialState: GlobalState = {
  collapsed: false,
  showSetting: false,
  colorPrimary: "#1677ff",
  isDark: false,
  isRadius:true
};
// 创建 slice
export const globalSlice = createSlice({
  name: "global", // 名称
  initialState, // 初始 state
  reducers: {
    // 定义 reducer 函数,该函数接受 state 和 action 作为参数
    setCollapsed: (state) => {
      // 更新 state
      state.collapsed = !state.collapsed;
    },
    setShowSetting: (state,action) => {
      // 更新设置状态为 action 载荷
      state.showSetting = action.payload;
    },
    setIsDark: (state) => {
      // 更新暗黑模式状态
      state.isDark = !state.isDark;
    },
    setColorPrimary: (state, action) => {
      // 更新主题颜色为 action 载荷
      state.colorPrimary = action.payload;
    },
    setIsRadius: (state) => {
      // 更新圆角状态
      state.isRadius = !state.isRadius;
    },
  },
});

// 为每个 case reducer 函数生成 Action creators
export const { setCollapsed, setIsDark, setColorPrimary,setShowSetting,setIsRadius } =
  globalSlice.actions;
// selectors 等其他代码可以使用导入的 `RootState` 类型
export const selectCollapsed = (state: RootState) => state.global.collapsed;
export const selectShowSetting = (state: RootState) => state.global.showSetting;
export const selectColorPrimary = (state: RootState) =>
  state.global.colorPrimary;
export const selectIsDark = (state: RootState) => state.global.isDark;
export const selectIsRadius = (state: RootState) => state.global.isRadius;
// 导出 reducer
export default globalSlice.reducer;
添加设置项组件
把设置项drawer的代码抽离到单独的组件中,在layout文件夹下新增setting.tsx
//layout/setting.tsx
import React, { useState } from "react";
import { Button, Flex, Drawer, Space, Switch } from "antd";
import { CloseOutlined, CheckOutlined } from "@ant-design/icons";
const colors = [
  {
    name: "拂晓蓝",
    value: "#1677ff",
  },
  {
    name: "薄暮",
    value: "#5f80c7",
  },
  {
    name: "日暮",
    value: "#faad14",
  },
  {
    name: "火山",
    value: "#f5686f",
  },
  {
    name: "酱紫",
    value: "#9266f9",
  },
  {
    name: "极光绿",
    value: "#3c9",
  },
  {
    name: "极客蓝",
    value: "#32a2d4",
  },
];
const Setting = () => {
  const [showPoup, setShowPoup] = useState(false);
  const [curColor, setCurColor] = useState("#1677ff");
  const [isSelectdDark, setIsSelectdDark] = useState(false);
  const [isSelectdRadius, setIsSelectdRadius] = useState(false);
  const onChangeDark = (checked: boolean) => {
    setIsSelectdDark(checked);
  };
  const onChangeRadius = (checked: boolean) => {
    setIsSelectdRadius(checked);
  };
  const handlesetCurColor = (color: string) => {
    setCurColor(color);
  };

  const onClose = () => {
    setShowPoup(false);
  };
  const ColorItem: React.FC<{ color: string; isSelectd: boolean }> = ({
    color,
    isSelectd,
  }) => {
    if (isSelectd) {
      return (
        <div
          className="w-6 h-6 flex justify-center items-center  rounded cursor-pointer items"
          style={{ background: color }}
        >
          <CheckOutlined style={{ color: "#fff" }} />
        </div>
      );
    } else {
      return (
        <div
          className="w-6 h-6 flex justify-center items-center  rounded cursor-pointer items"
          style={{ background: color }}
          onClick={() => handlesetCurColor(color)}
        ></div>
      );
    }
  };
  return (
    <Drawer
      title="设置"
      width={300}
      closeIcon={false}
      open={showPoup}
      extra={
        <Space>
          <Button
            type="text"
            onClick={onClose}
            icon={<CloseOutlined />}
          ></Button>
        </Space>
      }
    >
      <div className="mb-3 font-bold">主题颜色</div>
      <Flex gap="middle" justify="space-between" align="center">
        {colors.map((item) => (
          <ColorItem
            key={item.value}
            color={item.value}
            isSelectd={curColor == item.value}
          />
        ))}
      </Flex>
      <div className="mb-3 mt-3 font-bold">主题模式</div>
      <div className="flex justify-between mb-3">
        <div className="flex gap-2">
          <span>开启暗黑模式</span>
        </div>
        <div className="flex gap-2">
          <Switch
            defaultChecked
            checked={isSelectdDark}
            onChange={onChangeDark}
          />
        </div>
      </div>
      <div className="flex justify-between">
        <div className="flex gap-2">
          <span>开启圆角主题</span>
        </div>
        <div className="flex gap-2">
          <Switch
            defaultChecked
            checked={isSelectdRadius}
            onChange={onChangeRadius}
          />
        </div>
      </div>
    </Drawer>
  );
};

export default Setting;
组件中应用redux状态
头部组件
//laout/header.tsx
import React, { useState } from "react";
import { Button, Flex, Drawer, Space, Switch } from "antd";
import { CloseOutlined, CheckOutlined } from "@ant-design/icons";
const colors = [
  {
    name: "拂晓蓝",
    value: "#1677ff",
  },
  {
    name: "薄暮",
    value: "#5f80c7",
  },
  {
    name: "日暮",
    value: "#faad14",
  },
  {
    name: "火山",
    value: "#f5686f",
  },
  {
    name: "酱紫",
    value: "#9266f9",
  },
  {
    name: "极光绿",
    value: "#3c9",
  },
  {
    name: "极客蓝",
    value: "#32a2d4",
  },
];
const Setting = () => {
  const [showPoup, setShowPoup] = useState(false);
  const [curColor, setCurColor] = useState("#1677ff");
  const [isSelectdDark, setIsSelectdDark] = useState(false);
  const [isSelectdRadius, setIsSelectdRadius] = useState(false);
  const onChangeDark = (checked: boolean) => {
    setIsSelectdDark(checked);
  };
  const onChangeRadius = (checked: boolean) => {
    setIsSelectdRadius(checked);
  };
  const handlesetCurColor = (color: string) => {
    setCurColor(color);
  };

  const onClose = () => {
    setShowPoup(false);
  };
  const ColorItem: React.FC<{ color: string; isSelectd: boolean }> = ({
    color,
    isSelectd,
  }) => {
    if (isSelectd) {
      return (
        <div
          className="w-6 h-6 flex justify-center items-center  rounded cursor-pointer items"
          style={{ background: color }}
        >
          <CheckOutlined style={{ color: "#fff" }} />
        </div>
      );
    } else {
      return (
        <div
          className="w-6 h-6 flex justify-center items-center  rounded cursor-pointer items"
          style={{ background: color }}
          onClick={() => handlesetCurColor(color)}
        ></div>
      );
    }
  };
  return (
    <Drawer
      title="设置"
      width={300}
      closeIcon={false}
      open={showPoup}
      extra={
        <Space>
          <Button
            type="text"
            onClick={onClose}
            icon={<CloseOutlined />}
          ></Button>
        </Space>
      }
    >
      <div className="mb-3 font-bold">主题颜色</div>
      <Flex gap="middle" justify="space-between" align="center">
        {colors.map((item) => (
          <ColorItem
            key={item.value}
            color={item.value}
            isSelectd={curColor == item.value}
          />
        ))}
      </Flex>
      <div className="mb-3 mt-3 font-bold">主题模式</div>
      <div className="flex justify-between mb-3">
        <div className="flex gap-2">
          <span>开启暗黑模式</span>
        </div>
        <div className="flex gap-2">
          <Switch
            defaultChecked
            checked={isSelectdDark}
            onChange={onChangeDark}
          />
        </div>
      </div>
      <div className="flex justify-between">
        <div className="flex gap-2">
          <span>开启圆角主题</span>
        </div>
        <div className="flex gap-2">
          <Switch
            defaultChecked
            checked={isSelectdRadius}
            onChange={onChangeRadius}
          />
        </div>
      </div>
    </Drawer>
  );
};

export default Setting;
设置组件
//layout/setting.tsx
import React from "react";
import { Button, Flex, Drawer, Space, Switch } from "antd";
import { CloseOutlined, CheckOutlined } from "@ant-design/icons";
import { useAppSelector,useAppDispatch } from "@/hooks/UseGlobal.hooks";
import {  selectColorPrimary,selectIsDark,selectIsRadius,setIsDark, setColorPrimary,setShowSetting,setIsRadius } from "@/store/reducers/global";
const colors = [
  {
    name: "拂晓蓝",
    value: "#1677ff",
  },
  {
    name: "薄暮",
    value: "#5f80c7",
  },
  {
    name: "日暮",
    value: "#faad14",
  },
  {
    name: "火山",
    value: "#f5686f",
  },
  {
    name: "酱紫",
    value: "#9266f9",
  },
  {
    name: "极光绿",
    value: "#3c9",
  },
  {
    name: "极客蓝",
    value: "#32a2d4",
  },
];
type AppSiderProps = {
  showPoup: boolean;
}
const Setting:React.FC<AppSiderProps> = ({showPoup}) => {
  const curColor = useAppSelector(selectColorPrimary);
  const isSelectdDark = useAppSelector(selectIsDark);
  const isSelectdRadius = useAppSelector(selectIsRadius);
  const dispatch = useAppDispatch();
  const onChangeDark = () => {
    dispatch(setIsDark());
  };
  const onChangeRadius = () => {
    dispatch(setIsRadius());
  };
  const handlesetCurColor = (color: string) => {
    dispatch(setColorPrimary(color));
  };

  const onClose = () => {
    dispatch(setShowSetting(false));
  };
  const ColorItem: React.FC<{ color: string; isSelectd: boolean }> = ({
    color,
    isSelectd,
  }) => {
    if (isSelectd) {
      return (
        <div
          className="w-6 h-6 flex justify-center items-center  rounded cursor-pointer items"
          style={{ background: color }}
        >
          <CheckOutlined style={{ color: "#fff" }} />
        </div>
      );
    } else {
      return (
        <div
          className="w-6 h-6 flex justify-center items-center  rounded cursor-pointer items"
          style={{ background: color }}
          onClick={() => handlesetCurColor(color)}
        ></div>
      );
    }
  };
  return (
    <Drawer
      title="设置"
      width={300}
      closeIcon={false}
      open={showPoup}
      extra={
        <Space>
          <Button
            type="text"
            onClick={onClose}
            icon={<CloseOutlined />}
          ></Button>
        </Space>
      }
    >
      <div className="mb-3 font-bold">主题颜色</div>
      <Flex gap="middle" justify="space-between" align="center">
        {colors.map((item) => (
          <ColorItem
            key={item.value}
            color={item.value}
            isSelectd={curColor == item.value}
          />
        ))}
      </Flex>
      <div className="mb-3 mt-3 font-bold">主题模式</div>
      <div className="flex justify-between mb-3">
        <div className="flex gap-2">
          <span>开启暗黑模式</span>
        </div>
        <div className="flex gap-2">
          <Switch
            defaultChecked
            checked={isSelectdDark}
            onChange={onChangeDark}
          />
        </div>
      </div>
      <div className="flex justify-between">
        <div className="flex gap-2">
          <span>开启圆角主题</span>
        </div>
        <div className="flex gap-2">
          <Switch
            defaultChecked
            checked={isSelectdRadius}
            onChange={onChangeRadius}
          />
        </div>
      </div>
    </Drawer>
  );
};

export default Setting;
本地存储
设置了不同的主题和是否选择暗黑模式、圆角模式后我们希望使用者在下次进入到系统时候能继续使用之前的选择,这时我们需要对global.ts的状态管理做一些改造,把状态存储到本地存储中
//store/reducers/global.ts
import { createSlice } from "@reduxjs/toolkit";
import type { RootState } from "@/store/index.ts";

// 定义初始 state 的类型
interface GlobalState {
  collapsed: boolean; //是否折叠
  showSetting: boolean; //是否显示设置
  colorPrimary: string; //主题颜色
  isDark: boolean; //是否暗黑模式
  isRadius: boolean; //是否圆角
}
const getLocal = (type:string) => {
  //获取本地存储
  return localStorage.getItem(type);
};
// 使用该类型定义初始 state
const initialState: GlobalState = {
  collapsed: getLocal("collapsed")==='true' || false,
  showSetting: false,
  colorPrimary: getLocal("colorPrimary") || "#1677ff",
  isDark: getLocal("isDark") ==='true' || false,
  isRadius: getLocal("isRadius")!=='false' || true,
};
const setLocal = (type:string,value: string | boolean)=>{
  if (typeof value === 'string') {
    localStorage.setItem(type, value);
} else {
    // 可以选择忽略非字符串值,或者进行转换处理
    // 例如,将布尔值转换为字符串
    localStorage.setItem(type, value.toString());
}
}
// 创建 slice
export const globalSlice = createSlice({
  name: "global", // 名称
  initialState, // 初始 state
  reducers: {
    // 定义 reducer 函数,该函数接受 state 和 action 作为参数
    setCollapsed: (state) => {
      // 更新 state
      state.collapsed = !state.collapsed;
      setLocal("collapsed",state.collapsed);
    },
    setShowSetting: (state, action) => {
      // 更新设置状态为 action 载荷
      state.showSetting = action.payload;
    },
    setIsDark: (state) => {
      // 更新暗黑模式状态
      state.isDark = !state.isDark;
      setLocal("isDark",state.isDark);
    },
    setColorPrimary: (state, action) => {
      // 更新主题颜色为 action 载荷
      state.colorPrimary = action.payload;
      setLocal('colorPrimary',action.payload);
    },
    setIsRadius: (state) => {
      // 更新圆角状态
      state.isRadius = !state.isRadius;
      setLocal("isRadius",state.isRadius);
    },
  },
});

// 为每个 case reducer 函数生成 Action creators
export const {
  setCollapsed,
  setIsDark,
  setColorPrimary,
  setShowSetting,
  setIsRadius,
} = globalSlice.actions;
// selectors 等其他代码可以使用导入的 `RootState` 类型
export const selectCollapsed = (state: RootState) => state.global.collapsed;
export const selectShowSetting = (state: RootState) => state.global.showSetting;
export const selectColorPrimary = (state: RootState) =>
  state.global.colorPrimary;
export const selectIsDark = (state: RootState) => state.global.isDark;
export const selectIsRadius = (state: RootState) => state.global.isRadius;
// 导出 reducer
export default globalSlice.reducer;
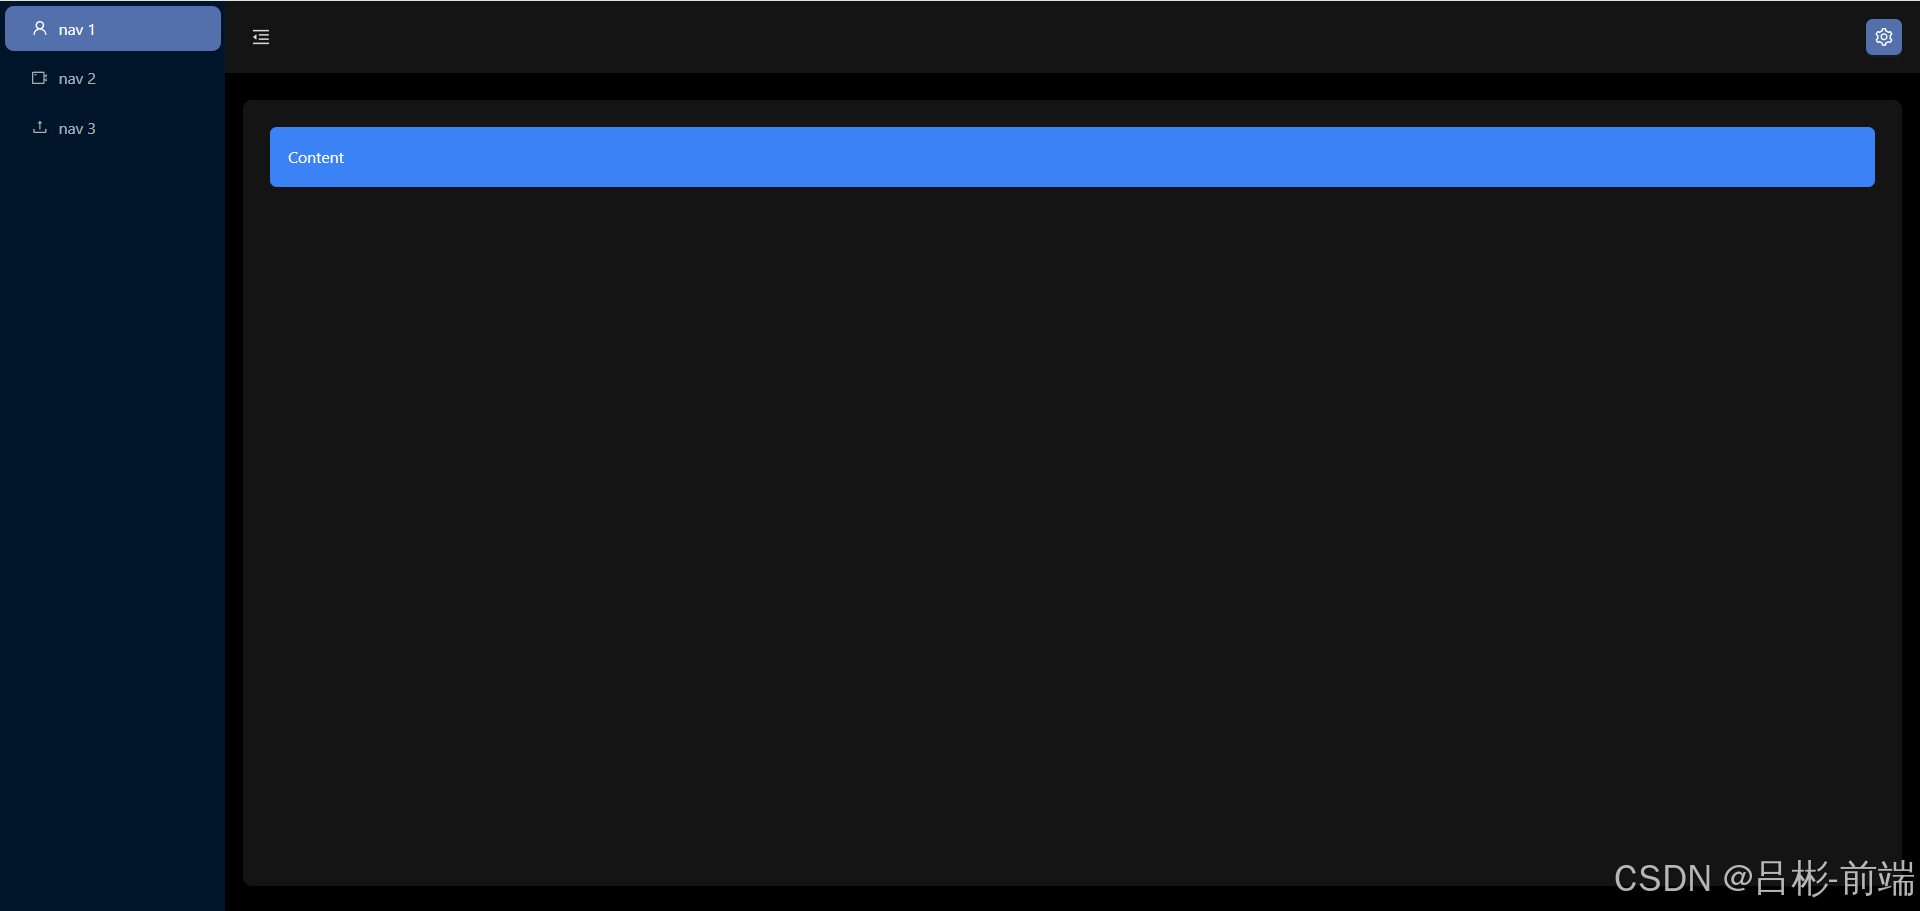
此时我们选择不同的设置
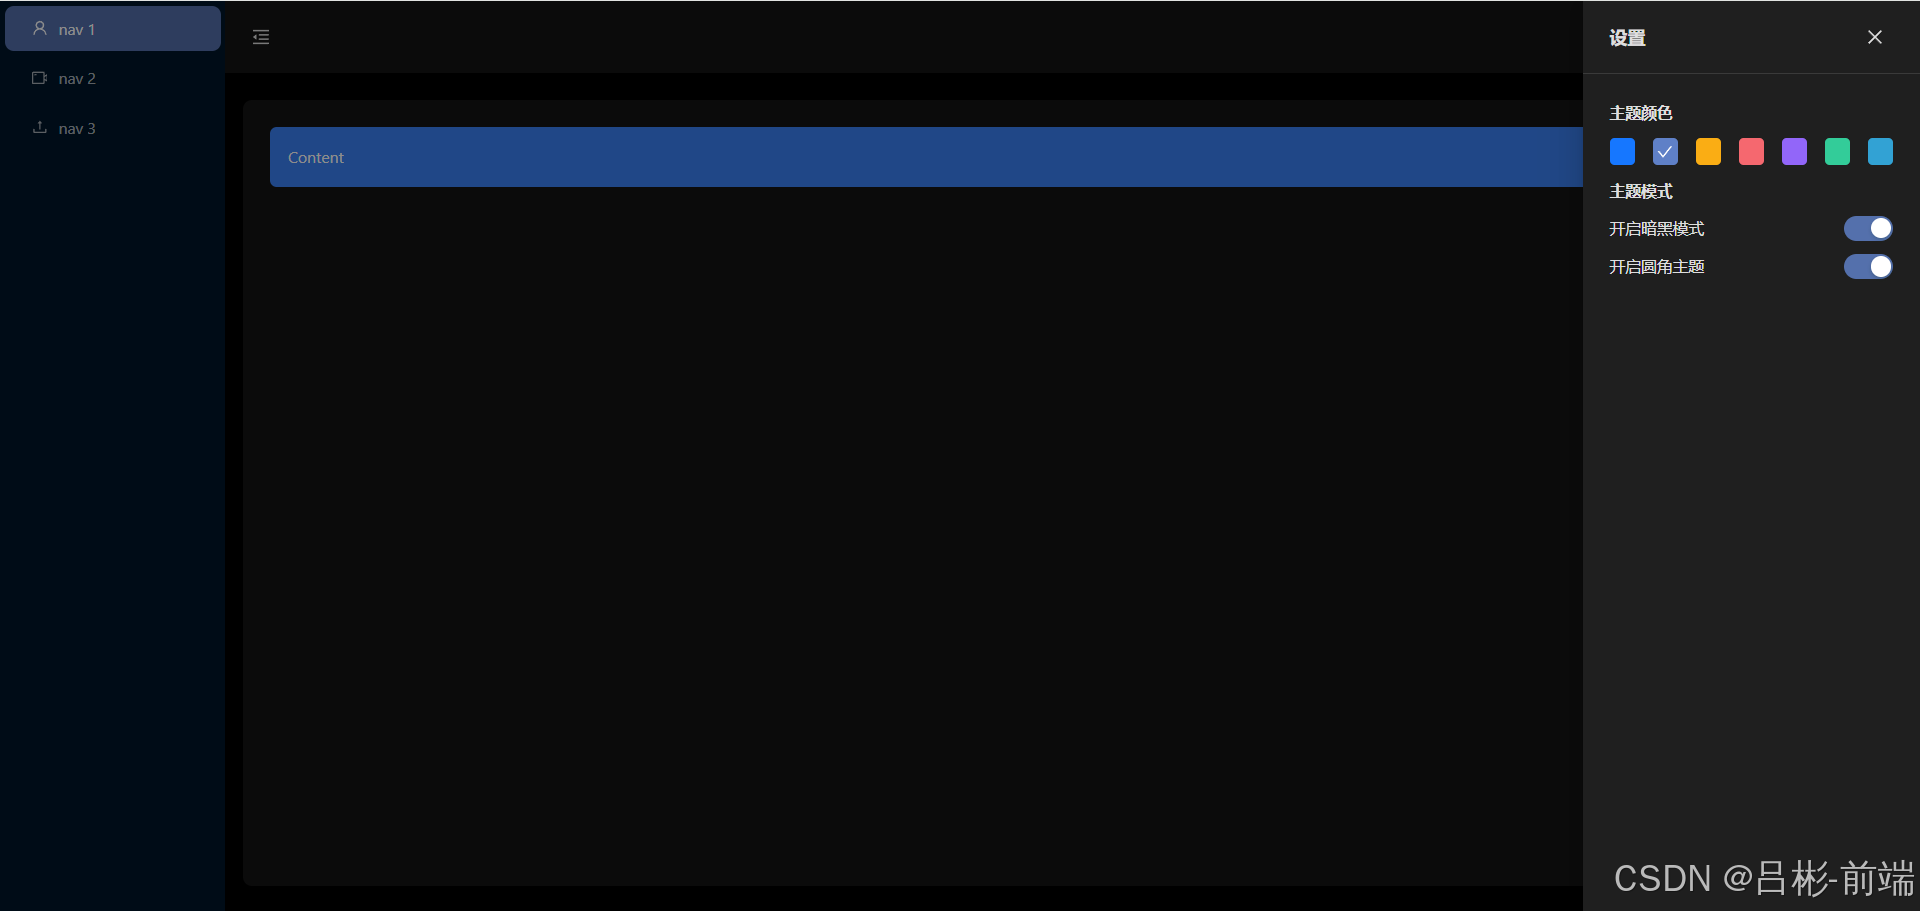
刷新页面后可以看到就是之前设置好的配置
总结
到此我们对全局配置的一个大概的工作完成了,当然实际项目和需求中可能会有不同或更多的配置按照这个思路可以添加不同的配置,当然如果已经很熟练的使用react+redux可以直接省略掉很多中间的步骤 ,比如直接新建setting.tsx子组件写逻辑,和直接在global.ts中添加状态管理及方法在组件中直接应用。
后续
本篇文章为项目使用redux配合本地存储做了全局设置,代码已经同步到了gitee仓库,下一篇会使用axios和mock来设置左侧菜单
