模块系统与命名空间
概念
模块化开发是目前最流行的组织代码方式,可以有效的解决代码之间的冲突与代码之间的依赖关系,模块系统一般视为“外部模块”,而命名空间一般视为“内部模块”
模块系统
TS中的模块化开发跟ES6中的模块化开发并没有太多区别,像ES6中的导入、导出、别名等,TS都是支持的。
TS跟ES6模块化的区别在于TS可以把类型进行模块化导入导出操作。
这里定义两个TS文件,分别为1_demo.ts和2_demo.ts。代码如下:
// 2_demo.ts
export type A = string
// 1_demo.ts
import type { A } from './2_demo'关键字type可加可不加,一般导出类型的时候尽量加上,这样可以区分开到底是值还是类型。
TS除了支持ES6的模块化风格写法外,也支持require风格,但是使用的比较少,下面我们来了解一下。
// 2_demo.ts
type A = string
export = A
// 1_demo.ts
import A = require('./2_demo')
let a: A = 'hello'下面来了解一下什么是模块化的动态引入,正常我们import导入方式是必须在顶部进行添加的,不能在其他语句中引入,这样就不能在后续的某个时机去导入,所以TS提供了动态引入模块的写法。
// 1_demo.ts
setTimeout(() => {
  import('./2_demo').then(({ a }) => {
    console.log(a)
  })
}, 2000)
这种动态导入只支持值的导入,不支持类型的导入,这需要注意一下。
命名空间
模块化是外部组织代码的一种方式,而命名空间则是内部组织代码的一种方式。防止在一个文件中产生代码之间的冲突。
TS提供了namespace语法来实现命名空间,代码如下:
namespace Foo {
  export let a = 123
}
namespace Bar {
  export let a = 456
}
console.log(Foo.a)
console.log(Bar.a)
命名空间也是可以导出的,在另一个模块中可以导入进行使用,并且导出值和类型都是可以的。
// 2_demo.ts
export namespace Foo {
  export let a = 123
  export type A = string
  export function foo() {}
  export class B {}
}
// 1_demo.ts
import { Foo } from './2_demo'
console.log(Foo.a)
let a: Foo.A = 'hello world'.d.ts 文件和declare
详情可参考:ts的.d.ts和declare究竟是干嘛用的_ts declare-CSDN博客
.d.ts
- 在 TypeScript 中以 .d.ts 为后缀的文件,我们称之为 TypeScript 声明文件。
- 主要作用是描述 JavaScript 模块内所有导出接口的类型信息,即用来声明变量,模块,type,interface等等
- 在.d.ts声明变量或者模块等东西之后,在其他地方可以不用import导入这些东西就可以直接用,而且有语法提示
- 但是也不是说创建了.d.ts文件,里面声明的东西就能生效了,毕竟归根到底也是.ts文件,需要进行预编译,所以需要在tsconfig.json文件里面的include数组里面添加这个文件,在该数组里可以不用写.d.ts文件的绝对路径,可以通过glob通配符,匹配这个文件所在的文件夹或者是“祖宗级别”文件夹
支持的glob通配符有:
*匹配0或多个字符(不包括目录分隔符)
?匹配一个任意字符(不包括目录分隔符)
**/递归匹配任意子目录
"include": [
    "src/**/*.ts",
    "src/**/*.tsx",
    "src/**/*.vue",
    "tests/**/*.ts",
    "tests/**/*.tsx"
  ],
更多详情可参考:tsconfig.json · TypeScript中文网 · TypeScript——JavaScript的超集
declare
- declare就是告诉TS编译器你担保这些变量和模块存在,并声明了相应类型,编译的时候不需要提示错误
- .d.ts 文件中的顶级声明必须以 "declare" 或 "export" 修饰符开头。
- 通过declare声明的类型或者变量或者模块,在include包含的文件范围内,都可以直接引用而不用去import或者import type相应的变量或者类型
声明一个类型
declare type Asd {
    name: string;
}
在include包含的文件范围内可以直接使用Asd这个type
声明一个模块
declare module '*.css';
declare module '*.less';
declare module '*.png';
在编辑ts文件的时候,如果你想导入一个.css/.less/.png格式的文件,如果没有经过declare的话是会提示语法错误的
声明一个变量
这个什么情况下会用到呢?假如我在项目中引入了一个sdk,这个sdk(我们以微信的sdk为例)里面有一些全局的对象(比如wx),但是如果不经过任何的声明,在ts文件里面直接用wx.config()的话,肯定会报错
declare namespace API {
    interface ResponseList {}
}
声明一个作用域
declare namespace API {
    interface ResponseList {}
}
声明完之后在其他地方的ts就可以直接API.ResponseList引用到这个接口类型
注意
.d.ts文件顶级声明declare最好不要跟export同级使用,不然在其他ts引用这个.d.ts的内容的时候,就需要手动import导入了
在.d.ts文件里如果顶级声明不用export的话,declare和直接写type、interface效果是一样的,在其他地方都可以直接引用
declare type Ass = {
    a: string;
}
type Bss = {
    b: string;
};
可以直接使用Ass和Bss作为某个变量的类型
@types和DefinitelyTyped仓库
DefinitelyTyped 是一个高质量的 TypeScript 类型定义的仓库
通过 @types 方式来安装常见的第三方 JavaScript 库的声明适配模块
参考地址:GitHub - DefinitelyTyped/DefinitelyTyped: The repository for high quality TypeScript type definitions.
那么这个仓库起到什么作用呢?在上面讲到,如果一个JS模块想要适配TS项目,那么需要有d.ts声明文件。那么如果这个JS模块没有提供声明文件的话,就可以通过DefinitelyTyped仓库下载第三方的声明文件来进行适配。
这个仓库会包含大部分常见JS库的声明文件,只需要下载就可以生效。下面我们举例,下载一个jquery库,并在TS项目引入jquery。
// 1_demo.ts
import $ from 'jquery // error,提示缺少声明文件jquery库并没有默认提供d.ts声明文件,所以导入模块的时候肯定是要报错的。鼠标移入到错误上,提示的信息就有让我们去安装对应的第三方声明文件,即:npm i --save-dev @types/jquery
那么我们按照提示进行安装后,就会解决适配问题了,错误信息不再提示,并且jquery库的类型系统也会生效。
当然并不是所有的JS模块都需要下载第三方的@types,因为有些模块默认就会代码d.ts的声明文件,例如moment这个模块,安装好后,就会自带moment.d.ts文件。
lib.d.ts和global.d.ts
lib.d.ts
当安装 TypeScript 时,会顺带安装一个 lib.d.ts 声明文件
这个文件包含 JavaScript 运行时以及 DOM 中存在各种常见的环境声明
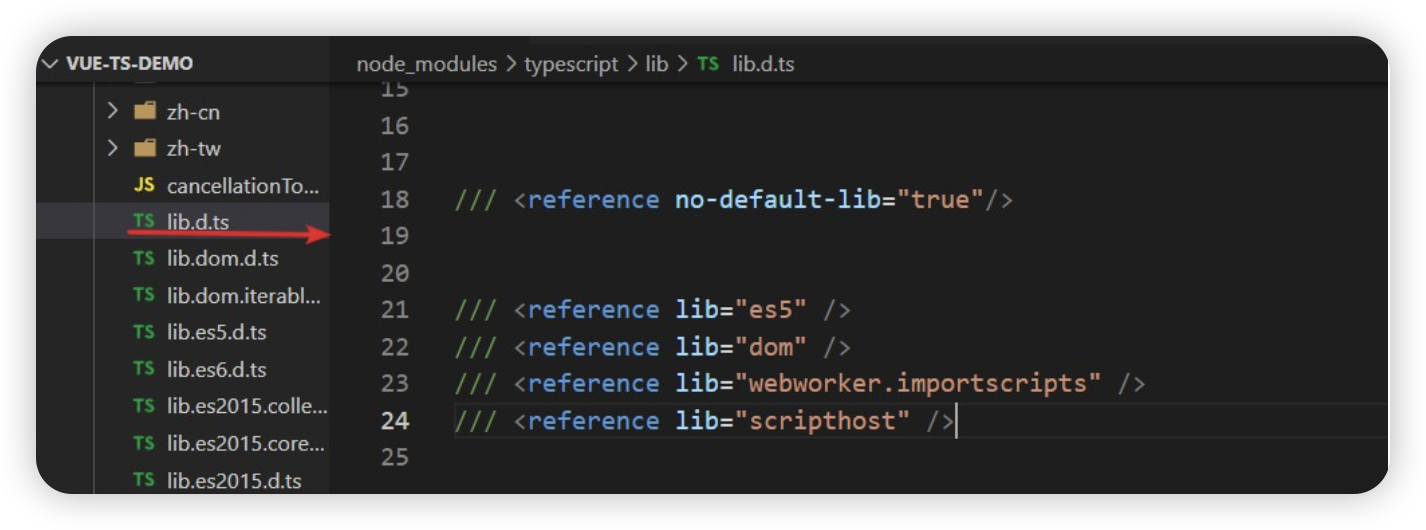
当我们使用一些原生JS操作的时候,也会拥有类型,代码如下:
let body: HTMLBodyElement | null = document.querySelector('body')
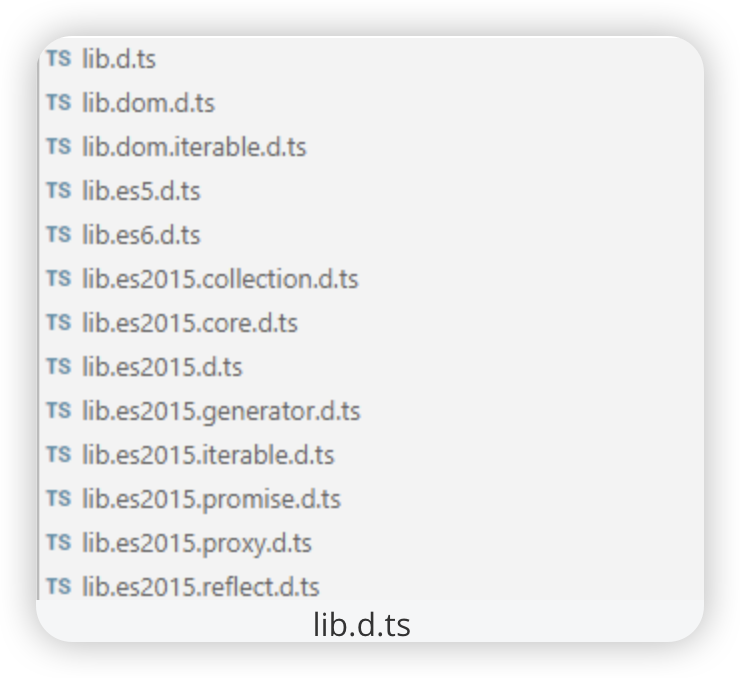
let date: Date = new Date()这里的HTMLBodyElement和Date都是TypeScript下自带的一些内置类型,这些类型都存放在lib这个文件夹下。
global.d.ts
根目录下新建 global.d.ts 文件,在这里可以扩展一些全局的类型
有时候我们也想扩展像lib.d.ts这样的声明类型,可以在全局下进行使用,所以TS给我们提供了global.d.ts文件使用方式,这个文件中定义的类型都是可以直接在全局下进行使用的,不需要模块导入。
// global.d.ts
type A = string
// 1_demo.ts
let a: A = 'hello' // ✔
let b: A = 123 // ✖tsconfig.json文件
这个配置文件主要使用compilerOptions: {}进行TS的编译与转化。当然还有一些其他外层可配置的字段,如下:
{
	"compilerOptions": {},     // 编译选项
  	"files": [],   // 包含在程序中的文件的允许列表
  	"extends": "", // 继承的另一个配置文件
  	"include": [], // 指定的进行编译解析
  	"exclude": [], // 指定的不进行编译解析
  	"references": [] // 项目引用,提升性能
}
其中files和include都是指定哪些文件是可以进行编译的,只不过files指定的是比较少的文件,多文件的话可以用include来进行指定,当然如果要跳过哪些文件不进行编译,就可以利用exclude字段。
extends可以通过继承的方式去加载另一个配置文件,使用的情况并不是很多。references可以把编译分成一个一个独立的模块,这样是有助于性能的提升。这些选项都是顶层的,用的最多的还是compilerOptions字段。
compilerOptions
通过tsc --init会自动生成tsconfig.json文件,这个文件会默认带有6个选项配置,如下:
{
  "compilerOptions": {
    "target": "es2016",         // 指定编译成的是哪个版本的js
      "module": "commonjs",       // 指定要使用的模块化的规范
      "strict": true,             // 所有严格检查的总开关
      "esModuleInterop": true,    // 兼容JS模块无default的导入
      "skipLibCheck": true,       // 跳过所有.d.ts文件的类型检查
      "forceConsistentCasingInFileNames": true  // 引入时强制区分大小写
  }
}除了初始的这些配置外,其他的配置都用注释给注释起来了,同时tsconfig.json把配置选项做了一些分类。
- Projects -> 项目
- Language and Environment -> 语言和环境
- Modules -> 模块
- JavaScript Support -> JS的支持
- Emit -> 发射
- Interop Constraints -> 操作约束
- Type Checking -> 类型检测
- Completeness -> 完整性
在Projects分类中,incremental表示增量配置,可以对编译进行缓存,下一次编译会在上一次编译的基础上完成,这样有助于性能;tsBuildInfoFile是增量编译的目录,生成一个缓存文件。
在Language and Environment分类中表示最终文件会编译成什么样子,target就是转化成JS的版本;jsx配置是可以指定tsx转换成jsx还是js。
在Modules 分类是用于控制模块的,module表示模块化转换后的风格,是ESM还是AMD还是CJS等;moduleResolution表示查找模块的方式,如果设置值为node表示查找模块的时候会找node_modules这个文件夹,如果选择其他的方式会导致查找模块的方式发生改变。
在JavaScript Support分类中主要是对JS进行一些配置的,allowJs表示是否允许对JS文件进行编译,默认是false,当开启为true的时候,可以把JS文件进行编译输出;checkJs表示可以对JS文件进行类型检测,如果类型发生改变就会有报错警告。
在Emit 分类中表示编译输出的情况,declaration表示是否生成d.ts文件;sourceMap表示是否生成.map文件。
在Interop Constraints分类中会对使用进行操作约束,esModuleInterop表示当模块不具备export default形式的时候也可以默认导入的方式来使用;forceConsistentCasingInFileNames表示模块引入的时候是否区分大小写。
在Type Checking分类表示对类型进行检测,strict表示是否开启严格模式,对类型检测会非常的严格,一般建议开启。在严格模式下限制是非常多的,例如:当一个变量是any类型的时候也要去指定一下类型;null不能成为其他类型的子类型,所以null不能随便赋值给其他类型等等。
在Completeness 分类表示是否具备完整性检测,skipLibCheck表示是否跳过对d.ts的类型检测,默认都是跳过的。
具体解析
{
  // 编译选项
  "compilerOptions": {
    // 生成代码的语言版本:将我们写的 TS 代码编译成哪个版本的 JS 代码
    // 命令行: tsc --target es5 11-测试TS配置文件.ts
    // 指定编译成的是哪个版本的js
    "target": "es5",
    // 指定要包含在编译中的 library
    "lib": ["dom", "dom.iterable", "esnext"],
    // 允许 ts 编译器编译 js 文件
    "allowJs": true,
    // 跳过所有.d.ts类型声明文件的类型检查
    "skipLibCheck": true,
    // es 模块 互操作,屏蔽 ESModule 和 CommonJS 之间的差异(兼容JS模块无default的导入)
    "esModuleInterop": true,
    // 允许通过 import x from 'y' 即使模块没有显式指定 default 导出
    "allowSyntheticDefaultImports": true,
    // 开启严格模式
    "strict": true,
    // 对文件名称强制区分大小写
    "forceConsistentCasingInFileNames": true,
    // 为 switch 语句启用错误报告
    "noFallthroughCasesInSwitch": true,
    // 生成代码的模块化标准
    "module": "esnext",
    // 模块解析(查找)策略
    "moduleResolution": "node",
    // 允许导入扩展名为.json的模块
    "resolveJsonModule": true,
    // 是否将没有 import/export 的文件视为旧(全局而非模块化)脚本文件
    "isolatedModules": true,
    // 编译时不生成任何文件(只进行类型检查)
    "noEmit": true,
    // 指定将 JSX 编译成什么形式
    "jsx": "react-jsx"
  },
  // 指定允许 ts 处理的目录
  "include": ["src"]
}
选项式API配合TS
在选项式API中可以引入,defineComponent方法,这个方法可以对选项式API进行自动类型推断。并且需要在<script>标签上明确指定lang="ts"这个属性。
基本用法
<template>
  <div class="app">
    <h3>选项式API-TS</h3>
    <p>{{count}} -- {{doubeCount}}</p>
    <button @click="handleClick(4)">点击</button>
  </div>
</template>

<script lang='ts'>
import { defineComponent } from "vue";

type Count = number | string

interface List {
  username: string,
  password: string
}

export default defineComponent({
  data() {
    return {
      count: 0 as Count,
      list: [] as List[]
    };
  },
  mounted() {
    this.count = 2;
    this.list.push({
      username: 'zs',
      password: '123456'
    })
  },
  computed: {
    doubeCount(): number | string {
      // 采用类型保护
      if(typeof this.count === 'number'){
        return this.count * 2
      } else {
        return this.count
      }
    }
  },
  methods: {
    handleClick(n: number){
      // 采用类型保护
      if(typeof this.count === 'number'){
        this.count += n
      } else {
      }
    }
  }
});
</script>
在选项式API中可以利用类型断言的方式给响应式数据进行类型注解。
<script lang="ts">
import { defineComponent } from 'vue'
type Count = number | string;
interface List {
  username: string
  age: number
}
export default defineComponent({
  data(){
    return {
      count: 0 as Count,
      list: [] as List[]
    }
  }
});
</script>
像计算属性、方法等功能就可以正常配合TS的类型系统进行使用就好,如果是多个类型可以通过类型保护的方式进行控制,代码如下:
<script lang="ts">
import { defineComponent } from 'vue'
export default defineComponent({
  ...
  computed: {
    doubleCount(): number|string{
      if(typeof this.count === 'number'){
        return this.count * 2;
      }
      else{
        return this.count;
      }
    }
  },
  methods: {
    handleClick(n: number){
      if(typeof this.count === 'number'){
        this.count += n;
      }
    }
  }
});
</script>
组件通讯中使用
主要利用的方案是,props + PropType模式,首先props属性可以直接采用Vue的方式来完成TS的类型注解。
父传子
App.vue
<template>
  <div class="app">
    <h4>选项式API-TS--父组件</h4>
    <hr>
    <Son :count="count" :list="list" />
  </div>
</template>

<script lang='ts'>
import { defineComponent } from "vue";
import Son from '@/components/Son.vue'

export default defineComponent({
  components: {
    Son
  },
  data() {
    return {
      count: 5,
      list: [{
        username: 'zs',
        age: 21
      }]
    };
  },
});
</script>
子组件:
<template>
  <div class="app">
    <h4>子组件</h4>
    <p>{{count}}</p>
  </div>
</template>

<script lang='ts'>
import { defineComponent } from "vue";
import type { PropType } from 'vue'

interface List {
  username: string,
  age: number
}

export default defineComponent({
  props: {
    count: [Number, String],
    list: Object as PropType<List[]>
  },
});
</script>
子传父
App.vue
<template>
  <div class="app">
    <h4>选项式API-TS--父组件</h4>
    <hr>
    <Son @getData="getData" />
  </div>
</template>

<script lang='ts'>
import { defineComponent } from "vue";
import Son from '@/components/Son.vue'

export default defineComponent({
  components: {
    Son
  },
  data() {
    return {
    };
  },
  methods: {
    getData(payload: string){
      console.log(payload);
    }
  }
});
</script>
子组件:
<template>
  <div class="app">
    <h4>子组件</h4>
    <p>{{count}}</p>
  </div>
</template>

<script lang='ts'>
import { defineComponent } from "vue";

export default defineComponent({
  data() {
    return {
    };
  },
  // emits: ['getData'],
  emits: { // 推荐写法
    'getData'(payload: string){
      return payload.length > 0
    }
  },
  mounted() {
    this.$emit('getData', 'hello')
  },
});
</script>
组合式API配合TS
组合式API中使用TS,要比选项式API中使用TS会更加的简单,不需要做过多的处理,只需要利用原生TS的能力就可以。并且组合式API都具备自动类型推断的能力,代码如下:
基本使用
<template>
  <h3>组合式API</h3>
  <p>{{count}}</p>
  <p>{{dobleCount}}</p>
  <p>
    <button @click="handleClick(8)">点击</button>
  </p>
</template>

<script setup lang='ts'>
import { computed, ref } from 'vue'

// 通过 泛型 的方式进行类型注解
let count = ref<number | string>(0)
count.value = 'hi'
count.value = 12

// 复杂类型
interface List {
  username: string,
  age: number
}
let list = ref<List[]>([])
list.value.push({
  username: 'zs',
  age: 12
})

// 计算属性
let num = ref(1)
let dobleCount = computed(() => num.value * 2)

// 方法
let handleClick = (n: number) => {
  num.value += n
}
</script>
组件通讯
总结来说,TS跟组合式的配合要比跟选项式的配合更加的简单,所以推荐项目采用组合式API + TS来进行开发项目。
父传子
主要利用的方案是,defineProps + 泛型模式,defineProps是组合式API中父子通信使用的主要方式,可以利用vue自带的方式进行类型注解。
App.vue
<template>
  <h3>组合式API--父组件</h3>
  <hr>
  <Son :count="count" :list="list" />
</template>

<script setup lang='ts'>
import Son from '@/components/Son.vue'

import { ref } from 'vue'

let count = ref(5)
let list = ref([{
  username: 'zs',
  age: 14
}])
</script>
子组件:
<template>
  <h4>子组件</h4>
  <p>{{count}}</p>
  <p>{{list}}</p>
</template>

<script setup lang='ts'>
import { defineProps } from 'vue'

// 第一种写法
// let props = defineProps({
//   count: [Number, String]
// })

// 2. 第二种写法--推荐
interface Props {
  count: number | string,
  list: {username: string, age: number}[]
}

defineProps<Props>()
</script>
子传父
主要利用的方案是defineEmits + 泛型的方案,跟我们的父子通信差不太多。
App.vue
<template>
  <h3>组合式API--父组件</h3>
  <hr>
  <Son @getData="getData" />
</template>

<script setup lang='ts'>
import Son from '@/components/Son.vue'

let getData = (payload: string) => {
  console.log(payload);
}
</script>
子组件:
<template>
  <h4>子组件</h4>
</template>

<script setup lang='ts'>
import { defineEmits } from 'vue'

interface Emits {
  (e: 'getData', payload:string): void
}
let emit = defineEmits<Emits>();
emit('getData', '20')
</script>
VueRouter配合TS
大多数情况下,路由都帮我们做了自动类型推断,那么路由给我们提供了很多内置的路由类型。
在路由模块中给我们内置了很多类型:
- RouteRecordRaw:路由表选项类型
- RouteMeta:扩展meta的类型
- RouteOptions:createRouter的配置类型
- RouteLocationNormalized:标准化的路由地址
- Router:router实例的类型
对于路由,其实我们并不会去关注太多,因为它已经帮我们做得差不多了
router/index.ts
import { createRouter, createWebHashHistory } from 'vue-router'
import type { RouteRecordRaw } from 'vue-router'

import HomeViewVue from '@/views/HomeView.vue'

declare module 'vue-router' {
  interface RouteMeta {
    // 是可选的
    isAdmin?: boolean,
    // 每个路由都必须声明
    requiresAuth: boolean
  }
}

const routes: Array<RouteRecordRaw> = [
  {
    path: '/',
    name: 'home',
    component: HomeViewVue,
    meta: {
      requiresAuth: true,
      isAdmin: false
    }
  }
]

const router = createRouter({
  history: createWebHashHistory(),
  routes
})

router.beforeEach((to, from, next) => {

})

export default router
demo.vue
<template>
  <h3>Home</h3>
</template>

<script setup lang='ts'>
import { useRoute, useRouter } from 'vue-router'

let router = useRouter()
let route = useRoute()

</script>RouteRecordRaw是对路由表选项类型进行设置的,可以规范路由表的类型,需要我们自己进行类型注解。
// router/index.ts
const routes: Array<RouteRecordRaw> = [
  {
    path: '/',
    name: 'home',
    component: HomeView
  }
]
我们经常要自己定义meta元信息的类型,做法如下:
declare module 'vue-router' {
  interface RouteMeta {
    // 是可选的
    isAdmin?: boolean
    // 每个路由都必须声明
    requiresAuth: boolean
  }
}
const routes: Array<RouteRecordRaw> = [
  {
    path: '/',
    name: 'home',
    component: HomeView,
    meta: { requiresAuth: true }
  }
]引入declare module 'vue-router'进行内部的合并处理,从而限定了meta原信息的类型,并且它是一种类型兼容性的方式。
RouterOptions 是createRouter的配置类型,这样在编写createRouter的时候就会自动进行类型推断。
// (alias) createRouter(options: RouterOptions): Router import createRouter
const router = createRouter({
  history: createWebHistory(process.env.BASE_URL),
  routes,
})
RouteLocationNormalized 是标准化的路由地址,在路由守卫和获取路由地址的情况下自动推断好。
// (parameter) to: RouteLocationNormalized
// (parameter) from: RouteLocationNormalized
router.beforeEach((to, from, next)=>{
});
Router 规范router实例的类型,在我们使用路由提供use函数,并产生router对象时自动推断产生。
<script setup lang="ts">
import { useRoute, useRouter } from 'vue-router';
// const router: Router
const router = useRouter();
</script>
这样当我们使用router对象的时候,会自动带有提示,并且我们不按照推断的形式进行设置属性,也会很好的给出提示错误。
包括具体方法的参数也会有类型限定,例如:router.push()传递正确的参数才可以。
总结一下路由与TS:官方提供的路由模块已经提供了大量写好的类型,一般都是自动推断好的,除非有一些值是需要我们手动指定的,需要进行类型注解,例如:routes路由表。
VueX配合TS
在安装脚手架的时候,可以选择自定义安装中,就会有状态管理的导入,这样在脚手架下就会有一个/store/index.ts这个状态管理的配置文件。
vuex中如何跟TS配合呢?实际上还是会比较复杂的,有如下步骤:
导出key:export const key;
InjectionKey<Store<StateAll>> = Symblo()
导入key:app.use(store, key)
重写useStore: export function useStore () { return baseUseStore(key)}
基本写法
main.ts
import { createApp } from 'vue'
import App from './App.vue'
import router from './router'
// 2.
++ import store, { key } from './store'

const app = createApp(App)
++ app.use(store, key)
app.use(router)
app.mount('#app')

// createApp(App).use(store).use(router).mount('#app')
store/index.ts
import { createStore, useStore as baseUseStore } from 'vuex'
import type { InjectionKey } from 'vue'
import type { Store } from 'vuex'

// 0.
export interface State {
  count: number
}

// 1.
export const key: InjectionKey<Store<State>> = Symbol()

// 3.重写 useStore 为了有类型规范提示
export function useStore () {
  return baseUseStore(key)
}

export default createStore<State>({
  state: {
    count: 1
  },
  getters: {
    doubleCount(state){
      return state.count * 2
    }
  },
  mutations: {
    add(state, payload: number) {
    }
  },
  actions: {
  },
  modules: {
  }
})
views/HomeView.vue
<template>
  <h3>Home--VueX</h3>
</template>

<script setup lang='ts'>
import { useStore } from '@/store'

let store = useStore()

store.state
</script>
分模块
在/store/index.ts中使用TS基本没有太大问题了,但是如何在子模块中也可以使用TS呢?首先了解一下vuex给我们提供的一些自带的类型。
- MutationTree -> mutation类型注解
- GetterTree -> getter类型注解
- ActionTree -> Action类型注解
- Store -> store对象的类型
- StoreOptions -> createStore参数类型
像MutationTree ,ActionTree,GetterTree 就是vuex提供的专门类型限定,同步方法、异步方法、计算属性的。所以我们可以直接去使用来控制状态管理的子模块。
具体可参考:vue3+ts的那个后台项目或者也可参考下面的这种方式
main.ts
import { createApp } from 'vue'
import App from './App.vue'
import router from './router'
// 2.
++ import store, { key } from './store'

const app = createApp(App)
++ app.use(store, key)
app.use(router)
app.mount('#app')

// createApp(App).use(store).use(router).mount('#app')
store/index.ts
import { createStore, useStore as baseUseStore } from 'vuex'
import users from './modules/users'
import type { UsersState } from './modules/users'
import type { Store } from 'vuex'
import type { InjectionKey } from 'vue'

export interface State {
  count: number
}

interface StateAll extends State {
  users: UsersState
}

export const key: InjectionKey<Store<StateAll>> = Symbol()

export function useStore () {
  return baseUseStore(key)
}

export default createStore<State>({
  state: {
    count: 1
  },
  getters: {
    doubleCount(state){
      return state.count * 2;
    }
  },
  mutations: {
    // add(state, payload: number){
    // }
  },
  actions: {
  },
  modules: {
    users
  }
})
views/HomeView.vue
<template>
  <h3>Home--VueX</h3>
</template>

<script setup lang='ts'>
import { useStore } from '@/store'

let store = useStore()

store.state
</script>
store/modules/users.ts
import type { MutationTree, ActionTree, GetterTree } from 'vuex'
import type { State } from '../index'

export interface UsersState {
  username: string
  age: number
}

const state: UsersState = {
  username: 'xiaoming',
  age: 20
};

const mutations: MutationTree<UsersState> = {
  // change(state){
  // }
};
const actions: ActionTree<UsersState, State> = {};
const getters: GetterTree<UsersState, State> = {
  doubleAge(state){
    return state.age * 2;
  }
};

export default {
  namespaced: true,
  state,
  mutations,
  actions,
  getters
}
Pinia 配合 TS
首先在main.ts中注册Pinia:
import { createPinia } from 'pinia'
const pinia = createPinia()
createApp(App).use(pinia).mount('#app')
继续在src文件夹中创建/stores/counter.js,并写入如下代码:
import { defineStore } from 'pinia'

interface Counter {
  counter: number
}

export const useCounterStore = defineStore('counterStore', {
  state: (): Counter => ({
    counter: 0
  }),
  actions: {
    add(n: number){
      this.counter += n;
    }
  }
})
通过Counter接口的类型注解后,对于counter响应式数据就具备了类型限定,add方法直接进行参数的类型注解就好。
在App.vue中引入counter.js并使用:
<template>
<button @click="handleClick">点击</button>{{ counter }}
</template>
<script setup>
import { storeToRefs } from 'pinia';
import { useCounterStore } from './stores/counter';
let counterStore = useCounterStore()
let { counter } = storeToRefs(counterStore);
let handleClick = () => {
    counterStore.add(2);
}
</script>
几乎不需要做额外的处理,Pinia会帮我们自动完成类型推断。
Element-plus配合TS
安装:npm install element-plus --save
main.ts
import { createApp } from 'vue'
import App from './App.vue'
import router from './router'
import store, { key } from './store'

++import ElementPlus from 'element-plus'
++import 'element-plus/dist/index.css'

const app = createApp(App)
app.use(ElementPlus)
app.use(store, key)
app.use(router)
app.mount('#app')

// createApp(App).use(store).use(router).mount('#app')
如果您使用 Volar,请在 tsconfig.json 中通过 compilerOptions.type 指定全局组件类型:

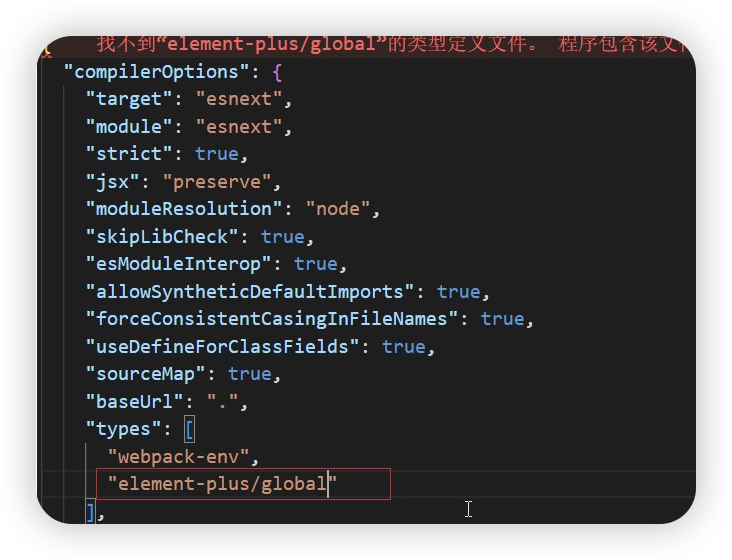
// tsconfig.json
"types": [
    "webpack-env",
    "element-plus/global"
]配置好后,当输入<的时候,就会自动带有提示组件功能,以及组件属性与属性值的提示效果。
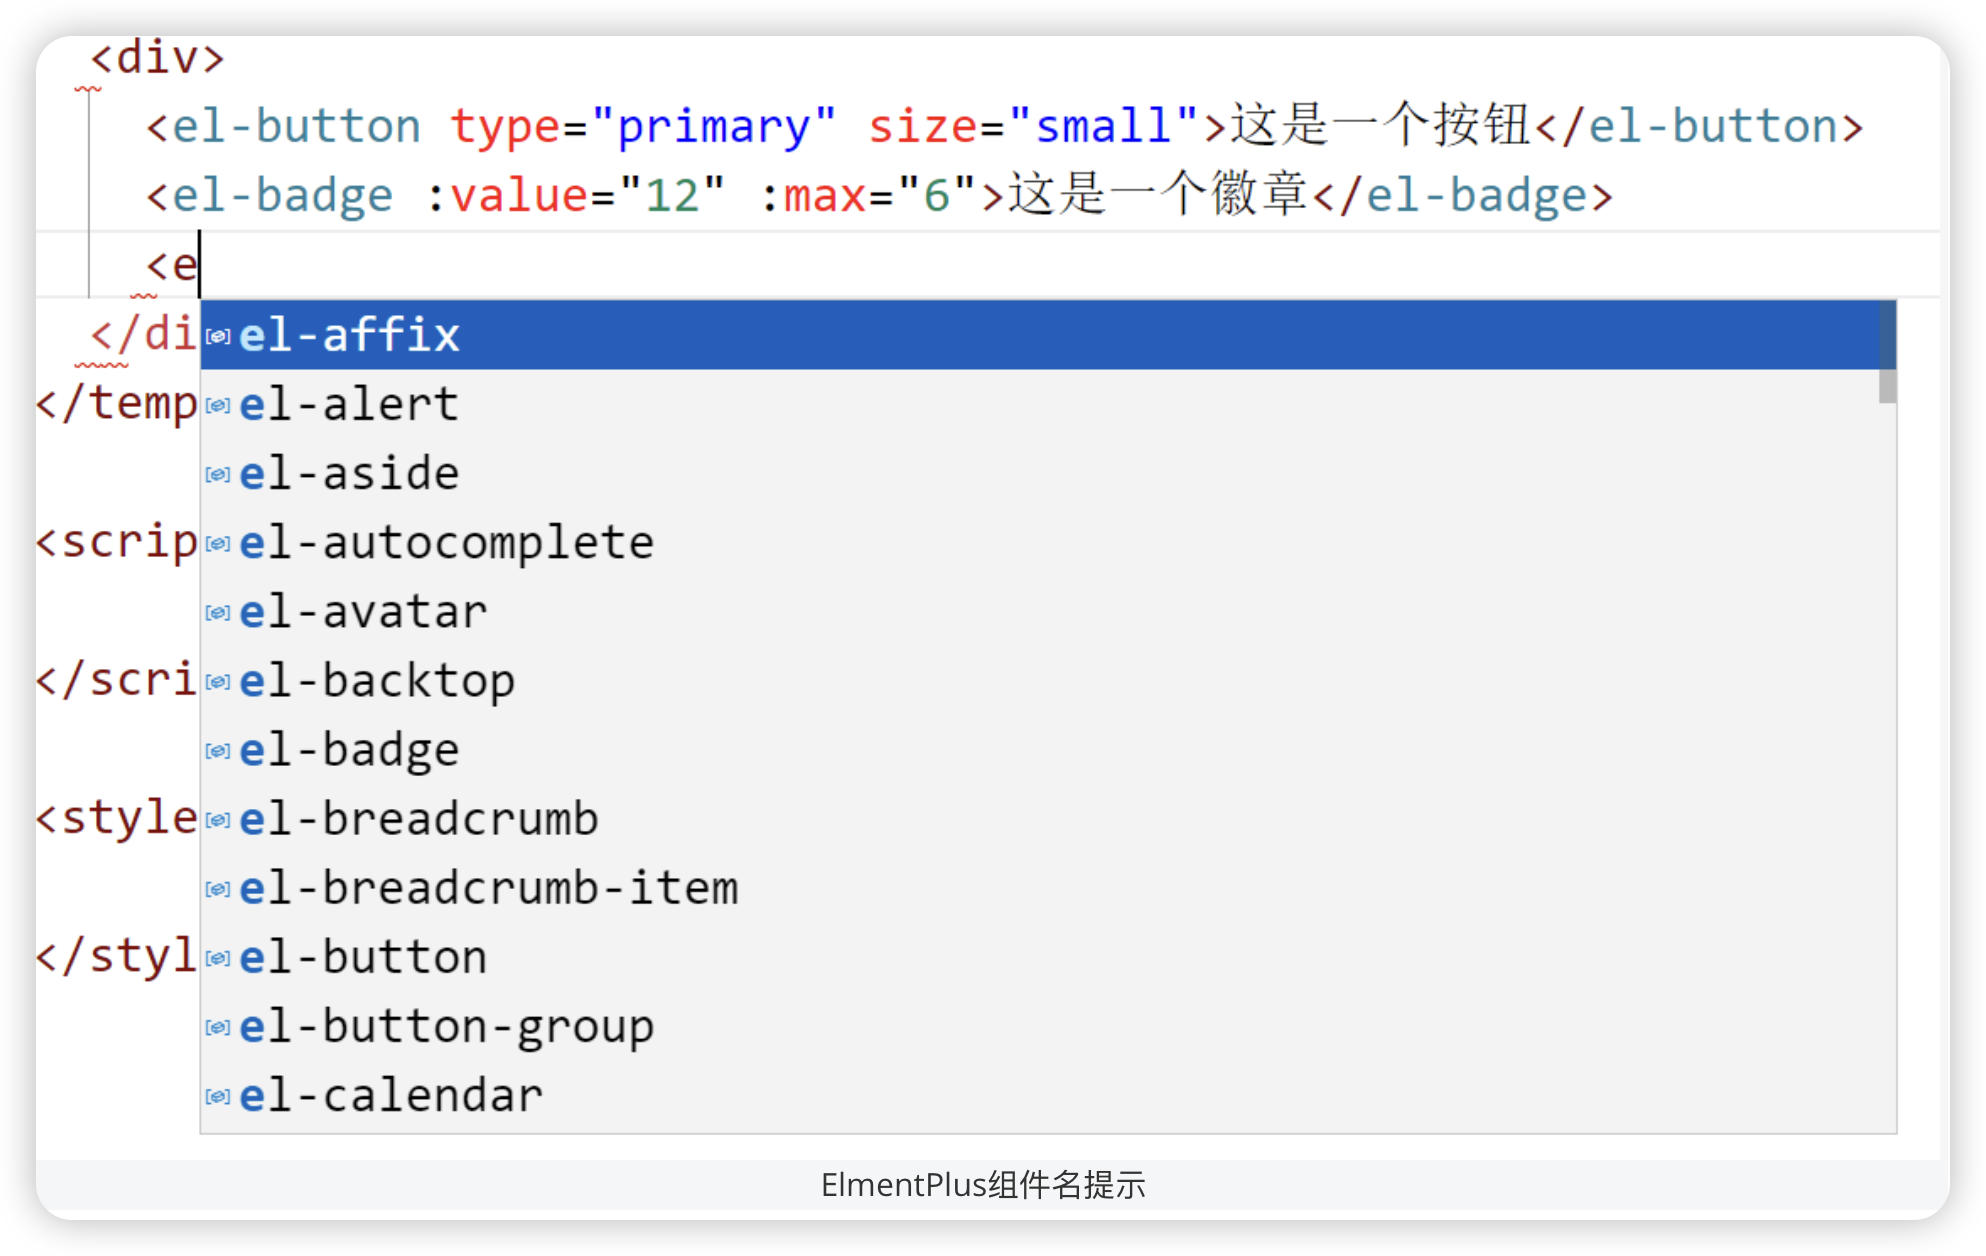

这里需要注意,由于Volar插件更新比较快,如果不能很好进行提示的话,可以把Volar插件降级到1.0.0这个版本。
除了提示外,Element Plus默认带有的类型都可以在Vue项目中引入,并进行使用,例如表单控件,代码如下:
<script lang="ts" setup>
  import { reactive, ref } from 'vue'
import type { FormInstance, FormRules } from 'element-plus'
const ruleFormRef = ref<FormInstance>()
  const rules = reactive<FormRules>({
  })
const submitForm = async (formEl: FormInstance | undefined) => {
}FormInstance用于定义表单实例的类型,FormRules用于定义表单规则的类型等。


