文章目录
- 一、关于 LeRobot
- 特点
- 模拟环境中预训练模型的示例
- 致谢
- 教程 - Getting Started with Real-World Robots
- 二、安装
- 三、Walkthrough
- 1、可视化数据集
- 2、`LeRobotDataset`的格式
- 3、评估预先训练的策略
- 4、训练你自己的政策
- 复制最先进的(SOTA)
- 四、贡献
- 1、添加新数据集
- 2、添加预训练策略
- 3、通过分析改进您的代码
一、关于 LeRobot
🤗LeRobot:通过端到端学习让机器人AI更易于访问,用于现实世界机器人技术的最先进的人工智能
- github : https://github.com/huggingface/lerobot
- 示例:https://github.com/huggingface/lerobot/tree/main/examples
- huggingface : https://huggingface.co/lerobot
特点
🤗LeRobot 旨在为PyTorch中的现实世界机器人 提供模型、数据集和工具。目标是降低 进入机器人技术的门槛,以便每个人都可以从共享数据集和预训练模型中做出贡献并从中受益。
🤗LeRobot 包含最先进的方法,这些方法已被证明可以转移到现实世界,重点是模仿学习和强化学习。
🤗LeRobot 已经提供了一套预训练模型、带有人类收集演示的数据集和模拟环境,无需组装机器人即可开始。在接下来的几周里,计划是在最实惠、功能最强大的机器人上增加对现实世界机器人技术的越来越多的支持。
🤗LeRobot 在这个Hugging Face 社区页面上托管预训练模型和数据集:huggingface.co/lerobot
模拟环境中预训练模型的示例
 | 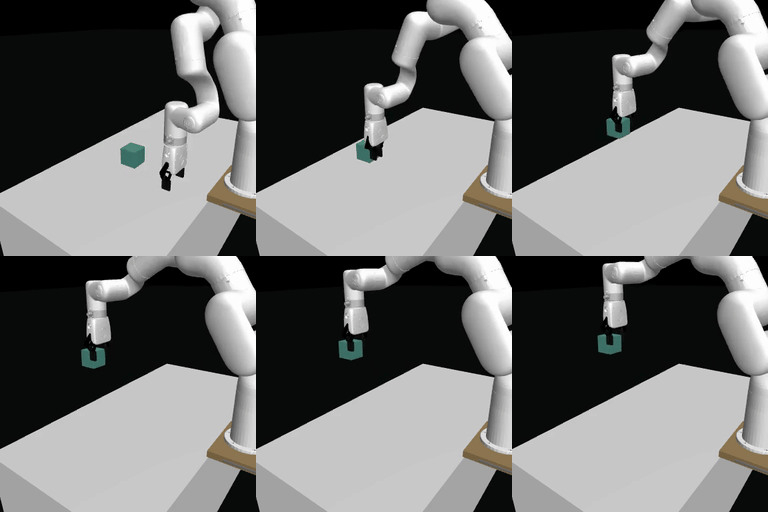 |  |
|---|---|---|
| ACT政策关于ALOHA环境 | TDMPC政策关于SimXArm环境 | 扩散政策关于PushT环境 |
致谢
- 感谢Tony Zaho、ZiupanFu及其同事开源ACT政策、ALOHA环境和数据集。我们的改编自ALOHA和Mobile ALOHA。
- 感谢程驰、徐振佳及其同事开源扩散政策、Pusht环境和数据集,以及UMI数据集。我们的改编自扩散政策和UMI抓取器。
- 感谢NicklasHansen、冯云海及其同事开源TDMPC政策、Simxarm环境和数据集。我们的改编自TDMPC和FOWM。
- 感谢Antonio Loquercio和Ashish Kumar的早期支持。
- 感谢Seungjae(Jay)Lee、Mahi Shafiullah及其同事的开源VQ-BeT政策,并帮助我们将代码库调整为我们的存储库。该政策改编自VQ-BeT存储库。
教程 - Getting Started with Real-World Robots

Hugging Face 刚刚发布了一个关于如何构建自己的机器人的深入教程!
用一台笔记本电脑 向它展示几个动作,教它新技能。
然后看你的自制机器人自主行动🤯
有关更多信息,请参阅我们在X上的帖子或我们的教程页面。
二、安装
下载我们的源代码:
git clone https://github.com/huggingface/lerobot.git
cd lerobot
使用Python 3.10创建一个虚拟环境并激活它,例如使用miniconda:
conda create -y -n lerobot python=3.10
conda activate lerobot
安装🤗LeRobot:
pip install -e .
**注意:**根据您的平台,如果在此步骤中遇到任何构建错误 您可能需要安装
cmake和build-essential来构建我们的一些依赖项。 在linux上:sudo apt-get install cmake build-essential
对于模拟,🤗LeRobot带有健身房环境,可以作为额外安装:
- aloha
- xarm
- pusht
例如,要使用aloha和pusht安装🤗LeRobot,请使用:
pip install -e ".[aloha, pusht]"
要使用权重和偏置进行实验跟踪,请登录
wandb login
(注意:您还需要在配置中启用WandB。见下文。)
三、Walkthrough
.
├── examples             # contains demonstration examples, start here to learn about LeRobot
|   └── advanced         # contains even more examples for those who have mastered the basics
├── lerobot
|   ├── configs          # contains hydra yaml files with all options that you can override in the command line
|   |   ├── default.yaml   # selected by default, it loads pusht environment and diffusion policy
|   |   ├── env            # various sim environments and their datasets: aloha.yaml, pusht.yaml, xarm.yaml
|   |   └── policy         # various policies: act.yaml, diffusion.yaml, tdmpc.yaml
|   ├── common           # contains classes and utilities
|   |   ├── datasets       # various datasets of human demonstrations: aloha, pusht, xarm
|   |   ├── envs           # various sim environments: aloha, pusht, xarm
|   |   ├── policies       # various policies: act, diffusion, tdmpc
|   |   ├── robot_devices  # various real devices: dynamixel motors, opencv cameras, koch robots
|   |   └── utils          # various utilities
|   └── scripts          # contains functions to execute via command line
|       ├── eval.py                 # load policy and evaluate it on an environment
|       ├── train.py                # train a policy via imitation learning and/or reinforcement learning
|       ├── control_robot.py        # teleoperate a real robot, record data, run a policy
|       ├── push_dataset_to_hub.py  # convert your dataset into LeRobot dataset format and upload it to the Hugging Face hub
|       └── visualize_dataset.py    # load a dataset and render its demonstrations
├── outputs               # contains results of scripts execution: logs, videos, model checkpoints
└── tests                 # contains pytest utilities for continuous integration
1、可视化数据集
查看示例1,它说明了如何使用我们的数据集类,该类自动从Hugging Face 集线器下载数据。
您还可以通过从命令行执行我们的脚本来本地可视化集线器上数据集的剧集:
python lerobot/scripts/visualize_dataset.py \
    --repo-id lerobot/pusht \
    --episode-index 0
或从具有根环境变量的本地文件夹中的数据集DATA_DIR(在以下情况下,将在 ./my_local_data_dir/lerobot/pusht 中搜索数据集)
DATA_DIR='./my_local_data_dir' python lerobot/scripts/visualize_dataset.py \
    --repo-id lerobot/pusht \
    --episode-index 0
它将打开rerun.io并显示摄像机流、机器人状态和动作,如下所示:
battery-720p.mov
我们的脚本还可以可视化存储在远程服务器上的数据集。更多指令可见:
python lerobot/scripts/visualize_dataset.py --help
2、LeRobotDataset的格式
使用LeRobotDataset格式的数据集非常简单。它可以从Hugging Face 集线器上的存储库或本地文件夹中加载,只需使用例如dataset = LeRobotDataset("lerobot/aloha_static_coffee")并且可以像任何Hugging Face 和PyTorch数据集一样被索引。例如dataset[0]将从数据集中检索一个时间框架,其中包含观察和一个动作,因为PyTorch张量准备好被馈送到模型。
对于LeRobotDataset的一个特殊性是,我们可以根据它们与索引帧的时间关系来检索多个帧,而不是通过索引来检索单个帧,方法是将delta_timestamps设置为相对于索引帧的相对时间列表。例如,使用delta_timestamps = {"observation.image": [-1, -0.5, -0.2, 0]}对于给定的索引,可以检索4个帧:索引帧之前1秒、0.5秒和0.2秒的3个“前”帧,以及索引帧本身(对应于0条目)。参见示例1_load_lerobot_dataset.py有关delta_timestamps.
在底层,LeRobotDataset格式利用了几种方法来序列化数据,如果您计划更紧密地使用这种格式,这将有助于理解。我们试图制作一种灵活而简单的数据集格式,涵盖强化学习和机器人技术、模拟和现实世界中存在的大多数类型的特征和特殊性,重点关注相机和机器人状态,但很容易扩展到其他类型的感官输入,只要它们可以用张量表示。
以下是一个典型的LeRobotDataset的重要细节和内部结构组织,实例化为dataset = LeRobotDataset("lerobot/aloha_static_coffee")。 确切的特征会因数据集而异,但不会改变主要方面:
dataset attributes:
  ├ hf_dataset: a Hugging Face dataset (backed by Arrow/parquet). Typical features example:
  │  ├ observation.images.cam_high (VideoFrame):
  │  │   VideoFrame = {'path': path to a mp4 video, 'timestamp' (float32): timestamp in the video}
  │  ├ observation.state (list of float32): position of an arm joints (for instance)
  │  ... (more observations)
  │  ├ action (list of float32): goal position of an arm joints (for instance)
  │  ├ episode_index (int64): index of the episode for this sample
  │  ├ frame_index (int64): index of the frame for this sample in the episode ; starts at 0 for each episode
  │  ├ timestamp (float32): timestamp in the episode
  │  ├ next.done (bool): indicates the end of en episode ; True for the last frame in each episode
  │  └ index (int64): general index in the whole dataset
  ├ episode_data_index: contains 2 tensors with the start and end indices of each episode
  │  ├ from (1D int64 tensor): first frame index for each episode — shape (num episodes,) starts with 0
  │  └ to: (1D int64 tensor): last frame index for each episode — shape (num episodes,)
  ├ stats: a dictionary of statistics (max, mean, min, std) for each feature in the dataset, for instance
  │  ├ observation.images.cam_high: {'max': tensor with same number of dimensions (e.g. `(c, 1, 1)` for images, `(c,)` for states), etc.}
  │  ...
  ├ info: a dictionary of metadata on the dataset
  │  ├ codebase_version (str): this is to keep track of the codebase version the dataset was created with
  │  ├ fps (float): frame per second the dataset is recorded/synchronized to
  │  ├ video (bool): indicates if frames are encoded in mp4 video files to save space or stored as png files
  │  └ encoding (dict): if video, this documents the main options that were used with ffmpeg to encode the videos
  ├ videos_dir (Path): where the mp4 videos or png images are stored/accessed
  └ camera_keys (list of string): the keys to access camera features in the item returned by the dataset (e.g. `["observation.images.cam_high", ...]`)
一个LeRobotDataset对其每个部分使用几种广泛的文件格式进行序列化,即:
- hf_dataset存储使用Hugging Face 数据集库序列化拼花
- 视频以mp4格式存储以节省空间或png文件
- episode_data_index使用
safetensor张量序列化格式保存 - 使用
safetensor张量序列化格式保存的统计数据 - 信息使用JSON保存
数据集可以从HuggingFace集线器无缝上传/下载。要处理本地数据集,您可以将DATA_DIR环境变量设置到根数据集文件夹中,如上面关于数据集可视化的部分所示。
3、评估预先训练的策略
查看示例2,该示例说明了如何从HugingFace中心下载预训练策略,并在其相应的环境中运行评估。
我们还提供了一个功能更强大的脚本来在同一部署期间在多个环境中并行评估。以下是托管在lerobot/diffusion_pusht上的预训练模型的示例:
python lerobot/scripts/eval.py \
    -p lerobot/diffusion_pusht \
    eval.n_episodes=10 \
    eval.batch_size=10
注意:训练自己的策略后,您可以使用以下方法重新评估检查点:
python lerobot/scripts/eval.py -p {OUTPUT_DIR}/checkpoints/last/pretrained_model
有关更多说明,请参阅python lerobot/scripts/eval.py --help。
4、训练你自己的政策
查看示例3,它说明了如何在python中使用我们的核心库训练模型,以及示例4,它说明了如何从命令行使用我们的训练脚本。
一般来说,您可以使用我们的训练脚本轻松地训练任何策略。以下是一个关于人类在Aloha模拟环境中为插入任务收集的轨迹训练ACT策略的示例:
python lerobot/scripts/train.py \
    policy=act \
    env=aloha \
    env.task=AlohaInsertion-v0 \
    dataset_repo_id=lerobot/aloha_sim_insertion_human \
实验目录是自动生成的,并将在您的终端中以黄色显示。它看起来像outputs/train/2024-05-05/20-21-12_aloha_act_default。您可以通过将此参数添加到train.pypython命令来手动指定实验目录:
hydra.run.dir=your/new/experiment/dir
在实验目录中,将有一个名为checkpoints的文件夹,其结构如下:
checkpoints
├── 000250  # checkpoint_dir for training step 250
│   ├── pretrained_model  # Hugging Face pretrained model dir
│   │   ├── config.json  # Hugging Face pretrained model config
│   │   ├── config.yaml  # consolidated Hydra config
│   │   ├── model.safetensors  # model weights
│   │   └── README.md  # Hugging Face model card
│   └── training_state.pth  # optimizer/scheduler/rng state and training step
要从检查点恢复训练,您可以将以下内容添加到train.pypython命令中:
hydra.run.dir=your/original/experiment/dir resume=true
它将加载预训练模型、优化器和调度器状态进行训练。有关更多信息,请参阅我们关于训练恢复的教程在此处。
要使用wandb记录训练和评估曲线,请确保您已将wandb login作为一次性设置步骤运行。然后,在运行上述训练命令时,通过添加以下内容在配置中启用WandB:
wandb.enable=true
运行的wandb日志的链接也将在您的终端中以黄色显示。这是它们在浏览器中的外观示例。还请查看此处以了解日志中一些常用指标的解释。

注意:为了提高效率,在训练期间,每个检查点都会在较少的集数上进行评估。您可以使用eval.n_episodes=500来评估比默认更多的集数。或者,训练后,您可能希望在更多的集数上重新评估您的最佳检查点或更改评估设置。有关更多说明,请参阅python lerobot/scripts/eval.py --help。
复制最先进的(SOTA)
我们组织了我们的配置文件(可在lerobot/configs下找到),以便它们在各自的原始作品中重现给定模型变体的SOTA结果。只需运行:
python lerobot/scripts/train.py policy=diffusion env=pusht
在PushT任务上重现扩散策略的SOTA结果。
预训练策略以及复制详细信息可以在https://huggingface.co/lerobot的“模型”部分找到。
四、贡献
如果您想为🤗LeRobot做出贡献,请查看我们的贡献指南。
1、添加新数据集
要将数据集添加到集线器,您需要使用写访问令牌登录,该令牌可以从Hugging Face 设置中生成:
huggingface-cli login --token ${HUGGINGFACE_TOKEN} --add-to-git-credential
然后指向原始数据集文件夹(例如data/aloha_static_pingpong_test_raw),并通过以下方式将数据集推送到集线器:
python lerobot/scripts/push_dataset_to_hub.py \
--raw-dir data/aloha_static_pingpong_test_raw \
--out-dir data \
--repo-id lerobot/aloha_static_pingpong_test \
--raw-format aloha_hdf5
有关更多说明,请参阅python lerobot/scripts/push_dataset_to_hub.py --help。
如果您的数据集格式不受支持,请通过复制pusht_zarr、umi_zarr、aloha_hdf5或xarm_pkl等示例在lerobot/common/datasets/push_dataset_to_hub/${raw_format}_format.py中实现您自己的格式。
2、添加预训练策略
训练好策略后,可以使用类似于${hf_user}/${repo_name}的集线器ID(例如lerobot/diffusion_pusht)将其上传到HugingFace集线器。
您首先需要找到实验目录中的检查点文件夹(例如outputs/train/2024-05-05/20-21-12_aloha_act_default/checkpoints/002500)。其中有一个pretrained_model目录,应该包含:
config.json:策略配置的序列化版本(遵循策略的数据类配置)。model.safetensors:一组torch.nn.Module参数,以Hugging Face 安全传感器格式保存。config.yaml:包含策略、环境和数据集配置的统一Hydra训练配置。策略配置应与config.json完全匹配。环境配置对任何想要评估策略的人都很有用。数据集配置只是作为可重复性的书面记录。
要将这些上传到中心,请运行以下命令:
huggingface-cli upload ${hf_user}/${repo_name} path/to/pretrained_model
有关其他人如何使用您的策略的示例,请参阅eval.py。
3、通过分析改进您的代码
用于分析策略评估的代码片段示例:
from torch.profiler import profile, record_function, ProfilerActivity

def trace_handler(prof):
    prof.export_chrome_trace(f"tmp/trace_schedule_{prof.step_num}.json")

with profile(
    activities=[ProfilerActivity.CPU, ProfilerActivity.CUDA],
    schedule=torch.profiler.schedule(
        wait=2,
        warmup=2,
        active=3,
    ),
    on_trace_ready=trace_handler
) as prof:
    with record_function("eval_policy"):
        for i in range(num_episodes):
            prof.step()
            # insert code to profile, potentially whole body of eval_policy function
2024-09-16(一)

