守护网站心脏:HAProxy负载均衡技术详解
文章目录
- **守护网站心脏:HAProxy负载均衡技术详解**
- haproxy介绍
- 特点
- 功能
- 配置
- 结论
- haproxy负载均衡测试
- haproxy主机操作
- 日志重定向操作
- webserver1主机操作
- webserver2主机操作
- haporxy相关配置测试
- backup参数测速
- haproxy主机操作
- webserver1主机操作
- webserver2主机操作
- disabled参数测速
- haproxy主机操作
- webserver1主机操作
- webserver2主机操作
- redirect prefix 参数测试
- haproxy主机操作
- 浏览器访问测试
- haporxy的热处理,注意:重启后会失效
- haproxy多进程如何热处理
- haproxy调度算法详解
- Round Robin (轮询)
- 描述
- 配置示例
- 适用场景
- 注意事项
- Least Connections (最少连接数)
- 描述
- 配置示例
- 适用场景
- 注意事项
- Source (源地址哈希)
- 描述
- 配置示例
- 适用场景
- 注意事项
- URI (URI 哈希)
- 描述
- 配置示例
- 适用场景
- 注意事项
- 总结
- haproxy状态页
- 浏览器测试
- haproxy的cookie会话保持
- haproxy主机操作
- cookie添加参数解释
- haproxy的IP透传
- 七层透传(mode=http)nginx
- haproxy主机操作
- webserver2主机(nginx)操作
- 七层透传(mode=http)apache
- haproxy主机操作
- webserver1主机(apache)操作
- 四层透传(mode=tcp)nginx
- haproxy主机操作
- webserver2主机(nginx)操作
- 四层透传(mode=tcp)apache
- 总结
- client主机操作
- haproxy的acl基本访问控制
- haproxy主机操作
- client主机测试
- haproxy的acl一些常用限制
- 基于域名的访问控制
- haproxy主机操作
- client主机操作
- 基于IP的访问控制
- haproxy主机操作
- client主机操作
- haproxy主机测试
- 基于IP的访问控制之黑名单
- haproxy主机操作
- client主机操作
- haproxy主机测试
- 在这个实验中172.25.254.200 -- client客户端,172.25.254.20 -- webserver2主机端
- 基于浏览器的访问控制
- haproxy主机操作
- client主机操作
- 浏览器访问测试
- 基于文件后缀名来实现动静分离
- haproxy主机操作
- webserver1主机操作
- client主机操作
- 浏览器访问控制
- 基于网址后面的目录文件的访问控制
- haproxy主机操作
- webserver1主机操作
- webserver2主机操作
- 浏览器访问测试
- haproxy自定义错误页面
- haproxy主机操作
- webserver1主机操作
- webserver2主机操作
- client主机操作
- 浏览器访问测试
- haproxy报错后跳转指定网站
- haproxy主机操作
- 浏览器测试
- haproxy四层负载数据库
- haproxy主机操作
- webserver1主机操作
- webserver2主机操作
- client主机操作
- haproxy之https网站加密
- haproxy主机操作
- webserver1主机操作
- webserver2主机操作
- 浏览器访问测试
- haproxy之https网站强制全站加密
- haproxy主机操作
- 浏览器访问测试
haproxy介绍
HAProxy(High Availability Proxy)是一个免费且开源的软件,被广泛用于实现高性能、高可用性的负载均衡和代理服务。它最初由 HA-SOFTWARE 开发,并已成为许多企业和组织中不可或缺的一部分,特别是在需要处理大量并发连接和高流量的环境中。
特点
-
高性能:
- HAProxy 能够处理成千上万的并发连接,使其成为大规模网站的理想选择。
- 它利用了高效的事件驱动模型,能够有效处理大量的网络请求。
-
高可用性:
- HAProxy 支持健康检查机制,能够监测后端服务器的健康状况。
- 它能够快速地将故障的服务器从负载均衡池中剔除,确保流量只被转发到健康的服务器上。
-
可配置性:
- HAProxy 提供了丰富的配置选项,允许管理员微调各种设置。
- 它支持多种负载均衡算法,可以根据具体需求选择最合适的算法。
-
扩展性:
- HAProxy 可以轻松地与现有的基础设施集成,并且可以通过集群来进一步提升可用性和性能。
-
安全性:
- 它支持 SSL/TLS 加密,可以保护传输的数据安全。
- HAProxy 可以用作防火墙的一部分,过滤恶意流量。
功能
-
负载均衡:
- HAProxy 可以根据预定义的规则和策略将传入的流量分发到多个后端服务器。
- 它支持多种负载均衡算法,如轮询、最少连接数、源地址哈希等。
-
健康检查:
- HAProxy 可以定期向后端服务器发送健康检查请求,以确定它们是否正常工作。
- 根据健康检查的结果,它可以自动将流量重定向到健康的服务器。
-
会话持久性:
- HAProxy 支持基于源 IP 地址或特定会话标识符的会话持久性。
- 这有助于确保来自同一客户端的所有请求都被定向到同一后端服务器。
-
SSL/TLS 终止:
- HAProxy 可以作为 SSL/TLS 终结点,这意味着它可以直接处理加密连接,减轻后端服务器的负担。
- 它支持 SNI (Server Name Indication) 和 ALPN (Application-Layer Protocol Negotiation)。
-
访问控制:
- HAProxy 可以配置 ACL (Access Control List),以限制对特定资源的访问。
- 它支持基于 IP 地址、HTTP 头部和其他条件的访问控制。
-
日志记录和监控:
- HAProxy 提供详细的日志记录功能,可用于监控系统的性能和行为。
- 它还支持外部监控工具,如 StatsD 和 Graphite。
配置
HAProxy 的配置文件通常位于 /etc/haproxy/haproxy.cfg,包含以下几个主要部分:
-
全局设置:
- 配置全局参数,如日志级别、最大连接数等。
-
监听器:
- 定义 HAProxy 如何接收和处理传入的连接。
- 通常配置端口、绑定地址和基本的安全设置。
-
后端:
- 配置后端服务器池,包括服务器地址、端口、健康检查设置等。
-
前端:
- 配置前端接口,定义如何接收客户端请求并将它们分发到后端服务器。
结论
HAProxy 是一个强大而灵活的工具,非常适合用于构建高可用性和高性能的网络应用和服务。无论是简单的负载均衡还是复杂的流量管理和安全策略,HAProxy 都是一个值得信赖的选择。
haproxy负载均衡测试
环境准备:
| 主机名 | IP | 角色 | VMware网络硬件配置 |
|---|---|---|---|
| haproxy | 172.25.254.100 | haproxy负载均衡机器 | 一块NAT的网卡 |
| webserver1 | 172.25.254.10 | 真实服务器 | 一块NAT的网卡 |
| webserver2 | 172.25.254.20 | 真实服务器 | 一块NAT的网卡 |
haproxy主机操作
[root@haproxy ~]# dnf install haproxy -y

[root@haproxy ~]# rpm -qc haproxy
/etc/haproxy/haproxy.cfg
/etc/logrotate.d/haproxy
/etc/sysconfig/haproxy

[root@haproxy ~]# vim /etc/haproxy/haproxy.cfg
# 修改内容如下
#---------------------------------------------------------------------
# main frontend which proxys to the backends
#---------------------------------------------------------------------
frontend webcluster
    bind *:80
    mode http
    use_backend webcluster-host

backend webcluster-host
    balance roundrobin
    server  web1    172.25.254.10:80
    server  web2    172.25.254.20:80

# 还有一种写法,直接写listen

#frontend webcluster
#   bind *:80
#   mode http
#   use_backend webcluster-host
#
#backend webcluster-host
#   balance roundrobin
#   server  web1    172.25.254.10:80
#   server  web2    172.25.254.20:80

listen webcluster
    bind *:80
    mode http
    balance roundrobin
    server web1 172.25.254.10:80
    server web2 172.25.254.20:80


[root@haproxy ~]# systemctl restart haproxy.service

# 测试
[root@haproxy ~]# for i in {1..10}
> do
> curl 172.25.254.100
> done
webserver1 - 172.25.254.10
webserver2 - 172.25.254.20
webserver1 - 172.25.254.10
webserver2 - 172.25.254.20
webserver1 - 172.25.254.10
webserver2 - 172.25.254.20
webserver1 - 172.25.254.10
webserver2 - 172.25.254.20
webserver1 - 172.25.254.10
webserver2 - 172.25.254.20
日志重定向操作
[root@haproxy ~]# vim /etc/rsyslog.conf

module(load="imudp") # needs to be done just once
input(type="imudp" port="514")

# Save boot messages also to boot.log
local7.*                                                /var/log/boot.log
local2.*                                                /var/log/haproxy.log

[root@haproxy ~]# systemctl restart haproxy.service

[root@haproxy log]# ll /var/log/haproxy.log
-rw------- 1 root root 1359  8月  7 16:26 /var/log/haproxy.log
[root@haproxy log]# cat /var/log/haproxy.log
Aug  7 16:26:29 localhost haproxy[2048]: Server static/static is DOWN, reason: Layer4 connection problem, info: "Connection refused", check duration: 0ms. 0 active and 0 backup servers left. 0 sessions active, 0 requeued, 0 remaining in queue.
Aug  7 16:26:29 localhost haproxy[2048]: backend static has no server available!
Aug  7 16:26:29 localhost haproxy[2048]: Server app/app1 is DOWN, reason: Layer4 connection problem, info: "Connection refused", check duration: 0ms. 3 active and 0 backup servers left. 0 sessions active, 0 requeued, 0 remaining in queue.
Aug  7 16:26:30 localhost haproxy[2048]: Server app/app2 is DOWN, reason: Layer4 connection problem, info: "Connection refused", check duration: 0ms. 2 active and 0 backup servers left. 0 sessions active, 0 requeued, 0 remaining in queue.
Aug  7 16:26:30 localhost haproxy[2048]: Server app/app3 is DOWN, reason: Layer4 connection problem, info: "Connection refused", check duration: 0ms. 1 active and 0 backup servers left. 0 sessions active, 0 requeued, 0 remaining in queue.
Aug  7 16:26:31 localhost haproxy[2048]: Server app/app4 is DOWN, reason: Layer4 connection problem, info: "Connection refused", check duration: 0ms. 0 active and 0 backup servers left. 0 sessions active, 0 requeued, 0 remaining in queue.
Aug  7 16:26:31 localhost haproxy[2048]: backend app has no server available!
webserver1主机操作
[root@webserver1 ~]# dnf install nginx -y
[root@webserver1 ~]# echo webserver1 - 172.25.254.10 > /usr/share/nginx/html/index.html

[root@webserver1 ~]# systemctl enable --now nginx.service
Created symlink /etc/systemd/system/multi-user.target.wants/nginx.service → /usr/lib/systemd/system/nginx.service.
webserver2主机操作
[root@webserver2 ~]# dnf install -y nginx
[root@webserver2 ~]# echo webserver2 - 172.25.254.20 > /usr/share/nginx/html/index.html
[root@webserver2 ~]# systemctl enable --now nginx.service
Created symlink /etc/systemd/system/multi-user.target.wants/nginx.service → /usr/lib/systemd/system/nginx.service.
haporxy相关配置测试
backup参数测速
haproxy主机操作
[root@haproxy ~]# dnf install httpd -y
[root@haproxy ~]# vim /etc/httpd/conf/httpd.conf
# 修改默认端口号
46 #Listen 12.34.56.78:80
47 Listen 8080

[root@haproxy ~]# systemctl restart httpd.service
[root@haproxy ~]# echo "sorry,下班了" > /var/www/html/index.html

[root@haproxy ~]# curl 172.25.254.100:8080
sorry,下班了

[root@haproxy ~]# vim /etc/haproxy/haproxy.cfg
listen webcluster
    bind *:80
    mode http
    balance roundrobin
    server web1 172.25.254.10:80 check inter 2 fall 3 rise 5 weight 2
    server web2 172.25.254.20:80 check inter 2 fall 3 rise 5 weight 1
    # backup指定,其它的真实服务器访问失败后,会访问我这个服务器 172.25.254.100:8080
    server web_sorry 172.25.254.100:8080 backup
[root@haproxy ~]# systemctl restart haproxy.service

# 访问测试
[root@haproxy ~]# curl 172.25.254.100
sorry,下班了
[root@haproxy ~]# curl 172.25.254.100
sorry,下班了
webserver1主机操作
[root@webserver1 ~]# systemctl stop nginx.service
webserver2主机操作
[root@webserver2 ~]# systemctl stop nginx.service
disabled参数测速
haproxy主机操作
[root@haproxy ~]# vim /etc/haproxy/haproxy.cfg
listen webcluster
    bind *:80
    mode http
    balance roundrobin
    # disabled参数,下线指定真实服务器
    server web1 172.25.254.10:80 check inter 2 fall 3 rise 5 weight 2 disabled
    server web2 172.25.254.20:80 check inter 2 fall 3 rise 5 weight 1
    server web_sorry 172.25.254.100:8080 backup

# 测试
[root@haproxy ~]# systemctl restart haproxy.service
[root@haproxy ~]# curl 172.25.254.100
webserver2 - 172.25.254.20
[root@haproxy ~]# curl 172.25.254.100
webserver2 - 172.25.254.20
[root@haproxy ~]# curl 172.25.254.100
webserver2 - 172.25.254.20
webserver1主机操作
[root@webserver1 ~]# systemctl start nginx.service
webserver2主机操作
[root@webserver2 ~]# systemctl start nginx.service
redirect prefix 参数测试
haproxy主机操作
[root@haproxy ~]# vim /etc/haproxy/haproxy.cfg

listen webcluster
    bind *:80
    mode http
    balance roundrobin
    redirect prefix http://www.baidu.com/
    #server web1 172.25.254.10:80 check inter 2 fall 3 rise 5 weight 2 disabled
    #server web2 172.25.254.20:80 check inter 2 fall 3 rise 5 weight 1
    #server web_sorry 172.25.254.100:8080 backup

[root@haproxy ~]# systemctl restart haproxy.service
浏览器访问测试

haporxy的热处理,注意:重启后会失效
[root@haproxy ~]# vim /etc/haproxy/haproxy.cfg
global
    log         127.0.0.1 local2

    chroot      /var/lib/haproxy
    pidfile     /var/run/haproxy.pid
    maxconn     4000

       user        haproxy
    group       haproxy
    daemon

    # turn on stats unix socket
    # 开启socker热处理,并且以root账户的身份去处理
    stats socket /var/lib/haproxy/stats mode 600 level admin

    # utilize system-wide crypto-policies
    ssl-default-bind-ciphers PROFILE=SYSTEM
    ssl-default-server-ciphers PROFILE=SYSTE

[root@haproxy ~]# systemctl restart haproxy.service
# 下载socat工具
[root@haproxy ~]# dnf install socat-1.7.4.1-5.el9.x86_64  -y

[root@haproxy ~]# echo "get weight webcluster/web1" | socat stdio /var/lib/haproxy/stats
2 (initial 2)

[root@haproxy ~]# echo "get weight webcluster/web2" | socat stdio /var/lib/haproxy/stats
1 (initial 1)

[root@haproxy ~]# echo "set weight webcluster/web1 1" | socat stdio /var/lib/haproxy/stats

[root@haproxy ~]# echo "get weight webcluster/web1" | socat stdio /var/lib/haproxy/stats
1 (initial 2)

[root@haproxy ~]# echo "show servers state" | socat stdio /var/lib/haproxy/stats
1
# be_id be_name srv_id srv_name srv_addr srv_op_state srv_admin_state srv_uweight srv_iweight srv_time_since_last_change srv_check_status srv_check_result srv_check_health srv_check_state srv_agent_state bk_f_forced_id srv_f_forced_id srv_fqdn srv_port srvrecord srv_use_ssl srv_check_port srv_check_addr srv_agent_addr srv_agent_port
2 webcluster 1 web1 172.25.254.10 2 0 1 2 218 6 0 7 7 0 0 0 - 80 - 0 0 - - 0
2 webcluster 2 web2 172.25.254.20 2 0 1 1 103 6 0 7 7 0 0 0 - 80 - 0 0 - - 0
4 static 1 static 127.0.0.1 0 0 1 1 217 8 2 0 6 0 0 0 - 4331 - 0 0 - - 0
5 app 1 app1 127.0.0.1 0 0 1 1 217 8 2 0 6 0 0 0 - 5001 - 0 0 - - 0
5 app 2 app2 127.0.0.1 0 0 1 1 217 8 2 0 6 0 0 0 - 5002 - 0 0 - - 0
5 app 3 app3 127.0.0.1 0 0 1 1 217 8 2 0 6 0 0 0 - 5003 - 0 0 - - 0
5 app 4 app4 127.0.0.1 0 0 1 1 216 8 2 0 6 0 0 0 - 5004 - 0 0 - - 0

[root@haproxy ~]# echo "show info" | socat stdio /var/lib/haproxy/stats
Name: HAProxy
Version: 2.4.17-9f97155
Release_date: 2022/05/13
Nbthread: 2
Nbproc: 1
Process_num: 1
Pid: 2634
Uptime: 0d 0h05m04s
Uptime_sec: 304
Memmax_MB: 0
PoolAlloc_MB: 0
PoolUsed_MB: 0
PoolFailed: 0
Ulimit-n: 8037
Maxsock: 8037
Maxconn: 4000
Hard_maxconn: 4000
CurrConns: 0
CumConns: 40675
CumReq: 13
MaxSslConns: 0
CurrSslConns: 0
CumSslConns: 0
Maxpipes: 0
PipesUsed: 0
PipesFree: 0
ConnRate: 0
ConnRateLimit: 0
MaxConnRate: 0
SessRate: 0
SessRateLimit: 0
MaxSessRate: 0
SslRate: 0
haproxy多进程如何热处理
[root@haproxy ~]# vim /etc/haproxy/haproxy.cfg

    # turn on stats unix socket
    # 为每一个进程独立建立一个控制文件
    stats socket /var/lib/haproxy/stats1 mode 600 level admin process 1
    stats socket /var/lib/haproxy/stats2 mode 600 level admin process 2

    # utilize system-wide crypto-policies
    ssl-default-bind-ciphers PROFILE=SYSTEM
    ssl-default-server-ciphers PROFILE=SYSTEM
    # 开启多进程
    nbproc 2
    cpu-map 1 0
    cpu-map 2 1

[root@haproxy ~]# systemctl restart haproxy.service
[root@haproxy ~]# ll /var/lib/haproxy/
总用量 0
srw------- 1 root root 0  8月  9 11:40 stats
srw------- 1 root root 0  8月  9 11:58 stats1
srw------- 1 root root 0  8月  9 11:58 stats2
haproxy调度算法详解
HAProxy 提供了一系列灵活的调度算法来分配客户端请求到后端服务器。选择正确的调度算法对于保证良好的性能和高可用性至关重要。本文将逐一介绍这些算法,并探讨它们的特点和应用场景。
Round Robin (轮询)
描述
轮询是最简单的调度算法之一。它按顺序将请求发送到后端服务器列表中的每个服务器。当到达列表末尾时,从头开始循环。
配置示例
backend servers
  mode http
  balance roundrobin
  server srv1 192.0.2.1:80 check
  server srv2 192.0.2.2:80 check
  server srv3 192.0.2.3:80 check
适用场景
- 当所有后端服务器具有相似性能和处理能力时。
- 当后端服务器资源分配均匀时。
注意事项
- 如果后端服务器性能不一致,可能会导致负载不均。
Least Connections (最少连接数)
描述
最少连接数算法试图将新的请求分发给当前连接数最少的服务器。这样可以尽量平衡各个服务器上的活动连接数。
配置示例
backend servers
  mode http
  balance leastconn
  server srv1 192.0.2.1:80 check
  server srv2 192.0.2.2:80 check
  server srv3 192.0.2.3:80 check
适用场景
- 当后端服务器的性能或配置不同,导致处理能力有差异时。
- 当需要动态调整服务器池时。
注意事项
- 需要实时监控连接数,可能对性能有一定影响。
Source (源地址哈希)
描述
源地址哈希算法基于客户端 IP 地址进行哈希计算,然后将请求分配给哈希值对应的后端服务器。这种方法可以确保来自同一客户端的请求总是被定向到同一台服务器,实现会话粘滞性。
配置示例
backend servers
  mode http
  balance source
  server srv1 192.0.2.1:80 check
  server srv2 192.0.2.2:80 check
  server srv3 192.0.2.3:80 check
适用场景
- 需要保持客户端会话状态的应用程序。
- 实现会话粘滞性以提高用户体验。
注意事项
- 如果后端服务器的性能或配置不同,可能导致负载不均。
- 适用于静态 IP 场景,对于动态 IP 或 NAT 环境可能不太适合。
URI (URI 哈希)
描述
URI 哈希算法基于 HTTP 请求的 URI 进行哈希计算,然后将请求分配给哈希值对应的后端服务器。这可以确保相同 URI 的请求总是被定向到同一台服务器。
配置示例
backend servers
  mode http
  balance uri
  server srv1 192.0.2.1:80 check
  server srv2 192.0.2.2:80 check
  server srv3 192.0.2.3:80 check
适用场景
- 需要确保相同 URL 的请求始终被路由到同一服务器的应用程序。
- 用于缓存优化或一致性哈希环。
注意事项
- 可能会导致不均匀的负载分布,特别是在 URL 分布不均匀的情况下。
总结
选择合适的调度算法取决于你的应用程序需求和后端服务器的特性。在实际部署中,可以根据实际情况组合使用不同的调度算法,以达到最佳效果。
haproxy状态页
root@haproxy ~]# vim /etc/haproxy/haproxy.cfg
listen stats
    mode http
    bind *:9999
    stats enable
    stats refresh 3
    stats uri /status
    stats auth shanxin:shanxin

[root@haproxy ~]# systemctl restart haproxy.service
浏览器测试


haproxy的cookie会话保持
haproxy主机操作
[root@haproxy ~]# vim /etc/haproxy/haproxy.cfg
listen webcluster
    bind *:80
    mode http
    balance roundrobin
    #redirect prefix http://www.baidu.com/
    #server web1 172.25.254.10:80 check inter 2 fall 3 rise 5 weight 2
    #server web2 172.25.254.20:80 check inter 2 fall 3 rise 5 weight 1
    #server web_sorry 172.25.254.100:8080 backup
    # 添加cookie功能
    cookie WEBCOOKIE insert nocache indirect
    server web1 172.25.254.10:80 cookie lee1 check inter 2 fall 3 rise 5 weight 1
    server web2 172.25.254.20:80 cookie lee2 check inter 2 fall 3 rise 5 weight 1

[root@haproxy ~]# systemctl restart haproxy.service

# 访问测速
[root@haproxy ~]# curl -b WEBCOOKIE=lee1 172.25.254.100
webserver1 - 172.25.254.10
[root@haproxy ~]# curl -b WEBCOOKIE=lee1 172.25.254.100
webserver1 - 172.25.254.10
[root@haproxy ~]# curl -b WEBCOOKIE=lee2 172.25.254.100
webserver2 - 172.25.254.20
[root@haproxy ~]# curl -b WEBCOOKIE=lee2 172.25.254.100
webserver2 - 172.25.254.20
[root@haproxy ~]# curl -b WEBCOOKIE=lee2 172.25.254.100
webserver2 - 172.25.254.20
cookie添加参数解释
name:cookie的key名称,用于实现持久连接
insert:插入新的cookie,默认不插入cookie
indirect:如果客户端已经有了cookie,则不会再发生cookie信息
nocache:当client和haproxy之间又缓存服务器(如CDN)时,不允许中间缓存器缓存cookie,因为这会导致很多经过同一个CDN的请求都发送到同一台后端服务器
haproxy的IP透传
环境准备:
| 主机名 | IP | 角色 | VMware网络硬件配置 |
|---|---|---|---|
| haproxy | 172.25.254.100 | haproxy负载均衡机器 | 一块NAT的网卡 |
| webserver1 | 172.25.254.10 | 真实服务器 | 一块NAT的网卡 |
| webserver2 | 172.25.254.20 | 真实服务器 | 一块NAT的网卡 |
| client | 172.25.254.200 | 测试主机 | 一块NAT的网卡 |
七层透传(mode=http)nginx
IP透传的用途:web服务器中需要记录客户端的真实IP地址,用于做访问统计、安全防护、行为分析、区域排行等场景。
haproxy主机操作
[root@haproxy ~]# vim /etc/haproxy/haproxy.cfg

defaults
    mode                    http
    log                     global
    option                  httplog
    option                  dontlognull
    option http-server-close
    # IP透传的参数,需要保持开启
    option forwardfor       except 127.0.0.0/8

[root@haproxy ~]# systemctl restart haproxy.service
webserver2主机(nginx)操作
[root@webserver2 ~]# > /var/log/nginx/access.log
[root@webserver2 ~]# cat /var/log/nginx/access.log
# 这里显示了真实访问主机的IP,透传成功
172.25.254.100 - - [10/Aug/2024:10:34:36 +0800] "GET / HTTP/1.1" 200 27 "-" "curl/7.76.1" "172.25.254.200"
七层透传(mode=http)apache
haproxy主机操作
[root@haproxy ~]# vim /etc/haproxy/haproxy.cfg

defaults
    mode                    http
    log                     global
    option                  httplog
    option                  dontlognull
    option http-server-close
    # IP透传的参数,需要保持开启
    option forwardfor       except 127.0.0.0/8

[root@haproxy ~]# systemctl restart haproxy.service
webserver1主机(apache)操作
[root@webserver1 ~]# vim /etc/httpd/conf/httpd.conf

# 添加这个内容到这里,%{X-Forwarded-For}i
    LogFormat "%{X-Forwarded-For}i %h %l %u %t \"%r\" %>s %b \"%{Referer}i\" \"%{User-Agent}i\"" combined

[root@webserver1 ~]# systemctl restart httpd.service

[root@webserver1 ~]# > /etc/httpd/logs/access_log
[root@webserver1 ~]# cat /etc/httpd/logs/access_log
# 这里显示了真实访问主机的IP,透传成功
172.25.254.200 172.25.254.100 - - [10/Aug/2024:10:42:53 +0800] "GET / HTTP/1.1" 403 27 "-" "curl/7.76.1"
四层透传(mode=tcp)nginx
haproxy主机操作
[root@haproxy ~]# vim /etc/haproxy/haproxy.cfg

listen webcluster
    bind *:80
    # 这里需要更改为tcp
    mode tcp
    balance roundrobin
    #redirect prefix http://www.baidu.com/
    #server web1 172.25.254.10:80 check inter 2 fall 3 rise 5 weight 2
    #server web2 172.25.254.20:80 check inter 2 fall 3 rise 5 weight 1
    #server web_sorry 172.25.254.100:8080 backup
    #cookie WEBCOOKIE insert nocache indirect
    server web1 172.25.254.10:80 check inter 2 fall 3 rise 5 weight 1
    # 这里需要加上send-proxy
    server web2 172.25.254.20:80 send-proxy check inter 2 fall 3 rise 5 weight 1

[root@haproxy ~]# systemctl restart haproxy.service
webserver2主机(nginx)操作
[root@webserver2 ~]# vim /etc/nginx/nginx.conf
http {
    log_format  main  '$remote_addr - $remote_user [$time_local] "$request" '
                      '$status $body_bytes_sent "$http_referer" '
                      # 在访问日志中通过变量$proxy_protocol_addr 记录透传过来的客户端IP
                      ' "$proxy_protocol_addr"'
                      '"$http_user_agent" "$http_x_forwarded_for"';

   server {
        listen       80 proxy_protocol; # 需要添加这个,才可以通过四层代理访问此网站
        listen       [::]:80;
        server_name  _;
        root         /usr/share/nginx/html;

        # Load configuration files for the default server block.
        include /etc/nginx/default.d/*.conf;

[root@webserver2 ~]# systemctl restart nginx.service

[root@webserver2 ~]# cat /var/log/nginx/access.log
# 这里显示了真实访问主机的IP,透传成功
172.25.254.100 - - [10/Aug/2024:10:56:26 +0800] "GET / HTTP/1.1" 200 27 "-"  "172.25.254.200""curl/7.76.1" "-"
172.25.254.100 - - [10/Aug/2024:10:56:27 +0800] "GET / HTTP/1.1" 200 27 "-"  "172.25.254.200""curl/7.76.1" "-"
四层透传(mode=tcp)apache
基本不使用了
总结
- 七层透传
- nginx直接就可以实现透传,不需要额外的配置
- apache需要添加在主配置文件中添加对应的格式才可以(一步操作)
- 四次透传
- nginx需要配置三个部分,主配置文件添加二块,haproxy配置文件添加一块(send-proxy)
- apache的这部分内容内取消掉了,无法实现了
client主机操作
# 都是访问操作
[root@client ~]# curl 172.25.254.10
[root@client ~]# curl 172.25.254.20
haproxy的acl基本访问控制
环境准备:
| 主机名 | IP | 角色 | VMware网络硬件配置 |
|---|---|---|---|
| haproxy | 172.25.254.100 | haproxy负载均衡机器 | 一块NAT的网卡 |
| webserver1 | 172.25.254.10 | 真实服务器 | 一块NAT的网卡 |
| webserver2 | 172.25.254.20 | 真实服务器 | 一块NAT的网卡 |
| client | 172.25.254.200 | 测试主机 | 一块NAT的网卡 |
haproxy主机操作
[root@haproxy ~]# vim /etc/haproxy/haproxy.cfg

# 进行一下配置文件的编写
frontend webcluster
    bind *:80
    mode http
    acl test  hdr_end(host) -i .org
    use_backend webcluster-host if test
    default_backend default-host

backend webcluster-host
    mode http
    server web1 172.25.254.10:80 check inter 2 fall 2 rise 5

backend default-host
    mode http
    server web2 172.25.254.20:80 check inter 2 fall 2 rise 5

[root@haproxy ~]# systemctl restart haproxy.service
client主机测试
[root@client ~]# vim /etc/hosts
[root@client ~]# cat /etc/hosts
127.0.0.1   localhost localhost.localdomain localhost4 localhost4.localdomain4
::1         localhost localhost.localdomain localhost6 localhost6.localdomain6
172.25.254.200  client.shanxin.org
172.25.254.10   www.shanxin.org
172.25.254.20   www.shanxin.com

# 测试成功
[root@client ~]# curl www.shanxin.org
webserver1 - 172.25.254.10
[root@client ~]# curl www.shanxin.com
webserver2 - 172.25.254.20
haproxy的acl一些常用限制
环境准备:
| 主机名 | IP | 角色 | VMware网络硬件配置 |
|---|---|---|---|
| haproxy | 172.25.254.100 | haproxy负载均衡机器 | 一块NAT的网卡 |
| webserver1 | 172.25.254.10 | 真实服务器 | 一块NAT的网卡 |
| webserver2 | 172.25.254.20 | 真实服务器 | 一块NAT的网卡 |
| client | 172.25.254.200 | 测试主机 | 一块NAT的网卡 |
基于域名的访问控制
haproxy主机操作
[root@haproxy ~]# vim /etc/haproxy/haproxy.cfg

frontend webcluster
    bind *:80
    mode http
    # acl访问控制
    acl domain hdr_dom(host) -i www.shanxin.org

    use_backend webcluster-host if domain
    default_backend default-host

backend webcluster-host
    mode http
    server web1 172.25.254.10:80 check inter 2 fall 2 rise 5

backend default-host
    mode http
    server web2 172.25.254.20:80 check inter 2 fall 2 rise 5

[root@haproxy ~]# systemctl restart haproxy.service
client主机操作
[root@client ~]# curl www.shanxin.org
webserver1 - 172.25.254.10
[root@client ~]# curl www.shanxin.com
webserver2 - 172.25.254.20
基于IP的访问控制
haproxy主机操作
[root@haproxy ~]# vim /etc/haproxy/haproxy.cfg

frontend webcluster
    bind *:80
    mode http

    acl ctrl_ip src 172.25.254.200 172.25.254.20 192.168.0.0/24

    use_backend webcluster-host if ctrl_ip
    default_backend default-host

backend webcluster-host
    mode http
    server web1 172.25.254.10:80 check inter 2 fall 2 rise 5

backend default-host
    mode http
    server web2 172.25.254.20:80 check inter 2 fall 2 rise 5

[root@haproxy ~]# systemctl restart haproxy.service
client主机操作
[root@client ~]# curl 172.25.254.100
webserver1 - 172.25.254.10
haproxy主机测试
[root@haproxy ~]# curl 172.25.254.100
webserver2 - 172.25.254.20
基于IP的访问控制之黑名单
haproxy主机操作
[root@haproxy ~]# vim /etc/haproxy/haproxy.cfg
frontend webcluster
    bind *:80
    mode http

    acl ctrl_ip src 172.25.254.200 172.25.254.20 192.168.0.0/24

    # use_backend webcluster-host if ctrl_ip
    http-request deny if ctrl_ip
    default_backend default-host

backend webcluster-host
    mode http
    server web1 172.25.254.10:80 check inter 2 fall 2 rise 5

backend default-host
    mode http
    server web2 172.25.254.20:80 check inter 2 fall 2 rise 5

[root@haproxy ~]# systemctl restart haproxy.service
client主机操作
[root@client ~]# curl 172.25.254.100
<html><body><h1>403 Forbidden</h1>
Request forbidden by administrative rules.
</body></html>
haproxy主机测试
[root@haproxy ~]# curl 172.25.254.100
webserver2 - 172.25.254.20
在这个实验中172.25.254.200 – client客户端,172.25.254.20 – webserver2主机端
基于浏览器的访问控制
haproxy主机操作
[root@haproxy ~]# vim /etc/haproxy/haproxy.cfg

frontend webcluster
    bind *:80
    mode http
    acl badwebrowers hdr_sub(User-Agent) -i curl wget
    http-request deny if badwebrowers
    default_backend default-host

backend webcluster-host
    mode http
    server web1 172.25.254.10:80 check inter 2 fall 2 rise 5

backend default-host
    mode http
    server web2 172.25.254.20:80 check inter 2 fall 2 rise 5

[root@haproxy ~]# systemctl restart haproxy.service
client主机操作
[root@client ~]# curl 172.25.254.100
<html><body><h1>403 Forbidden</h1>
Request forbidden by administrative rules.
</body></html>
浏览器访问测试

基于文件后缀名来实现动静分离
haproxy主机操作
[root@haproxy ~]# vim /etc/haproxy/haproxy.cfg
frontend webcluster
    bind *:80
    mode http
    acl static path_end -i .html .jpg .png .css .js
    acl php path_end -i .php

    use_backend webcluster-host if php

    default_backend default-host

backend webcluster-host
    mode http
    server web1 172.25.254.10:80 check inter 2 fall 2 rise 5

backend default-host
    mode http
    server web2 172.25.254.20:80 check inter 2 fall 2 rise 5

[root@haproxy ~]# systemctl restart haproxy.service
webserver1主机操作
[root@webserver1 ~]# dnf install php -y
[root@webserver1 ~]# systemctl disable --now nginx.service

[root@webserver1 ~]# systemctl restart httpd.service
[root@webserver1 ~]# vim /var/www/html/index.php
[root@webserver1 ~]# cat /var/www/html/index.php
<?php
        phpinfo();
?>
client主机操作
[root@client ~]# curl 172.25.254.100
webserver2 - 172.25.254.20
浏览器访问控制

基于网址后面的目录文件的访问控制
haproxy主机操作
[root@haproxy ~]# vim /etc/haproxy/haproxy.cfg

frontend webcluster
    bind *:80
    mode http
    acl static path_sub -m sub static
    acl php    path_sub -m sub php

    use_backend webcluster-host if php

    default_backend default-host

backend webcluster-host
    mode http
    server web1 172.25.254.10:80 check inter 2 fall 2 rise 5

backend default-host
    mode http
    server web2 172.25.254.20:80 check inter 2 fall 2 rise 5
[root@haproxy ~]# systemctl restart haproxy.service
webserver1主机操作
[root@webserver1 ~]# mkdir /var/www/html/php/ -p
[root@webserver1 ~]# cp /var/www/html/index.php /var/www/html/php/
webserver2主机操作
[root@webserver2 ~]# mkdir /usr/share/nginx/html/static/ -p
[root@webserver2 static]# cp /usr/share/nginx/html/index.html /usr/share/nginx/html/static/
浏览器访问测试

haproxy自定义错误页面
haproxy主机操作
# 查看错误页面文件的存储路径
[root@haproxy ~]# rpm -ql haproxy | grep http
/usr/share/doc/haproxy/design-thoughts/http2.txt
/usr/share/doc/haproxy/design-thoughts/http_load_time.url
/usr/share/doc/haproxy/internals/http-cookies.txt
/usr/share/doc/haproxy/internals/http-docs.txt
/usr/share/doc/haproxy/internals/http-parsing.txt
/usr/share/doc/haproxy/option-http_proxy.cfg
/usr/share/haproxy/400.http
/usr/share/haproxy/403.http
/usr/share/haproxy/408.http
/usr/share/haproxy/500.http
/usr/share/haproxy/502.http
/usr/share/haproxy/503.http
/usr/share/haproxy/504.http

[root@haproxy ~]# mkdir  /etc/haproxy/errorpage/
[root@haproxy ~]# cp /usr/share/haproxy/503.http /etc/haproxy/errorpage/503.http
[root@haproxy ~]# vim /etc/haproxy/errorpage/503.http
# 修改内容如下
HTTP/1.0 503 Service Unavailable
Cache-Control: no-cache
Connection: close
Content-Type: text/html

<html><body><h1>errrrrrrrrrrrr</h1>
No server is available to handle this request.
</body></html>

# 配置haproxy主配置文件
[root@haproxy conf.d]# vim /etc/haproxy/haproxy.cfg

    timeout client          1m
    timeout server          1m
    timeout http-keep-alive 10s
    timeout check           10s
    maxconn                 3000

	# 这条语句要放在default里面
    errorfile   503 /etc/haproxy/errorpage/503.http

[root@haproxy conf.d]# systemctl restart haproxy.service
webserver1主机操作
[root@webserver1 ~]# systemctl stop httpd.service
webserver2主机操作
[root@webserver2 static]# systemctl stop nginx.service
client主机操作
[root@client ~]# curl 172.25.254.100
<html><body><h1>errrrrrrrrrrrr</h1>
No server is available to handle this request.
</body></html>

[root@client ~]# curl 172.25.254.10
curl: (7) Failed to connect to 172.25.254.10 port 80: 拒绝连接
[root@client ~]# curl 172.25.254.20
curl: (7) Failed to connect to 172.25.254.20 port 80: 拒绝连接
浏览器访问测试

haproxy报错后跳转指定网站
haproxy主机操作
[root@haproxy conf.d]# vim /etc/haproxy/haproxy.cfg

    #errorfile  503 /etc/haproxy/errorpage/503.http
    # 也是在defualt语句块中
    errorloc    503 https://www.baidu.com
[root@haproxy conf.d]# systemctl restart haproxy.service
浏览器测试

haproxy四层负载数据库
haproxy主机操作
# 在haproxy的子配置文件中配置
[root@haproxy conf.d]# vim /etc/haproxy/conf.d/web.cfg
[root@haproxy conf.d]# cat /etc/haproxy/conf.d/web.cfg
listen dbserver
        bind *:3306
        mode tcp
        balance static-rr
        server db1      172.25.254.10:3306 check inter 2 fall 2 rise 5
        server db2      172.25.254.20:3306 check inter 2 fall 2 rise 5

[root@haproxy conf.d]# systemctl restart haproxy.service
webserver1主机操作
[root@webserver1 ~]# dnf install mariadb-server -y
[root@webserver1 ~]# systemctl enable --now mariadb
[root@webserver1 ~]# vim /etc/my.cnf.d/mariadb-server.cnf

[mysqld]
server-id=1 # 设置数据库的id为了在之后的测试方便
datadir=/var/lib/mysql
socket=/var/lib/mysql/mysql.sock
log-error=/var/log/mariadb/mariadb.log
pid-file=/run/mariadb/mariadb.pid

[root@webserver1 ~]# systemctl restart mariadb.service

[root@webserver1 ~]# mysql

# 建立普通用户lee,并授予权限,为了之后的远程登录测试
MariaDB [(none)]> create user lee@'%' identified by 'lee';
Query OK, 0 rows affected (0.001 sec)

MariaDB [(none)]> grant all on *.* to lee@'%' identified by 'lee';
Query OK, 0 rows affected (0.001 sec)

MariaDB [(none)]> quit
Bye
webserver2主机操作
[root@webserver2 ~]# dnf install mariadb-server -y
[root@webserver2 ~]# systemctl enable --now mariadb
[root@webserver2 ~]# vim /etc/my.cnf.d/mariadb-server.cnf

[mysqld]
server-id=2 # server-id=1 # 设置数据库的id为了在之后的测试方便
datadir=/var/lib/mysql
socket=/var/lib/mysql/mysql.sock
log-error=/var/log/mariadb/mariadb.log
pid-file=/run/mariadb/mariadb.pid

[root@webserver2 ~]# systemctl restart mariadb.service

[root@webserver2 ~]# mysql
MariaDB [(none)]> create user lee@'%' identified by 'lee';
Query OK, 0 rows affected (0.001 sec)

MariaDB [(none)]> grant all on *.* to lee@'%' identified by 'lee';
Query OK, 0 rows affected (0.001 sec)
MariaDB [(none)]> quit
Bye
client主机操作
[root@client ~]# mysql -ulee -plee -h 172.25.254.100
MariaDB [(none)]> select @@server_id;
+-------------+
| @@server_id |
+-------------+
|           1 |
+-------------+
1 row in set (0.001 sec)
MariaDB [(none)]> quit
Bye

[root@client ~]# mysql -ulee -plee -h 172.25.254.100
MariaDB [(none)]> select @@server_id;
+-------------+
| @@server_id |
+-------------+
|           2 |
+-------------+
1 row in set (0.001 sec)
MariaDB [(none)]> quit
Bye

[root@client ~]# mysql -ulee -plee -h 172.25.254.100
MariaDB [(none)]> select @@server_id;
+-------------+
| @@server_id |
+-------------+
|           1 |
+-------------+
1 row in set (0.001 sec)
MariaDB [(none)]> quit
Bye

[root@client ~]# mysql -ulee -plee -h 172.25.254.100
MariaDB [(none)]> select @@server_id;
+-------------+
| @@server_id |
+-------------+
|           2 |
+-------------+
1 row in set (0.001 sec)
haproxy之https网站加密
haproxy主机操作
# 建立证书以及密钥的存储目录
[root@haproxy ~]# mkdir -p /etc/haproxy/certs
# 生成证书以及密钥
[root@haproxy ~]# openssl req -newkey rsa:2048 -nodes -sha256 -keyout /etc/haproxy/certs/shanxin.org.key -x509 -days 365 -out /etc/haproxy/certs/shanxin.org.crt

[root@haproxy ~]# ll /etc/haproxy/certs/
总用量 8
-rw-r--r-- 1 root root 1415  8月 10 17:19 shanxin.org.crt
-rw------- 1 root root 1708  8月 10 17:18 shanxin.org.key

# 将证书以及密钥文件都存储在配置默认路径中
[root@haproxy ~]# cat /etc/haproxy/certs/shanxin.org.key /etc/haproxy/certs/shanxin.org.crt > /etc/haproxy/certs/shanxin.org.pem
[root@haproxy ~]# ll /etc/haproxy/certs/shanxin.org.pem
-rw-r--r-- 1 root root 3123  8月 10 17:21 /etc/haproxy/certs/shanxin.org.pem

[root@haproxy ~]# vim /etc/haproxy/conf.d/web.cfg

listen web-https
    bind *:443 ssl crt /etc/haproxy/certs/shanxin.org.pem
    mode http
    balance roundrobin
    server web1 172.25.254.10:80 check inter 2 fall 2 rise 5 # 这里实际上是对haproxy主机进行了https加密,真实的服务器还是80端口,未加密
    server web2 172.25.254.20:80 check inter 2 fall 2 rise 5

[root@haproxy ~]# systemctl restart haproxy.service
webserver1主机操作
[root@webserver1 ~]# systemctl start httpd.service
webserver2主机操作
[root@webserver2 ~]# systemctl start nginx.service
浏览器访问测试


haproxy之https网站强制全站加密
haproxy主机操作
[root@haproxy ~]# vim /etc/haproxy/conf.d/web.cfg

listen webcluster
    bind *:80
    mode http
    redirect scheme https if !{ ssl_fc }
n
[root@haproxy ~]# systemctl restart haproxy.service
浏览器访问测试

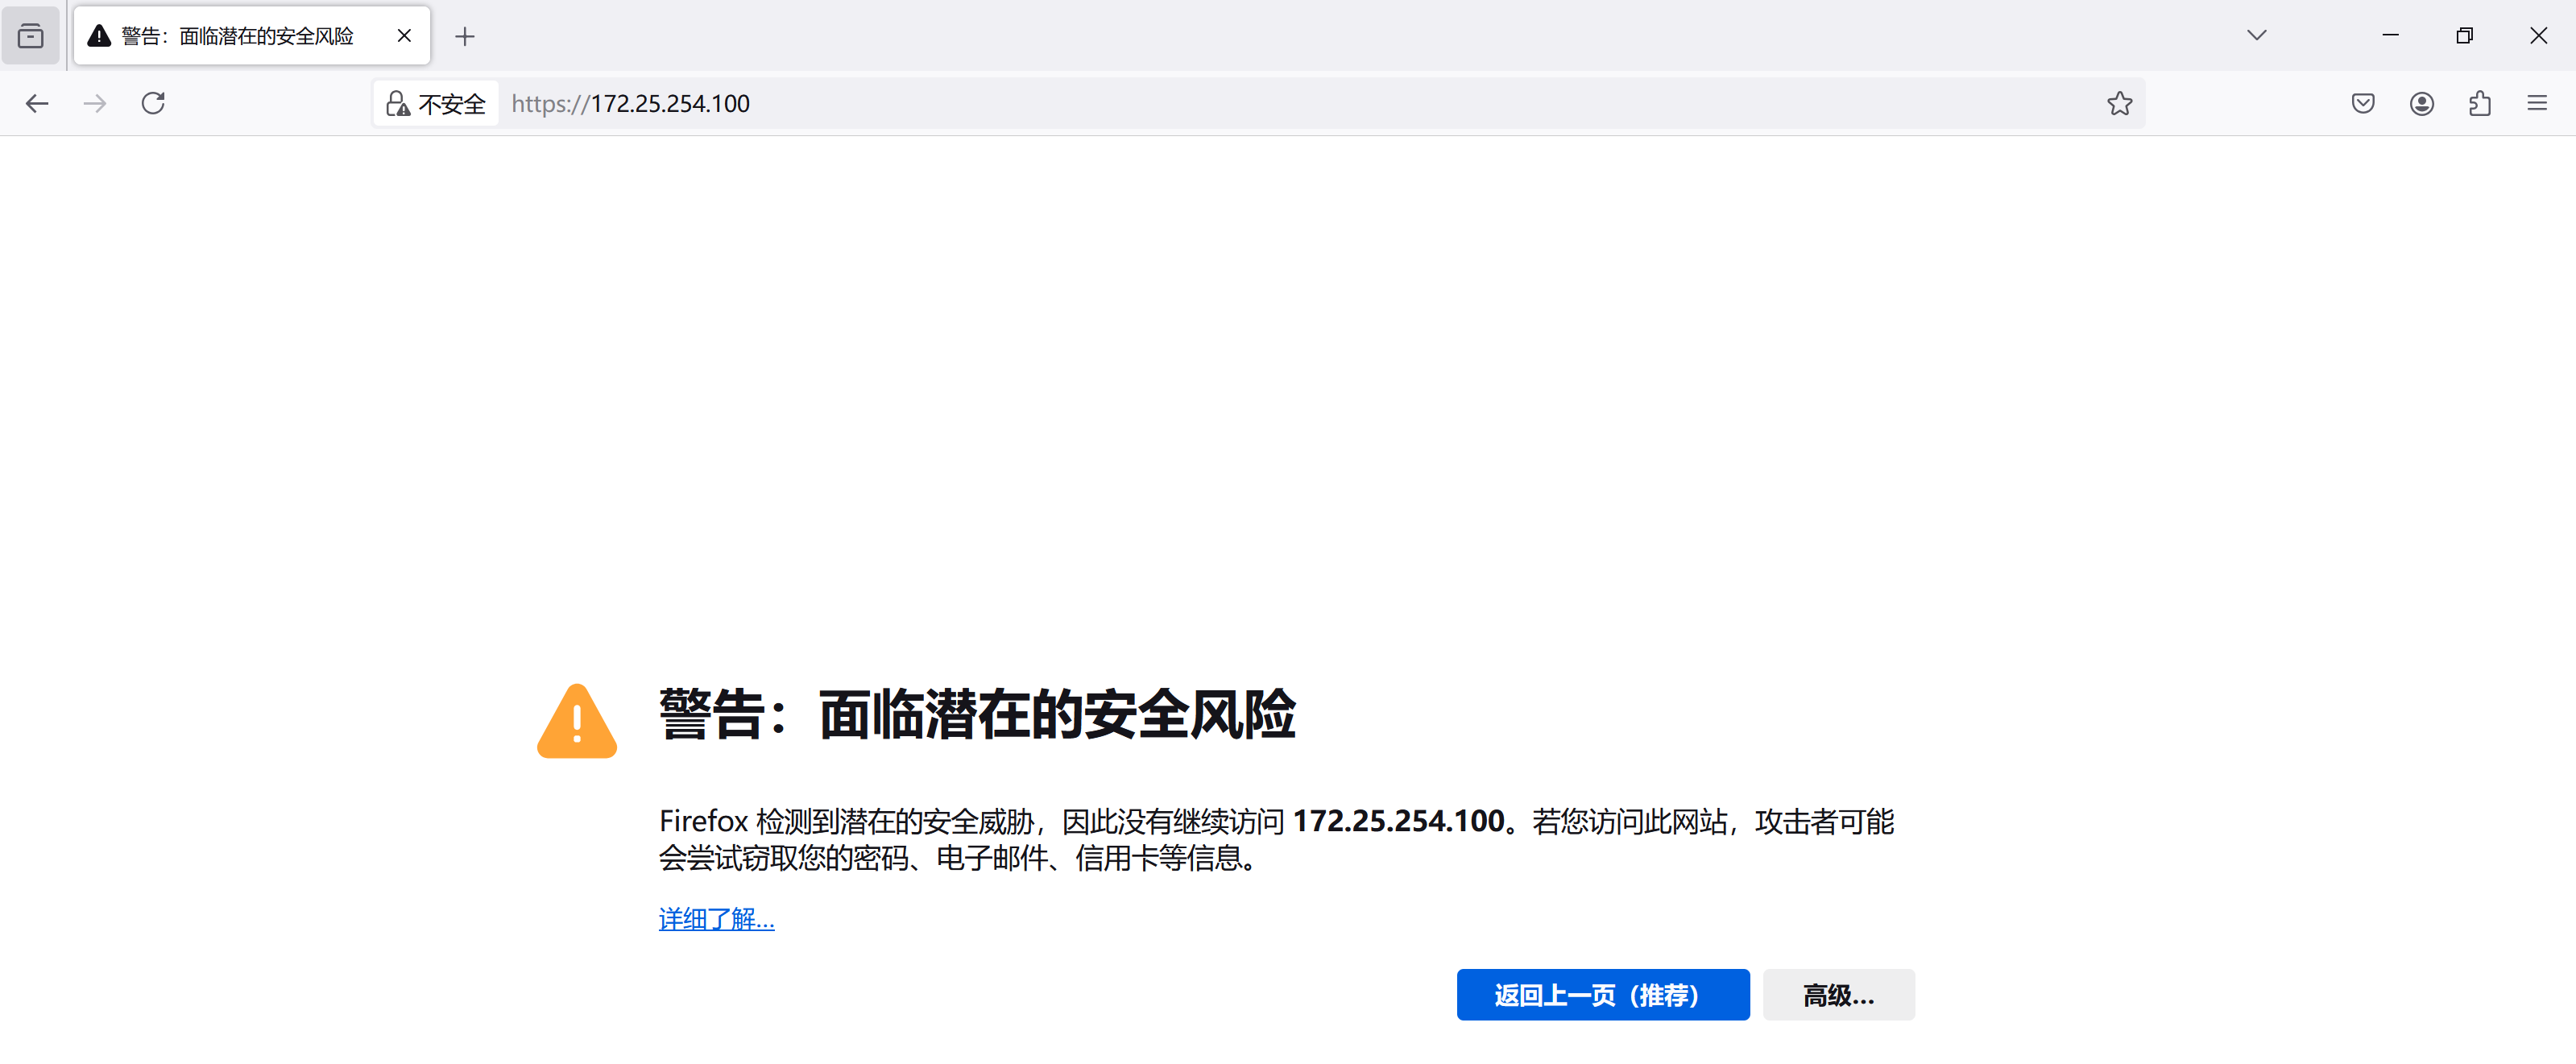
这里在地址栏中原本输入的是172.25.254.100,但最终访问的是https://172.25.254.100