写这篇文章的目的是让大家都可以学到东西,核心代码中列出了处理思维和调用方法,业务代码已经过滤掉了,希望大家不要做crud程序员!!要思考。。。该博客不懂时可联系下方。

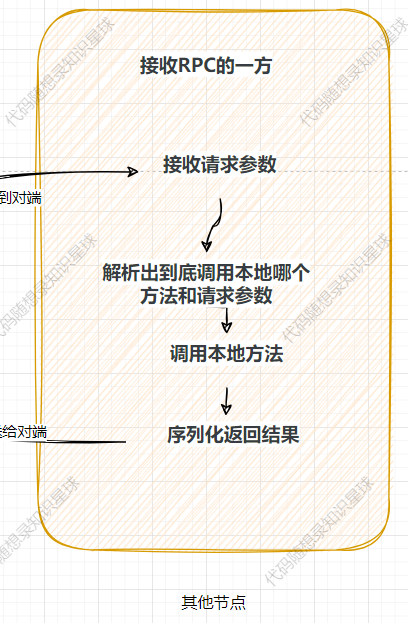
1、流程图如下

2、策略描述
实现方式:
设计模式:父策略调动子策略
业务理念:在不影响原有业务的前提下增加优化
报错机制:当加载logo时报错,直接返回原有文件地址
业务分支:
1、pdf策略:
使用PDDocument处理pdf,主要流程如下
①生成下角PDF(自适应源文件大小)
②拉取源文件到本地
③转换PDF到JPG并合并文件(pdf直接合并会自动分页)
④将转换后的文件重新生成PDF
2、图片策略:
①生成下角PDF(自适应源文件大小)
②拉取源文件到本地
③转换pdf文件成图片并同源文件合并
3、压缩包策略:
根据压缩包的格式走不通的解压 压缩方式
①拉取压缩包到本地
②生成下角PDF
③解压压缩包并将生成的PDF放入
④压缩文件目录
剩余问题(优化性问题):
1、效率问题: 第一次下载文件时,因未处理过需要走策略模式,因处理步骤较多可能会很慢。
2、自适应问题:PDF自适应时会将清晰度降低,目前不走自适应
3、核心代码模块
一、图片格式处理
①生成左小角文件
public void createJpgWithSize(String filePath, float width, float height, Contact contact) {

        try (PDDocument document = new PDDocument();
             FileOutputStream fio = new FileOutputStream(new File(filePath))) {

            // 创建具有指定大小的页面
            PDPage page = new PDPage(new PDRectangle(width, height));
            try (PDPageContentStream contentStream = new PDPageContentStream(document, page)) {

                // 设置字体和颜色
                File fontFile = new File("/data/config/easybii/simhei.ttf");
                PDType0Font font = PDType0Font.load(document, fontFile);
                contentStream.setFont(font, 22);
                contentStream.setNonStrokingColor(Color.black);

                String phone = " ";
                if (StringUtils.isNotBlank(contact.getTelephone())) {

                    phone += contact.getTelephone();
                }
                if (StringUtils.isNotBlank(contact.getTelephone1())) {

                    phone += "  " + contact.getTelephone();
                }
                // 写入文字
                contentStream.beginText();
                contentStream.newLineAtOffset(20, 15);
                contentStream.showText("报价联系人: " + contact.getName() + phone);
                contentStream.endText();
            }
            // 将页面添加到文档中
            document.addPage(page);
            // 保存文档
            document.save(fio);
        } catch (IOException e) {

            e.printStackTrace();
        }
    }
②将pdf文件转化为jpg
  public void convertPDDocumentToImage(String pdfPath, String outputImagePath) {

        try (PDDocument document = PDDocument.load(new File(pdfPath))) {

            PDFRenderer renderer = new PDFRenderer(document);
            BufferedImage image = renderer.renderImageWithDPI(0, 300); // 0 表示第一页,300 是 DPI

            javax.imageio.ImageIO.write(image, "jpg", new File(outputImagePath));
        } catch (IOException e) {

            e.printStackTrace();
        }
    }
③压缩尺寸
 /**
     * 压缩尺寸
     *
     * @param sourceImagePath
     * @param targetImagePath
     * @param targetWidth
     * @param targetHeight
     */
    public void resizeJpg(String sourceImagePath, String targetImagePath, float targetWidth, float targetHeight) {

        try {

            BufferedImage sourceImage = ImageIO.read(new File(sourceImagePath));

            float sourceWidth = sourceImage.getWidth();
            float sourceHeight = sourceImage.getHeight();

            double scaleX = (double) targetWidth / sourceWidth;
            double scaleY = (double) targetHeight / sourceHeight;
            double scale = Math.min(scaleX, scaleY);

            int newWidth = (int) (sourceWidth * scale);
            int newHeight = (int) (sourceHeight * scale);

            BufferedImage resizedImage = new BufferedImage(newWidth, newHeight, BufferedImage.TYPE_INT_RGB);

            Graphics2D graphics2D = resizedImage.createGraphics();
            graphics2D.setRenderingHint(RenderingHints.KEY_INTERPOLATION, RenderingHints.VALUE_INTERPOLATION_BILINEAR);
            graphics2D.drawImage(sourceImage, 0, 0, newWidth, newHeight, null);
            graphics2D.dispose();

            ImageIO.write(resizedImage, "jpg", new FileOutputStream(new File(targetImagePath)));
        } catch (IOException e) {

            e.printStackTrace();
        }
    }
④合并俩个图片
/**
     * 将俩张图片合并为一张图片
     *
     * @param image1Path
     * @param image2Path
     * @param mergedImagePath
     */
    public String mergeJpgImages(String image1Path, String image2Path, String mergedImagePath) {

        try {

            ImageInputStream input1 = ImageIO.createImageInputStream(new File(image1Path));
            ImageReader reader1 = ImageIO.getImageReaders(input1).next();
            reader1.setInput(input1);
            BufferedImage image1 = reader1.read(0);

            ImageInputStream input2 = ImageIO.createImageInputStream(new File(image2Path));
            ImageReader reader2 = ImageIO.getImageReaders(input2).next();
            reader2.setInput(input2);
            BufferedImage image2 = reader2.read(0);

            int width = Math.max(image1.getWidth(), image2.getWidth());
            int height = image1.getHeight() + image2.getHeight();

            BufferedImage mergedImage = new BufferedImage(width, height, BufferedImage.TYPE_INT_RGB);

            // 绘制第一张图片
            mergedImage.getGraphics().drawImage(image1, 0, 0, null);

            // 绘制第二张图片在第一张图片下方
            mergedImage.getGraphics().drawImage(image2, 0, image1.getHeight(), null


