基于上文,继续
瑞芯微平台RK3568系统开发(2)Camera 开发1-CSDN博客
1、使用v4l2-ctl说明
media-ctl工具的操作是通过/dev/medio0等media设备,它所管理是media的拓扑结构中各个节点的format,大小,链接。
v4l2-ctl工具则是针对/dev/video0,/dev/video1等video设备,它在video设备上进行set_fmt,reqbuf,qbuf,dqbuf,stream_on,stream_off等一系列操作。
本文主要用v4l2-ctl进行采集帧数据,设置曝光、gain、VTS等v4l2_control。
建议先查看v4l2-ctl的帮助文档。
帮助文档内容比较多,分成很多个部分,我们比较关心的是其的streaming,vidcap。
帮助文档梗概如下:
[root@RK356X:~]# v4l2-ctl – help
General/Common options:
--all          display all information available
-C, --get-ctrl <ctrl>[,<ctrl>...]
get the value of the controls [VIDIOC_G_EXT_CTRLS]
-c, --set-ctrl <ctrl>=<val>[,<ctrl>=<val>...]
set the value of the controls [VIDIOC_S_EXT_CTRLS]
-D, --info          show driver info [VIDIOC_QUERYCAP]
-d, --device <dev> use device <dev> instead of /dev/video0
if <dev> starts with a digit, then /dev/video<dev> is used
-e, --out-device <dev> use device <dev> for output streams instead of the default device as set with --device
if <dev> starts with a digit, then /dev/video<dev> is used
-h, --help display this help message
完整的帮助文档如下:
[root@RK356X:~]# v4l2-ctl --help-all
General/Common options:
--all          display all information available
-C, --get-ctrl <ctrl>[,<ctrl>...]
get the value of the controls [VIDIOC_G_EXT_CTRLS]
-c, --set-ctrl <ctrl>=<val>[,<ctrl>=<val>...]
set the value of the controls [VIDIOC_S_EXT_CTRLS]
-D,           --info show driver info [VIDIOC_QUERYCAP]
-d, --device <dev> use device <dev> instead of /dev/video0
if <dev> starts with a digit, then /dev/video<dev> is used
-e, --out-device <dev> use device <dev> for output streams instead of the default device as set with --device
if <dev> starts with a digit, then /dev/video<dev> is used
-h, --help          display this help message
--help-all          all options
--help-io          input/output options
--help-meta          metadata format options
--help-misc          miscellaneous options
--help-overlay          overlay format options
--help-sdr          SDR format options
--help-selection          crop/selection options
--help-stds           standards and other video timings options
--help-streaming          streaming options
--help-subdev          sub-device options
--help-tuner          tuner/modulator options
--help-vbi          VBI format options
--help-vidcap          video capture format options
--help-vidout          vidout output format options
--help-edid          edid handling options
-k, --concise          be more concise if possible.
-l, --list-ctrls          display all controls and their values [VIDIOC_QUERYCTRL]
-L, --list-ctrls-menus          display all controls and their menus [VIDIOC_QUERYMENU]
与streaming相关的参数如下:
[root@RK356X:~]# v4l2-ctl --help-streaming
Video Streaming options:
--stream-count <count>
stream <count> buffers. The default is to keep streaming forever. This count does not include the number of initial skipped buffers as is passed by --stream-skip.
--stream-skip <count>
skip the first <count> buffers. The default is 0.
--stream-sleep <count>
sleep for 1 second every <count> buffers. If <count> is 0, then sleep forever right after streaming starts. The default i s -1 (never sleep).
--stream-to <file>
stream to this file. The default is to discard the data. If <file> is '-', then the data is written to stdout and the --silent option is turned on automatically.
--stream-to-hdr <file>
stream to this file. Same as --stream-to, but each frame is prefixed by a header. Use for compressed data.
--stream-to-host <hostname[:port]>
stream to this host. The default port is 8362.
--stream-lossless always use lossless video compression.
--stream-poll          use non-blocking mode and select() to stream.
与vidcap相关的参数如下:
[root@RK356X:~]# v4l2-ctl --help-vidcap
Video Capture Formats options:
--list-formats          display supported video formats [VIDIOC_ENUM_FMT]
--list-formats-ext          display supported video formats including frame sizes and intervals
--list-framesizes <f>          list supported  framesizes for pixelformat <f> [VIDIOC_ENUM_FRAMESIZES] pixelformat is the fourcc value as a string
--list-frameintervals width=<w>, height=<h>, pixelformat=<f>          list supported frame intervals for pixelformat <f> and the given width and height [VIDIOC_ENUM_FRAMEINTERVALS] pixelformat is the fourcc value as a string
--list-fields          list supported fields for the current format
-V, --get-fmt-video           query the video capture format [VIDIOC_G_FMT]
-v, --set-fmt-video
2、使用v4l2-ctl抓帧
示例一,抓取RKCIF输出的1帧NV12数据保存到/tmp/nv12.bin,分辨率为640x480。
在保存数据前,先丢弃前面3帧
(即前面3帧虽然返回给userspace,但不保存到文件)。
$ v4l2-ctl -d/dev/video0\
--set-fmt-video=width=640,height=480, pixelformat=NV12 \
--stream-mmap=3 \
--stream-skip=3 \
--stream-to=/tmp/nv12. bin \
--stream-count=1 \
--stream-poll
运行过程中有<<<<符号输出,表示进度。
可以检查/tmp/nv12.bin文件大小,如果有数据表示抓取成功。
示例二,抓取RKISP输出的10帧NV12数据保存到/tmp/nv12.bin,分辨率为1920x1080。
$ v4l2-ctl -d /dev/video0 \
--set-selection=target=crop, top=0, left=0, width=1920,height=1080 \
--set-fmt-video=width=1920, height=1080, pixelformat=NV12 \
--stream-mmap=3 \
--stream-to=/tmp/nv12. bin \
--stream-count=10 \
--stream-poll
同样运行过程中有<<<<符号输出,表示进度。
可以检查/tmp/nv12.bin文件大小,如果有数据表示抓取成功。
参数的说明:
-d,指定操作对象为/dev/video0设备。
--set-selection,指定对输入图像进行裁剪。特别是当RKISP1的前级大小发生变化时要保证selection不大于前级输出大小。RKCIF的裁剪则是通过--set-crop参数设置的
--set-fmt-video,指定了宽高及pxielformat(用FourCC表示)。NV12即用FourCC表示的pixelformat。
--stream-mmap,指定buffer的类型为mmap,即由kernel分配的物理连续的或经过iommu映射的buffer。
--stream-skip,指定丢弃(不保存到文件)前3帧
--stream-to,指定帧数据保存的文件路径
--stream-count,指定抓取的帧数,不包括--stream-skip丢弃的数量
--stream-poll,该选项指示v4l2-ctl采用异步IO,即在dqbuf前先用select等等帧数据完成,从而保证dqbuf不阻塞。否则dqbuf将会阻塞直到有数据帧到来
3、使用GStreamer
在Rockchip发布的LinuxSDK下,可以使用GStreamer预览Camera的图像、编码。
使用v4l2src plugin即可从video device中获取图像。
默认地,rkisp_3A_server也会随之启动调制(Tunning),从而能够得到亮度、色彩正常的图像。
3.1 使用GStreamer显示图像
以下命令可以将Camera图像显示在屏幕上。
$ export LD_LIBRARY_PATH=$LD_LIBRARY_PATH:/usr/lib/gstreamer-1.0
$ export XDG_RUNTIME_DIR=/tmp/.xdg
$ gst-launch-1.0 v4l2src device=/dev/video0! \
video/x-raw, format=NV12,width=640,height=480, framerate=30/1 ! kmssink
运行正常的话,屏幕上会显示出摄像头图像。
按ctrl+c结束程序即可退出。
3.2 GStreamer视频、图片编码
Linux SDK同时还带有硬件编码,如下命令可以将Camera数据流编码并保存成文件。
$ gst-launch-1.0 v4l2src device=/dev/video0 num-buffers=100 ! \
video/x-raw, format=NV12,width=640,height=480, framerate=30/1 ! \
videoconvert ! mpph264enc ! h264parse ! mp4mux ! \
filesink location=/tmp/h264.mp4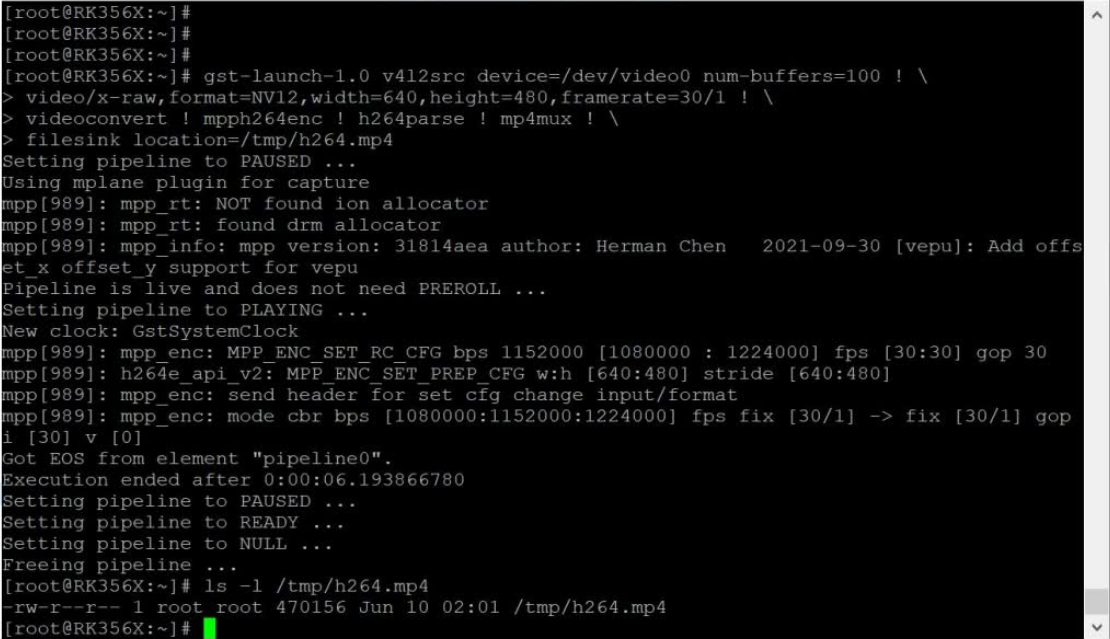
$ gst-launch-1.0 -v v4l2src device=/dev/video0 num-buffers=10 ! \
video/x-raw, format=NV12,width=640,height=480 ! mppjpegenc ! \
multifilesink location=/tmp/test%05d. jpg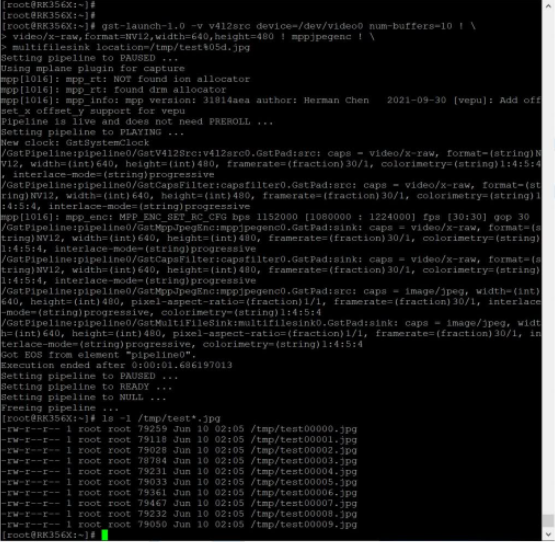
3.3 无屏板子调试
Rockchip Linux SDK 提供了librkuvc.so,利用该接口可以将板子当作一个uvc camera使用, 通过usb otg与PC端相连接。
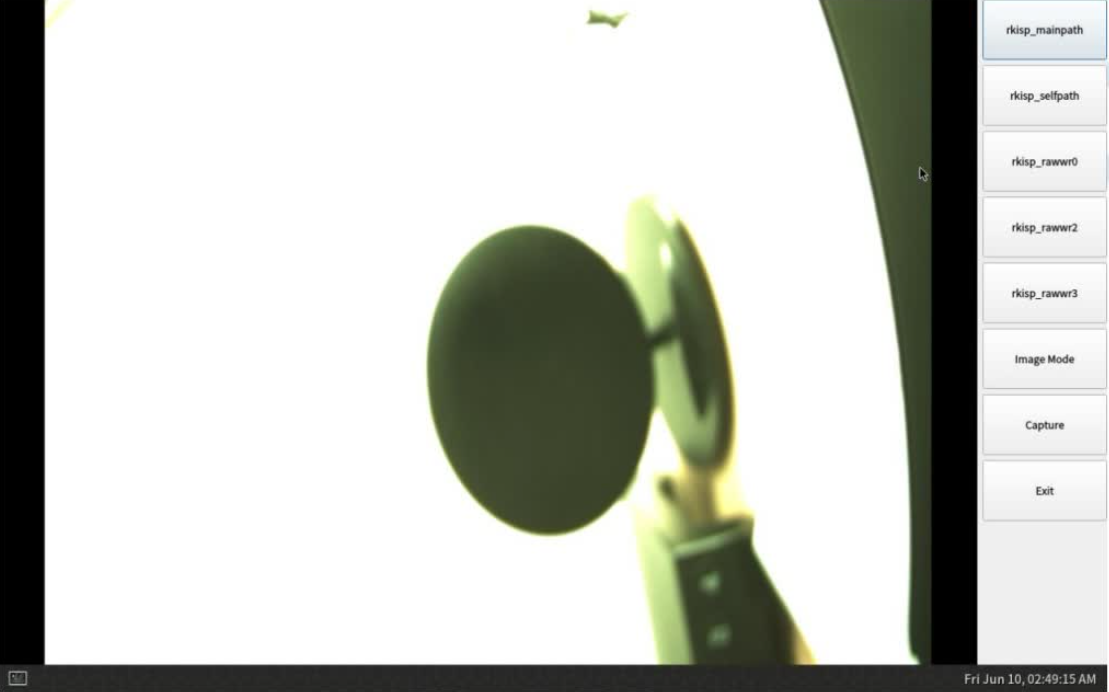
3.4 摄像头测试:qcamera
开发板上烧入Buildroot固件后,开机启动,
桌面上就会显示qcamera图标,用鼠标点击后,就会出现摄像头图像:
