近期,KubeSphere 社区的讨论中频繁出现关于 Docker 官方镜像仓库访问受限的问题。
本文旨在为您提供一个详细的指南, 展示在 Docker 官方镜像访问受限的情况下,如何通过 KubeKey v3.1.2 一次性成功部署 KubeSphere v3.4.1 以及 Kubernetes v1.28.8 集群。这将帮助您克服访问限制,确保部署过程的顺利进行。
实战服务器配置(架构1:1复刻小规模生产环境,配置略有不同)
| 主机名 | IP | CPU | 内存 | 系统盘 | 数据盘 | 用途 |
|---|---|---|---|---|---|---|
| ksp-control-1 | 192.168.9.91 | 8 | 16 | 40 | 100 | KubeSphere/k8s-control-plane/Worker |
| ksp-control-2 | 192.168.9.92 | 8 | 16 | 40 | 100 | KubeSphere/k8s-control-plane/Worker |
| ksp-control-3 | 192.168.9.93 | 8 | 16 | 40 | 100 | KubeSphere/k8s-control-plane/Worker |
| 合计 | 3 | 24 | 48 | 120 | 300 |
实战环境涉及软件版本信息
- 操作系统:openEuler 22.03 LTS SP3 x86_64
- KubeSphere:v3.4.1
- Kubernetes:v1.28.8
- KubeKey: v3.1.2
1. 前置条件
请参考 Kubernetes 集群节点 openEuler 22.03 LTS SP3 系统初始化指南,完成操作系统初始化配置。
初始化指南中没有涉及操作系统升级的任务,在能联网的环境建议初始化的时候升级操作系统,然后重启节点。
2. 安装部署 KubeSphere 和 Kubernetes
2.1 下载 KubeKey
本文将 Control-1 节点作为部署节点,把 KubeKey 最新版 (v3.1.2) 二进制文件下载到该服务器。
- 下载最新版的 KubeKey
mkdir ~/kubekey
cd ~/kubekey/

# 选择中文区下载(访问 GitHub 受限时使用)
export KKZONE=cn
curl -sfL https://get-kk.kubesphere.io | sh -- 查看 KubeKey 支持的 Kubernetes 版本列表
./kk version --show-supported-k8s
$ ./kk version --show-supported-k8s
v1.19.0
......(受限于篇幅,中间的不展示,请读者根据需求查看)
v1.28.10
v1.28.11
v1.29.0
v1.29.1
v1.29.2
v1.29.3
v1.29.4
v1.29.5
v1.29.6
v1.30.0
v1.30.1
v1.30.2
说明: 输出结果为 KubeKey 支持的结果,但不代表 KubeSphere 和其他 K8s 也能完美支持。
KubeKey 支持的 K8s 版本还是比较新的。本文选择 v1.28.8,生产环境可以选择 v1.26.15 或是其他次要版本是双数且补丁版本数超过 5 的版本。不建议选择太老的版本了,毕竟 v1.30 都已经发布了。
2.2 创建集群部署配置文件
本文部署一套三节点,control-plane 和 worker 复用的 Kubernetes 集群。同时,部署只启用默认插件的 KubeSphere 管理平台。
- 创建集群配置文件
本文选择了 KubeSphere v3.4.1 和 Kubernetes v1.28.8。因此,指定配置文件名称为 ksp-v341-v1288.yaml,如果不指定,默认的文件名为 config-sample.yaml。
./kk create config --name opsxlab -f ksp-v341-v1288.yaml --with-kubernetes v1.28.8 --with-kubesphere v3.4.1- 修改配置文件
重点说明:解决 DockerHub 镜像拉取受限的核心办法就是修改 registry 的相关配置,显示的指定镜像从国内镜像仓库拉取。
编辑配置文件, vi ksp-v341-v1288.yaml,主要修改 kind: Cluster 小节的相关配置,修改说明如下。
- hosts:指定节点的 IP、ssh 用户、ssh 密码、ssh 端口。示例演示了 ssh 端口号的配置方法。
- roleGroups:指定 etcd、control-plane 、worker 使用相同的三个节点
- internalLoadbalancer: 启用内置的 HAProxy 负载均衡器
- domain:自定义域名 lb.opsxlab.cn,无特殊需求可使用默认值 lb.kubesphere.local
- clusterName:自定义 opsxlab.cn,无特殊需求可使用默认值 cluster.local
- autoRenewCerts:该参数可以实现证书到期自动续期,默认为 true
- containerManager:使用 containerd
- storage.openebs.basePath:新增配置,指定 openebs 默认存储路径为 /data/openebs/local
- registry.privateRegistry:核心配置, 解决 Docker 官方镜像不可用的问题
- registry.namespaceOverride: 核心配置, 解决 Docker 官方镜像不可用的问题
修改后的完整示例如下:
apiVersion: kubekey.kubesphere.io/v1alpha2
kind: Cluster
metadata:
  name: opsxlab
spec:
  hosts:
  - {name: ksp-control-1, address: 192.168.9.91, internalAddress: 192.168.9.91, user: root, password: "OpsXlab@2024"}
  - {name: ksp-control-2, address: 192.168.9.92, internalAddress: 192.168.9.92, user: root, password: "OpsXlab@2024"}
  - {name: ksp-control-3, address: 192.168.9.93, internalAddress: 192.168.9.93, user: root, password: "OpsXlab@2024"}
  roleGroups:
    etcd:
    - ksp-control-1
    - ksp-control-2
    - ksp-control-3
    control-plane:
    - ksp-control-1
    - ksp-control-2
    - ksp-control-3
    worker:
    - ksp-control-1
    - ksp-control-2
    - ksp-control-3
  controlPlaneEndpoint:
    ## Internal loadbalancer for apiservers
    internalLoadbalancer: haproxy
    domain: lb.opsxlab.cn
    address: ""
    port: 6443
  kubernetes:
    version: v1.28.8
    clusterName: opsxlab.cn
    #dnsDomain: opsxlab.cn
    autoRenewCerts: true
    containerManager: containerd
  etcd:
    type: kubekey
  network:
    plugin: calico
    kubePodsCIDR: 10.233.64.0/18
    kubeServiceCIDR: 10.233.0.0/18
    ## multus support. https://github.com/k8snetworkplumbingwg/multus-cni
    multusCNI:
      enabled: false
  storage:
    openebs:
      basePath: /data/openebs/local # 默认没有的新增配置,base path of the local PV
  registry:
    privateRegistry: "registry.cn-beijing.aliyuncs.com" # 使用阿里云镜像
    namespaceOverride: "kubesphereio" # 阿里云镜像 KubeSphere 官方 namespace
    registryMirrors: []
    insecureRegistries: []
  addons: []

---
......
2.3 部署集群
执行下面的命令,使用配置文件 ksp-v341-v1288.yaml 部署集群。
export KKZONE=cn
./kk create cluster -f ksp-v341-v1288.yaml
上面的命令执行后,KubeKey 先检查部署 Kubernetes 的依赖及其它配置是否符合要求。通过检查后,系统将提示您确认安装。输入 yes 并按 ENTER 继续部署。
部署完成需要大约 20-30 分钟左右,具体看网速和机器配置(注:kubeadm、kubelet 等 10个二进制安装包,总大小 400M,因下载限速 1024K,下载时间需要 7分钟)。
部署完成后,您应该会在终端上看到类似于下面的输出。提示部署完成的同时,输出中还会显示用户登陆 KubeSphere 的默认管理员用户和密码。
#####################################################
###              Welcome to KubeSphere!           ###
#####################################################

Console: http://192.168.9.91:30880
Account: admin
Password: P@88w0rd
NOTES:
  1. After you log into the console, please check the
     monitoring status of service components in
     "Cluster Management". If any service is not
     ready, please wait patiently until all components
     are up and running.
  2. Please change the default password after login.

#####################################################
https://kubesphere.io             2024-07-17 22:34:20
#####################################################
22:34:20 CST skipped: [ksp-control-3]
22:34:20 CST skipped: [ksp-control-2]
22:34:20 CST success: [ksp-control-1]
22:34:20 CST Pipeline[CreateClusterPipeline] execute successfully
Installation is complete.

Please check the result using the command:

        kubectl logs -n kubesphere-system $(kubectl get pod -n kubesphere-system -l 'app in (ks-install, ks-installer)' -o jsonpath='{.items[0].metadata.name}') -f
3. 验证 k8s 集群
3.1 KubeSphere 管理控制台验证集群状态
我们打开浏览器访问 Control-1 节点的 IP 地址和端口 30880,可以看到 KubeSphere 管理控制台的登录页面。
输入默认用户 admin 和默认密码 P@88w0rd,然后点击「登录」。
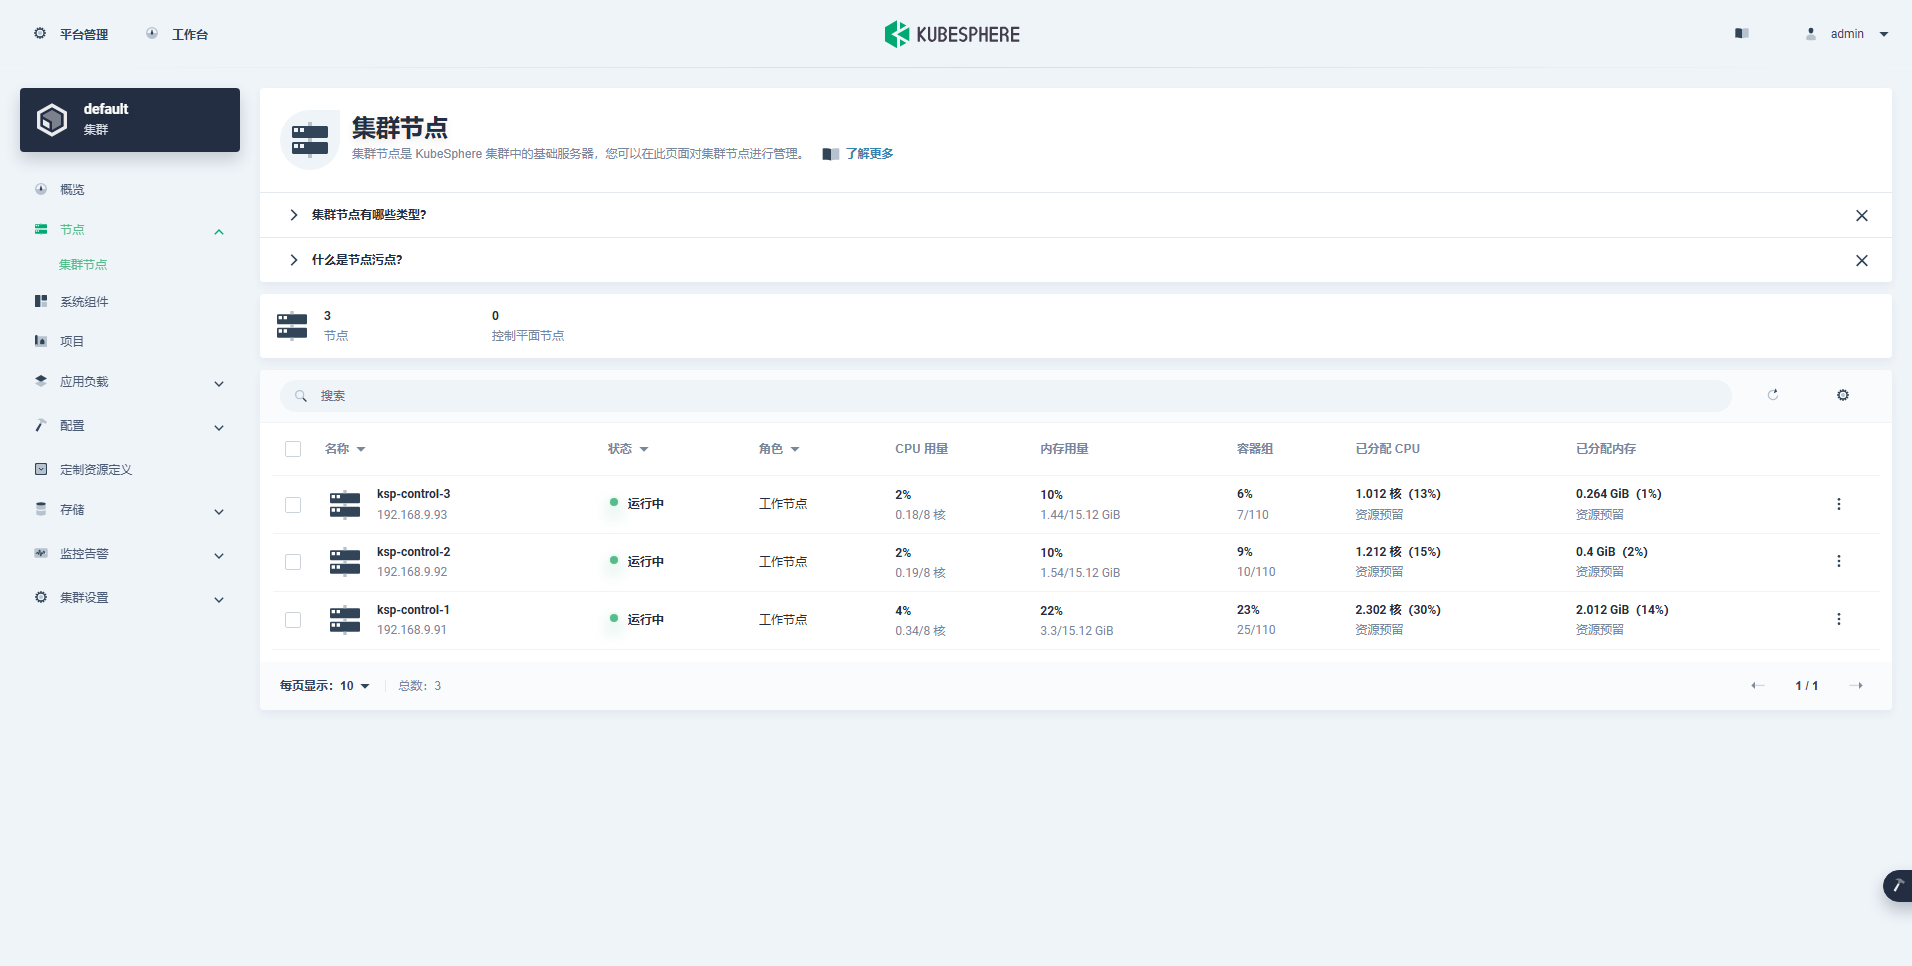
- 查看集群节点信息(CPU、内存资源使用量不大)

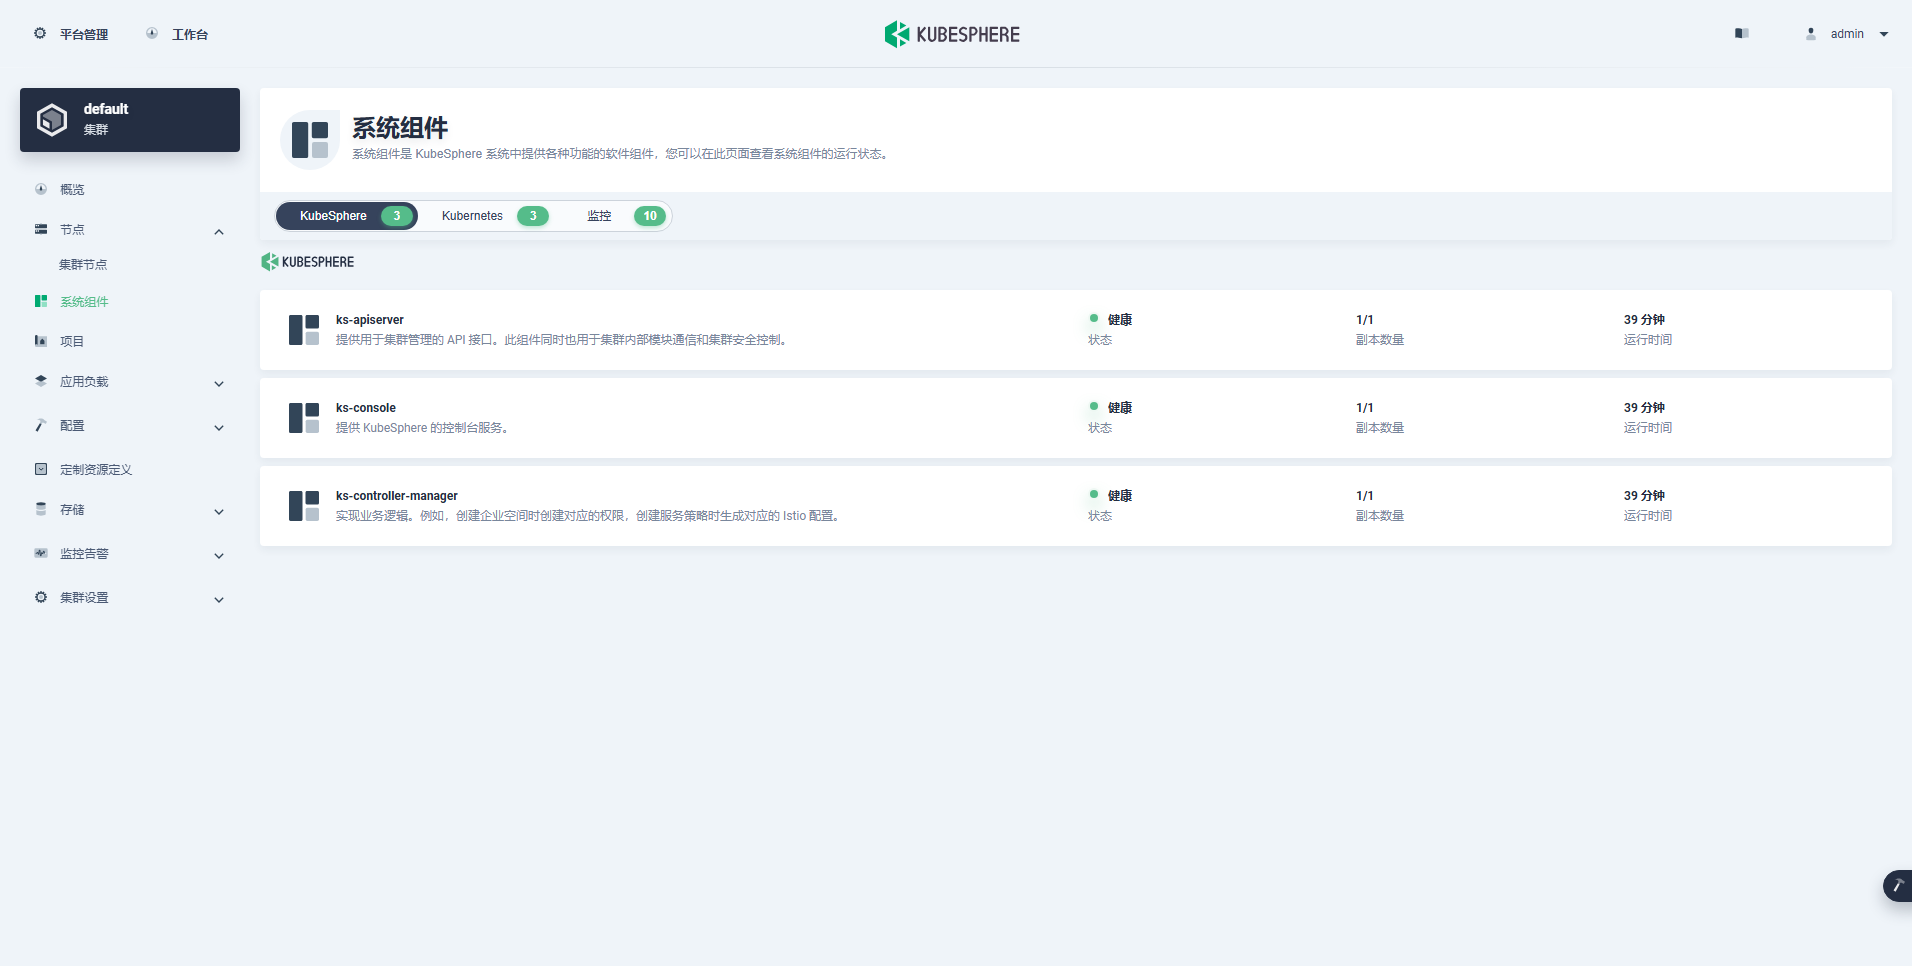
- 查看组件信息(最小化)

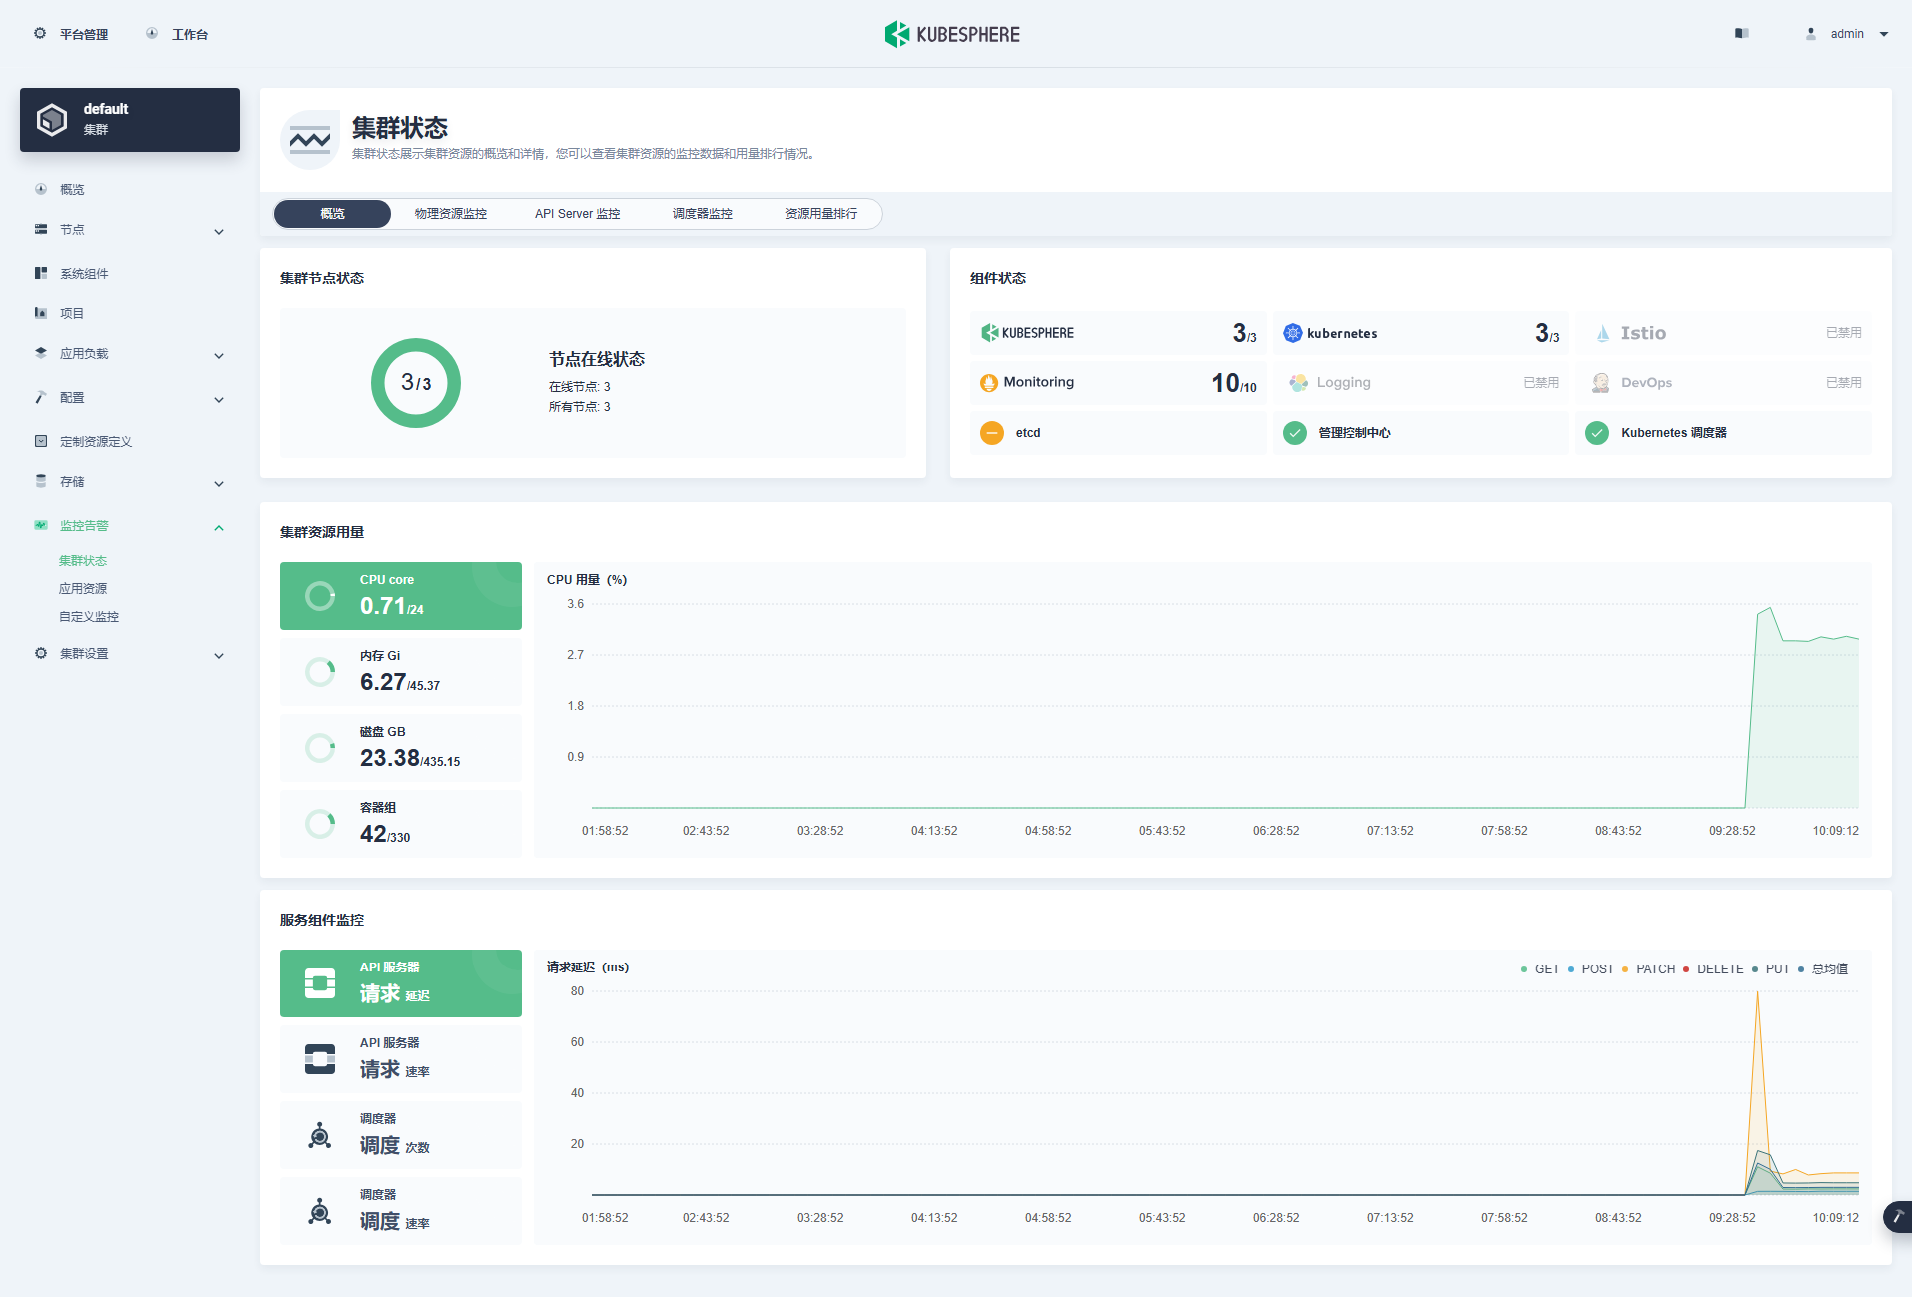
- 查看监控信息

3.2 kubectl 命令行验证集群状态
本小节只是简单查看基本状态,并不全面,更多的细节请自己体验探索。
- 查看集群节点信息
在 control-1 节点运行 kubectl 命令获取 Kubernetes 集群上的可用节点列表。
kubectl get nodes -o wide在输出结果中可以看到,当前的 Kubernetes 集群节点数量,并详细展示每个节点的名字、状态、角色、存活时间、Kubernetes 版本号、内部 IP、操作系统类型、内核版本和容器运行时等信息。
$ kubectl get nodes -o wide
NAME            STATUS   ROLES                  AGE   VERSION   INTERNAL-IP    EXTERNAL-IP   OS-IMAGE                    KERNEL-VERSION                       CONTAINER-RUNTIME
ksp-control-1   Ready    control-plane,worker   42m   v1.28.8   192.168.9.91   <none>        openEuler 22.03 (LTS-SP3)   5.10.0-182.0.0.95.oe2203sp3.x86_64   containerd://1.7.13
ksp-control-2   Ready    control-plane,worker   41m   v1.28.8   192.168.9.92   <none>        openEuler 22.03 (LTS-SP3)   5.10.0-182.0.0.95.oe2203sp3.x86_64   containerd://1.7.13
ksp-control-3 Ready control-plane,worker 41m v1.28.8 192.168.9.93 <none> openEuler 22.03 (LTS-SP3) 5.10.0-182.0.0.95.oe2203sp3.x86_64 containerd://1.7.13- 查看 Pod 列表
输入以下命令获取在 Kubernetes 集群上运行的 Pod 列表,确保所有的容器状态都是 Running。
kubectl get pods -o wide -A3.3 验证节点镜像列表
下面展示一下最小化部署一套 KubeSphere 和 Kubernetes 集群到底依赖哪些镜像,以及镜像的下载地址、TAG、大小。
- Control 节点的镜像列表(29 个)
$ crictl images
IMAGE                                                                         TAG                 IMAGE ID            SIZE
registry.cn-beijing.aliyuncs.com/kubesphereio/alertmanager                    v0.23.0             ba2b418f427c0       26.5MB
registry.cn-beijing.aliyuncs.com/kubesphereio/cni                             v3.27.3             6527a35581401       88.4MB
registry.cn-beijing.aliyuncs.com/kubesphereio/coredns                         1.9.3               5185b96f0becf       14.8MB
registry.cn-beijing.aliyuncs.com/kubesphereio/defaultbackend-amd64            1.4                 846921f0fe0e5       1.82MB
registry.cn-beijing.aliyuncs.com/kubesphereio/k8s-dns-node-cache              1.22.20             ff71cd4ea5ae5       30.5MB
registry.cn-beijing.aliyuncs.com/kubesphereio/ks-apiserver                    v3.4.1              c486abe6f1cc8       65.8MB
registry.cn-beijing.aliyuncs.com/kubesphereio/ks-console                      v3.4.1              aa81987f764d3       51.7MB
registry.cn-beijing.aliyuncs.com/kubesphereio/ks-controller-manager           v3.4.1              2a2294b6c6af0       50.3MB
registry.cn-beijing.aliyuncs.com/kubesphereio/ks-installer                    v3.4.1              d6ce52546e1c3       156MB
registry.cn-beijing.aliyuncs.com/kubesphereio/kube-apiserver                  v1.28.8             e70a71eaa5605       34.7MB
registry.cn-beijing.aliyuncs.com/kubesphereio/kube-controller-manager         v1.28.8             e5ae3e4dc6566       33.5MB
registry.cn-beijing.aliyuncs.com/kubesphereio/kube-controllers                v3.27.3             3e4fd05c0c1c0       33.4MB
registry.cn-beijing.aliyuncs.com/kubesphereio/kube-proxy                      v1.28.8             5ce97277076c6       28.1MB
registry.cn-beijing.aliyuncs.com/kubesphereio/kube-rbac-proxy                 v0.11.0             29589495df8d9       19.2MB
registry.cn-beijing.aliyuncs.com/kubesphereio/kube-scheduler                  v1.28.8             ad3260645145d       18.7MB
registry.cn-beijing.aliyuncs.com/kubesphereio/kube-state-metrics              v2.6.0              ec6e2d871c544       12MB
registry.cn-beijing.aliyuncs.com/kubesphereio/kubectl                         v1.22.0             30c7baa8e18c0       26.6MB
registry.cn-beijing.aliyuncs.com/kubesphereio/linux-utils                     3.3.0               e88cfb3a763b9       26.9MB
registry.cn-beijing.aliyuncs.com/kubesphereio/node-exporter                   v1.3.1              1dbe0e9319764       10.3MB
registry.cn-beijing.aliyuncs.com/kubesphereio/node                            v3.27.3             5c6ffd2b2a1d0       116MB
registry.cn-beijing.aliyuncs.com/kubesphereio/notification-manager-operator   v2.3.0              7ffe334bf3772       19.3MB
registry.cn-beijing.aliyuncs.com/kubesphereio/notification-manager            v2.3.0              2c35ec9a2c185       21.6MB
registry.cn-beijing.aliyuncs.com/kubesphereio/notification-tenant-sidecar     v3.2.0              4b47c43ec6ab6       14.7MB
registry.cn-beijing.aliyuncs.com/kubesphereio/pause                           3.9                 e6f1816883972       321kB
registry.cn-beijing.aliyuncs.com/kubesphereio/prometheus-config-reloader      v0.55.1             7c63de88523a9       4.84MB
registry.cn-beijing.aliyuncs.com/kubesphereio/prometheus-operator             v0.55.1             b30c215b787f5       14.3MB
registry.cn-beijing.aliyuncs.com/kubesphereio/prometheus                      v2.39.1             6b9895947e9e4       88.5MB
registry.cn-beijing.aliyuncs.com/kubesphereio/provisioner-localpv             3.3.0               739e82fed8b2c       28.8MB
registry.cn-beijing.aliyuncs.com/kubesphereio/snapshot-controller v4.0.0 f1d8a00ae690f 19MB- Worker 节点的镜像列表(11 个)
$ crictl images
IMAGE                                                                   TAG                 IMAGE ID            SIZE
registry.cn-beijing.aliyuncs.com/kubesphereio/cni                       v3.27.3             6527a35581401       88.4MB
registry.cn-beijing.aliyuncs.com/kubesphereio/coredns                   1.9.3               5185b96f0becf       14.8MB
registry.cn-beijing.aliyuncs.com/kubesphereio/k8s-dns-node-cache        1.22.20             ff71cd4ea5ae5       30.5MB
registry.cn-beijing.aliyuncs.com/kubesphereio/kube-apiserver            v1.28.8             e70a71eaa5605       34.7MB
registry.cn-beijing.aliyuncs.com/kubesphereio/kube-controller-manager   v1.28.8             e5ae3e4dc6566       33.5MB
registry.cn-beijing.aliyuncs.com/kubesphereio/kube-proxy                v1.28.8             5ce97277076c6       28.1MB
registry.cn-beijing.aliyuncs.com/kubesphereio/kube-rbac-proxy           v0.11.0             29589495df8d9       19.2MB
registry.cn-beijing.aliyuncs.com/kubesphereio/kube-scheduler            v1.28.8             ad3260645145d       18.7MB
registry.cn-beijing.aliyuncs.com/kubesphereio/node-exporter             v1.3.1              1dbe0e9319764       10.3MB
registry.cn-beijing.aliyuncs.com/kubesphereio/node                      v3.27.3             5c6ffd2b2a1d0       116MB
registry.cn-beijing.aliyuncs.com/kubesphereio/pause                     3.9                 e6f1816883972       321kB
免责声明:
- 笔者水平有限,尽管经过多次验证和检查,尽力确保内容的准确性,但仍可能存在疏漏之处。敬请业界专家大佬不吝指教。
- 本文所述内容仅通过实战环境验证测试,读者可学习、借鉴,但严禁直接用于生产环境。由此引发的任何问题,作者概不负责!
本文由博客一文多发平台 OpenWrite 发布!


![CTF-NSSCTF[NISACTF 2022]](https://i-blog.csdnimg.cn/direct/af5b0507415348b1997b929288d918be.png)
