1、版本说明:
系统版本:centos stream 9
Kubernetes版本:最新版(v1.30)
docker版本:27.1.1
| 节点 | 主机名 | ip |
| 主节点 | k8s-master | 172.31.0.10 |
| 节点1 | k8s-node1 | 172.31.0.11 |
| 节点2 | k8s-node2 | 172.31.0.12 |
2、首先,使用Vagrant和Virtualbox创建centos stream 9虚拟机。
2.1、安装Vagrant
vagrant官网下载地址:Install | Vagrant | HashiCorp Developer
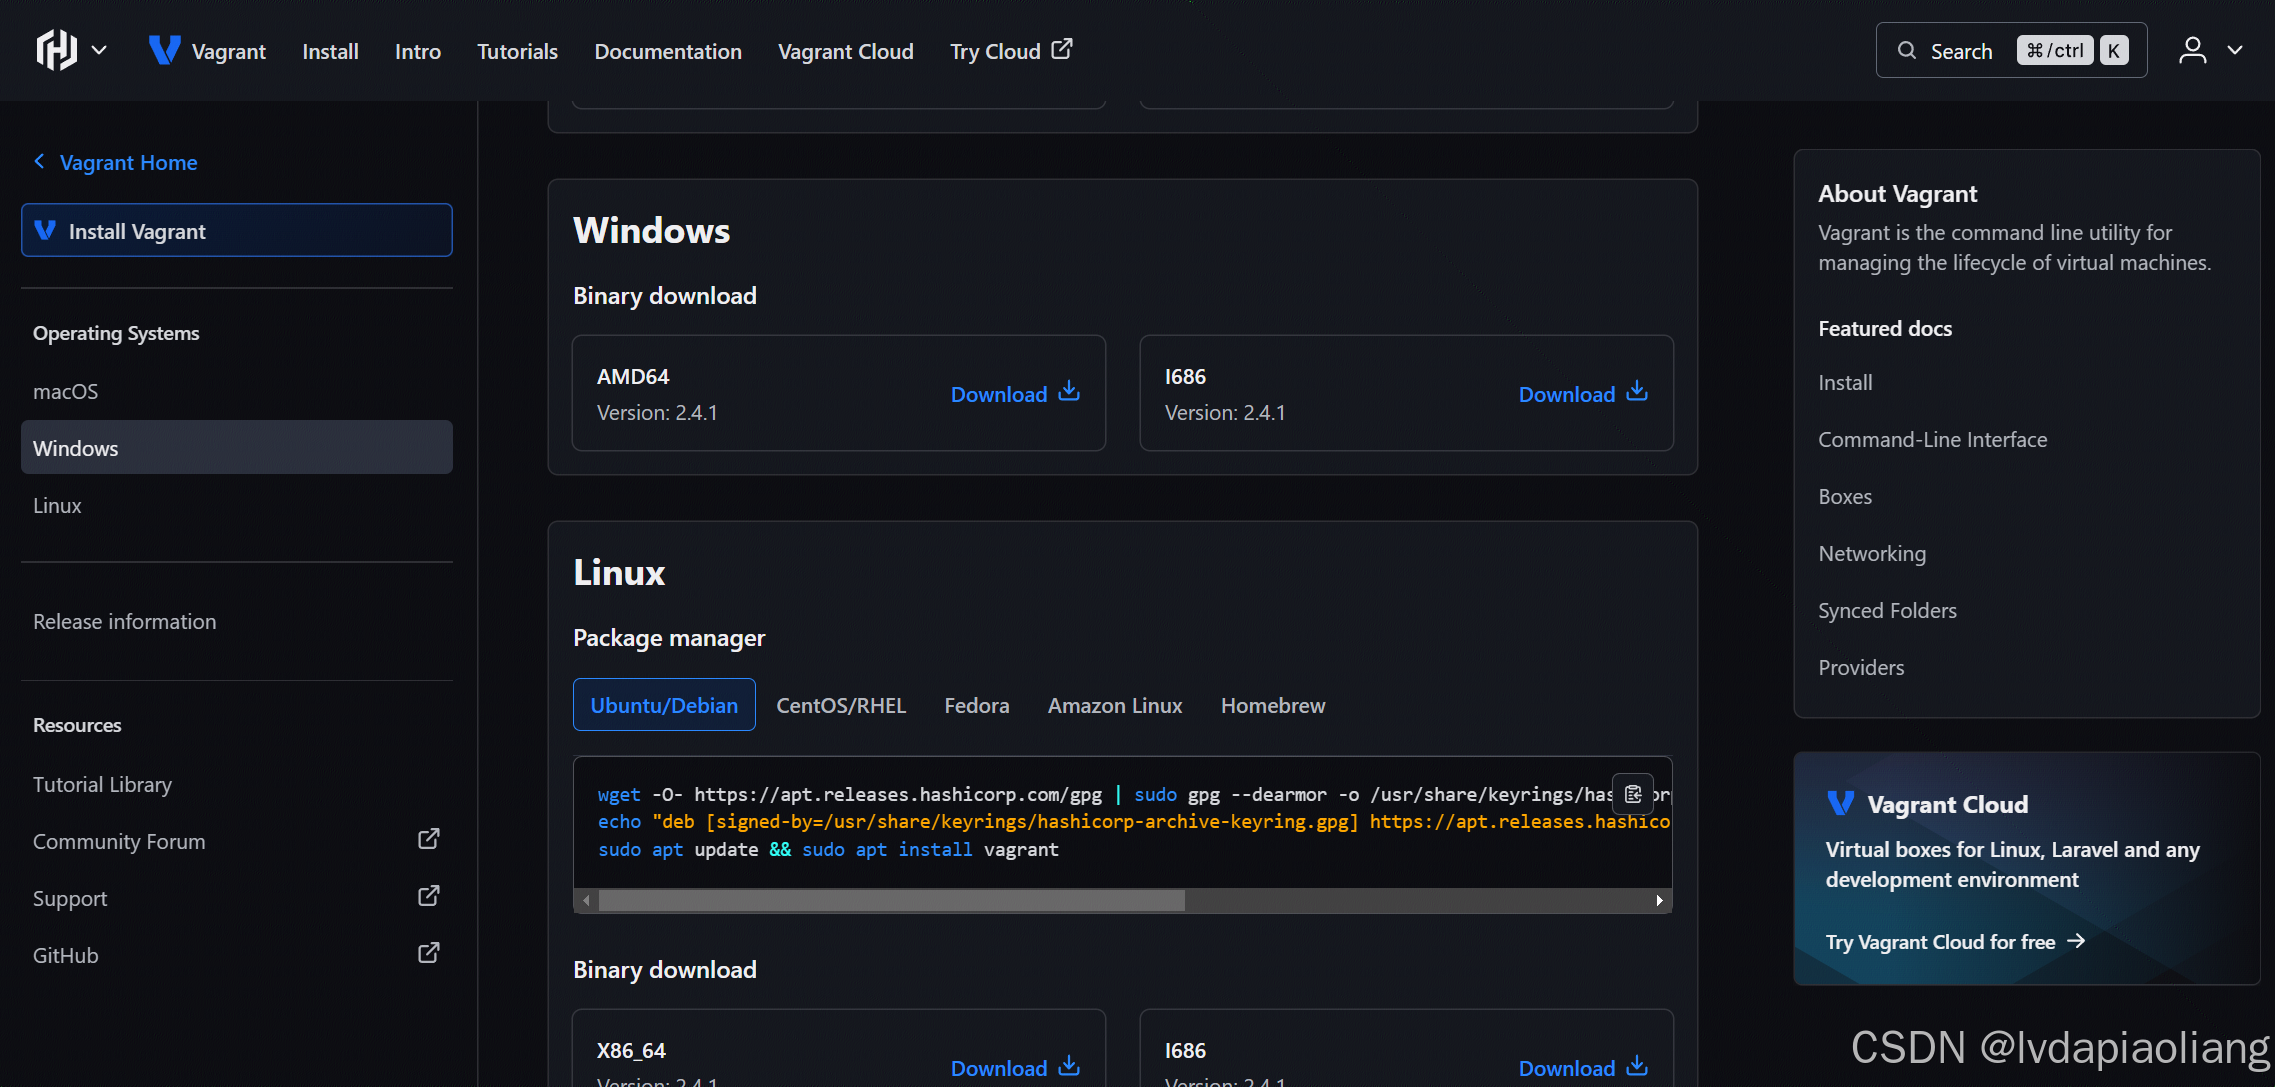
这里我们下载Windows版的vagrant_2.4.1_windows_amd64.msi安装包,双击后进行安装:
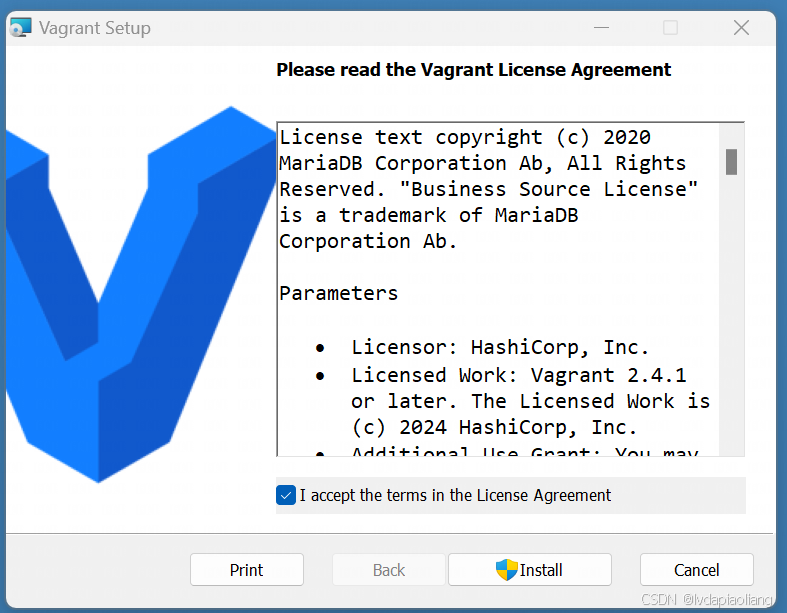
勾选"I accept the terms in the License Agreement",点击"Install"进行安装。
点击"Finish",然后点击"Yes"重启电脑。
重启之后,我们的vagrant就可以使用了。
2.2、安装Virtualbox
Virtualbox下载地址:
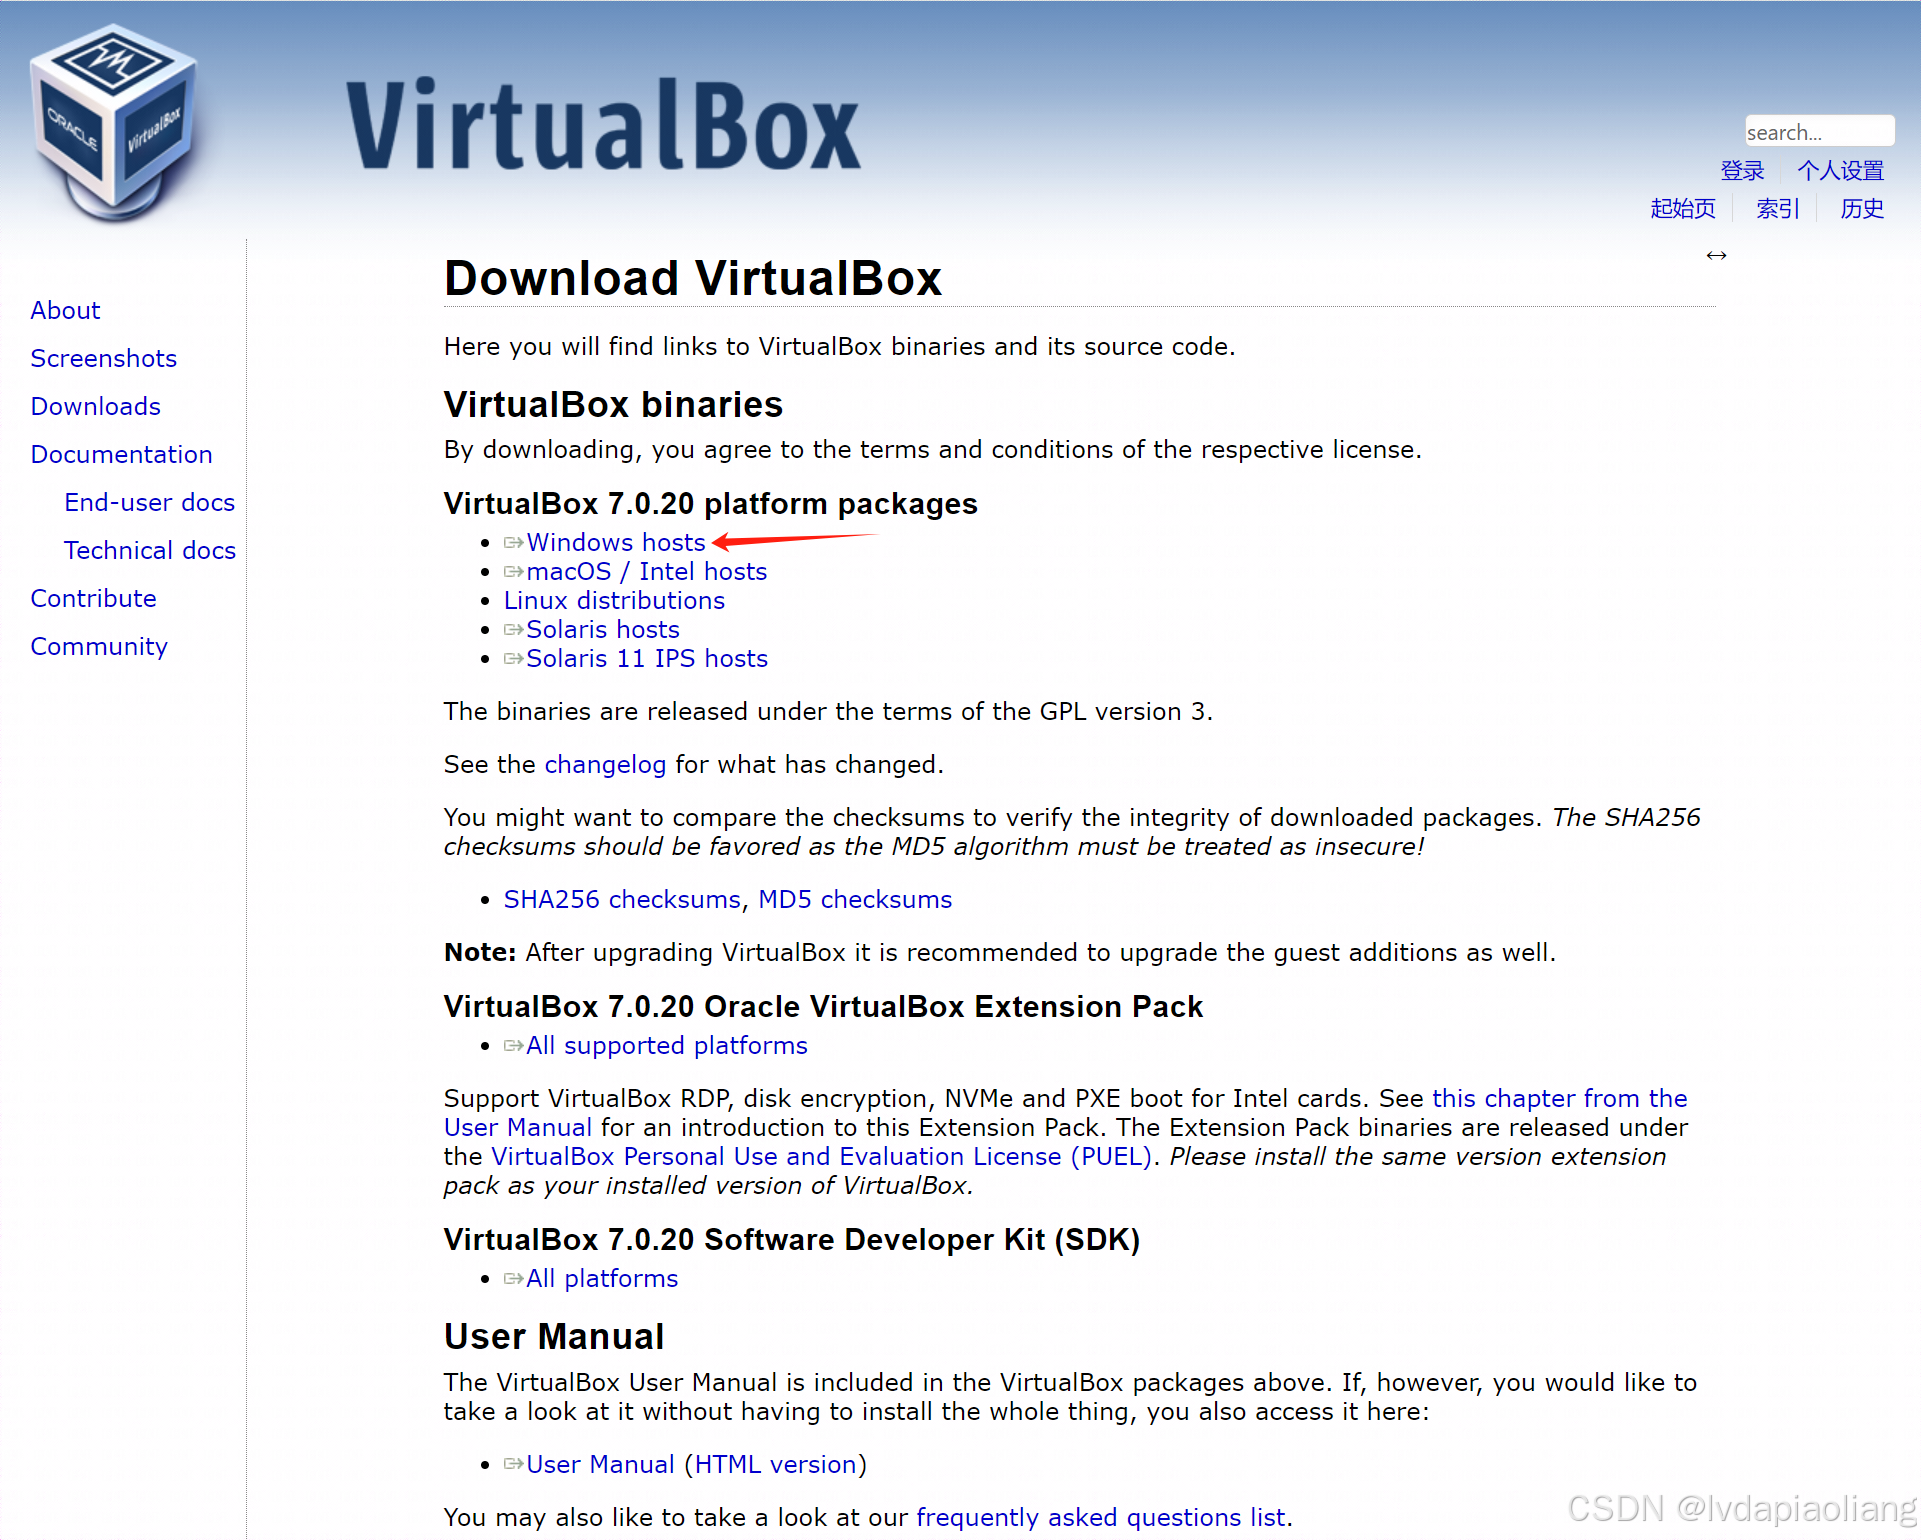
下载VirtualBox-7.0.20-163906-Win.exe![]() https://download.virtualbox.org/virtualbox/7.0.20/VirtualBox-7.0.20-163906-Win.exe安装包。
https://download.virtualbox.org/virtualbox/7.0.20/VirtualBox-7.0.20-163906-Win.exe安装包。
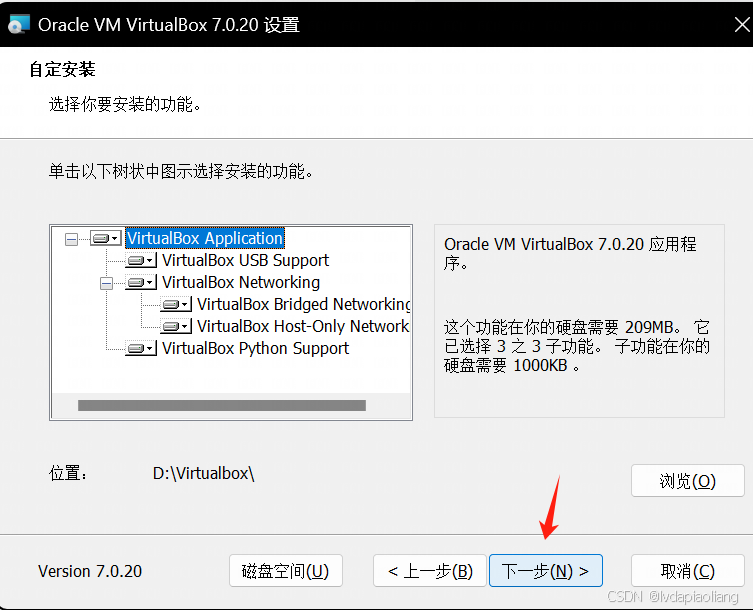
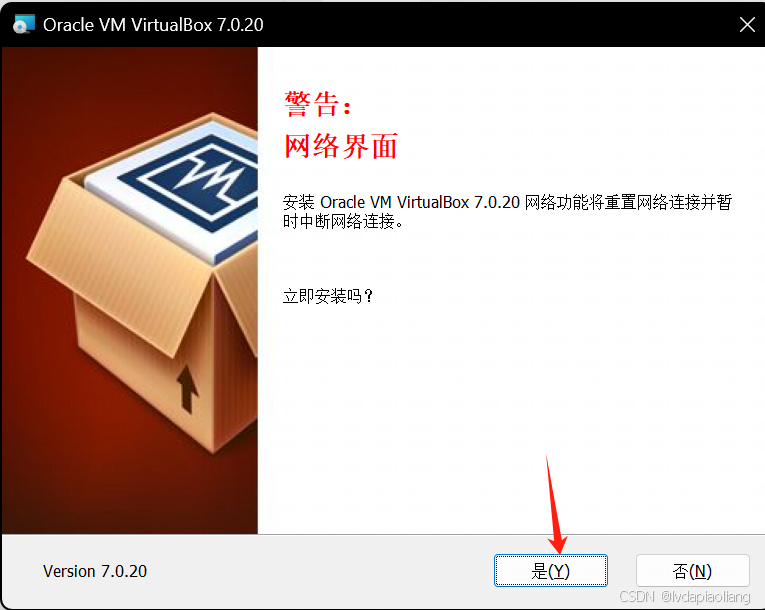
然后进行安装:
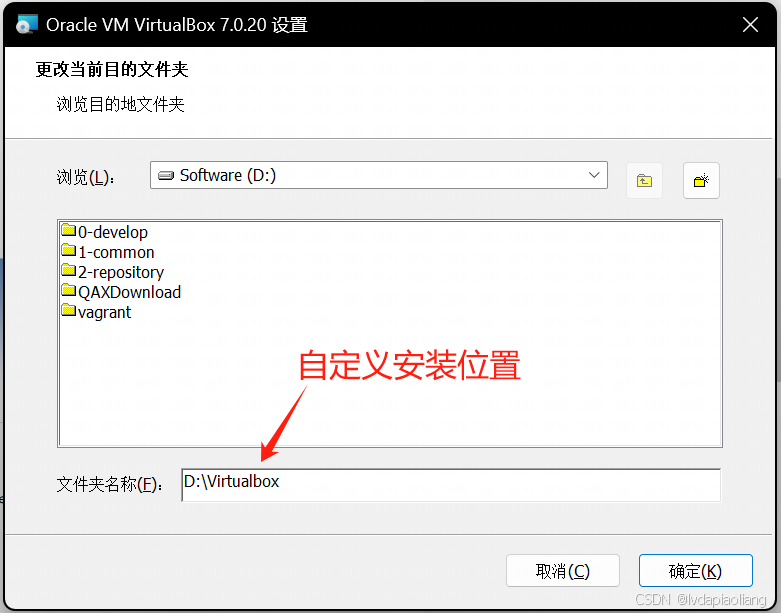
virtualbox默认是安装在c盘,我不想安装在c盘,修改到了d盘,在安装过程中出现了下面的报错:

然后在打开cmd命令行,执行下面官网说的命令:
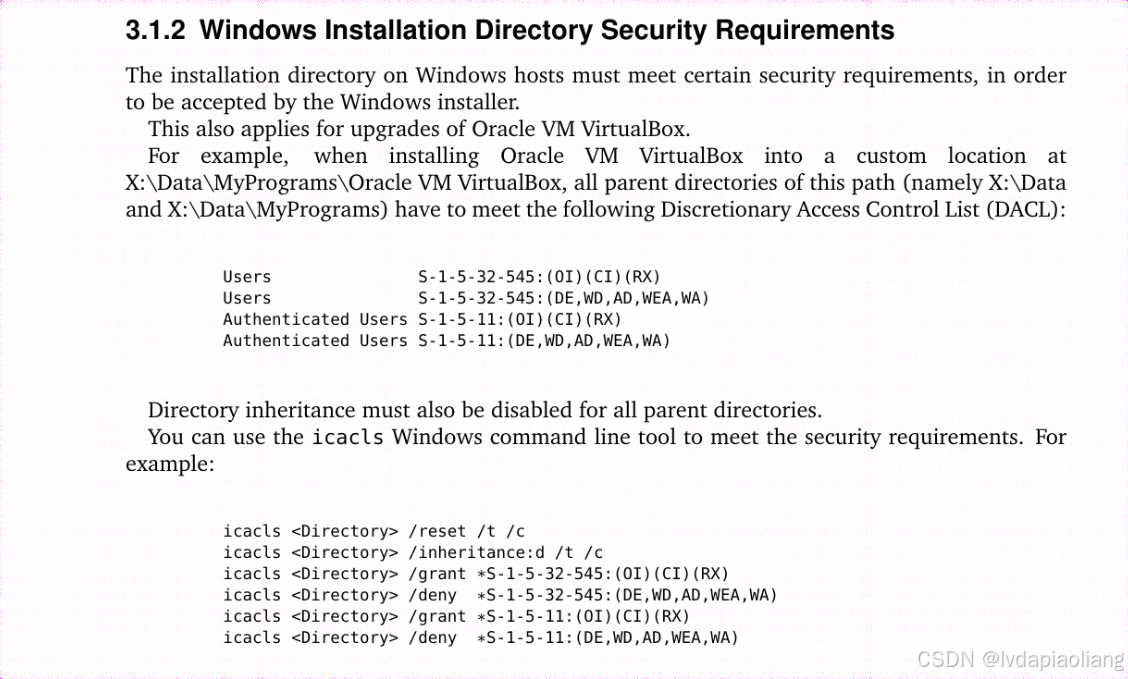
icacls D:\virtualbox /reset /t /c
icacls D:\virtualbox /inheritance:d /t /c
icacls D:\virtualbox /grant *S-1-5-32-545:(OI)(CI)(RX)
icacls D:\virtualbox /deny *S-1-5-32-545:(DE,WD,AD,WEA,WA)
icacls D:\virtualbox /grant *S-1-5-11:(OI)(CI)(RX)
icacls D:\virtualbox /deny *S-1-5-11:(DE,WD,AD,WEA,WA)
命令执行成功后继续接下来的步骤。

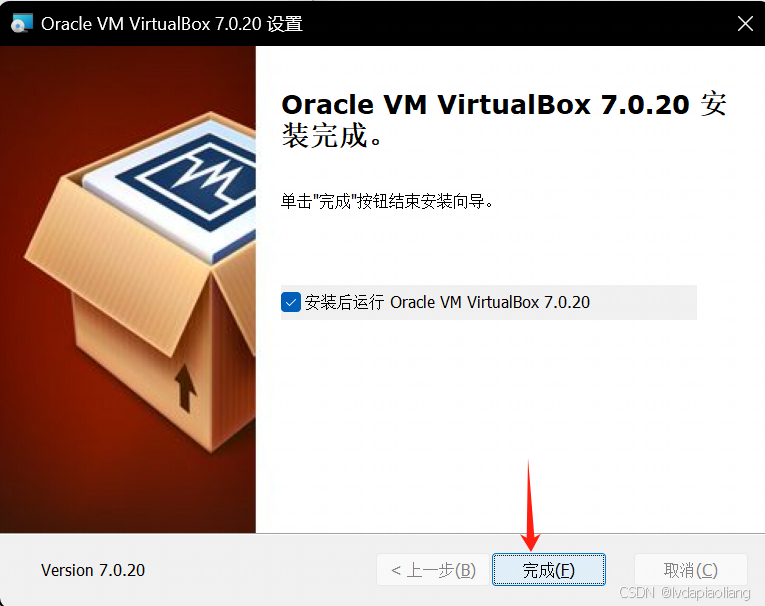
这样,virtualbox就安装完成了。安装完之后记得重启一下电脑。
2.3、使用Vagrant快速安装Centos stream 9虚拟机,并自动在在虚拟机中安装好docker。
2.3.1、首先,在D盘创建一个vagrant的文件夹(可以自定义其他的目录),然后在文件夹中创建centos_stream_9的文件夹。然后创建名为:Vagrantfile的文件。注意这个文件就叫这个名字不能更改。
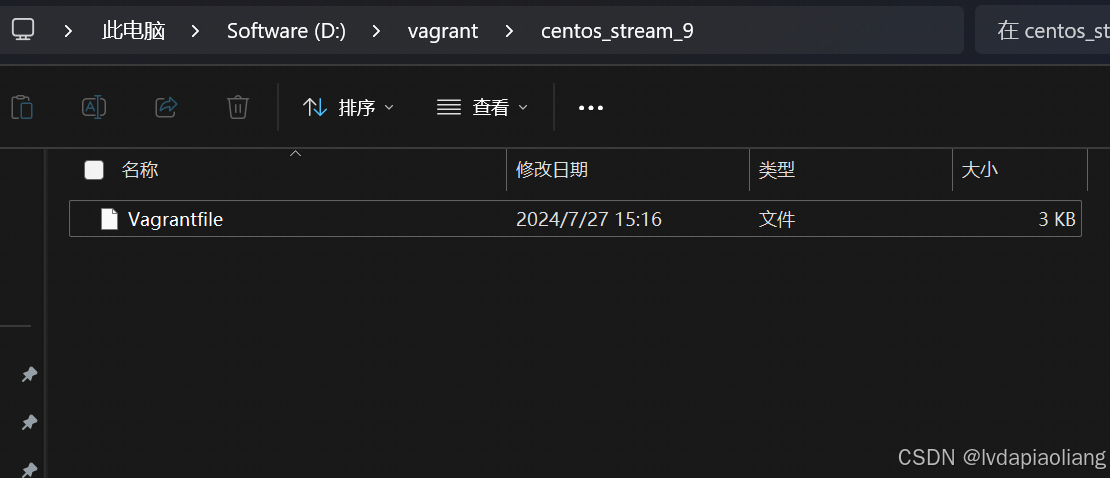
Vagrantfile的文件内容如下:
# -*- mode: ruby -*-
# vi: set ft=ruby :

# All Vagrant configuration is done below. The "2" in Vagrant.configure
# configures the configuration version (we support older styles for
# backwards compatibility). Please don't change it unless you know what
# you're doing.
Vagrant.configure("2") do |config|
  # The most common configuration options are documented and commented below.
  # For a complete reference, please see the online documentation at
  # https://docs.vagrantup.com.

  # Every Vagrant development environment requires a box. You can search for
  # boxes at https://vagrantcloud.com/search.
  config.vm.box = "eurolinux-vagrant/centos-stream-9"
  config.vm.box_version = "9.0.45"

  # Disable automatic box update checking. If you disable this, then
  # boxes will only be checked for updates when the user runs
  # `vagrant box outdated`. This is not recommended.
  # config.vm.box_check_update = false

  # Create a forwarded port mapping which allows access to a specific port
  # within the machine from a port on the host machine. In the example below,
  # accessing "localhost:8080" will access port 80 on the guest machine.
  # NOTE: This will enable public access to the opened port
  # config.vm.network "forwarded_port", guest: 80, host: 8080

  # Create a forwarded port mapping which allows access to a specific port
  # within the machine from a port on the host machine and only allow access
  # via 127.0.0.1 to disable public access
  # config.vm.network "forwarded_port", guest: 80, host: 8080, host_ip: "127.0.0.1"

  # Create a private network, which allows host-only access to the machine
  # using a specific IP.
  # 指定虚拟机网络ip为:172.31.0.10
  config.vm.network "private_network", ip: "172.31.0.10"

  # Create a public network, which generally matched to bridged network.
  # Bridged networks make the machine appear as another physical device on
  # your network.
  # config.vm.network "public_network"

  # Share an additional folder to the guest VM. The first argument is
  # the path on the host to the actual folder. The second argument is
  # the path on the guest to mount the folder. And the optional third
  # argument is a set of non-required options.
  # config.vm.synced_folder "../data", "/vagrant_data"

  # Disable the default share of the current code directory. Doing this
  # provides improved isolation between the vagrant box and your host
  # by making sure your Vagrantfile isn't accessible to the vagrant box.
  # If you use this you may want to enable additional shared subfolders as
  # shown above.
  # config.vm.synced_folder ".", "/vagrant", disabled: true

  # Provider-specific configuration so you can fine-tune various
  # backing providers for Vagrant. These expose provider-specific options.
  # Example for VirtualBox:
  #
  # config.vm.provider "virtualbox" do |vb|
  #   # Display the VirtualBox GUI when booting the machine
  #   vb.gui = true
  #
  #   # Customize the amount of memory on the VM:
  #   vb.memory = "1024"
  # end
  #
  # View the documentation for the provider you are using for more
  # information on available options.

  # Enable provisioning with a shell script. Additional provisioners such as
  # Ansible, Chef, Docker, Puppet and Salt are also available. Please see the
  # documentation for more information about their specific syntax and use.
  config.vm.provision "shell", inline: <<-SHELL
  # 1、Docker安装
  # 1.1、卸载旧版本docker
  sudo yum remove docker docker-client docker-client-latest docker-common docker-latest docker-latest-logrotate docker-logrotate docker-engine
  # 1.2、设置存储库
  sudo yum install -y yum-utils
  sudo yum-config-manager --add-repo http://mirrors.aliyun.com/docker-ce/linux/centos/docker-ce.repo
  # 1.3、安装 Docker Engine
  sudo yum install -y docker-ce docker-ce-cli containerd.io docker-buildx-plugin docker-compose-plugin
  sudo systemctl enable docker
  sudo systemctl start docker
  # 1.4、禁用防火墙
  sudo systemctl stop firewalld
  sudo systemctl disable firewalld
  # 1.5、修改 SSH 配置
  sudo sed -i 's/^#*PasswordAuthentication .*/PasswordAuthentication yes/' /etc/ssh/sshd_config
  sudo sed -i 's/^#*PermitRootLogin .*/PermitRootLogin yes/' /etc/ssh/sshd_config
  # 1.6、重启 SSH 服务
  sudo systemctl restart sshd.service
  # 1.7、修改 root 用户密码
  echo "root:1TdhblkFcdhx2a" | sudo chpasswd
  # 1.8、配置 Docker 镜像加速
  mkdir -p /etc/docker
  cat > /etc/docker/daemon.json <<EOF
  {
    "registry-mirrors": ["https://6kx4zyno.mirror.aliyuncs.com","https://registry.docker-cn.com"],
    "exec-opts": ["native.cgroupdriver=systemd"]
  }
EOF

  sudo systemctl daemon-reload
  sudo systemctl restart docker

  # 2、配置非root用户(Docker)执行docker命令时不使用sudo。
  # 2.1、创建名为 "Docker" 的用户
  sudo useradd Docker
  # 2.2、设置 "Docker" 用户的密码
  echo "Docker:1TdhblkFcdhx2a" | sudo chpasswd
  # 2.3、创建名为 "docker" 的组
  sudo groupadd docker
  # 2.4、将用户 "Docker" 添加到组 "docker"
  sudo gpasswd -a Docker docker
  # 2.5、重启docker
  sudo systemctl restart docker

  SHELL
end
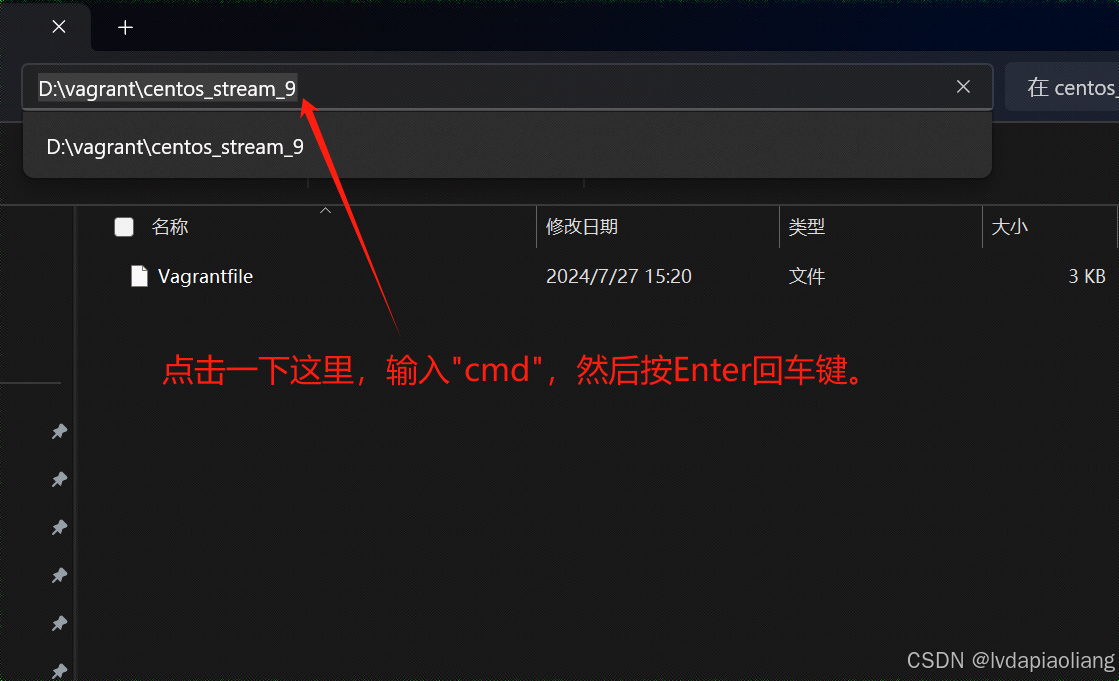
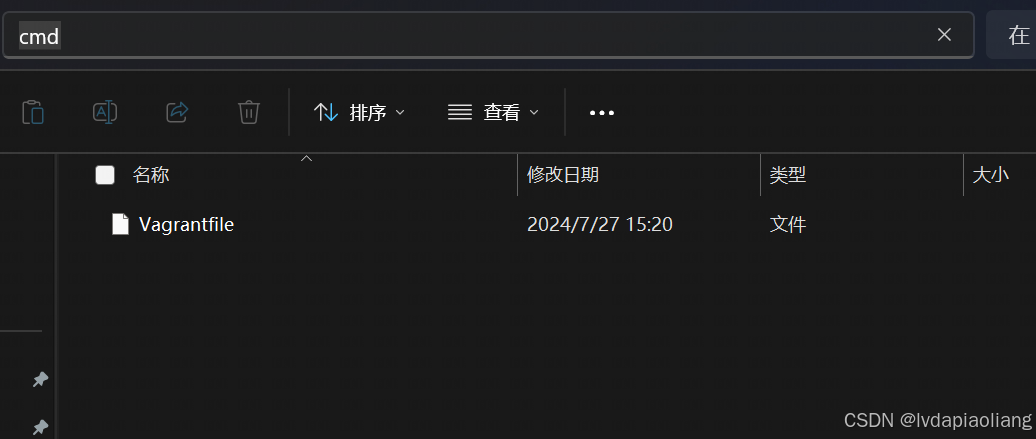
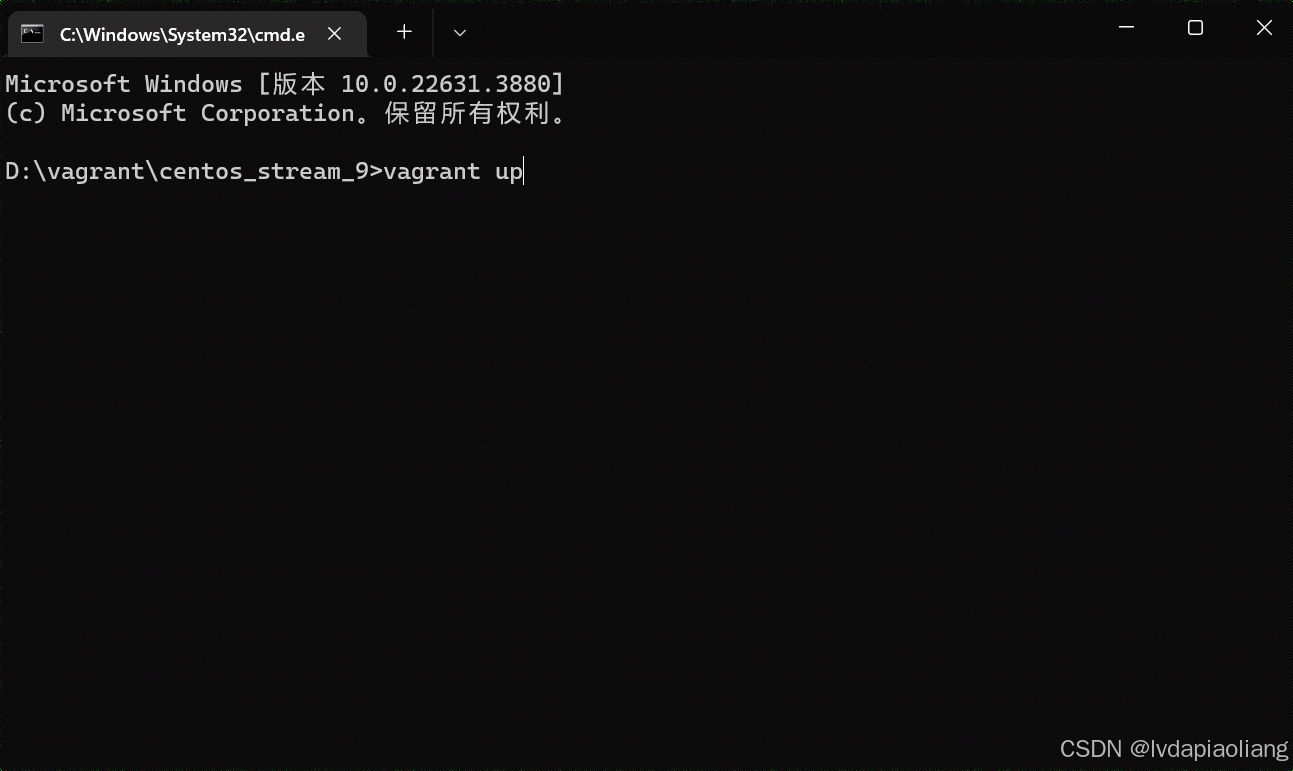
在弹出的cmd命令框中输入下面的命令:
vagrant up
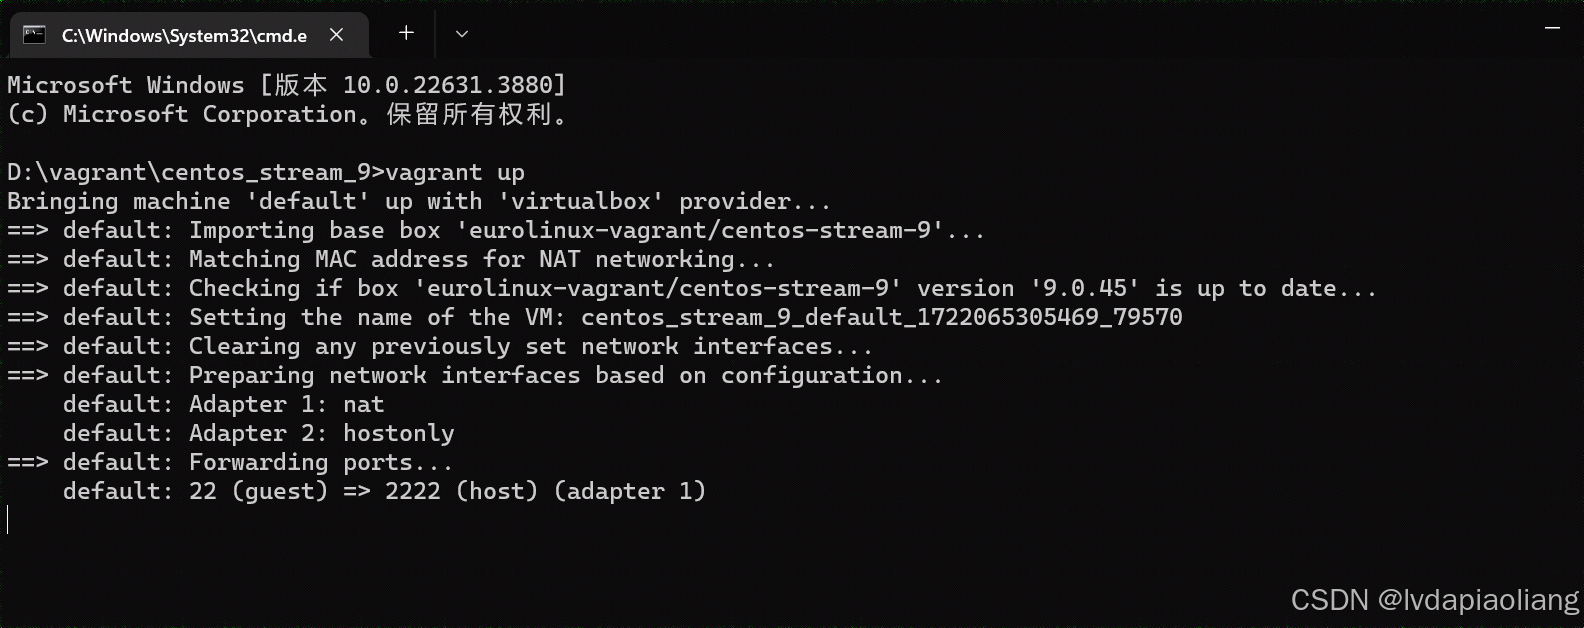
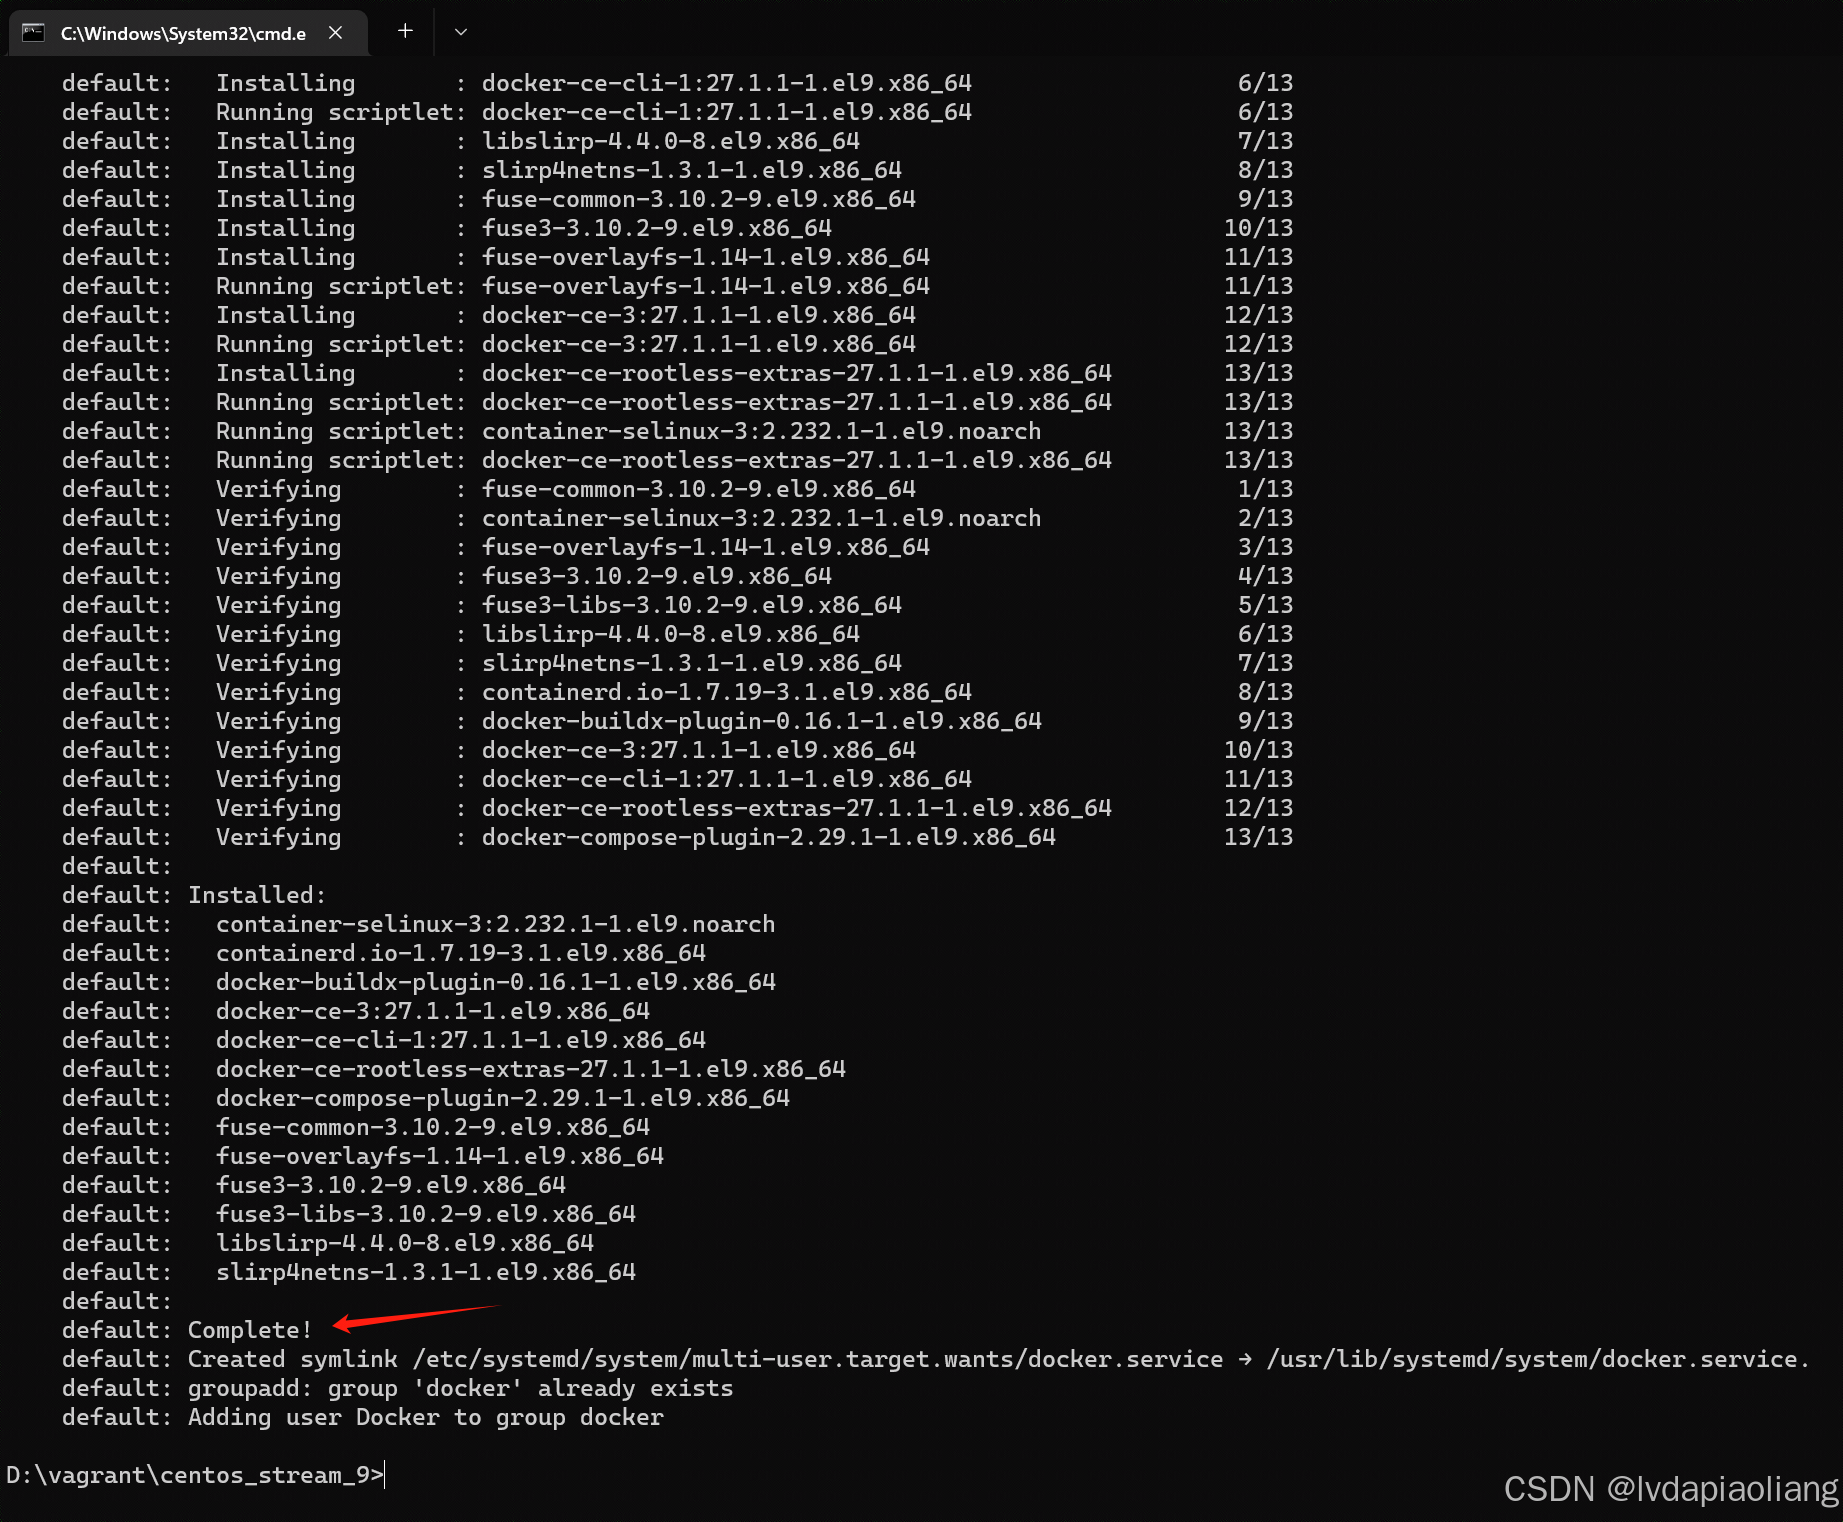
等待执行完之后,我们就可以得到一台安装好Docker并且运行的centos stream 9的虚拟机。第一次执行的时候因为会下载centos stream 9的镜像文件,所以会很慢,我大概等了20分钟。成功以后再次安装centos stream 9就很快了。
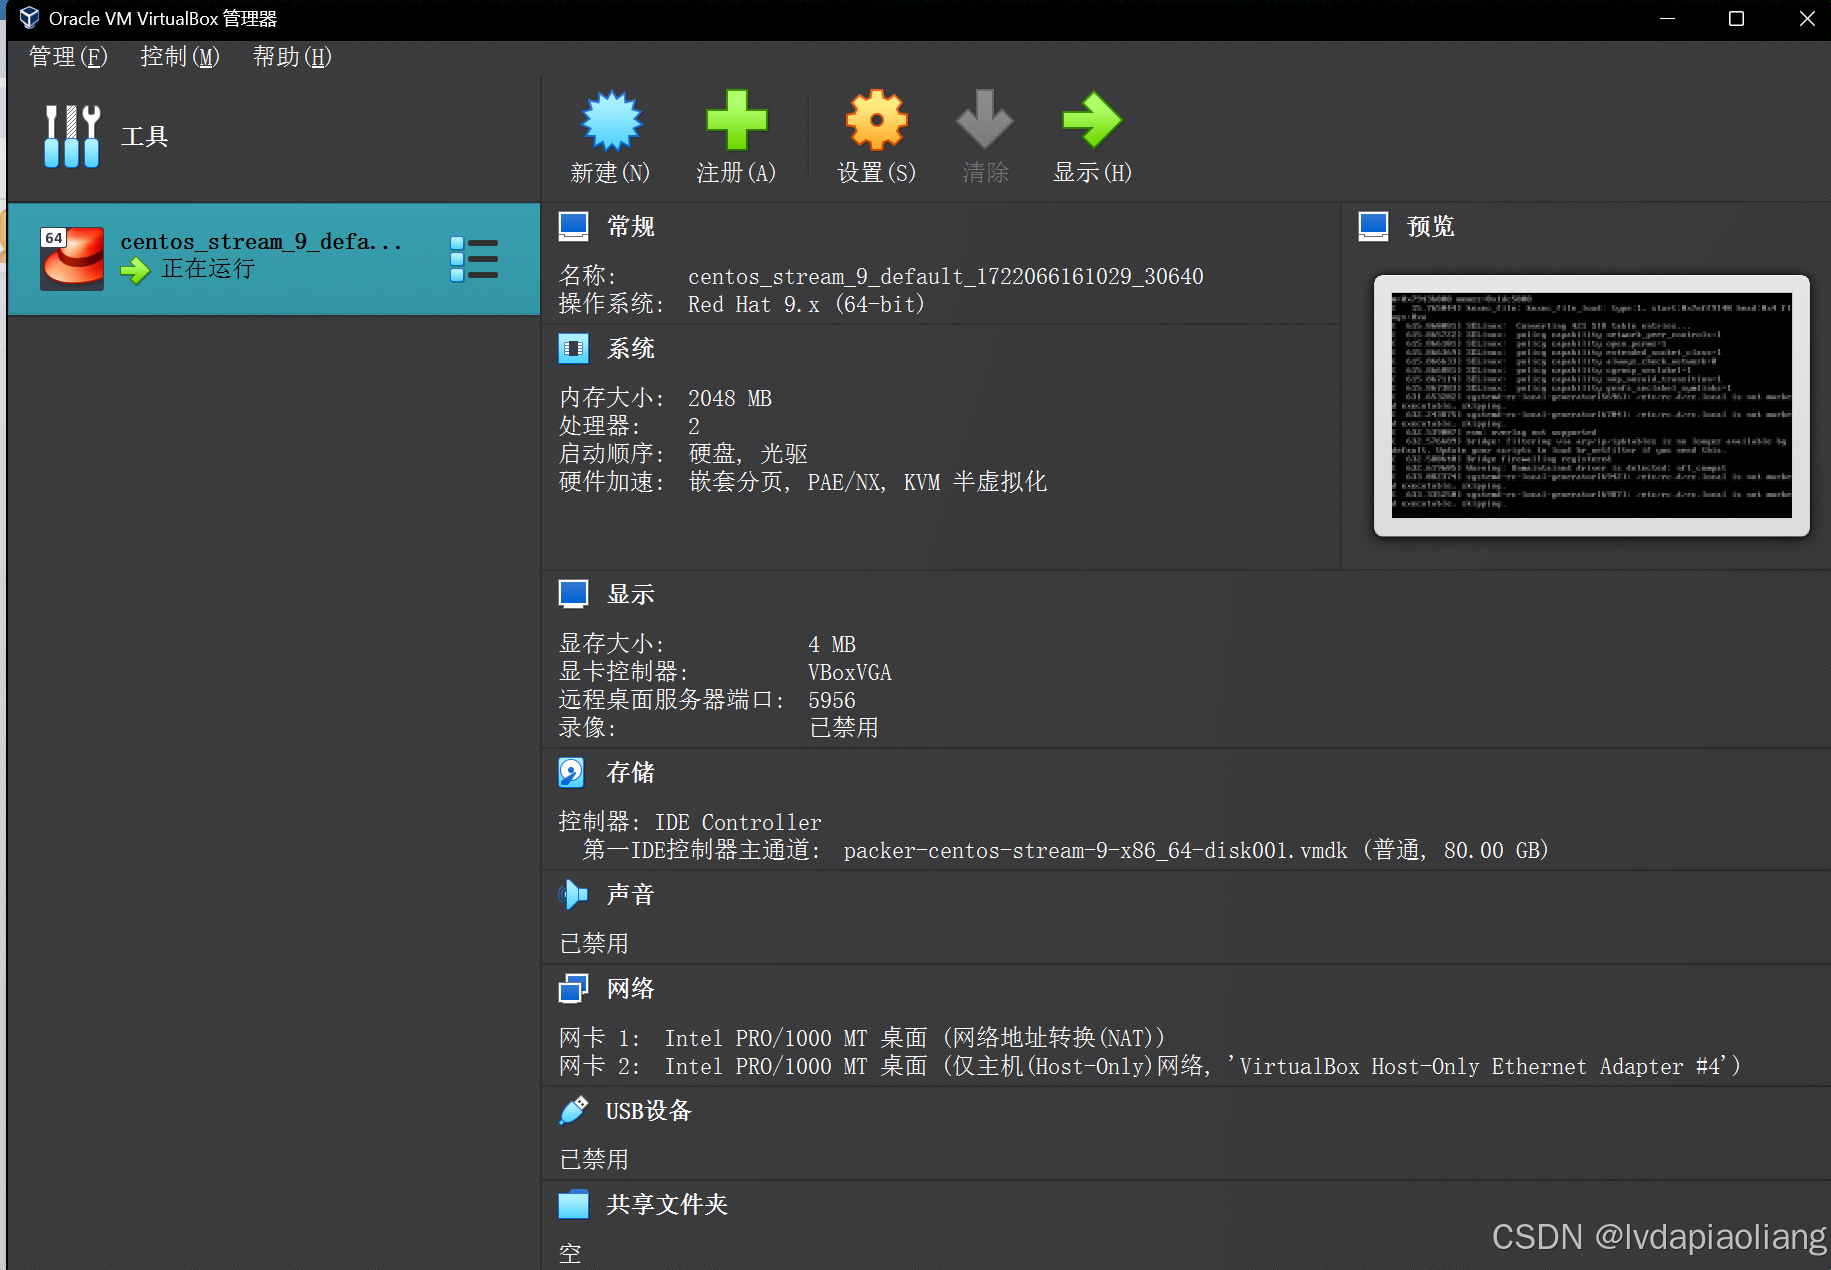
我们打开virtualbox,就可以看到这个虚拟机正在运行。
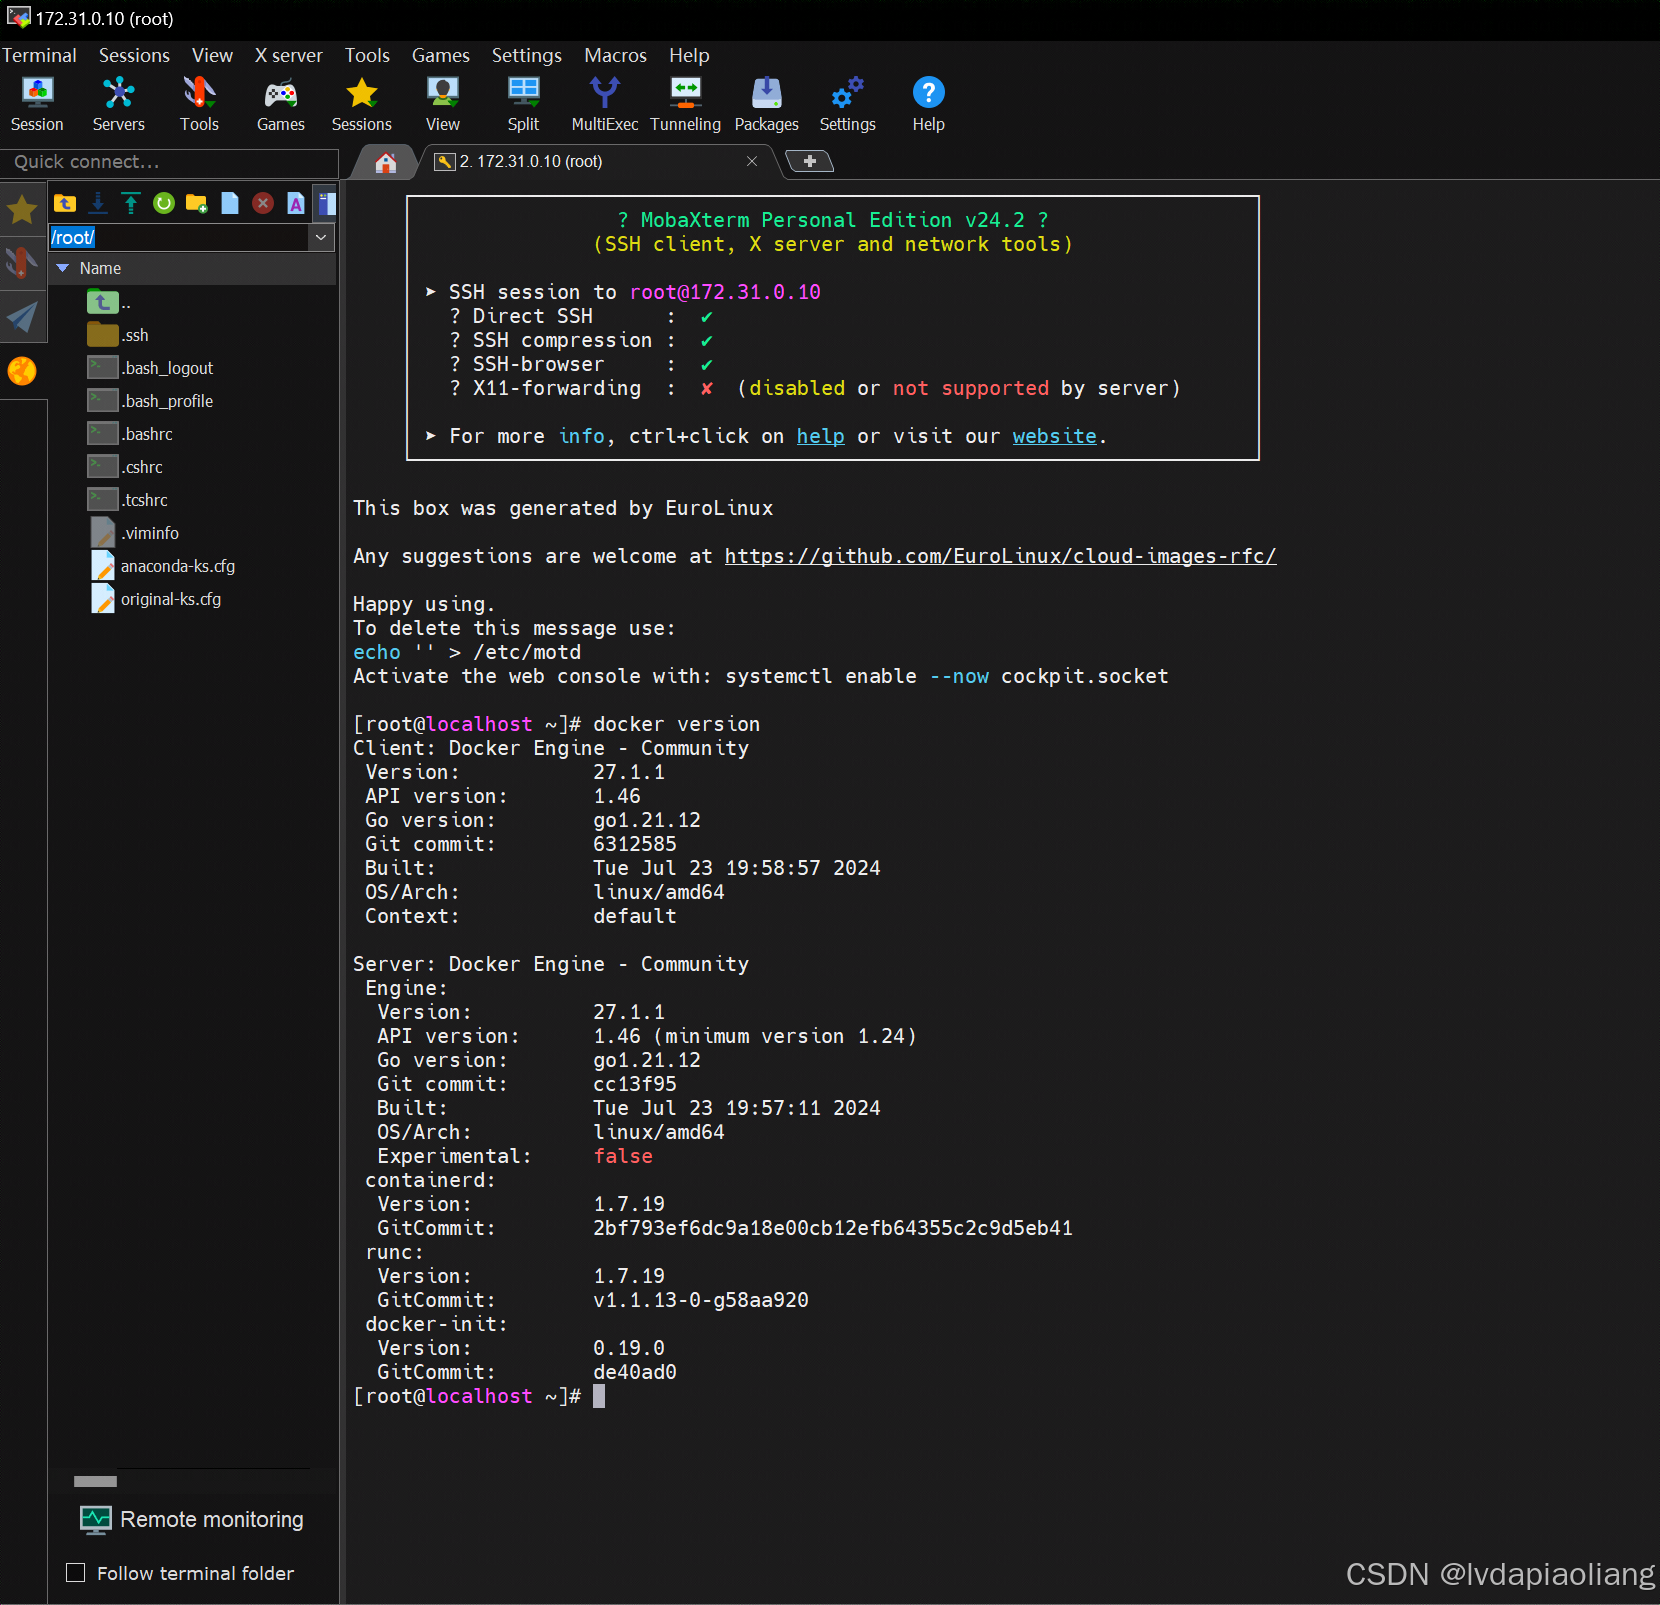
使用MobaXterm或者其他ssh工具连接这个虚拟机。
MobaXterm下载地址:MobaXterm free Xserver and tabbed SSH client for Windows
虚拟机连接信息如下:
IP:172.31.0.10
用户:root
密码:1TdhblkFcdhx2a
密码可能有些长,这样记忆:一条大河波浪宽,风吹稻花香两岸。
3、Kubernetes集群
Kubernetes官方文档地址:
3.1、通过kubeadm快速安装Kubernetes集群
Kubernetes从v1.4版本开始引入了命令行工具kubeadm,以简化集群的安装过程,到v1.13版本时,kubeadm已经达到GA阶段。
3.1.1、在安装kubeadm前,需要关闭Linux的系统交换分区(swap),这可以通过下面的命令实现:
#关闭swap
swapoff -a
sed -ri 's/.*swap.*/#&/' /etc/fstab

3.1.2、然后,将 SELinux 设置为 permissive 模式(相当于将其禁用)。
# 将 SELinux 设置为 permissive 模式(相当于将其禁用)
sudo setenforce 0
sudo sed -i 's/^SELINUX=enforcing$/SELINUX=permissive/' /etc/selinux/config

3.1.3、修改/etc/hosts文件,添加域名映射
# 所有机器添加master的域名映射,保证各个node节点可以ping通master。以下需要修改为自己的IP和域名。
echo "172.31.0.10 k8s-master" >> /etc/hosts
# 添加这个映射,解决后期calico网络插件安装的报错。
echo "185.199.111.133 raw.githubusercontent.com" >> /etc/hosts

3.1.4、允许 iptables 检查桥接流量
按照步骤执行下面的命令:
cat <<EOF | sudo tee /etc/modules-load.d/k8s.conf
overlay
br_netfilter
EOF

sudo modprobe overlay

sudo modprobe br_netfilter

cat <<EOF | sudo tee /etc/sysctl.d/k8s.conf
net.bridge.bridge-nf-call-ip6tables = 1
net.bridge.bridge-nf-call-iptables = 1
net.ipv4.ip_forward = 1
vm.swappiness = 0
EOF

sudo sysctl --system

3.1.5、配置containerd
3.1.5.1、生成默认配置内容
containerd config default > /etc/containerd/config.toml
3.1.5.2、编辑/etc/containerd/config.toml
vim /etc/containerd/config.toml
修改如下内容:
1、SystemdCgroup的值改为true
SystemdCgroup = true2、替换sandbox的镜像地址和版本
sandbox_image = "registry.aliyuncs.com/google_containers/pause:3.9"3、添加镜像加速
[plugins]
[plugins."io.containerd.grpc.v1.cri".registry]
...
[plugins."io.containerd.grpc.v1.cri".registry.mirrors]
# 以下内容为新添加
[plugins."io.containerd.grpc.v1.cri".registry.mirrors."k8s.gcr.io"]
endpoint = ["registry.aliyuncs.com/google_containers"]
下面为修改之后的完整config.toml文件:
disabled_plugins = []
imports = []
oom_score = 0
plugin_dir = ""
required_plugins = []
root = "/var/lib/containerd"
state = "/run/containerd"
temp = ""
version = 2

[cgroup]
  path = ""

[debug]
  address = ""
  format = ""
  gid = 0
  level = ""
  uid = 0

[grpc]
  address = "/run/containerd/containerd.sock"
  gid = 0
  max_recv_message_size = 16777216
  max_send_message_size = 16777216
  tcp_address = ""
  tcp_tls_ca = ""
  tcp_tls_cert = ""
  tcp_tls_key = ""
  uid = 0

[metrics]
  address = ""
  grpc_histogram = false

[plugins]

  [plugins."io.containerd.gc.v1.scheduler"]
    deletion_threshold = 0
    mutation_threshold = 100
    pause_threshold = 0.02
    schedule_delay = "0s"
    startup_delay = "100ms"

  [plugins."io.containerd.grpc.v1.cri"]
    cdi_spec_dirs = ["/etc/cdi", "/var/run/cdi"]
    device_ownership_from_security_context = false
    disable_apparmor = false
    disable_cgroup = false
    disable_hugetlb_controller = true
    disable_proc_mount = false
    disable_tcp_service = true
    drain_exec_sync_io_timeout = "0s"
    enable_cdi = false
    enable_selinux = false
    enable_tls_streaming = false
    enable_unprivileged_icmp = false
    enable_unprivileged_ports = false
    ignore_deprecation_warnings = []
    ignore_image_defined_volumes = false
    image_pull_progress_timeout = "5m0s"
    image_pull_with_sync_fs = false
    max_concurrent_downloads = 3
    max_container_log_line_size = 16384
    netns_mounts_under_state_dir = false
    restrict_oom_score_adj = false
    sandbox_image = "registry.aliyuncs.com/google_containers/pause:3.9"
    selinux_category_range = 1024
    stats_collect_period = 10
    stream_idle_timeout = "4h0m0s"
    stream_server_address = "127.0.0.1"
    stream_server_port = "0"
    systemd_cgroup = false
    tolerate_missing_hugetlb_controller = true
    unset_seccomp_profile = ""

    [plugins."io.containerd.grpc.v1.cri".cni]
      bin_dir = "/opt/cni/bin"
      conf_dir = "/etc/cni/net.d"
      conf_template = ""
      ip_pref = ""
      max_conf_num = 1
      setup_serially = false

    [plugins."io.containerd.grpc.v1.cri".containerd]
      default_runtime_name = "runc"
      disable_snapshot_annotations = true
      discard_unpacked_layers = false
      ignore_blockio_not_enabled_errors = false
      ignore_rdt_not_enabled_errors = false
      no_pivot = false
      snapshotter = "overlayfs"

      [plugins."io.containerd.grpc.v1.cri".containerd.default_runtime]
        base_runtime_spec = ""
        cni_conf_dir = ""
        cni_max_conf_num = 0
        container_annotations = []
        pod_annotations = []
        privileged_without_host_devices = false
        privileged_without_host_devices_all_devices_allowed = false
        runtime_engine = ""
        runtime_path = ""
        runtime_root = ""
        runtime_type = ""
        sandbox_mode = ""
        snapshotter = ""

        [plugins."io.containerd.grpc.v1.cri".containerd.default_runtime.options]

      [plugins."io.containerd.grpc.v1.cri".containerd.runtimes]

        [plugins."io.containerd.grpc.v1.cri".containerd.runtimes.runc]
          base_runtime_spec = ""
          cni_conf_dir = ""
          cni_max_conf_num = 0
          container_annotations = []
          pod_annotations = []
          privileged_without_host_devices = false
          privileged_without_host_devices_all_devices_allowed = false
          runtime_engine = ""
          runtime_path = ""
          runtime_root = ""
          runtime_type = "io.containerd.runc.v2"
          sandbox_mode = "podsandbox"
          snapshotter = ""

          [plugins."io.containerd.grpc.v1.cri".containerd.runtimes.runc.options]
            BinaryName = ""
            CriuImagePath = ""
            CriuPath = ""
            CriuWorkPath = ""
            IoGid = 0
            IoUid = 0
            NoNewKeyring = false
            NoPivotRoot = false
            Root = ""
            ShimCgroup = ""
            SystemdCgroup = true

      [plugins."io.containerd.grpc.v1.cri".containerd.untrusted_workload_runtime]
        base_runtime_spec = ""
        cni_conf_dir = ""
        cni_max_conf_num = 0
        container_annotations = []
        pod_annotations = []
        privileged_without_host_devices = false
        privileged_without_host_devices_all_devices_allowed = false
        runtime_engine = ""
        runtime_path = ""
        runtime_root = ""
        runtime_type = ""
        sandbox_mode = ""
        snapshotter = ""

        [plugins."io.containerd.grpc.v1.cri".containerd.untrusted_workload_runtime.options]

    [plugins."io.containerd.grpc.v1.cri".image_decryption]
      key_model = "node"

    [plugins."io.containerd.grpc.v1.cri".registry]
      config_path = ""

      [plugins."io.containerd.grpc.v1.cri".registry.auths]

      [plugins."io.containerd.grpc.v1.cri".registry.configs]

      [plugins."io.containerd.grpc.v1.cri".registry.headers]

      [plugins."io.containerd.grpc.v1.cri".registry.mirrors]
        [plugins."io.containerd.grpc.v1.cri".registry.mirrors."k8s.gcr.io"]
          endpoint = ["registry.aliyuncs.com/google_containers"]
    [plugins."io.containerd.grpc.v1.cri".x509_key_pair_streaming]
      tls_cert_file = ""
      tls_key_file = ""

  [plugins."io.containerd.internal.v1.opt"]
    path = "/opt/containerd"

  [plugins."io.containerd.internal.v1.restart"]
    interval = "10s"

  [plugins."io.containerd.internal.v1.tracing"]

  [plugins."io.containerd.metadata.v1.bolt"]
    content_sharing_policy = "shared"

  [plugins."io.containerd.monitor.v1.cgroups"]
    no_prometheus = false

  [plugins."io.containerd.nri.v1.nri"]
    disable = true
    disable_connections = false
    plugin_config_path = "/etc/nri/conf.d"
    plugin_path = "/opt/nri/plugins"
    plugin_registration_timeout = "5s"
    plugin_request_timeout = "2s"
    socket_path = "/var/run/nri/nri.sock"

  [plugins."io.containerd.runtime.v1.linux"]
    no_shim = false
    runtime = "runc"
    runtime_root = ""
    shim = "containerd-shim"
    shim_debug = false

  [plugins."io.containerd.runtime.v2.task"]
    platforms = ["linux/amd64"]
    sched_core = false

  [plugins."io.containerd.service.v1.diff-service"]
    default = ["walking"]

  [plugins."io.containerd.service.v1.tasks-service"]
    blockio_config_file = ""
    rdt_config_file = ""

  [plugins."io.containerd.snapshotter.v1.aufs"]
    root_path = ""

  [plugins."io.containerd.snapshotter.v1.blockfile"]
    fs_type = ""
    mount_options = []
    root_path = ""
    scratch_file = ""

  [plugins."io.containerd.snapshotter.v1.devmapper"]
    async_remove = false
    base_image_size = ""
    discard_blocks = false
    fs_options = ""
    fs_type = ""
    pool_name = ""
    root_path = ""

  [plugins."io.containerd.snapshotter.v1.native"]
    root_path = ""

  [plugins."io.containerd.snapshotter.v1.overlayfs"]
    mount_options = []
    root_path = ""
    sync_remove = false
    upperdir_label = false

  [plugins."io.containerd.snapshotter.v1.zfs"]
    root_path = ""

  [plugins."io.containerd.tracing.processor.v1.otlp"]

  [plugins."io.containerd.transfer.v1.local"]
    config_path = ""
    max_concurrent_downloads = 3
    max_concurrent_uploaded_layers = 3

    [[plugins."io.containerd.transfer.v1.local".unpack_config]]
      differ = ""
      platform = "linux/amd64"
      snapshotter = "overlayfs"

[proxy_plugins]

[stream_processors]

  [stream_processors."io.containerd.ocicrypt.decoder.v1.tar"]
    accepts = ["application/vnd.oci.image.layer.v1.tar+encrypted"]
    args = ["--decryption-keys-path", "/etc/containerd/ocicrypt/keys"]
    env = ["OCICRYPT_KEYPROVIDER_CONFIG=/etc/containerd/ocicrypt/ocicrypt_keyprovider.conf"]
    path = "ctd-decoder"
    returns = "application/vnd.oci.image.layer.v1.tar"

  [stream_processors."io.containerd.ocicrypt.decoder.v1.tar.gzip"]
    accepts = ["application/vnd.oci.image.layer.v1.tar+gzip+encrypted"]
    args = ["--decryption-keys-path", "/etc/containerd/ocicrypt/keys"]
    env = ["OCICRYPT_KEYPROVIDER_CONFIG=/etc/containerd/ocicrypt/ocicrypt_keyprovider.conf"]
    path = "ctd-decoder"
    returns = "application/vnd.oci.image.layer.v1.tar+gzip"

[timeouts]
  "io.containerd.timeout.bolt.open" = "0s"
  "io.containerd.timeout.metrics.shimstats" = "2s"
  "io.containerd.timeout.shim.cleanup" = "5s"
  "io.containerd.timeout.shim.load" = "5s"
  "io.containerd.timeout.shim.shutdown" = "3s"
  "io.containerd.timeout.task.state" = "2s"

[ttrpc]
  address = ""
  gid = 0
  uid = 0
然后重启containerd
systemctl daemon-reload
systemctl restart containerd
systemctl status containerd

3.1.6、添加Kubernetes的yum仓库
添加 Kubernetes 的 yum 仓库。在仓库定义中的 exclude 参数确保了与 Kubernetes 相关的软件包在运行 yum update 时不会升级,因为升级 Kubernetes 需要遵循特定的过程。请注意,此仓库仅包含适用于 Kubernetes 1.30 的软件包; 对于其他 Kubernetes 次要版本,则需要更改 URL 中的 Kubernetes 次要版本以匹配你所需的次要版本 (你还应该检查正在阅读的安装文档是否为你计划安装的 Kubernetes 版本的文档)。
# 此操作会覆盖 /etc/yum.repos.d/kubernetes.repo 中现存的所有配置
cat <<EOF | sudo tee /etc/yum.repos.d/kubernetes.repo
[kubernetes]
name=Kubernetes
baseurl=https://pkgs.k8s.io/core:/stable:/v1.30/rpm/
enabled=1
gpgcheck=1
gpgkey=https://pkgs.k8s.io/core:/stable:/v1.30/rpm/repodata/repomd.xml.key
exclude=kubelet kubeadm kubectl cri-tools kubernetes-cni
EOF

3.1.7、安装 kubelet、kubeadm 和 kubectl,并启用 kubelet 以确保它在启动时自动启动:
sudo yum install -y kubelet kubeadm kubectl --disableexcludes=kubernetes

sudo systemctl enable --now kubelet

3.1.8、Kubernetes主节点初始化
通过kubeadm config print init-defaults > init-config.yaml命令可以获取默认的初始化参数文件:
kubeadm config print init-defaults > init-config.yaml

编辑init-config.yaml文件
主要修改以下几个地方

1、advertiseAddress:改为当前主机的ip地址
2、nodeRegistration.name:改为当前主机的hostname
3、imageRepository:我这里改成自己的私人仓库地址了,如果自己有的话可以改成自己的,没有的话可以改成阿里云的镜像源地址:registry.aliyuncs.com/google_containers
4、新添加KubeletConfiguration,指定驱动类型。内容如下:
---
kind: KubeletConfiguration
apiVersion: kubelet.config.k8s.io/v1beta1
cgroupDriver: systemd
5、serviceSubnet:这个看情况,如果自己想改的话也可以改,我这里用的默认的
6、podSubnet:指定容器的ip段
7、kubernetesVersion:改为当前对应的版本
修改后的init-config.yaml文件内容如下:
apiVersion: kubeadm.k8s.io/v1beta3
bootstrapTokens:
- groups:
  - system:bootstrappers:kubeadm:default-node-token
  token: abcdef.0123456789abcdef
  ttl: 24h0m0s
  usages:
  - signing
  - authentication
kind: InitConfiguration
localAPIEndpoint:
  advertiseAddress: 172.31.0.10
  bindPort: 6443
nodeRegistration:
  criSocket: unix:///var/run/containerd/containerd.sock
  imagePullPolicy: IfNotPresent
  name: k8s-master
  taints: null
---
apiServer:
  timeoutForControlPlane: 4m0s
apiVersion: kubeadm.k8s.io/v1beta3
certificatesDir: /etc/kubernetes/pki
clusterName: kubernetes
controllerManager: {}
dns: {}
etcd:
  local:
    dataDir: /var/lib/etcd
imageRepository: registry.aliyuncs.com/google_containers
kind: ClusterConfiguration
kubernetesVersion: 1.30.0
networking:
  dnsDomain: cluster.local
  podSubnet: 192.168.0.0/16
  serviceSubnet: 10.96.0.0/16
scheduler: {}
---
kind: KubeletConfiguration
apiVersion: kubelet.config.k8s.io/v1beta1
cgroupDriver: systemd
通过kubeadm init --config=init-config.yaml命令安装Master
kubeadm init --config=init-config.yaml
安装成功之后执行:
mkdir -p $HOME/.kube
sudo cp -i /etc/kubernetes/admin.conf $HOME/.kube/config
sudo chown $(id -u):$(id -g) $HOME/.kube/configexport KUBECONFIG=/etc/kubernetes/admin.conf
3.2、安装calico网络插件
Quickstart for Calico on Kubernetes | Calico Documentation

Install Calico
-
Install the Tigera Calico operator and custom resource definitions.
kubectl create -f https://raw.githubusercontent.com/projectcalico/calico/v3.28.0/manifests/tigera-operator.yamlnote
Due to the large size of the CRD bundle,
kubectl applymight exceed request limits. Instead, usekubectl createorkubectl replace. -
Install Calico by creating the necessary custom resource. For more information on configuration options available in this manifest, see the installation reference.
kubectl create -f https://raw.githubusercontent.com/projectcalico/calico/v3.28.0/manifests/custom-resources.yamlnote
Before creating this manifest, read its contents and make sure its settings are correct for your environment. For example, you may need to change the default IP pool CIDR to match your pod network CIDR.
-
Confirm that all of the pods are running with the following command.
watch kubectl get pods -n calico-systemWait until each pod has the
STATUSofRunning.note
The Tigera operator installs resources in the
calico-systemnamespace. Other install methods may use thekube-systemnamespace instead. -
Remove the taints on the control plane so that you can schedule pods on it.
kubectl taint nodes --all node-role.kubernetes.io/control-plane-It should return the following.
node/<your-hostname> untainted -
Confirm that you now have a node in your cluster with the following command.
kubectl get nodes -o wideIt should return something like the following.
NAME              STATUS   ROLES    AGE   VERSION   INTERNAL-IP   EXTERNAL-IP   OS-IMAGE             KERNEL-VERSION    CONTAINER-RUNTIME
<your-hostname>   Ready    master   52m   v1.12.2   10.128.0.28   <none>        Ubuntu 18.04.1 LTS   4.15.0-1023-gcp   docker://18.6.1
Congratulations! You now have a single-host Kubernetes cluster with Calico.
执行kubectl get pods -A查看pod状态:
kubectl get pods -A

kubectl describe po csi-node-driver-hs8sr -n calico-system
解决办法(要翻墙):
docker pull docker.io/calico/csi:v3.28.0
docker pull docker.io/calico/apiserver:v3.28.0
docker pull docker.io/calico/kube-controllers:v3.28.0
然后再执行kubectl get pods -A查看pod状态:
kubectl get pods -A

看到所有pods状态都是Running
3.3、验证集群
kubectl get nodes