DigitalOcean 在 2024 年 5 月开始支持在托管数据库(PostgreSQL、MySQL、Redis和Kafka)中收集可观测指标。我们将在本偏内容中,告诉大家如何使用部署在 DigitalOcean App Platform 上的网络应用程序,为 DigitalOcean 上的 PostgreSQL 托管数据库收集可观测指标。
你将在这次demo中使用一个 Node.js 应用程序示例,并将其连接到你将在本教程中创建的 DigitalOcean PostgreSQL 托管数据库。到本教程结束时,你将拥有一个 Prometheus 仪表板,它可以从连接到 App Platform Web 应用程序的 PostgreSQL 托管数据库中抓取并显示指标。
准备工作
开始之前,请确保具备以下准备工作:
- 准备一个 DigitalOcean 账户。
- 部署在 App Platform 上的 Node.js 应用程序示例。
- 部署并连接到 App Platform 应用程序的 PostgreSQL 数据库。
- 个人访问Token具有读/写(rw)访问权限。你可以按照此前教程中的“如何创建个人访问Token”为自己创建一个访问Token。
步骤 1 - 设置 PostgreSQL 托管数据库
首先,我们需要创建一个 PostgreSQL 数据库。
导航至 DigitalOcean 云控制面板中的“数据库”部分。
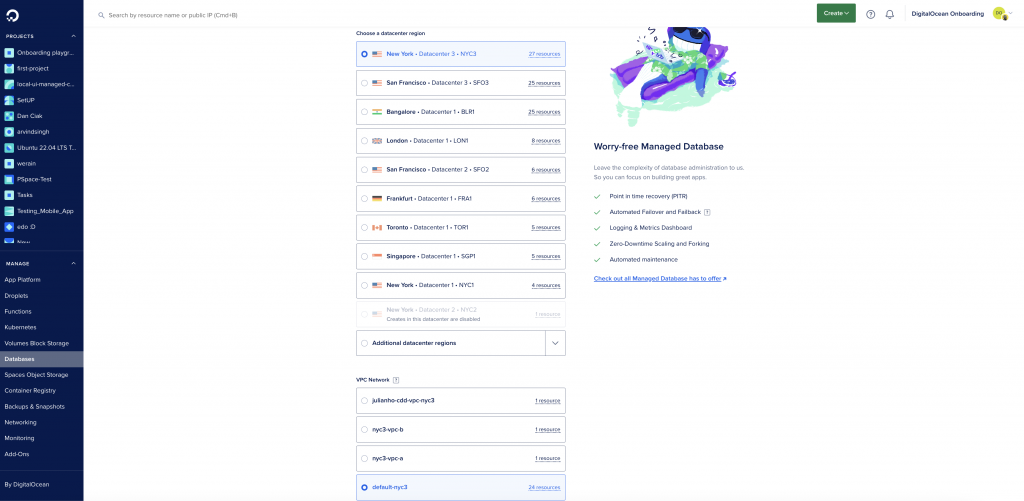
单击“创建数据库群集”,然后选择 PostgreSQL。你将会选择一个数据中心区域和 VPC 网络,如下图所示:
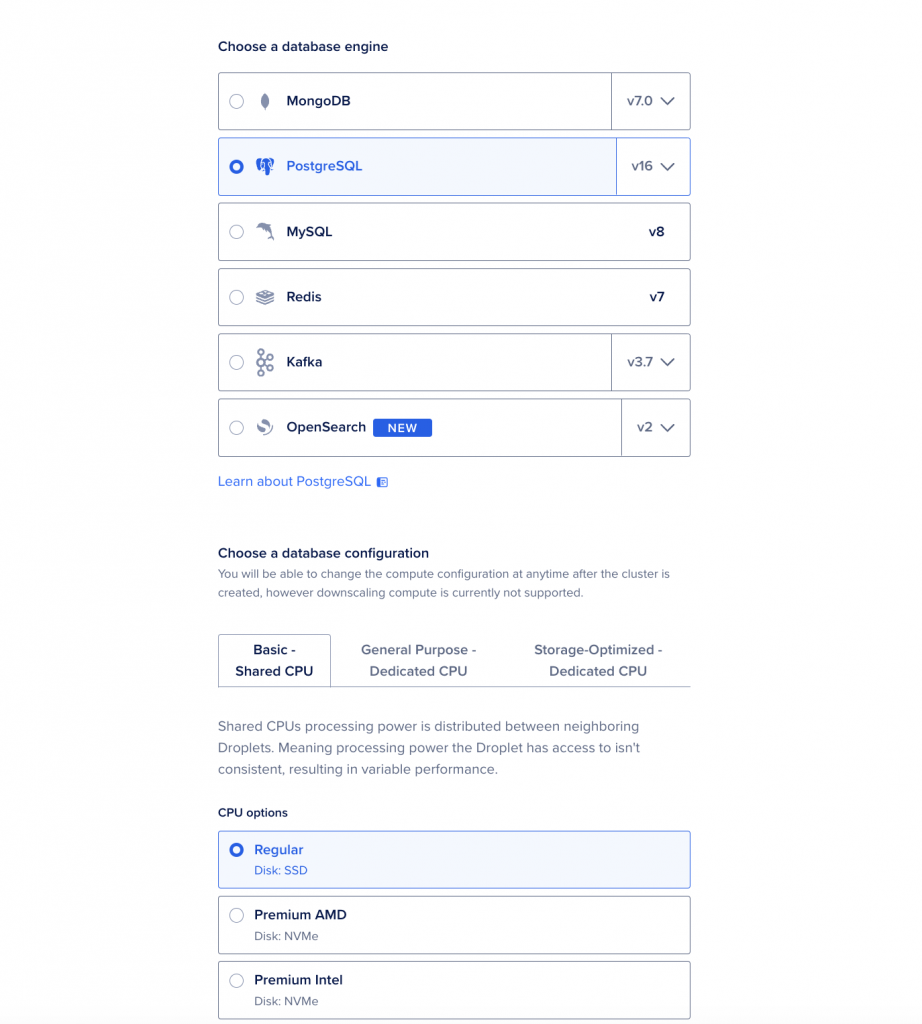
接下来,选择 PostgreSQL 作为数据库,并配置数据库的其他设置。
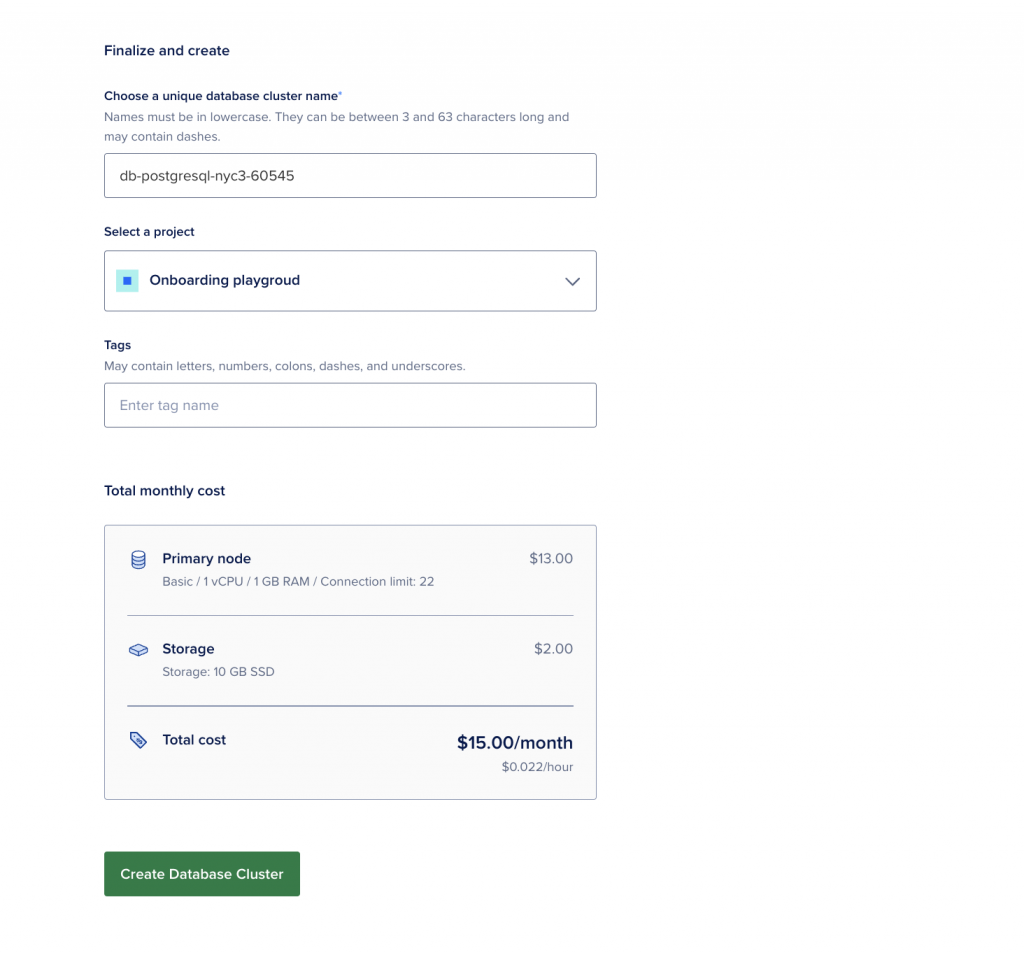
按照屏幕上的说明操作,完成数据库设置后,单击 Create Database cluster。
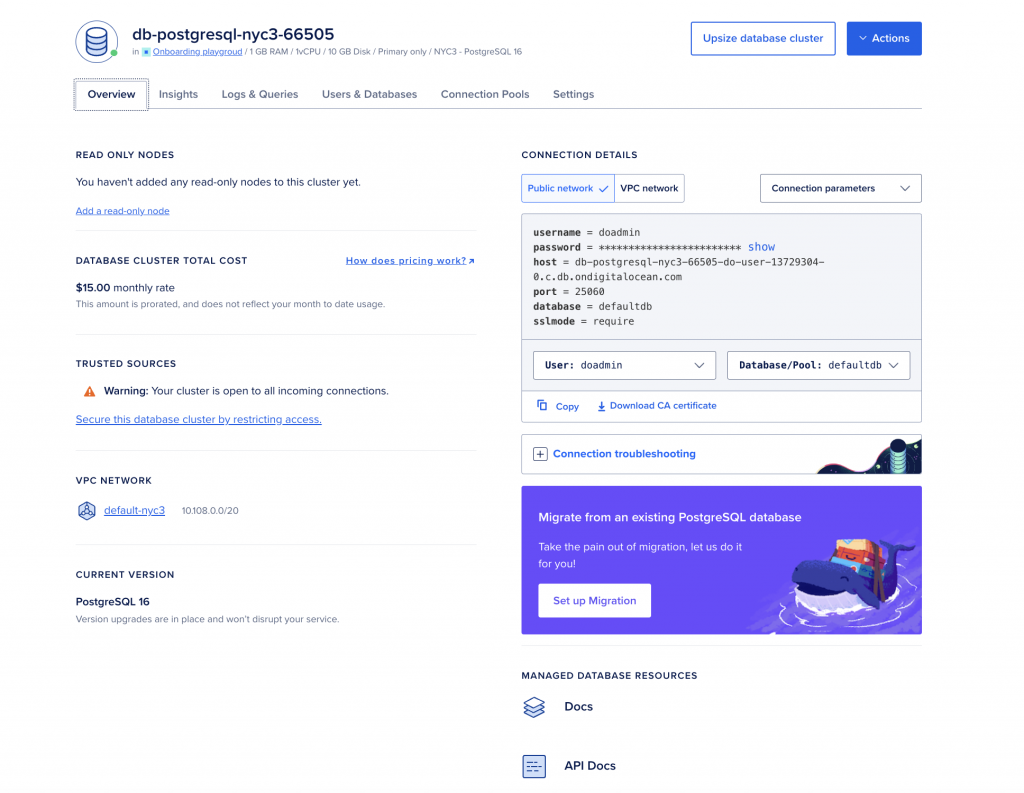
创建 PostgreSQL 托管数据库群集后,你可以在以下选项卡中查看其概览、见解、日志和设置:
步骤 2 - 在应用程序平台上部署 Node.js Web 应用程序示例
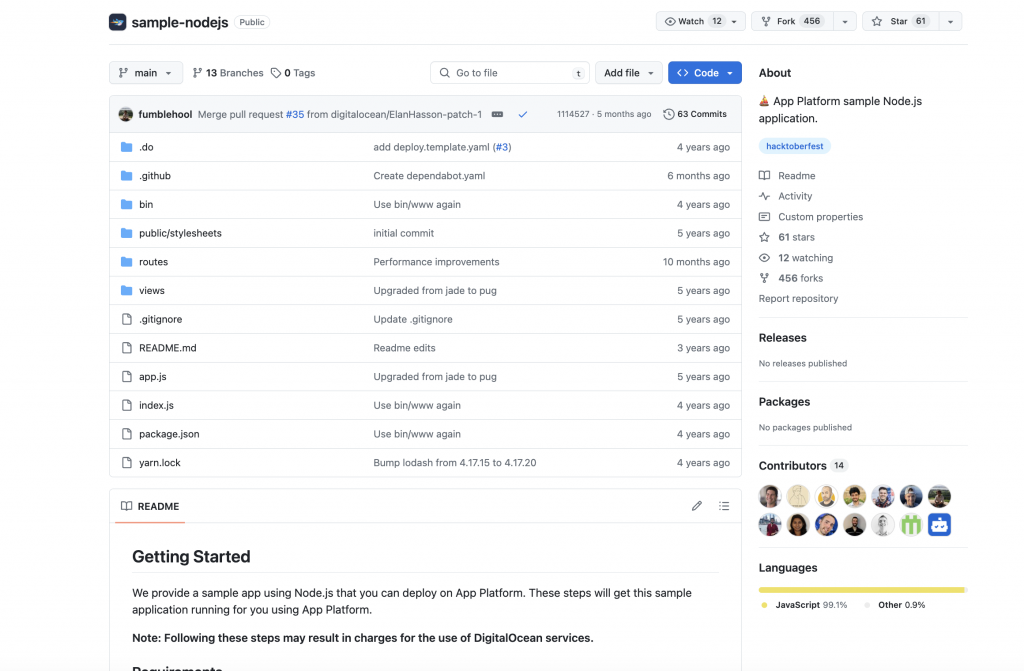
你可以按照以下步骤部署 Node.js 示例应用程序,或者使用这个 GitHub 仓库在 App Platform 上创建 Node.js 示例应用程序。
如果你使用后者,则需要将此 GitHub 仓库 Fork 到你的 GitHub 账户,这样你就能在云中存储一份副本。点击 GitHub 仓库中的 Fork 按钮,然后按照屏幕上的说明操作。
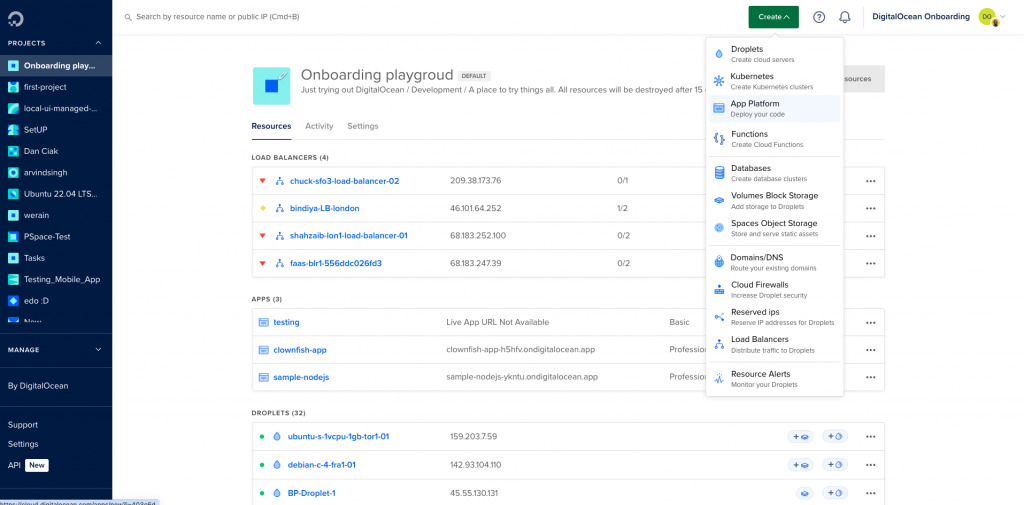
现在登录 DigitalOcean 云门户,导航至Create App -> App Platform。
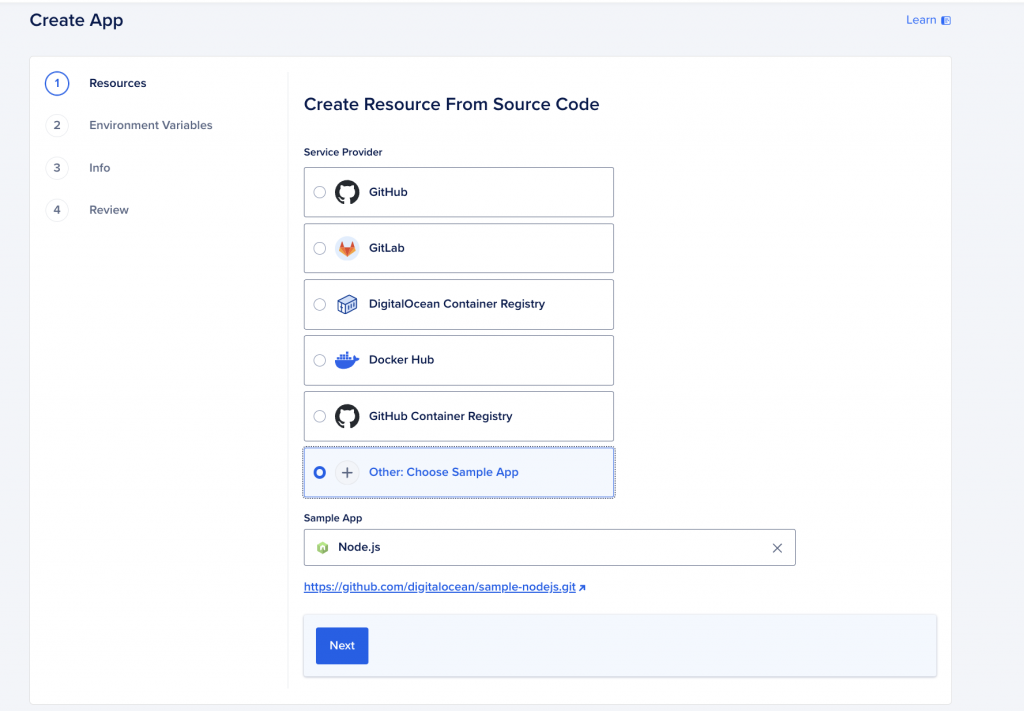
接下来,选择“Other: Choose Sample App”,从Sample App 下拉菜单中选择 Node.js 示例应用程序,并单击Next。
按照屏幕上的说明设置应用程序的资源、常规配置和环境变量,然后单击Next。完成后,查看应用程序的整体配置并点击Create Resources。应用程序创建完成后,需要一些时间才能部署到应用程序平台上。
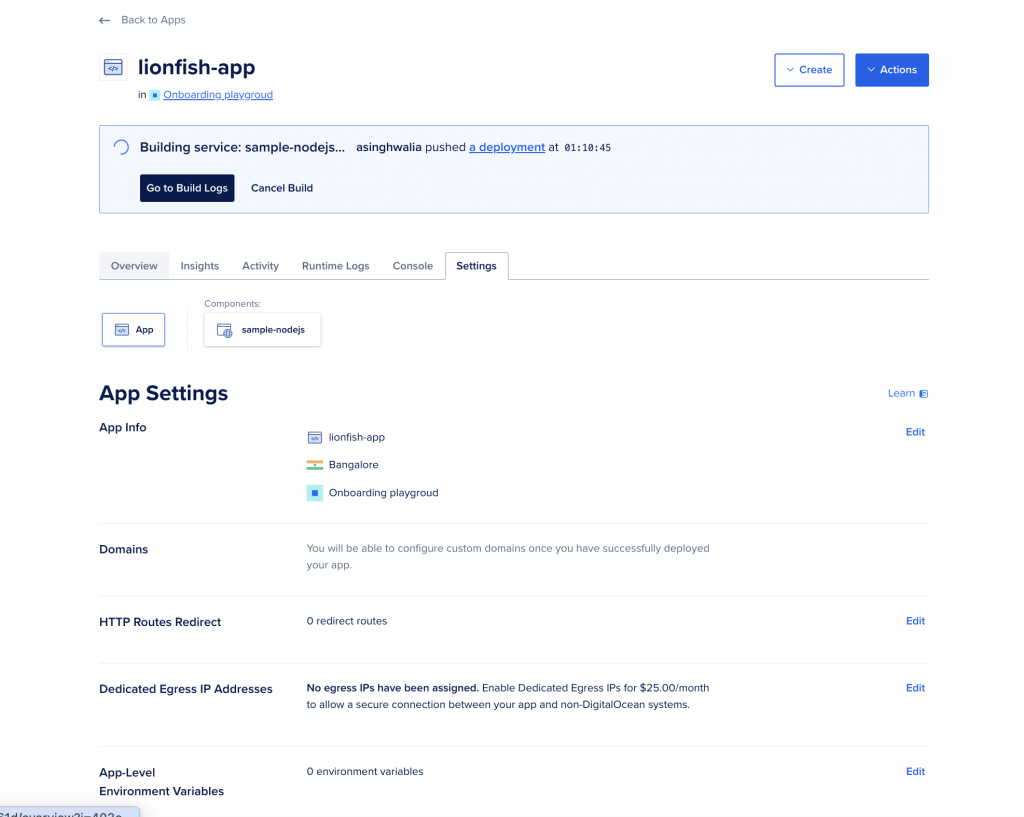
应用程序部署和构建完成后,你可以在浏览器中查看应用程序的概述并访问已部署。
应用程序部署和构建完成后,你可以在浏览器中查看应用程序的概述并访问已部署的应用程序。
步骤 3 - 将 PostgreSQL 数据库附加到 App Platform 应用程序
在本步骤中,你将把步骤 1 中创建的 PostgreSQL 托管数据库附加到步骤 2 中创建的示例 Node.js 应用程序。
导航到已部署的 App Platform 应用程序,单击已部署应用程序仪表板上的Create按钮,然后单击 “Create/Attach Database”。

选择“Previously Created DigitalOcean Database”,然后选择最近部署的 PostgreSQL 托管数据库集群,点击底部的“Attach Database” 按钮。
注意:确保选中 App Platform 应用程序作为受信任资源的复选框。这将创建一个安全的连接,只接受来自应用程序的流量。
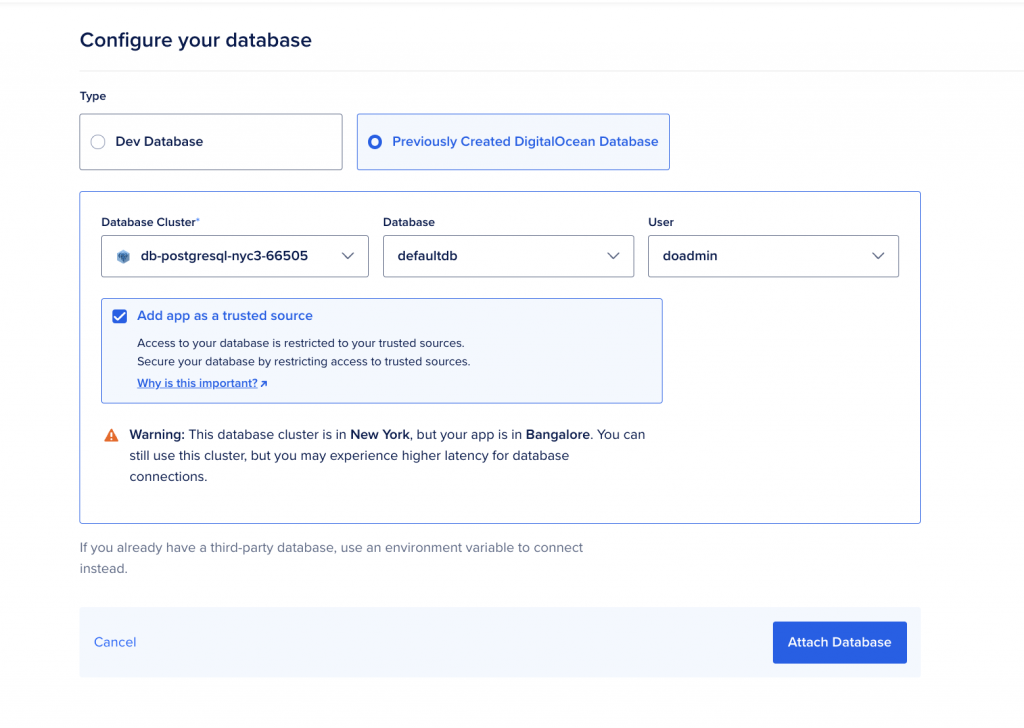
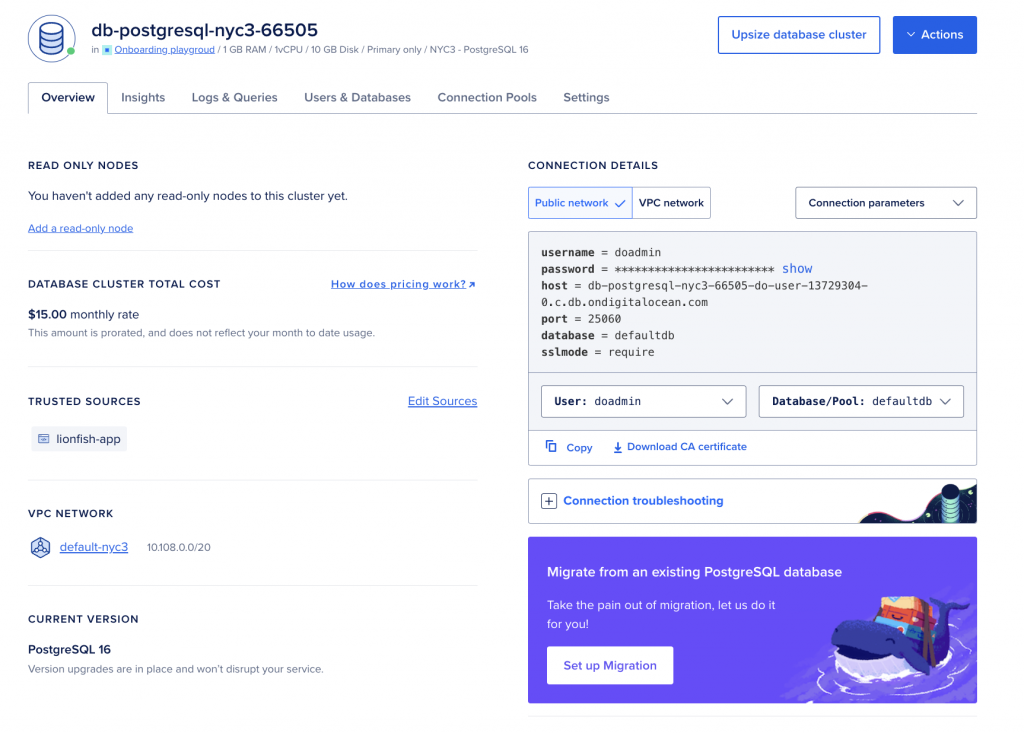
你可以在Database Overview部分验证 App Platform 应用程序是否已成功添加为可信源。
步骤4 - 从 /metrics 端点获取可抓取的指标
你可以通过编程方式从 Metrics 端点查看数据库群集的指标。该端点包含的指标数量是你在控制面板“洞察”选项卡中访问的指标的二十倍以上。
你可以使用 curl 命令或 Postman 来可视化这些指标,并将其集成到像 Prometheus 这样的监控系统中。
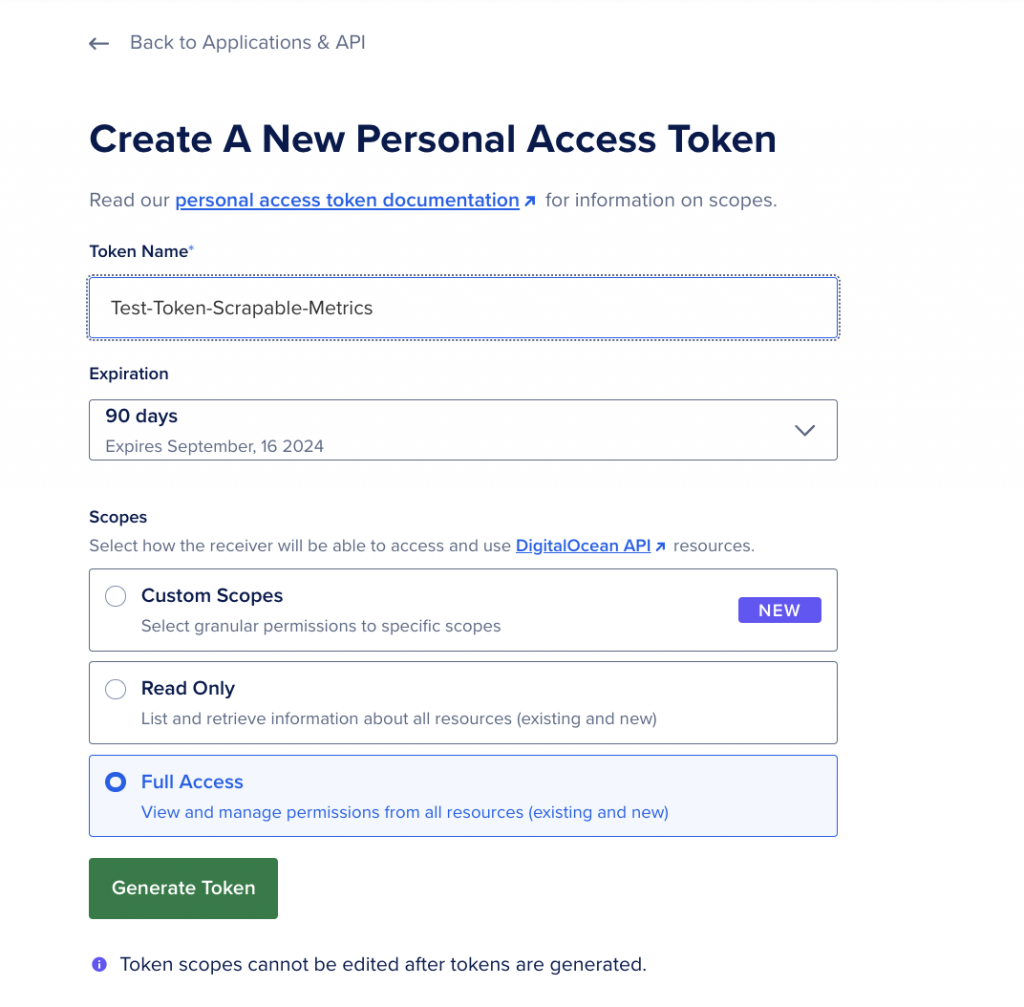
首先,前往 DigitalOcean 控制面板上的 API 部分,创建一个Create A New Personal Access Token,然后单击Generate Token with Full Access。请记下这个访问Token,因为在接下来的步骤中会用到它。
在本案例中,你将使用 Postman 执行所有 HTTP 请求,或者也可以在 App Platform 应用程序实例中使用 curl 命令来获取 API 请求的响应。
获取主机名和端口
首先,你需要通过发送 GET 请求来获取群集的度量主机名。发送请求到 https://api.digitalocean.com/v2/databases/{UUID}。
在 App Platform 应用程序实例中执行以下 curl 命令。请前往控制台部分进行操作。
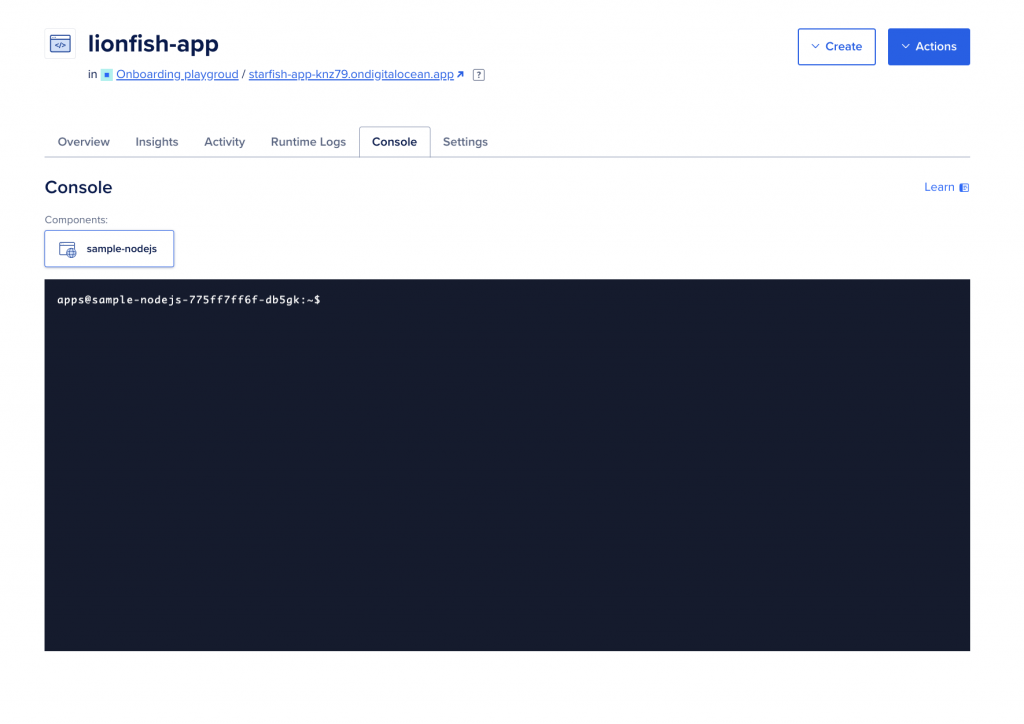
使用以下命令获取数据库的主机名和证书:
apps@sample-nodejs-775ff7ff6f-db5gk:~$ curl --silent -XGET --location 'https://api.digitalocean.com/v2/databases/{UUID}' --header 'Content-Type: application/json' --header "Authorization: Bearer $RO_DIGITALOCEAN_TOKEN"请将 {UUID} 和 $RO_DIGITALOCEAN_TOKEN 分别替换为你的 PostgreSQL 托管数据库的 UUID 和你的个人访问Token。
注意:你可以在 URL 中找到数据库的 UUID,如下面截图中突出显示的文本所示。

该命令应为你提供包含 PostgreSQL 托管数据库集群详细信息的输出如下:
Output
"database": {
        "id": "192a6077-d103-4e72-bd2c-e370fd6b5608",
        "name": "db-postgresql-nyc3-66505",
        "engine": "pg",
        "version": "16",
        "semantic_version": "16.3",
        "connection": {
            "protocol": "postgresql",
            "uri": "postgresql://doadmin:PASSWORD@db-postgresql-nyc3-66505-do-user-13729304-0.c.db.ondigitalocean.com:25060/defaultdb?sslmode=require",
            "database": "defaultdb",
            "host": "db-postgresql-nyc3-66505-do-user-13729304-0.c.db.ondigitalocean.com",
            "port": 25060,
            "user": "doadmin",
            "password": "PASSWORD",
            "ssl": true
        },
        "private_connection": {
            "protocol": "postgresql",
            "uri": "postgresql://doadmin:PASSWORD@private-db-postgresql-nyc3-66505-do-user-13729304-0.c.db.ondigitalocean.com:25060/defaultdb?sslmode=require",
            "database": "defaultdb",
            "host": "private-db-postgresql-nyc3-66505-do-user-13729304-0.c.db.ondigitalocean.com",
            "port": 25060,
            "user": "doadmin",
            "password": "PASSWORD",
            "ssl": true
        },
        "metrics_endpoints": [
            {
                "host": "db-postgresql-nyc3-66505-do-user-13729304-0.c.db.ondigitalocean.com",
                "port": 9273
            }
        ],
        "users": [
            {
                "name": "doadmin",
                "role": "primary",
                "password": "PASSWORD"
            }
        ],
        "db_names": [
            "defaultdb"
        ],
        "num_nodes": 1,
        "region": "nyc3",
        "status": "online",
        "created_at": "2024-06-10T21:04:32Z",
        "maintenance_window": {
            "day": "monday",
            "hour": "00:07:46",
            "pending": false
        },
        "size": "db-s-1vcpu-1gb",
        "tags": [
            "testtestnn"
        ],
        "private_network_uuid": "xxxxxxxxxx",
        "project_id": "xxxxxxxxxxx",
        "read_only": false,
        "version_end_of_life": "2028-11-09T00:00:00Z",
        "version_end_of_availability": "2028-05-09T00:00:00Z",
        "storage_size_mib": 10240
    }
}
在上面的输出中,请注意主机和端口对。在我们的例子中,主机是 db-postgresql-nyc3-66505-do-user-13729304-0.c.db.ondigitalocean.com,端口是 9273。
如果你的系统上安装了 Postman,并且系统的 IP 地址已被添加为数据库可信源,你也可以在 Postman 上执行上述 HTTP GET 请求。
只需添加 URL https://api.digitalocean.com/v2/databases/{UUID},然后在授权选项卡下将个人访问Token替换为 Bearer Token 的授权类型。

获取集群的指标凭据
接下来,你需要获取集群的指标凭据。你可以使用管理员或写入Token向 https://api.digitalocean.com/v2/databases/metrics/credentials 发出 GET 请求来检索这些凭据。
从 App Platform 应用实例中使用以下 curl 命令:
apps@sample-nodejs-775ff7ff6f-db5gk:~$ curl --silent -XGET --location 'https://api.digitalocean.com/v2/databases/metrics/credentials' --header 'Content-Type: application/json' --header "Authorization: Bearer xxxxxxxxxxxxxxxxx" 该命令应为你提供带有用户名和密码的集群指标凭据。
Output{
    "credentials": {
        "basic_auth_username": "prom2prh",
        "basic_auth_password": "xxxxxxxxxxxxx"
    }
}
访问 /metrics 端点
要使用 cURL 访问端点,请向 https://$HOST:9273/metrics 发出 GET 请求,并将主机名、用户名和密码变量替换为你在前面步骤中找到的凭据:
apps@sample-nodejs-775ff7ff6f-db5gk:~$ curl -X GET -k -u $USERNAME:$PASSWORD https://$HOST:9273/metrics它应该会为你提供大量的元数据,如下所示:
Output...
1",project="do-user-13729304-0",service="db-postgresql-nyc3-66505",service_type="pg"} 0.7
# HELP system_n_cpus Telegraf collected metric
# TYPE system_n_cpus gauge
system_n_cpus{cloud="custom-digitalocean-do-nyc3",host="db-postgresql-nyc3-66505-1",project="do-user-13729304-0",service="db-postgresql-nyc3-66505",service_type="pg"} 1
# HELP system_n_unique_users Telegraf collected metric
# TYPE system_n_unique_users gauge
system_n_unique_users{cloud="custom-digitalocean-do-nyc3",host="db-postgresql-nyc3-66505-1",project="do-user-13729304-0",service="db-postgresql-nyc3-66505",service_type="pg"} 0
# HELP system_n_users Telegraf collected metric
# TYPE system_n_users gauge
system_n_users{cloud="custom-digitalocean-do-nyc3",host="db-postgresql-nyc3-66505-1",project="do-user-13729304-0",service="db-postgresql-nyc3-66505",service_type="pg"} 0
# HELP system_uptime Telegraf collected metric
# TYPE system_uptime counter
system_uptime{cloud="custom-digitalocean-do-nyc3",host="db-postgresql-nyc3-66505-1",project="do-user-13729304-0",service="db-postgresql-nyc3-66505",service_type="pg"} 640073
...
步骤5 - 使用 Prometheus 可视化指标
要使用 Prometheus 访问端点,请将以下配置复制到文件 prometheus.yml 中,并替换主机名、用户名、密码和 CA 证书路径。这将配置 Prometheus 以使用访问端点所需的所有凭据:
# prometheus.yml
global:
  scrape_interval: 15s
  evaluation_interval: 15s

scrape_configs:
  - job_name: 'dbaas_cluster_metrics_svc_discovery'
    scheme: https
    tls_config:
      ca_file: /path/to/ca.crt
    dns_sd_configs:
      - names:
          - $TARGET_ADDRESS
        type: 'A'
        port: 9273
        refresh_interval: 15s
    metrics_path: '/metrics'
    basic_auth:
      username: $BASIC_AUTH_USERNAME
      password: $BASIC_AUTH_PASSWORD
请替换 $TARGET_ADDRESS、$BASIC_AUTH_USERNAME 和 $BASIC_AUTH_PASSWORD 为你在前面步骤中获得的主机名、用户名和密码。
然后,将以下连接脚本复制到名为 up.sh 的文件中。此脚本运行 envsubst 并使用上一步中的配置启动 Prometheus 容器。
#!/bin/bash
envsubst < prometheus.yml > /tmp/dbaas-prometheus.yml

docker run -p 9090:9090 \
-v /tmp/dbaas-prometheus.yml:/etc/prometheus/prometheus.yml \
prom/prometheus
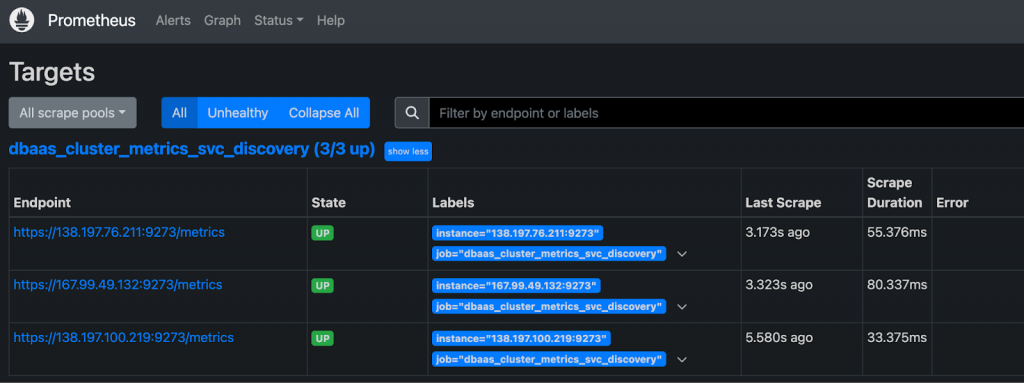
在浏览器中访问 http://localhost:9090/targets 以确认多个主机已启动并运行正常。
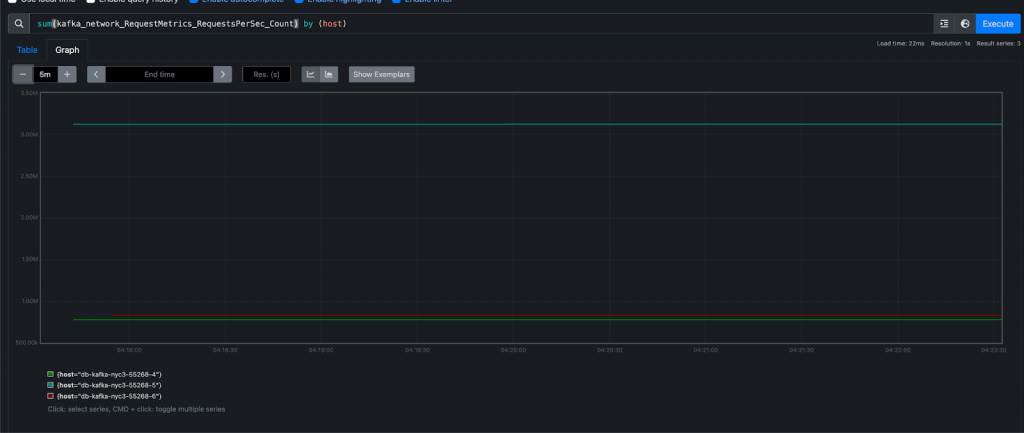
然后,导航到 http://localhost:9090/graph 以查询 Prometheus 的数据库指标。
有关更多详细信息,请参阅 Prometheus DNS SD 文档和 TLS 配置文档。
你还可以查看 官方 PostgreSQL 监控统计文档以了解和理解每个指标。
另外,你可以关于如何为 PostgreSQL 托管数据库收集可抓取指标的信息。
结论
以上就是本教程的全部内容,通过教程你已经了解了如何使用部署在 DigitalOcean App Platform 和 Prometheus 上的 Node.js Web 应用程序,设置并抓取 DigitalOcean 上 PostgreSQL 托管数据库中的指标。通过启用可抓取指标,你可以轻松监控数据库的性能和运行状况,确保最佳运行,并深入故障排除以解决任何问题。
如果还需要咨询更详细的产品信息,或需要技术支持,可直接联系 DigitalOcean 中国区独家战略合作伙伴卓普云。


