沙尘传输模拟教程(基于wrf-chem)
文章目录
- 沙尘传输模拟教程(基于wrf-chem)
- 简介
- 实验目的
- wrf-chem简介
- 软件准备
- wps、wrf-chem安装
- conda安装
- ncl安装
- ncap安装
- 数据准备
- 气象数据准备
- 下垫面数据准备
- WPS数据预处理
- namelist.wps的设置
- geogrid.exe下垫面处理
- ungrib.exe气象数据预处理
- metgrid.exe气象插值
- WRF模型运行
- 参数设置
- 沙尘模式选择
- real.exe生成气象场
- wrf-chem进行沙尘侵蚀和传输模拟
- 后处理与结果展示
- 数据后处理
- 结果图
- 参考
简介
实验目的
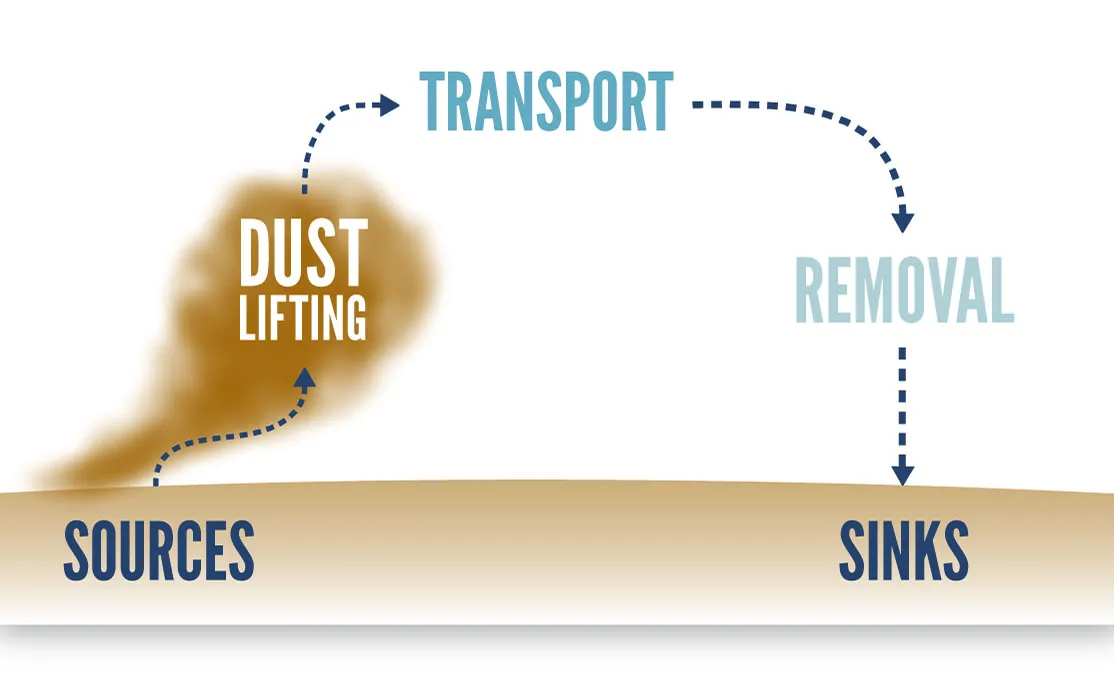
本实验的目的是使用 WRF-Chem 模拟和分析地表(沙漠)区域产生的沙尘的侵蚀和传输过程。通过构建一个包含沙尘侵蚀图的 WRF 域domain,研究沙尘在大气中的输送和扩散情况。
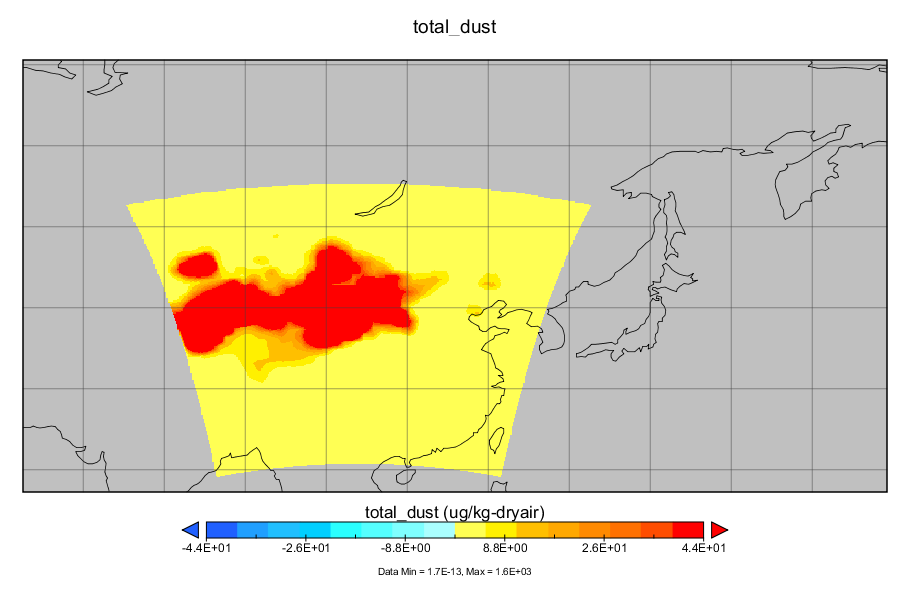
我们的实验区域为中国黄河附近的沙漠,研究时间为2024年7月11日-7月16日,最后得到这段时间的沙尘侵蚀和传输情况。
wrf-chem简介
WRF(Weather Research and Forecasting Model)是一个用于大气研究和天气预报的数值模型。
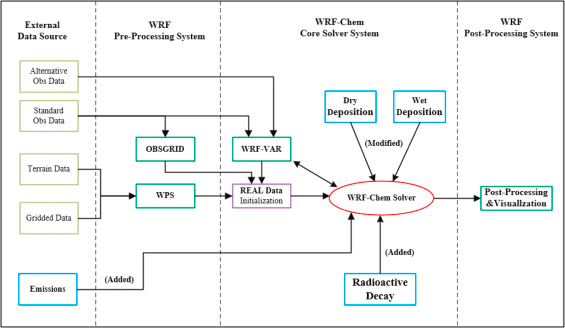
WRF-Chem 是 WRF 模型的一个扩展版本,它集成了大气化学和气溶胶过程的模拟功能。WRF-Chem可用于:
- 化学过程模拟:包括气态污染物、气溶胶和化学反应。
- 气溶胶过程:模拟气溶胶的生成、增长、凝结、沉降和输送。
- 污染物传输:模拟污染物在大气中的水平和垂直输送过程。
- 反馈机制:化学成分和气溶胶对气象过程的反馈,如辐射和云微物理过程。
软件准备
wps、wrf-chem安装
本教程这是官方例子(https://ruc.noaa.gov/wrf/wrf-chem/tutorialexercises.htm)的扩充,我们使用官方推荐的wrf 3.9和wps 3.9版本,熟悉这个过程后,可以切换为WRF V4版本。
前往网站:https://www2.mmm.ucar.edu/wrf/users/download/get_sources.html下载。
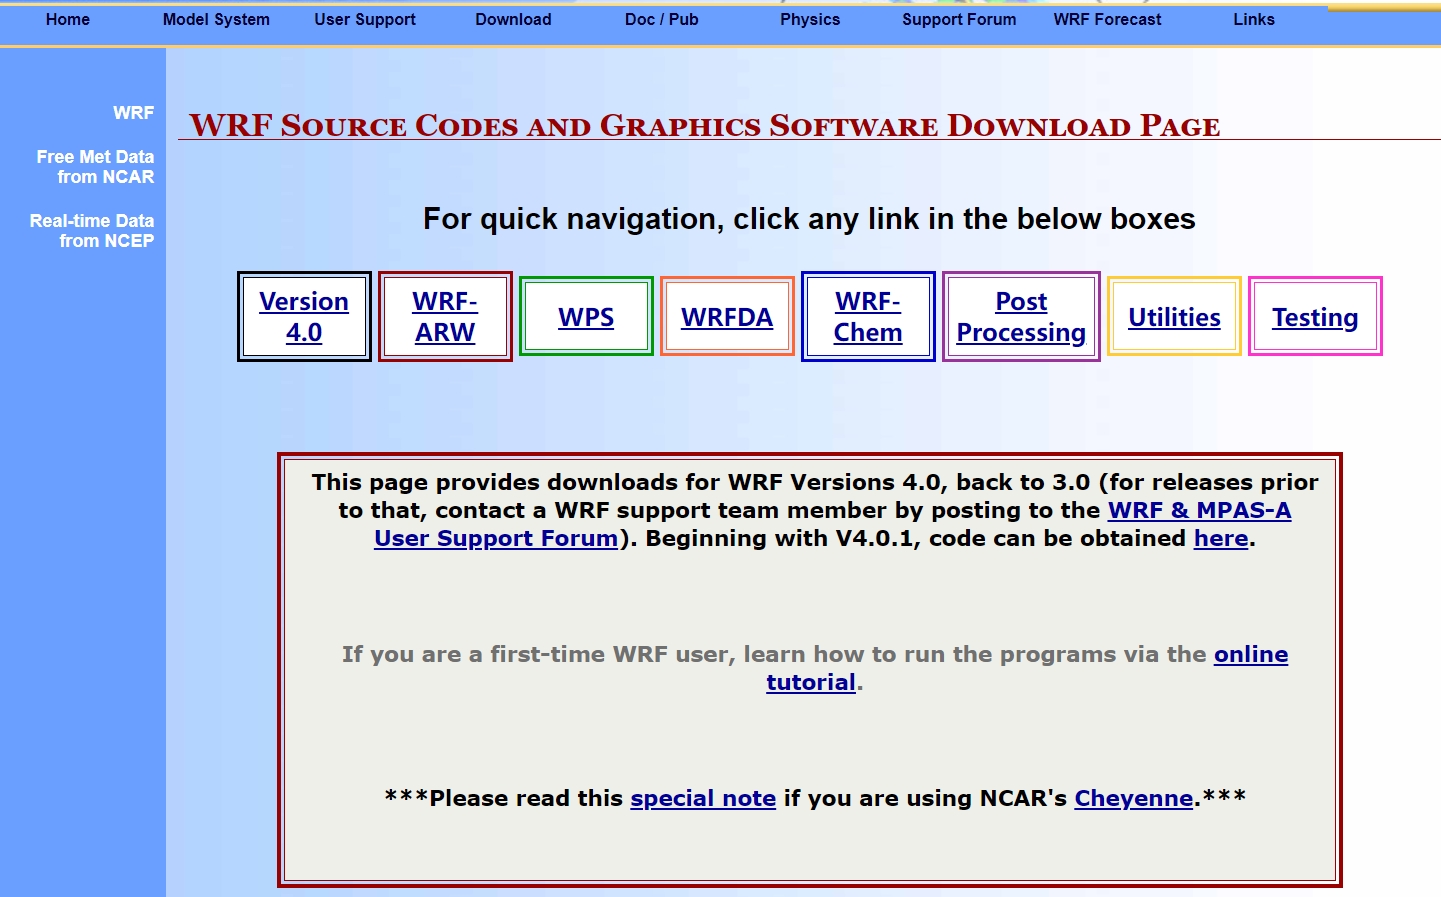
参考网站:https://www2.mmm.ucar.edu/wrf/OnLineTutorial/compilation_tutorial.php
按照网站给出的8个步骤,依次进行测试、安装好netcdf、mpich等包,最后再安装wps和wrf。

安装注意事项:
(1)WPS安装
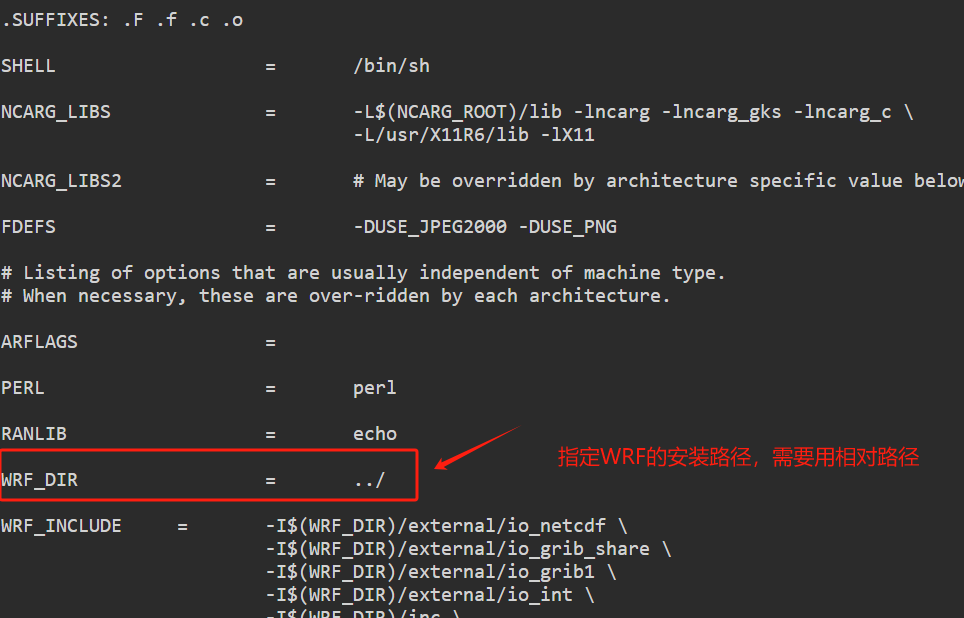
安装wps3.9版本在configure后,会有一个configure.wps文件,需要手动修改WRF_DIR参数,改为wrf安装目录的相对路径。
(2)wrf-chem安装
安装wrf时,打开bashrc设置安装过程中编译wrf-chem(wrf默认是不安装的,需要手动开启)
#先打开环境变量
vim ~/.bashrc
然后在环境变量中添加以下参数,开启wrf-chem:
# 启用WRF-Chem
export WRF_EM_CORE=1
export EM_CORE=1
export NMM_CORE=0
export WRF_CHEM=1
export EM_CORE=1
这样wrf安装完毕后wrf-chem也同时编译完成了。
conda安装
在Linux系统中安装conda,前往网站:https://docs.anaconda.com/miniconda/ 下载miniconda,
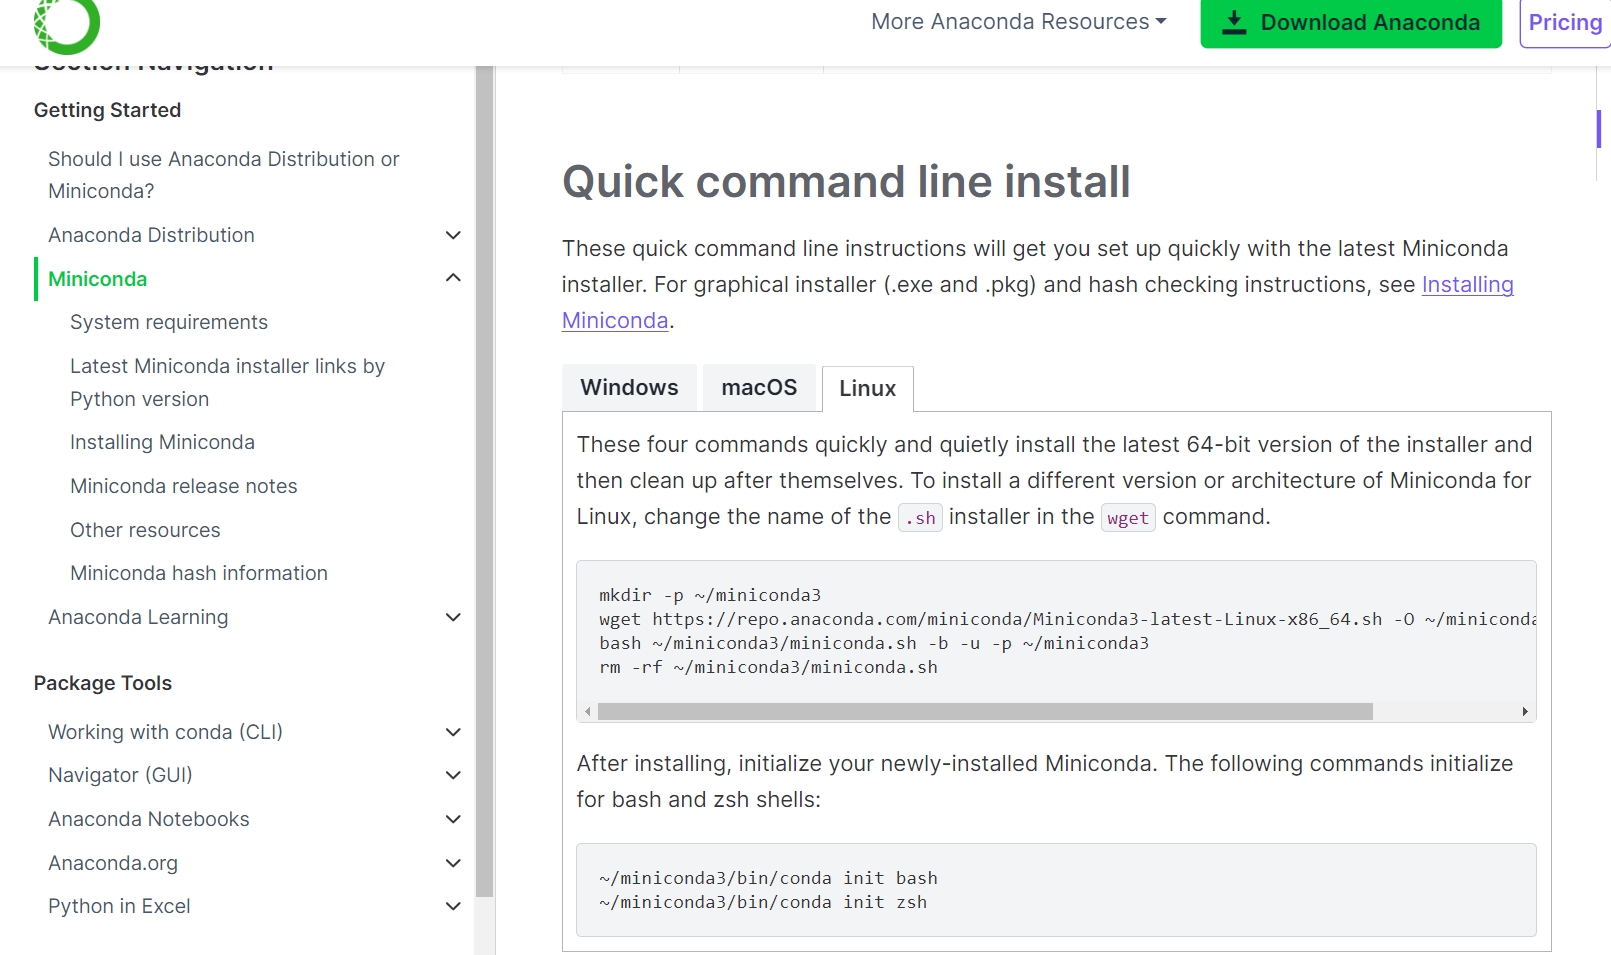
安装过程参考官网,可以选择离线和在线两种安装方式,安装完成后,新建一个环境:
conda create -n nco_ncl_env
conda activate nco_ncl_env
设置频道优先级,优先使用 conda-forge 提供的包:
conda config --add channels conda-forge
conda config --set channel_priority strict
ncl安装
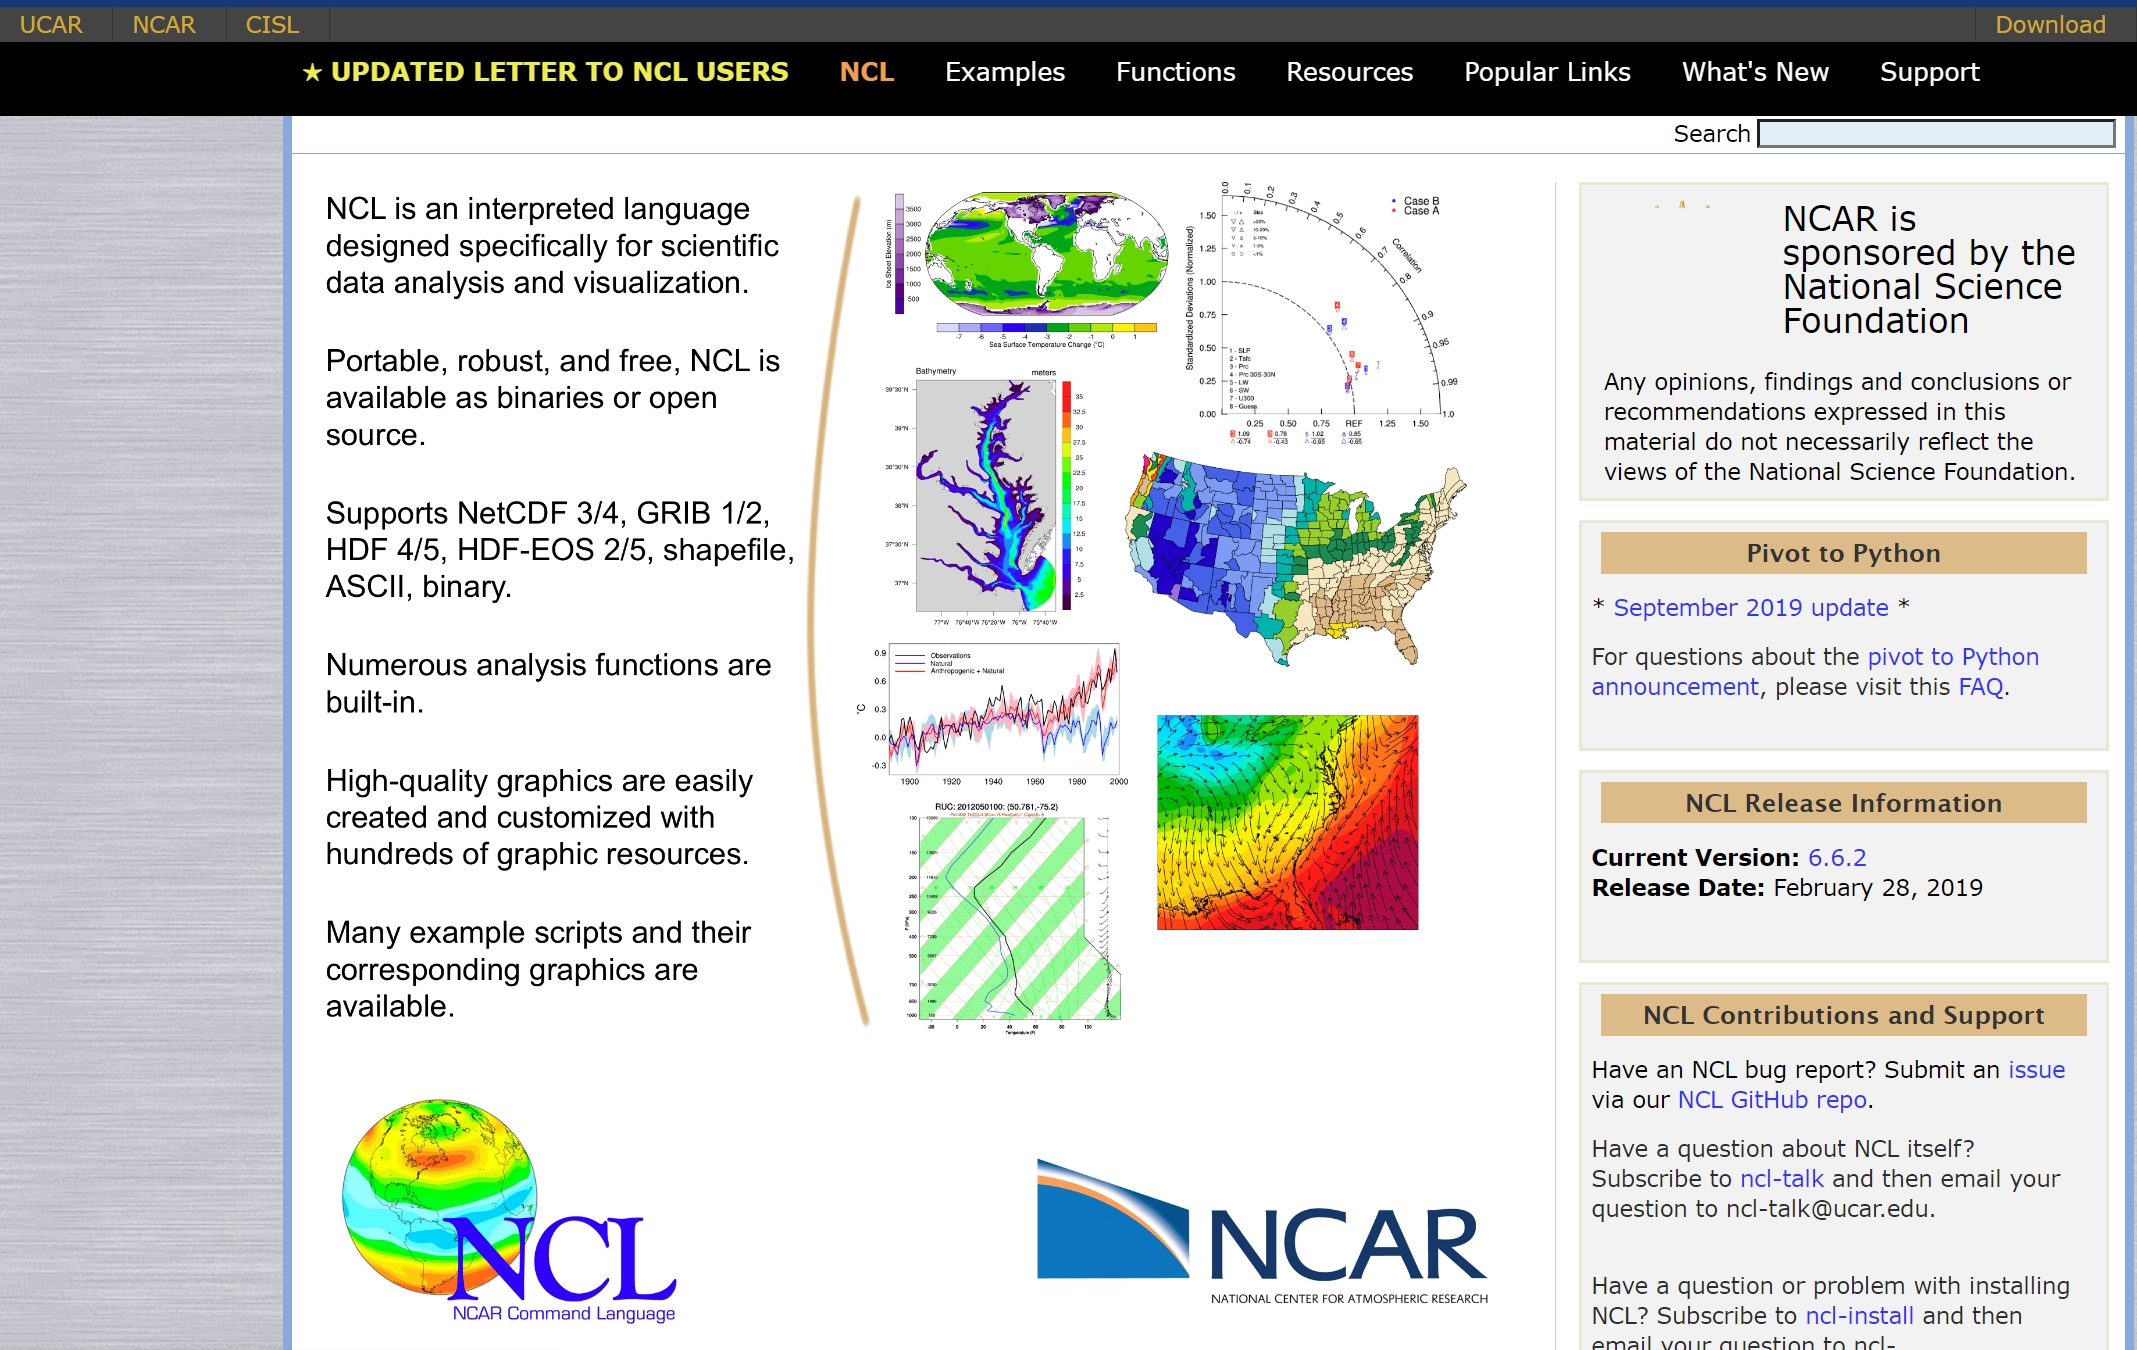
NCL(The NCAR Command Language)是由美国国家大气研究中心(NCAR)开发的一种专门用于气象数据展示的一门语言。有多种方式可以安装,我们选择最方便的conda进行安装。
conda install -c conda-forge ncl
ncap安装
我们后面还需要用到ncap处理wrfout数据(把不同颗粒大小的沙尘汇总)。
ncap 是 NCO (NetCDF Operators) 工具包中的一个命令行工具,用于处理 NetCDF 文件中的变量及其数据。这里我们依然可以偷懒,使用conda快速安装。
conda install -c conda-forge nco
数据准备
气象数据准备
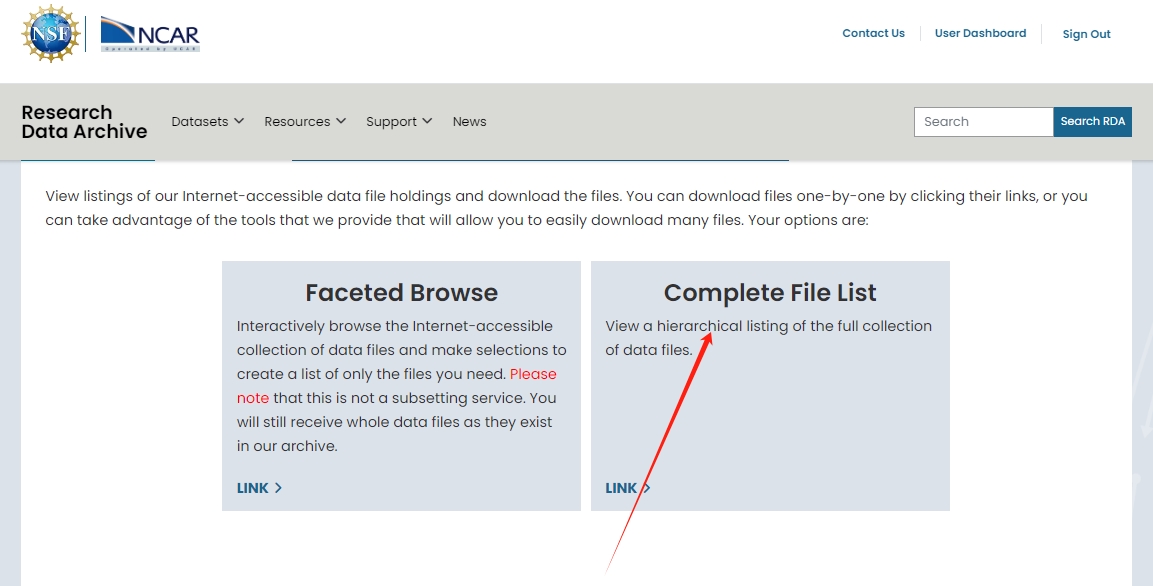
前往FNL数据的官网:https://rda.ucar.edu/datasets/ds083.2/,选择Complete File List全气象要素(包含70多种气象要素)。
选择时间下载气象数据:

这里我下载了2024.07.11到2024.07.16的气象数据,请按照你的时间要求下载。
下垫面数据准备
前往网站:https://www2.mmm.ucar.edu/wrf/users/download/get_sources_wps_geog_V3.html,下载wrf v3的下垫面数据:
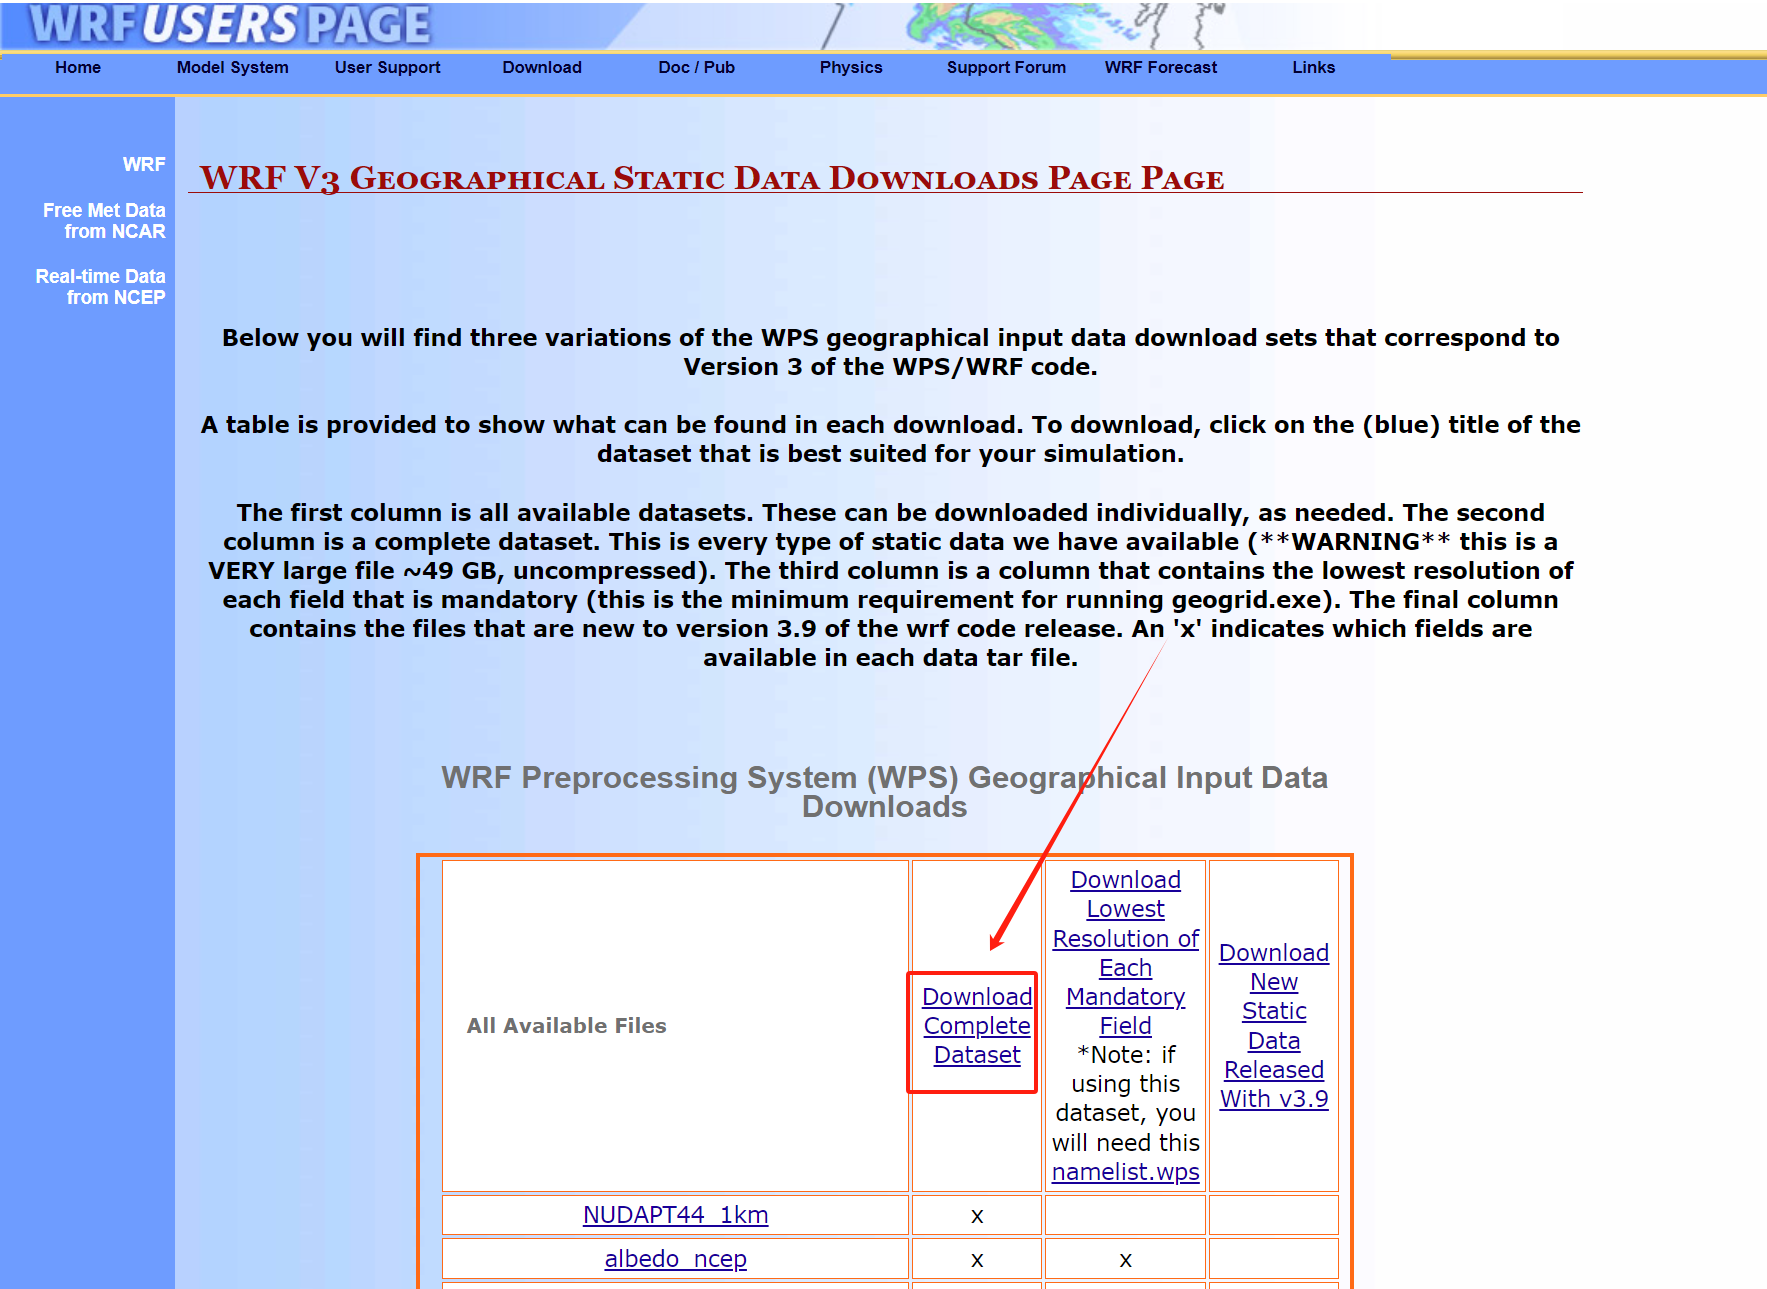
这个下垫面数据包含有全球的地表特征,包括地形高度、土地利用、土壤类型、植被指数、水体覆盖和地表反照率等,也有我们这次实验需要模拟的沙尘侵蚀erodibility数据。下垫面数据大概是3G,解压后大概是20个G。
WPS数据预处理
namelist.wps的设置
可以根据自己的区域和时间段进行调整,下面是我的设置:
&share
 wrf_core = 'ARW',
 max_dom = 1,
 start_date = '2024-07-11_00:00:00',
 end_date   = '2024-07-16_00:00:00',
 interval_seconds = 21600
 io_form_geogrid = 2,
/

&geogrid
 parent_id         =   1,
 parent_grid_ratio =   1,
 i_parent_start    =   1,
 j_parent_start    =   1,
 e_we              =  41,
 e_sn              =  41,
 dx = 100000,
 dy = 100000,
 map_proj = 'lambert',
 ref_lat   =  38.00,
 ref_lon   =  104.00,
 truelat1  =  35.0,
 truelat2  =  45.0,
 stand_lon =  104.0,
 geog_data_path = '/WRF3_GEOG/geog'
/

&ungrib
 out_format = 'WPS',
 prefix = 'FILE',
/

&metgrid
 fg_name = 'FILE'
 io_form_metgrid = 2,
/
geogrid.exe下垫面处理
cd geogrid

ln -svf GEOGRID.TBL.ARW_CHEM GEOGRID.TBL

cd ..

./geogrid.exe
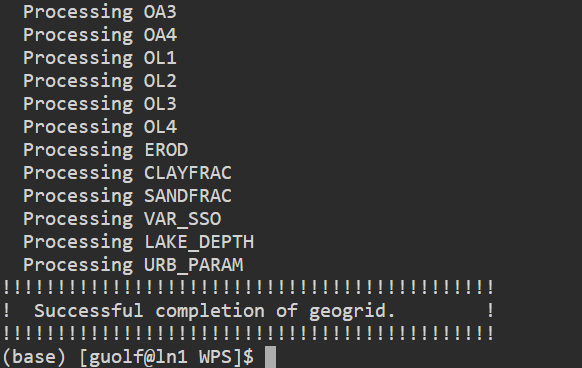
文件夹中会多一个geo_em.d0*.nc 的文件,这个包含了研究区域的下垫面数据,
ungrib.exe气象数据预处理
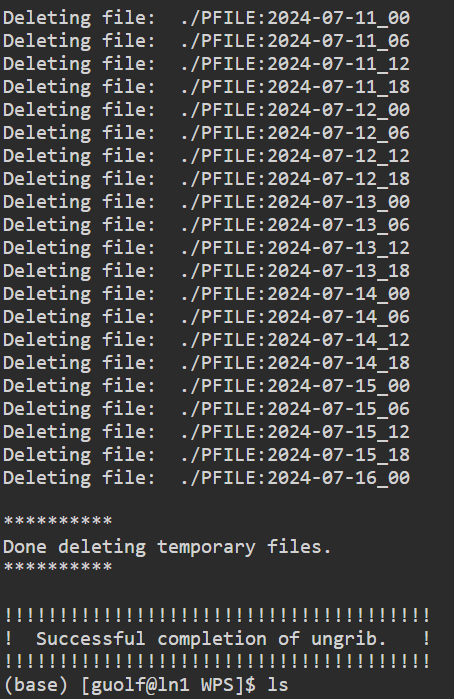
使用ungrib.exe处理数据:
metgrid.exe气象插值

WRF模型运行
参数设置
namelist的具体参数可以参考官方说明,由于太多,这里不做说明,可查看官方网站的说明:https://www2.mmm.ucar.edu/wrf/users/namelist_best_prac_wrf.html
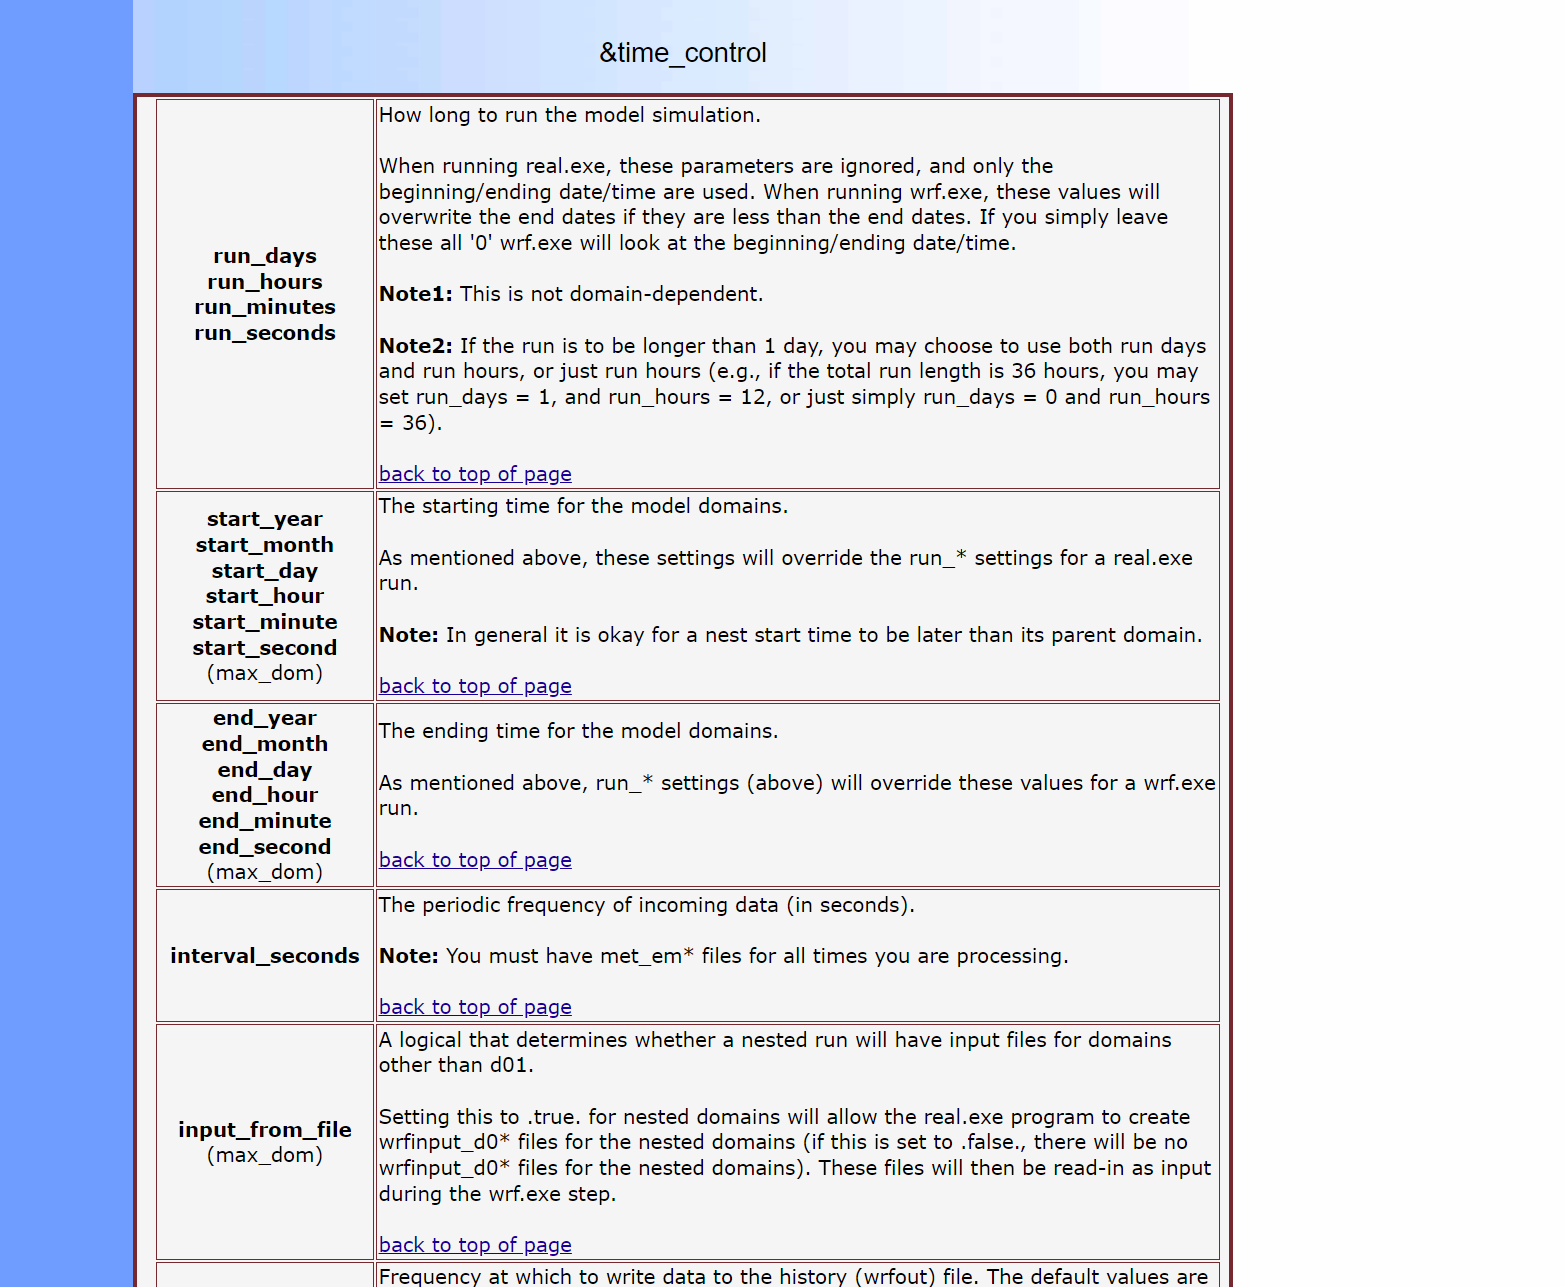
&time_control
 run_days                            = 2,
 run_hours                           = 0,
 run_minutes                         = 0,
 run_seconds                         = 0,
 start_year                          = 2024,
 start_month                         = 07,
 start_day                           = 13,
 start_hour                          = 00,
 start_minute                        = 00,
 start_second                        = 00,
 end_year                            = 2024,
 end_month                           = 07,
 end_day                             = 15,
 end_hour                            = 00,
 end_minute                          = 00,
 end_second                          = 00,
 interval_seconds                    = 21600,
 input_from_file                     = .true.,
 history_interval                    = 60,
 frames_per_outfile                  = 72,
 restart                             = .false.,
 restart_interval                    =    0,
 io_form_history                     = 2,
 io_form_restart                     = 2,
 io_form_input                       = 2,
 io_form_boundary                    = 2,
 auxinput6_inname                    = 'wrfbiochemi_d01',
 auxinput7_inname                    = 'wrffirechemi_d<domain>',
 auxinput8_inname                    = 'wrfchemi_gocart_bg_d<domain>',
 auxinput12_inname                   = 'wrf_chem_input',
 auxinput5_interval_m                = 86400,
 auxinput7_interval_m                = 86400,
 auxinput8_interval_m                = 86400,
 io_form_auxinput2                   = 2,
 io_form_auxinput5                   = 0,
 io_form_auxinput6                   = 0,
 io_form_auxinput7                   = 0,
 io_form_auxinput8                   = 0,
 io_form_auxinput12                  = 0,
 debug_level                         = 0,
 auxinput1_inname                    = "met_em.d<domain>.<date>",
/
 auxinput13_inname                   = 'wrfchemv_d<domain>',
 auxinput13_interval_m               = 86400,
 io_form_auxinput13                  = 0,

 &dfi_control
/

 &domains
 time_step                           = 600,
 time_step_fract_num                 = 0,
 time_step_fract_den                 = 1,
 max_dom                             = 1,
 s_we                                =   1,
 e_we                                = 41,
 s_sn                                =   1,
 e_sn                                = 41,
 e_vert                              = 31,
 num_metgrid_levels                  = 42,
 num_metgrid_soil_levels             = 4,
 dx                                  = 100000,
 dy                                  = 100000,
 grid_id                             = 1,
 parent_id                           = 0,
 i_parent_start                      = 1,
 j_parent_start                      = 1,
 parent_grid_ratio                   = 1,
 parent_time_step_ratio              = 1,
 p_top_requested                     = 5000,
 feedback                            = 1,
 smooth_option                       = 0,
 p_top_requested                     = 5000,
 zap_close_levels                    = 50,
 interp_type                         = 1,
 t_extrap_type                       = 2,
 force_sfc_in_vinterp                = 0,
 use_levels_below_ground             = .true.,
 use_surface                         = .true.,
 lagrange_order                      = 1,
 /
 sfcp_to_sfcp                        = .true.,

 &physics
 num_land_cat                        = 21,
 mp_physics                          = 4,
 progn                               = 0,
 ra_lw_physics                       = 1,
 ra_sw_physics                       = 2,
 radt                                = 30,
 sf_sfclay_physics                   = 1,
 sf_surface_physics                  = 2,
 bl_pbl_physics                      = 1,
 bldt                                = 0,
 cu_physics                          = 5,
 cu_diag                             = 1,
 cudt                                = 0,
 ishallow                            = 0,
 isfflx                              = 1,
 ifsnow                              = 1,
 icloud                              = 1,
 surface_input_source                = 1,
 num_soil_layers                     = 4,
 sf_urban_physics                    = 0,
 mp_zero_out                         = 2,
 mp_zero_out_thresh                  = 1.e-12,
 maxiens                             = 1,
 maxens                              = 3,
 maxens2                             = 3,
 maxens3                             = 16,
 ensdim                              = 144,
 cu_rad_feedback                     = .true.,
 /

 &fdda
 /

 &dynamics
 rk_ord                              = 3,
 w_damping                           = 1,
 diff_opt                            = 1,
 km_opt                              = 4,
 diff_6th_opt                        = 0,
 diff_6th_factor                     = 0.12,
 base_temp                           = 290.
 damp_opt                            = 0,
 zdamp                               = 5000.,
 dampcoef                            = 0.01,
 khdif                               = 0,
 kvdif                               = 0,
 non_hydrostatic                     = .true.,
 moist_adv_opt                       = 2,
 scalar_adv_opt                      = 2,
 chem_adv_opt                        = 2,
 tke_adv_opt                         = 2,
 time_step_sound                     = 4,
 h_mom_adv_order                     = 5,
 v_mom_adv_order                     = 3,
 h_sca_adv_order                     = 5,
 v_sca_adv_order                     = 3,
 /

 &bdy_control
 spec_bdy_width                      = 5,
 spec_zone                           = 1,
 relax_zone                          = 4,
 specified                           = .true.,
 nested                              = .false.,
 /

 &grib2
 /

 &namelist_quilt
 nio_tasks_per_group = 0,
 nio_groups = 1,
 /

 &chem
 kemit                               = 1,
 chem_opt                            = 401,
 bioemdt                             = 0,
 photdt                              = 0,
 chemdt                              = 10,
 io_style_emissions                  = 0,
 emiss_opt                           = 3,
 emiss_opt_vol                       = 0,
 emiss_ash_hgt                       = 20000.,
 chem_in_opt                         = 0,
 phot_opt                            = 0,
 gas_drydep_opt                      = 0,
 aer_drydep_opt                      = 1,
 bio_emiss_opt                       = 0,
 ne_area                             = 0,
 dust_opt                            = 1,
 dmsemis_opt                         = 0,
 seas_opt                            = 0,
 depo_fact                           = 0.25,
 gas_bc_opt                          = 0,
 gas_ic_opt                          = 0,
 aer_bc_opt                          = 1,
 aer_ic_opt                          = 1,
 gaschem_onoff                       = 0,
 aerchem_onoff                       = 1,
 wetscav_onoff                       = 0,
 cldchem_onoff                       = 0,
 vertmix_onoff                       = 1,
 chem_conv_tr                        = 0,
 conv_tr_wetscav                     = 0,
 conv_tr_aqchem                      = 0,
 biomass_burn_opt                    = 0,
 plumerisefire_frq                   = 30,
 have_bcs_chem                       = .false.,
 aer_ra_feedback                     = 0,
 aer_op_opt                          = 0,
 opt_pars_out                        = 0,
 diagnostic_chem                     = 0,
 /
沙尘模式选择
也可以试试其他沙尘传输模型,在namelist.input中修改,这里我选择的是dust_opt=1:
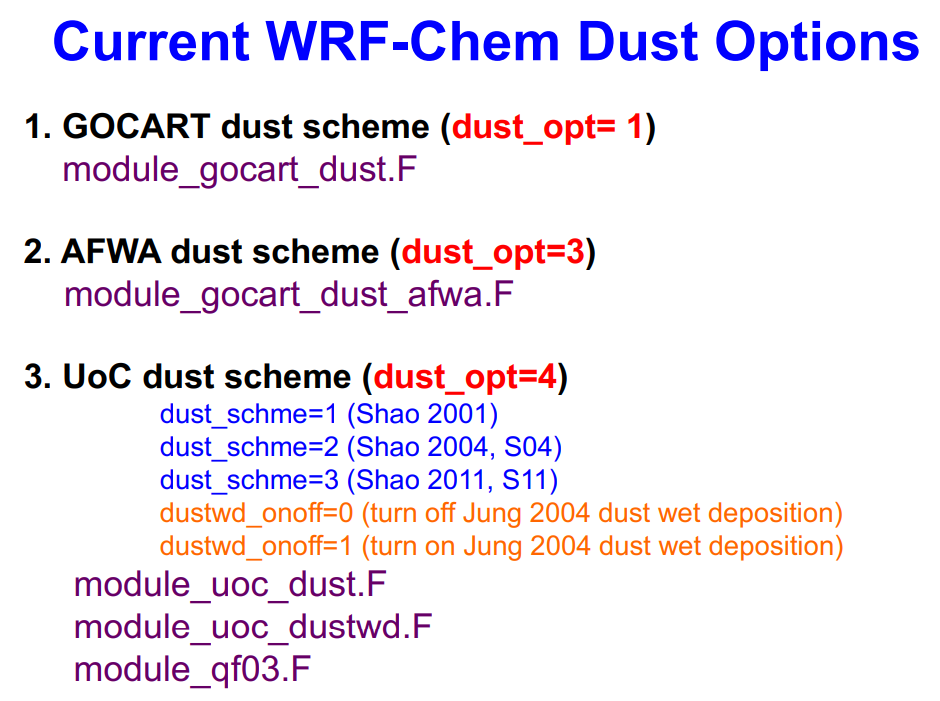
- GOCART 沙尘方案(dust_opt=1)
- 使用 GOCART(Goddard Chemistry Aerosol Radiation and Transport)沙尘排放方案。
- AFWA 沙尘方案(dust_opt=3)
- 使用 AFWA(Air Force Weather Agency)沙尘排放方案。
- UoC 沙尘方案(dust_opt=4)
- 使用 UoC(University of Cologne)沙尘排放方案。
real.exe生成气象场
使用命令:
#使用mpich并行运行,并用nohup后台运行
nohup mpirun -np 8 ./real.exe >&realexe.log &
#或者直接run
./real.exe

#查看进度
tail -f rsl.out.0000
如果计算量比较大,可以用sbatch提交到超算平台进行计算。
wrf-chem进行沙尘侵蚀和传输模拟
mpirun -np 8 ./wrf.exe
#wrf.exe也可以用sbatch提交作业到超算平台上
tail rsl.out.0000
运行完成。
后处理与结果展示
数据后处理
我们模拟的,不同大小的沙尘相加:
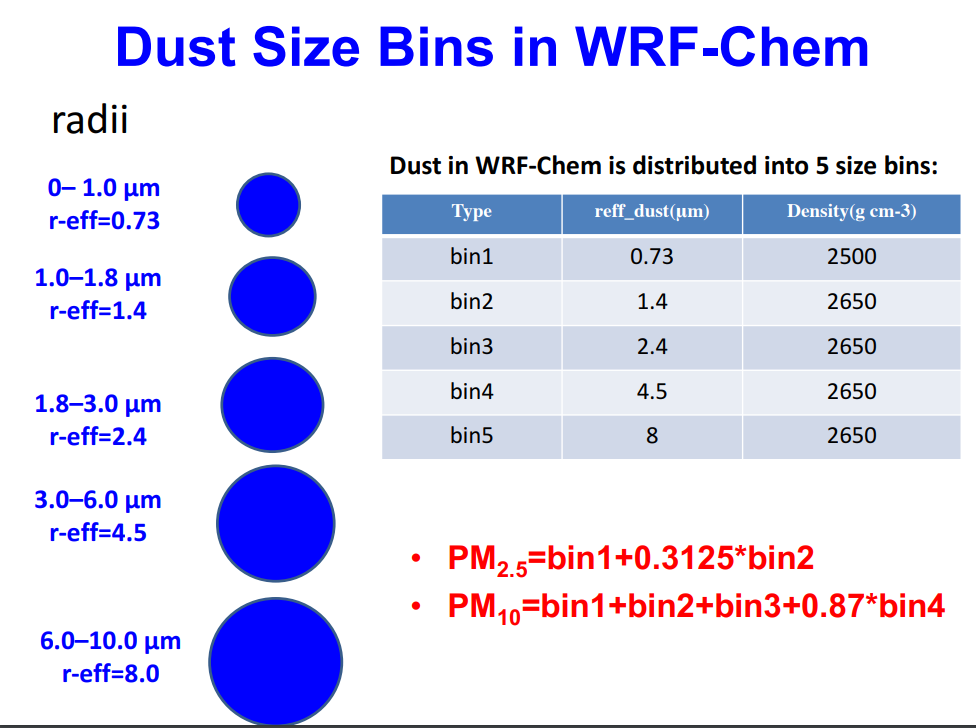
使用ncap2进行汇总:
ncap2 -v -s "total_dust=DUST_1+DUST_2+DUST_3+DUST_4+DUST_5" wrfout_d01_2024-07-13_00:00:00 dust1_all.nc
结果图
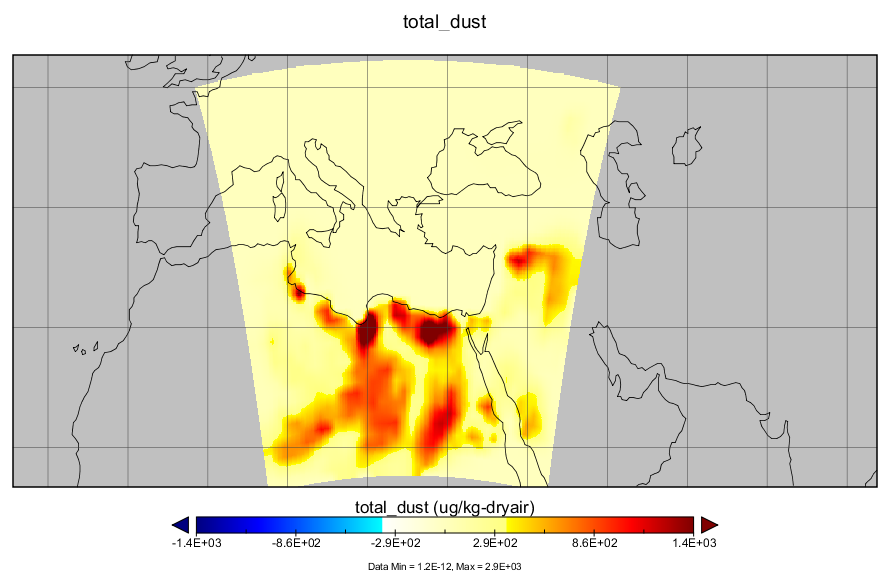
我们可以用ncl直接出图,也可以下载到本地用panoply查看。
(1)地中海区域的沙尘传输浓度图(2010年某时刻)
(1)部分中国区域的沙尘浓度分布情况(2024年7月某时刻)
自此,实验完毕
(由于我还在入门,难免有不周到之处,后续还会继续更新这方面的教程)。
参考
官方实验地址:https://ruc.noaa.gov/wrf/wrf-chem/tutorialexercises.htm
WRF/WPS V3版本:https://www2.mmm.ucar.edu/wrf/users/download/get_sources.html
WRF安装指南:https://www2.mmm.ucar.edu/wrf/OnLineTutorial/compilation_tutorial.php
WPS的namelist制作与出图:https://zhuanlan.zhihu.com/p/705431890
下垫面数据:https://www2.mmm.ucar.edu/wrf/users/download/get_sources_wps_geog_V3.html
conda下载地址:https://docs.anaconda.com/miniconda/
NCL出图:https://www.ncl.ucar.edu/Download/
namelist.wps的设置:https://www2.mmm.ucar.edu/wrf/users/namelist_best_prac_wps.html
namelist.input的设置:https://www2.mmm.ucar.edu/wrf/users/namelist_best_prac_wrf.html


