前言
在实际处理过程中,我们使用YOLO V8进行推理时,通常会针对一张图片进行推理。如果需要对多张图片进行推理,则可以通过一个循环来实现对图片逐张进行推理。
单张图片推理时,需要注意图片的尺寸必须是32的倍数,否则可能导致推理失败。在下面的示例中,我们展示了如何使用PyTorch和Ultralytics库进行单张图片的推理:
import torch
from ultralytics import YOLO

# Load a pretrained YOLOv8n model
model = YOLO('yolov8n-pose.pt')

# Create a random torch tensor of BCHW shape (1, 3, 640, 640) with values in range [0, 1] and type float32
source = torch.rand(1, 3, 640, 640, dtype=torch.float32)

# Run inference on the source
results = model(source)  # list of Results objects
批量图片推理时,也需要注意图片的尺寸必须是32的倍数。在下面的示例中,我们展示了如何使用PyTorch和Ultralytics库进行多张图片的批量推理:
import torch
from ultralytics import YOLO

# Load a pretrained YOLOv8n model
model = YOLO('yolov8n-pose.pt')

# Create a random torch tensor of BCHW shape (1, 3, 640, 640) with values in range [0, 1] and type float32
source = torch.rand(4, 3, 640, 640, dtype=torch.float32)

# Run inference on the source
results = model(source)  # list of Results objects
需要注意的是,在批量推理时,虽然一次推理了多张图片,但实际处理方式仍然是通过循环进行的。在下面的文章中,我们将介绍如何使用更高效的方式进行批量推理,以获得更快的推理速度和更好的性能。
下面我们介绍如何将【单张图片推理】检测代码给修改成 【批量图片推理】代码,进行批量推理。
一、批量推理的前处理
原始代码
@staticmethod
def letterbox(im, new_shape=(640, 640), color=(114, 114, 114), scaleup=True, stride=32):
    # Resize and pad image while meeting stride-multiple constraints
    shape = im.shape[:2]  # current shape [height, width]
    if isinstance(new_shape, int):
        new_shape = (new_shape, new_shape)

    # Scale ratio (new / old)
    r = min(new_shape[0] / shape[0], new_shape[1] / shape[1])
    if not scaleup:  # only scale down, do not scale up (for better val mAP)
        r = min(r, 1.0)

    # Compute padding
    ratio = r, r  # width, height ratios
    new_unpad = int(round(shape[1] * r)), int(round(shape[0] * r))
    dw, dh = new_shape[1] - new_unpad[0], new_shape[0] - new_unpad[1]  # wh padding
    # minimum rectangle
    dw, dh = np.mod(dw, stride), np.mod(dh, stride)  # wh padding
    dw /= 2  # divide padding into 2 sides
    dh /= 2

    if shape[::-1] != new_unpad:  # resize
        im = cv2.resize(im, new_unpad, interpolation=cv2.INTER_LINEAR)

    top, bottom = int(round(dh - 0.1)), int(round(dh + 0.1))
    left, right = int(round(dw - 0.1)), int(round(dw + 0.1))
    im = cv2.copyMakeBorder(im, top, bottom, left, right, cv2.BORDER_CONSTANT, value=color)  # add border
    return im, ratio, (dw, dh)

def precess_image(self, img_src, img_size, half, device):
    # Padded resize
    img = self.letterbox(img_src, img_size)[0]
    # Convert
    img = img.transpose((2, 0, 1))[::-1]  # HWC to CHW, BGR to RGB
    img = np.ascontiguousarray(img)
    img = torch.from_numpy(img).to(device)

    img = img.half() if half else img.float()  # uint8 to fp16/32
    img = img / 255  # 0 - 255 to 0.0 - 1.0
    if len(img.shape) == 3:
        img = img[None]  # expand for batch dim
    return img
处理方式
我们要先知道在原始处理方式中是如何操作的:
它包含以下步骤:
-
self.pre_transform:即 letterbox 添加灰条
-
img.transpose((2, 0, 1))[::-1]:HWC to CHW, BGR to RGB
-
torch.from_numpy:to Tensor
-
img.float() :uint8 to fp32
-
im /= 255:除以 255,归一化
-
img[None]:增加维度
在上述处理过程中我们最主要进行修改的就是 self.pre_transform 里面的操作,其余部分都是可以直接进行批量操作的。
在 letterbox 中最主要的操作就是下面两个函数,使用 opencv 进行实现的。我们要进行批量操作,那么 opencv 库是不能实现的,进行批量操作一般会用 广播机制 或者 tensor操作 来实现。
im = cv2.resize(im, new_unpad, interpolation=cv2.INTER_LINEAR)
im = cv2.copyMakeBorder(im, top, bottom, left, right, cv2.BORDER_CONSTANT, value=color)
由于最终输入到模型里面的是一个tensor,所以在这里我们使用 tensor的操作方式进行实现。
尺寸修改
原始方法:
im = cv2.resize(im, new_unpad, interpolation=cv2.INTER_LINEAR)

现在方法:
resized_tensor = F.interpolate(image_tensor, size=new_unpad, mode='bilinear', align_corners=False)
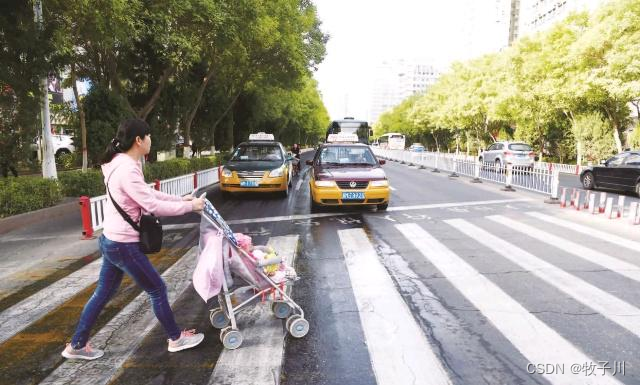
两者的实现效果:
原始方法:(1176, 1956, 3) --》(385, 640, 3)
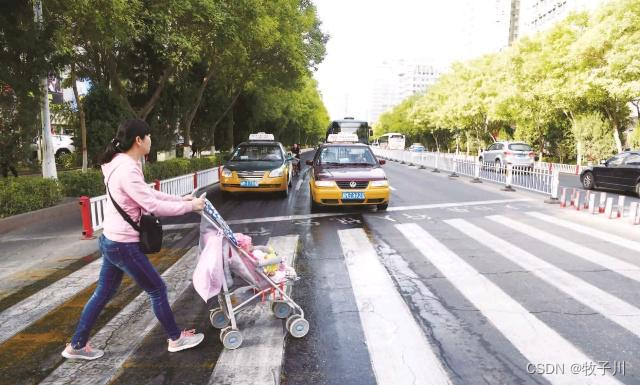
现在方法:(1176, 1956, 3) --》(385, 640, 3)
添加边框
原始方式:
im = cv2.copyMakeBorder(im, top, bottom, left, right, cv2.BORDER_CONSTANT, value=color)

现在方法:
padded_tensor = F.pad(resized_tensor, (top, bottom, left, right), mode='constant', value=padding_value)
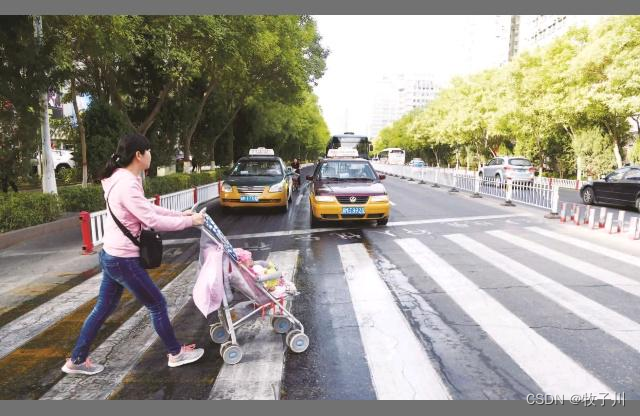
两者的实现效果:
原始方法:(385, 640, 3) --》(416, 640, 3)
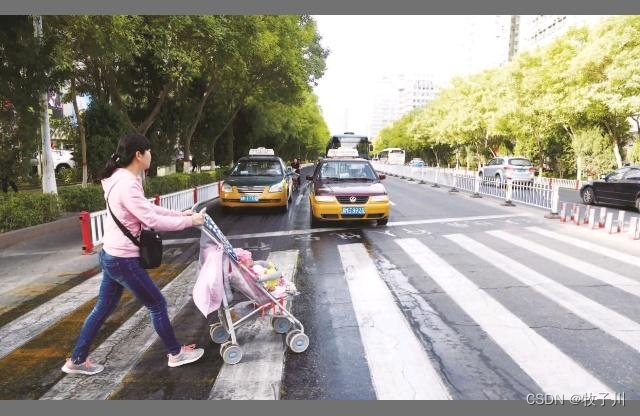
现在方法:(385, 640, 3) --》(416, 640, 3)
修改后的代码
def tensor_process(self, image_cv):
    img_shape = image_cv.shape[1:]
    new_shape = [640, 640]
    r = min(new_shape[0] / img_shape[0], new_shape[1] / img_shape[1])
    # Compute padding
    new_unpad = int(round(img_shape[0] * r)), int(round(img_shape[1] * r))

    dw, dh = new_shape[1] - new_unpad[0], new_shape[0] - new_unpad[1]  # wh padding
    dw, dh = np.mod(dw, 32), np.mod(dh, 32)  # wh padding
    dw /= 2  # divide padding into 2 sides
    dh /= 2

    top, bottom = int(round(dh - 0.1)), int(round(dh + 0.1))
    left, right = int(round(dw - 0.1)), int(round(dw + 0.1))

    padding_value = 114

    image_tensor = torch.from_numpy(image_cv).permute(0, 3, 1, 2).float()
    image_tensor = image_tensor.to(self.device)

    resized_tensor = F.interpolate(image_tensor, size=new_unpad, mode='bilinear', align_corners=False)

    padded_tensor = F.pad(resized_tensor, (top, bottom, left, right), mode='constant', value=padding_value)
    infer_tensor = padded_tensor / 255.0

    return infer_tensor
二、批量推理的后处理
原始代码
def non_max_suppression(
    prediction,
    conf_thres=0.25,
    iou_thres=0.45,
    classes=None,
    agnostic=False,
    multi_label=False,
    labels=(),
    max_det=300,
    nc=0,  # number of classes (optional)
    max_time_img=0.05,
    max_nms=30000,
    max_wh=7680,
    rotated=False,
):
    """
    Perform non-maximum suppression (NMS) on a set of boxes, with support for masks and multiple labels per box.

    Args:
        prediction (torch.Tensor): A tensor of shape (batch_size, num_classes + 4 + num_masks, num_boxes)
            containing the predicted boxes, classes, and masks. The tensor should be in the format
            output by a model, such as YOLO.
        conf_thres (float): The confidence threshold below which boxes will be filtered out.
            Valid values are between 0.0 and 1.0.
        iou_thres (float): The IoU threshold below which boxes will be filtered out during NMS.
            Valid values are between 0.0 and 1.0.
        classes (List[int]): A list of class indices to consider. If None, all classes will be considered.
        agnostic (bool): If True, the model is agnostic to the number of classes, and all
            classes will be considered as one.
        multi_label (bool): If True, each box may have multiple labels.
        labels (List[List[Union[int, float, torch.Tensor]]]): A list of lists, where each inner
            list contains the apriori labels for a given image. The list should be in the format
            output by a dataloader, with each label being a tuple of (class_index, x1, y1, x2, y2).
        max_det (int): The maximum number of boxes to keep after NMS.
        nc (int, optional): The number of classes output by the model. Any indices after this will be considered masks.
        max_time_img (float): The maximum time (seconds) for processing one image.
        max_nms (int): The maximum number of boxes into torchvision.ops.nms().
        max_wh (int): The maximum box width and height in pixels

    Returns:
        (List[torch.Tensor]): A list of length batch_size, where each element is a tensor of
            shape (num_boxes, 6 + num_masks) containing the kept boxes, with columns
            (x1, y1, x2, y2, confidence, class, mask1, mask2, ...).
    """

    # Checks
    assert 0 <= conf_thres <= 1, f"Invalid Confidence threshold {conf_thres}, valid values are between 0.0 and 1.0"
    assert 0 <= iou_thres <= 1, f"Invalid IoU {iou_thres}, valid values are between 0.0 and 1.0"
    if isinstance(prediction, (list, tuple)):  # YOLOv8 model in validation model, output = (inference_out, loss_out)
        prediction = prediction[0]  # select only inference output

    bs = prediction.shape[0]  # batch size
    nc = nc or (prediction.shape[1] - 4)  # number of classes
    nm = prediction.shape[1] - nc - 4
    mi = 4 + nc  # mask start index
    xc = prediction[:, 4:mi].amax(1) > conf_thres  # candidates

    # Settings
    # min_wh = 2  # (pixels) minimum box width and height
    time_limit = 0.5 + max_time_img * bs  # seconds to quit after
    multi_label &= nc > 1  # multiple labels per box (adds 0.5ms/img)

    prediction = prediction.transpose(-1, -2)  # shape(1,84,6300) to shape(1,6300,84)
    if not rotated:
        prediction[..., :4] = xywh2xyxy(prediction[..., :4])  # xywh to xyxy

    t = time.time()
    output = [torch.zeros((0, 6 + nm), device=prediction.device)] * bs
    for xi, x in enumerate(prediction):  # image index, image inference
        # Apply constraints
        # x[((x[:, 2:4] < min_wh) | (x[:, 2:4] > max_wh)).any(1), 4] = 0  # width-height
        x = x[xc[xi]]  # confidence

        # Cat apriori labels if autolabelling
        if labels and len(labels[xi]) and not rotated:
            lb = labels[xi]
            v = torch.zeros((len(lb), nc + nm + 4), device=x.device)
            v[:, :4] = xywh2xyxy(lb[:, 1:5])  # box
            v[range(len(lb)), lb[:, 0].long() + 4] = 1.0  # cls
            x = torch.cat((x, v), 0)

        # If none remain process next image
        if not x.shape[0]:
            continue

        # Detections matrix nx6 (xyxy, conf, cls)
        box, cls, mask = x.split((4, nc, nm), 1)

        if multi_label:
            i, j = torch.where(cls > conf_thres)
            x = torch.cat((box[i], x[i, 4 + j, None], j[:, None].float(), mask[i]), 1)
        else:  # best class only
            conf, j = cls.max(1, keepdim=True)
            x = torch.cat((box, conf, j.float(), mask), 1)[conf.view(-1) > conf_thres]

        # Filter by class
        if classes is not None:
            x = x[(x[:, 5:6] == torch.tensor(classes, device=x.device)).any(1)]

        # Check shape
        n = x.shape[0]  # number of boxes
        if not n:  # no boxes
            continue
        if n > max_nms:  # excess boxes
            x = x[x[:, 4].argsort(descending=True)[:max_nms]]  # sort by confidence and remove excess boxes

        # Batched NMS
        c = x[:, 5:6] * (0 if agnostic else max_wh)  # classes
        scores = x[:, 4]  # scores
        if rotated:
            boxes = torch.cat((x[:, :2] + c, x[:, 2:4], x[:, -1:]), dim=-1)  # xywhr
            i = nms_rotated(boxes, scores, iou_thres)
        else:
            boxes = x[:, :4] + c  # boxes (offset by class)
            i = torchvision.ops.nms(boxes, scores, iou_thres)  # NMS
        i = i[:max_det]  # limit detections

        # # Experimental
        # merge = False  # use merge-NMS
        # if merge and (1 < n < 3E3):  # Merge NMS (boxes merged using weighted mean)
        #     # Update boxes as boxes(i,4) = weights(i,n) * boxes(n,4)
        #     from .metrics import box_iou
        #     iou = box_iou(boxes[i], boxes) > iou_thres  # iou matrix
        #     weights = iou * scores[None]  # box weights
        #     x[i, :4] = torch.mm(weights, x[:, :4]).float() / weights.sum(1, keepdim=True)  # merged boxes
        #     redundant = True  # require redundant detections
        #     if redundant:
        #         i = i[iou.sum(1) > 1]  # require redundancy

        output[xi] = x[i]
        if (time.time() - t) > time_limit:
            LOGGER.warning(f"WARNING ⚠️ NMS time limit {time_limit:.3f}s exceeded")
            break  # time limit exceeded

    return output
处理方式
我们要先知道在原始处理方式中是如何操作的。
在这个里面,最主要的操作就是 nms 操作,这里的 nms 操作就是一张图一张图的结果进行处理,不是多张图的结果一起处理,我们最主要的就是要修改这里的代码。
但是在这里,我们要先理解在原始的处理方式是怎样的逻辑。
原始 nms 逻辑
在这里就只给出关键步骤:
计算第4列到第mi列中的最大值,然后将这个最大值与conf_thres进行比较,得到一个布尔值结果。最终的输出是一个布尔张量,表示每一行是否存在大于conf_thres的最大值。
xc = prediction[:, 4:mi].amax(1) > conf_thres # candidates将原始预测框中的 xywh 转为 xyxy
prediction[..., :4] = xywh2xyxy(prediction[..., :4])从原始结果中选择出为True的结果,得到初步的筛选结果
x = x[xc[xi]] # confidence分离出 标注框,类别,掩码
box, cls, mask = x.split((4, nc, nm), 1)再次根据 cls 进行筛选,并拼接成新的推理结果
 conf, j = cls.max(1, keepdim=True)
 x = torch.cat((box, conf, j.float(), mask), 1)[conf.view(-1) > conf_thres]
计算nms
boxes = x[:, :4] + c  # boxes (offset by class)
i = torchvision.ops.nms(boxes, scores, iou_thres)  # NMS
只选出前 max_det的输出结果,避免有多余的输出
i = i[:max_det] # limit detections现在 nms 逻辑
将 prediction 中所有批次的结果进行统一,处理成一个批次,在将这个批次送入到 batched_nms 中,最后在进行处理,得到标注框,类别,置信度。
筛选出为true的索引(批次数)和行数
true_indices = torch.nonzero(xc)根据索引和行数筛选出 prediction 中真实的结果,注意:这个结果是所有的批次的结果
selected_rows = prediction[true_indices[:, 0], true_indices[:, 1]]将批次数添加在筛选出的结果中,用于区分出那个结果是那个批次的。注意:这个的批次也可以看成是对应的图片
new_prediction = torch.cat((selected_rows, true_indices[:, 0].unsqueeze(1).float()), dim=1)分割出标注框、类别、掩码、索引(批次)
box, cls, mask, idxs = new_prediction.split((4, nc, nm, 1), 1)筛选出最大的类别的置信和类别索引
conf, j = cls.max(1, keepdim=True)根据类别置信度再次进行筛选,选出符合的结果,并进行拼接,得到一个新的结果
x = torch.cat((box, conf, j.float()), 1)[conf.squeeze(-1) > conf_thres]将标注框,置信度,索引,iou值送入到 batched_nms 中,选出最终的预测结果的索引标签。
cls = x[:, 5]  # classes
c = x[:, 5:6] * (0 if agnostic else max_wh)
boxes, scores = x[:, :4] + c, x[:, 4]  # boxes (offset by class), scores
idxs = idxs.t().squeeze(0)

keep = torchvision.ops.batched_nms(boxes, scores, idxs, iou_thres)
batched_nms:以批处理方式执行非最大值抑制。每个索引值对应一个类别,NMS不会应用于不同类别的元素之间。
参数:
boxes (Tensor[N, 4]):标注框,为
(x1, y1, x2, y2)格式,其中0 <= x1 < x2和0 <= y1 < y2。scores (Tensor[N]):每个标注框的得分
idxs (Tensor[N]):每个标注框的类别索引。
iou_threshold(float):剔除 IoU > iou_threshold 的所有重叠方框
返回值:
Tensor:int64,为 NMS 保留的元素索引,按分数递减排序
def batched_nms(boxes: Tensor, scores: Tensor, idxs: Tensor, iou_threshold: float,) -> Tensor:根据 nms 的筛选结果,选择出最终的预测结果
boxes[keep] = self.scale_boxes(inferShape, boxes[keep], orgShape)
temp_masks = masks[keep].view(len(masks[keep]), *self.model.kpt_shape) if len(masks[keep]) else masks[keep][:, 6:]
masks[keep] = self.scale_coords(inferShape, temp_masks, orgShape).view(len(masks[keep]), -1)

boxes = boxes[keep].cpu().numpy()
scores = scores[keep].cpu().numpy()
cls = cls[keep].cpu().numpy()
masks = masks[keep].cpu().numpy()
idxs = idxs[keep].cpu().numpy()
修改后的代码
def non_max_suppression(self, prediction, inferShape, orgShape, conf_thres=0.25, iou_thres=0.45,
                        agnostic=True, multi_label=False, max_wh=7680, nc=0):
    prediction = prediction[0]  # select only inference output

    nc = nc  # number of classes
    nm = prediction.shape[1] - nc - 4
    mi = 4 + nc  # mask start index
    xc = prediction[:, 4:mi].amax(1) > conf_thres  # candidates

    # Settings
    multi_label &= nc > 1  # multiple labels per box (adds 0.5ms/img)

    prediction = prediction.transpose(-1, -2)  # shape(1,84,6300) to shape(1,6300,84)
    prediction[..., :4] = self.xywh2xyxy(prediction[..., :4])  # xywh to xyxy

    true_indices = torch.nonzero(xc)
    selected_rows = prediction[true_indices[:, 0], true_indices[:, 1]]
    new_prediction = torch.cat((selected_rows, true_indices[:, 0].unsqueeze(1).float()), dim=1)

    if new_prediction.shape[0] == 0:
        return

    box, cls, mask, idxs = new_prediction.split((4, nc, nm, 1), 1)
    conf, j = cls.max(1, keepdim=True)
    x = torch.cat((box, conf, j.float(), mask), 1)[conf.squeeze(-1) > conf_thres]
    if not x.shape[0]:  # no boxes
        return

    cls = x[:, 5]  # classes
    c = x[:, 5:6] * (0 if agnostic else max_wh)
    boxes, scores = x[:, :4] + c, x[:, 4]  # boxes (offset by class), scores
    masks = x[:, 6:]
    idxs = idxs.t().squeeze(0)

    keep = torchvision.ops.batched_nms(boxes, scores, idxs, iou_thres)

    boxes[keep] = self.scale_boxes(inferShape, boxes[keep], orgShape)
    temp_masks = masks[keep].view(len(masks[keep]), *self.model.kpt_shape) if len(masks[keep]) else masks[keep][:, 6:]
    masks[keep] = self.scale_coords(inferShape, temp_masks, orgShape).view(len(masks[keep]), -1)

    boxes = boxes[keep].cpu().numpy()
    scores = scores[keep].cpu().numpy()
    cls = cls[keep].cpu().numpy()
    masks = masks[keep].cpu().numpy()
    idxs = idxs[keep].cpu().numpy()

    results = np.hstack((boxes, np.expand_dims(scores, axis=1)))
    results = np.hstack((results, np.expand_dims(cls, axis=1)))
    results = np.hstack((results, masks))
    results = np.hstack((results, np.expand_dims(idxs, axis=1)))
    return results
三、完整代码
通过上面的解析,我们了解了 YOLO V8-Detection 如何进行批量的推理图片的方法,并对每一步进行了实现。
完整的推理代码如下:
# -*- coding:utf-8 -*-
# @author: 牧锦程
# @微信公众号: AI算法与电子竞赛
# @Email:  m21z50c71@163.com
# @VX:fylaicai

import os.path
import random
import cv2
import numpy as np
import torch
import torchvision

from ultralytics.nn.autobackend import AutoBackend
import torch.nn.functional as F

class YOLOV8PoseInfer:
    def __init__(self, weights, cuda, conf_thres, iou_thres) -> None:
        self.imgsz = 640
        self.device = cuda
        self.model = AutoBackend(weights, device=torch.device(cuda))
        self.model.eval()
        self.names = self.model.names
        self.half = False
        self.conf = conf_thres
        self.iou = iou_thres
        self.color = {"font": (255, 255, 255)}
        self.color.update(
            {self.names[i]: (random.randint(0, 255), random.randint(0, 255), random.randint(0, 255))
             for i in range(len(self.names))})

        self.skeleton = [[16, 14], [14, 12], [17, 15], [15, 13], [12, 13], [6, 12], [7, 13], [6, 7], [6, 8],
                         [7, 9], [8, 10], [9, 11], [2, 3], [1, 2], [1, 3], [2, 4], [3, 5], [4, 6], [5, 7]]
        pose_palette = np.array([[255, 128, 0], [255, 153, 51], [255, 178, 102], [230, 230, 0], [255, 153, 255],
                                 [153, 204, 255], [255, 102, 255], [255, 51, 255], [102, 178, 255], [51, 153, 255],
                                 [255, 153, 153], [255, 102, 102], [255, 51, 51], [153, 255, 153], [102, 255, 102],
                                 [51, 255, 51], [0, 255, 0], [0, 0, 255], [255, 0, 0], [255, 255, 255]], dtype=np.uint8)
        self.kpt_color = pose_palette[[16, 16, 16, 16, 16, 0, 0, 0, 0, 0, 0, 9, 9, 9, 9, 9, 9]]
        self.limb_color = pose_palette[[9, 9, 9, 9, 7, 7, 7, 0, 0, 0, 0, 0, 16, 16, 16, 16, 16, 16, 16]]

    def infer(self, img_array, save_path):
        img = self.tensor_process(img_array)
        preds = self.model(img)
        results = self.non_max_suppression(preds, img.shape[2:], img_src.shape, self.conf, self.iou, nc=len(self.names))

        for result in results:
            self.draw_kpts(img_array[int(result[-1])], result[6: -1].reshape(*self.model.kpt_shape))
            self.draw_box(img_array[int(result[-1])], result[:4], result[4], self.names[result[5]])

        for i in range(img_array.shape[0]):
            cv2.imwrite(os.path.join(save_path, f"{i}.jpg"), img_array[i])

    def draw_box(self, img_src, box, conf, cls_name):
        lw = max(round(sum(img_src.shape) / 2 * 0.003), 2)  # line width
        tf = max(lw - 1, 1)  # font thickness
        sf = lw / 3  # font scale

        color = self.color[cls_name]
        label = f'{cls_name} {conf:.4f}'
        p1, p2 = (int(box[0]), int(box[1])), (int(box[2]), int(box[3]))
        # 绘制矩形框
        cv2.rectangle(img_src, p1, p2, color, thickness=lw, lineType=cv2.LINE_AA)
        # text width, height
        w, h = cv2.getTextSize(label, 0, fontScale=sf, thickness=tf)[0]
        # label fits outside box
        outside = box[1] - h - 3 >= 0
        p2 = p1[0] + w, p1[1] - h - 3 if outside else p1[1] + h + 3
        # 绘制矩形框填充
        cv2.rectangle(img_src, p1, p2, color, -1, cv2.LINE_AA)
        # 绘制标签
        cv2.putText(img_src, label, (p1[0], p1[1] - 2 if outside else p1[1] + h + 2),
                    0, sf, self.color["font"], thickness=2, lineType=cv2.LINE_AA)

    def draw_kpts(self, img_src, kpts, shape=(640, 640), radius=5, kpt_line=True):
        nkpt, ndim = kpts.shape
        is_pose = nkpt == 17 and ndim in {2, 3}
        kpt_line &= is_pose  # `kpt_line=True` for now only supports human pose plotting

        for i, k in enumerate(kpts):
            color_k = [int(x) for x in self.kpt_color[i]]
            x_coord, y_coord = k[0], k[1]
            if x_coord % shape[1] != 0 and y_coord % shape[0] != 0:
                if len(k) == 3:
                    conf = k[2]
                    if conf < 0.5:
                        continue
                cv2.circle(img_src, (int(x_coord), int(y_coord)), radius, color_k, -1, lineType=cv2.LINE_AA)

        if kpt_line:
            ndim = kpts.shape[-1]
            for i, sk in enumerate(self.skeleton):
                pos1 = (int(kpts[(sk[0] - 1), 0]), int(kpts[(sk[0] - 1), 1]))
                pos2 = (int(kpts[(sk[1] - 1), 0]), int(kpts[(sk[1] - 1), 1]))
                if ndim == 3:
                    conf1 = kpts[(sk[0] - 1), 2]
                    conf2 = kpts[(sk[1] - 1), 2]
                    if conf1 < 0.5 or conf2 < 0.5:
                        continue
                if pos1[0] % shape[1] == 0 or pos1[1] % shape[0] == 0 or pos1[0] < 0 or pos1[1] < 0:
                    continue
                if pos2[0] % shape[1] == 0 or pos2[1] % shape[0] == 0 or pos2[0] < 0 or pos2[1] < 0:
                    continue
                cv2.line(img_src, pos1, pos2, [int(x) for x in self.limb_color[i]], thickness=2, lineType=cv2.LINE_AA)


    def tensor_process(self, image_cv):
        img_shape = image_cv.shape[1:]
        new_shape = [640, 640]
        r = min(new_shape[0] / img_shape[0], new_shape[1] / img_shape[1])
        # Compute padding
        new_unpad = int(round(img_shape[0] * r)), int(round(img_shape[1] * r))

        dw, dh = new_shape[1] - new_unpad[0], new_shape[0] - new_unpad[1]  # wh padding
        dw, dh = np.mod(dw, 32), np.mod(dh, 32)  # wh padding
        dw /= 2  # divide padding into 2 sides
        dh /= 2

        top, bottom = int(round(dh - 0.1)), int(round(dh + 0.1))
        left, right = int(round(dw - 0.1)), int(round(dw + 0.1))

        padding_value = 114

        # Convert
        image_cv = image_cv[..., ::-1].transpose((0, 3, 1, 2))  # BGR to RGB, BHWC to BCHW, (n, 3, h, w)
        image_cv = np.ascontiguousarray(image_cv)  # contiguous
        image_tensor = torch.from_numpy(image_cv).float()
        image_tensor = image_tensor.to(self.device)

        resized_tensor = F.interpolate(image_tensor, size=new_unpad, mode='bilinear', align_corners=False)
        padded_tensor = F.pad(resized_tensor, (top, bottom, left, right), mode='constant', value=padding_value)
        infer_tensor = padded_tensor / 255.0

        return infer_tensor

    def non_max_suppression(self, prediction, inferShape, orgShape, conf_thres=0.25, iou_thres=0.45,
                            agnostic=True, multi_label=False, max_wh=7680, nc=0):
        prediction = prediction[0]  # select only inference output

        nc = nc  # number of classes
        nm = prediction.shape[1] - nc - 4
        mi = 4 + nc  # mask start index
        xc = prediction[:, 4:mi].amax(1) > conf_thres  # candidates

        # Settings
        multi_label &= nc > 1  # multiple labels per box (adds 0.5ms/img)

        prediction = prediction.transpose(-1, -2)  # shape(1,84,6300) to shape(1,6300,84)
        prediction[..., :4] = self.xywh2xyxy(prediction[..., :4])  # xywh to xyxy

        true_indices = torch.nonzero(xc)
        selected_rows = prediction[true_indices[:, 0], true_indices[:, 1]]
        new_prediction = torch.cat((selected_rows, true_indices[:, 0].unsqueeze(1).float()), dim=1)

        if new_prediction.shape[0] == 0:
            return

        box, cls, mask, idxs = new_prediction.split((4, nc, nm, 1), 1)
        conf, j = cls.max(1, keepdim=True)
        x = torch.cat((box, conf, j.float(), mask), 1)[conf.squeeze(-1) > conf_thres]
        if not x.shape[0]:  # no boxes
            return

        cls = x[:, 5]  # classes
        c = x[:, 5:6] * (0 if agnostic else max_wh)
        boxes, scores = x[:, :4] + c, x[:, 4]  # boxes (offset by class), scores
        masks = x[:, 6:]
        idxs = idxs.t().squeeze(0)

        keep = torchvision.ops.batched_nms(boxes, scores, idxs, iou_thres)

        boxes[keep] = self.scale_boxes(inferShape, boxes[keep], orgShape)
        temp_masks = masks[keep].view(len(masks[keep]), *self.model.kpt_shape) if len(masks[keep]) else masks[keep][:, 6:]
        masks[keep] = self.scale_coords(inferShape, temp_masks, orgShape).view(len(masks[keep]), -1)

        boxes = boxes[keep].cpu().numpy()
        scores = scores[keep].cpu().numpy()
        cls = cls[keep].cpu().numpy()
        masks = masks[keep].cpu().numpy()
        idxs = idxs[keep].cpu().numpy()

        results = np.hstack((boxes, np.expand_dims(scores, axis=1)))
        results = np.hstack((results, np.expand_dims(cls, axis=1)))
        results = np.hstack((results, masks))
        results = np.hstack((results, np.expand_dims(idxs, axis=1)))
        return results

    def xywh2xyxy(self, x):
        assert x.shape[-1] == 4, f"input shape last dimension expected 4 but input shape is {x.shape}"
        y = torch.empty_like(x) if isinstance(x, torch.Tensor) else np.empty_like(x)  # faster than clone/copy
        dw = x[..., 2] / 2  # half-width
        dh = x[..., 3] / 2  # half-height
        y[..., 0] = x[..., 0] - dw  # top left x
        y[..., 1] = x[..., 1] - dh  # top left y
        y[..., 2] = x[..., 0] + dw  # bottom right x
        y[..., 3] = x[..., 1] + dh  # bottom right y
        return y

    def clip_boxes(self, boxes, shape):
        if isinstance(boxes, torch.Tensor):  # faster individually (WARNING: inplace .clamp_() Apple MPS bug)
            boxes[..., 0] = boxes[..., 0].clamp(0, shape[1])  # x1
            boxes[..., 1] = boxes[..., 1].clamp(0, shape[0])  # y1
            boxes[..., 2] = boxes[..., 2].clamp(0, shape[1])  # x2
            boxes[..., 3] = boxes[..., 3].clamp(0, shape[0])  # y2
        else:  # np.array (faster grouped)
            boxes[..., [0, 2]] = boxes[..., [0, 2]].clip(0, shape[1])  # x1, x2
            boxes[..., [1, 3]] = boxes[..., [1, 3]].clip(0, shape[0])  # y1, y2
        return boxes

    def scale_boxes(self, img1_shape, boxes, img0_shape, ratio_pad=None, padding=True, xywh=False):
        if ratio_pad is None:  # calculate from img0_shape
            gain = min(img1_shape[0] / img0_shape[0], img1_shape[1] / img0_shape[1])  # gain  = old / new
            pad = (
                round((img1_shape[1] - img0_shape[1] * gain) / 2 - 0.1),
                round((img1_shape[0] - img0_shape[0] * gain) / 2 - 0.1),
            )  # wh padding
        else:
            gain = ratio_pad[0][0]
            pad = ratio_pad[1]

        if padding:
            boxes[..., 0] -= pad[0]  # x padding
            boxes[..., 1] -= pad[1]  # y padding
            if not xywh:
                boxes[..., 2] -= pad[0]  # x padding
                boxes[..., 3] -= pad[1]  # y padding
        boxes[..., :4] /= gain
        return self.clip_boxes(boxes, img0_shape)

    def scale_coords(self, img1_shape, coords, img0_shape, ratio_pad=None, normalize=False, padding=True):
        if ratio_pad is None:  # calculate from img0_shape
            gain = min(img1_shape[0] / img0_shape[0], img1_shape[1] / img0_shape[1])  # gain  = old / new
            pad = (img1_shape[1] - img0_shape[1] * gain) / 2, (img1_shape[0] - img0_shape[0] * gain) / 2  # wh padding
        else:
            gain = ratio_pad[0][0]
            pad = ratio_pad[1]

        if padding:
            coords[..., 0] -= pad[0]  # x padding
            coords[..., 1] -= pad[1]  # y padding
        coords[..., 0] /= gain
        coords[..., 1] /= gain
        coords = self.clip_coords(coords, img0_shape)
        if normalize:
            coords[..., 0] /= img0_shape[1]  # width
            coords[..., 1] /= img0_shape[0]  # height
        return coords

    def clip_coords(self, coords, shape):
        if isinstance(coords, torch.Tensor):  # faster individually (WARNING: inplace .clamp_() Apple MPS bug)
            coords[..., 0] = coords[..., 0].clamp(0, shape[1])  # x
            coords[..., 1] = coords[..., 1].clamp(0, shape[0])  # y
        else:  # np.array (faster grouped)
            coords[..., 0] = coords[..., 0].clip(0, shape[1])  # x
            coords[..., 1] = coords[..., 1].clip(0, shape[0])  # y
        return coords

if __name__ == '__main__':
    weights = r'./weights/yolov8n-pose.pt'
    cuda = 'cuda:0'
    save_path = "./runs"

    if not os.path.exists(save_path):
        os.mkdir(save_path)

    model = YOLOV8PoseInfer(weights, cuda, 0.45, 0.45)

    img_path = r'./img/bus.jpg'
    img_src = cv2.imread(img_path)
    model.infer(np.array([img_src, img_src]), save_path)
四、书籍推荐
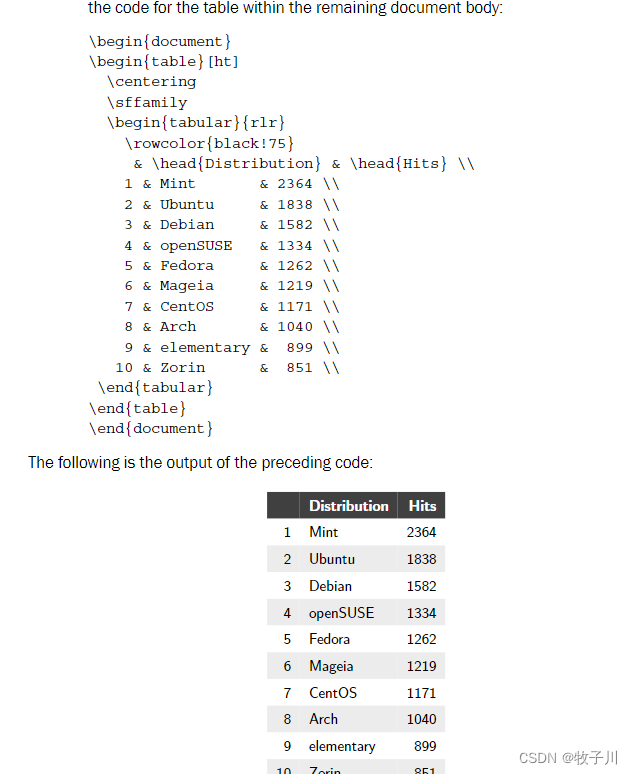
推荐一本书籍:《LaTeX Cookbook (Stefan Kottwitz)》 (z-lib.org)
本书籍由Stefan Kottwitz撰写,于2015年由Packt Publishing出版社出版。这本书主要面向已经具备LaTeX基础知识并希望提高使用效率的读者,通过90多个实用技巧,指导读者如何快速准备LaTeX文档以解决各种复杂的文档制作任务。
书中内容涵盖了以下方面:
-
文档类型多样性:介绍了不同类型的文档,如论文、书籍、简历、演示文稿、信件、传单和大型海报的LaTeX制作技巧。
-
文本调整:教授如何定制文档中的文本细节,包括输入带重音符号的字符、改善文本对齐和连字符、将数字转换为文字等。
-
字体调整:指导如何选择和调整文档中的字体,包括全局字体选择、本地字体切换、导入单个符号等。
-
图片处理:提供了包括图像质量优化、自动化图像定位、图像操作、添加图像框架等技巧。
-
设计美观:介绍了如何添加背景图像、创建装饰性图案、设计漂亮的标题等。
-
表格设计:讲解了如何创建清晰易读的表格,包括添加脚注、对齐数字数据、上色、合并单元格等。
-
目录、索引和参考文献:提供了快速开始和自定义目录、图表列表、参考文献、术语表和索引的方法。
-
PDF功能最大化:探索了PDF的功能,如添加超链接、元数据、版权信息、注释、创建可填写表单等。
-
图形创建:包含了创建图表、流程图、树状图、条形图、饼图、维恩图和思维导图等的技巧。
-
高级数学:深入探讨了LaTeX在数学公式排版上的优势,包括初学者快速入门、微调公式、自动换行、公式中高亮显示等。
-
科学技术:讨论了LaTeX在化学、物理、计算机科学等科学领域以及电子技术等领域的应用。
-
互联网支持:提供了探索在线LaTeX资源、使用网络论坛、提出好问题的指南。
最后,文档还提供了一些关于如何在LaTeX中创建特定文档元素的示例代码和说明,如使用hyperref包添加超链接、使用pdfcomment包添加注释、创建可填写的PDF表单、优化电子书阅读器的输出、移除白色边距、合并PDF文件以及创建动画等。这些示例展示了LaTeX在文档制作中的高级应用和功能。
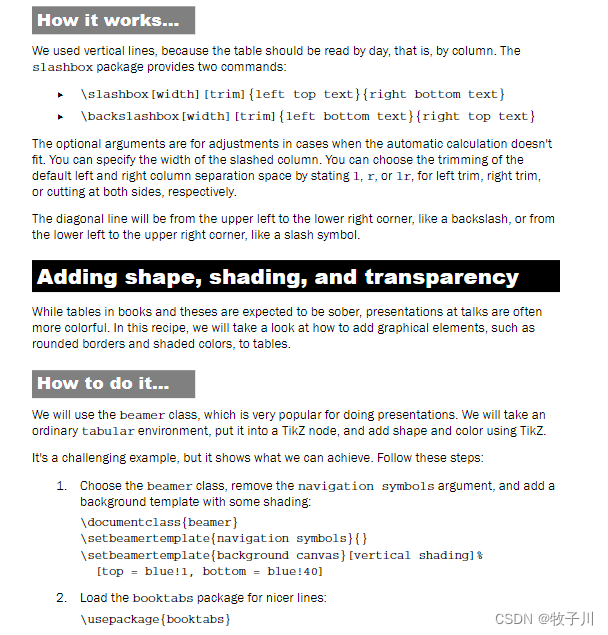
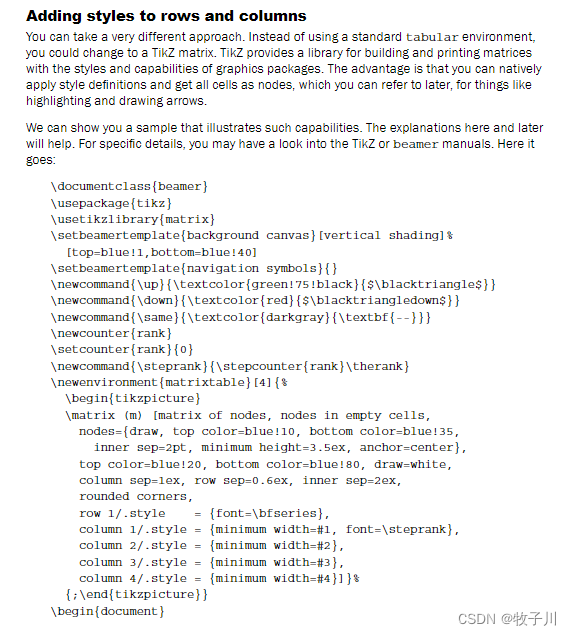
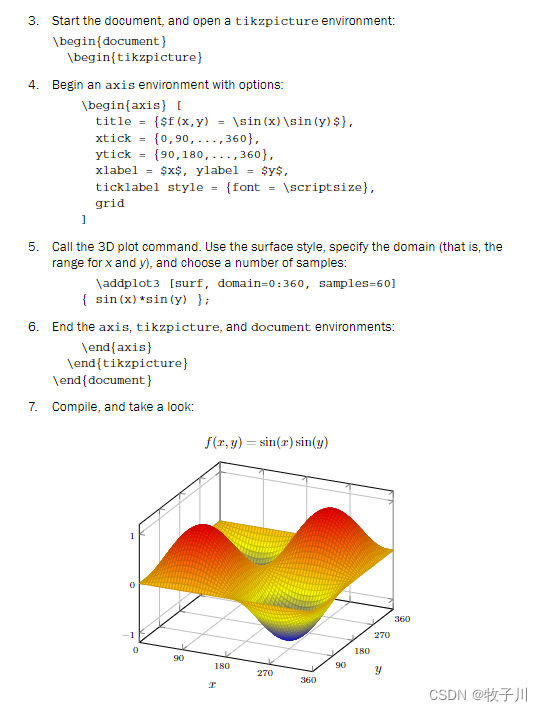
关注下方公众号:@AI算法与电子竞赛,回复关键字“PDF”获取下载地址
五、链接作者
欢迎关注我的公众号:@AI算法与电子竞赛
硬性的标准其实限制不了无限能的我们,所以啊!少年们加油吧!


![[Spring] SpringBoot基本配置与快速上手](https://i-blog.csdnimg.cn/direct/67d39e1f5d9c4dfb82c994965f006534.png)
