📚博客主页:knighthood2001
✨公众号:认知up吧 (目前正在带领大家一起提升认知,感兴趣可以来围观一下)
🎃知识星球:【认知up吧|成长|副业】介绍
❤️如遇文章付费,可先看看我公众号中是否发布免费文章❤️
🙏笔者水平有限,欢迎各位大佬指点,相互学习进步!
假设,你有模型,有训练好的模型文件,有模型推理代码,就可以把他放到flask上进行展示。
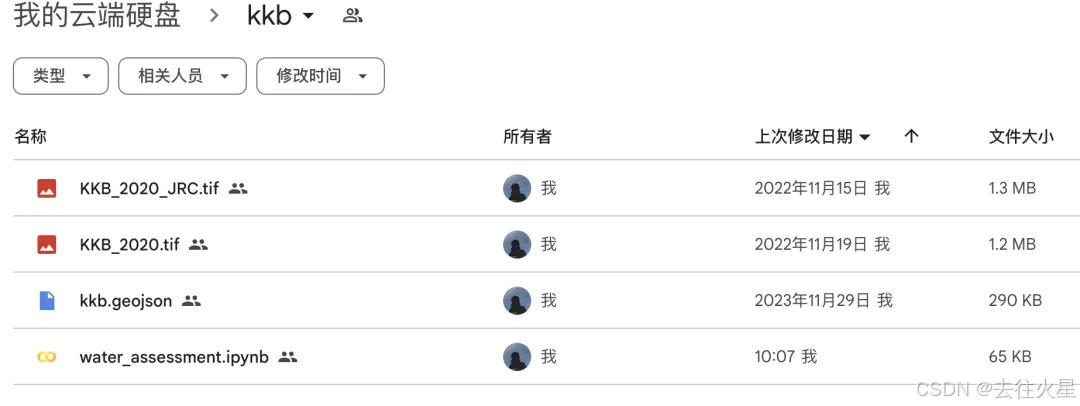
项目架构

index.html是模板文件app.py是项目运行的入口best_model.pth是训练好的模型参数model.py是神经网络模型,这里采用的是GoogleNet网络。model_reasoning.py是模型推理,通过这里面的代码,我们可以在本地进行猫狗图片的预测。
运行图

点击选择文件

图片下面就显示预测结果了。

项目完整代码与讲解
index.html
<!DOCTYPE html>
<html lang="en">
<head>
    <meta charset="UTF-8">
    <title>图像分类</title>
    <style>
        body {
            font-family: Arial, sans-serif;
            margin: 20px;
        }
        #result {
            margin-top: 10px;
        }
        #preview-image {
            max-width: 400px;
            margin-top: 20px;
        }
    </style>
</head>
<body>
    <h1>图像分类</h1>
    <form id="upload-form" action="/predict" method="post" enctype="multipart/form-data">
        <input type="file" name="file" accept="image/*" onchange="previewImage(event)">
        <input type="submit" value="预测">
    </form>

    <img id="preview-image" src="" alt="">
    <br>
    <div id="result"></div>

    <script>
        document.getElementById('upload-form').addEventListener('submit', async (e) => {
            e.preventDefault();  // 阻止默认的表单提交行为
            const formData = new FormData(); // 创建一个新的FormData对象,用于封装表单数据
            formData.append('file', document.querySelector('input[type=file]').files[0]);  // 添加表单数据
            // 使用fetch API发送POST请求到'/predict'路径,并将formData作为请求体
            const response = await fetch('/predict', {
                method: 'POST',
                body: formData
            });
            // 获取响应的JSON数据
            const result = await response.json();
            // 将预测结果显示在页面上ID为'result'的元素中
            document.getElementById('result').innerText = `预测结果: ${result.prediction}`;
        });

        function previewImage(event) {
            const file = event.target.files[0];  // 获取上传的文件对象
            const reader = new FileReader();  // 创建一个FileReader对象,用于读取文件内容

            // 清空上一次的预测结果
            document.getElementById('result').innerText = '';

            // 当文件读取完成后,将文件内容显示在页面上ID为'preview-image'的元素中
            reader.onload = function(event) {
                document.getElementById('preview-image').setAttribute('src', event.target.result);
            }
            // 如果用户选择了文件,则开始读取文件内容
            if (file) {
                reader.readAsDataURL(file); // 将文件读取为DataURL格式,这样可以直接用作img元素的src属性
            }
        }
    </script>
</body>
</html>
前端我练的不多,很多解释已经在代码中讲了。
model.py
这是GoogleNet的网络架构
import torch
from torch import nn
from torchsummary import summary
# 定义一个Inception模块
class Inception(nn.Module):
    def __init__(self, in_channels, c1, c2, c3, c4):  # 这些参数,所在的位置都会发送变化,所有需要这个参数
        super(Inception, self).__init__()
        self.ReLU = nn.ReLU()

        # 路线1,单1×1卷积层
        self.p1_1 = nn.Conv2d(in_channels=in_channels, out_channels=c1, kernel_size=1)

        # 路线2,1×1卷积层, 3×3的卷积
        self.p2_1 = nn.Conv2d(in_channels=in_channels, out_channels=c2[0], kernel_size=1)
        self.p2_2 = nn.Conv2d(in_channels=c2[0], out_channels=c2[1], kernel_size=3, padding=1)

        # 路线3,1×1卷积层, 5×5的卷积
        self.p3_1 = nn.Conv2d(in_channels=in_channels, out_channels=c3[0], kernel_size=1)
        self.p3_2 = nn.Conv2d(in_channels=c3[0], out_channels=c3[1], kernel_size=5, padding=2)

        # 路线4,3×3的最大池化, 1×1的卷积
        self.p4_1 = nn.MaxPool2d(kernel_size=3, padding=1, stride=1)
        self.p4_2 = nn.Conv2d(in_channels=in_channels, out_channels=c4, kernel_size=1)


    def forward(self, x):
        p1 = self.ReLU(self.p1_1(x))
        p2 = self.ReLU(self.p2_2(self.ReLU(self.p2_1(x))))
        p3 = self.ReLU(self.p3_2(self.ReLU(self.p3_1(x))))
        p4 = self.ReLU(self.p4_2(self.p4_1(x)))
        return torch.cat((p1, p2, p3, p4), dim=1)

class GoogLeNet(nn.Module):
    def __init__(self, Inception, in_channels, out_channels):
        super(GoogLeNet, self).__init__()
        self.b1 = nn.Sequential(
            nn.Conv2d(in_channels=in_channels, out_channels=64, kernel_size=7, stride=2, padding=3),
            nn.ReLU(),
            nn.MaxPool2d(kernel_size=3, stride=2, padding=1))

        self.b2 = nn.Sequential(
            nn.Conv2d(in_channels=64, out_channels=64, kernel_size=1),
            nn.ReLU(),
            nn.Conv2d(in_channels=64, out_channels=192, kernel_size=3, padding=1),
            nn.ReLU(),
            nn.MaxPool2d(kernel_size=3, stride=2, padding=1))

        self.b3 = nn.Sequential(
            Inception(192, 64, (96, 128), (16, 32), 32),
            Inception(256, 128, (128, 192), (32, 96), 64),
            nn.MaxPool2d(kernel_size=3, stride=2, padding=1))

        self.b4 = nn.Sequential(
            Inception(480, 192, (96, 208), (16, 48), 64),
            Inception(512, 160, (112, 224), (24, 64), 64),
            Inception(512, 128, (128, 256), (24, 64), 64),
            Inception(512, 112, (128, 288), (32, 64), 64),
            Inception(528, 256, (160, 320), (32, 128), 128),
            nn.MaxPool2d(kernel_size=3, stride=2, padding=1))

        self.b5 = nn.Sequential(
            Inception(832, 256, (160, 320), (32, 128), 128),
            Inception(832, 384, (192, 384), (48, 128), 128),
            nn.AdaptiveAvgPool2d((1, 1)),
            nn.Flatten(),
            nn.Linear(1024, out_channels))

        for m in self.modules():
            if isinstance(m, nn.Conv2d):
                nn.init.kaiming_normal_(m.weight, mode="fan_out", nonlinearity='relu')
                if m.bias is not None:
                    nn.init.constant_(m.bias, 0)

                elif isinstance(m, nn.Linear):
                    nn.init.normal_(m.weight, 0, 0.01)
                    if m.bias is not None:
                        nn.init.constant_(m.bias, 0)

    def forward(self, x):
        x = self.b1(x)
        x = self.b2(x)
        x = self.b3(x)
        x = self.b4(x)
        x = self.b5(x)
        return x


if __name__ == "__main__":
    device = torch.device("cuda" if torch.cuda.is_available() else "cpu")
    model = GoogLeNet(Inception, 1, 10).to(device)
    print(summary(model, (1, 224, 224)))
model_reasoning.py
import torch
from torchvision import transforms
from model import GoogLeNet, Inception
from PIL import Image

def test_model(model, test_file):
    # 设定测试所用到的设备,有GPU用GPU没有GPU用CPU
    device = "cuda" if torch.cuda.is_available() else 'cpu'
    model = model.to(device)
    classes = ['猫', '狗']
    print(classes)
    image = Image.open(test_file)

    # normalize = transforms.Normalize([0.162, 0.151, 0.138], [0.058, 0.052, 0.048])
    # # 定义数据集处理方法变量
    # test_transform = transforms.Compose([transforms.Resize((224, 224)), transforms.ToTensor(), normalize])

    # 定义数据集处理方法变量
    test_transform = transforms.Compose([transforms.Resize((224, 224)), transforms.ToTensor()])
    image = test_transform(image)

    # 添加批次维度,变成[1,3,224,224]
    image = image.unsqueeze(0)

    with torch.no_grad():
        model.eval()
        image = image.to(device)  # 图片也要放到设备当中
        output = model(image)
        print(output.tolist())
        pre_lab = torch.argmax(output, dim=1)
        result = pre_lab.item()
    print("预测值:", classes[result])
    return classes[result]

def test_special_model(best_model_file, test_file):
    # 加载模型
    model = GoogLeNet(Inception, in_channels=3, out_channels=2)
    model.load_state_dict(torch.load(best_model_file))

    # 模型的推理判断
    return test_model(model, test_file)

if __name__ == "__main__":
    # # 加载模型
    # model = GoogLeNet(Inception, in_channels=3, out_channels=2)
    # model.load_state_dict(torch.load('best_model.pth'))
    # # 模型的推理判断
    # test_model(model, "test_data/images.jfif")

    test_special_model("best_model.pth", "static/1.jpg")
这段代码与之前的模型推理代码不同的是,我添加了test_special_model函数,方便后续app.py中可以直接调用这个函数进行模型推理。
app.py
import os
from flask import Flask, request, jsonify, render_template

from model_reasoning import test_special_model
from model_reasoning import test_model
app = Flask(__name__)

# 定义路由
@app.route('/')
def index():
    return render_template('index.html')

@app.route('/predict', methods=['POST'])
def predict():
    if request.method == 'POST':
        # 获取上传的文件
        file = request.files['file']
        if file:
            # 调用模型进行预测
            # # 加载模型
            # model = GoogLeNet(Inception, in_channels=3, out_channels=2)
            # basedir = os.path.abspath(os.path.dirname(__file__))
            #
            # model.load_state_dict(torch.load(basedir + '/best_model.pth'))
            # result = test_model(model, file)

            basedir = os.path.abspath(os.path.dirname(__file__))
            best_model_file = basedir + '/best_model.pth'
            result = test_special_model(best_model_file, file)
            return jsonify({'prediction': result})
        else:
            return jsonify({'error': 'No file found'})


if __name__ == '__main__':
    app.run(debug=True)
如果没有上文中的test_special_model函数,那么这里你就需要
   # 加载模型
   model = GoogLeNet(Inception, in_channels=3, out_channels=2)
   basedir = os.path.abspath(os.path.dirname(__file__))

   model.load_state_dict(torch.load(basedir + '/best_model.pth'))
   result = test_model(model, file)
并且还需要导入相应的库。
best_model.pth
最重要的是,你需要训练好的一个模型。
有需要的,可以联系我,我直接把这个项目代码发你。省得你还需要配置项目架构。
小插曲
我为什么会使用绝对路径,因为我在使用相对路径后,代码提示找不到这个路径。
    basedir = os.path.abspath(os.path.dirname(__file__))
    best_model_file = basedir + '/best_model.pth'
然后,我刚刚又试了一下,发现使用相对路径,又可以运行成功了。
真是不可思议(这个小插曲花了我大半个小时)。