目录
1.ArkUI 的基础
2.组件的属性方法
3.文本颜色
4.文字溢出省略号
5.行高
6.图片组件
7.输入框
8.按钮
9.内边距padding
10.外边距margin
11. 边框 border
12.设置组件圆角
13.特殊圆角的设置(正圆、胶囊圆(左右半圈))
14. 背景属性
(1)背景图语法:.backgroundImage(背景图地址,背景图平铺方式-枚举ImageRepeat)
(2)背景图位置语法:
(3)背景尺寸的大小
15.线性布局-主轴对齐方式
16.线性布局-交叉轴对齐方式
17.自适应伸缩
18.弹性布局
19.绝对定位
20.层级
21.层叠布局
22.交互-点击事件
23.状态管理
24.ForEach渲染控制
25. Badge角标组件
26.Grid布局
27.Swiper轮播图
28.使用@Extend封装重复的代码
29. @Styles 抽取通用的属性、事件
30.@Builder 自定义构建函数(结构、样式、事件)
31.滚动容器Scroll
(1)滚动容器Scroll-常用属性:
(2)滚动容器Scroll-控制器:
(3)Scroll-事件
(4)示例:点击火箭返回顶部显示效果:
32.容器组件Tabs
(1)简单示例效果:
(2)自定义TabBar-高亮切换
33.自定义组件
(1)基本的使用
(2)封装组件,然后通过导入的形式使用
34.@BuidlerParam构造函数
示例一:(外部传递了UI,默认覆盖原有的UI效果)
示例二:(外部没有传递UI,默认原有的UI效果)
35. 持续更新中....
1.ArkUI 的基础
(1)ArkUI 的界面的最小单位是组件
(2)ArkUI 组件分类
容器组件: Column、Row
基础组件: Text
注意:build有且只能有一个根元素,且是容器组件
基础代码:
// 使用 @Entry 装饰器定义组件为页面的入口点
@Entry
// 使用 @Component 装饰器定义一个名为 Index 的组件
@Component
struct Index {
  // 使用 @State 装饰器定义一个状态变量 message,并初始化为 'Hello World'
  @State message: string = 'Hello World';

  // 定义组件的构建方法
  build() {
    // 创建一个水平布局的 Row 容器
    Row() {
      // 在 Row 容器中创建一个垂直布局的 Column 容器
      Column() {
        // 在 Column 容器中创建一个 Text 组件,内容为状态变量 message 的值
        Text(this.message)
          // 设置文本的字体大小为 50
          .fontSize(50)
          // 设置文本的字体权重为 Bold(加粗)
          .fontWeight(FontWeight.Bold)
      }
      // 设置 Column 容器的宽度为 '100%'
      .width('100%')
    }
    // 设置 Row 容器的高度为 '100%'
    .height('100%')
  }
}
2.组件的属性方法
| 组件属性方法 | 描述 |
| .width(值) | 宽度 |
| .height(值) | 高度 |
| .backgroundColor(Color.Pink) | 背景色 |
| .fontSize(值) | 字体大小 |
| .fontweight(FontWeight.Bold) | 字体粗细 |
其中 width、height、backgroundColor是通用属性,fontSize、fontweight是文字属性
3.文本颜色
语法:.fontColor(颜色值)
| 颜色值说明 | 具体演示 |
| Color.颜色名 | Color.Red、Color.Pink |
| #开头的16进制 | #fc5531 |
4.文字溢出省略号
语法:.textOverflow({
overflow: TextOverflow.XXX
})
注意:需要配合.maxLines(行数)来使用才有效果
5.行高
语法:.lineHeight(数字)
6.图片组件
语法:Image(图片数据源)
对于本地图片的资源一般存放到 resources -> base -> media中
网络图片数据源直接写链接即可
对于本地图片数据源通过Image($r('app.media.文件名'))
7.输入框
语法: TextInput(参数对象)
.属性方法()
1.参数对象:placeholder 提示文本
2.属性方法: .type(InputType.xxx)设置输入框 type 类型
| type值 | 解释说明 |
| Normal | 基本输入模式,无特殊限制 |
| Password | 密码输入模式 |
示例:
TextInput({
    placeholder: '占位符文本'
}).type(InputType.Password)
8.按钮
语法: Button('按钮文本')
9.内边距padding
作用:在组件内添加间距,拉开内容与组件边缘之间的距离
对四个方向的内边距设置距离的语法:
.padding(边距值)
对单个方向的内边距设置距离的语法:
.padding({
top:边距值,
right:边距值,
bottom:边距值,
left:边距值,
})
10.外边距margin
作用:在组件外添加间距,拉开两个组件之间的距离
对四个方向的内边距设置距离的语法:
.margin(边距值)
对单个方向的内边距设置距离的语法:
.margin({
top:边距值,
right:边距值,
bottom:边距值,
left:边距值,
})
11. 边框 border
作用:给组件添加边界,进行修饰美化
四个方向边框样式一致语法:
.border({
width:1, //宽度(必须设置)
color:#e94242, //颜色
style:BorderStyle.Solid //样式
})
可选择单个方向的边框的样式设置的语法:
.border({
width:{left:1,top:2}, //宽度(必须设置)
color:#e94242, //颜色
style:{
left:BorderStyle.Dashed,
top:BorderStyle.Dotted
} //样式 还有bottom 和 right
})
12.设置组件圆角
四个圆角相同语法:
.borderRadius(10)
单个圆角设置的语法:
.borderRadius({
topLeft:5,
topRight:15,
bottomLeft:25,
bottomRight:35
})
13.特殊圆角的设置(正圆、胶囊圆(左右半圈))
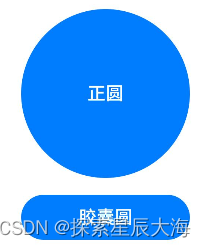
正圆示例:
      Button('正圆')
        .width(150) //宽度和高度一致
        .height(150)
        .borderRadius(75) //圆角是宽度或高度的一半
胶囊圆(左右半圈)示例:
      Button('胶囊圆')
        .width(150) //宽度大、高度小
        .height(40)
        .borderRadius(20) //圆角是高度的一半
14. 背景属性
| 属性方法 | 属性 |
| 背景色 | backgroundColor |
| 背景图 | backgroundImage |
| 背景图位置 | backgroundImagePosition |
| 背景图尺寸 | backgroundImageSize |
(1)背景图语法:
.backgroundImage(背景图地址,背景图平铺方式-枚举ImageRepeat)
| 背景图平铺方式 | 描述 |
| NoRepeat | 不平铺、默认值 |
| x | 水平平铺 |
| y | 垂直平铺 |
| xy | 水平垂直平铺 |
(2)背景图位置语法:
.backgroundImagePosition(坐标对象 或 枚举)
位置坐标:{ x : 位置坐标, y : 位置坐标}
枚举 Alignment
例如:
.backgroundImagePosition({x:100,y:100})
.backgroundImagePosition(Alignment.Center)
注意:背景定位-单位问题
背景定位默认单位:px 实际的物理像素点,我们直接测量的是px单位,设备出厂,就定好了分辨率单位
宽高默认单位:vp 虚拟像素,相对于不同的设备会自动转换,保证不同设备视觉一致(推荐)
使用函数:vp2px(数值) 将vp进行转换,得到px的数值
示例:
.backgroundImagePosition({x:vp2px(100),y:vp2px(100)})
(3)背景尺寸的大小
语法:
.backgroundImageSize(宽高对象 或 枚举)
参数背景图宽高:{ width:尺寸,height:尺寸 }
枚举 ImageSize
| 枚举参数 | 说明 |
| Contain | 等比例缩放背景图,当宽或高与组件尺寸相同停止播放 |
| Cover | 等比例缩放背景图至完全覆盖组件范围 |
| Auto | 默认、原图尺寸 |
15.线性布局-主轴对齐方式
线性布局通过线性容器Column和Row创建
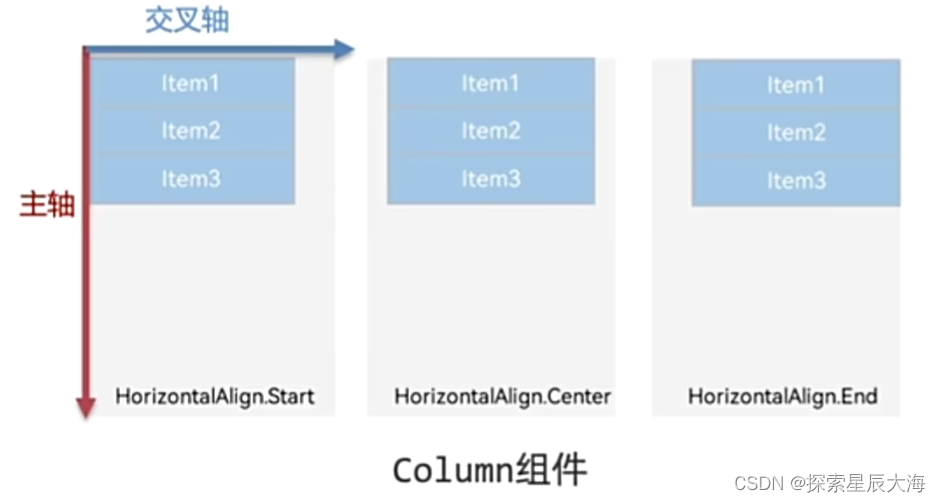
Column容器:子元素 垂直方向 排列
Row容器:子元素 水平方向 排序
Column排布主方向上的对齐方式
属性:.justifyContent(枚举FlexAlign) (Row排布主方向上的对齐方式相似)

16.线性布局-交叉轴对齐方式
属性:.alignItems(枚举)
| 枚举类型 | 描述 |
| HorizontalAlign | 交叉轴在水平方向 |
| VerticalAlign | 交叉轴在垂直方向 |

17.自适应伸缩
设置layoutWeight属性的 子元素 和 兄弟元素,会 按照权重 进行 主轴的 空间分配
语法:.layoutWeight(数字)
18.弹性布局
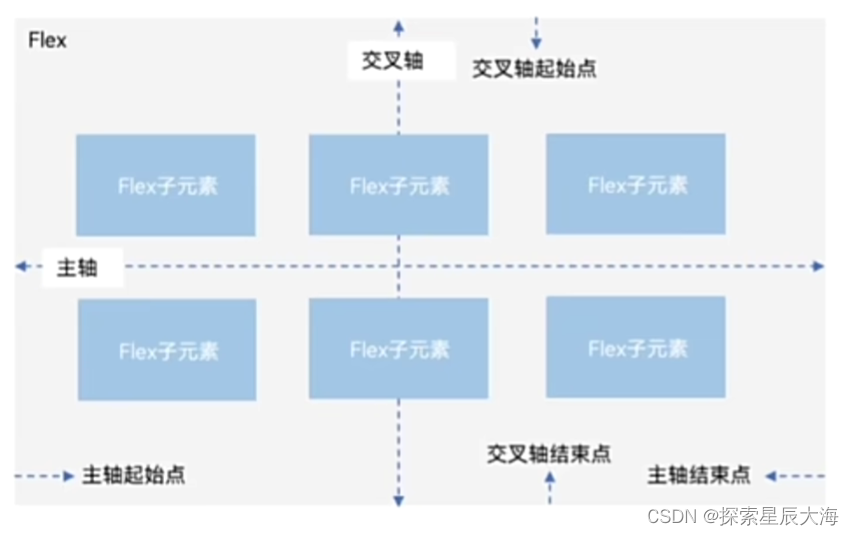
语法:Flex(参数对象){
子组件1
子组件2
子组件n
}
| 说明 | 参数对象 |
| 主轴方向 | direction |
| 主轴对齐方式 | justifyContent |
| 交叉轴对齐方式 | alignItems |
| 布局换行 | wrap |
搜索历史示例:
实现效果显示:
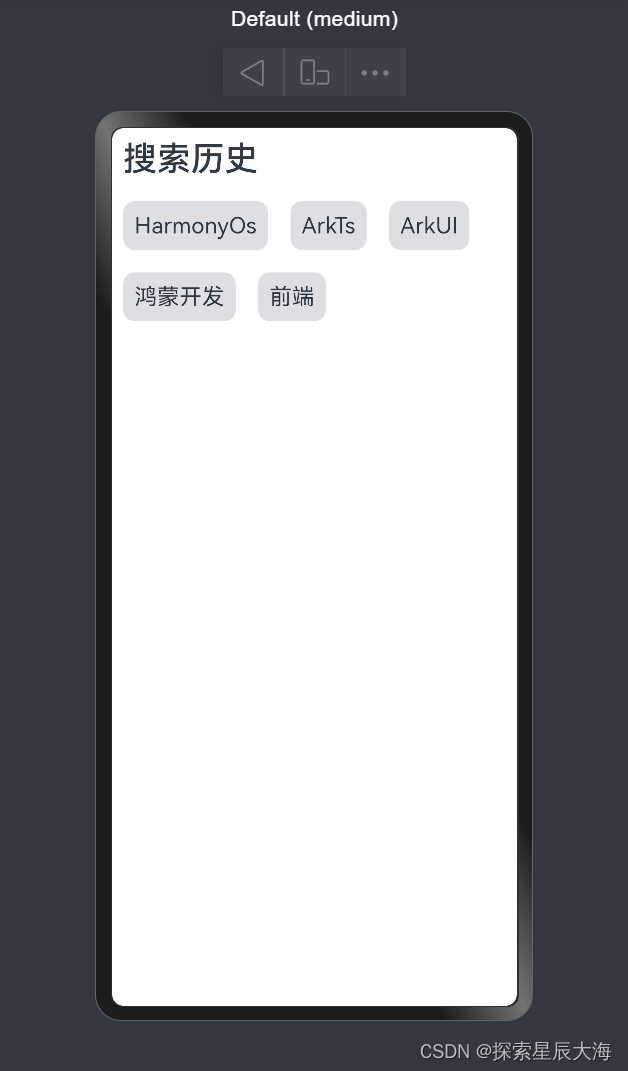
代码:
@Entry
@Component
struct Index {
  build() {
    Column(){
      Text('搜索历史')
        .fontSize(30)
        .fontWeight(FontWeight.Medium)
        .width('100%')
        .padding(10)


      Flex({
        direction:FlexDirection.Row,
        wrap:FlexWrap.Wrap
      }){
        Text('HarmonyOs')
          .fontSize(20)
          .backgroundColor('#ffdedee3')
          .margin(10)
          .padding(10)
          .borderRadius(10)

        Text('ArkTs')
          .fontSize(20)
          .backgroundColor('#ffdedee3')
          .margin(10)
          .padding(10)
          .borderRadius(10)

        Text('ArkUI')
          .fontSize(20)
          .backgroundColor('#ffdedee3')
          .margin(10)
          .padding(10)
          .borderRadius(10)

        Text('鸿蒙开发')
          .fontSize(20)
          .backgroundColor('#ffdedee3')
          .margin(10)
          .padding(10)
          .borderRadius(10)

        Text('前端')
          .fontSize(20)
          .backgroundColor('#ffdedee3')
          .margin(10)
          .padding(10)
          .borderRadius(10)
      }

    }
  }
}
19.绝对定位
绝对定位:
语法:.position(位置对象)
参数:{ x:水平偏移量,y:垂直偏移量 }
参照父组件左上角进行偏移。
绝对定位后的组件 不再占用自身原有的位置。
20.层级
作用:调整组件的层级
语法:.zIndex(数字)
参数:数字越大,显示层级越高
21.层叠布局
语法:
stack({
alignContent: Alignment.Center //默认
}){
Item()1
Item()2
Item()3
}
22.交互-点击事件
语法:
.onClick(()=>{
})
示例代码:
@Entry
@Component
struct Index {
  build() {
    Column(){
      Button('你是高手吗?')
        .onClick(()=>{
          AlertDialog.show({
            message:'弹框-我是高手'
          })
        })

    }
    .width('100%')

  }
}
23.状态管理
普通变量:只有初始化时进行渲染,后续不会再刷新。
状态变量:需要装饰器 @State 修饰,改变会引起UI的渲染刷新;必须设置类型和初始值
示例:
@Entry
@Component
struct Index {

  @State hello:string = 'Hello World'
  hello2:string = 'Hello World'
  build() {
    Column(){
      Text(this.hello.toString())
        .fontSize(40)
        .onClick(()=>{
          this.hello = 'Hello HarmonyOs'
        })

      Text(this.hello2.toString())
        .fontSize(40)
        .onClick(()=>{
          this.hello2 = 'Hello HarmonyOs'
        })

    }
    .width('100%')

  }
}
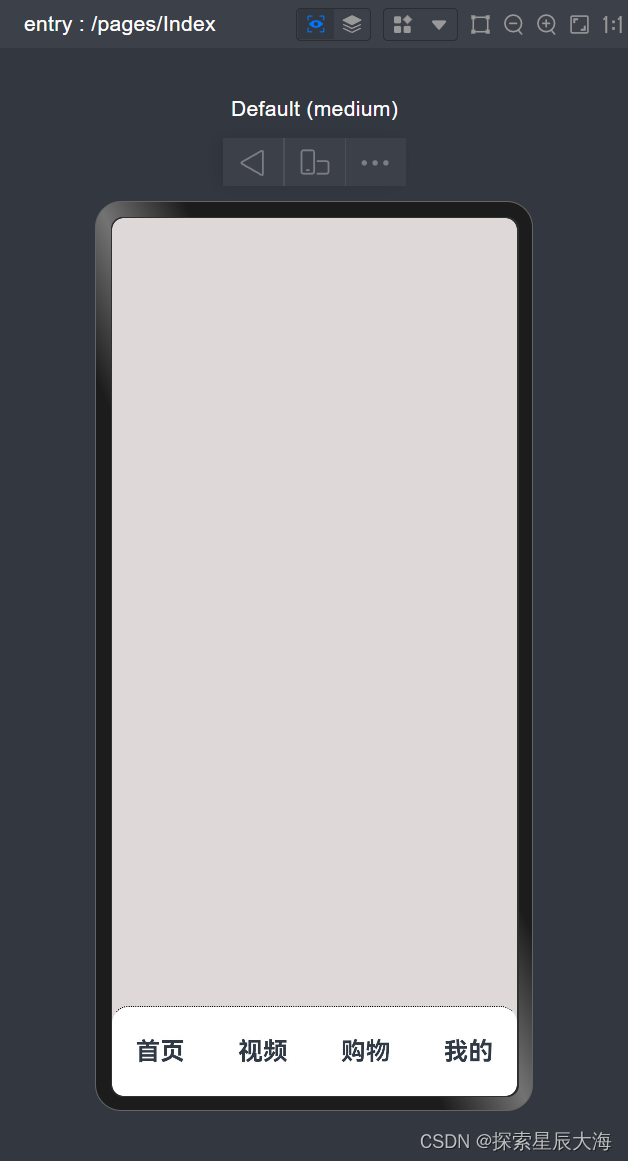
24.ForEach渲染控制
ForEach可以基于数组的个数,渲染组件的个数
语法:ForEach(arr,(item,index)=>{ })
示例效果显示:
代码:
@Entry
@Component
struct Index {
 @State nav:string[] =['首页','视频','购物','我的']
 build(){
  Column(){
   Blank()
   Row({space:5}){
    ForEach(this.nav,(item:string,index)=>{
     Text(item)
      .fontSize(22)
      .fontWeight(FontWeight.Bold)
      .layoutWeight(1)
      .textAlign(TextAlign.Center)
    })
   }
   .border({
    width:{top:1},
    style:BorderStyle.Dotted
   })
   .borderRadius({topLeft:15,topRight:15})
   .height(80)
   .width('100%')
   .backgroundColor(Color.White)


  }
  .height('100%')
  .width('100%')
  .backgroundColor('#ffded8d8')
 }
}
25. Badge角标组件
语法:Badge({
count: 1 //角标数值
position: BadgePosition.RightTop, //角标位置
style:{
fontSize: 10, //文字大小
badgeSize:16, //圆角大小
badgeColor: Color.Red //圆形底色
}
}){
Image($r('app.media.bg'))
.width(50)
}
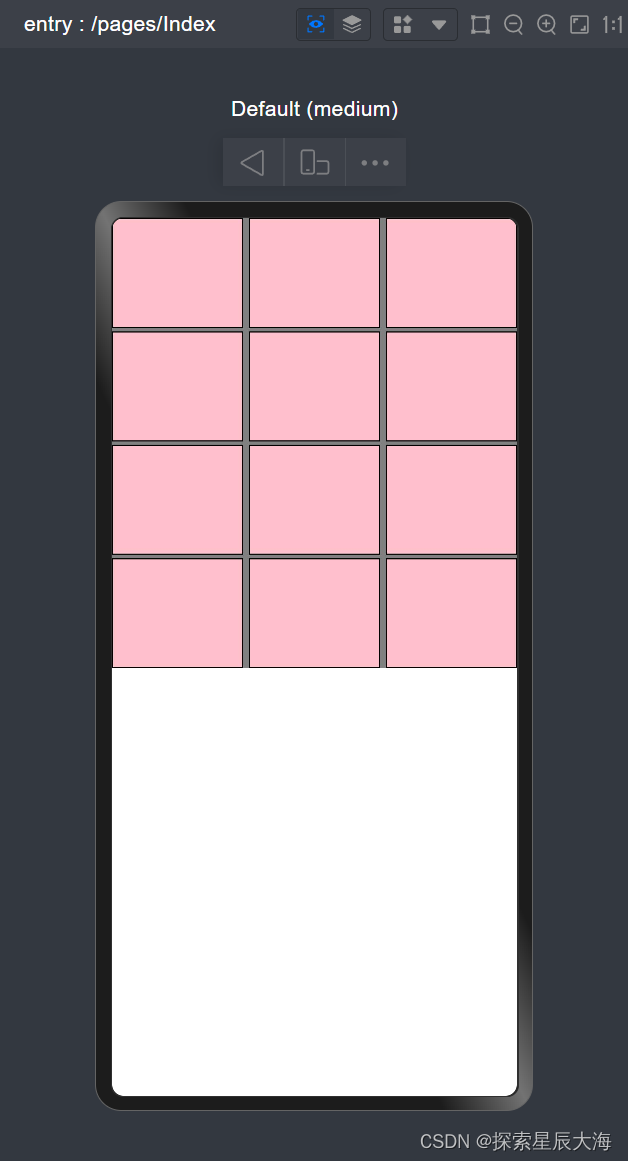
26.Grid布局
Grid布局的主要属性
.columnsTemplate('1fr 1fr 1fr')        //列数以及占比
.rowsTemplate('1fr 1fr 1fr 1fr')        //行数以及占比
.columnsGap(5)        //每列间隔
.rowsGap(3)        //每行间隔
显示效果:
示例代码:
@Entry
@Component
struct Index {
 @State category:string[] =['首页','视频','购物','我的','电影','动漫','游戏','商店','知识','世界','节日','幽默']
 build(){
  Grid(){
   ForEach(this.category,()=>{
    GridItem(){
     Column(){

     }.width('100%')
     .height('100%')
     .backgroundColor(Color.Pink)
     .border({width:1})
    }
   })


  }
  .columnsTemplate('1fr 1fr 1fr')
  .rowsTemplate('1fr 1fr 1fr 1fr')
  .columnsGap(5)
  .rowsGap(3)
  .width('100%')
  .height('400')
  .backgroundColor(Color.Gray)

 }
}
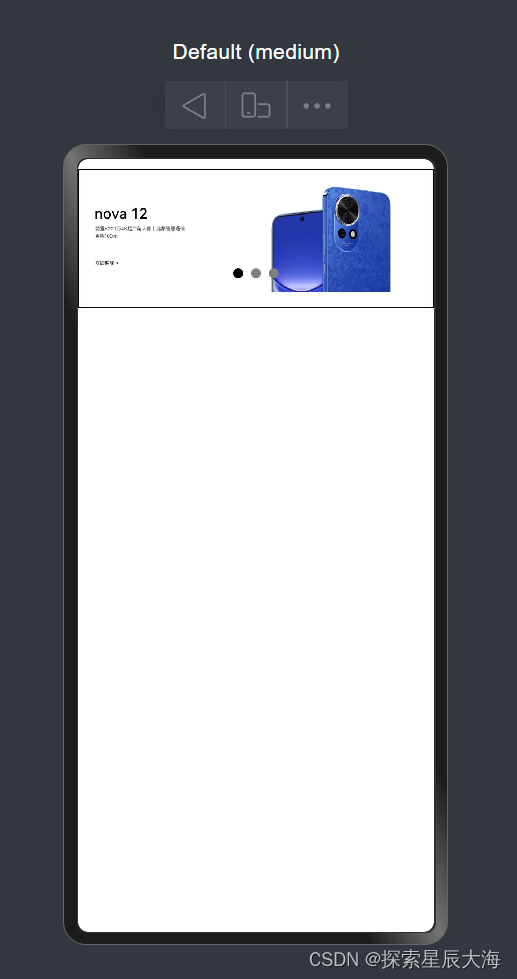
27.Swiper轮播图
语法:
Swiper(){
// 轮播图内容
Image($r(' '))
Image($r(' '))
Image($r(' '))
}.width('100%').height(150)
.indicator(
Indicator.dot() //小圆点
.itemWidth(20) //默认宽
.itemHeight(20) //默认高
.color(Color.White) //默认的颜色
.selectedItemWidth(30) //选中的宽
.selectedItemHeight(30) //选中的高
.selectedColor(Color.Black) //选中的颜色
)
.loop(true) //是否开启循环 //默认true
.autoPlay(true) //是否开启自动播放 默认false
.interval(4000) //自动播放的时间间隔(ms) 默认3000
.vertical(false) //纵向滑动轮播 默认false
轮播图示例显示效果:
示例代码:
@Entry
@Component
struct Index {
build(){

 Column(){

  Swiper(){

   Image($r('app.media.swiper_phone_00'))
   Image($r('app.media.swiper_phone_01'))
   Image($r('app.media.swiper_phone_03'))

  }.width('100%')
  .height(140)
  .autoPlay(true)
  .interval(2000)
  .padding(15)
  .border({width:1})
  .margin(10)
  .indicator(
   Indicator.dot()
    .itemWidth(10)
    .itemHeight(10)
    .color(Color.Gray)
    .selectedItemWidth(10)
    .selectedItemHeight(10)
    .selectedColor(Color.Black)
  )
 }.width('100%').height('100%')

}


}
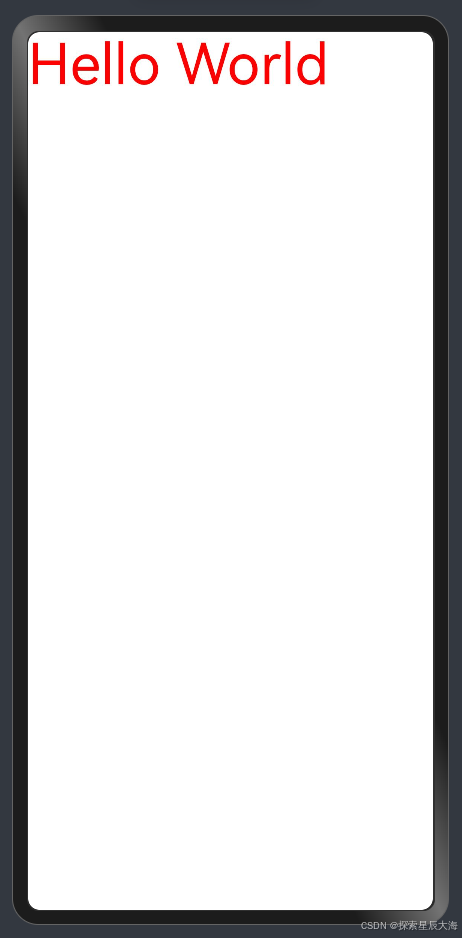
28.使用@Extend封装重复的代码
扩展组件的样式、事件,实现复用的效果
语法:
@Extend(组件名)
function 自定义属性名(自定义参数){
//设置与组件名相关的属性
}
使用方式:
组件名()
.自定义属性名(自定义参数)
示例显示效果:
示例代码:
@Extend(Text)
function testExtend(fontSize:number){
 .fontColor(Color.Red)
 .fontSize(fontSize)
}

@Entry
@Component
struct Index {
 build(){
 Column() {
  Text('Hello World')
   .testExtend(50)
 }
 }
}
29. @Styles 抽取通用的属性、事件
注意:@Styles和@Extend的实现的功能差不多,但是@Extend是封装特定的组件,而@Styles封装的是通用的组件,且@Styles有两种定义的方式,@Styles不可以传递参数
(1)全局定义语法:
@Styles function 自定义方法名(){
//自定义通用属性
}
(2)组件内定义语法:
@Styles 自定义方法名(){
//自定义通用属性
}
示例显示效果:

示例代码:
//组件外
@Styles function commonStyles() {
 .width('100%')
 .backgroundColor(Color.Red)

}

@Entry
@Component
struct Index {
 //组件内
 @Styles setHeight(){
  .height(150)
 }

 build(){
 Column() {
  Text('Hello World')
   .commonStyles()
   .setHeight()

 }
 }
}
30.@Builder 自定义构建函数(结构、样式、事件)
@Builder跟@Extend和@Styles的使用差不多,不过@Builder不是特定对于某个组件或通用属性生效,而是对全部组件以及组件的属性生效。
语法:
@Builder function 自定义方法名(自定义参数){
//自定义组件
}
示例显示效果:
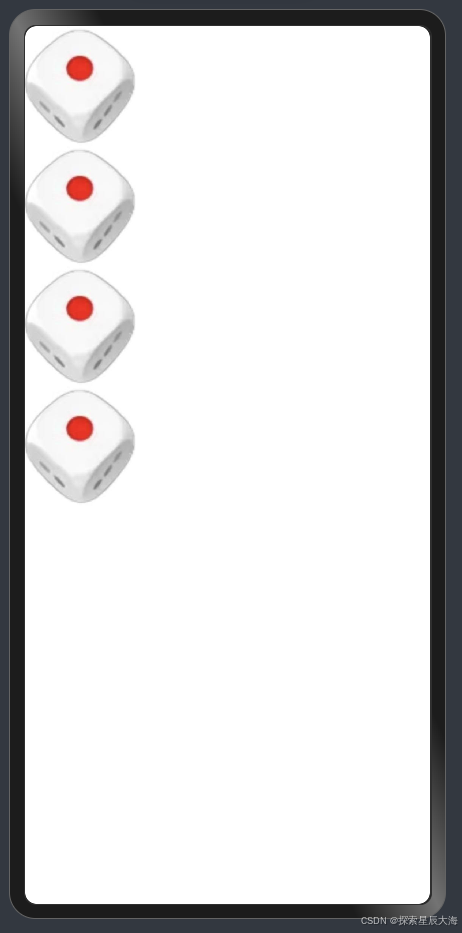
示例代码:
@Builder function diceImage(){
 Image($r('app.media.one'))
  .width(100)
}

@Entry
@Component
struct Index {

 build(){
 Column() {
   diceImage()
   diceImage()
   diceImage()
   diceImage()
 }
 }
}
31.滚动容器Scroll
当子组件的布局尺寸 超过Scroll的尺寸时,内容可以滚动
语法:
Scroll(){
// 只支持一个子组件
Column(){
//内容放在内部
//尺寸超过Scroll 开始滚动
}
}.with('100%')
.height(200)
.scrollable(ScrollDirection.xxx) //ScrollDirection.Vertical 纵向,ScrollDirection.Horizontal 横向
(1)滚动容器Scroll-常用属性:
| 名称 | 参数类型 | 描述 |
| scrollable | ScrollDirection | 设置滚动方向: ScrollDirection.Vertical 纵向 SCrollDirection Horizontal 横向 |
| scrollBar | BarState | 设置滚动条状态 BarState.On 一直显示 BarState.Off 一直隐藏 BarState.Auto 滑动显示 |
| scrollBarColor | string | number | Color | 设置滚动条的颜色 |
| scrollBarWidth | string | number | 设置滚动套的宽度 |
| edgeEffect | value:EdgeEffect | 设置边缘滑动效果: EdgeEffect.None 无 EdgeEffect.Spring 弹簧 EdgeEffect.Fade 阴影 |
(2)滚动容器Scroll-控制器:
通过创建Scroll的控制器获取Scroll滑动的距离;也可以通过Scroll控制器通过事件的方式转移到指定的位置
示例代码:
@Builder function box(color:ResourceColor){
 Text()
  .width('100%')
  .height(180)
  .backgroundColor(color)
}

@Entry
@Component
struct Index {
myScroller:Scroller = new Scroller()

 build(){
  Column(){
   Scroll(this.myScroller){
    Column(){
      box(Color.Red)
      box(Color.Yellow)
      box(Color.Gray)
      box(Color.Green)
     }.width('100%')

    }.width('100%')
    .height(400)
    .backgroundColor(Color.Pink)

    Button('返回顶部')
      .onClick(()=>{
        this.myScroller.scrollEdge(Edge.Top)
      })

    Button('获取当前滑动距离')
      .onClick(()=>{
        AlertDialog.show({
          message:`x:${this.myScroller.currentOffset().xOffset},y:${this.myScroller.currentOffset().yOffset}`
        })
      })

   }

  }

}
(3)Scroll-事件
//滚动时,一直触发
.onScroll((x,y)=>{
//触发内容
})
(4)示例:点击火箭返回顶部
显示效果:
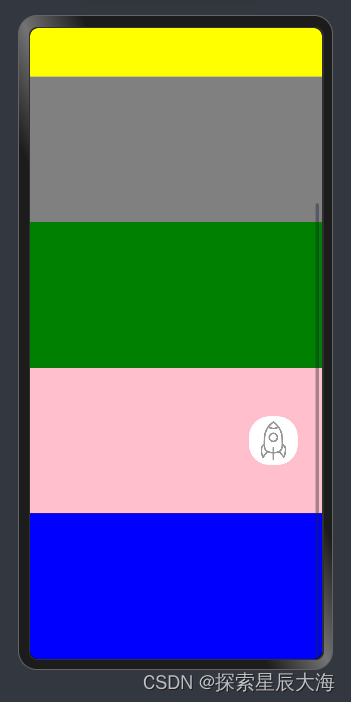
示例代码:
@Builder function box(color:ResourceColor){
 Text()
  .width('100%')
  .height(180)
  .backgroundColor(color)
}

@Entry
@Component
struct Index {
  myScroller:Scroller = new Scroller()
  @State yOffset:number = 0

 build(){
  Column(){
    Stack(){
      Scroll(this.myScroller){
        Column(){
          box(Color.Red)
          box(Color.Yellow)
          box(Color.Gray)
          box(Color.Green)
          box(Color.Pink)
          box(Color.Blue)

        }.width('100%')

      }.width('100%')
        .height('100%')
        .onScroll((x,y)=>{
          this.yOffset = this.myScroller.currentOffset().yOffset
          console.log('y:'+this.yOffset)
        })

        if(this.yOffset > 200){

          Image($r('app.media.rocket'))
            .width(60)
            .height(60)
            .padding(5)
            .offset({x:120,y:120})
            .borderRadius(25)
            .backgroundColor(Color.White)
            .onClick(()=>{
              this.myScroller.scrollEdge(Edge.Top)
            })
        }

      }
    }
  }

}
32.容器组件Tabs
常用于分页展示,顶部或底部的导航栏
语法:
// 起始:BarPosition.Start ,结尾:BarPosition.End
Tabs({ barPosition: BarPosition.XXX}){
//内容
}
.tarBar('tab名')
.vertical(true) //垂直导航:true 水平导航:false
.scrollable(true) //允许滑动:true 不允许滑动:false
.animationDuration(0) //切换动画的时间,毫秒
.barMode(BarMode.XXX) //设置为滚动效果:BarMode.Scrollable 默认为不滚动:BarMode.Fixed
(1)简单示例效果:

示例代码:
@Entry
@Component
struct Index {

 build() {
   Column() {
     Tabs(){
       TabContent(){
         Text('首页内容')
       }.tabBar('首页')

       TabContent(){
         Text('视频内容')
       }.tabBar('视频')

       TabContent(){
         Text('购物内容')
       }.tabBar('购物')

       TabContent(){
         Text('首页内容')
       }.tabBar('我的')
     }

   }
 }
}
(2)自定义TabBar-高亮切换
通过监听切换事件,获取索引值,记录高亮的索引
该每个tabBar起个标记,0,1,2
在tabBar内部比较(标记 ==记录的索引?高亮:不高亮)
| 属性 | 描述 |
| onChange(event:(index:number)=>void) | Tab页签切换后触发的事件 index 为当前的索引,索引从0开始 滑动切换,点击切换都会触发 |
| onTabBarClick(event:(index:number)=>void) | Tab页签点击后触发的事件。 Index 被点击的index索引,索引从0开始 |
示例效果:
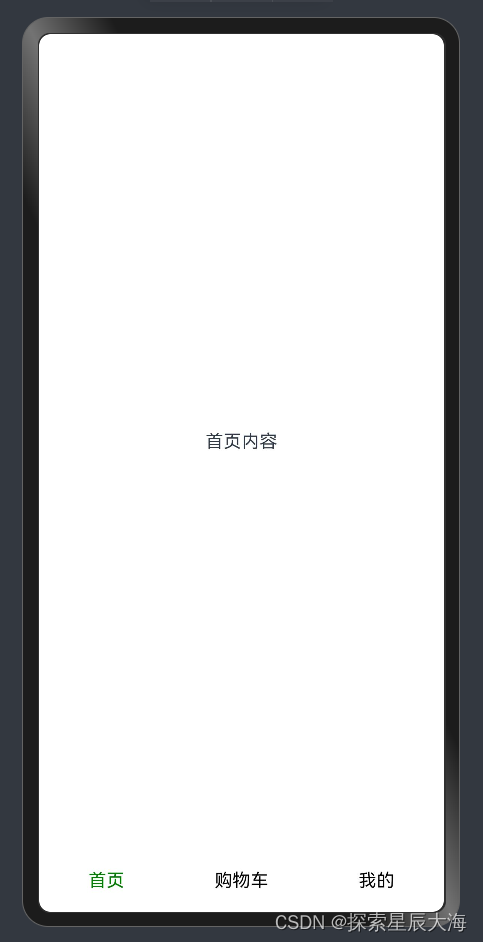
示例代码:
interface NavTitle {
  title: string,
  img: Resource,
  selectedImg:Resource
}

@Entry
@Component
struct Index {


  @State selectedIndex:number = 0
  @Builder
  myBuilder(itemIndex:number,title: string, img: Resource,selectedImg: Resource) {
    Column() {
      Image(itemIndex==this.selectedIndex ? selectedImg:img)
        .width(40)
      Text(title)
        .fontColor(itemIndex==this.selectedIndex ? Color.Green:Color.Black)
    }
  }

  @State navBottom: NavTitle[] = [
    {
      title: '首页',
      img: $r('app.media.home'),
      selectedImg:$r('app.media.selected_home')
    },
    {
      title: '购物车',
      img: $r('app.media.shop_cart'),
      selectedImg:$r('app.media.selected_shop_cart')
    },
    {
      title: '我的',
      img: $r('app.media.my'),
      selectedImg:$r('app.media.selected_my')
    }
  ]

  build() {
    Tabs({ barPosition: BarPosition.End }) {
      ForEach(this.navBottom, (item: NavTitle, index) => {
        TabContent() {
          Text(item.title + '内容')
        }
        .tabBar(this.myBuilder(index,item.title, item.img,item.selectedImg))

      })
    }.onChange((index:number)=>{
      this.selectedIndex = index
    })

  }

}
33.自定义组件
(1)基本的使用
语法:
@Component
struct 自定义组件名{
build(){
//描述UI
}
}
示例:
@Component
struct testComponent {
  build(){
    Text('Hello World')
      .fontSize(40)
  }
}

@Entry
@Component
struct Index {
  build(){
    Column(){
      testComponent()
    }
  }
}
(2)封装组件,然后通过导入的形式使用
一般情况下都不会将组件写一起写,都会对每个组件单独封装
封装的组件为:
interface NavTitle {
  title: string,
  img: Resource,
  selectedImg:Resource
}


@Preview
@Component
export struct NavBottomTabs {

  //成员变量
  @State currentTitle:string = ''
  //成员函数(不可传入覆盖)
  showTip(){
    AlertDialog.show({
      message:'你切换了tab'
    })
  }

  //成员函数(可传入覆盖)
  showTip2 = () => {
    AlertDialog.show({
      message:'你切换了tab2'
    })
  }

  @State selectedIndex:number = 0
  @Builder
  myBuilder(itemIndex:number,title: string, img: Resource,selectedImg: Resource) {
    Column() {
      Image(itemIndex==this.selectedIndex ? selectedImg:img)
        .width(40)
      Text(title)
        .fontColor(itemIndex==this.selectedIndex ? Color.Green:Color.Black)
    }
  }

  @State navBottom: NavTitle[] = [
    {
      title: '首页',
      img: $r('app.media.home'),
      selectedImg:$r('app.media.selected_home')
    },
    {
      title: '购物车',
      img: $r('app.media.shop_cart'),
      selectedImg:$r('app.media.selected_shop_cart')
    },
    {
      title: '我的',
      img: $r('app.media.my'),
      selectedImg:$r('app.media.selected_my')
    }
  ]

  build() {
    Tabs({ barPosition: BarPosition.End }) {
      ForEach(this.navBottom, (item: NavTitle, index) => {
        TabContent() {
          Text(this.currentTitle)
            .fontSize(40)
            .backgroundColor(Color.Red)


        }
        .tabBar(this.myBuilder(index,item.title, item.img,item.selectedImg))
      })
    }.onChange((index:number)=>{
      this.selectedIndex = index
      this.showTip()
      this.showTip2()
    })

  }

}
使用的方式:(可以修改原有的成员变量,和箭头函数的成员函数)
注意:不是箭头函数的成员函数不可覆盖
import {NavBottomTabs} from '../component/nav_bottom_tabs'

@Entry
@Component
struct Index {

  build(){
    Column(){
      NavBottomTabs({currentTitle:'你好',showTip2(){
        console.log('传入覆盖了showTip2函数的内容')
      }})
    }
  }
}
34.@BuidlerParam构造函数
可以让自定义组件允许外部传递UI(也可以传递子组件中的多个@BuidlerParam构造函数)
语法:
//组件部分
@Component
struct 自定义组件名{
@BuilderParam 自定义函数:() => void = this.defaultUI
@Builder
defaultUI(){
//自定义组件
}
build(){
Column(){
this.自定义函数()
}
}
}
//调用组件
@Entry
@Component
struct Index{
build() {
Column(){
自定义组件名() //方式一:不传递外部组件
自定义组件名() { //方式二:传递外部组件(覆盖原有默认组件)
// 组件内容
}
}
}
}
示例一:(外部传递了UI,默认覆盖原有的UI效果)
@Component
struct TitleComponent{
  @BuilderParam TitleName:()=>void = this.defaultTitle
  @Builder
  defaultTitle(){
    Text('还没命名标题')
      .fontSize(30)
  }

  build(){
    Column(){
      this.TitleName()
    }
  }
}

@Entry
@Component
struct Index {

  build(){
    Column(){

      TitleComponent(){
        Text('教学@BuilderParam')
          .fontSize(30)
      }

    }
  }
}
运行结果:

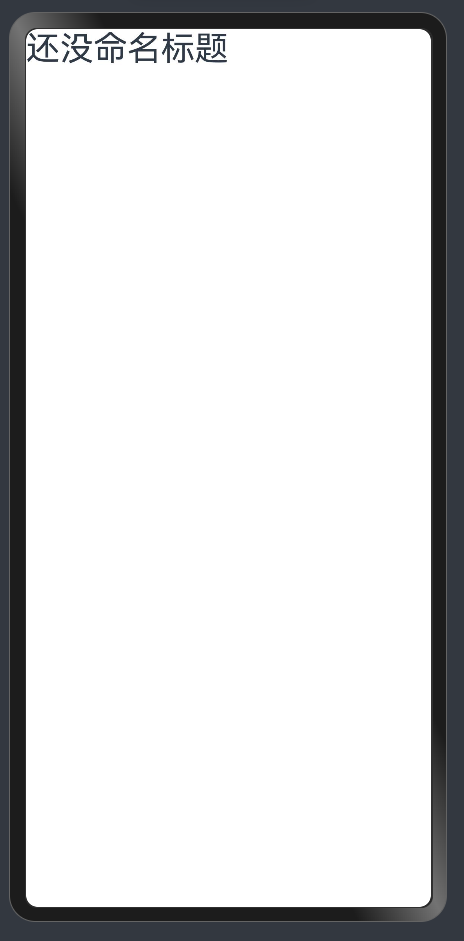
示例二:(外部没有传递UI,默认原有的UI效果)
@Component
struct TitleComponent{
  @BuilderParam TitleName:()=>void = this.defaultTitle
  @Builder
  defaultTitle(){
    Text('还没命名标题')
      .fontSize(30)
  }

  build(){
    Column(){
      this.TitleName()
    }
  }
}

@Entry
@Component
struct Index {

  build(){
    Column(){

      TitleComponent()

    }
  }
}
运行效果显示:
