使用Arduino和超声波传感器测量声速
Step 1: 硬件
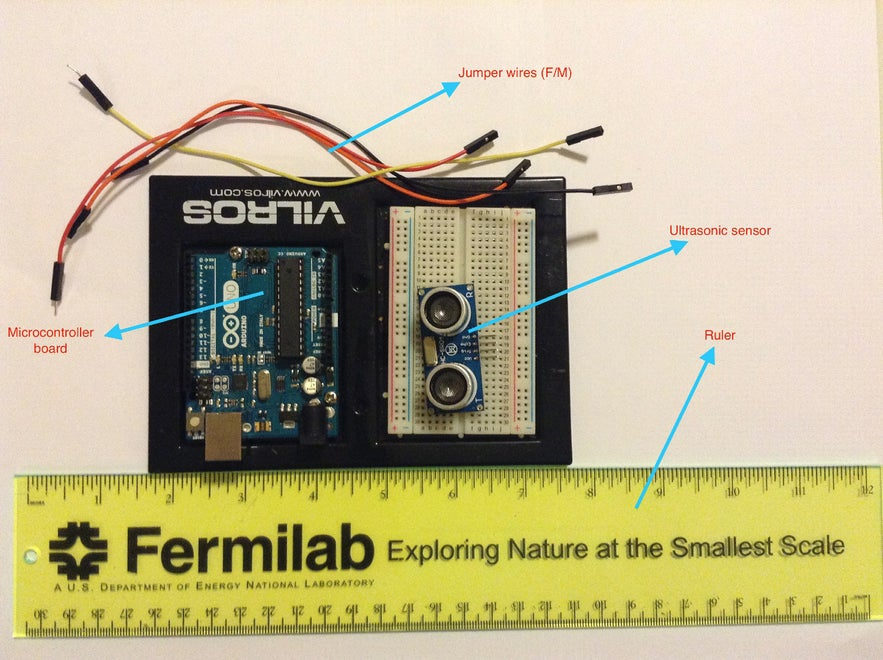
- Arduino Uno单片机
- 超声波传感器(HC-SR04)
- 标尺
- 跳线(母/公)
- 计算器
Step 2: Arduino Uno 微控制器
The Arduino Uno is a credit card size microcontroller board.
Arduino Uno是一款信用卡大小的微控制器板。
It has the following important components:
它具有以下重要组件:
-
Power pins 电源引脚
-
14 digital I/O pins
14 个数字 I/O 引脚 -
6 analog inputs 6 个模拟输入
-
16 MHz crystal oscillator
16 MHz晶体振荡器 -
Reset button 复位按钮
-
USB connection. USB 连接。
We can connect it to a computer with a USB cable or battery to get started.
我们可以使用USB电缆或电池将其连接到计算机以开始使用。
Arduino Uno can sense the environment by receiving input from a variety of sensors and can control LEDs, Servo motors, motors, and other actuators.
Arduino Uno 可以通过接收来自各种传感器的输入来感知环境,并可以控制 LED、伺服电机、电机和其他执行器。
Step 3: 关于超声波传感器
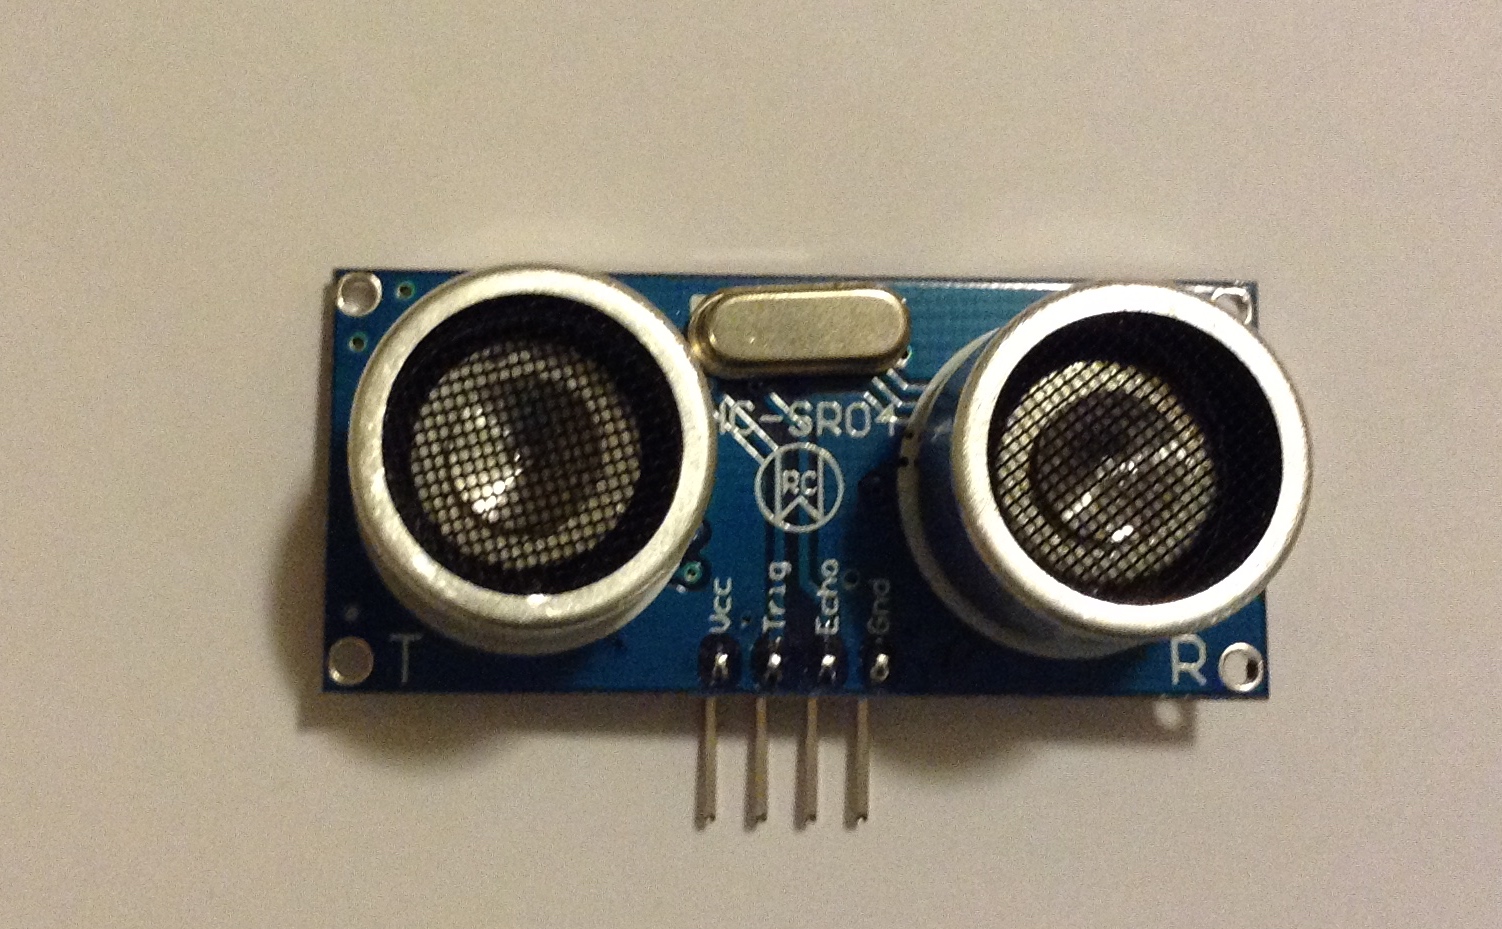
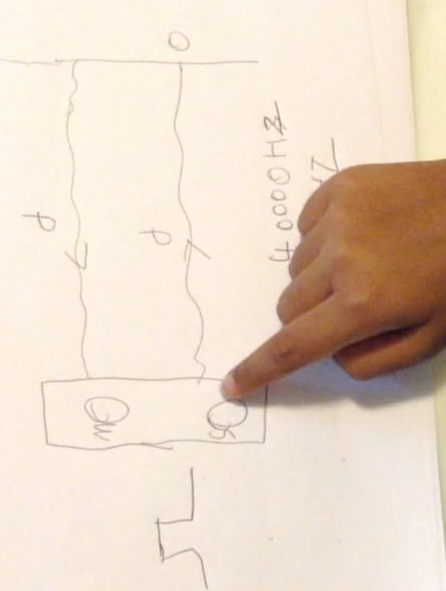
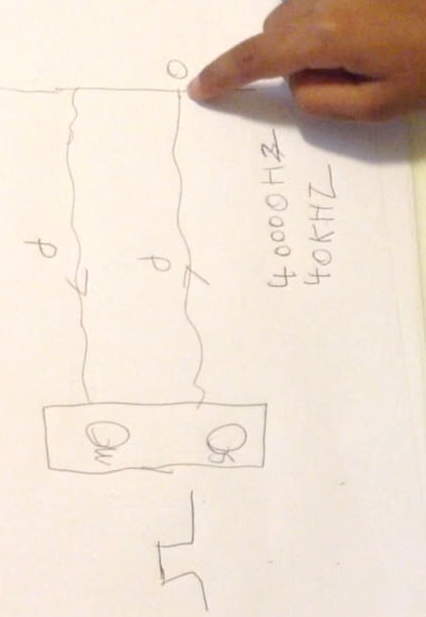
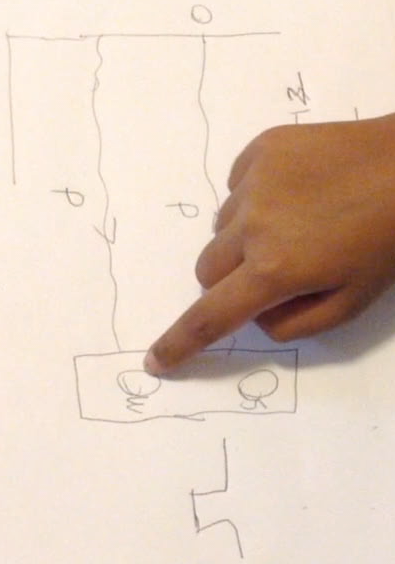
HC-SR04 ultrasonic modules have two transducers: one acts as a speaker (S) which converts electric pulses into sound waves and emits them with a frequency of 40000 Hz (40 kHz), the other acts as a microphone (M) to receive the ultrasonic waves that have bounced off an object (O).
HC-SR04超声波模块有两个换能器:一个充当扬声器(S),将电脉冲转换为声波并以40000Hz(40kHz)的频率发射,另一个充当麦克风(M)接收从物体(O)反射的超声波。
The timer will start on the microcontroller when the pulse is transmitted and timer will stop when echo waves are received by the microphone. That is how we get the total time for the wave to travel from S --> O --> M.
当脉冲传输时,定时器将在微控制器上启动,当麦克风接收到回波时,定时器将停止。这就是我们如何获得波从 S --> O --> M 传播的总时间。
Step 4: 将超声波传感器连接到微控制器
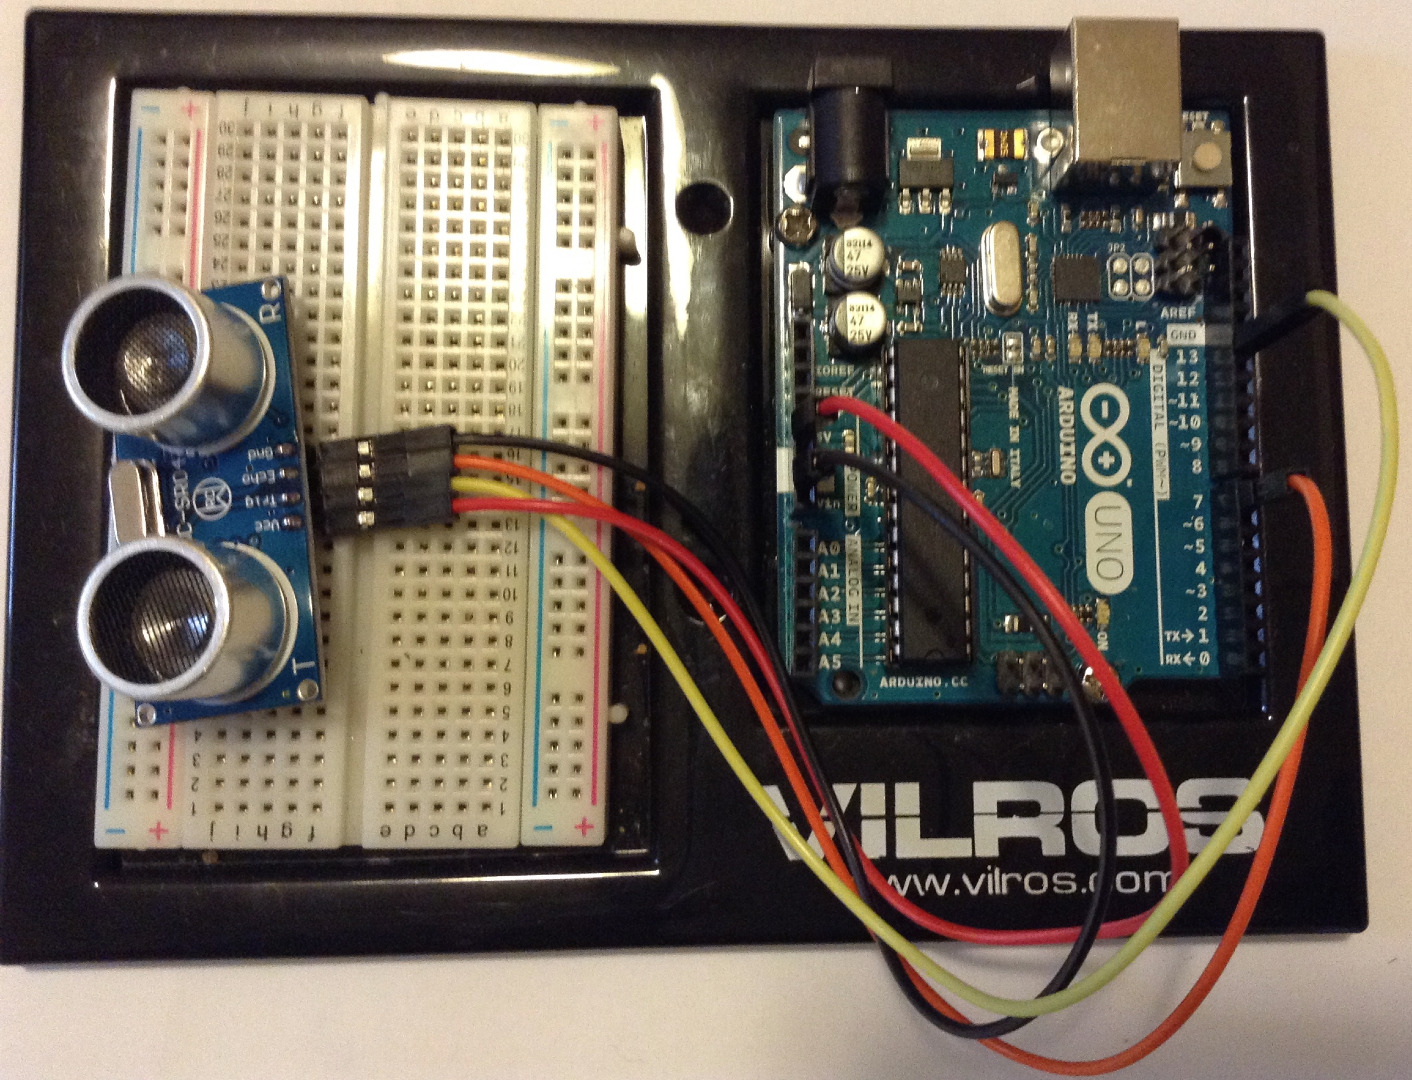
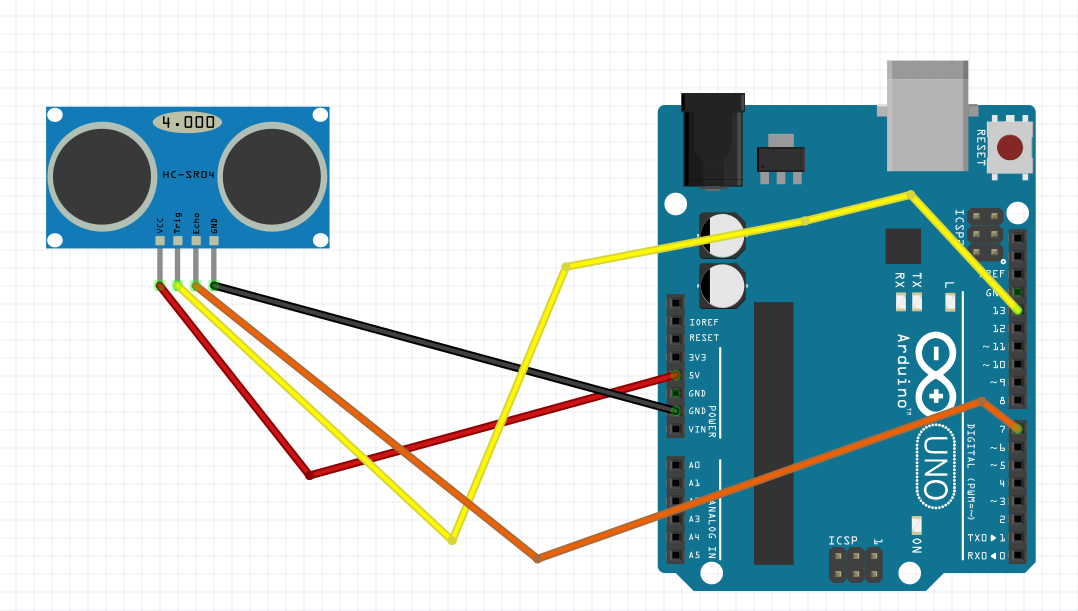
HC-SR04 Ultrasonic sensor has four pins:
HC-SR04超声波传感器有四个引脚:
-
Vcc: Operating Voltage pin
Vcc:工作电压引脚 -
Trig: Signal transmitting pin
Trig:信号发射引脚 -
Echo: bounced off signal sensing pin
回波:从信号感应引脚反弹 -
Gnd: Ground pin Gnd:接地引脚
Connect all these 4 pins to microcontroller board with jumper wires.
使用跳线将所有这 4 个引脚连接到微控制器板。
- Connect Vcc to 5V pin
- 将Vcc连接到5V引脚
- Gnd to ground pin
- Gnd接地引脚
- Trig to pin 13
- 三角到销 13
- Echo to pin 7
- 回声到引脚 7
You can choose any digital pins on the microcontroller for connecting Trig and Echo of the ultrasonic sensor.
您可以选择微控制器上的任何数字引脚来连接超声波传感器的 Trig 和 Echo。
Step 5:Arduino 软件程序 (Sketch)
The Arduino program basically will do the following steps:
Arduino程序基本上会执行以下步骤:
- Turn on Trig pin 打开 Trig 引脚
- Send out a 10 microsecond width pulse
发出 10 微秒宽度的脉冲 - Turn off theTrig pin
关闭Trig引脚 - Print the total time of travel of the pulse on the serial monitor.
在串行监视器上打印脉冲的总行程时间。
----------------------------------------------------------------
int trigPin = 13;  // set pin 13 as trig pin
int echoPin = 7;   // set pin 7 as echo pin
int time;
void setup() {

  Serial.begin(9600);

  pinMode(trigPin, OUTPUT);  // set trig pin as output, we send pulse through this

  pinMode(echoPin, INPUT);  // set echo pin as input, we detect echo through this pin
}
void loop() {
  //sending 10 microsecond width pulses, frequency ~ 40KHz

  digitalWrite(trigPin, LOW);
  delayMicroseconds(2000);

  digitalWrite(trigPin, HIGH);    //trig pin
  delayMicroseconds(10);  //pulse width 10 microseconds
  digitalWrite(trigPin, LOW);     //trig pin off
  time = pulseIn(echoPin, HIGH);  //pulseIn(), function return time in microseconds

  //print time on the serial monitor

  Serial.print(" Time taken for the pulse to travel:  ");
  Serial.print(time);
  Serial.println(" microseconds");
  delay(2000);
}
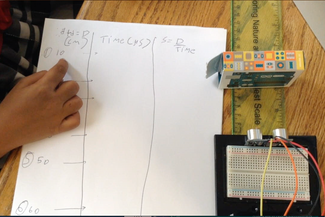
Step 6: 实验设置、程序和数据采集
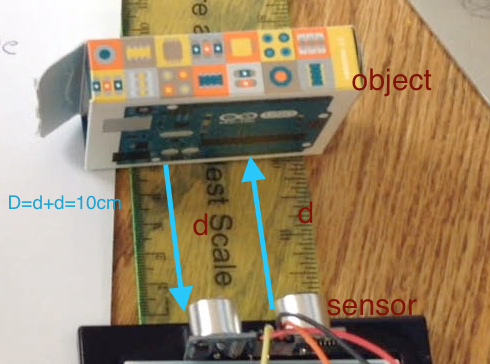
Before starting the experiment note down the room temperature, in our case it was 75 degrees F.
在开始实验之前,记下室温,在我们的例子中是 75 华氏度。
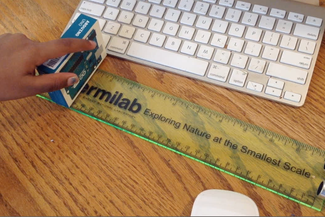
- We need to put the sensor at 0 cm on the ruler
我们需要将传感器放在尺子上的0厘米处
-
Put your object at any desired position on the ruler, we kept it at 5cm, so the total distance (D) is 10 centimeters.
将您的物体放在尺子上任何想要的位置,我们将其保持在 5 厘米,因此总距离 (D) 为 10 厘米。
-
Upload the program to microcontroller with USB cable.
使用USB线将程序上传到微控制器。
-
open the serial monitor, and we can see the total time of travel of the pulse, write that on data sheet.
打开串行监视器,我们可以看到脉冲的总行程时间,写在数据表上。
-
Move the object to 10 cm position on the scale, now the total distance is 20 cm, and write down the time from serial monitor.
将物体移动到刻度上的 10 厘米位置,现在总距离为 20 厘米,然后记下串行监视器的时间。
-
We took data (time) for 6 trails (at different positions), if you have a longer ruler then you can take data for more data points.
我们采集了 6 条轨迹(不同位置)的数据(时间),如果您有更长的尺子,那么您可以获取更多数据点的数据。
Step 7: Data Analysis and Experimental Result. 第 7 步:数据分析和实验结果。
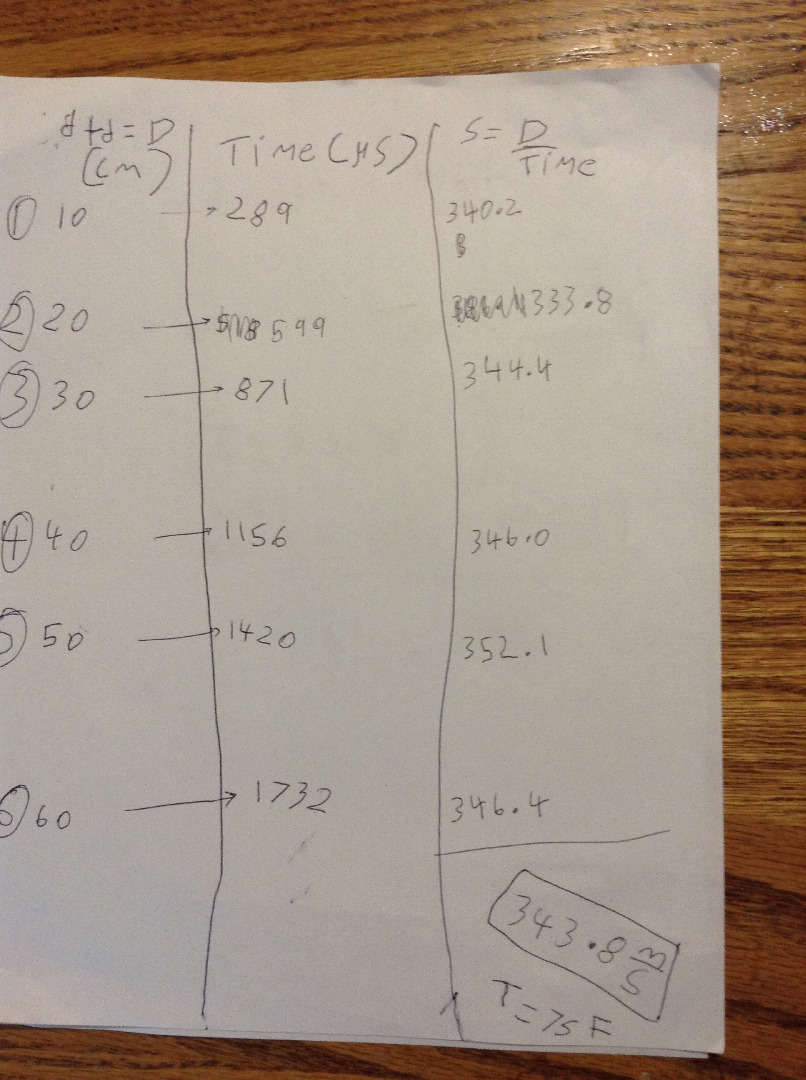
After noting down the total time for different distances, now we can calculate the speed of sound:
记下不同距离的总时间后,现在我们可以计算声速:
Speed of sound = Distance/Time (S=D/T)
声速 = 距离/时间 (S=D/T)
For example: 例如:
Distance = 10 cm, Time = 289 microseconds = 28910-6 s
距离 = 10 厘米,时间 = 289 微秒 = 28910^-6 秒
S = D/T = 10 cm / 28910-6 s = 0.03460207612 *104 m/s
S = D/T = 10 cm / 28910-6 s = 0.03460207612 *104 米/秒
S = 346.02 m/s
小号 = 346.02 米/秒
After calculating the speed of sound for different distances, finally take the average (sum of all speeds divided by 6).
在计算不同距离的声速后,最后取平均值(所有速度的总和除以 6)。
The average S = 343.8 m/s at 75 F.
75 F 时的平均 S = 343.8 m/s。
Step 8: Confirmation 第 8 步:确认

The speed of sound in our experiment is 343.8 m/s
我们实验中的声速为 343.8 m/s
Speed of sound waves traveling in a medium will change based on the temperature (T) of the medium.
声波在介质中传播的速度会根据介质的温度 (T) 而变化。
Speed of sound in air as a function of temperature : S = 331.4 + 0.6Tc m/s
空气中的声速随温度的函数:S = 331.4 + 0.6Tc m/s
where Tc = temperature in degrees centigrade.
其中 Tc = 温度,单位为摄氏度。
Based on this formula, the accepted speed of sound at 75 F (23.88 degree Centigrade), S = 345.9 m/s
根据该公式,75 F(23.88 摄氏度)时可接受的声速,S = 345.9 m/s
percent error = [ |accepted value - experimental value| / (accepted value) ] * 100 %
误差百分比 = [ |接受值 - 实验值| / (接受值) ] * 100 %
percent error = 0.6 % (pretty close)
误差百分比 = 0.6 %(非常接近)