@RestController
@RequestMapping ( "/demo" )
public class DemoController {
@GetMapping ( "/hello" )
public String getHello ( ) {
return "SpringBoot HelloWorld! 123" ;
}
@GetMapping ( "/{id}" )
public User getUser ( @PathVariable Integer id) {
Map < Integer , User > = new HashMap < > ( ) ;
userMap. put ( 1 , new User ( "张一" ) ) ;
userMap. put ( 2 , new User ( "张二" ) ) ;
userMap. put ( 3 , new User ( "张三" ) ) ;
return userMap. get ( id) ;
}
@PostMapping ( "/add" )
public Map < String , Object > addUser ( @RequestBody User user) {
Map < String , Object > = new HashMap < > ( ) ;
map. put ( "code" , 200 ) ;
map. put ( "msg" , "添加成功" ) ;
System . out. println ( user) ;
return map;
}
@PutMapping ( "/update" )
public Map < String , Object > updateUser ( @RequestBody User user) {
Map < String , Object > = new HashMap < > ( ) ;
map. put ( "code" , 200 ) ;
map. put ( "msg" , "修改成功" ) ;
System . out. println ( user) ;
return map;
}
@DeleteMapping ( "/delete/{id}" )
public Map < String , Object > deleteUser ( @PathVariable Integer id) {
Map < String , Object > = new HashMap < > ( ) ;
map. put ( "code" , 200 ) ;
map. put ( "msg" , "删除成功" ) ;
System . out. println ( id) ;
return map;
}
RestTemplate是Spring提供的,用于访问Rest服务的,提供了许多便捷访问远程Http服务的方法。传统情况下在Java代码里访问restful服务,一般使用Apache的HttpClient。由于此种方法使用起来太过繁琐,所以,Spring提供了一种简单、便捷的模板类来进行操作,它就是RestTemplate。 @RestController
@RequestMapping ( "/rest" )
public class RestTemController {
private RestTemplate restTemplate;
public RestTemController ( RestTemplateBuilder restTemplateBuilder) {
this . restTemplate = restTemplateBuilder. build ( ) ;
}
@RequestMapping ( "/testRestQuery" )
public String testRestTemplate1 ( ) {
Integer id = 1 ;
User user = restTemplate. getForObject ( "http://localhost:8091/springboot_dev/demo/{id}" , User . class , id) ;
if ( user != null ) {
return user. toString ( ) ;
}
return "用户不存在" ;
}
@RequestMapping ( "/testRestAdd" )
public String testRestTemplate2 ( ) {
User user = new User ( "张三" , 20 , new Date ( ) , "北京市海淀区" , Arrays . asList ( "打球" , "跑步" , "钓鱼" ) , new HashMap < String , Object > ( ) { {
put ( "朋友1" , "小明" ) ;
put ( "朋友2" , "小花" ) ;
put ( "朋友3" , "小张" ) ;
} } ) ;
ResponseEntity < Map > = restTemplate. postForEntity ( "http://localhost:8091/springboot_dev/demo/add" , user, Map . class ) ;
return Objects . requireNonNull ( responseEntity. getBody ( ) ) . toString ( ) ;
}
@RequestMapping ( "/testRestUpdate" )
public String testRestTemplate3 ( ) {
User user = new User ( "张四" , 20 , new Date ( ) , "西安市海淀区" , Arrays . asList ( "打球" , "跑步" , "钓鱼" ) , new HashMap < String , Object > ( ) { {
put ( "朋友1" , "小明" ) ;
put ( "朋友2" , "小花" ) ;
put ( "朋友3" , "小张" ) ;
} } ) ;
restTemplate. put ( "http://localhost:8091/springboot_dev/demo/update" , user) ;
return "成功修改" ;
}
@RequestMapping ( "/testRestUpdate2" )
public String testRestTemplate4 ( ) {
User user = new User ( "张四" , 20 , new Date ( ) , "西安市海淀区" , Arrays . asList ( "打球" , "跑步" , "钓鱼" ) , new HashMap < String , Object > ( ) { {
put ( "朋友1" , "小明" ) ;
put ( "朋友2" , "小花" ) ;
put ( "朋友3" , "小张" ) ;
} } ) ;
HttpEntity < User > = new HttpEntity < > ( user) ;
ResponseEntity < Map > = restTemplate. exchange ( "http://localhost:8091/springboot_dev/demo/update" , HttpMethod . PUT , httpEntity, Map . class ) ;
return Objects . requireNonNull ( response. getBody ( ) ) . toString ( ) ;
}
@RequestMapping ( "/testRestDelete" )
public String testRestTemplate5 ( ) {
Integer id = 1 ;
ResponseEntity < Map > = restTemplate. exchange ( "http://localhost:8091/springboot_dev/demo//delete/{id}" , HttpMethod . DELETE , null , Map . class , id) ;
return Objects . requireNonNull ( response. getBody ( ) ) . toString ( ) ;
}
}
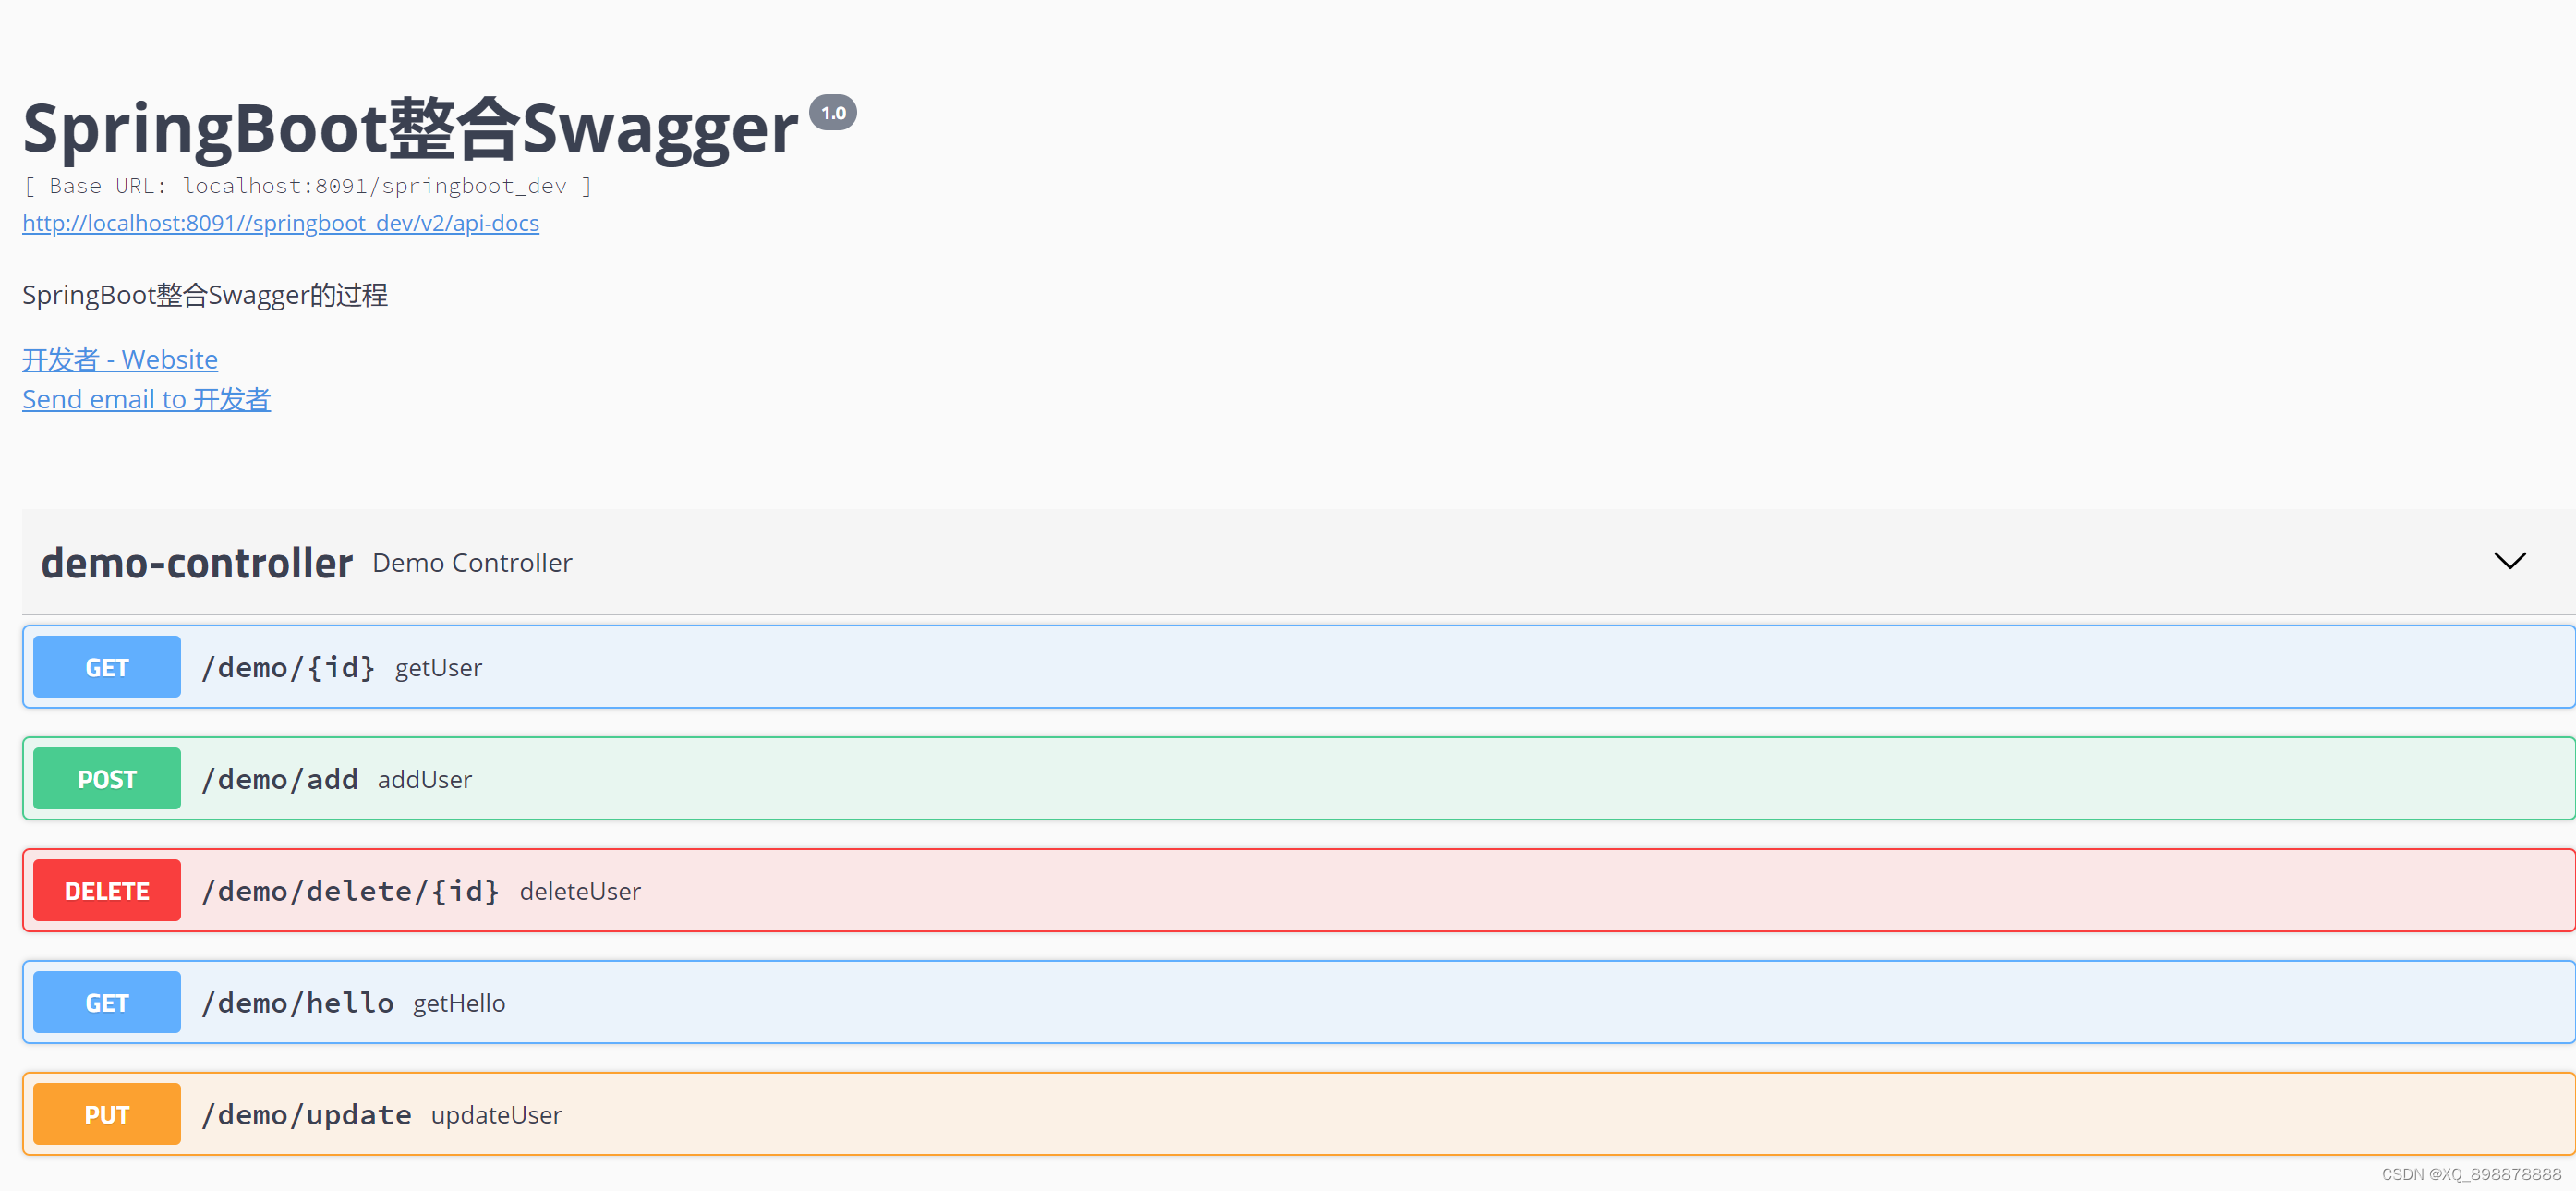
Swagger是一个用于生成、描述和调用 RESTful 接口的 Web 服务。通俗的来讲,Swagger 就是将项目中所有(想要暴露的)接口展现在页面上,并且可以进行接口调用和测试的服务。有以下 3 个重要的作用:
将项目中所有的接口展现在页面上,这样后端就不需要专门为前端编写专门的接口文档; 当接口更新之后,只需要修改代码中的 Swagger 描述就可以实时生成新的接口文档了,从而规避了接口文档老旧不能使用的问题; 通过 Swagger 页面,我们可以直接进行接口调用,降低了项目开发阶段的调试成本。
< dependency> < groupId> </ groupId> < artifactId> </ artifactId> < version> </ version> </ dependency> < dependency> < groupId> </ groupId> < artifactId> </ artifactId> < version> </ version> </ dependency> @Configuration
@EnableSwagger2
public class SwaggerConfig {
@Bean
public Docket createRestApi ( ) {
return new Docket ( DocumentationType . SWAGGER_2 )
. useDefaultResponseMessages ( false )
. pathMapping ( "/" )
. apiInfo ( apiInfo ( ) )
. select ( )
. apis ( RequestHandlerSelectors . basePackage ( "com.trs.controller" ) )
. paths ( PathSelectors . any ( ) )
. build ( ) ;
}
private ApiInfo apiInfo ( ) {
return new ApiInfoBuilder ( )
. title ( "SpringBoot整合Swagger" )
. description ( "SpringBoot整合Swagger的过程" )
. version ( "1.0" )
. contact ( new Contact ( "开发者" , "www.baodu.com" , "12345@qq.com" ) )
. build ( ) ;
}
}
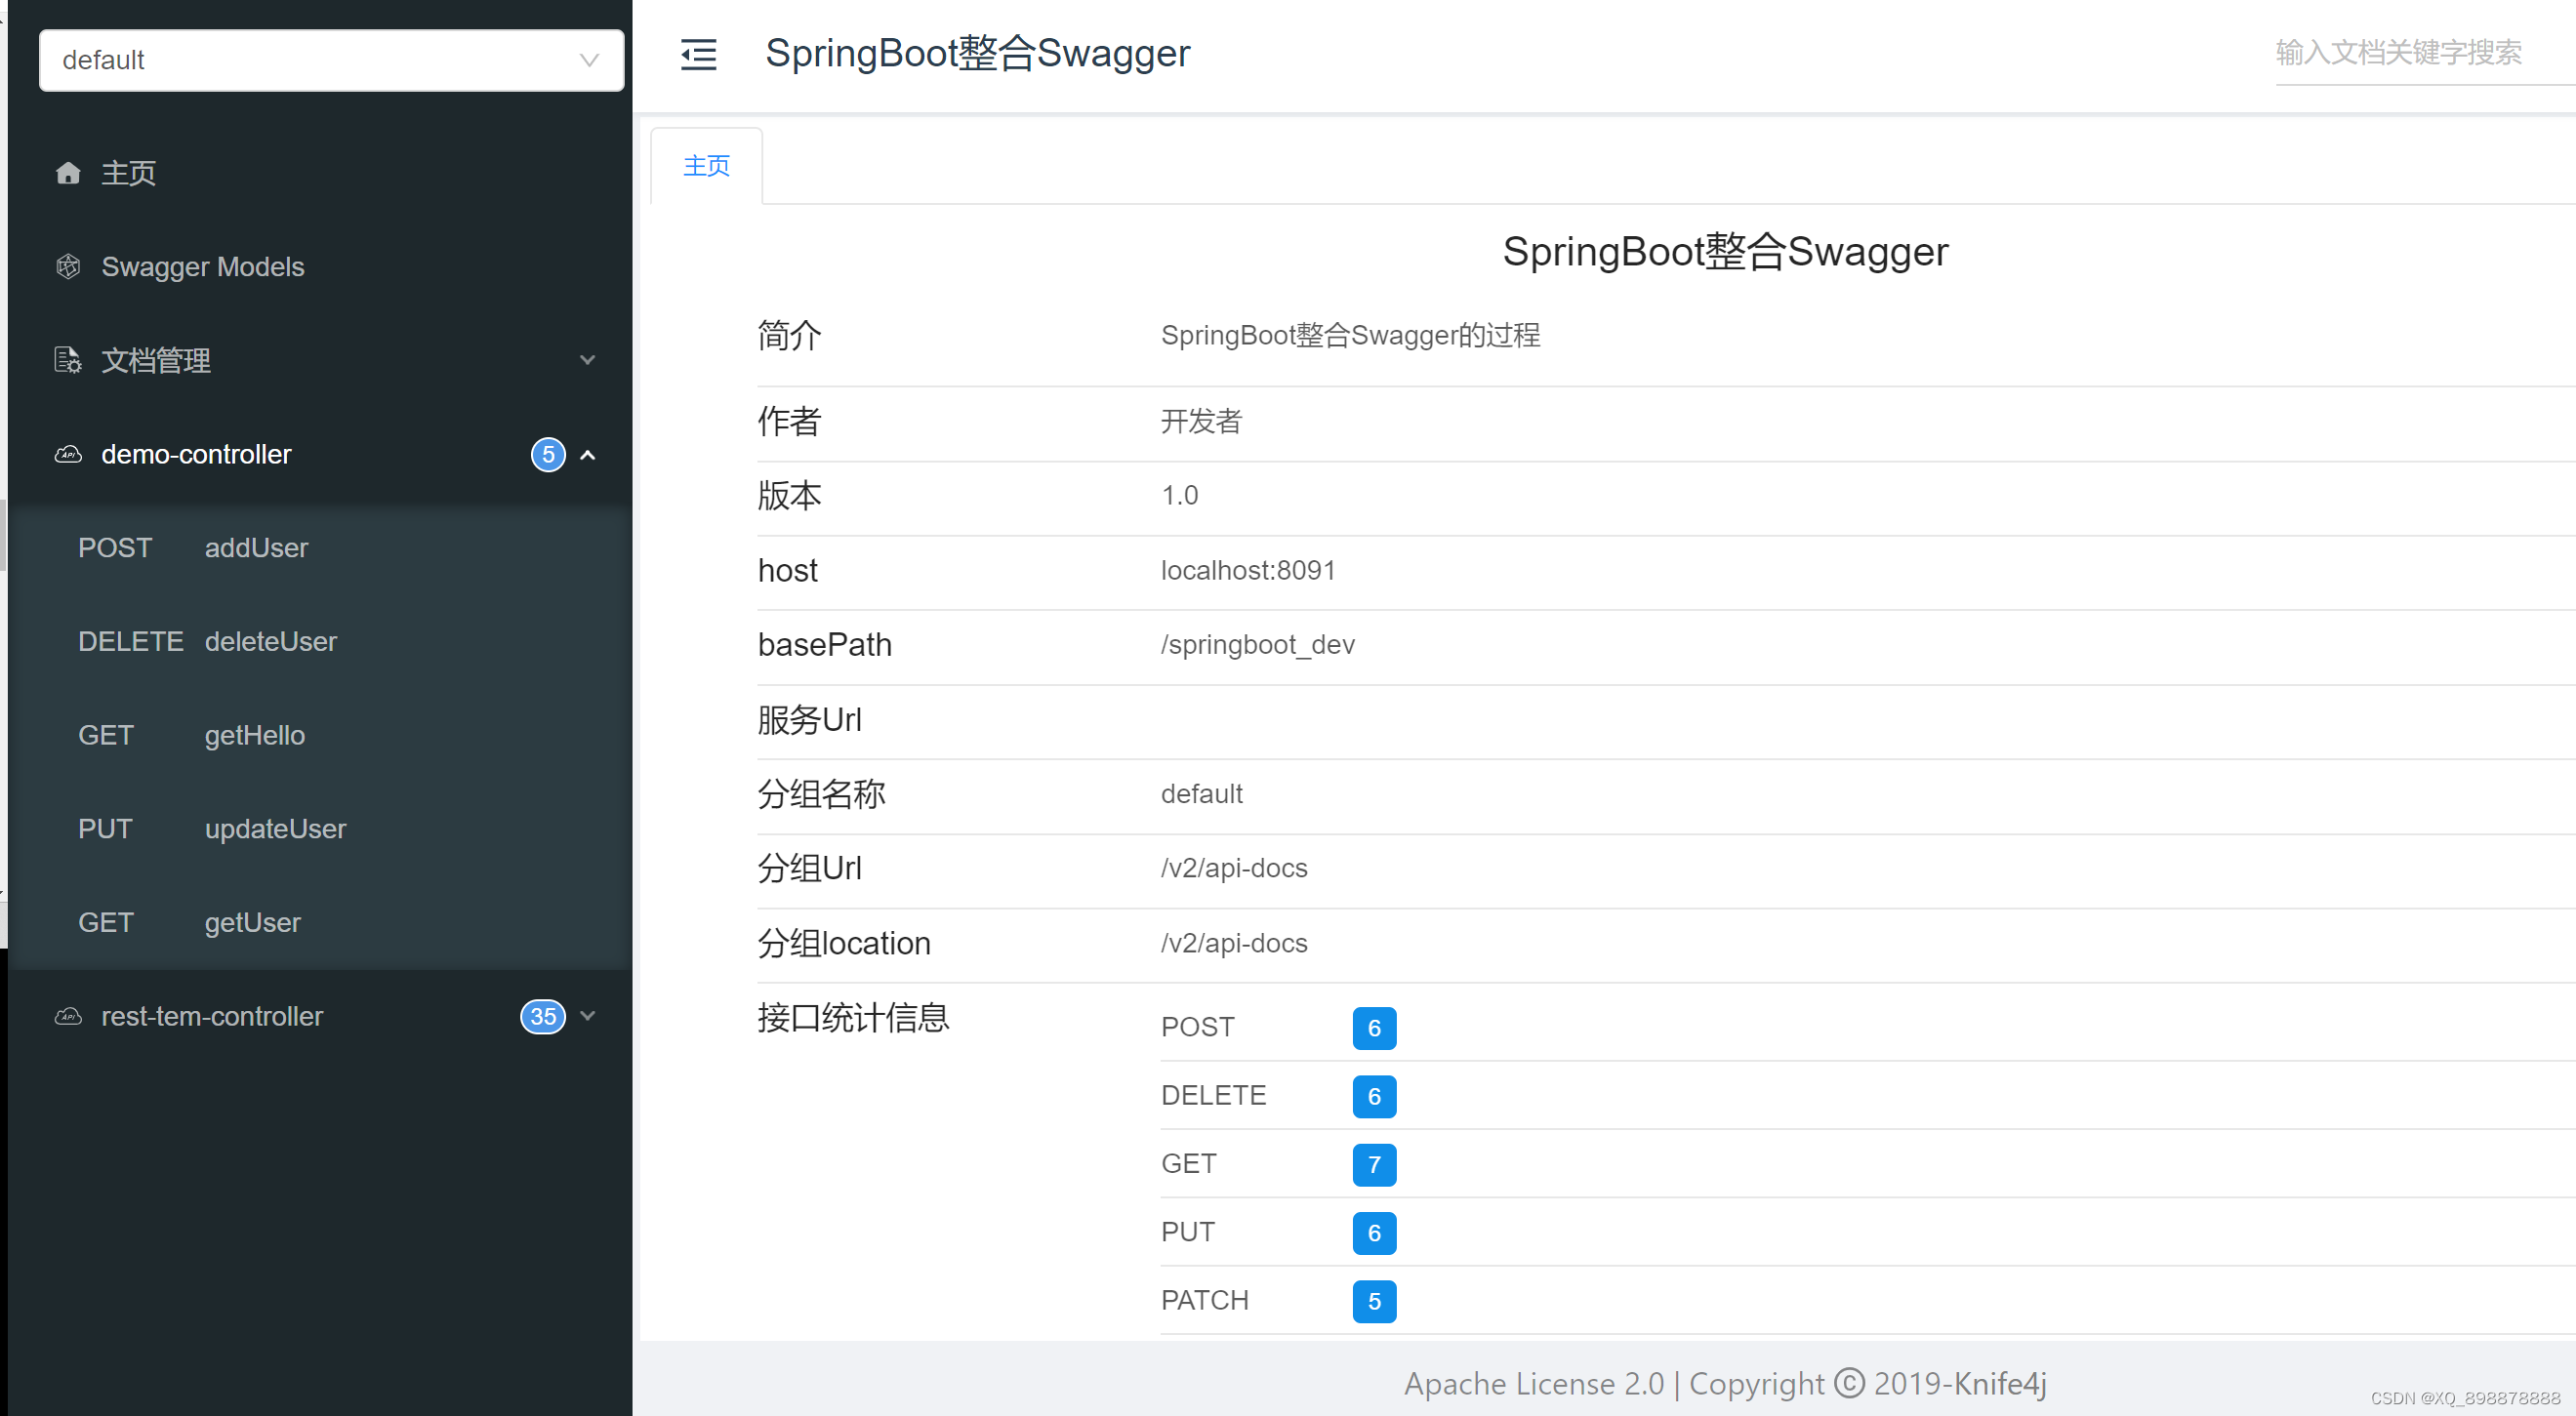
访问地址 :http://localhost:8091//springboot_dev/swagger-ui.html knife4j是Swagger2的增强版,更加友好的操作页面,更多强大的功能,基于Swagger2和 OpenAPI,提供了一个更好的接口文档界面。引入依赖 < dependency> < groupId> </ groupId> < artifactId> </ artifactId> < version> </ version> </ dependency> @Configuration
@EnableSwagger2WebMvc
public class SwaggerConfig {
@Bean
public Docket createRestApi ( ) {
return new Docket ( DocumentationType . SWAGGER_2 )
. useDefaultResponseMessages ( false )
. pathMapping ( "/" )
. apiInfo ( apiInfo ( ) )
. select ( )
. apis ( RequestHandlerSelectors . basePackage ( "com.trs.controller" ) )
. paths ( PathSelectors . any ( ) )
. build ( ) ;
}
private ApiInfo apiInfo ( ) {
return new ApiInfoBuilder ( )
. title ( "SpringBoot整合Swagger" )
. description ( "SpringBoot整合Swagger的过程" )
. version ( "1.0" )
. contact ( new Contact ( "开发者" , "www.baodu.com" , "12345@qq.com" ) )
. build ( ) ;
}
}
访问地址 :http://localhost:8091//springboot_dev/doc.html 作用 :修饰Controller类中的方法,用于说明一个http请求的操作。相关属性 :
value:方法的说明;notes:提示内容;tags:可替代value;作用 :修饰Controller类中方法的参数,用于设置参数说明相关属性 :
name:参数名;
value:参数说明;
required:是否必填,默认为false;
@RestController
@RequestMapping ( "/user" )
@Api ( tags = { "用户API" } , value = "用户API" )
public class UserController {
@GetMapping ( "/getUserInfo" )
@ApiOperation ( value= "获取用户信息" , tags= { "获取用户信息" } , notes= "注意参数必须一致" )
public User getUserInfo (
@ApiParam ( name= "userId" , value= "用户Id" , required= true )
Long userId,
@ApiParam ( name= "userName" , value= "用户名称" , required= false )
String userName) {
User user = userService. getUserInfo ( ) ;
return user;
}
}
作用 :修饰类、方法、参数等等,表示不显示在swagger的文档中。作用 :用于对方法中的单个参数进行说明;相关属性 :
name:参数名;value:参数说明;dataType:数据类型;paramType:参数类型;required:是否必须传值;example:举例说明;@ApiOperation ( "查询用户列表" )
@GetMapping ( "/select" )
@ApiImplicitParam ( name = "name" , value = "用户名" , dataType= "String" , paramType = "query" , required = true , example = "张三" )
public void queryList ( String name) { }
作用 :用于对方法中的多个参数进行说明,包含了多个@ApiImplicitParam。@ApiOperation ( "查询用户列表" )
@GetMapping ( "/select" )
@ApiImplicitParams ( {
@ApiImplicitParam ( name= "name" , value= "用户名" , dataType= "string" , paramType = "query" , example= "xingguo" ) ,
@ApiImplicitParam ( name= "id" , value= "用户id" , dataType= "long" , paramType = "query" )
} )
public void queryList ( Long id, String name) { }
作用 :对响应结果进行说明; @GetMapping ( "/getAiResult" )
@ApiOperation ( "信息软删除" )
@ApiResponses ( { @ApiResponse ( code = 200 , message = "操作成功" ) ,
@ApiResponse ( code = 500 , message = "服务器内部异常" ) ,
@ApiResponse ( code = 405 , message = "权限不足" ) } )
public RtnResult remove ( Long id) { }
作用 :修饰对象类,并对对象类进行说明,用于Model实体类接收参数的场景。相关属性 :
value:设置对象名称;description:对对象类进行具体描述;作用 :修饰对象类中的属性,并对属性进行说明;相关属性 :
value:字段说明;name:字段名称;dataType:数据类型;required:是否必填,默认false;example:举例说明;hidden:是否隐藏;@ApiModel ( value = "司法信号实体" , description= "司法信号对象" )
public class JusticeSiganlModel implements Serializable {
@ApiModelProperty ( name = "eid" , value = "企业Id" , example = "qa64b0ed4b4093" )
private String eid;
@ApiModelProperty ( name = "entName" , value = "企业名称" , required = "true" , hidden= "true" )
private String entName;
}
