手机实现录音功能,安卓和苹果都可。功能,点击开始录制录音后,随时可以停止录音,如果不点击停止最多录制15秒。
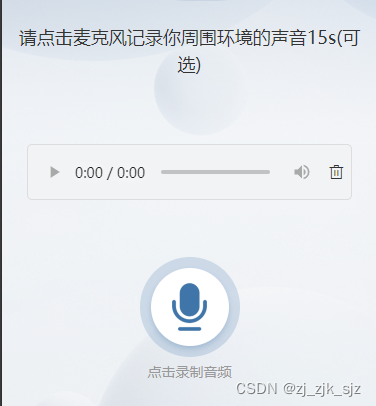
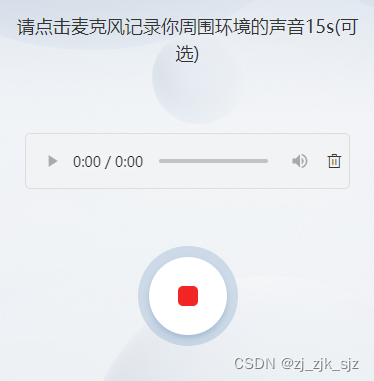
页面结构
<!--音频-->
<div class="audio-box">
    <audio id="audioPlayer"
           controls
           controlslist="noplaybackrate nodownload"
           preload="auto"></audio>
    <i @click="deleteAudio" class="el-icon-delete"></i>
</div>

<!--录制按钮-->
<div class="out-ring">
	<!--未录制状态-->
    <div @click="startRecording" v-show="!isRecording" class="in-ring">
        <img src="@/assets/img/audio.png" alt="" style="height:48px;">
    </div>
    <!--录制中-->
    <div v-show="isRecording" @click="stopClick" class="in-ring">
        <div class="red-square"></div>
    </div>
</div>
<!--录制提示-->
<div v-show="!isRecording" class="tip">点击录制音频</div>
函数
/**
 * 开始录音
 */
async startRecording() {
    let that = this
    try {
        const stream = await navigator.mediaDevices.getUserMedia({audio: true});
        that.mediaRecorder = new MediaRecorder(stream);
        that.mediaRecorder.ondataavailable = e => {
            that.audioChunks.push(e.data);
        };
        that.mediaRecorder.start();
        that.isRecording = true;

        that.timer = setTimeout(that.stopRecording, 15000);

    } catch (err) {
        that.$toast('录音失败')
    }
},

/**
 * 结束录音
 */
stopRecording() {
    this.mediaRecorder.stop();
    this.mediaRecorder.onstop = () => {
        let audioBlob = new Blob(this.audioChunks, {'type': 'audio/mp3; codecs=opus'});
        let soundUrl = URL.createObjectURL(audioBlob);

        //生成file对象
        let file = new File([audioBlob], 'yinpin.mp3', {
            type: 'application/json',
            lastModified: Date.now()
        })

        //页面播放录音
        this.showAudio(soundUrl)

        this.$store.commit('SET_AUDIO_FILE', file)
        this.$store.commit('SET_AUDIO_URL', soundUrl)

        // 重置音频块数组以备下次录音
        this.audioChunks = [];
    };
    this.isRecording = false;
    this.$toast('录音结束')
},

/**
 * 停止录音点击事件
 */
stopClick() {
    clearTimeout(this.timer);
    this.timer = null
    this.stopRecording()
},

/**
 * 展示音频
 */
showAudio(Url) {
    let audio = document.getElementById('audioPlayer');
    audio.src = Url;
    audio.load();
},

/**
 * 删除音频
 */
deleteAudio() {
    this.showAudio('');
    this.audioChunks = [];
    this.$store.commit('SET_AUDIO_FILE', null)
    this.$store.commit('SET_AUDIO_URL', null)
}
注意,在项目尚未发布时,也就是前端在手机上测试录音功能时,会出现navigator.mediaDevices未定义的情况,可以百度搜索,有三种解决办法。我的解决办法是:使用内网穿透,生成一个公网ip,就可以解决这个问题。具体教程可以参考这边文章:https://blog.csdn.net/qq_42978230/article/details/113618902。使用时,注意将本地地址改为localhost,文章中未提及这个。
