黑*头条_第3章_文章详情前后端成形记
文章目录
- 黑*头条_第3章_文章详情前后端成形记
- 文章详情前后端成形记
- 1 分布式主键封装
- 1.1 依赖导入
- 1.2 配置文件
- 1.3 枚举封装
- 1.4 序列封装
- 1.5 Client封装
- 1.6 Config封装
- 1.7 Sequences封装
- 1.8 使用案例
- 1.9 扩展自增表
- 2 App文章详情
- 2.1 功能需求
- 2.2 前端需求
- 2.2.1 详情页需求
- 2.2.2 内容页需求
- 2.3 术语定义
- 2.3.1【行为实体】
- 2.3.2 【ZKSEQUENCE】
- 2.3.3 【DN】
- 2.4 后端定义
- 2.4.1 路由定义
- 2.4.2 工程定义
- 2.4.3 接口定义
- 2.5 前端定义
- 2.5.1 组件定义
- 2.5.2 页面定义
- 2.5.3 路由定义
- 2.6 结构定义
- 3 app文章详情-后台接口开发
- 3.1 文章内容接口
- 3.1.1 接口定义
- 基本定义
- CODE定义
- 3.1.2 Mapper实现
- 3.1.3 service代码实现
- 3.1.4 接口定义及controller
- 3.1.5 单元测试
- 3.2 文章关系接口
- 3.2.1 接口定义
- 基本定义
- CODE定义
- 3.2.2 Mapper实现
- 3.2.3 service代码实现
- 3.2.4 接口定义及controller实现
- 3.2.5 单元测试
- 3.3 关注接口
- 3.3.1 工程创建
- 3.3.2 初始项目
- 3.3.3 接口定义
- 基本定义
- CODE定义
- 3.3.4 Mapper实现
- 3.3.5 service代码实现
- 3.3.6 接口定义及controller定义
- 3.3.7 单元测试
- 3.4 点赞接口
- 3.4.1 接口定义
- 基本定义
- CODE定义
- 3.4.2 Mapper实现
- 3.4.3 service代码实现
- 3.4.4 接口定义及controller定义
- 3.4.5 单元测试
- 3.5 不喜欢接口
- 3.5.1 接口定义
- 基本定义
- CODE定义
- 3.5.2 Mapper实现
- 3.5.3 service代码实现
- 3.5.4 接口定义及controller实现
- 3.6 app文章详情-阅读接口
- 3.6.1基本定义
- 3.6.2 CODE定义
- 3.6.3 Mapper实现
- 3.6.4 service代码实现
- 3.6.5 接口定义及controller实现
- 3.6.6 单元测试
- 4 后端开发思考
- 5 前端详情开发
- 5.1 创建文件
- 5.2 Model定义
- 5.3 实现Api
- 5.3.1 store调整
- 5.3.2 request调整
- 5.3.2.1 基本调整
- 5.3.2.2 完整代码
- 5.3.3 Article api代码
- 5.3.4 Home api代码
- 5.4 实现VIEW
- 5.5 实现VM
- 5.5.1 mounted
- 5.5.2 created
- 5.5.3 destoryed
- 5.5.4 loadInfo
- 5.5.5 loadBehavior
- 5.5.6 like
- 5.5.7 unlike
- 5.5.8 share
- 5.5.9 collection
- 5.5.10 forward
- 5.5.11 follow
- 5.5.12 read
- 5.5.13 其它方法
- 5.6 实现Style
- 5.7 路由配置
- 5.8 页面跳转
- 5.9 效果演示
- 5.5.13 其它方法
- 5.6 实现Style
- 5.7 路由配置
- 5.8 页面跳转
- 5.9 效果演示
文章详情前后端成形记
- 熟悉Zookeeper的封装集成
- 熟悉分布式自增主键的封装
- 熟悉页面场景行为的收集
- 掌握文章详情页面的需求和实现流程
- 掌握mockMvc接口测试的使用场景和方法
1 分布式主键封装
在项目中支持分组扩展的数据表的ID需要在分片之前分配好数据主键ID的值,此功能在Mycat、Redis、ZK中都可以轻松实现,考虑中间件负载均匀和演示ZK实战应用的目的,项目中使用ZK来生成分布式自增ID,在实际项目中这种方式也是很常用的手段。
1.1 依赖导入
项目中使用Curator客户端连接使用ZK,在heima-leadnews\pom.xml中引入依赖管理包:
<properties>
    <curator.version>4.2.0</curator.version>
</properties>
<!-- curator ZK 客户端 -->
<dependency>
    <groupId>org.apache.curator</groupId>
    <artifactId>curator-framework</artifactId>
    <version>${curator.version}</version>
</dependency>
<dependency>
    <groupId>org.apache.curator</groupId>
    <artifactId>curator-recipes</artifactId>
    <version>${curator.version}</version>
</dependency>
在heima-leadnews\heima-leadnews-common\pom.xml中引入包:
<!-- curator ZK 客户端 -->
<dependency>
    <groupId>org.apache.curator</groupId>
    <artifactId>curator-framework</artifactId>
</dependency>
<dependency>
    <groupId>org.apache.curator</groupId>
    <artifactId>curator-recipes</artifactId>
</dependency>
1.2 配置文件
ZK自增组件功能,几乎在所有的微服务中都会用到,因此应抽取到common中公用,其配置文件为heima-leadnews-common\src\main\resources\zookeeper.properties,存储内容如下:
# zk host地址
zk.host=192.168.220.145:2181
# zk自增存储node
zk.sequence-path=/heima-leadnews/sequence/
1.3 枚举封装
创建com.heima.common.zookeeper.sequence.ZkSequenceEnum文件,用于定义通过Zk生成自增ID的枚举,在项目中规范要求与物理表名项目,使用与当前项目阶段的枚举如下:
public enum ZkSequenceEnum {
    AP_LIKES,AP_READ_BEHAVIOR,AP_COLLECTION,AP_USER_FOLLOW,AP_USER_FAN
}
1.4 序列封装
创建com.heima.common.zookeeper.sequence.ZkSequence文件,用于封装程序在运行时每个表对应的自增器,这里主要通过分布式原子自增类(DistributedAtomicLong)实现,注意每500毫秒重试3次后仍然生成失败则返回null,由上层处理,相关实现代码如下:
public class ZkSequence {

    RetryPolicy retryPolicy = new ExponentialBackoffRetry(500, 3);

    DistributedAtomicLong distAtomicLong;

    public ZkSequence(String sequenceName, CuratorFramework client){
        distAtomicLong = new DistributedAtomicLong(client,sequenceName,retryPolicy);
    }

    /**
     * 生成序列
     * @return
     * @throws Exception
     */
    public Long sequence() throws Exception{
        AtomicValue<Long> sequence = this.distAtomicLong.increment();
        if(sequence.succeeded()){
            return sequence.postValue();
        }else{
            return null;
        }
    }

}
1.5 Client封装
创建com.heima.common.zookeeper.ZookeeperClient类,通过PostConstruct注解在内构器之后调用init方法初始化客户端连接,并调用initZkSequence方法初始项目所定义的ZkSequence,并存储在zkSequence的Map集合中,最终提供sequence方法来查询对应zkSequence获取自增ID,相关实现代码如下:
@Setter
@Getter
public class ZookeeperClient  {
    private static Logger logger = LoggerFactory.getLogger(ZookeeperClient.class);
    private String host;
    private String sequencePath;

    // 重试休眠时间
    private final int SLEEP_TIME_MS = 1000;
    // 最大重试1000次
    private final int MAX_RETRIES = 1000;
    //会话超时时间
    private final int SESSION_TIMEOUT = 30 * 1000;
    //连接超时时间
    private final int CONNECTION_TIMEOUT = 3 * 1000;

    //创建连接实例
    private CuratorFramework client = null;
    // 序列化集合
    private Map<String, ZkSequence> zkSequence = Maps.newConcurrentMap();

    public ZookeeperClient(String host,String sequencePath){
        this.host = host;
        this.sequencePath = sequencePath;
    }

    @PostConstruct
    public void init() throws Exception{
        this.client = CuratorFrameworkFactory.builder()
                .connectString(this.getHost())
                .connectionTimeoutMs(CONNECTION_TIMEOUT)
                .sessionTimeoutMs(SESSION_TIMEOUT)
                .retryPolicy(new ExponentialBackoffRetry(SLEEP_TIME_MS, MAX_RETRIES)).build();
        this.client.start();
        this.initZkSequence();
    }

    public void initZkSequence(){
        ZkSequenceEnum[] list = ZkSequenceEnum.values();
        for (int i = 0; i < list.length; i++) {
            String name = list[i].name();
            String path = this.sequencePath+name;
            ZkSequence seq = new ZkSequence(path,this.client);
            zkSequence.put(name,seq);
        }
    }

    /**
     * 生成SEQ
     * @param name
     * @return
     * @throws Exception
     */
    public Long sequence(ZkSequenceEnum name){
        try {
            ZkSequence seq = zkSequence.get(name.name());
            if (seq != null) {
                return seq.sequence();
            }
        }catch (Exception e){
            logger.error("获取[{}]Sequence错误:{}",name,e);
        }
        return null;
    }
}
注:在这里ZookeeperClient是一个BeanFactory,ZkSequence是一个FactoryBean。
1.6 Config封装
创建com.heima.common.zookeeper.ZkConfig类,用于自动化配置环境文件的导入,和zkClient定义Bean定义,其相关的实现代码如下:
/**
 * 自动化配置核心数据库的连接配置
 */
@Setter
@Getter
@Configuration
@ConfigurationProperties(prefix="zk")
@PropertySource("classpath:zookeeper.properties")
public class ZkConfig {

    String host;
    String sequencePath;

    /**
     * 这是最快的数据库连接池
     * @return
     */
    @Bean
    public ZookeeperClient zookeeperClient(){
        return new ZookeeperClient(this.host,this.sequencePath);
    }

}
1.7 Sequences封装
为便于程序中调用,以及对自增生成失败的统一处理,项目中规范通过com.heima.zookeeper.sequence.Sequences类统一暴露生成自增主键的功能,相关代码如下:
@Component
public class Sequences {

    @Autowired
    private ZookeeperClient client;

    public Long sequenceApLikes(){
        return this.client.sequence(ZkSequenceEnum.AP_LIKES);
    }

    public Long sequenceApReadBehavior(){
        return this.client.sequence(ZkSequenceEnum.AP_READ_BEHAVIOR);
    }

    public Long sequenceApCollection(){
        return this.client.sequence(ZkSequenceEnum.AP_COLLECTION);
    }

    public Long sequenceApUserFollow(){return this.client.sequence(ZkSequenceEnum.AP_USER_FOLLOW);}

    public Long sequenceApUserFan(){return this.client.sequence(ZkSequenceEnum.AP_USER_FAN);}

}
1.8 使用案例
项目中使用需要开发包扫描,@ComponentScan({“com.heima.zookeeper”})然后代码中参考如下步骤使用:
// 第一步,注入Sequences
@Autowired
private Sequences sequences;

// 第二步,在方法中调用生成
alb.setId(sequences.sequenceApCollection());
注:调用成功后会在zk路径/heima-leadnews/sequence/下创建相应表节点,依次可作为功能开发成功的依据,相应的测试就不在此处演示。
1.9 扩展自增表
如后期需要新增ZkSequence自增表,可参考以下操作步骤,快速实现:
-
在ZkSequenceEnum中定义对应的枚举项,规范要求枚举项与物理表名一致且大写
-
在Sequences中定义对应的调用方法,规范要求方法由sequence前缀+驼峰表名组成
2 App文章详情
2.1 功能需求
在文章列表中点击文章进入到文章详情查看页面,页面显示内容包括:标题、作者、作者头像、发布时间、是否关注、喜欢、不喜欢、分享、评论、收藏、转发、猜你喜欢等内容。除此之外还需收集用户打开页面时间、阅读次数、阅读百分比等信息。
文章内容展示为富文本样式,支持文本和图片两类元素,图片可以设置图片高度,文本支持字体颜色、字体大小、字体加粗等常规样式。
主要功能逻辑规则:
-
关注:(收藏、喜欢、不喜欢功能类似)
【关注】:如果未登录,跳转登录;否则调用关注接口,调用成功后文字变为取消关注
【取消关注】:调用取消关注接口,调用成功后文字变为关注
-
分享:
【分享】:点击后弹出分享平台选择列表,点击后调整对应分享界面
-
转发:
【转发】:如果未登录,跳转登录页面;登录后或者已登录直接调整到转发内容编辑页面;
-
评论:
【评论】:如果未登录,调整登录页面;否则直接可输入评论信息提交;
-
阅读:
【阅读】:用户进入详情页面时,记录阅读时长、页面加载时长、阅读百分比等信息;用户离开详情页面时,提交阅读行为数据;
本案例开发功能包括:
-
关注、收藏、喜欢、不喜欢功能,但是不做未登录演示
-
分享、转发功能,只实现行为记录,不实现分享平台的选择
-
阅读功能完全实现
-
文章内容富文展示功能:包括文字和文章,支持特殊样式设定
-
后置文章状态检查:如果文章已被删除,则给与提示
-
评论功能,暂不实现
2.2 前端需求
2.2.1 详情页需求
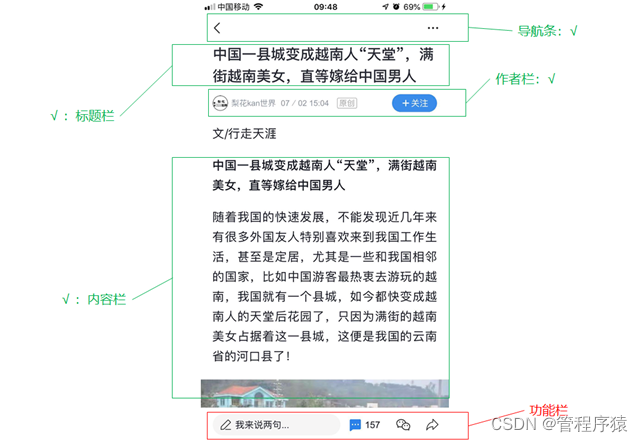
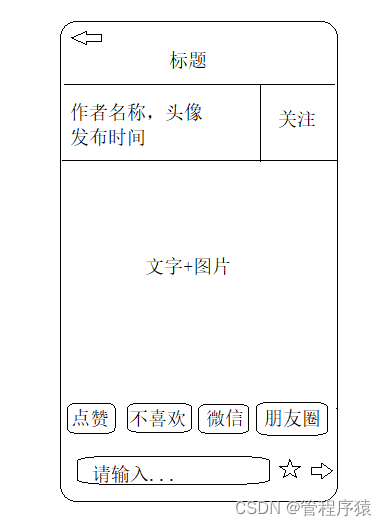
详情页面常用布局主要分为以下几个模块:
-
导航条:放置返回按钮,标题以及更多的功能按钮
-
标题栏:放置文章的标题
-
作者栏:放置文章作者头像、名称,以及是否关注
-
内容栏:放置文章内容
-
功能栏:放置快速操作功能
-
评论栏:放置当前文章的热门评论信息
-
相关栏:放置与本文章相似的文章列表
注:黑马头条课程不实现功能栏、评论栏,相关栏。
2.2.2 内容页需求

文章详情中的文章应该是富文本,支持图片、文字、链接、标签等样式,黑马头条演示实现文字、和图片富文本:
-
图片:图片固定占整行,高度按照长度等比缩放
-
文字:文字有默认样式,也可通过参数设置文字样式,比如大小、粗细
属于定义
2.3 术语定义
2.3.1【行为实体】
指的是产生行为的对象,在此项目中泛指APP用户、或者APP设备;相关的信息定义表详见ap_behavior_entry。其定义的目的是支撑登录和为登录状态下的行为数据收集,和数据推荐。
2.3.2 【ZKSEQUENCE】
指的是分布式自增序列的生成的方式。Mycat自身支持ZK_SEQUENCE的生成方式、Redis也支持并发自增ID,但在这里我选择ZK作为项目的分布式自增主键实现,用于复合字段的分片表主键的生成,主要的原因有两点:
-
负载均匀思想:Redis负载缓存、Mycat负载路由、Zk负载主键的生成
-
演示ZK的集成和使用
2.3.3 【DN】
DN是DataNode的缩写,泛指在个技术场景中的数据存储节点,比如:
-
在Mycat中指定的是数据库存储节点;
-
在Hadoop中指的是数据节点;
-
在微服务中指的是各微服务应用节点;
-
在Kafka中指的是broker节点;
2.4 后端定义
2.4.1 路由定义
本功能会涉及以下相关数据表,用于读取文章内容和配置,存储在文章详情页面产生的各种行为,相关表的Mycat路由定义如下:
| 序号 | 表名 | 表名 | 临时表? | 主键方式 | 日增/总量 | 分表量 | 存放DN | 分表字段 |
|---|---|---|---|---|---|---|---|---|
| 1 | APP用户粉丝信息表 | ap_user_fan | 否 | zk_sequence | 100,000,000 | 40 | DN[0~39] | burst=(id,user_id) |
| 2 | APP不喜欢行为表 | ap_unlikes_behavior | 是 | mycat | 1,000,000 | 1 | DN[0] | entry_id |
| 3 | APP关注行为表 | ap_follow_behavior | 是 | mycat | 2,000,000 | 1 | DN[1] | entry_id |
| 4 | APP分享行为表 | ap_share_behavior | 是 | mycat | 1,000,000 | 1 | DN[2] | entry_id |
| 5 | APP收藏行为表 | ap_collection | 否 | zk_sequence | 1,000,000 | 50 | DN[0~49] | burst=(id_entry_id) |
| 6 | APP点赞行为表 | ap_likes_behavior | 否 | zk_sequence | 5,000,000 | 50 | DN[0~49] | burst=(id_behavior_entry_id) |
| 7 | APP行为实体表 | ap_behavior_entry | 否 | zk_sequence | 2,000,000 | 50 | DN[0~49] | burst=(id_entry_id) |
| 8 | APP转发行为表 | ap_forward_behavior | 是 | mycat | 1,000,000 | 1 | DN[7] | entry_id |
| 9 | APP阅读行为表 | ap_read_behavior | 否 | zk_sequence | 20,000,000 | 50 | DN[0~49] | burst=(id_entry_id) |
| 10 | APP已发布文章配置表 | ap_article_config | 否 | mycat | 1,000,000 | 40 | DN[0~39] | article_id |
| 11 | APP已发布文章内容表 | ap_article_content | 否 | mycat | 1,000,000 | 40 | DN[0~39] | article_id |
| 12 | APP用户关注信息表 | ap_user_follow | 否 | zk_sequence | 100,000,000 | 40 | DN[0~39] | burst=(id,user_id) |
2.4.2 工程定义
APP文章服务:heima-leadnews-article
APP行为数据采集服务:heima-leadnews-behavior
APP用户个人中心服务:heima-leadnews-user
项目Mycat管理工程:service-mycat
2.4.3 接口定义
文章详情页面接口遵照项目通用格式标准,主要接口如下:
APP文章服务:
-
文章内容接口:用于加载文章的配置信息和文章内容
-
文章关系接口:用于加载当前行为实体与本文章的关系
APP用户个人中心服务:
- 关注接口:用于提交关注或取消关注的动作请求
APP行为数据采集服务:
-
点赞接口:用于提交点赞或取消点赞的动作请求
-
不喜欢接口:用于提交不喜欢或取消不喜欢的动作请求
-
阅读接口:用于提交用户阅读文章的行为记录
-
收藏接口:用于提交收藏或取消收藏的动作请求
-
转发接口:用于提交转发行为的记录请求(注:此数据正常是在后台转发功能实现中自动记录,此处的实现,主要是用于收集和演示,为后续功能提供支持)
-
分享接口:用户提供分享行为的记录请求(注:此数据正常是在后台转发功能实现中自动记录,此处的实现,主要是用于收集和演示,为后续功能提供支持)
2.5 前端定义
2.5.1 组件定义
按照代码重用性的规划,此部分VIEW可抽取以下几个公用组件:
-
详情导航组件(article_top_bar):实现返回列表,显示文章部分标题功能
-
图文按钮组件(button):实现渲染有图标和文章的按钮,比如点赞、不喜欢等
-
评论输入组件(input):实现评论输入
-
详情功能栏组件(article_bottom_bar):实现评论输入、收藏、转发等功能的封装
2.5.2 页面定义
- 详情页面(index):实现文章详情页面的VIEW功能
2.5.3 路由定义
- [/article/:id]:一级路由;指向文章详情页,并传递文章id
2.6 结构定义
3 app文章详情-后台接口开发
3.1 文章内容接口
3.1.1 接口定义
基本定义
由于框架封装只对JSON反序列化自增ID,需要请求文章ID需要封装为DTO.
| 参考标准 | 请参考通用接口规范 |
|---|---|
| 接口名称 | /api/v1/article/load_article_info |
| 请求DTO | com.heima.model.article.dtos.ArticleInfoDto |
| 响应DTO | 使用Map进行封装,其中格式如下: { “config”😕/ ApArticleConfig ,“content”😕/ApArticleContent } 注意:如果文章已经删除,content属性将不返回 |
CODE定义
| 错误代码 | 描述 |
|---|---|
| PARAM_INVALID | PARAM_INVALID(501,“无效参数”), |
3.1.2 Mapper实现
(1)文章内容 ApArticleContent
创建类com.heima.model.article.pojos.ApArticleContent
生成的ApArticleContent注释和get方法可以删除,然后使用lombok @Data注解,优雅的实现pojo方法。另外注意articleId需要增加@IdEncrypt注解,以作输出混淆。
@Data
public class ApArticleContent {
    private Integer id;
    // 增加注解,JSON序列化时自动混淆加密
    @IdEncrypt
    private Integer articleId;
    private String content;
}
ApArticleContentMapper
创建类com.heima.model.mappers.app.ApArticleContentMapper
定义按照文章ID查询内容方法:
public interface ApArticleContentMapper {
    ApArticleContent selectByArticleId(Integer articleId);
}
ApArticleContentMapper.xml
创建文件resources/mappers/app/ApArticleContentMapper.xml
ApArticleContent是按照article_id字段进行分库分表,由Mycat管理自增主键,SQL如下:
<mapper namespace="com.heima.model.mappers.app.ApArticleContentMapper" >
  <resultMap id="BaseResultMap" type="com.heima.model.article.pojos.ApArticleContent" >
      <id column="id" property="id"  />
      <result column="article_id" property="articleId"/>
      <result column="content" property="content"  />
  </resultMap>
  <sql id="Base_Column_List" >
    id, article_id
  </sql>
  <sql id="Blob_Column_List" >
    content
  </sql>
  <select id="selectByArticleId" resultMap="BaseResultMap" parameterType="java.lang.Integer" >
    select
    <include refid="Base_Column_List" />
    ,
    <include refid="Blob_Column_List" />
    from ap_article_content
    where article_id = #{articleId}
  </select>
</mapper>
(2)文章配置ApArticleConfig
创建类com.heima.model.article.pojos.ApArticleConfig
生成的ApArticleConfing注释和get方法可以删除,然后使用lombok @Data注解,优雅的实现pojo方法。另外注意articleId需要增加@IdEncrypt注解,以作输出混淆。
@Data
public class ApArticleConfig {
    private Long id;
    // 增加注解,JSON序列化时自动混淆加密
    @IdEncrypt
    private Integer articleId;
    private Boolean isComment;
    private Boolean isForward;
    private Boolean isDown;
    private Boolean isDelete;
}
ApArticleConfigMapper
创建类com.heima.model.mappers.app.ApArticleConfigMapper
定义按照文章ID查询内容方法:
public interface ApArticleConfigMapper {
    ApArticleConfig selectByArticleId(Integer articleId);
}
ApArticleConfigMapper.xml
创建文件resources/mappers/app/ApArticleConfigMapper.xml
ApArticleConfig是按照article_id字段进行分库分表,由Mycat管理自增主键,SQL如下:
<mapper namespace="com.heima.model.mappers.app.ApArticleConfigMapper" >
  <resultMap id="BaseResultMap" type="com.heima.model.article.pojos.ApArticleConfig" >
      <id column="id" property="id"/>
      <result column="article_id" property="articleId" />
      <result column="is_comment" property="isComment"/>
      <result column="is_forward" property="isForward" />
      <result column="is_down" property="isDown"/>
      <result column="is_delete" property="isDelete"/>
  </resultMap>
  <sql id="Base_Column_List" >
    id, article_id, is_comment, is_forward, is_down, is_delete
  </sql>
    <!-- 通过文章ID查询文章配置 -->
  <select id="selectByArticleId" resultMap="BaseResultMap" parameterType="int" >
    select <include refid="Base_Column_List" /> from ap_article_config where article_id = #{articleId}
  </select>
</mapper>
3.1.3 service代码实现
AppArticleInfoService
创建类:com.heima.article.service.AppArticleInfoService
定义获取文章详情接口:
public interface AppArticleInfoService {

    /**
     * 加载文章详情内容
     * @param articleId
     * @return
     */
    ResponseResult getArticleInfo(Integer articleId);
}
AppArticleInfoServiceImpl
创建类:com.heima.article.service.impl.AppArticleInfoServiceImpl
@Getter
@Service
public class AppArticleInfoServiceImpl implements AppArticleInfoService {

    @Autowired
    private ApArticleContentMapper apArticleContentMapper;
    @Autowired
    private ApArticleConfigMapper apArticleConfigMapper;

    /**
     * 加载文章详情内容
     * @param articleId
     * @return
     */
    public ResponseResult getArticleInfo(Integer articleId){
        // 参数无效
        if(articleId==null||articleId<1){
            return ResponseResult.errorResult(AppHttpCodeEnum.PARAM_INVALID);
        }
        ApArticleConfig config = apArticleConfigMapper.selectByArticleId(articleId);
        Map<String,Object> data = new HashMap<>();
        // 参数无效
        if(config==null){
            return ResponseResult.errorResult(AppHttpCodeEnum.PARAM_INVALID);
        }else if(!config.getIsDelete()){
            // 没删除的标识才返回给客户端
            ApArticleContent content = apArticleContentMapper.selectByArticleId(articleId);
            data.put("content",content);
        }
        data.put("config",config);
        return ResponseResult.okResult(data);
    }
}
3.1.4 接口定义及controller
ArticleInfoDto
创建类:com.heima.model.article.dtos.ArticleInfoDto
此类在model模块中创建,定义请求入参,实现如下:
@Data
public class ArticleInfoDto {
    // 文章ID
    @IdEncrypt
    Integer articleId;
}
ArticleInfoControllerApi
创建类:com.heima.article.apis.ArticleInfoControllerApi
此类在apis模块中创建,定义了相关接口,实现如下:
/**
 * 首頁文章
 */
public interface ArticleInfoControllerApi {
    /**
     * 加載首頁详情
     * @param dto 封装参数对象
     * @return 文章详情
     */
    ResponseResult loadArticleInfo(ArticleInfoDto dto);

    /**
     * 加载文章详情的行为内容
     * @param dto
     * @return
     */
    ResponseResult loadArticleBehavior( ArticleInfoDto dto)

}
ArticleInfoController
创建类:com.heima.article.controller.v1.ArticleInfoController
该类的实现较为简单,引入Service并调用即可:
@RestController
@RequestMapping("/api/v1/article")
public class ArticleInfoController implements ArticleInfoControllerApi {

    @Autowired
    private AppArticleInfoService appArticleInfoService;

    @Override
    @PostMapping("/load_article_info")
    public ResponseResult loadArticleInfo(@RequestBody ArticleInfoDto dto) {
        return appArticleInfoService.getArticleInfo(dto.getArticleId());
    }
}
3.1.5 单元测试
创建测试类:com.heima.article.controller.v1.ArticleInfoControllerTest
使用MockMvc进行接口调用测试,代码如下:
@RunWith(SpringRunner.class)
@SpringBootTest
@AutoConfigureMockMvc
public class ArticleInfoControllerTest {

    @Autowired
    MockMvc mvc;
    @Autowired
    ObjectMapper mapper;

    @Test
    public void testLoadArticleInfo() throws Exception{
        ArticleInfoDto dto = new ArticleInfoDto();
        dto.setArticleId(1);
        MockHttpServletRequestBuilder builder = MockMvcRequestBuilders.post("/api/v1/article/load_article_info");
        builder.contentType(MediaType.APPLICATION_JSON_VALUE)
                .content(mapper.writeValueAsBytes(dto));
        mvc.perform(builder).andExpect(MockMvcResultMatchers.status().isOk()).andDo(MockMvcResultHandlers.print());
    }
}
3.2 文章关系接口
3.2.1 接口定义
基本定义
此接口用于加载当前行为实体与文章及文章作者之间的关系,比如喜欢、关注等。
| 参考标准 | 请参考通用接口规范 |
|---|---|
| 接口名称 | /api/v1/article/ load_article_behavior |
| 请求DTO | com.heima.model.article.dtos.ArticleInfoDto |
| 响应DTO | 使用Map进行封装,其中格式如下: { “isfollow”😕/ 是否关注, “islike”😕/ 是否点赞, “isunlike”😕/ 是否不喜欢, “iscollection”😕/是否收藏 } |
CODE定义
| PARAM_INVALID | PARAM_INVALID(501,“无效参数”) |
|---|---|
| PARAM_REQUIRE | PARAM_REQUIRE(500,“缺少参数”) |
3.2.2 Mapper实现
相关类在model模块中实现
(1)ApBehaviorEntry 行为实体
创建类com.heima.model.behavior.pojos.ApBehaviorEntry
@Data
public class ApBehaviorEntry {
    private Integer id;
    private Boolean type;
    private Integer entryId;
    private Date createdTime;
    public String burst;
}
ApBehaviorEntryMapper
创建类com.heima.model.mappers.app.ApBehaviorEntryMapper
此类通过selectByUserIdOrEquipment方法查询对应行为实体数据,定义如下:
public interface ApBehaviorEntryMapper {
    ApBehaviorEntry selectByUserIdOrEquipment(Long userId,Integer equipmentId);
}
ApBehaviorEntryMapper.xml
查询行为实体优先用UserId进行查询,如未登录或提供则用设备ID进行查询,由于ApBehaviorEntry使用burst进行分片数据,因此查询时需用注解表达查询DN,实现如下:
<mapper namespace="com.heima.model.mappers.app.ApBehaviorEntryMapper" >
  <resultMap id="BaseResultMap" type="com.heima.model.behavior.pojos.ApBehaviorEntry" >
      <id column="id" property="id" />
      <result column="type" property="type"/>
      <result column="entry_id" property="entryId" />
      <result column="created_time" property="createdTime" />
      <result column="burst" property="burst"/>
  </resultMap>
  <sql id="Base_Column_List" >
    id, type, entry_id, created_time
  </sql>
  <!-- 选择用户的行为对象,优先按用户选择 -->
  <select id="selectByUserIdOrEquipment" resultMap="BaseResultMap" >
    <if test="userId!=null">
      /*!mycat:sql=select id from ap_behavior_entry where burst='0-${userId}'*/
      select * from ap_behavior_entry a where  a.entry_id=#{userId} and type=1 limit 1
    </if>

    <if test="userId==null and equipmentId!=null">
      /*!mycat:sql=select id from ap_behavior_entry where burst='0-${equipmentId}'*/
      select * from ap_behavior_entry a where  a.entry_id=#{equipmentId} and type=0 limit 1
    </if>
  </select>
</mapper>
(2)ApCollection APP收藏信息表
创建类com.heima.model.article.pojos.ApCollection
生成的ApCollection注释和get方法可以删除,然后使用lombok @Data注解,优雅的实现pojo方法。另外注意behaviorEntryId、entryId需要增加@IdEncrypt注解,以作输出混淆,burst字段需要过滤输出。同时在此类中定义了收藏内容的枚举类型Type。
@Data
public class ApCollection {
    private Long id;
    @IdEncrypt
    private Integer behaviorEntryId;
    @IdEncrypt
    private Integer entryId;
    private Short type;
    private Date collectionTime;
    private Date publishedTime;
    @JsonIgnore
    private String burst;
    // 定义收藏内容类型的枚举
    @Alias("ApCollectionEnumType")
    public enum Type{
        ARTICLE((short)0),DYNAMIC((short)1);
        short code;
        Type(short code){
            this.code = code;
        }
        public short getCode(){
            return this.code;
        }
    }
}
ApCollectionMapper
创建类com.heima.model.mappers.app.ApCollectionMapper
定义按照行为实体ID、收藏内容ID、和类型查询收藏方法:
public interface ApCollectionMapper {
    /**
     * 选择一个终端的收藏数据
     * @return
     */
    ApCollection selectForEntryId(String burst,Integer objectId,Integer entryId,Short type);
}
ApCollectionMapper.xml
创建文件resources/mappers/app/ApCollectionMapper.xml
ApCollection是按照burst字段进行分库分表,查询时注意使用Mycat注解确定路由DN,SQL如下:
<?xml version="1.0" encoding="UTF-8" ?>
<!DOCTYPE mapper PUBLIC "-//mybatis.org//DTD Mapper 3.0//EN" "http://mybatis.org/dtd/mybatis-3-mapper.dtd" >
<mapper namespace="com.heima.model.mappers.app.ApCollectionMapper" >
  <resultMap id="BaseResultMap" type="com.heima.model.article.pojos.ApCollection" >
      <id column="id" property="id" />
      <result column="behavior_entry_id" property="behaviorEntryId" />
      <result column="entry_id" property="entryId" />
      <result column="type" property="type"/>
      <result column="collection_time" property="collectionTime"  />
      <result column="published_time" property="publishedTime" />
      <result column="burst" property="burst" />
  </resultMap>
  <sql id="Base_Column_List" >
    id, behavior_entry_id, entry_id, type, collection_time, published_time
  </sql>

    <select id="selectForEntryId" resultMap="BaseResultMap">
      /*!mycat:sql=select id from ap_collection where burst='${burst}'*/
        select * from ap_collection where behavior_entry_id=#{objectId} and entry_id=#{entryId} and type=#{type}
    </select>
</mapper>
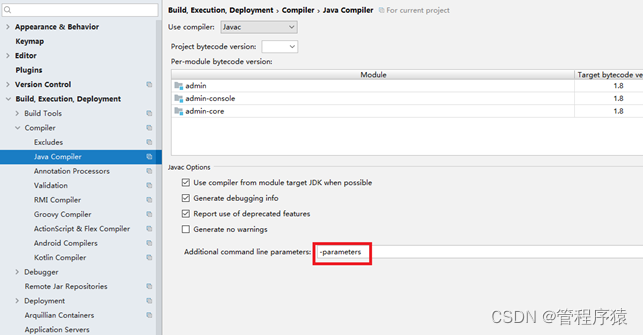
注意:此处用了Mybatis的参数名称来映射SQL中的变量,要支持此方式,需要在Java编译时把方法参数名称信息也编译到class字节文件中,具体可设置一个编译参数即可:
-
File->Settings->Build,Execution,Deployment->Compiler->Java Compiler
-
在 Additional command line parameters: 后面填上 -parameters,如下图
(3)ApUserFollow APP用户关注信息
创建类com.heima.model.user.pojos.ApUserFollow
生成的ApUserFollow注释和get方法可以删除,然后使用lombok @Data注解,优雅的实现pojo方法。另外注意userId、followId需要增加@IdEncrypt注解,以作输出混淆,burst字段需要过滤输出。
@Data
public class ApUserFollow {
    private Long id;
    @IdEncrypt
    private Long userId;
    @IdEncrypt
    private Integer followId;
    private String followName;
    private Short level;
    private Boolean isNotice;
    private Date createdTime;
    @JsonIgnore
    private String burst;
}
ApUserFollowMapper
创建类com.heima.model.mappers.app.ApUserFollowMapper
定义按照用户ID、关注用户Id查询关注信息方法:
public interface ApUserFollowMapper {
    ApUserFollow selectByFollowId(String burst,Long userId,Integer followId);
}
ApUserFollowMapper.xml
创建文件resources/mappers/app/ApUserFollowMapper.xml
ApUserFollow是按照字段进行分库分表,查询时注意使用注解确定路由,如下:
<resultMap id="BaseResultMap" type="com.heima.model.user.pojos.ApUserFollow" >
      <id column="id" property="id" />
      <result column="user_id" property="userId" />
      <result column="follow_id" property="followId" />
      <result column="follow_name" property="followName"/>
      <result column="level" property="level"/>
      <result column="is_notice" property="isNotice"/>
      <result column="created_time" property="createdTime" />
      <result column="burst" property="burst"/>
  </resultMap>
  <sql id="Base_Column_List" >
    id, user_id, follow_id, follow_name, level, is_notice, created_time
  </sql>
  <select id="selectByFollowId" resultMap="BaseResultMap" >
    /*!mycat:sql=select id from ap_user_follow where burst='${burst}'*/
    select * from ap_user_follow where user_id = #{userId} and  follow_id = #{followId}
  </select>
</mapper>
(4)ApLikesBehavior APP点赞行为
创建类com.heima.model.behavior.pojos.ApLikesBehavior
生成的ApLikesBehavior注释和get方法可以删除,然后使用lombok @Data注解,优雅的实现pojo方法。另外注意behaviorEntryId、entryId需要增加@IdEncrypt注解,以作输出混淆,burst字段需要过滤输出。同时在此类中定义了点赞内容的枚举类型Type、点赞操作的类型Operation。
@Data
public class ApLikesBehavior {
    private Long id;
    @IdEncrypt
    private Integer behaviorEntryId;
    @IdEncrypt
    private Integer entryId;
    private Short type;
    private Short operation;
    private Date createdTime;
    @JsonIgnore
    private String burst;
    // 定义点赞内容的类型
    @Alias("ApLikesBehaviorEnumType")
    public enum Type{
        ARTICLE((short)0),DYNAMIC((short)1),COMMENT((short)2);
        short code;
        Type(short code){
            this.code = code;
        }
        public short getCode(){
            return this.code;
        }
    }
    //定义点赞操作的方式,点赞还是取消点赞
    @Alias("ApLikesBehaviorEnumOperation")
    public enum Operation{
        LIKE((short)0),CANCEL((short)1);
        short code;
        Operation(short code){
            this.code = code;
        }
        public short getCode(){
            return this.code;
        }
    }

}
ApLikesBehaviorMapper
创建类com.heima.model.mappers.app.ApLikesBehaviorMapper
定义按照行为实体、点赞内容、点赞操作方式查询点赞信息,指选择最后一条方法:
package com.heima.article.mysql.core.model.mappers.app;

public interface ApLikesBehaviorMapper {
    /**
     * 选择最后一条喜欢按钮
     * @return
     */
    ApLikesBehavior selectLastLike(String burst,Integer objectId,Integer entryId,Short type);
}
ApLikesBehaviorMapper.xml
创建文件resources/mappers/app/ApLikesBehaviorMapper.xml
ApLikesBehavior是按照burst字段进行分库分表,查询时注意使用Mycat注解确定路由DN,SQL如下:
<?xml version="1.0" encoding="UTF-8" ?>
<!DOCTYPE mapper PUBLIC "-//mybatis.org//DTD Mapper 3.0//EN" "http://mybatis.org/dtd/mybatis-3-mapper.dtd" >
<mapper namespace="com.heima.model.mappers.app.ApLikesBehaviorMapper" >
  <resultMap id="BaseResultMap" type="com.heima.model.behavior.pojos.ApLikesBehavior" >
      <id column="id" property="id"/>
      <result column="behavior_entry_id"  property="behaviorEntryId"/>
      <result column="entry_id" property="entryId" />
      <result column="type" property="type" />
      <result column="operation" property="operation"/>
      <result column="created_time" property="createdTime"/>
      <result column="burst" property="burst"/>
  </resultMap>
  <sql id="Base_Column_List" >
    id, behavior_entry_id, entry_id, type, operation, created_time,burst
  </sql>

    <select id="selectLastLike" resultMap="BaseResultMap">
      /*!mycat:sql=select id from ap_likes_behavior where burst='${burst}'*/
        select * from ap_likes_behavior where behavior_entry_id=#{objectId} and entry_id=#{entryId} and type=#{type} order by created_time desc limit 1
    </select>
</mapper>
(5)ApUnlikesBehavior APP不喜欢行为
创建类com.heima.model.behavior.pojos.ApUnlikesBehavior
生成的ApUnlikesBehavior注释和get方法可以删除,然后使用lombok @Data注解,优雅的实现pojo方法。另外注意articleId、entryId需要增加@IdEncrypt注解,以作输出混淆。同时在此类中定义了不喜欢操作的枚举类型Type。
@Data
public class ApUnlikesBehavior {
    private Long id;
    @IdEncrypt
    private Integer entryId;
    @IdEncrypt
    private Integer articleId;
    private Short type;
    private Date createdTime;
    // 定义不喜欢操作的类型
    @Alias("ApUnlikesBehaviorEnumType")
    public enum Type{
        UNLIKE((short)0),CANCEL((short)1);
        short code;
        Type(short code){
            this.code = code;
        }
        public short getCode(){
            return this.code;
        }
    }
}
ApUnlikesBehaviorMapper
创建类com.heima.model.mappers.app.ApUnlikesBehaviorMapper
定义按照行为实体ID、文章ID查询不喜欢最有一条信息的方法:
public interface ApUnlikesBehaviorMapper {
    /**
     * 选择最后一条不喜欢数据
     * @return
     */
    ApUnlikesBehavior selectLastUnLike(Integer entryId,Integer articleId);
}
ApUnlikesBehaviorMapper.xml
创建文件resources/mappers/app/ApUnlikesBehaviorMapper.xml
ApUnlikesBehavior是按照entry_id字段进行分库分表,由Mycat管理自增主键,SQL如下:
<mapper namespace="com.heima.model.mappers.app.ApUnlikesBehaviorMapper" >
  <resultMap id="BaseResultMap" type="com.heima.model.behavior.pojos.ApUnlikesBehavior" >
      <id column="id" property="id"/>
      <result column="entry_id" property="entryId" />
      <result column="article_id" property="articleId"/>
      <result column="type" property="type"/>
      <result column="created_time" property="createdTime" />
  </resultMap>
  <sql id="Base_Column_List" >
    id, entry_id, type, created_time
  </sql>
    <select id="selectLastUnLike" resultMap="BaseResultMap">
        select * from ap_unlikes_behavior where entry_id=#{entryId} and article_id=#{articleId} order by created_time desc limit 1
    </select>
</mapper>
(6)ApAuthor APP文章作者信息
创建类com.heima.model.article.pojos.ApAuthor
生成的ApAuthor注释和get方法可以删除,然后使用lombok @Data注解,优雅的实现pojo方法。
package com.heima.article.mysql.core.model.pojos.app;

import lombok.Data;

import java.util.Date;

@Data
public class ApAuthor {
    private Integer id;
    private String name;
    private Boolean type;
    private Integer userId;
    private Date createdTime;
}
ApAuthorMapper
创建类com.heima.mappers.app.ApAuthorMapper
定义按照作者ID
public interface ApAuthorMapper {
    ApAuthor selectById(Integer id);
}
ApAuthorMapper.xml
创建文件resources/mappers/app/ApAuthorMapper.xml
ApAuthor是没有分库分表,由Mycat管理自增主键,SQL如下:
<mapper namespace="com.heima.mappers.app.ApAuthorMapper" >
  <resultMap id="BaseResultMap" type="com.heima.model.article.pojos.ApAuthor" >
      <result column="id" property="id" />
      <result column="name" property="name"/>
      <result column="type" property="type"/>
      <result column="user_id" property="userId"/>
      <result column="created_time" property="createdTime"/>
  </resultMap>

  <select id="selectById" resultMap="BaseResultMap">
    select * from ap_author where id=#{id}
  </select>
</mapper>
3.2.3 service代码实现
(1)AppArticleInfoService
在com.heima.article.service.AppArticleInfoService类中定义接口:
/**
 * 加载文章详情的初始化配置信息,比如关注、喜欢、不喜欢、阅读位置等
 * @param dto
 * @return
 */
ResponseResult loadArticleBehavior(ArticleInfoDto dto);
(2)AppArticleInfoServiceImpl
在com.heima.article.service.impl.AppArticleInfoServiceImpl类中实现接口:
/**
 * 加载文章详情的初始化配置信息,比如关注、喜欢、不喜欢、阅读位置等
 * @param dto
 * @return
 */
public ResponseResult loadArticleBehavior(ArticleInfoDto dto){
    ApUser user = AppThreadLocalUtils.getUser();
    // 用户和设备不能同时为空
    if(user==null&& dto.getEquipmentId()==null){
        return ResponseResult.errorResult(AppHttpCodeEnum.PARAM_REQUIRE);
    }
    Long userId = null;
    if(user!=null){
        userId = user.getId();
    }
    ApBehaviorEntry apBehaviorEntry = getApBehaviorEntryMapper().selectByUserIdOrEquipment(userId, dto.getEquipmentId());
    // 行为实体找以及注册了,逻辑上这里是必定有值得,除非参数错误
    if(apBehaviorEntry==null){
        return ResponseResult.errorResult(AppHttpCodeEnum.PARAM_INVALID);
    }
    boolean isUnLike=false,isLike=false,isCollection=false,isFollow=false;
    String burst = BurstUtils.groudOne(apBehaviorEntry.getId());

    // 判断是否是已经不喜欢
    ApUnlikesBehavior apUnlikesBehavior = getApUnlikesBehaviorMapper().selectLastUnLike(apBehaviorEntry.getId(),dto.getArticleId());
    if(apUnlikesBehavior!=null&&apUnlikesBehavior.getType()==ApUnlikesBehavior.Type.UNLIKE.getCode()){
        isUnLike=true;
    }
    // 判断是否是已经喜欢
    ApLikesBehavior apLikesBehavior = getApLikesBehaviorMapper().selectLastLike(burst,apBehaviorEntry.getId(),dto.getArticleId(), ApCollection.Type.ARTICLE.getCode());
    if(apLikesBehavior!=null&&apLikesBehavior.getOperation()==ApLikesBehavior.Operation.LIKE.getCode()){
        isLike=true;
    }
    // 判断是否收藏
    ApCollection apCollection = getApCollectionMapper().selectForEntryId(burst,apBehaviorEntry.getId(),dto.getArticleId(),ApCollection.Type.ARTICLE.getCode());
    if(apCollection!=null){
        isCollection=true;
    }
    // 判断是否关注
    ApAuthor apAuthor = getApAuthorMapper().selectById(dto.getAuthorId());
    if(user!=null&&apAuthor!=null&&apAuthor.getUserId()!=null) {
        ApUserFollow apUserFollow = getApUserFollowMapper().selectByFollowId(BurstUtils.groudOne(user.getId()), user.getId(), apAuthor.getUserId());
        if (apUserFollow != null) {
            isFollow = true;
        }
    }

    Map<String,Object> data = Maps.newHashMap();
    data.put("isfollow",isFollow);
    data.put("islike",isLike);
    data.put("isunlike",isUnLike);
    data.put("iscollection",isCollection);

    return ResponseResult.okResult(data);
}
3.2.4 接口定义及controller实现
(1)ArticleInfoDto
在com.heima.article.mysql.core.model.dtos.ArticleInfoDto类中增加以下字段:
 // 设备ID
    @IdEncrypt
    Integer equipmentId;
    // 作者ID
    @IdEncrypt
    Integer authorId;
(2)ArticleInfoControllerApi
在com.heima.article.apis.ArticleInfoControllerApi类中增加接口定义:
/**
     * 加载文章详情的行为内容
     * @param dto
     * @return
     */
ResponseResult loadArticleBehavior( ArticleInfoDto dto);
(3)ArticleInfoController
在com.heima.article.controller.v1.ArticleInfoController类中,增加接口方法:
@Override
@PostMapping("/load_article_behavior")
public ResponseResult loadArticleBehavior(@RequestBody ArticleInfoDto dto) {
    return appArticleInfoService.loadArticleBehavior(dto);
}
3.2.5 单元测试
在com.heima.article.controller.v1.ArticleInfoControllerTest测试类中使用MockMvc进行接口调用测试,代码如下:
@Test
public void testLoadArticleBehavior() throws Exception{
    ArticleInfoDto dto = new ArticleInfoDto();
    dto.setArticleId(1);
    dto.setAuthorId(1);
    dto.setEquipmentId(1);
    MockHttpServletRequestBuilder builder = MockMvcRequestBuilders.post("/api/v1/article/load_article_behavior");
    builder.contentType(MediaType.APPLICATION_JSON_VALUE)
            .content(mapper.writeValueAsBytes(dto));
    mvc.perform(builder).andExpect(MockMvcResultMatchers.status().isOk()).andDo(MockMvcResultHandlers.print());
}
3.3 关注接口
关注接口实现当前登录用户关注其他用户,属于APP用户个人中心服务的接口,因此需要先创建工程。
3.3.1 工程创建
- 在根项目下创建Maven module项目,项目名称为heima-leadnews-user,groupId:com.heima。创建后在根pom.xml中module元素中增加以下代码:
<module>heima-leadnews-user</module>
- 在heima-leadnews-user/pom.xml中增加父项目信息:
<parent>
  <artifactId>heima-leadnews</artifactId>
  <groupId>com.heima</groupId>
  <version>1.0-SNAPSHOT</version>
</parent>
-
复制heima-leadnews-article下的dev、test、prod三个环境配置文件到heima-leadnews-article下
-
复制heima-leadnews-article resources下的application.propertie、log4j2.xml文件到heima-leadnews-user/src/main/resources下
-
复制heima-leadnews-article/pom.xml中的依赖和build内容到heima-leadnews-user/pom.xml中
3.3.2 初始项目
-
创建com.heima.user.config包,并复制heima-leadnews-article项目下com.heima.article.config的MysqlConfig三个文件
-
创建启动类:com.heima.user.UserJarApplication
@SpringBootApplication
public class UserJarApplication {
    public static void main(String[] args) {
        SpringApplication.run(UserJarApplication.class, args);
    }
}
3.3.3 接口定义
基本定义
此接口用于实现当前用户关注其它用户的记录,基本定义如下:
| 参考标准 | 请参考通用接口规范 |
|---|---|
| 接口名称 | /api/v1/user/user_follow |
| 请求DTO | com.heima.model.user.dtos.UserRelationDto |
| 响应DTO | 操作成功的数量 |
CODE定义
| PARAM_INVALID | PARAM_INVALID(501,“无效参数”) |
|---|---|
| PARAM_REQUIRE | PARAM_REQUIRE(500,“缺少参数”) |
| DATA_NOT_EXIST | DATA_NOT_EXIST(1000,“数据不存在”) |
| NEED_LOGIN | NEED_LOGIN(1,“需要登录后操作”) |
| DATA_EXIST | DATA_EXIST(1000,“数据已经存在”) |
3.3.4 Mapper实现
(1)ApFollowBehavior APP关注行为
创建类com.heima.model.behavior.pojos.ApFollowBehavior
@Data
public class ApFollowBehavior {
    private Long id;
    private Integer entryId;
    private Integer articleId;
    private Integer followId;
    private Date createdTime;
}
ApFollowBehaviorMapper
创建类com.heima.model.mappers.app.ApFollowBehaviorMapper
定义按照关注行为插入方法:
public interface ApFollowBehaviorMapper {
    int insert(ApFollowBehavior record);
}
ApFollowBehaviorMapper.xml
创建文件resources/mappers/app/ApFollowBehaviorMapper.xml
ApFollowBehavior是按照_idMycatidSQL
<mapper namespace="com.heima.model.mappers.app.ApFollowBehaviorMapper" >
  <resultMap id="BaseResultMap" type="com.heima.model.behavior.pojos.ApFollowBehavior" >
      <id column="id" property="id" />
      <result column="entry_id" property="entryId"/>
      <result column="article_id" property="articleId"/>
      <result column="follow_id" property="followId"/>
      <result column="created_time" property="createdTime"/>
  </resultMap>
  <sql id="Base_Column_List" >
    id, entry_id, article_id, follow_id, created_time
  </sql>
  <insert id="insert" parameterType="com.heima.model.behavior.pojos.ApFollowBehavior" >
    insert into ap_follow_behavior (entry_id, article_id, follow_id, created_time)
    values ( #{entryId}, #{articleId},#{followId}, #{createdTime})
  </insert>
</mapper>
(2)ApUserFollowMapperAPP用户关注信息
在com.heima.model.mappers.app.ApUserFollowMapper
 int insert(ApUserFollow record);;
 int deleteByFollowId(String burst,Long userId,Integer followId);
ApUserFollowMapper.xml
在resources/mappers/app/ApUserFollowMapper.xml中,实现对应Mapper方法,注意以下两点:
-
删除时,使用Mycat注解确定数据路由DN
-
插入时,需插入ID注解,并在程序中调用Sequences生产ZK自增ID
 <delete id="deleteByFollowId">
    /*!mycat:sql=select id from ap_user_follow where burst='${burst}'*/
    delete from ap_user_follow where user_id = #{userId} and  follow_id = #{followId}
    </delete>
  <insert id="insert" parameterType="com.heima.model.user.pojos.ApUserFollow" >
    insert into ap_user_follow (id, user_id, follow_id,
      follow_name, level, is_notice,
      created_time,burst)
    values (#{id}, #{userId}, #{followId},
      #{followName}, #{level}, #{isNotice},
      #{createdTime},#{burst})
  </insert>
(3)ApUserFanAPP用户粉丝信息
创建类com.heima.model.user.pojos.ApUserFan
生成的ApUserFan注释和get方法可以删除,然后使用lombok @Data注解,优雅的实现pojo方法。另外注意userID、fansId需要增加@IdEncrypt注解,以作输出混淆,burst字段需要过滤输出。
@Data
public class ApUserFan {
    private Long id;
    @IdEncrypt
    private Integer userId;
    @IdEncrypt
    private Long fansId;
    private String fansName;
    private Short level;
    private Date createdTime;
    private Boolean isDisplay;
    private Boolean isShieldLetter;
    private Boolean isShieldComment;
    @JsonIgnore
    private String burst;
}
ApUserFanMapper
创建类com.heima.model.mappers.app.ApUserFanMapper
定义按照插入粉丝、查找粉丝、删除粉丝的方法:
public interface ApUserFanMapper {
    int insert(ApUserFan record);
    ApUserFan selectByFansId(String burst,Integer userId ,Long fansId);
    int deleteByFansId(String burst,Integer userId ,Long fansId);
}
ApUserFanMapper.xml
创建文件resources/mappers/app/ApUserFanMapper.xml
ApUserFan是按照burst字段进行分库分表,查询时注意使用Mycat注解:
-
删除时,使用Mycat注解确定数据路由DN
-
插入时,需插入ID注解,并在程序中调用Sequences生产ZK自增ID
-
查询时,使用Mycat注解确定数据路由DN
<mapper namespace="com.heima.model.mappers.app.ApUserFanMapper" >
  <resultMap id="BaseResultMap" type="com.heima.model.user.pojos.ApUserFan" >
      <id column="id" property="id"/>
      <result column="user_id" property="userId"/>
      <result column="fans_id" property="fansId" />
      <result column="fans_name" property="fansName"/>
      <result column="level" property="level"/>
      <result column="created_time" property="createdTime" />
      <result column="is_display" property="isDisplay"/>
      <result column="is_shield_letter" property="isShieldLetter"/>
      <result column="is_shield_comment" property="isShieldComment"/>
      <result column="burst" property="burst"/>
  </resultMap>
  <sql id="Base_Column_List" >
    id, user_id, fans_id, fans_name, level, created_time, is_display, is_shield_letter,is_shield_comment
  </sql>
  <select id="selectByFansId" resultMap="BaseResultMap">
      /*!mycat:sql=select id from ap_user_fan where burst='${burst}'*/
    select <include refid="Base_Column_List" /> from ap_user_fan where user_id = #{userId} and  fans_id = #{fansId}
 </select>

    <delete id="deleteByFansId">
    /*!mycat:sql=select id from ap_user_fan where burst='${burst}'*/
    delete from ap_user_fan where user_id = #{userId} and  fans_id = #{fansId}
    </delete>

  <insert id="insert" parameterType="com.heima.model.user.pojos.ApUserFan" >
    insert into ap_user_fan (id, user_id, fans_id,
      fans_name, level, created_time,
      is_display, is_shield_letter, is_shield_comment,burst
      )
    values (#{id}, #{userId}, #{fansId},
      #{fansName}, #{level}, #{createdTime},
      #{isDisplay}, #{isShieldLetter}, #{isShieldComment},{#burst}
      )
  </insert>
</mapper>
(4)ApUserAPP用户信息
创建类com.heima.model.user.pojos.ApUser
生成的ApUser注释和get方法可以删除,然后使用lombok @Data注解,优雅的实现pojo方法。
@Data
public class ApUser {
    private Long id;
    private String salt;
    private String name;
    private String password;
    private String phone;
    private String image;
    private Boolean sex;
    private Boolean isCertification;
    private Boolean isIdentityAuthentication;
    private Boolean status;
    private int flag;
}
ApUserMapper
创建类com.heima.model.mappers.app.ApUserMapper
定义按照用户ID查询用户信息的方法:
public interface ApUserMapper {
    ApUser selectById(Integer id);
}
ApUserMapper.xml
创建文件resources/mappers/app/ApUserMapper.xml
ApUser是按照字段进行分库分表,由管理自增主键,如下:
<mapper namespace="com.heima.model.mappers.app.ApUserMapper" >
  <resultMap id="BaseResultMap" type="com.heima.model.user.pojos.ApUser" >
      <id column="id" property="id" />
      <result column="salt" property="salt"/>
      <result column="name" property="name"/>
      <result column="password" property="password"/>
      <result column="phone" property="phone"/>
      <result column="image" property="image"/>
      <result column="sex" property="sex"/>
      <result column="is_certification" property="isCertification"/>
      <result column="is_identity_authentication" property="isIdentityAuthentication"/>
      <result column="status" property="status"/>
      <result column="flag" property="flag"/>
  </resultMap>
  <sql id="Base_Column_List" >
    id, salt, name, password, phone, image, sex, is_certification, is_identity_authentication,
    status, flag
  </sql>
  <select id="selectById" resultMap="BaseResultMap">
  select  <include refid="Base_Column_List" /> from ap_user where id = #{id}
</select>
</mapper>
3.3.5 service代码实现
(1)AppFollowBehaviorService
创建类com.heima.user.service.AppFollowBehaviorService,并定义saveFollowBehavior方法:
public interface AppFollowBehaviorService {
    /**
     * 存储关注数据
     * @param dto
     * @return
     */
    public ResponseResult saveFollowBehavior(FollowBehaviorDto dto);
}
(2)AppFollowBehaviorServiceImpl
创建类com.heima.user.service.impl.AppFollowBehaviorServiceImpl,在此需求中,存储关注行为是一个可选需求,因此采用异步存储的方式,提升关注接口的性能,并注意@Async的方法和调用方法不能存放同一个类中。
@Service
public class AppFollowBehaviorServiceImpl implements AppFollowBehaviorService {
Logger logger  = LoggerFactory.getLogger(AppFollowBehaviorServiceImpl.class);
    @Autowired
    private ApFollowBehaviorMapper apFollowBehaviorMapper;
    @Autowired
    private ApBehaviorEntryMapper apBehaviorEntryMapper;
    @Autowired
    private Sequences sequences;

    @Override
    @Async
    public ResponseResult saveFollowBehavior(FollowBehaviorDto dto){
logger.info("异步存储关注行为:{}",dto);
        ApUser user = AppThreadLocalUtils.getUser();
        // 用户和设备不能同时为空
        if(user==null&& dto.getEquipmentId()==null){
            return ResponseResult.errorResult(AppHttpCodeEnum.PARAM_REQUIRE);
        }
        Long userId = null;
        if(user!=null){
            userId = user.getId();
        }
        ApBehaviorEntry apBehaviorEntry = apBehaviorEntryMapper.selectByUserIdOrEquipment(userId, dto.getEquipmentId());
        // 行为实体找以及注册了,逻辑上这里是必定有值得,除非参数错误
        if(apBehaviorEntry==null){
            return ResponseResult.errorResult(AppHttpCodeEnum.PARAM_INVALID);
        }
        ApFollowBehavior alb = new ApFollowBehavior();
        alb.setEntryId(apBehaviorEntry.getId());
        alb.setCreatedTime(new Date());
        alb.setArticleId(dto.getArticleId());
        alb.setFollowId(dto.getFollowId());
        return ResponseResult.okResult(apFollowBehaviorMapper.insert(alb));
    }
}
(3)ThreadPoolConfig
User模块创建类:com.heima.user.config.ThreadPoolConfig
异步方法的执行实际会使用一个SimpleThreadPoolTaskExecutor,实际项目中为监控和排除线程错误常常自定义相关线程池,代码如下:
-
注意使用@EnableAsync开启异步执行的功能
-
自定义的线程池建议都自定义前缀,便于日志排查
@Configuration
@EnableAsync
public class ThreadPoolConfig {

    private static final int corePoolSize = 10;           // 核心线程数(默认线程数)
    private static final int maxPoolSize = 100;              // 最大线程数
    private static final int keepAliveTime = 10;         // 允许线程空闲时间(单位:默认为秒)
    private static final int queueCapacity = 500;        // 缓冲队列数
    private static final String threadNamePrefix = "default-async"; // 线程池名前缀

    /**
     * 默认异步线程池
     * @return
     */
    @Bean
    public ThreadPoolTaskExecutor taskExecutor(){
        ThreadPoolTaskExecutor pool = new ThreadPoolTaskExecutor();
        pool.setThreadNamePrefix(threadNamePrefix);
        pool.setCorePoolSize(corePoolSize);
        pool.setMaxPoolSize(maxPoolSize);
        pool.setKeepAliveSeconds(keepAliveTime);
        pool.setQueueCapacity(queueCapacity);
        // 直接在execute方法的调用线程中运行
        pool.setRejectedExecutionHandler(new ThreadPoolExecutor.CallerRunsPolicy());
        // 初始化
        pool.initialize();
        return pool;
    }

}
问题:在saveFollowBehavior方法中能使用AppThreadLocalUtils获取用户信息吗?为什么?
(4)AppUserRelationService
创建类com.heima.user.service.AppUserRelationService,并定义follow方法:
public interface AppUserRelationService {
    public ResponseResult follow(UserRelationDto dto);
}
(5)AppArticleInfoServiceImpl
创建类com.heima.user.service.impl.AppUserRelationServiceImpl,并实现follow方法:
@Service
public class AppUserRelationServiceImpl implements AppUserRelationService {

    Logger logger = LoggerFactory.getLogger(AppUserRelationServiceImpl.class);

    @Autowired
    ApUserFollowMapper apUserFollowMapper;
    @Autowired
    ApUserFanMapper apUserFanMapper;
    @Autowired
    ApAuthorMapper apAuthorMapper;
    @Autowired
    ApUserMapper apUserMapper;
    @Autowired
    AppFollowBehaviorService appFollowBehaviorService;
    @Autowired
    Sequences sequences;

    /**
     * 关注/取消一个人
     * @param dto
     * @return
     */
    public ResponseResult follow(UserRelationDto dto){
        if(dto.getOperation()==null||dto.getOperation()<0||dto.getOperation()>1){
            return ResponseResult.errorResult(AppHttpCodeEnum.PARAM_INVALID,"无效的operation参数");
        }
        Integer followId = dto.getUserId();
        if(followId==null&&dto.getAuthorId()==null) {
            return ResponseResult.errorResult(AppHttpCodeEnum.PARAM_REQUIRE,"followId或authorId不能为空");
        }else if(followId==null) {
            ApAuthor aa = apAuthorMapper.selectById(dto.getAuthorId());
            if(aa!=null) {
                followId = aa.getUserId();
            }
        }
        if(followId==null){
            return ResponseResult.errorResult(AppHttpCodeEnum.DATA_NOT_EXIST,"关注人不存在");
        }else {
            ApUser user = AppThreadLocalUtils.getUser();
            if(user!=null) {
                if(dto.getOperation()==0) {
                    return followByUserId(user, followId, dto.getArticleId());
                }else{
                    return followCancelByUserId(user,followId);
                }
            }else{
                return ResponseResult.errorResult(AppHttpCodeEnum.NEED_LOGIN);
            }
        }
    }

    /**
     * 处理关注逻辑
     * @param user
     * @param followId
     * @return
     */
    private ResponseResult followByUserId(ApUser user,Integer followId,Integer articleId){
        // 判断用户是否存在
        ApUser followUser = apUserMapper.selectById(followId);
        if(followUser==null){
            return ResponseResult.errorResult(AppHttpCodeEnum.DATA_NOT_EXIST,"关注用户不存在");
        }
        ApUserFollow auf = apUserFollowMapper.selectByFollowId(BurstUtils.groudOne(user.getId()),user.getId(),followId);
        if(auf==null){
                ApUserFan fan = apUserFanMapper.selectByFansId(BurstUtils.groudOne(followId), followId, user.getId());
                if (fan == null) {
                    fan = new ApUserFan();
                    fan.setId(sequences.sequenceApUserFan());
                    fan.setUserId(followId);
                    fan.setFansId(user.getId());
                    fan.setFansName(user.getName());
                    fan.setLevel((short) 0);
                    fan.setIsDisplay(true);
                    fan.setIsShieldComment(false);
                    fan.setIsShieldLetter(false);
                    fan.setBurst(BurstUtils.encrypt(fan.getId(), fan.getUserId()));
                    apUserFanMapper.insert(fan);
                }
            auf = new ApUserFollow();
            auf.setId(sequences.sequenceApUserFollow());
            auf.setUserId(user.getId());
            auf.setFollowId(followId);
            auf.setFollowName(followUser.getName());
            auf.setCreatedTime(new Date());
            auf.setLevel((short) 0);
            auf.setIsNotice(true);
            auf.setBurst(BurstUtils.encrypt(auf.getId(),auf.getUserId()));
            // 记录关注行为
            FollowBehaviorDto dto = new FollowBehaviorDto();
            dto.setFollowId(followId);
            dto.setArticleId(articleId);
            appFollowBehaviorService.saveFollowBehavior(dto);
            return ResponseResult.okResult(apUserFollowMapper.insert(auf));
        }else{
            return ResponseResult.errorResult(AppHttpCodeEnum.DATA_EXIST,"已关注");
        }
    }

    /**
     * 处理取消关注逻辑
     * @param user
     * @param followId
     * @return
     */
    private ResponseResult followCancelByUserId(ApUser user,Integer followId){
        ApUserFollow auf = apUserFollowMapper.selectByFollowId(BurstUtils.groudOne(user.getId()),user.getId(),followId);
        if(auf==null){
            return ResponseResult.errorResult(AppHttpCodeEnum.DATA_NOT_EXIST,"未关注");
        }else{
                ApUserFan fan = apUserFanMapper.selectByFansId(BurstUtils.groudOne(followId), followId, user.getId());
                if (fan != null) {
                    apUserFanMapper.deleteByFansId(BurstUtils.groudOne(followId), followId, user.getId());
                }
            return ResponseResult.okResult(apUserFollowMapper.deleteByFollowId(BurstUtils.groudOne(user.getId()),user.getId(),followId));
        }
    }
}
3.3.6 接口定义及controller定义
(1)UserRelationDto
在Model中创建类com.heima.model.user.dtos.UserRelationDto
  @Data
public class UserRelationDto {

    // 文章作者ID
    @IdEncrypt
    Integer authorId;

    // 用户ID
    @IdEncrypt
    Integer userId;

    // 文章
    @IdEncrypt
    Integer articleId;
    /**
     * 操作方式
     * 0  关注
     * 1  取消
     */
    Short operation;
}
(2)UserRelationControllerApi
在com.heima.user.apis.UserRelationControllerApi类中定义接口:
/**
 * 关注
 */
public interface UserRelationControllerApi {
    ResponseResult follow(UserRelationDto dto);
}
(3)UserRelationController
在com.heima.user.controller.v1.UserRelationController类中,增加接口:
@RestController
@RequestMapping("/api/v1/user")
public class UserRelationController implements UserRelationControllerApi {
    @Autowired
    private AppUserRelationService appUserRelationService;
    @Override
    @PostMapping("/user_follow")
    public ResponseResult follow(@RequestBody UserRelationDto dto){
        return appUserRelationService.follow(dto);
    }
}
3.3.7 单元测试
在com.heima.user.controller.v1.UserRelationControllerTest测试类中使用MockMvc进行接口调用测试,代码如下:
- 测试用例中不会自动加载WebFilter定义的过滤,如需要使用可手动添加,此处不演示,直接把用户信息设置在线程中,较为便捷。
@RunWith(SpringRunner.class)
@SpringBootTest
@AutoConfigureMockMvc
public class UserRelationControllerTest {

    @Autowired
    MockMvc mvc;
    @Autowired
    ObjectMapper mapper;

    // 设置线程中的用户信息
    @Before
    public void initUser(){
        ApUser user = new ApUser();
        user.setId(1l);
        AppThreadLocalUtils.setUser(user);
    }
    // 关注
    @Test
    public void testFollowAdd() throws Exception{
        UserRelationDto dto = new UserRelationDto();
        dto.setOperation((short)0);
        dto.setArticleId(1);
        dto.setAuthorId(1);
        MockHttpServletRequestBuilder builder = MockMvcRequestBuilders.post("/api/v1/user/user_follow");
        builder.contentType(MediaType.APPLICATION_JSON_VALUE)
                .content(mapper.writeValueAsBytes(dto));
        mvc.perform(builder).andExpect(MockMvcResultMatchers.status().isOk()).andDo(MockMvcResultHandlers.print());
        Thread.sleep(10000);
    }

    // 取消关注
    @Test
    public void testFollowCancel() throws Exception{
        UserRelationDto dto = new UserRelationDto();
        dto.setOperation((short)1);
        dto.setArticleId(1);
        dto.setAuthorId(1);
        MockHttpServletRequestBuilder builder = MockMvcRequestBuilders.post("/api/v1/user/user_follow");
        builder.contentType(MediaType.APPLICATION_JSON_VALUE)
                .content(mapper.writeValueAsBytes(dto));
        mvc.perform(builder).andExpect(MockMvcResultMatchers.status().isOk()).andDo(MockMvcResultHandlers.print());
    }
}
3.4 点赞接口
此接口应在behavior模块中定义
3.4.1 接口定义
基本定义
由于框架封装只对JSON反序列化自增ID,需要请求文章ID需要封装为DTO.
| 参考标准 | 请参考通用接口规范 |
|---|---|
| 接口名称 | /api/v1/behavior/like_behavior |
| 请求DTO | com.heima.behavior.mysql.core.model.dtos.LikesBehaviorDto |
| 响应DTO | 输出插入数据条数的数量 |
CODE定义
| PARAM_INVALID | PARAM_INVALID(501,“无效参数”), |
|---|---|
| PARAM_REQUIRE | PARAM_REQUIRE(500,“缺少参数”) |
3.4.2 Mapper实现
ApLikesBehaviorMapper APP点赞行为
在com.heima.article.mysql.core.model.mappers.app.ApLikesBehaviorMapper中定义点赞数据插入方法:
int insert(ApLikesBehavior record);
ApLikesBehaviorMapper.xml
在resources/mappers/app/ApLikesBehaviorMapper.xml中,实现对应Mapper的insert方法,注意插入数据需在程序中调用Sequences生产ZK自增ID:
  <insert id="insert" parameterType="com.heima.article.mysql.core.model.pojos.app.ApLikesBehavior" >
    insert into ap_likes_behavior (id, behavior_entry_id, entry_id, type, operation, created_time,burst)
    values (#{id}, #{behaviorEntryId}, #{entryId}, #{type}, #{operation},
      #{createdTime},#{burst})
  </insert>
3.4.3 service代码实现
(1)AppLikesBehaviorService
创建类:com.heima.behavior.service.AppLikesBehaviorService
定义文章关系信息接口:
public interface AppLikesBehaviorService {
    /**
     * 存储喜欢数据
     * @param dto
     * @return
     */
    public ResponseResult saveLikesBehavior(LikesBehaviorDto dto);
}
(2)AppLikesBehaviorServiceImpl
创建类:com.heima.behavior.service.impl.AppLikesBehaviorServiceImpl,实现saveLikesBehavior方法,增量插入行为数据。
@Service
public class AppLikesBehaviorServiceImpl implements AppLikesBehaviorService {

    @Autowired
    private ApLikesBehaviorMapper apLikesBehaviorMapper;
    @Autowired
    private ApBehaviorEntryMapper apBehaviorEntryMapper;
    @Autowired
    private Sequences sequences;

    @Override
    public ResponseResult saveLikesBehavior(LikesBehaviorDto dto){
        ApUser user = AppThreadLocalUtils.getUser();
        // 用户和设备不能同时为空
        if(user==null&& dto.getEquipmentId()==null){
            return ResponseResult.errorResult(AppHttpCodeEnum.PARAM_REQUIRE);
        }
        Long userId = null;
        if(user!=null){
            userId = user.getId();
        }
        ApBehaviorEntry apBehaviorEntry = apBehaviorEntryMapper.selectByUserIdOrEquipment(userId, dto.getEquipmentId());
        // 行为实体找以及注册了,逻辑上这里是必定有值得,除非参数错误
        if(apBehaviorEntry==null){
            return ResponseResult.errorResult(AppHttpCodeEnum.PARAM_INVALID);
        }
        ApLikesBehavior alb = new ApLikesBehavior();
        alb.setId(sequences.sequenceApLikes());
        alb.setBehaviorEntryId(apBehaviorEntry.getId());
        alb.setCreatedTime(new Date());
        alb.setEntryId(dto.getEntryId());
        alb.setType(dto.getType());
        alb.setOperation(dto.getOperation());
        alb.setBurst(BurstUtils.encrypt(alb.getId(),alb.getBehaviorEntryId()));
        return ResponseResult.okResult(apLikesBehaviorMapper.insert(alb));
    }

}
3.4.4 接口定义及controller定义
(1)LikesBehaviorDto
创建类:com.heima.behavior.mysql.core.model.dtos.LikesBehaviorDto
此类在model模块中创建,定义请求入参,实现如下,注意entryId、equipmentId属性需要序列化混淆输入。
@Data
public class LikesBehaviorDto {
    // 设备ID
    @IdEncrypt
    Integer equipmentId;
    // 文章、动态、评论等ID
    @IdEncrypt
    Integer entryId;
    /**
     * 喜欢内容类型
     * 0文章
     * 1动态
     * 2评论
     */
    Short type;
    /**
     * 喜欢操作方式
     * 0 点赞
     * 1 取消点赞
     */
    Short operation;
}
(2)BehaviorControllerApi
在类com.heima.behavior.apis.BehaviorControllerApi中增加saveLikesBehavior方法
ResponseResult saveLikesBehavior(LikesBehaviorDto dto);
(3)BehaviorController
在com.heima.behavior.controller.v1.BehaviorController类中实现saveLikesBehavior接口方法,调用对应的service接口即可。
    @Autowired
    private AppLikesBehaviorService appLikesBehaviorService;

    @Override
    @PostMapping("/like_behavior")
    public ResponseResult saveLikesBehavior(@RequestBody LikesBehaviorDto dto) {
        return appLikesBehaviorService.saveLikesBehavior(dto);
}
3.4.5 单元测试
此接口就不演示单元测试,后续在集成前端后,通过界面演示。
3.5 不喜欢接口
3.5.1 接口定义
基本定义
由于框架封装只对JSON反序列化自增ID,需要请求文章ID需要封装为DTO.
| 参考标准 | 请参考通用接口规范 |
|---|---|
| 接口名称 | /api/v1/behavior/unlike_behavior |
| 请求DTO | com.heima.behavior.mysql.core.model.dtos.UnLikesBehaviorDto |
| 响应DTO | 输出插入数据条数的数量 |
CODE定义
| PARAM_INVALID | PARAM_INVALID(501,“无效参数”), |
|---|---|
| PARAM_REQUIRE | PARAM_REQUIRE(500,“缺少参数”) |
3.5.2 Mapper实现
ApUnlikesBehaviorMapper APP不喜欢行为
在com.heima.article.mysql.core.model.mappers.app.ApUnlikesBehaviorMapper中定义不喜欢数据插入的方法:
int insert(ApUnlikesBehavior record);
ApUnlikesBehaviorMapper.xml
在resources/mappers/app/ApUnlikesBehaviorMapper.xmlMapperinsertMycatIDid
<insert id="insert" parameterType="com.heima.article.mysql.core.model.pojos.app.ApUnlikesBehavior" >
    insert into ap_unlikes_behavior (entry_id, article_id,type, created_time)values (#{entryId}, #{articleId},#{type,jdbcType=TINYINT}, #{createdTime})
  </insert>
3.5.3 service代码实现
(1)AppUnLikesBehaviorService
创建类:com.heima.behavior.service.AppUnLikesBehaviorService
定义不喜欢信息保存方法:
public interface AppUnLikesBehaviorService {

    /**
     * 存储不喜欢数据
     * @param dto
     * @return
     */
    public ResponseResult saveUnLikesBehavior(UnLikesBehaviorDto dto);
}
(2)AppUnLikesBehaviorServiceImpl
创建类:com.heima.behavior.service.impl.AppUnLikesBehaviorServiceImpl
实现saveUnLikesBehavior方法,增量插入行为数据。
@Service
public class AppUnLikesBehaviorServiceImpl implements AppUnLikesBehaviorService {

    @Autowired
    private ApUnlikesBehaviorMapper apUnLikesBehaviorMapper;
    @Autowired
    private ApBehaviorEntryMapper apBehaviorEntryMapper;

    @Override
    public ResponseResult saveUnLikesBehavior(UnLikesBehaviorDto dto){
        ApUser user = AppThreadLocalUtils.getUser();
        // 用户和设备不能同时为空
        if(user==null&& dto.getEquipmentId()==null){
            return ResponseResult.errorResult(AppHttpCodeEnum.PARAM_REQUIRE);
        }
        Long userId = null;
        if(user!=null){
            userId = user.getId();
        }
        ApBehaviorEntry apBehaviorEntry = apBehaviorEntryMapper.selectByUserIdOrEquipment(userId, dto.getEquipmentId());
        // 行为实体找以及注册了,逻辑上这里是必定有值得,除非参数错误
        if(apBehaviorEntry==null){
            return ResponseResult.errorResult(AppHttpCodeEnum.PARAM_INVALID);
        }
        ApUnlikesBehavior alb = new ApUnlikesBehavior();
        alb.setEntryId(apBehaviorEntry.getId());
        alb.setCreatedTime(new Date());
        alb.setArticleId(dto.getArticleId());
        alb.setType(dto.getType());
        return ResponseResult.okResult(apUnLikesBehaviorMapper.insert(alb));
    }
}
3.5.4 接口定义及controller实现
UnLikesBehaviorDto
创建类:com.heima.behavior.mysql.core.model.dtos.UnLikesBehaviorDto
此类在model模块中创建,定义请求入参,实现如下:
@Data
public class UnLikesBehaviorDto {
    // 设备ID
    @IdEncrypt
    Integer equipmentId;
    // 文章ID
    @IdEncrypt
    Integer articleId;

    /**
     * 不喜欢操作方式
     * 0 不喜欢
     * 1 取消不喜欢
     */
    Short type;
}
BehaviorControllerApi
在类com.heima.behavior.apis.BehaviorControllerApi中增加saveUnLikesBehavior方法:
ResponseResult saveUnLikesBehavior( UnLikesBehaviorDto dto) ;
BehaviorController
在com.heima.behavior.controller.v1.BehaviorControllersaveUnLikesBehaviorservice
private AppUnLikesBehaviorService appUnLikesBehaviorService;
    @Override
    @PostMapping("/unlike_behavior")
    public ResponseResult saveUnLikesBehavior(@RequestBody UnLikesBehaviorDto dto) {
        return appUnLikesBehaviorService.saveUnLikesBehavior(dto);
}
3.6 app文章详情-阅读接口
通过阅读时间、阅读百分比等数据能够进一步计算出用户对文章的喜爱程度,主要数据由前端收集,后端进行相关的存储。
在实际业务中,用户如果再次点开文章阅读,此数据还可以用来恢复上次用户阅读位置,提升产品体验,此场景功能的实现了解一下,本项目中不进行实现。
3.6.1基本定义
由于框架封装只对JSON反序列化自增ID,需要请求文章ID需要封装为DTO.
| 参考标准 | 请参考通用接口规范 |
|---|---|
| 接口名称 | /api/v1/behavior/read_behavior |
| 请求DTO | com.heima.behavior.mysql.core.model.dtos.ReadBehaviorDto |
| 响应DTO | 输出插入数据条数的数量 |
3.6.2 CODE定义
| PARAM_INVALID | PARAM_INVALID(501,“无效参数”), |
|---|---|
| PARAM_REQUIRE | PARAM_REQUIRE(500,“缺少参数”) |
3.6.3 Mapper实现
(1)ApReadBehaviorAPP阅读行为
创建类com.heima.article.mysql.core.model.pojos.app.ApReadBehavior
生成的ApReadBehavior注释和get方法可以删除,然后使用lombok @Data注解,优雅的实现pojo方法。另外注意articleId、entryId需要增加@IdEncrypt注解,以作输出混淆,burst字段需要过滤输出。
@Data
public class ApReadBehavior {
    private Long id;
    @IdEncrypt
    private Integer entryId;
    @IdEncrypt
    private Integer articleId;
    private Short count;
    private Integer readDuration;
    private Short percentage;
    private Short loadDuration;
    private Date createdTime;
    private Date updatedTime;
    @JsonIgnore
    private String burst;
}
(2)ApReadBehaviorMapper 接口
创建类com.heima.article.mysql.core.model.mappers.app.ApReadBehaviorMapper
定义插入、更新、查询三个方法:
public interface ApReadBehaviorMapper {
    int insert(ApReadBehavior record);
    int update(ApReadBehavior record);
    ApReadBehavior selectByEntryId(String burst,Integer entryId,Integer articleId);
}
(3)ApReadBehaviorMapper.xml映射文件
创建文件resources/mappers/app/ApReadBehaviorMapper.xml
ApReadBehavior是按照burst字段进行分库分表,查询、更新时注意使用Mycat注解确定路由DN,插入时需在程序中生成ID,SQL如下:
<mapper namespace="com.heima.article.mysql.core.model.mappers.app.ApReadBehaviorMapper" >
  <resultMap id="BaseResultMap" type="com.heima.article.mysql.core.model.pojos.app.ApReadBehavior" >
      <id column="id" property="id" />
      <result column="entry_id" property="entryId" />
      <result column="article_id" property="articleId" />
      <result column="count" property="count"/>
      <result column="read_duration" property="readDuration" />
      <result column="percentage" property="percentage"/>
      <result column="load_duration" property="loadDuration"/>
      <result column="created_time" property="createdTime" />
      <result column="updated_time" property="updatedTime" />
      <result column="burst" property="burst" />
  </resultMap>
  <sql id="Base_Column_List" >
    id, entry_id, article_id, count, read_duration, percentage, load_duration, created_time,updated_time,burst
  </sql>
  <!-- 使用注解方式指明SQL执行的DN -->
  <select id="selectByEntryId" resultMap="BaseResultMap">
    /*!mycat:sql=select id from ap_read_behavior where burst='${burst}'*/
    select  <include refid="Base_Column_List" /> from ap_read_behavior where entry_id = #{entryId} and article_id=#{articleId}
  </select>

  <insert id="insert" parameterType="com.heima.article.mysql.core.model.pojos.app.ApReadBehavior" >
    insert into ap_read_behavior (id, entry_id, article_id, count, read_duration, percentage, load_duration, created_time,updated_time,burst)
    values (#{id}, #{entryId}, #{articleId},
      #{count,jdbcType=TINYINT}, #{readDuration}, #{percentage,jdbcType=TINYINT},
      #{loadDuration,jdbcType=TINYINT}, #{createdTime}, #{updatedTime},#{burst})
  </insert>

  <update id="update" parameterType="com.heima.article.mysql.core.model.pojos.app.ApReadBehavior" >
    /*!mycat:sql=select id from ap_read_behavior where burst='${burst}'*/
    update ap_read_behavior
    <set >
      <if test="readDuration != null" >
        read_duration = read_duration + #{readDuration},
      </if>
      <if test="percentage != null" >
        percentage = GREATEST(percentage,#{percentage}),
      </if>
      <if test="loadDuration != null" >
        load_duration = #{loadDuration},
      </if>
      <if test="count != null" >
        count = count+1,
      </if>
      <if test="updatedTime != null" >
        updated_time = #{updatedTime},
      </if>
    </set>
    where entry_id = #{entryId} and article_id = #{articleId} and  burst=#{burst}
  </update>
</mapper>
3.6.4 service代码实现
(1)AppReadBehaviorService
创建类:com.heima.behavior.service.AppReadBehaviorService定义接口saveReadBehavior方法:
public interface AppReadBehaviorService {
    /**
     * 存储阅读数据
     * @param dto
     * @return
     */
    public ResponseResult saveReadBehavior(ReadBehaviorDto dto);
}
(2)AppReadBehaviorServiceImpl
创建类:com.heima.behavior.service.impl.AppReadBehaviorServiceImpl,并实现
saveReadBehavior方法。
阅读行为可能发生多次,第一次是新增数据,第二次是更新阅读时间,最大阅读比例,阅读次数等信息。
@Service
public class AppReadBehaviorServiceImpl implements AppReadBehaviorService {
    @Autowired
    private ApReadBehaviorMapper apReadBehaviorMapper;
    @Autowired
    private ApBehaviorEntryMapper apBehaviorEntryMapper;
    @Autowired
    private Sequences sequences;

    @Override
    public ResponseResult saveReadBehavior(ReadBehaviorDto dto){
        ApUser user = AppThreadLocalUtils.getUser();
        // 用户和设备不能同时为空
        if(user==null&& dto.getEquipmentId()==null){
            return ResponseResult.errorResult(AppHttpCodeEnum.PARAM_REQUIRE);
        }
        Long userId = null;
        if(user!=null){
            userId = user.getId();
        }
        ApBehaviorEntry apBehaviorEntry = apBehaviorEntryMapper.selectByUserIdOrEquipment(userId, dto.getEquipmentId());
        // 行为实体找以及注册了,逻辑上这里是必定有值得,除非参数错误
        if(apBehaviorEntry==null){
            return ResponseResult.errorResult(AppHttpCodeEnum.PARAM_INVALID);
        }
        ApReadBehavior alb = apReadBehaviorMapper.selectByEntryId(BurstUtils.groudOne(apBehaviorEntry.getId()),apBehaviorEntry.getId(),dto.getArticleId());
        boolean isInsert = false;
        if(alb==null){
            alb = new ApReadBehavior();
            alb.setId(sequences.sequenceApReadBehavior());
            isInsert = true;
        }
        alb.setEntryId(apBehaviorEntry.getId());
        alb.setCount(dto.getCount());
        alb.setPercentage(dto.getPercentage());
        alb.setArticleId(dto.getArticleId());
        alb.setLoadDuration(dto.getLoadDuration());
        alb.setReadDuration(dto.getReadDuration());
        alb.setCreatedTime(new Date());
        alb.setUpdatedTime(new Date());
        alb.setBurst(BurstUtils.encrypt(alb.getId(),alb.getEntryId()));
        // 插入
        if(isInsert){
            return ResponseResult.okResult(apReadBehaviorMapper.insert(alb));
        }else {
            // 更新
            return ResponseResult.okResult(apReadBehaviorMapper.update(alb));
        }
    }
}
3.6.5 接口定义及controller实现
(1)ReadBehaviorDto
创建类:com.heima.behavior.mysql.core.model.dtos.ReadBehaviorDto
此类在model模块中创建,定义请求入参,实现如下:
@Data
public class ReadBehaviorDto {
    // 设备ID
    @IdEncrypt
    Integer equipmentId;
    // 文章、动态、评论等ID
    @IdEncrypt
    Integer articleId;
    /**
     * 阅读次数
     */
    Short count;
    /**
     * 阅读时长(S)
     */
    Integer readDuration;

    /**
     * 阅读百分比,0~100
     */
    Short percentage;
    /**
     * 加载时间
     */
    Short loadDuration;
}
(2)BehaviorControllerApi接口定义
在类com.heima.behavior.apis.BehaviorControllerApi中增加saveReadBehavior方法
ResponseResult saveReadBehavior( ReadBehaviorDto dto);
(3)BehaviorController
在com.heima.behavior.controller.v1.BehaviorController类中实现saveReadBehavior接口方法,调用对应的service接口即可。
    @Autowired
    private AppReadBehaviorService appReadBehaviorService;
    @Override
    @PostMapping("/read_behavior")
    public ResponseResult saveReadBehavior(@RequestBody ReadBehaviorDto dto) {
        return appReadBehaviorService.saveReadBehavior(dto);
    }
3.6.6 单元测试
此接口就不演示单元测试,后续在集成前端后,通过界面演示。
4 后端开发思考
- 通过观察可发现获取行为实体的代码较为通用,可以抽象出功能方法,放置在一个BaseServiceImpl类中,相关Service都继承这个类。在这里就不做相关代码演示。
- 通过代码观察,了解到对于代码的异常没做过多的异常处理,这部分内容将在后续进行统一拦截演示。
- 通过代码观察,了解到目前写代码的规范没做过多的注重,这部分内将在后续进行统一演示。
5 前端详情开发
在进行前端开发过程中,我们会遇见2个棘手的问题,以及相关的解决思路如下:
-
文章内容富文本内容,如何跨平台渲染?
内容是一个JSON对象数组,每个对象对应一种输出类型,比如文本、图片。
-
图片如何自适应高度?(此问题作为线下探讨话题,后面课程会给出参考代码)
获得图真实高度之后,按照屏幕自动缩放比例。
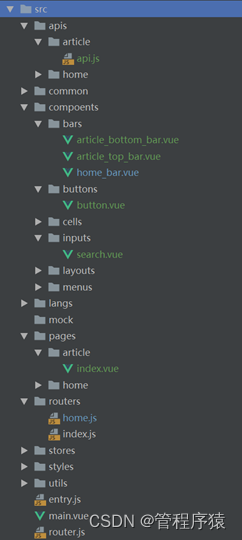
5.1 创建文件
创建src/pages/article/index.vue文件,用于实现页面功能
5.2 Model定义
-
页面包含的参数,主要是文章列表项的数据对象,包含文章id、文章标题等:
[‘id’,‘title’,‘date’,‘comment’,‘type’,‘source’,‘authorId’]
-
详情页面属性主要包括以下几部分:
- scrollerHeight:辅助实现文章内容高度的计算
- icon:定义页面用到的button图标
- config:存储文章的配置,比如是否删除、是否可评论
- content:存储当前页面显示的文章内容,其属性字段,参考后端返回的model
- relation:定义行为实体与当前文章的关系,比如是否点赞、是否收藏等
- time:定义文章详情页面的时间参数和变量
- test:用于功能演示的测试变量
props:['id','title','date','comment','type','source','authorId'],
data(){
    return {
        scrollerHeight:'500px',
        icon : {
            like : '\uf164',
            unlike : '\uf1f6',
            wechat : '\uf086',
            friend : '\uf268'
        },
        config:{},//文章配置
        content:{},//文章内容
        relation:{
            islike: false,
            isunlike: false,
            iscollection: false,
            isfollow: false,
            isforward:false
        },//关系
        time : {
            timer:null,//定时器
            timerStep:100,//定时器步长
            readDuration:0,//阅读时长
            percentage:0,//阅读比例
            loadDuration:0,//加载时长
            loadOff:true//加载完成控制
        },//时间相关属性
        test : {
            isforward : false
        }
    }
}
5.3 实现Api
详情页面的部分行为不要求用户必须登录,有设备ID好即可,并且在后端接口中会要求传入设备ID,前端对此参数需做全局存储管理,可存储在store中。
5.3.1 store调整
src/store/store.js文件中需要增加对设备ID存储和获取的方法,具体调整如下:
- 定义函数中增加变量
this.equipmentidKey = "EQUIPMENTID_KEY"
- 属性方法中增加对应方法
setEquipmentId : function(equipmentId){
    return this.__setItem(this.equipmentidKey,equipmentId);
},
getEquipmentId : function(){
    return this.__getItem(this.equipmentidKey);
}
- 在__check函数中增加初始化值得逻辑,以方便接口测试
if(this.storage==null){
    this.storage = weex.requireModule("storage");
    // equipmentId=1
    this.setEquipmentId("8D3E8E0CF883C4E99329AF8A29300AB6")
}
5.3.2 request调整
5.3.2.1 基本调整
详情页面关注功能要求传入用户Id,因此需要实现后端接口的JWT和验签功能,调整如下:
- 在定义函数中增加变量
this.store = null;
- 在属性方法中增加setStore方法
setStore : function(store){
    this.store = store
}
- 在entry.js文件中调用setStore方法
Vue.prototype.$store = store
request.setStore(store)
Vue.prototype.$request = request
5.3.2.2 完整代码
Request的调整还有以下调整:
-
安装crypto-js加密库
-
实现安装查询字符串排序参数,并生成验签字符串的sign方法
-
在__check方法中初始化JWT token字符串(这里做测试,后续登录接口成功后会设置此值)
-
在post方法中调整body为对象参,增加parms参数,并传入header安全参数
-
在get方法中传入header安全参数
var querystring=require("querystring");
var crypto =require('crypto-js')
function Request() {
    this.stream=null;
    this.store = null;
}
Request.prototype={
    setStore : function(store){
        this.store = store
    },
    __check : function(){
        if(!this.stream){
            this.stream = weex.requireModule("stream");
            // user=1
            this.store.setToken("eyJhbGciOiJIUzUxMiIsInppcCI6IkdaSVAifQ.H4sIAAAAAAAAADWLQQqEMAwA_5KzPcQ2LfU3iWbZCkIhFVyW_fvGg7cZhvnCPhosIBXzq2gKlYlDypsE0RVDwiI0C9FaIkzQeMCClCNSzDVNYKf4bR8betzdzPWt7WA3Pjc37t1Zr_6cZb7P5g1_fxA93U6AAAAA.vWYfL-u7d2no6iVdqS-DzlD4WcQrSsx_U8gLjvZJQ9Itmlw1zeQLCl4sVZ_4EeU33ExCNCHjuCTPoGay4OYEcw")
        }
        return this.stream;
    },
    post : function(path,body,parms){
        let stream = this.__check()
        let time = new Date().getTime()
        if(parms==undefined)parms={}
else{
    path = path+"?"+querystring.stringify(parms)
}
        parms['t']=time
        return this.store.getToken().then(token=>{
            return new Promise((resolve, reject) => {
                stream.fetch({
                    method: 'POST',
                    url: path,
                    type: 'json',
                    headers:{
                        'Content-Type': 'application/json; charset=UTF-8',
                        'token':token,
                        't': ''+time,
                        'md':this.sign(parms)
                    },
                    body:JSON.stringify(body)
                }, (response) => {
                    if (response.status == 200) {
                        resolve(response.data)
                    }
                    else {
                        reject(response)
                    }
                })
            })
        }).catch(e=>{
            return new Promise((resolve, reject) => {
                reject(e);
            })
        })
    },
    get : function(path,parms){
        let stream = this.__check();
        if(parms){
            let tmp = querystring.stringify(parms)
            if(path.indexOf("?")==-1){
                tmp="?"+tmp;
            }else{
                tmp="&"+tmp;
            }
            path+=tmp;
        }
        let time = new Date().getTime()
        parms['t']=time
        return this.store.getToken().then(token=>{
            return new Promise((resolve, reject) => {
                stream.fetch({
                    method: 'GET',
                    url: path,
                    type: 'json',
                    headers:{
                        'Content-Type': 'application/json; charset=UTF-8',
                        'token':token,
                        't': ''+time,
                        'md':this.sign(parms)
                    }
                }, (response) => {
                    if (response.status == 200) {
                        resolve(response.data)
                    }
                    else {
                        reject(response)
                    }
                })
            })
        }).catch(e=>{
            return new Promise((resolve, reject) => {
                reject(e);
            })
        })
    },
    sign : function(parms){
        let arr = [];
        for (var key in parms) {
            arr.push(key)
        }
        arr.sort();
        let str = '';
        for (var i in arr) {
            if(str!=''){
                str+="&"
            }
            str += arr[i] + "=" + parms[arr[i]]
        }
        return crypto.MD5(str).toString()
    }
}
export  default new Request()
5.3.3 Article api代码
api是对后端接口的一一实现,由于安全已在request.js中封装,因此api实现较为简单,其文件代码如下,包含了关注、收藏、转发、点赞、不喜欢、阅读、分享、加载文章内容、加载文章关系几个接口的实现:
function Api(){
    var vue;
}
Api.prototype = {
    setVue : function(vue){
        this.vue = vue;
    },
    // 保存展现行为数据
    loadinfo : function(articleId){
        let url = this.vue.$config.urls.get('load_article_info')
        return new Promise((resolve, reject) => {
            this.vue.$request.post(url,{articleId:articleId}).then((d)=>{
                resolve(d);
            }).catch((e)=>{
                reject(e);
            })
        })
    },
    // 加载文章关系信息
    loadbehavior: function(articleId,authorId){
        let url = this.vue.$config.urls.get('load_article_behavior')
        return this.vue.$store.getEquipmentId().then(equipmentId=>{
            return new Promise((resolve, reject) => {
                this.vue.$request.post(url,{equipmentId:equipmentId,articleId:articleId,authorId:authorId}).then((d)=>{
                    resolve(d);
                }).catch((e)=>{
                    reject(e);
                })
            })
        }).catch(e=>{
            return new Promise((resolve, reject) => {
                reject(e);
            })
        })
    },
    // 喜欢、点赞
    like : function(data){
        let url = this.vue.$config.urls.get('like_behavior')
        return this.vue.$store.getEquipmentId().then(equipmentId=>{
            return new Promise((resolve, reject) => {
                this.vue.$request.post(url,{equipmentId:equipmentId,entryId:data.articleId,type:0,operation:data.operation}).then((d)=>{
                    resolve(d);
                }).catch((e)=>{
                    reject(e);
                })
            })
        }).catch(e=>{
            return new Promise((resolve, reject) => {
                reject(e);
            })
        })
    },
    // 不喜欢
    unlike : function(data){
        let url = this.vue.$config.urls.get('unlike_behavior')
        return this.vue.$store.getEquipmentId().then(equipmentId=>{
            return new Promise((resolve, reject) => {
                this.vue.$request.post(url,{equipmentId:equipmentId,articleId:data.articleId,type:data.type}).then((d)=>{
                    resolve(d);
                }).catch((e)=>{
                    reject(e);
                })
            })
        }).catch(e=>{
            return new Promise((resolve, reject) => {
                reject(e);
            })
        })
    },
    // 不喜欢
    read : function(data){
        let url = this.vue.$config.urls.get('read_behavior')
        return this.vue.$store.getEquipmentId().then(equipmentId=>{
            return new Promise((resolve, reject) => {
                this.vue.$request.post(url,{
                    equipmentId:equipmentId,
                    articleId:data.articleId,
                    count:1,
                    readDuration:data.readDuration,
                    percentage:data.percentage,
                    loadDuration:data.loadDuration
                }).then((d)=>{
                    resolve(d);
                }).catch((e)=>{
                    reject(e);
                })
            })
        }).catch(e=>{
            return new Promise((resolve, reject) => {
                reject(e);
            })
        })
    },
    // 收藏
    collection : function(data){
        let url = this.vue.$config.urls.get('collection_behavior')
        return this.vue.$store.getEquipmentId().then(equipmentId=>{
            return new Promise((resolve, reject) => {
                this.vue.$request.post(url,{
                    equipmentId:equipmentId,
                    entryId:data.articleId,
                    publishedTime:data.publishedTime,
                    type:0,
                    operation:data.operation
                }).then((d)=>{
                    resolve(d);
                }).catch((e)=>{
                    reject(e);
                })
            })
        }).catch(e=>{
            return new Promise((resolve, reject) => {
                reject(e);
            })
        })
    },
    // 转发
    forward : function(data){
        let url = this.vue.$config.urls.get('forward_behavior')
        return this.vue.$store.getEquipmentId().then(equipmentId=>{
            return new Promise((resolve, reject) => {
                this.vue.$request.post(url,{
                    equipmentId:equipmentId,
                    articleId:data.articleId
                }).then((d)=>{
                    resolve(d);
                }).catch((e)=>{
                    reject(e);
                })
            })
        }).catch(e=>{
            return new Promise((resolve, reject) => {
                reject(e);
            })
        })
    },
    // 分享
    share : function(data){
        let url = this.vue.$config.urls.get('share_behavior')
        return this.vue.$store.getEquipmentId().then(equipmentId=>{
            return new Promise((resolve, reject) => {
                this.vue.$request.post(url,{
                    equipmentId:equipmentId,
                    articleId:data.articleId,
                    type:data.type
                }).then((d)=>{
                    resolve(d);
                }).catch((e)=>{
                    reject(e);
                })
            })
        }).catch(e=>{
            return new Promise((resolve, reject) => {
                reject(e);
            })
        })
    }
    ,
    // 关注
    follow : function(data){
        let url = this.vue.$config.urls.get('user_follow')
        return new Promise((resolve, reject) => {
            this.vue.$request.post(url,{
                authorId:data.authorId,
                operation:data.operation,
                articleId:data.articleId
            }).then((d)=>{
                resolve(d);
            }).catch((e)=>{
                reject(e);
            })
        })
    }
}

export default new Api()
思考这个地方的代码有没有可优化的点?后续再做代码优化
5.3.4 Home api代码
由于调整了request的规则,对于之前主页的API需要调整调用方式,具体代码如下:
-
调整loaddata方法,从store中获取设备ID
-
调整saveShowBehavior方法,从store中获取设备ID
function Api(){
    this.vue;
}
Api.prototype = {
    setVue : function(vue){
        this.vue = vue;
    },
    // 加载数据
    loaddata : function(params){
        let dir = params.loaddir
        let url = this.getLoadUrl(dir)
        return this.vue.$store.getEquipmentId().then(equipmentId=> {
            return new Promise((resolve, reject) => {
                this.vue.$request.get(url,params).then((d)=>{
                    resolve(d);
                }).catch((e)=>{
                    reject(e);
                })
            })
        }).catch(e=>{
            return new Promise((resolve, reject) => {
                reject(e);
            })
        })
    },
    // 保存展现行为数据
    saveShowBehavior : function(params){
        let ids = [];
        for(let k in params){
            if(params[k]){
                ids.push({id:k});
            }
        }
        if(ids.length>0){
            let url = this.vue.$config.urls.get('show_behavior')
            return this.vue.$store.getEquipmentId().then(equipmentId=> {
                return new Promise((resolve, reject) => {
                    this.vue.$request.post(url, {
                        equipmentId: equipmentId,
                        articleIds: ids
                    }).then((d) => {
                        d.data = ids
                        resolve(d);
                    }).catch((e) => {
                        reject(e);
                    })
                })
            }).catch(e=>{
                return new Promise((resolve, reject) => {
                    reject(e);
                })
            })
        }
    },
    // 区别请求那个URL
    getLoadUrl : function(dir){
        let url = this.vue.$config.urls.get('load')
        if(dir==0)
            url = this.vue.$config.urls.get('loadnew')
        else if(dir==2)
            url = this.vue.$config.urls.get('loadmore')
        return url;
    }
}

export default new Api()
5.4 实现VIEW
详情页面包含顶部导航栏和底部功能栏,其中内容区域注意使用scroller滚动组件进行包装,相关实现代码如下:
<template>
    <div class="art-page">
        <div class="art-top"><TopBar :text="title"/></div>
        <scroller class="scroller" ref="scroller" @scroll="scroller" show-scrollbar="true">
            <text class="title">{{title}}</text>
            <div class="info">
                <image src="https://p3.pstatp.com/thumb/1480/7186611868" class="head"></image>
                <text class="author">{{source}}</text>
                <text class="time">{{formatDate(date)}}</text>
                <div class="empty"></div>
                <wxc-button class="button" v-if="relation.isfollow" @wxcButtonClicked="follow" text="取消关注" size="small"></wxc-button>
                <wxc-button class="button" v-if="!relation.isfollow" @wxcButtonClicked="follow" text="+关注" size="small"></wxc-button>
            </div>
            <div class="content">
                <template v-for="item in content">
                    <text class="text" :style="getStyle(item.style)" v-if="item.type=='text'">{{item.value}}</text>
                    <image class="image" :style="getStyle(item.style)" v-if="item.type=='image'" :src="item.value"></image>
                </template>
            </div>
            <div class="tools">
                <Button text="点赞" @onClick="like" :icon='icon.like' :active="relation.islike" active-text="取消赞"/>
                <Button text="不喜欢" @onClick="unlike" :icon='icon.unlike' :active="relation.isunlike" />
                <Button text="微信" :icon='icon.wechat' @onClick="share(0)"/>
                <Button text="朋友圈" :icon='icon.friend' @onClick="share(1)"/>
            </div>
        </scroller>
        <div class="art-bottom"><BottomBar :forward="test.isforward" @clickForward="forward"
                                           :collection="relation.iscollection" @clickCollection="collection" /></div>
    </div>
</template>
5.5 实现VM
VM需要调用API进行内容数据绑定,以及实现行为数据的收集与提交。
5.5.1 mounted
挂载完成需要重新设置文章内容部分的高度,以适应内容自动提供滚动功能。
mounted(){
    this.scrollerHeight=(Utils.env.getPageHeight()-180)+'px';
}
5.5.2 created
创建完成后需要做以下几件事情:
-
初始化Api vue属性
-
调用文章内容加载方法loadInfo
-
调用文章关系加载方法loadBehavior
-
启动定时器记录用户在此页面停留时长、loadInfo方法的加载时长
created(){
    Api.setVue(this);
    this.loadInfo();
this.loadBehavior();
    let _this = this;
    this.time.timer = setInterval(function(){
        _this.time.readDuration+=_this.time.timerStep
        if(_this.time.loadOff){
            _this.time.loadDuration+=_this.time.timerStep
        }
    },this.time.timerStep)
}
5.5.3 destoryed
在用户离开页面时,提交用户的阅读行为数据,并清理timer
destroyed(){
    this.read();
}
5.5.4 loadInfo
调用loadinfo的方法,如果返回成功则赋值config和content值,注意content为支持富文本展示功能,其值格式被定义为JSON数组字符串,设置时可用eval转换。
loadInfo : function(){
    Api.loadinfo(this.id).then((d)=>{
        if(d.code==0){
            this.config = d.data['config']
            let temp = d.data['content']
            if(temp){
                temp = temp.content
                this.content = eval("("+temp+")")
                this.time.loadOff=false;//关闭加载时间的记录
            }
        }else{
            modal.toast({message: d.errorMessage,duration: 3})
        }
    }).catch((e)=>{
        console.log(e)
    })
}
- content值格式示例:
[
{
        type: 'text',
        value: '这个暑期档被灭霸打了响指之后就显得非常暗淡。易烊千玺的首部大荧幕男主角作品《少年的你》撤档,管虎的战争片《八佰》也因“技术问题”没法如期上映,《伟大的梦想》萎缩成《小小的愿望》,《悲伤逆流成河》不得不强颜欢笑,化作《流淌的美好时光》。'
    },
    {
        type: 'text',
        value: '唯一振奋人心的大概就是“复活”的这部《长安十二时辰》,它突然上线给人带来的惊讶不小于前阵子突然消失的《九州缥缈录》。'
    },
    {
        type: 'image',
        value: 'https://p3.pstatp.com/large/pgc-image/RVFRw8xCiUeTbd',
        style:{
            height:'810px'
        }
    },
    {
        type: 'text',
        value: '6月27日,雷佳音和易烊千玺主演的《长安十二时辰》上线,播出一周,讨论声众多,连身边不少把国产剧放在鄙视链最底端的朋友都追起剧来。'
    },
    {
        type: 'text',
        value: '但我怎么也没想到,和同事关于这部剧的讨论是从吃开始的。罪魁祸首是可以吸的火晶柿子。糙汉张小敬吃柿子的套路太骚气,又红又圆的小柿子,把精致吸管往里一插,手指肚捧着柿子,就这么喝起来了。大家忍不住就柿子品种来了一轮南北方大讨论,琢磨着去哪能骚气地喝一回小柿子。'
    },
    {
        type: 'image',
        value: 'https://p3.pstatp.com/large/pgc-image/RVFRw9gDn1CAGc',
        style:{
            height:'176PX'
        }
    },
    {
        type: 'image',
        value: 'https://p3.pstatp.com/large/pgc-image/RVFRwBeGmhQHL8',
        style:{
            height:'211PX'
        }
    },
    {
        type: 'image',
        value: 'https://p3.pstatp.com/large/pgc-image/RVFRwEM7cyRgyz',
        style:{
            height:'211PX'
        }
    },
    {
        type: 'text',
        value: '《长安十二时辰》的开场简直就是雷佳音的大型吃喝直播,我至今在帮他数着,在顺手忙活解救长安城的前提下,就这十二时辰里,雷佳音到底能吃多少东西。',
        style: {
            fontWeight: 'bold',
            fontSize:'36px'
        }
    },
    {
        type: 'image',
        value: 'https://p3.pstatp.com/large/pgc-image/RVFRwHoGEipU4R',
        style:{
            height:'211PX'
        }
    },
]
5.5.5 loadBehavior
该方法调用后端接口获取文章关系信息,并赋值给relation属性
loadBehavior : function(){
    Api.loadbehavior(this.id,this.authorId).then((d)=>{
        if(d.code==0){
            this.relation = d.data
        } else{
           modal.toast({message: d.errorMessage,duration: 3})
        }
    }).catch((e)=>{
        console.log(e)
    })
}
5.5.6 like
该函数实现点赞和取消点的接口调用,如果成功修改本地属性islike的值
// 点赞
like : function(){
    Api.like({articleId:this.id,operation:this.relation.islike?1:0}).then(d=>{
        if(d.code==0){
            this.relation.islike = !this.relation.islike
        }else{
            modal.toast({message: d.errorMessage,duration: 3})
        }
    }).catch((e)=>{
        console.log(e)
    })
}
5.5.7 unlike
实现不喜欢和取消不喜欢的功能,如果调用成功则修改本地属性isunlike的值
// 不喜欢
unlike : function(){
    Api.unlike({articleId:this.id,type:this.relation.isunlike?1:0}).then(d=>{
        if(d.code==0){
            this.relation.isunlike = !this.relation.isunlike
        }else{
            modal.toast({message: d.errorMessage,duration: 3})
        }
    }).catch((e)=>{
        console.log(e)
    })
}
5.5.8 share
分享成功后给出相关提示
// 分享
share : function(type){
    Api.share({articleId:this.id,type:type}).then(d=>{
        if(d.code==0){
            modal.toast({message: '分享成功',duration: 3})
        }else{
            modal.toast({message: d.errorMessage,duration: 3})
        }
    }).catch((e)=>{
        console.log(e)
    })
}
5.5.9 collection
实现收藏和取消收藏的功能,如果调用成功,则修改本地iscollection值
// 收藏
collection : function(){
    Api.collection({articleId:this.id,publishedTime:this.date,operation:this.relation.iscollection?1:0}).then(d=>{
        if(d.code==0){
            this.relation.iscollection = !this.relation.iscollection
        }else{
            modal.toast({message: d.errorMessage,duration: 3})
        }
    }).catch((e)=>{
        console.log(e)
    })
}
5.5.10 forward
转发功能用户行为数据的收集演示,通过点亮按钮来表现调用成功
// 转发
forward : function(){
    Api.forward({articleId:this.id}).then(d=>{
        this.test.isforward = !this.test.isforward
    }).catch((e)=>{
        console.log(e)
    })
}
5.5.11 follow
实现关注和取消关注的切换操作,如果操作成功,则给出提示并修改本地isfollow的值
// 关注
follow : function(){
    Api.follow({articleId:this.id,authorId:this.authorId,operation:this.relation.isfollow?1:0}).then(d=>{
        if(d.code==0){
            this.relation.isfollow = !this.relation.isfollow
            modal.toast({message:this.relation.isfollow?'成功关注':'成功取消关注',duration: 3})
        }else{
            modal.toast({message: d.errorMessage,duration: 3})
        }
    }).catch((e)=>{
        console.log(e)
    })
}
5.5.12 read
阅读行为数据的提交,不做请求结果的处理
// 阅读行为
read : function(){
    clearInterval( this.time.timer)
    Api.read({articleId:this.id,readDuration:this.time.readDuration,percentage:this.time.percentage,loadDuration:this.time.loadDuration});
}
5.5.13 其它方法
-
formatDate:时间格式化工具类
-
getStyle:用户辅助实现富文本样式的支持
-
scroller:用于简单滚动条位置,实时计算用户的阅读到的位置百分比
formatDate:function(time){
    return this.$date.format10(time);
},
getStyle:function(item){
    if(item){
        return item;
    }else{
        return {}
    }
},
scroller : function(e){
    let y = Math.abs(e.contentOffset.y)+(Utils.env.getPageHeight()-180)
    let height = e.contentSize.height
    this.time.percentage = Math.max(parseInt((y*100)/height),this.time.percentage)
}
5.6 实现Style
<style scoped>
    .art-page{
        position: absolute;
        top: 0;
        left: 0;
        right: 0;
        bottom: 0;
        width: 750px;
        flex-direction: column;
    }
    .art-top{
        top: 0;
        height: 90px;
        position: fixed;
        z-index: 999;
    }
    .art-bottom{
        bottom: 0;
        position: fixed;
        width: 750px;
    }
    .scroller{
        flex: 1;
        flex-direction: column;
        width: 750px;
        padding: 0px 20px;
        margin: 90px 0px;
    }
    .title{
        font-size: 48px;
        font-weight: bold;
        margin: 10px 0px;
    }
    .info{
        margin-top: 20px;
        line-height: 48px;
        align-items: center;
        flex-direction: row;
    }
    .head{
        width: 48px;
        height: 48px;
        border-radius: 48px;
    }
    .author{
        font-size: 28px;
        color: #adadad;
        margin-left: 15px;
    }
    .time{
        font-size: 28px;
        color: #adadad;
        margin-left: 15px;
    }
    .empty{
        flex: 1;
    }
    .content{
        flex-direction: column;
        font-size: 30px;
        justify-content:flex-start;
        margin-top: 20px;
        color: #222;
        word-wrap: break-word;
        text-align: justify;
    }
    .text {
        margin: 15px 0px;
    }
    .image{
        display:inline-block;
        margin: 15px 0px;
        border-radius: 5px;
        height: 300px;
    }
    .tools{
        margin: 10px 0px;
        flex-direction: row;
        height: 60px;
    }
</style>
5.7 路由配置
新增详情页面,需要配置路由,以便页面跳入;在这里详情页面应该配置成一级路由,在src/routers/home.js文件中更改:
// ============  主页路由MODE- ==================
import Layout from '@/compoents/layouts/layout_main'
import Home from '@/pages/home/index'
import Article from '@/pages/article/index'

let routes = [
    {
        path: '/',
        component: Layout,
        children:[
            {
                path:'/home',
                name:'Home',
                component: Home
            }
        ]
    },{
        path:'/article/:id',
        name: 'article-info',
        component:Article
    }
]

export default routes;
5.8 页面跳转
在src/page/home/index.vue中实现文章列表点击打开详情的实现:
// 列表项点击事件
wxcPanItemClicked(id){
  this.$router.push('/article/'+id)
}
5.9 效果演示
w
modal.toast({message:this.relation.isfollow?‘成功关注’:‘成功取消关注’,duration: 3})
}else{
modal.toast({message: d.errorMessage,duration: 3})
}
}).catch((e)=>{
console.log(e)
})
}
#### 5.5.12    read

阅读行为数据的提交,不做请求结果的处理

```javascript
// 阅读行为
read : function(){
    clearInterval( this.time.timer)
    Api.read({articleId:this.id,readDuration:this.time.readDuration,percentage:this.time.percentage,loadDuration:this.time.loadDuration});
}
5.5.13 其它方法
-
formatDate:时间格式化工具类
-
getStyle:用户辅助实现富文本样式的支持
-
scroller:用于简单滚动条位置,实时计算用户的阅读到的位置百分比
formatDate:function(time){
    return this.$date.format10(time);
},
getStyle:function(item){
    if(item){
        return item;
    }else{
        return {}
    }
},
scroller : function(e){
    let y = Math.abs(e.contentOffset.y)+(Utils.env.getPageHeight()-180)
    let height = e.contentSize.height
    this.time.percentage = Math.max(parseInt((y*100)/height),this.time.percentage)
}
5.6 实现Style
<style scoped>
    .art-page{
        position: absolute;
        top: 0;
        left: 0;
        right: 0;
        bottom: 0;
        width: 750px;
        flex-direction: column;
    }
    .art-top{
        top: 0;
        height: 90px;
        position: fixed;
        z-index: 999;
    }
    .art-bottom{
        bottom: 0;
        position: fixed;
        width: 750px;
    }
    .scroller{
        flex: 1;
        flex-direction: column;
        width: 750px;
        padding: 0px 20px;
        margin: 90px 0px;
    }
    .title{
        font-size: 48px;
        font-weight: bold;
        margin: 10px 0px;
    }
    .info{
        margin-top: 20px;
        line-height: 48px;
        align-items: center;
        flex-direction: row;
    }
    .head{
        width: 48px;
        height: 48px;
        border-radius: 48px;
    }
    .author{
        font-size: 28px;
        color: #adadad;
        margin-left: 15px;
    }
    .time{
        font-size: 28px;
        color: #adadad;
        margin-left: 15px;
    }
    .empty{
        flex: 1;
    }
    .content{
        flex-direction: column;
        font-size: 30px;
        justify-content:flex-start;
        margin-top: 20px;
        color: #222;
        word-wrap: break-word;
        text-align: justify;
    }
    .text {
        margin: 15px 0px;
    }
    .image{
        display:inline-block;
        margin: 15px 0px;
        border-radius: 5px;
        height: 300px;
    }
    .tools{
        margin: 10px 0px;
        flex-direction: row;
        height: 60px;
    }
</style>
5.7 路由配置
新增详情页面,需要配置路由,以便页面跳入;在这里详情页面应该配置成一级路由,在src/routers/home.js文件中更改:
// ============  主页路由MODE- ==================
import Layout from '@/compoents/layouts/layout_main'
import Home from '@/pages/home/index'
import Article from '@/pages/article/index'

let routes = [
    {
        path: '/',
        component: Layout,
        children:[
            {
                path:'/home',
                name:'Home',
                component: Home
            }
        ]
    },{
        path:'/article/:id',
        name: 'article-info',
        component:Article
    }
]

export default routes;
5.8 页面跳转
在src/page/home/index.vue中实现文章列表点击打开详情的实现:
// 列表项点击事件
wxcPanItemClicked(id){
  this.$router.push('/article/'+id)
}
5.9 效果演示

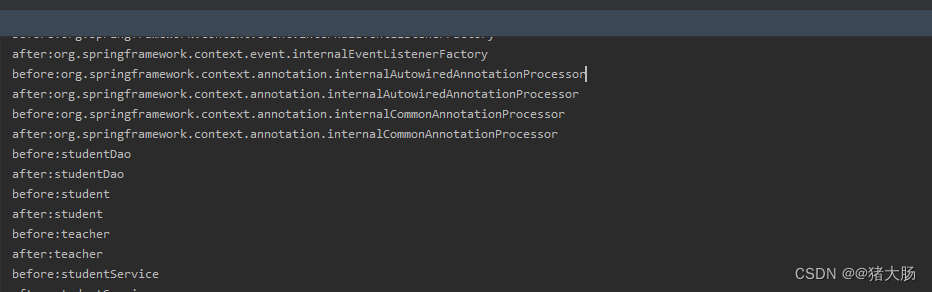


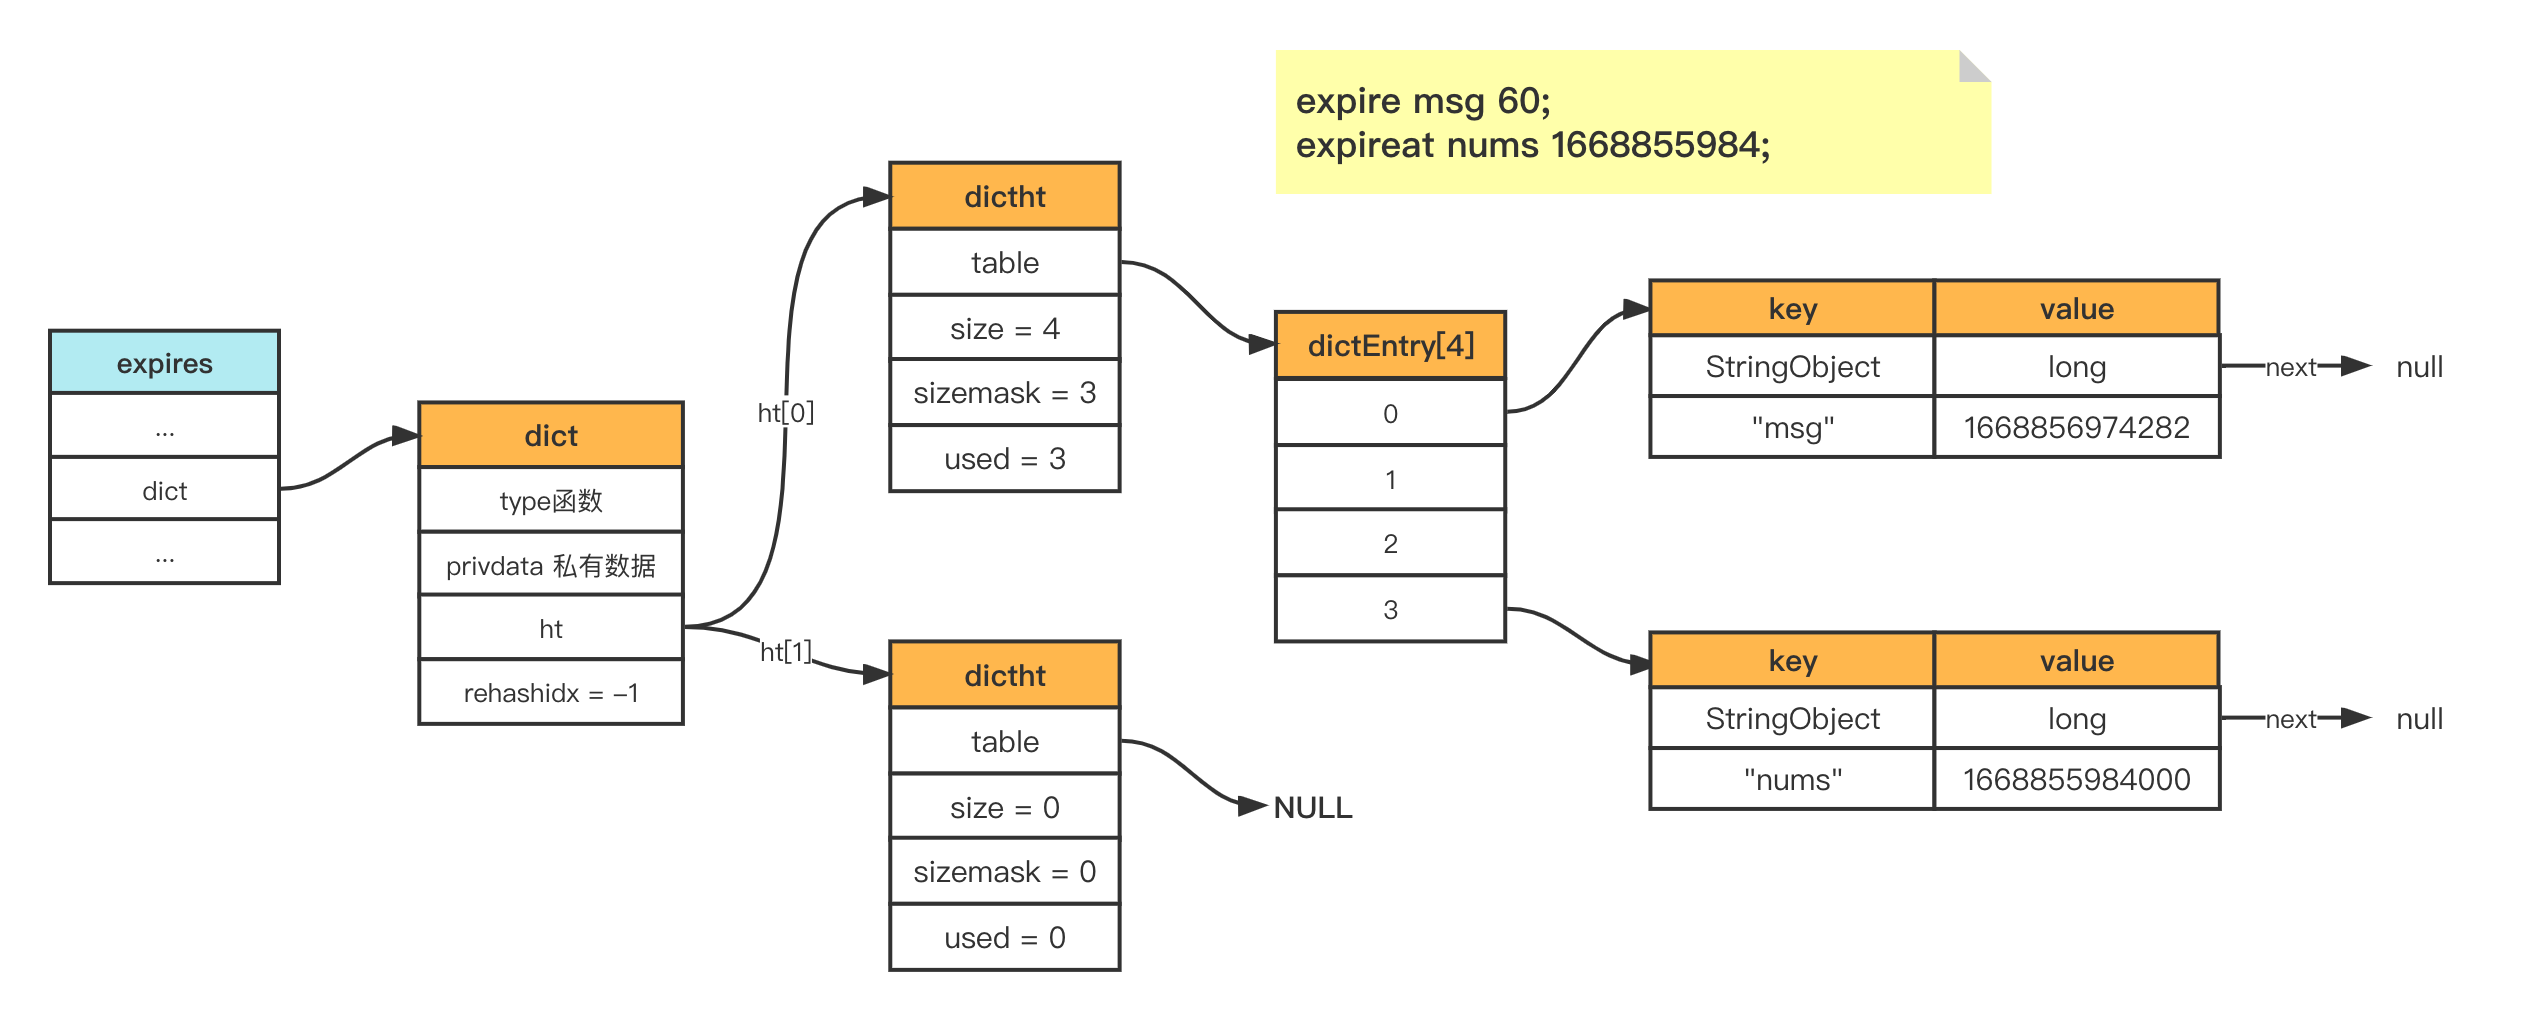
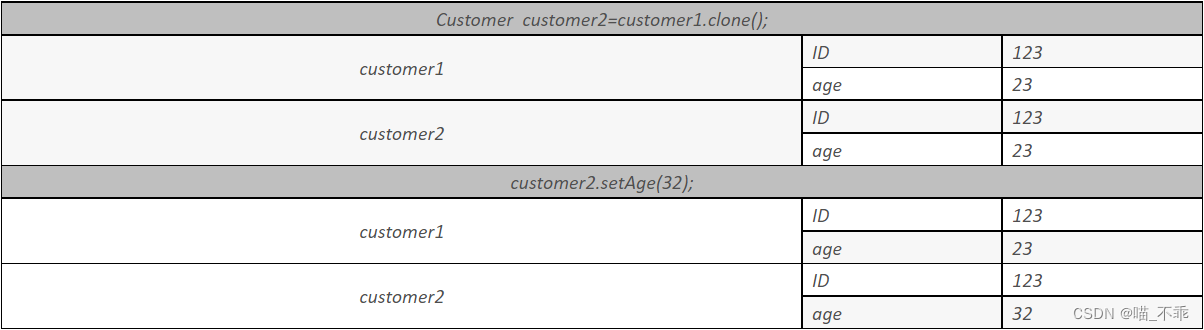
![[附源码]SSM计算机毕业设计智慧教室预约JAVA](https://img-blog.csdnimg.cn/5dfe376bf2c74ac08fbec78e26bd826f.png)