文章目录
- 前言
- 一、实现登录接口对象封装和调用
- 1.0 登录接口的接口测试文档
- 1.1 接口对象层(封装)
- 1.2 测试脚本层(调用)
- 二、课程新增接口对象封装和调用
- 2.0 课程新增接口的接口测试文档
- 2.1 接口对象层(封装)
- 2.2 测试脚本层(调用)
- 三、合同上传接口对象封装和调用
- 3.0 合同上传的接口测试文档
- 3.1 接口对象层(封装)
- 3.2 测试脚本层(调用)
- 四、合同新增接口对象封装和调用
- 2.0 合同新增接口的接口测试文档
- 2.1 接口对象层(封装)
- 2.2 测试脚本层(调用)
- 总结
前言
一、实现登录接口对象封装和调用
1.0 登录接口的接口测试文档
接口信息:1.验证码:(1)地址:http://kdtx-test.itheima.net/api/captchaImage(2)方法:get
2.登录:(1)地址:http://kdtx-test.itheima.net/api/login(2)方法:Post(3)请求数据:(4)请求头:Content-Type: application/json(5)请求体:{"username": "admin", "password": " admin123","code":"2", "uuid":"验证码接口返回数据"}
1.1 接口对象层(封装)
封装的重要概念:
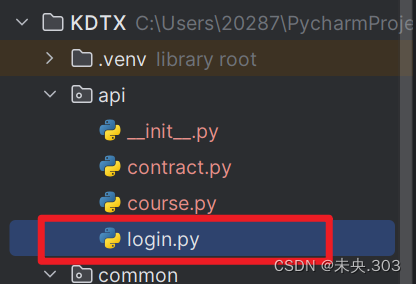
接口封装时,重点是依据接口文档封装接口信息,需要使用的测试数据是从测试用例传递的、接口方法被调用时需要返回对应的响应结果。封装是通过根据接口API文档封装,所以定义在API的目录下。
实现的基本步骤:
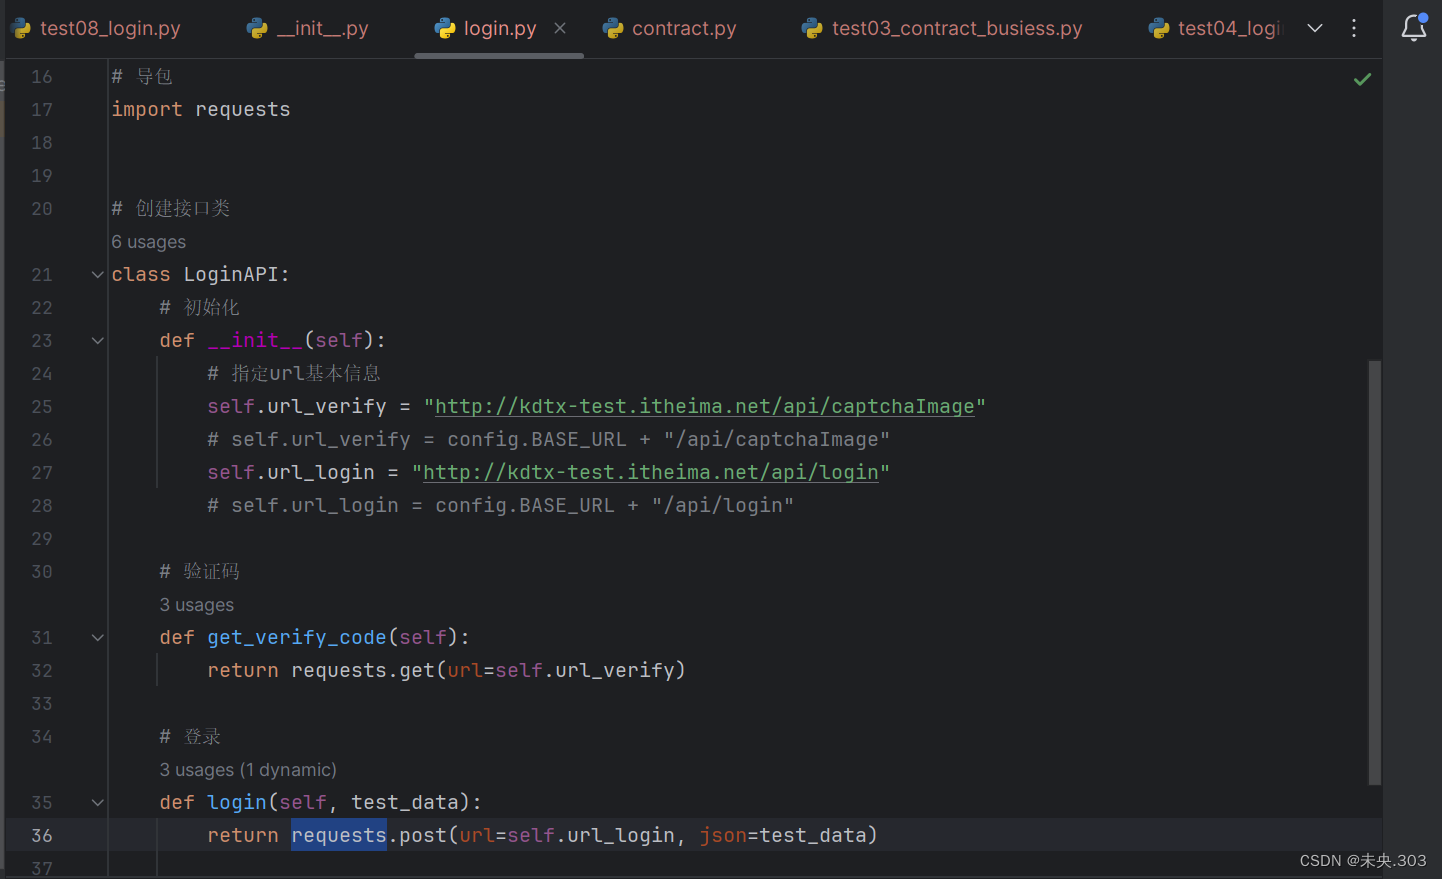
(1)导包操作:# 导包 import requests(2)创建接口的类:
# 创建接口类
class LoginAPI:
(3)创建初始化方法:
初始化方法中需要指定接口的基本信息url。
# 初始化
    def __init__(self):
        # 指定url基本信息
        self.url_verify = "http://kdtx-test.itheima.net/api/captchaImage"
        self.url_login = "http://kdtx-test.itheima.net/api/login"
(4)创建验证码、登录方法:
接口方法被调用时候,需要返回对应的响应结果信息。只有返回之后,才能在测试用例中使用倒响应结果的值。
    # 验证码接口方法
    def get_verify_code(self):
        return requests.get(url=self.url_verify)

    # 登录接口方法
    def login(self, test_data):
        return requests.post(url=self.url_login, json=test_data)
备注:
(1)登录接口方法中的test_data。
因为要从外部传入测试数据,所以在方法定义时候创建一个参数来接收传递的数据。
(2)json = test_data
此处数据是请求体json中的数据。
因为json数据的请求体在request格式中是通过json参数进行处理。即:json = test_data.
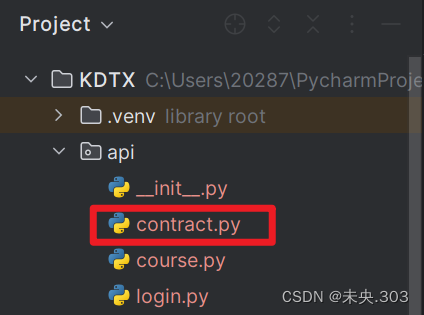
实现图示说明:
1.2 测试脚本层(调用)
测试脚本层说明:
- 重点关注测试数据准备和断言
- 重点关注业务流程的处理
- 直接调用接口对象层发送请求
实现的基本步骤:
(1)导包:
导入调用接口对象层中定义的登录接口api.login# 导包 from api.login import LoginAPI import pytest
(2)创建测试类:
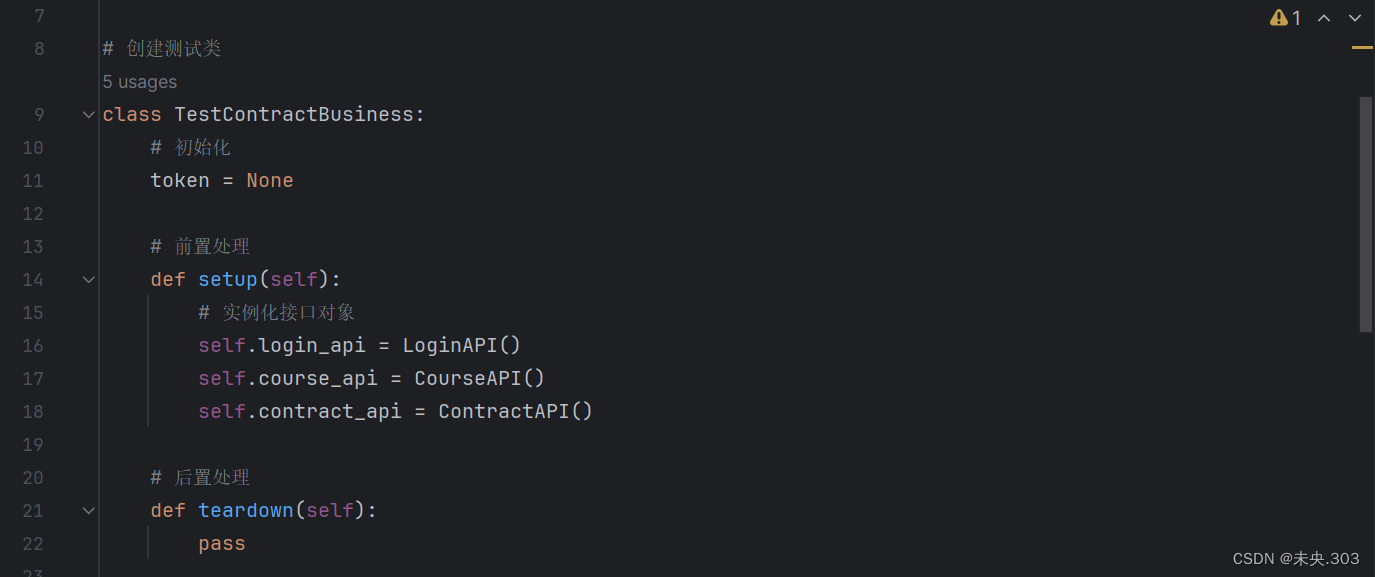
测试类一般以Test开头进行命名。# 创建测试类 class TestLoginAPI:
(3)设置前置处理和后置处理
前置处理中先实例化一个登录接口的对象
 # 前置处理
    def setup(self):
        # 实例化接口对象
        self.login_api = LoginAPI()
 # 后置处理
    def teardown(self):
        pass
(4)创建登录成功方法,并实现获取验证码和登录操作
# 1、登录成功
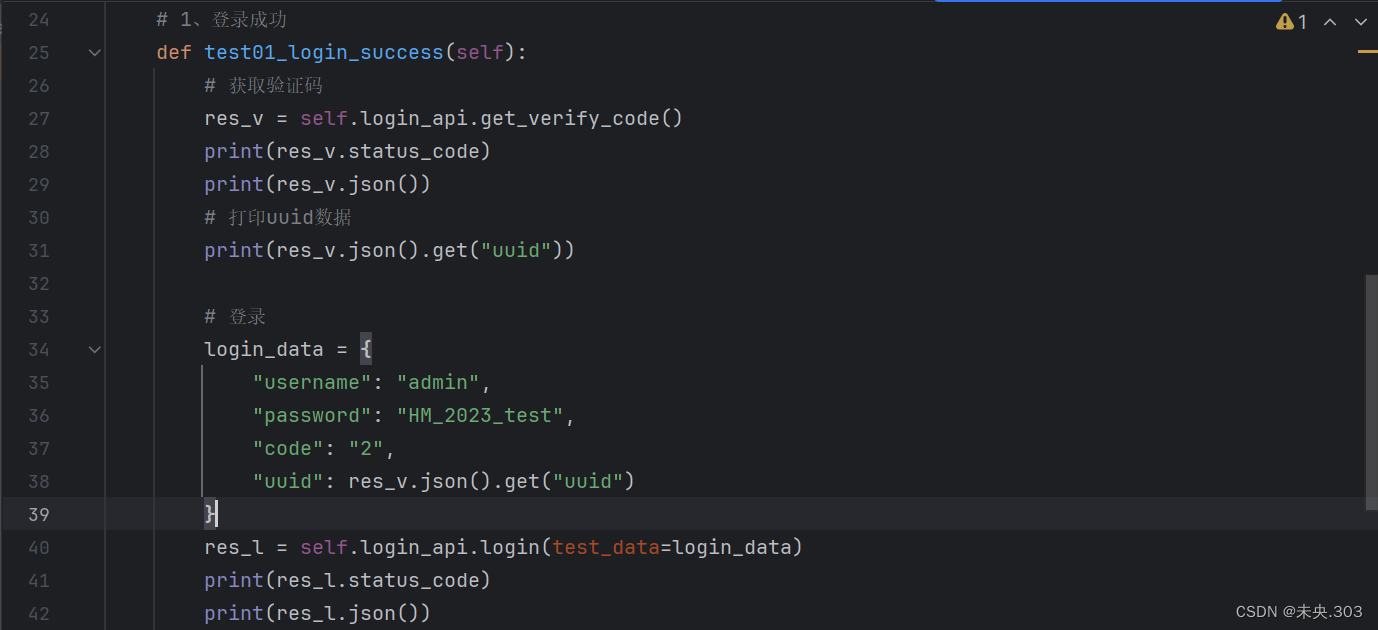
    def test01_login_success(self):
        # 获取验证码
        res_v = self.login_api.get_verify_code()
        print(res_v.status_code)
        print(res_v.json())
        # 打印uuid数据
        print(res_v.json().get("uuid"))

        # 登录
        login_data = {
            "username": "admin",
            "password": "HM_2023_test",
            "code": "2",
            "uuid": res_v.json().get("uuid")# 此处调用验证码中的uuid数据
        }
        res_l = self.login_api.login(test_data=login_data)
        print(res_l.status_code)
        print(res_l.json())
实例图示说明:
输出结果:
二、课程新增接口对象封装和调用
2.0 课程新增接口的接口测试文档
接口信息:(1)URL:http://kdtx-test.itheima.net/api/clues/course(2)方法:Post(3)请求数据:(4)请求头:{ "Content-Type ": "application/json ", "Authorization": "xxx " }(5)请求体:{ "name": "测试开发提升课01", "subject": "6","price": 899,"applicablePerson": "2", "info": "测试开发提升课01"}
2.1 接口对象层(封装)
封装的重要概念:
接口封装时,重点是依据接口文档封装接口信息,需要使用的测试数据是从测试用例传递的、接口方法被调用时需要返回对应的响应结果。封装是通过根据接口API文档封装,所以定义在API的目录下。
实现的基本步骤:
(1)导包操作:# 导包 import requests(2)创建接口的类:
# 创建接口类
class CourseAPI:
(3)创建初始化方法:
初始化方法中需要指定接口的基本信息url。
# 初始化
    def __init__(self):
        # 指定url基本信息
        self.url_add_course = "http://kdtx-test.itheima.net/api/clues/course"
(4)创建课程添加方法:
接口方法被调用时候,需要返回对应的响应结果信息。只有返回之后,才能在测试用例中使用倒响应结果的值。
此处方法中定义了test_data, token都是需要从外部接收的数据,所以最终的返回里面也要有响应结果的值。如test_data是json格式的,token是headers格式中的数据。
 def add_course(self, test_data, token):
        return requests.post(url=self.url_add_course, json=test_data, headers={"Authorization": token})
2.2 测试脚本层(调用)
实现的基本步骤:
(1)导包:
导入调用接口对象层中定义的登录接口api.login# 导包 import pytest from api.course import CourseAPI
(2)创建测试类:
测试类一般以Test开头进行命名。# 创建测试类 class TestContractBusiness: # 初始化 token = None
(3)设置前置处理和后置处理
前置处理中先实例化一个登录接口的对象
 # 前置处理
    def setup(self):
        # 实例化接口对象
        self.course_api = CourseAPI()


    # 后置处理
    def teardown(self):
        pass
(4)创建课程新增方法,并实现课程新增操作
# 2、课程新增成功
    def test02_add_course(self):
        add_data = {"name": "测试开发提升课01", "subject": "6", "price": 899, "applicablePerson": "2",
                    "info": "测试开发提升课01"}
        response = self.course_api.add_course(test_data=add_data, token=TestContractBusiness.token)
# 提取登录成功之后的token数据并保存在类的属性中 TestContractBusiness.token = res_l.json().get("token")
三、合同上传接口对象封装和调用
3.0 合同上传的接口测试文档
接口信息:(1)URL: http://kdtx-test.itheima.net/api/common/upload(2)方法:Post(3)请求数据:(4)请求头:{ "Content-Type ": " multipart/form-data ", "Authorization": "xxx " }(5)请求体:{" file " : 合同文件"}思考:① 如何提交multipart/form-data数据?通过使用:requests.请求方法(url, data=None, json =None, headers=None, files =None)步骤① 读取文件数据f = open(" test.pdf ", " rb ")步骤② 设置请求数据response = requests.post(url=xxx, files= {" file " : f"})
3.1 接口对象层(封装)
实现的基本步骤:
(1)导包操作:# 导包 import requests(2)创建接口的类:
# 创建接口类
class ContractAPI:
(3)创建初始化方法:
初始化方法中需要指定接口的基本信息url。
 # 初始化
    def __init__(self):
        self.url_upload = "http://kdtx-test.itheima.net/api/common/upload"
(4)创建课程添加方法:
接口方法被调用时候,需要返回对应的响应结果信息。只有返回之后,才能在测试用例中使用倒响应结果的值。
 # 合同上传接口
    def upload_contract(self, test_data, token):
        return requests.post(url=self.url_upload, files={"file": test_data}, headers={"Authorization":  token})
3.2 测试脚本层(调用)
实现的基本步骤:
(1)导包:
导入调用接口对象层中定义的登录接口api.login# 导包 import pytest from api.contract import ContractAPI
(2)创建测试类:
测试类一般以Test开头进行命名。# 创建测试类 class TestContractBusiness: # 初始化 token = None
(3)设置前置处理和后置处理
前置处理需要先处理验证码获取和登录接口操作,依次为前提才能进行文件上传。
 # 前置处理
    def setup(self):
        # 实例化接口对象
        self.login_api = LoginAPI()
        self.course_api = CourseAPI()
        self.contract_api = ContractAPI()

    # 1、登录成功
    def test01_login_success(self):
        # 获取验证码
        res_v = self.login_api.get_verify_code()
        print(res_v.status_code)
        print(res_v.json())
        # 打印uuid数据
        print(res_v.json().get("uuid"))

        # 登录
        login_data = {
            "username": "admin",
            "password": "HM_2023_test",
            "code": "2",
            "uuid": res_v.json().get("uuid")
        }
        res_l = self.login_api.login(test_data=login_data)
        print(res_l.status_code)
        print(res_l.json())
        # 提取登录成功之后的token数据并保存在类的属性中
        TestContractBusiness.token = res_l.json().get("token")
        print(TestContractBusiness.token)


    # 后置处理
    def teardown(self):
        pass
(4)创建合同上传方法,并实现合同上传操作
 # 3、上传合同成功
    def test03_upload_contract(self):
        # 读取pdf文件数据
        f = open("../data/test.pdf", "rb")
        response = self.contract_api.upload_contract(test_data=f, token=TestContractBusiness.token)
        print(response.json())
四、合同新增接口对象封装和调用
2.0 合同新增接口的接口测试文档
接口信息:新增合同:(1)url地址:http://kdtx-test.itheima.net/api/contract(2)方法:Post(3)请求数据:(4)请求头:{ "Content-Type ": "application/json ", "Authorization": "xxx " }(5)请求体:{ "name": "测试888", "phone": "13612345678", "contractNo": "HT10012003","subject": "6", "courseId": " 99", "channel": "0", "activityId": 77, "fileName": "xxx"}
2.1 接口对象层(封装)
封装的重要概念:
接口封装时,重点是依据接口文档封装接口信息,需要使用的测试数据是从测试用例传递的、接口方法被调用时需要返回对应的响应结果。封装是通过根据接口API文档封装,所以定义在API的目录下。
实现的基本步骤:
(1)导包操作:# 导包 import requests(2)创建接口的类:
# 创建接口类
class ContractAPI:
(3)创建初始化方法:
初始化方法中需要指定接口的基本信息url。
 # 初始化
    def __init__(self):
        self.add_contrat = "http://kdtx-test.itheima.net/api/contract"
(4)创建合同添加方法:
接口方法被调用时候,需要返回对应的响应结果信息。只有返回之后,才能在测试用例中使用倒响应结果的值。
此处方法中定义了test_data, token都是需要从外部接收的数据,所以最终的返回里面也要有响应结果的值。如test_data是json格式的,token是headers格式中的数据。
# 新增合同接口
    def add_contract(self,test_data,token):
        return requests.post(url=self.add_contrat,json=test_data,headers={"Authorization":  token})
2.2 测试脚本层(调用)
实现的基本步骤:
(1)导包:
导入调用接口对象层中定义的登录接口api.login# 导包 import pytest from api.contract import ContractAPI
(2)创建测试类:
测试类一般以Test开头进行命名。# 创建测试类 class TestContractBusiness: # 初始化 token = None
(3)设置前置处理和后置处理
前置处理中先实例化一个登录接口的对象
 # 前置处理
    def setup(self):
        # 实例化接口对象
        self.contract_api = ContractAPI()


    # 后置处理
    def teardown(self):
        pass
(4)创建课程新增方法,并实现课程新增操作
 # 4、新增合同成功
    def test04_add_contract(self):
        add_contract = {"name": "测试888",
                        "phone": "13612341888",
                        "contractNo": "HT20026194",
                        "subject": "6",
                        "courseId": 99,
                        "channel": "0",
                        "activityId": 77,
                        "fileName": "/profile/upload/2023/01/05/86e5a3b8-b08c-470c-a17d-71375c3a8b9f.pdf"
        }
        response = self.contract_api.add_contract(test_data=add_contract, token=TestContractBusiness.token)
        print(response.json())
# 提取登录成功之后的token数据并保存在类的属性中 TestContractBusiness.token = res_l.json().get("token")
