提示:文章写完后,目录可以自动生成,如何生成可参考右边的帮助文档
文章目录
- 前言
- 从ipynb文件入手
- 带注释的python文件
- modules
- mask.py
- utils.py
前言
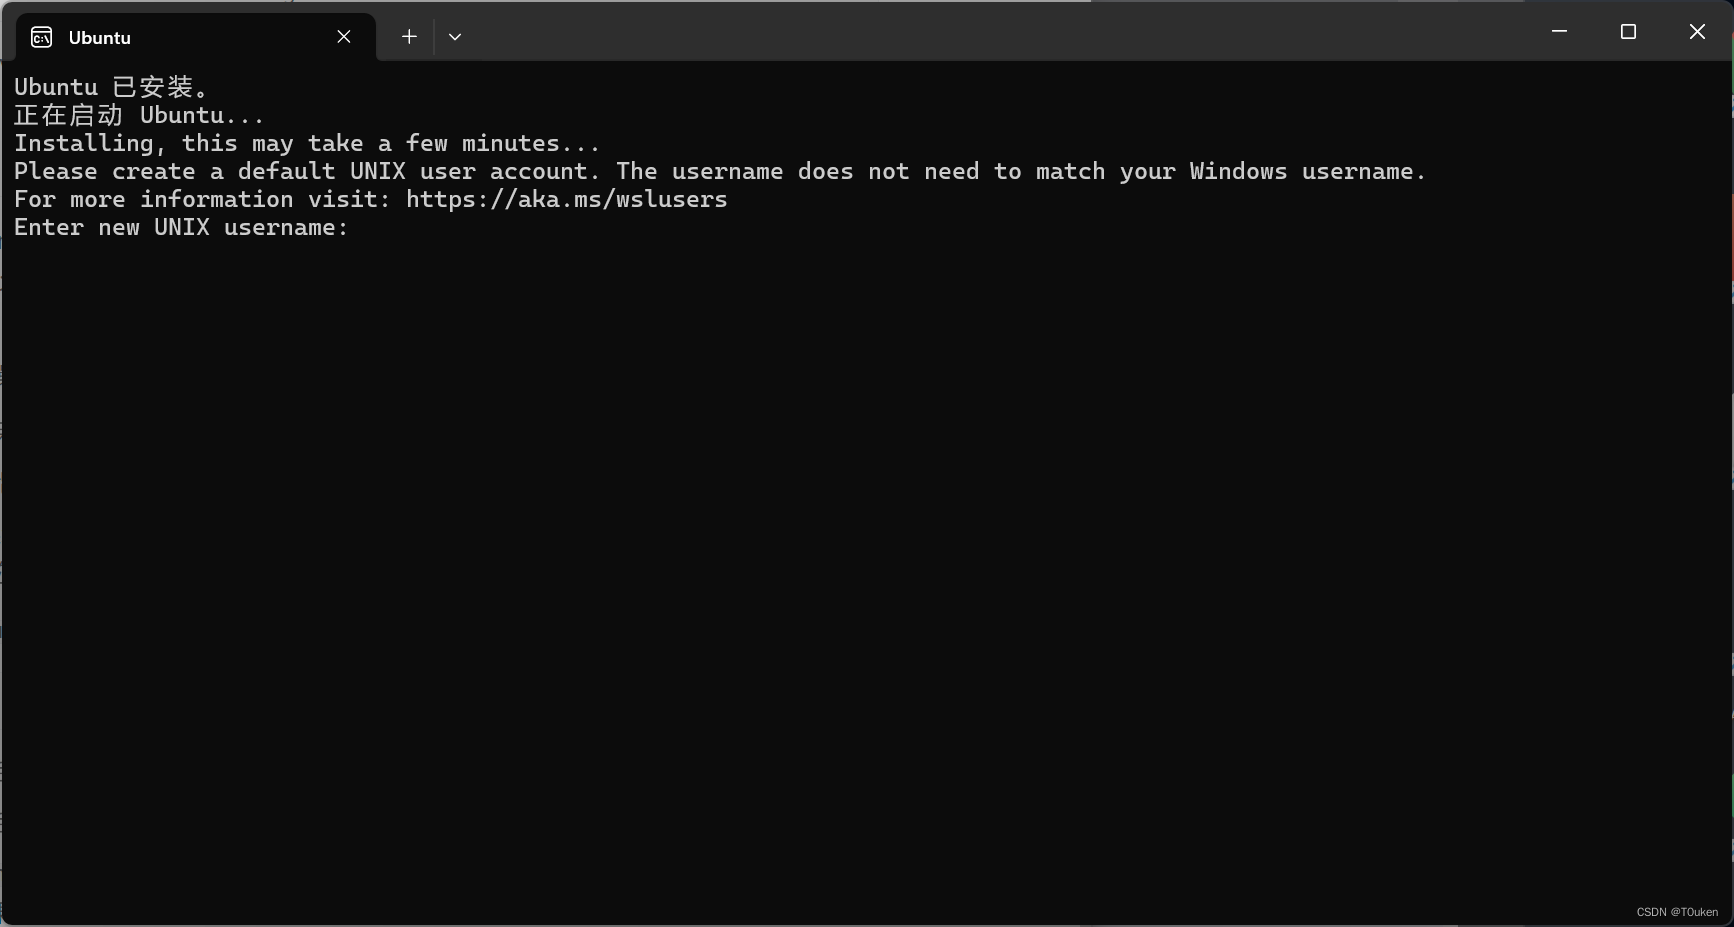
1.可以去github直接下载这个项目,这样下载得到的是比较干净的版本,我把有注释的按照放在本文中,参考学习
项目地址

2.本文的一些python基础可在下面的链接中的第一部分ImageMasking找到
python基础
从ipynb文件入手
带注释的python文件
modules
mask.py
from requests import patch
from timm.models.vision_transformer import PatchEmbed, Block
# Copyright (c) Meta Platforms, Inc. and affiliates.
# All rights reserved.
# This source code is licensed under the license found in the
# LICENSE file in the root directory of this source tree.
# --------------------------------------------------------
# References:
# timm: https://github.com/rwightman/pytorch-image-models/tree/master/timm
# DeiT: https://github.com/facebookresearch/deit
# --------------------------------------------------------
from functools import partial
import random
import math
import torch
import torch.nn as nn
import numpy as np
from timm.models.vision_transformer import PatchEmbed, Block
from modules.pos_embed import get_2d_sincos_pos_embed
class MaskingStrategy(nn.Module):
""" Masked Autoencoder with VisionTransformer backbone
"""
def __init__(self, img_size=224, patch_size=16, in_chans=3,
embed_dim=1024, choice='random'):
super().__init__()
# --------------------------------------------------------------------------
# MAE encoder specifics
self.patch_embed = PatchEmbed(img_size, patch_size, in_chans, embed_dim)
self.choice=choice
num_patches = self.patch_embed.num_patches
self.cls_token = nn.Parameter(torch.zeros(1, 1, embed_dim))
self.pos_embed = nn.Parameter(torch.zeros(1, num_patches + 1, embed_dim), requires_grad=False) # fixed sin-cos embedding
self.norm = nn.LayerNorm(embed_dim)
self.initialize_weights()
def initialize_weights(self):
# initialization
# initialize (and freeze) pos_embed by sin-cos embedding
pos_embed = get_2d_sincos_pos_embed(self.pos_embed.shape[-1], int(self.patch_embed.num_patches**.5), cls_token=True)
self.pos_embed.data.copy_(torch.from_numpy(pos_embed).float().unsqueeze(0))
# initialize patch_embed like nn.Linear (instead of nn.Conv2d)
w = self.patch_embed.proj.weight.data
torch.nn.init.xavier_uniform_(w.view([w.shape[0], -1]))
# timm's trunc_normal_(std=.02) is effectively normal_(std=0.02) as cutoff is too big (2.)
torch.nn.init.normal_(self.cls_token, std=.02)
# initialize nn.Linear and nn.LayerNorm
self.apply(self._init_weights)
def _init_weights(self, m):
if isinstance(m, nn.Linear):
# we use xavier_uniform following official JAX ViT:
torch.nn.init.xavier_uniform_(m.weight)
if isinstance(m, nn.Linear) and m.bias is not None:
nn.init.constant_(m.bias, 0)
elif isinstance(m, nn.LayerNorm):
nn.init.constant_(m.bias, 0)
nn.init.constant_(m.weight, 1.0)
def patchify(self, imgs):
"""
imgs: (N, 3, H, W)
x: (N, L, patch_size**2 *3)
"""
p = self.patch_embed.patch_size[0]
assert imgs.shape[2] == imgs.shape[3] and imgs.shape[2] % p == 0
h = w = imgs.shape[2] // p
x = imgs.reshape(shape=(imgs.shape[0], 3, h, p, w, p))
x = torch.einsum('nchpwq->nhwpqc', x)
x = x.reshape(shape=(imgs.shape[0], h * w, p**2 * 3))
return x
def unpatchify(self, x):
"""
x: (N, L, patch_size**2 *3)
imgs: (N, 3, H, W)
"""
p = self.patch_embed.patch_size[0]
h = w = int(x.shape[1]**.5)
assert h * w == x.shape[1]
x = x.reshape(shape=(x.shape[0], h, w, p, p, 3))
x = torch.einsum('nhwpqc->nchpwq', x)
imgs = x.reshape(shape=(x.shape[0], 3, h * p, h * p))
return imgs
def random_masking(self, x, mask_ratio):
"""
Perform per-sample random masking by per-sample shuffling.
Per-sample shuffling is done by argsort random noise.
x: [N, L, D], sequence
"""
N, L, D = x.shape # batch, length, dim
len_keep = int(L * (1 - mask_ratio))
noise = torch.rand(N, L, device=x.device) # noise in [0, 1]
# sort noise for each sample
ids_shuffle = torch.argsort(noise, dim=1) # ascend: small is keep, large is remove
# The location of i-th (0-L) patch in ids_shuffle
ids_restore = torch.argsort(ids_shuffle, dim=1)
# keep the first subset
ids_keep = ids_shuffle[:, :len_keep]
# only keep first unmasked embeddings via indexing
x_masked = torch.gather(x, dim=1, index=ids_keep.unsqueeze(-1).repeat(1, 1, D))
# generate the binary mask: 0 is keep, 1 is remove
mask = torch.ones([N, L], device=x.device)
mask[:, :len_keep] = 0
# unshuffle to get the binary mask
mask = torch.gather(mask, dim=1, index=ids_restore)
return x_masked, mask, ids_restore
def forward(self, x, mask_ratio):
# embed patches
x = self.patch_embed(x)
# add pos embed w/o cls token
x = x + self.pos_embed[:, 1:, :]
# masking: length -> length * mask_ratio
if self.choice=='random':
x, mask, ids_restore = self.random_masking(x, mask_ratio)
else:
pass
# append cls token
cls_token = self.cls_token + self.pos_embed[:, :1, :]
cls_tokens = cls_token.expand(x.shape[0], -1, -1)
x = torch.cat((cls_tokens, x), dim=1)
x = self.norm(x)
return x, mask, ids_restore
class RandomMaskingStrategy:
""" Masked Autoencoder with VisionTransformer backbone
"""
def __init__(self, img_size=224, patch_size=16, device='cpu'):
super().__init__()
# --------------------------------------------------------------------------
self.patch_size=patch_size
self.img_size=img_size
# 这里计算这副图片能够划分为多少个patch
self.num_patches=int((img_size/patch_size)**2)
self.device=torch.device(device)
# self.device=torch.device('cuda' if torch.cuda.is_available() else 'cpu')
def patchify(self, imgs):
"""
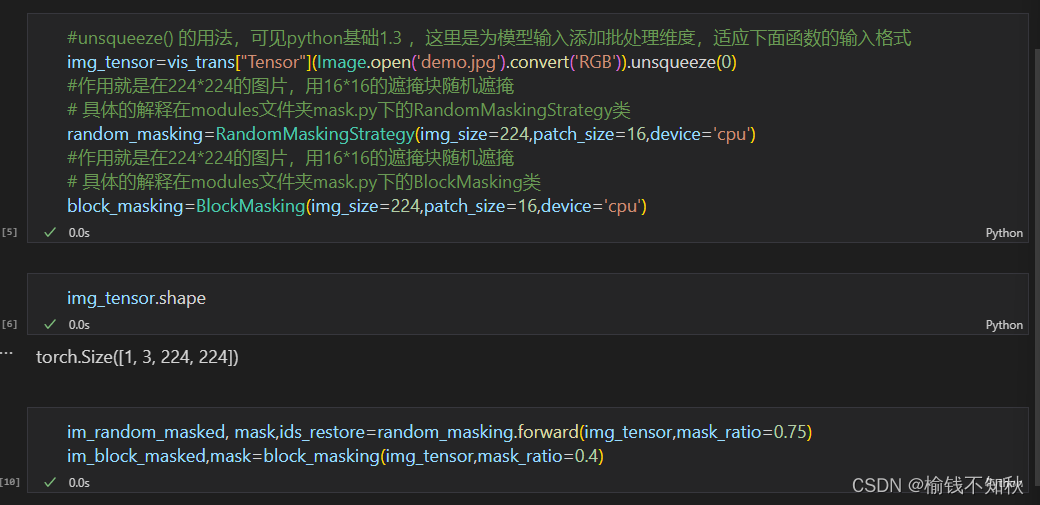
看到这里的N,就是刚刚那个unsqueeze(0)的作用,匹配上这个维度
imgs: (N, 3, H, W)
x: (N, L, patch_size**2 *3)
"""
p = self.patch_size
# assert 语句用于测试表达式是否为真。如果表达式为假,则会引发 AssertionError 并终止程序执行。
# 这一句就要求我们输入的图片高和宽相等,我们这里是224*224,并且高可以整除patch_size
assert imgs.shape[2] == imgs.shape[3] and imgs.shape[2] % p == 0
h = w = imgs.shape[2] // p
#读这一句,随机损失读者寿命,作用就是将图片成功划分为patch,对应了函数名-patchify
'''
imgs.shape[0]:保持批量大小不变,即 N。
3:保持通道数不变
h 和 p:将高度 H 拆分为 h 和 p 两个维度。
w 和 p:将宽度 W 拆分为 w 和 p 两个维度。
'''
x = imgs.reshape(shape=(imgs.shape[0], 3, h, p, w, p))
'''
PyTorch 的 einsum 函数来重新排列张量的维度。
'nchpwq' 表示输入张量 x 的当前维度排列,即 (N, C, h, p, w, q)。
'nhwpqc' 表示输出张量的目标维度排列,即 (N, h, w, p, q, C)
N 代表批处理维度
h 代表分块后的高度
w 代表分块后的宽度
p 和 q 代表每个块的高度和宽度
C 代表通道数
'''
x = torch.einsum('nchpwq->nhwpqc', x)
'''
imgs.shape[0]:保持批处理维度不变,即 N。
h * w:将原来的高有几块和宽有几块,相乘表示总的图像块数。
p**2 * 3:将每个图像块的高度、宽度和通道数合并。
'''
x = x.reshape(shape=(imgs.shape[0], h * w, p**2 * 3))
return x
def unpatchify(self, x):
"""
这个将被划分开的小图片集 重新组合为 一张完整的图片,与上面的函数是反操作
x: (N, L, patch_size**2 *3)
imgs: (N, 3, H, W)
"""
p = self.patch_size
h = w = int(x.shape[1]**.5)
assert h * w == x.shape[1]
x = x.reshape(shape=(x.shape[0], h, w, p, p, 3))
x = torch.einsum('nhwpqc->nchpwq', x)
imgs = x.reshape(shape=(x.shape[0], 3, h * p, h * p))
return imgs
def random_masking(self, batch_size, mask_ratio):
"""
Perform per-sample random masking by per-sample shuffling.
Per-sample shuffling is done by argsort random noise.
x: [N, L, D], sequence
"""
# N, L, D = x.shape # batch, length, dim
N=batch_size
L=self.num_patches
#int() 向下取整
len_keep = int(L * (1 - mask_ratio))
# 生成一个形状为 (N, L) 的张量,张量中的值在 [0, 1) 的区间内均匀分布
noise = torch.rand(N, L, device=self.device) # noise in [0, 1]
# sort noise for each sample
#dim=1是根据L维度,就是对被划分的小块patch的random值进行排序,默认升序,排队从矮到高
# 下面这两句讲解可见python基础1.4
ids_shuffle = torch.argsort(noise, dim=1) # ascend: small is keep, large is remove
# The location of i-th (0-L) patch in ids_shuffle
# 将 ids_shuffle 还原到原始顺序
ids_restore = torch.argsort(ids_shuffle, dim=1)
# keep the first subset
ids_keep = ids_shuffle[:, :len_keep]
# only keep first unmasked embeddings via indexing
# x_masked = torch.gather(x, dim=1, index=ids_keep.unsqueeze(-1).repeat(1, 1, D))
# generate the binary mask: 0 is keep, 1 is remove
mask = torch.ones([N, L], device=self.device)
mask[:, :len_keep] = 0
# unshuffle to get the binary mask
# 33 取消洗牌以获得二进制掩码
mask = torch.gather(mask, dim=1, index=ids_restore)
return mask, ids_restore
def forward(self, x, mask_ratio):
batch_size=x.shape[0]
mask, ids_restore = self.random_masking(batch_size, mask_ratio)
patch_size=16
# visualize the mask
# mask.detach() 会创建一个新张量,该张量与原始张量 mask 具有相同的数据,但不会再参与梯度计算。
mask = mask.detach() #[batch_size, H*W]
'''
unsqueeze(-1):张量在最后一个维度(-1 表示最后一个维度)上增加一个维度。
repeat(1, 1, patch_size**2 * 3) 对 unsqueeze(-1) 后的张量进行重复操作。具体来说:
第一个参数 1 表示沿着第一个维度(即 N)不重复,保持不变。
第二个参数 1 表示沿着第二个维度(即 H*W)不重复,保持不变。
第三个参数 patch_size**2 * 3 表示沿着第三个维度重复 patch_size**2 * 3 次。
这里 patch_size 是一个标量,用来表示一个图像块的大小,
patch_size**2 * 3 表示每个像素点对应的信息复制了 patch_size**2 个通道
'''
pix_mask = mask.unsqueeze(-1).repeat(1, 1, patch_size**2 *3) # [N, H*W, p*p*3]
pix_mask = self.unpatchify(pix_mask) # 1 is removing, 0 is keeping
# 将 pix_mask 张量按照指定的顺序进行维度转置,
# 并确保返回的张量不再保留梯度信息,并将其移动到 CPU 上进行后续处理或输出
pix_mask = torch.einsum('nchw->nhwc', pix_mask).detach().cpu()
x = torch.einsum('nchw->nhwc', x)
# masked image 0 is keep, 1 is remove
im_masked = x * (1 - pix_mask)
# 要访问返回值的第0个维度得到被遮掩的图像im_masked ,
return im_masked, mask, ids_restore
class BlockMasking:
def __init__(
self, img_size, patch_size=16, device='cpu'):
self.device=torch.device(device)
self.patch_size=patch_size
self.height = int(img_size/patch_size)
self.width = int(img_size/patch_size)
self.num_patches = self.height * self.width
self.num_masking_patches=None
self.min_num_patches=None
self.max_num_patches=None
# max_aspect = max_aspect or 1 / min_aspect
self.log_aspect_ratio = None
# 该方法用于定义该类的实例的“官方”字符串表示形式,见python基础1.5
# 可以直观的观察到初始化的数据
def __repr__(self):
repr_str = "Generator(%d, %d -> [%d ~ %d], max = %d, %.3f ~ %.3f)" % (
self.height, self.width, self.min_num_patches, self.max_num_patches,
self.num_masking_patches, self.log_aspect_ratio[0], self.log_aspect_ratio[1])
return repr_str
# def get_shape(self):
# return self.height, self.width
def unpatchify(self, x):
"""
x: (batch_size, H,W,768)
"""
p = self.patch_size
h=w= x.shape[1]
# h = w = int(x.shape[1]**.5)
# assert h * w == x.shape[1]
x = x.reshape(shape=(x.shape[0], h, w, p, p, 3))
x = torch.einsum('nhwpqc->nchpwq', x)
imgs = x.reshape(shape=(x.shape[0], 3, h * p, h * p))
return imgs
def _mask(self, mask, max_mask_patches):
delta = 0
for attempt in range(10):
#生成两个指定参数之间的随机浮点数,包括下限而不包括上限
target_area = random.uniform(self.min_num_patches, max_mask_patches)
# 星号 * 在函数调用中的作用是将一个可迭代对象(比如列表或元组)解包成单独的位置参数。
# self.log_aspect_ratio 应该是一个包含两个元素的列表或元组,用来指定 random.uniform 函数的参数范围。
# 在指定比例范围内随机生成一个比例,aspect_ratio是高宽比
aspect_ratio = math.exp(random.uniform(*self.log_aspect_ratio))
#round() - 四舍五入,距离相等靠近偶数,h和w是高和宽方向遮掩几块
h = int(round(math.sqrt(target_area * aspect_ratio)))
w = int(round(math.sqrt(target_area / aspect_ratio)))
if w < self.width and h < self.height:
top = random.randint(0, self.height - h)
left = random.randint(0, self.width - w)
num_masked = mask[top: top + h, left: left + w].sum()
# Overlap
if 0 < h * w - num_masked <= max_mask_patches:
for i in range(top, top + h):
for j in range(left, left + w):
if mask[i, j] == 0:
mask[i, j] = 1
delta += 1
if delta > 0:
break
return delta
def __call__(self,x, mask_ratio=0.4, min_num_patches=4, max_num_patches=None,
min_aspect=0.3, max_aspect=None):
batch_size=x.shape[0]
self.num_masking_patches = self.num_patches*mask_ratio
self.min_num_patches = min_num_patches
self.max_num_patches = self.num_patches*mask_ratio if max_num_patches is None else max_num_patches
max_aspect = max_aspect or 1 / min_aspect
self.log_aspect_ratio = (math.log(min_aspect), math.log(max_aspect))
mask = np.zeros(shape=(batch_size,self.height,self.width), dtype=np.int64)
for i in range(batch_size):
mask_count = 0
while mask_count < self.num_masking_patches:
max_mask_patches = self.num_masking_patches - mask_count
max_mask_patches = min(max_mask_patches, self.max_num_patches)
delta = self._mask(mask[i], max_mask_patches)
if delta == 0:
break
else:
mask_count += delta
mask=torch.from_numpy(mask)
pix_mask = mask.unsqueeze(-1).repeat(1, 1,1, self.patch_size**2 *3)# (1, H, W, p*p*3)
pix_mask = self.unpatchify(pix_mask) # 1 is removing, 0 is keeping
pix_mask = torch.einsum('nchw->nhwc', pix_mask).detach().cpu()
x = torch.einsum('nchw->nhwc', x)
im_masked = x * (1 - pix_mask)
return im_masked,mask
utils.py
import torchvision.transforms.functional as F
import random
import torch
from PIL import Image
import numpy as np
import os
import datetime
import logging
import matplotlib.pyplot as plt
def RandomSeed(seed):
np.random.seed(seed)
torch.manual_seed(seed)
torch.cuda.manual_seed_all(seed)
torch.backends.cudnn.deterministic = True
torch.backends.cudnn.benchmark = False
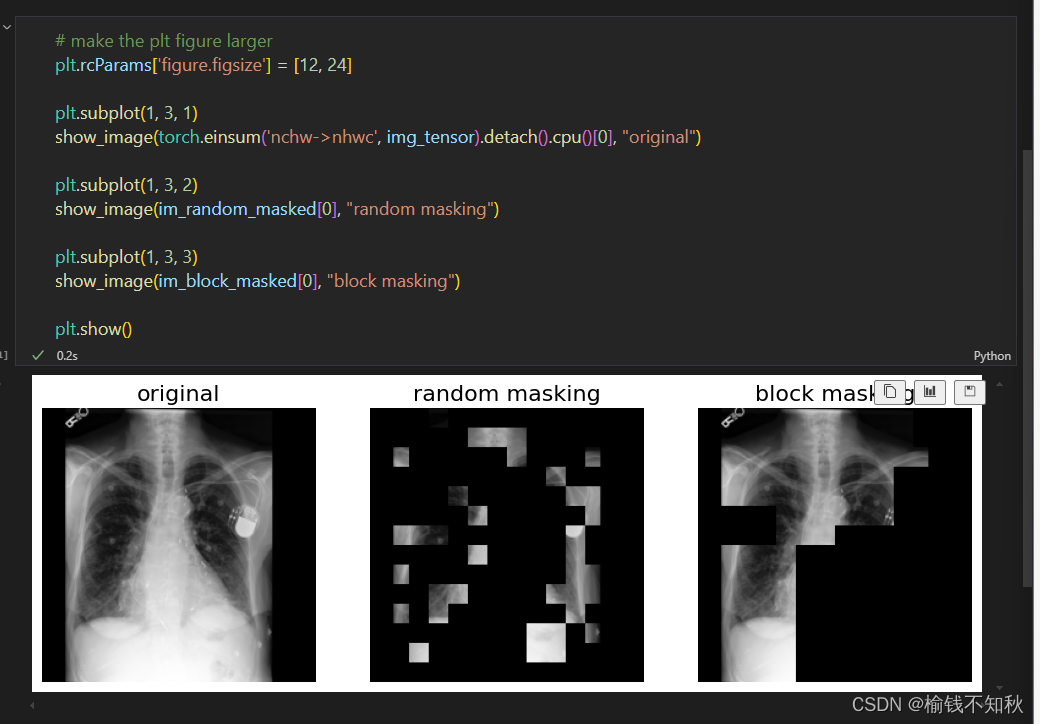
def show_image(image, title=''):
# image is [H, W, 3]
assert image.shape[2] == 3
plt.imshow(torch.clip(image * 255, 0, 255).int())
plt.title(title, fontsize=16)
plt.axis('off')
return
class PairedTransform:
def __init__(self, transform):
self.transform = transform
def __call__(self, img1, img2):
# 保存当前随机种子
torch_state = torch.get_rng_state()
random_state = random.getstate()
# 对第一张图片应用变换
img1 = self.transform(img1)
# 恢复随机种子,确保相同的变换应用到第二张图片
torch.set_rng_state(torch_state)
random.setstate(random_state)
img2 = self.transform(img2)
return img1, img2
#保持比例,缩放图像
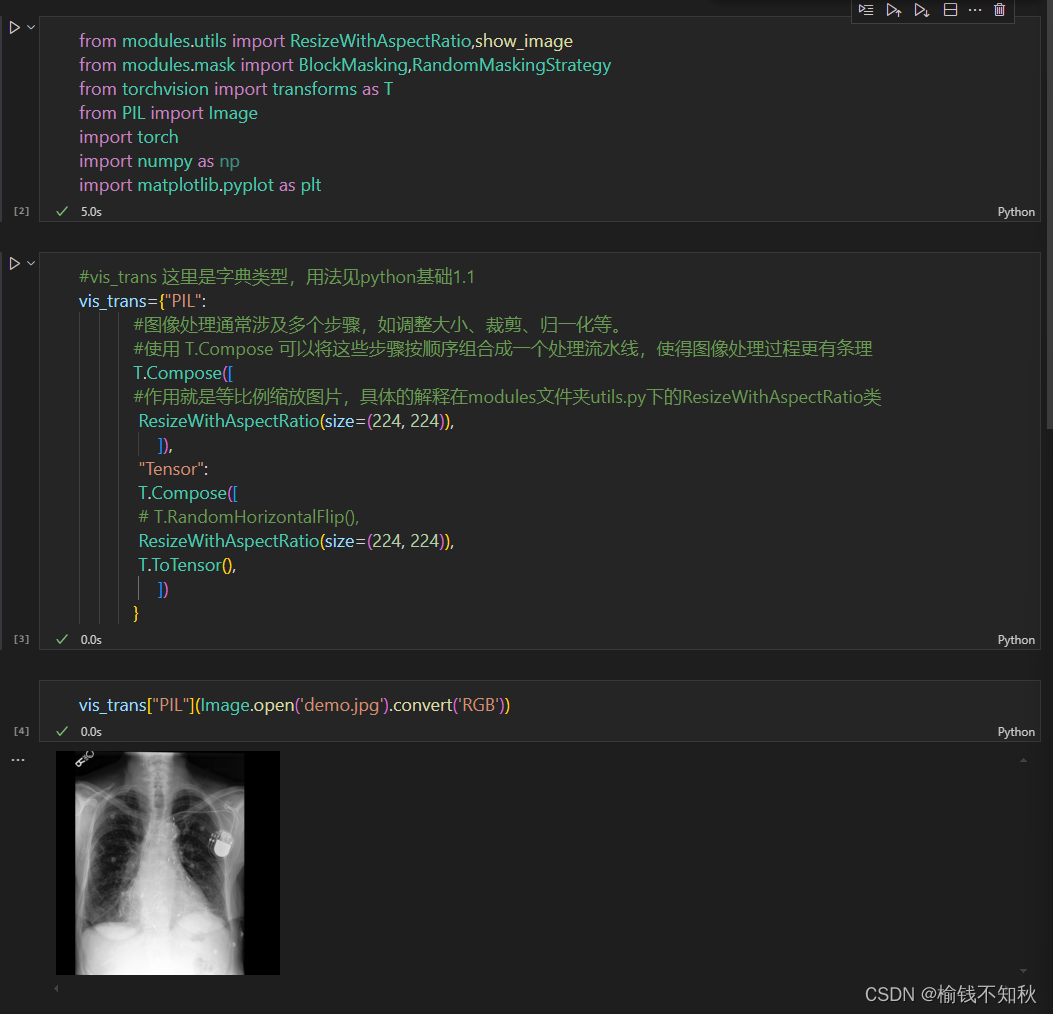
class ResizeWithAspectRatio:
#关于类的__init__和__call__的使用,基础1.2有介绍
def __init__(self, size, interpolation=Image.BILINEAR):
"""
Initialize the transform.
Args:
这里的size参数是要传入元组类型的目标尺寸,如(224,128)
interpolation是所选择的插值方法
- size (tuple): Desired output size (height, width).
- interpolation (int): Interpolation method. Default is PIL.Image.BILINEAR.
"""
self.size = size
self.interpolation = interpolation
def __call__(self, img):
"""
Apply the transform to an image.
Args:
- img (PIL Image or Tensor): Image to be resized.
Returns:
- PIL Image or Tensor: Resized image.
"""
#获取原始的图像的尺寸和目标图像的尺寸
original_width, original_height = img.size
target_height, target_width = self.size
# Calculate new size to keep aspect ratio
#计算原始图像的宽高比,最后生成的图像是宽高比不变的,尽可能接近目标尺寸
aspect_ratio = original_width / original_height
# 以宽高中更大的那一个尺寸为基准,另一个尺寸根据宽高比计算得到
if aspect_ratio > 1: # Wider image
new_width = target_width
new_height = int(target_width / aspect_ratio)
else: # Taller image or square
new_height = target_height
new_width = int(target_height * aspect_ratio)
# Resize the image
# 将图像重新调整大小
resized_image = F.resize(img, (new_height, new_width), self.interpolation)
# Calculate padding
# 计算等比例且尽可能靠近目标大小后(大尺寸那一边完全满足),剩下一小部分需要填充,采取以图像居中,四周填充的策略
pad_left = (target_width - new_width) // 2
pad_right = target_width - new_width - pad_left
pad_top = (target_height - new_height) // 2
pad_bottom = target_height - new_height - pad_top
# Pad the resized image to the target size
#resized_image:需要填充的图像,(pad_left, pad_top, pad_right, pad_bottom):定义填充的大小。分别表示左、上、右、下的填充像素数。
# padding_mode='constant':填充模式。constant 表示用常数值填充。
# fill=0:填充值。此处用 0 填充,即用黑色填充边缘
padded_image = F.pad(resized_image, (pad_left, pad_top, pad_right, pad_bottom), padding_mode='constant', fill=0)
return padded_image
def setup_logging(work_dir,name):
# Create a directory with the current timestamp
current_time = datetime.datetime.now().strftime('%Y-%m-%d_%H-%M-%S')
run_dir = os.path.join(work_dir, f"{name}_{current_time}")
os.makedirs(run_dir, exist_ok=True)
# Set up logging to file and console
log_file = os.path.join(run_dir, 'log.txt')
logging.basicConfig(level=logging.INFO, format='%(asctime)s - %(levelname)s - %(message)s', handlers=[
logging.FileHandler(log_file),
logging.StreamHandler()
])
return run_dir
![[每周一更]-(第103期):GIT初始化子模块](https://img-blog.csdnimg.cn/direct/9c71a0fe979140c29433620914d491af.jpeg#pic_center)