黑*头条_第4章_文章搜索前后端成形记 & 实名认证审核
文章目录
- 黑*头条_第4章_文章搜索前后端成形记 & 实名认证审核
- 文章搜索前后端成形记 & admin实名认证审核
- 1 文章详情-前端开发
- 2 后端需求分析
- 2.1 功能需求
- 3 定义
- 3.1 术语定义
- 3.2. 接口定义
- 4 后端开发
- 4.1 查询搜索记录接口
- 4.1.1 接口定义
- 4.1.2 类定义
- 4.1.3 Mapper实现
- 4.1.4 代码思路分析
- 4.1.5 代码实现
- 4.1.6 单元测试
- 4.2 删除搜索记录接口
- 4.2.1 接口定义
- 4.2.2 类定义
- 4.2.3 Mapper实现
- 4.2.4 service思路分析
- 4.2.5 代码实现
- 4.2.6 单元测试
- 4.3 清空搜索记录接口
- 4.3.1 接口定义
- 4.3.2 类定义
- 4.3.3 Mapper实现
- 4.3.4 service思路分析
- 4.3.5 代码实现
- 4.3.6 单元测试
- 4.4 查询今日热词接口
- 4.4.1 接口定义
- 4.4.2 类定义
- 4.4.3 Mapper实现
- 4.4.4 service思路分析
- 4.4.5 代码实现
- 4.4.6 单元测试
- 4.5 查询联想词接口
- 4.5.1 接口定义
- 4.5.2 类定义
- 4.5.3 Mapper实现
- 4.5.4 service思路分析
- 4.5.5 代码实现
- 4.5.6 单元测试
- 4.6 文章搜索接口
- 4.6.1 ES配置使用
- 4.6.1 接口定义
- 4.6.2 类定义
- 4.6.3 Mapper实现
- 4.6.4 service思路分析
- 4.6.5 代码实现
- 4.6.6 单元测试
- 6 前端需求分析
- 6.1 搜索页需求
- 6.2 结果页需求
- 7 定义
- 7.1 组件定义
- 7.2 页面定义
- 7.3 路由定义
- 7.4 结构定义
- 8 开发
- 8.1 搜索页面实现
- 8.1.1 创建文件
- 8.1.2 Model定义
- 8.1.3 实现Api
- 8.1.4 实现VIEW
- 8.1.5 实现VM
- 8.1.6 实现Style
- 8.1.7 路由配置
- 8.1.8 页面跳转
- 8.1.9 效果演示
- 8.2 搜索结果页面实现
- 8.2.1 创建文件
- 8.2.2 Model定义
- 8.2.3 实现Api
- 8.2.4 实现VIEW
- 8.2.5 实现VM
- 8.2.6 效果演示
文章搜索前后端成形记 & admin实名认证审核
- 掌握app登录模块的开发
- 熟悉文章详情前台代码流程
- 掌握ES的封装集成
- 熟练ES的API使用
- 熟悉admin管理平台前后端开发
- 掌握JWT技术以及实战应用技巧
- 熟悉VUE+ELEMENT UI的实战开发
1 文章详情-前端开发
1.1登录接口
参考其他微服务,创建heima-leadnews-login搭建环境
1.1.1 基本定义
通过用户输入用户名和密码验证用户,并且返回jwt字符串
| 参考标准 | 请参考通用接口规范 |
|---|---|
| 接口名称 | /api/v1/login/login_auth |
| 请求DTO | com.heima.model.user.pojos.ApUser |
| 响应DTO | ResponseResult:{token:“验证字符串”,user:{用户信息}} |
1.1.2 code定义
| PARAM_INVALID | PARAM_INVALID(501,“无效参数”), |
|---|---|
| AP_USER_DATA_NOT_EXIST | AP_USER_DATA_NOT_EXIST(1001,“ApUser数据不存在”) |
| LOGIN_PASSWORD_ERROR | LOGIN_PASSWORD_ERROR(2,“密码错误”) |
1.1.3 mapper实现
在ApUserMapper接口新增方法
ApUser selectByApPhone(String phone);
ApUserMapper.xml文件
<select id="selectByApPhone" resultMap="BaseResultMap">
    select
    <include refid="Base_Column_List" />
    from ap_user where phone = #{phone} limit 1;
</select>
1.1.4 service代码实现
创建接口:com.heima.login.service.ApUserLoginService
public interface ApUserLoginService {
    /**
     * 用户登录验证
     * @param user
     * @return
     */
    ResponseResult loginAuth(ApUser user);

}
实现类:com.heima.login.service.impl.ApUserLoginServiceImpl
@Service
public class ApUserLoginServiceImpl implements ApUserLoginService {


    @Autowired
    private ApUserMapper apUserMapper;

    @Override
    public ResponseResult loginAuth(ApUser user) {
        //验证参数
        if(StringUtils.isEmpty(user.getPhone()) || StringUtils.isEmpty(user.getPassword())){
            return ResponseResult.errorResult(AppHttpCodeEnum.PARAM_INVALID);
        }
        //查询用户
        ApUser dbUser = apUserMapper.selectByApPhone(user.getPhone());
        if(dbUser==null){
            return ResponseResult.errorResult(AppHttpCodeEnum.AP_USER_DATA_NOT_EXIST);
        }
        //密码错误
        if(!user.getPassword().equals(dbUser.getPassword())){
            return ResponseResult.errorResult(AppHttpCodeEnum.LOGIN_PASSWORD_ERROR);
        }
        dbUser.setPassword("");
        Map<String,Object> map = Maps.newHashMap();
        map.put("token", AppJwtUtil.getToken(dbUser));
        map.put("user",dbUser);
        return ResponseResult.okResult(map);
    }
}
1.1.5 接口定义及controller实现
定义接口com.heima.login.apis.LoginControllerApi
public interface LoginControllerApi {

    public ResponseResult login(@RequestBody ApUser user)
}
编写controller
@RestController
@RequestMapping("/api/v1/login")
public class LoginController implements LoginControllerApi {

    @Autowired
    private ApUserLoginService apUserLoginService;

    @PostMapping("login_auth")
    @Override
    public ResponseResult login(@RequestBody ApUser user) {
        return apUserLoginService.loginAuth(user);
    }
}
1.2其他配置项(必须配置)
1.2.1配置jackson解析
在article、behavior、user、login微服务模块中都设置
在数字id进行参数传递的时候需要序列化和反序列化,详细可参考第一天jackson封装
@Configuration
@ComponentScan("com.heima.common.common.init")
public class InitConfig {
}
1.2.2 配置过滤
在article、behavior、user、login微服务模块中都设置
在登录之后验证工作都是在这些过滤器中处理,比如把登录之后的用户放入线程中,详细可查看com.heima.common.web.app.security这个包下的类
@Configuration
@ServletComponentScan("com.heima.common.web.app.security")
public class SecurityConfig {
}
1.3 前端详情开发
在进行前端开发过程中,我们会遇见2个棘手的问题,以及相关的解决思路如下:
-
文章内容富文本内容,如何跨平台渲染?
内容是一个JSON对象数组,每个对象对应一种输出类型,比如文本、图片。
-
图片如何自适应高度?(此问题作为线下探讨话题,后面课程会给出参考代码)
获得图真实高度之后,按照屏幕自动缩放比例。
1.3.1 创建文件
创建src/pages/article/index.vue文件,用于实现页面功能
1.3.2 Model定义
-
页面包含的参数,主要是文章列表项的数据对象,包含文章id、文章标题等:
[‘id’,‘title’,‘date’,‘comment’,‘type’,‘source’,‘authorId’]
-
详情页面属性主要包括以下几部分:
- scrollerHeight:辅助实现文章内容高度的计算
- icon:定义页面用到的button图标
- config:存储文章的配置,比如是否删除、是否可评论
- content:存储当前页面显示的文章内容,其属性字段,参考后端返回的model
- relation:定义行为实体与当前文章的关系,比如是否点赞、是否收藏等
- time:定义文章详情页面的时间参数和变量
- test:用于功能演示的测试变量
props:['id','title','date','comment','type','source','authorId'],
data(){
    return {
        scrollerHeight:'500px',
        icon : {
            like : '\uf164',
            unlike : '\uf1f6',
            wechat : '\uf086',
            friend : '\uf268'
        },
        config:{},//文章配置
        content:{},//文章内容
        relation:{
            islike: false,
            isunlike: false,
            iscollection: false,
            isfollow: false,
            isforward:false
        },//关系
        time : {
            timer:null,//定时器
            timerStep:100,//定时器步长
            readDuration:0,//阅读时长
            percentage:0,//阅读比例
            loadDuration:0,//加载时长
            loadOff:true//加载完成控制
        },//时间相关属性
        test : {
            isforward : false
        }
    }
}
1.3.3 实现Api
详情页面的部分行为不要求用户必须登录,有设备ID好即可,并且在后端接口中会要求传入设备ID,前端对此参数需做全局存储管理,可存储在store中。
(1)store调整
src/store/store.js文件中需要增加对设备ID存储和获取的方法,具体调整如下:
- 定义函数中增加变量
this.equipmentidKey = "EQUIPMENTID_KEY"
- 属性方法中增加对应方法
setEquipmentId : function(equipmentId){
    return this.__setItem(this.equipmentidKey,equipmentId);
},
getEquipmentId : function(){
    return this.__getItem(this.equipmentidKey);
}
- 在__check函数中增加初始化值得逻辑,以方便接口测试
if(this.storage==null){
    this.storage = weex.requireModule("storage");
    // equipmentId=1
    this.setEquipmentId("8D3E8E0CF883C4E99329AF8A29300AB6")
}
(2)request调整
基本调整
详情页面关注功能要求传入用户Id,因此需要实现后端接口的JWT和验签功能,调整如下:
- 在定义函数中增加变量
this.store = null;
- 在属性方法中增加setStore方法
setStore : function(store){
    this.store = store
}
- 在entry.js文件中调用setStore方法
Vue.prototype.$store = store
request.setStore(store)
Vue.prototype.$request = request
完整代码
Request的调整还有以下调整:
- 安装crypto-js加密库
- 实现安装查询字符串排序参数,并生成验签字符串的sign方法
- 在__check方法中初始化JWT token字符串(这里做测试,后续登录接口成功后会设置此值)
- 在post方法中调整body为对象参,增加parms参数,并传入header安全参数
- 在get方法中传入header安全参数
var querystring=require("querystring");
var crypto =require('crypto-js')
function Request() {
    this.stream=null;
    this.store = null;
}
Request.prototype={
    setStore : function(store){
        this.store = store
    },
    __check : function(){
        if(!this.stream){
            this.stream = weex.requireModule("stream");
            // user=1
            this.store.setToken("eyJhbGciOiJIUzUxMiIsInppcCI6IkdaSVAifQ.H4sIAAAAAAAAADWLQQqEMAwA_5KzPcQ2LfU3iWbZCkIhFVyW_fvGg7cZhvnCPhosIBXzq2gKlYlDypsE0RVDwiI0C9FaIkzQeMCClCNSzDVNYKf4bR8betzdzPWt7WA3Pjc37t1Zr_6cZb7P5g1_fxA93U6AAAAA.vWYfL-u7d2no6iVdqS-DzlD4WcQrSsx_U8gLjvZJQ9Itmlw1zeQLCl4sVZ_4EeU33ExCNCHjuCTPoGay4OYEcw")
        }
        return this.stream;
    },
    post : function(path,body,parms){
        let stream = this.__check()
        let time = new Date().getTime()
        if(parms==undefined)parms={}
else{
    path = path+"?"+querystring.stringify(parms)
}
        parms['t']=time
        return this.store.getToken().then(token=>{
            return new Promise((resolve, reject) => {
                stream.fetch({
                    method: 'POST',
                    url: path,
                    type: 'json',
                    headers:{
                        'Content-Type': 'application/json; charset=UTF-8',
                        'token':token,
                        't': ''+time,
                        'md':this.sign(parms)
                    },
                    body:JSON.stringify(body)
                }, (response) => {
                    if (response.status == 200) {
                        resolve(response.data)
                    }
                    else {
                        reject(response)
                    }
                })
            })
        }).catch(e=>{
            return new Promise((resolve, reject) => {
                reject(e);
            })
        })
    },
    get : function(path,parms){
        let stream = this.__check();
        if(parms){
            let tmp = querystring.stringify(parms)
            if(path.indexOf("?")==-1){
                tmp="?"+tmp;
            }else{
                tmp="&"+tmp;
            }
            path+=tmp;
        }
        let time = new Date().getTime()
        parms['t']=time
        return this.store.getToken().then(token=>{
            return new Promise((resolve, reject) => {
                stream.fetch({
                    method: 'GET',
                    url: path,
                    type: 'json',
                    headers:{
                        'Content-Type': 'application/json; charset=UTF-8',
                        'token':token,
                        't': ''+time,
                        'md':this.sign(parms)
                    }
                }, (response) => {
                    if (response.status == 200) {
                        resolve(response.data)
                    }
                    else {
                        reject(response)
                    }
                })
            })
        }).catch(e=>{
            return new Promise((resolve, reject) => {
                reject(e);
            })
        })
    },
    sign : function(parms){
        let arr = [];
        for (var key in parms) {
            arr.push(key)
        }
        arr.sort();
        let str = '';
        for (var i in arr) {
            if(str!=''){
                str+="&"
            }
            str += arr[i] + "=" + parms[arr[i]]
        }
        return crypto.MD5(str).toString()
    }
}
export  default new Request()
(3)Article api代码
api是对后端接口的一一实现,由于安全已在request.js中封装,因此api实现较为简单,其文件代码如下,包含了关注、收藏、转发、点赞、不喜欢、阅读、分享、加载文章内容、加载文章关系几个接口的实现:
function Api(){
    var vue;
}
Api.prototype = {
    setVue : function(vue){
        this.vue = vue;
    },
    // 保存展现行为数据
    loadinfo : function(articleId){
        let url = this.vue.$config.urls.get('load_article_info')
        return new Promise((resolve, reject) => {
            this.vue.$request.post(url,{articleId:articleId}).then((d)=>{
                resolve(d);
            }).catch((e)=>{
                reject(e);
            })
        })
    },
    // 加载文章关系信息
    loadbehavior: function(articleId,authorId){
        let url = this.vue.$config.urls.get('load_article_behavior')
        return this.vue.$store.getEquipmentId().then(equipmentId=>{
            return new Promise((resolve, reject) => {
                this.vue.$request.post(url,{equipmentId:equipmentId,articleId:articleId,authorId:authorId}).then((d)=>{
                    resolve(d);
                }).catch((e)=>{
                    reject(e);
                })
            })
        }).catch(e=>{
            return new Promise((resolve, reject) => {
                reject(e);
            })
        })
    },
    // 喜欢、点赞
    like : function(data){
        let url = this.vue.$config.urls.get('like_behavior')
        return this.vue.$store.getEquipmentId().then(equipmentId=>{
            return new Promise((resolve, reject) => {
                this.vue.$request.post(url,{equipmentId:equipmentId,entryId:data.articleId,type:0,operation:data.operation}).then((d)=>{
                    resolve(d);
                }).catch((e)=>{
                    reject(e);
                })
            })
        }).catch(e=>{
            return new Promise((resolve, reject) => {
                reject(e);
            })
        })
    },
    // 不喜欢
    unlike : function(data){
        let url = this.vue.$config.urls.get('unlike_behavior')
        return this.vue.$store.getEquipmentId().then(equipmentId=>{
            return new Promise((resolve, reject) => {
                this.vue.$request.post(url,{equipmentId:equipmentId,articleId:data.articleId,type:data.type}).then((d)=>{
                    resolve(d);
                }).catch((e)=>{
                    reject(e);
                })
            })
        }).catch(e=>{
            return new Promise((resolve, reject) => {
                reject(e);
            })
        })
    },
    // 不喜欢
    read : function(data){
        let url = this.vue.$config.urls.get('read_behavior')
        return this.vue.$store.getEquipmentId().then(equipmentId=>{
            return new Promise((resolve, reject) => {
                this.vue.$request.post(url,{
                    equipmentId:equipmentId,
                    articleId:data.articleId,
                    count:1,
                    readDuration:data.readDuration,
                    percentage:data.percentage,
                    loadDuration:data.loadDuration
                }).then((d)=>{
                    resolve(d);
                }).catch((e)=>{
                    reject(e);
                })
            })
        }).catch(e=>{
            return new Promise((resolve, reject) => {
                reject(e);
            })
        })
    },
    // 收藏
    collection : function(data){
        let url = this.vue.$config.urls.get('collection_behavior')
        return this.vue.$store.getEquipmentId().then(equipmentId=>{
            return new Promise((resolve, reject) => {
                this.vue.$request.post(url,{
                    equipmentId:equipmentId,
                    entryId:data.articleId,
                    publishedTime:data.publishedTime,
                    type:0,
                    operation:data.operation
                }).then((d)=>{
                    resolve(d);
                }).catch((e)=>{
                    reject(e);
                })
            })
        }).catch(e=>{
            return new Promise((resolve, reject) => {
                reject(e);
            })
        })
    },
    // 转发
    forward : function(data){
        let url = this.vue.$config.urls.get('forward_behavior')
        return this.vue.$store.getEquipmentId().then(equipmentId=>{
            return new Promise((resolve, reject) => {
                this.vue.$request.post(url,{
                    equipmentId:equipmentId,
                    articleId:data.articleId
                }).then((d)=>{
                    resolve(d);
                }).catch((e)=>{
                    reject(e);
                })
            })
        }).catch(e=>{
            return new Promise((resolve, reject) => {
                reject(e);
            })
        })
    },
    // 分享
    share : function(data){
        let url = this.vue.$config.urls.get('share_behavior')
        return this.vue.$store.getEquipmentId().then(equipmentId=>{
            return new Promise((resolve, reject) => {
                this.vue.$request.post(url,{
                    equipmentId:equipmentId,
                    articleId:data.articleId,
                    type:data.type
                }).then((d)=>{
                    resolve(d);
                }).catch((e)=>{
                    reject(e);
                })
            })
        }).catch(e=>{
            return new Promise((resolve, reject) => {
                reject(e);
            })
        })
    }
    ,
    // 关注
    follow : function(data){
        let url = this.vue.$config.urls.get('user_follow')
        return new Promise((resolve, reject) => {
            this.vue.$request.post(url,{
                authorId:data.authorId,
                operation:data.operation,
                articleId:data.articleId
            }).then((d)=>{
                resolve(d);
            }).catch((e)=>{
                reject(e);
            })
        })
    }
}

export default new Api()
思考这个地方的代码有没有可优化的点?后续再做代码优化
(4)Home api代码
由于调整了request的规则,对于之前主页的API需要调整调用方式,具体代码如下:
- 调整loaddata方法,从store中获取设备ID
- 调整saveShowBehavior方法,从store中获取设备ID
function Api(){
    this.vue;
}
Api.prototype = {
    setVue : function(vue){
        this.vue = vue;
    },
    // 加载数据
    loaddata : function(params){
        let dir = params.loaddir
        let url = this.getLoadUrl(dir)
        return this.vue.$store.getEquipmentId().then(equipmentId=> {
            return new Promise((resolve, reject) => {
                this.vue.$request.get(url,params).then((d)=>{
                    resolve(d);
                }).catch((e)=>{
                    reject(e);
                })
            })
        }).catch(e=>{
            return new Promise((resolve, reject) => {
                reject(e);
            })
        })
    },
    // 保存展现行为数据
    saveShowBehavior : function(params){
        let ids = [];
        for(let k in params){
            if(params[k]){
                ids.push({id:k});
            }
        }
        if(ids.length>0){
            let url = this.vue.$config.urls.get('show_behavior')
            return this.vue.$store.getEquipmentId().then(equipmentId=> {
                return new Promise((resolve, reject) => {
                    this.vue.$request.post(url, {
                        equipmentId: equipmentId,
                        articleIds: ids
                    }).then((d) => {
                        d.data = ids
                        resolve(d);
                    }).catch((e) => {
                        reject(e);
                    })
                })
            }).catch(e=>{
                return new Promise((resolve, reject) => {
                    reject(e);
                })
            })
        }
    },
    // 区别请求那个URL
    getLoadUrl : function(dir){
        let url = this.vue.$config.urls.get('load')
        if(dir==0)
            url = this.vue.$config.urls.get('loadnew')
        else if(dir==2)
            url = this.vue.$config.urls.get('loadmore')
        return url;
    }
}

export default new Api()
1.3.4 实现VIEW
详情页面包含顶部导航栏和底部功能栏,其中内容区域注意使用scroller滚动组件进行包装,相关实现代码如下:
<template>
    <div class="art-page">
        <div class="art-top"><TopBar :text="title"/></div>
        <scroller class="scroller" ref="scroller" @scroll="scroller" show-scrollbar="true">
            <text class="title">{{title}}</text>
            <div class="info">
                <image src="https://p3.pstatp.com/thumb/1480/7186611868" class="head"></image>
                <text class="author">{{source}}</text>
                <text class="time">{{formatDate(date)}}</text>
                <div class="empty"></div>
                <wxc-button class="button" v-if="relation.isfollow" @wxcButtonClicked="follow" text="取消关注" size="small"></wxc-button>
                <wxc-button class="button" v-if="!relation.isfollow" @wxcButtonClicked="follow" text="+关注" size="small"></wxc-button>
            </div>
            <div class="content">
                <template v-for="item in content">
                    <text class="text" :style="getStyle(item.style)" v-if="item.type=='text'">{{item.value}}</text>
                    <image class="image" :style="getStyle(item.style)" v-if="item.type=='image'" :src="item.value"></image>
                </template>
            </div>
            <div class="tools">
                <Button text="点赞" @onClick="like" :icon='icon.like' :active="relation.islike" active-text="取消赞"/>
                <Button text="不喜欢" @onClick="unlike" :icon='icon.unlike' :active="relation.isunlike" />
                <Button text="微信" :icon='icon.wechat' @onClick="share(0)"/>
                <Button text="朋友圈" :icon='icon.friend' @onClick="share(1)"/>
            </div>
        </scroller>
        <div class="art-bottom"><BottomBar :forward="test.isforward" @clickForward="forward"
                                           :collection="relation.iscollection" @clickCollection="collection" /></div>
    </div>
</template>
1.3.5 实现VM
VM需要调用API进行内容数据绑定,以及实现行为数据的收集与提交。
(1)mounted
挂载完成需要重新设置文章内容部分的高度,以适应内容自动提供滚动功能。
mounted(){
    this.scrollerHeight=(Utils.env.getPageHeight()-180)+'px';
}
(2)created
创建完成后需要做以下几件事情:
- 初始化Api vue属性
- 调用文章内容加载方法loadInfo
- 调用文章关系加载方法loadBehavior
- 启动定时器记录用户在此页面停留时长、loadInfo方法的加载时长
created(){
    Api.setVue(this);
    this.loadInfo();
this.loadBehavior();
    let _this = this;
    this.time.timer = setInterval(function(){
        _this.time.readDuration+=_this.time.timerStep
        if(_this.time.loadOff){
            _this.time.loadDuration+=_this.time.timerStep
        }
    },this.time.timerStep)
}
(3)destoryed
在用户离开页面时,提交用户的阅读行为数据,并清理timer
destroyed(){
    this.read();
}
(4)loadInfo
调用loadinfo的方法,如果返回成功则赋值config和content值,注意content为支持富文本展示功能,其值格式被定义为JSON数组字符串,设置时可用eval转换。
loadInfo : function(){
    Api.loadinfo(this.id).then((d)=>{
        if(d.code==0){
            this.config = d.data['config']
            let temp = d.data['content']
            if(temp){
                temp = temp.content
                this.content = eval("("+temp+")")
                this.time.loadOff=false;//关闭加载时间的记录
            }
        }else{
            modal.toast({message: d.errorMessage,duration: 3})
        }
    }).catch((e)=>{
        console.log(e)
    })
}
- content值格式示例:
[
{
        type: 'text',
        value: '这个暑期档被灭霸打了响指之后就显得非常暗淡。易烊千玺的首部大荧幕男主角作品《少年的你》撤档,管虎的战争片《八佰》也因“技术问题”没法如期上映,《伟大的梦想》萎缩成《小小的愿望》,《悲伤逆流成河》不得不强颜欢笑,化作《流淌的美好时光》。'
    },
    {
        type: 'text',
        value: '唯一振奋人心的大概就是“复活”的这部《长安十二时辰》,它突然上线给人带来的惊讶不小于前阵子突然消失的《九州缥缈录》。'
    },
    {
        type: 'image',
        value: 'https://p3.pstatp.com/large/pgc-image/RVFRw8xCiUeTbd',
        style:{
            height:'810px'
        }
    },
    {
        type: 'text',
        value: '6月27日,雷佳音和易烊千玺主演的《长安十二时辰》上线,播出一周,讨论声众多,连身边不少把国产剧放在鄙视链最底端的朋友都追起剧来。'
    },
    {
        type: 'text',
        value: '但我怎么也没想到,和同事关于这部剧的讨论是从吃开始的。罪魁祸首是可以吸的火晶柿子。糙汉张小敬吃柿子的套路太骚气,又红又圆的小柿子,把精致吸管往里一插,手指肚捧着柿子,就这么喝起来了。大家忍不住就柿子品种来了一轮南北方大讨论,琢磨着去哪能骚气地喝一回小柿子。'
    },
    {
        type: 'image',
        value: 'https://p3.pstatp.com/large/pgc-image/RVFRw9gDn1CAGc',
        style:{
            height:'176PX'
        }
    },
    {
        type: 'image',
        value: 'https://p3.pstatp.com/large/pgc-image/RVFRwBeGmhQHL8',
        style:{
            height:'211PX'
        }
    },
    {
        type: 'image',
        value: 'https://p3.pstatp.com/large/pgc-image/RVFRwEM7cyRgyz',
        style:{
            height:'211PX'
        }
    },
    {
        type: 'text',
        value: '《长安十二时辰》的开场简直就是雷佳音的大型吃喝直播,我至今在帮他数着,在顺手忙活解救长安城的前提下,就这十二时辰里,雷佳音到底能吃多少东西。',
        style: {
            fontWeight: 'bold',
            fontSize:'36px'
        }
    },
    {
        type: 'image',
        value: 'https://p3.pstatp.com/large/pgc-image/RVFRwHoGEipU4R',
        style:{
            height:'211PX'
        }
    },
]
(5)loadBehavior
该方法调用后端接口获取文章关系信息,并赋值给relation属性
loadBehavior : function(){
    Api.loadbehavior(this.id,this.authorId).then((d)=>{
        if(d.code==0){
            this.relation = d.data
        } else{
           modal.toast({message: d.errorMessage,duration: 3})
        }
    }).catch((e)=>{
        console.log(e)
    })
}
(6)like
该函数实现点赞和取消点的接口调用,如果成功修改本地属性islike的值
// 点赞
like : function(){
    Api.like({articleId:this.id,operation:this.relation.islike?1:0}).then(d=>{
        if(d.code==0){
            this.relation.islike = !this.relation.islike
        }else{
            modal.toast({message: d.errorMessage,duration: 3})
        }
    }).catch((e)=>{
        console.log(e)
    })
}
(7)unlike
实现不喜欢和取消不喜欢的功能,如果调用成功则修改本地属性isunlike的值
// 不喜欢
unlike : function(){
    Api.unlike({articleId:this.id,type:this.relation.isunlike?1:0}).then(d=>{
        if(d.code==0){
            this.relation.isunlike = !this.relation.isunlike
        }else{
            modal.toast({message: d.errorMessage,duration: 3})
        }
    }).catch((e)=>{
        console.log(e)
    })
}
(8)share
分享成功后给出相关提示
// 分享
share : function(type){
    Api.share({articleId:this.id,type:type}).then(d=>{
        if(d.code==0){
            modal.toast({message: '分享成功',duration: 3})
        }else{
            modal.toast({message: d.errorMessage,duration: 3})
        }
    }).catch((e)=>{
        console.log(e)
    })
}
(9) collection
实现收藏和取消收藏的功能,如果调用成功,则修改本地iscollection值
// 收藏
collection : function(){
    Api.collection({articleId:this.id,publishedTime:this.date,operation:this.relation.iscollection?1:0}).then(d=>{
        if(d.code==0){
            this.relation.iscollection = !this.relation.iscollection
        }else{
            modal.toast({message: d.errorMessage,duration: 3})
        }
    }).catch((e)=>{
        console.log(e)
    })
}
(10) forward
转发功能用户行为数据的收集演示,通过点亮按钮来表现调用成功
// 转发
forward : function(){
    Api.forward({articleId:this.id}).then(d=>{
        this.test.isforward = !this.test.isforward
    }).catch((e)=>{
        console.log(e)
    })
}
(11)follow
实现关注和取消关注的切换操作,如果操作成功,则给出提示并修改本地isfollow的值
// 关注
follow : function(){
    Api.follow({articleId:this.id,authorId:this.authorId,operation:this.relation.isfollow?1:0}).then(d=>{
        if(d.code==0){
            this.relation.isfollow = !this.relation.isfollow
            modal.toast({message:this.relation.isfollow?'成功关注':'成功取消关注',duration: 3})
        }else{
            modal.toast({message: d.errorMessage,duration: 3})
        }
    }).catch((e)=>{
        console.log(e)
    })
}
(12)read
阅读行为数据的提交,不做请求结果的处理
// 阅读行为
read : function(){
    clearInterval( this.time.timer)
    Api.read({articleId:this.id,readDuration:this.time.readDuration,percentage:this.time.percentage,loadDuration:this.time.loadDuration});
}
(13)其它方法
- formatDate:时间格式化工具类
- getStyle:用户辅助实现富文本样式的支持
- scroller:用于简单滚动条位置,实时计算用户的阅读到的位置百分比
formatDate:function(time){
    return this.$date.format10(time);
},
getStyle:function(item){
    if(item){
        return item;
    }else{
        return {}
    }
},
scroller : function(e){
    let y = Math.abs(e.contentOffset.y)+(Utils.env.getPageHeight()-180)
    let height = e.contentSize.height
    this.time.percentage = Math.max(parseInt((y*100)/height),this.time.percentage)
}
1.3.6 实现Style
<style scoped>
    .art-page{
        position: absolute;
        top: 0;
        left: 0;
        right: 0;
        bottom: 0;
        width: 750px;
        flex-direction: column;
    }
    .art-top{
        top: 0;
        height: 90px;
        position: fixed;
        z-index: 999;
    }
    .art-bottom{
        bottom: 0;
        position: fixed;
        width: 750px;
    }
    .scroller{
        flex: 1;
        flex-direction: column;
        width: 750px;
        padding: 0px 20px;
        margin: 90px 0px;
    }
    .title{
        font-size: 48px;
        font-weight: bold;
        margin: 10px 0px;
    }
    .info{
        margin-top: 20px;
        line-height: 48px;
        align-items: center;
        flex-direction: row;
    }
    .head{
        width: 48px;
        height: 48px;
        border-radius: 48px;
    }
    .author{
        font-size: 28px;
        color: #adadad;
        margin-left: 15px;
    }
    .time{
        font-size: 28px;
        color: #adadad;
        margin-left: 15px;
    }
    .empty{
        flex: 1;
    }
    .content{
        flex-direction: column;
        font-size: 30px;
        justify-content:flex-start;
        margin-top: 20px;
        color: #222;
        word-wrap: break-word;
        text-align: justify;
    }
    .text {
        margin: 15px 0px;
    }
    .image{
        display:inline-block;
        margin: 15px 0px;
        border-radius: 5px;
        height: 300px;
    }
    .tools{
        margin: 10px 0px;
        flex-direction: row;
        height: 60px;
    }
</style>
1.3.7 路由配置
新增详情页面,需要配置路由,以便页面跳入;在这里详情页面应该配置成一级路由,在src/routers/home.js文件中更改:
// ============  主页路由MODE- ==================
import Layout from '@/compoents/layouts/layout_main'
import Home from '@/pages/home/index'
import Article from '@/pages/article/index'

let routes = [
    {
        path: '/',
        component: Layout,
        children:[
            {
                path:'/home',
                name:'Home',
                component: Home
            }
        ]
    },{
        path:'/article/:id',
        name: 'article-info',
        component:Article
    }
]

export default routes;
1.3.8 页面跳转
在src/page/home/index.vue中实现文章列表点击打开详情的实现:
// 列表项点击事件
wxcPanItemClicked(id){
  this.$router.push('/article/'+id)
}
1.3.9 效果演示

2 后端需求分析
2.1 功能需求
在文章搜索中,点击搜索框,进入搜索界面。页面显示今日热搜词,输入文字提示的联想词,在搜索框不输入任何内容情况下,还需要显示历史搜索记录。归纳后端需支持的主要功能包括:
-
搜索记录
-
查询搜索记录
-
删除搜索记录
-
清空搜索记录
-
-
今日热词
- 获取今日热词
-
搜索文章
-
搜索文章
-
保存搜索记录
-
-
联想词
- 查询联想词

3 定义
3.1 术语定义
【无】
3.2. 接口定义
文章详情页面接口遵照项目通用格式标准,主要接口如下:
-
查询搜索记录接口: 查询用户历史搜索记录
-
删除搜索记录接口:删除用户搜索记录
-
清空搜索记录接口:清空用户搜索记录
-
查询今日热词接口:根据日期查询热词
-
查询联想词接口:根据关键词联想关键词
-
文章搜索接口:搜索文章
4 后端开发
4.1 查询搜索记录接口
4.1.1 接口定义
(1) 基本定义
由于框架封装只对JSON反序列化自增ID,需要请求文章ID需要封装为DTO.
| 参考标准 | 请参考通用接口规范 |
|---|---|
| 接口名称 | /api/v1/article/search/load_search_history |
| 请求DTO | com.heima.model.article.dtos.UserSearchDto |
| 响应DTO | ResponseResult: {List } |
(2)CODE定义
| PARAM_INVALID | PARAM_INVALID(501,“无效参数”), |
|---|---|
4.1.2 类定义
类说明:
-
ApUserSearch是对应数据表的POJO对象,放置model模块
-
UserSearchDto封装接口请求数据,放置在model模块
-
ApUserSearchMapper是MybatisMapper文件,放置在model模块
-
ArticleSearchControllerApi是服务接口定义,放置在apis模块
-
ApArticleSearchService、ApArticleSearchServiceImpl、ArticleSearchController是对功能的实现,放置在article模块
4.1.3 Mapper实现
(1) ApUserSearch
创建类com.heima.model.user.pojos.ApUserSearch
@Data
public class ApUserSearch {
    private Integer id;
    @IdEncrypt
    private Integer entryId;
    private String keyword;
    private Integer status;
    private Date createdTime;
}
(2)ApUserSearchMapper
创建类com.heima.model.mappers.app.ApUserSearchMapper
定义按照entryId查询历史记录方法:
public interface ApUserSearchMapper {
/**
根据entryId查询搜索记录
@param entryId
@return
*/
List<ApUserSearch> selectByEntryId(@Param("entryId") Integer entryId, @Param("limit") int limit);
}
ApUserSearchMapper.xml
<mapper namespace="com.heima.model.mappers.app.ApUserSearchMapper" >
  <resultMap id="BaseResultMap" type="com.heima.model.user.pojos.ApUserSearch" >
      <id column="id" property="id" />
      <result column="entry_id" property="entryId" />
      <result column="keyword" property="keyword" />
      <result column="status" property="status" />
      <result column="created_time" property="createdTime" />
  </resultMap>
  <sql id="Base_Column_List" >
    id, entry_id, keyword, status, created_time
  </sql>
  <select id="selectByEntryId" resultMap="BaseResultMap">
    select
    <include refid="Base_Column_List" />
    from ap_user_search
    where entry_id = #{entryId} and status = 1
    order by created_time desc limit #{limit}
  </select>
</mapper>
4.1.4 代码思路分析
-
判断入参articleId是否合法,不合法则返回PARAM_INVALID错误
-
查询文章对应的ApArticleConfig配置信息
-
如果未查询到ApArticleConfig信息,则返回PARAM_INVALID错误
-
如果文章未被删除,则查找处理文章内容对象
-
封装响应DTO返回数据
4.1.5 代码实现
(1)ApArticleSearchService
创建类:com.heima.article.service.ApArticleSearchService
定义获取历史记录接口:
public interface ApArticleSearchService {

/**
查询搜索历史
@param userSearchDto
@return
*/
ResponseResult findUserSearch(UserSearchDto userSearchDto); }
(2)ApArticleSearchServiceImpl
创建类:com.heima.article.service.ApArticleSearchServiceImpl
@Service
public class ApArticleSearchServiceImpl implements ApArticleSearchService {
    @Autowired
    private ApBehaviorEntryMapper apBehaviorEntryMapper;
     @Autowired
    private ApUserSearchMapper apUserSearchMapper;

    public ResponseResult getEntryId(UserSearchDto dto){
        ApUser user = AppThreadLocalUtils.getUser();
        // 用户和设备不能同时为空
        if(user == null && dto.getEquipmentId()==null){
            return ResponseResult.errorResult(AppHttpCodeEnum.PARAM_REQUIRE);
        }
        Long userId = null;
        if(user!=null){
            userId = user.getId();
        }
        ApBehaviorEntry apBehaviorEntry = apBehaviorEntryMapper.selectByUserIdOrEquipment(userId, dto.getEquipmentId());
        // 行为实体找以及注册了,逻辑上这里是必定有值得,除非参数错误
        if(apBehaviorEntry==null){
            return ResponseResult.errorResult(AppHttpCodeEnum.PARAM_INVALID);
        }
        return ResponseResult.okResult(apBehaviorEntry.getId());
    }

	@Override
	public ResponseResult findUserSearch(UserSearchDto dto) {
        if(dto.getPageSize()>50){
            return ResponseResult.errorResult(AppHttpCodeEnum.PARAM_INVALID);
        }
        ResponseResult ret = getEntryId(dto);
        if(ret.getCode()!=AppHttpCodeEnum.SUCCESS.getCode()){
            return ret;
        }
        List<ApUserSearch> list = apUserSearchMapper.selectByEntryId((Integer) ret.getData(), dto.getPageSize());
        return ResponseResult.okResult(list);
}
(3)UserSearchDto
创建类:com.heima.model.article.dtos.UserSearchDto
此类在model模块中创建,定义请求入参,实现如下:
@Data
public class UserSearchDto {
    // 设备ID
    @IdEncrypt
    Integer equipmentId;
    String searchWords;
    List<ApUserSearch> hisList;
    String hotDate;
    int pageNum;
    int pageSize;

    public int getFromIndex(){
    if(this.pageNum<1)return 0;
    if(this.pageSize<1) this.pageSize = 10;
    	return this.pageSize  (pageNum1);
    }
}
(4)ArticleSearchControllerApi
创建类:com.heima.article.apis.ArticleSearchControllerApi
此类在apis模块中创建,定义了相关接口,实现如下:
/**
首頁文章
*/
public interface ArticleSearchControllerApi {

/**
查询搜索历史
@param userSearchDto
@return
*/
ResponseResult findUserSearch(UserSearchDto userSearchDto);

}
(5)ArticleSearchController
创建类:com.heima.article.controller.v1.ArticleSearchController
该类的实现较为简单,引入Service并调用即可:
@RestController
@RequestMapping("/api/v1/article/search")
public class ArticleSearchController implements ArticleSearchControllerApi {

    @Autowired
    private ApArticleSearchService apArticleSearchService;

    @PostMapping("/load_search_history")
    public ResponseResult findUserSearch(@RequestBody UserSearchDto userSearchDto) {
    	return apArticleSearchService.findUserSearch(userSearchDto);
    }
}
4.1.6 单元测试
创建测试类:com.heima.article.controller.v1.ArticleSearchTest
使用MockMvc进行接口调用测试,代码如下:
@RunWith(SpringRunner.class)
@SpringBootTest
@AutoConfigureMockMvc
public class ArticleSearchTest {

    @Autowired
    MockMvc mvc;
    @Autowired
    ObjectMapper mapper;

	@Test
    public void testLoadArticleInfo() throws Exception {
        UserSearchDto dto = new UserSearchDto();
        dto.setEquipmentId(1);
        dto.setPageSize(20);
        MockHttpServletRequestBuilder builder =
                MockMvcRequestBuilders.post("/api/v1/article/search/load_search_history")
                        .contentType(MediaType.APPLICATION_JSON_VALUE)
                        .content(mapper.writeValueAsBytes(dto));
        mvc.perform(builder).andExpect(MockMvcResultMatchers.status().isOk()).andDo(MockMvcResultHandlers.print());
    }
4.2 删除搜索记录接口
4.2.1 接口定义
(1)基本定义
由于框架封装只对JSON反序列化自增ID,需要请求文章ID需要封装为DTO.
| 参考标准 | 请参考通用接口规范 |
|---|---|
| 接口名称 | /api/v1/article/search/del_search |
| 请求DTO | com.heima.model.article.dtos.UserSearchDto |
| 响应DTO | ResponseResult {删除的条数 } |
(2)CODE定义
| PARAM_INVALID | PARAM_INVALID(501,“无效参数”), |
|---|---|
4.2.2 类定义
-
ApUserSearch是对应数据表的POJO对象,放置model模块
-
UserSearchDto封装接口请求数据,放置在model模块
-
ApUserSearchMapper是MybatisMapper文件,放置在model模块
-
ArticleSearchControllerApi是服务接口定义,放置在apis模块
-
ApArticleSearchService、ApArticleSearchServiceImpl、ArticleSearchController是对功能的实现,放置在article模块
4.2.3 Mapper实现
(1)ApUserSearchMapper
定义删除搜索记录方法:
/**
删除搜索记录
@param entryId
@param hisIds
@return
*/
int delUserSearch(@Param("entryId") Integer entryId,@Param("hisIds") List<Integer> hisIds);
ApUserSearchMapper.xml
<update id="delUserSearch">
    update ap_user_search
    set status = 0
    where entry_id =#{entryId} and id in(
    <foreach item="item" collection="hisIds" separator=",">
      #{item}
    </foreach>
    )
  </update>
4.2.4 service思路分析
-
判断入参hisIds是否合法,不合法则返回PARAM_INVALID错误
-
把上述hisIds的状态置为0
-
封装响应DTO返回数据
4.2.5 代码实现
(1)ApArticleSearchService
定义删除搜索记录接口:
/**
删除搜索历史
@param userSearchDto
@return
*/
ResponseResult delUserSearch(UserSearchDto userSearchDto);
(2)AppArticleInfoServiceImpl
@Override
public ResponseResult delUserSearch(UserSearchDto dto) {
    if(dto.getHisList() ==null  dto.getHisList().size()<=0){
    	return ResponseResult.errorResult(AppHttpCodeEnum.PARAM_REQUIRE);
    }
    ResponseResult ret = getEntryId(dto);
    if(ret.getCode()!=AppHttpCodeEnum.SUCCESS.getCode()){
    	return ret;
    }
    List<Integer> ids = dto.getHisList().stream().map(r>r.getId()).collect(Collectors.toList());
    int rows = apUserSearchMapper.delUserSearch((Integer) ret.getData(),ids);
    return ResponseResult.okResult(rows);
}
(3)ArticleSearchControllerApi
创建类:com.heima.article.apis.ArticleSearchControllerApi
此类在apis模块中创建,定义了相关接口,实现如下:
/**
删除搜索历史
@param userSearchDto
@return
*/
ResponseResult delUserSearch(UserSearchDto userSearchDto);
(4)ArticleSearchController
该类的实现较为简单,引入Service并调用即可:
@PostMapping("/del_search")
@Override
public ResponseResult delUserSearch(@RequestBody UserSearchDto userSearchDto) {
    return apArticleSearchService.delUserSearch(userSearchDto);
}
4.2.6 单元测试
在当前类中新增测试方法com.heima.article.controller.v1.ArticleSearchTest
使用MockMvc进行接口调用测试,代码如下:
@Test
public void testDelUserSearch() throws Exception {
    UserSearchDto dto = new UserSearchDto();
    dto.setEquipmentId(1);
    ApUserSearch apUserSearch = new ApUserSearch();
    apUserSearch.setId(7103);
    List<ApUserSearch> list = new ArrayList<>();
    list.add(apUserSearch);
    dto.setHisList(list);
    MockHttpServletRequestBuilder builder =
        MockMvcRequestBuilders.post("/api/v1/article/search/del_search")
        .contentType(MediaType.APPLICATION_JSON_VALUE)
        .content(mapper.writeValueAsBytes(dto));
    mvc.perform(builder).andExpect(MockMvcResultMatchers.status().isOk()).andDo(MockMvcResultHandlers.print());
}
4.3 清空搜索记录接口
4.3.1 接口定义
(1)基本定义
由于框架封装只对JSON反序列化自增ID,需要请求文章ID需要封装为DTO.
| 参考标准 | 请参考通用接口规范 |
|---|---|
| 接口名称 | /api/v1/article/search/clear_search |
| 请求DTO | com.heima.model.article.dtos.UserSearchDto |
| 响应DTO | ResponseResult {删除的条数} |
(2)CODE定义
| PARAM_INVALID | PARAM_INVALID(501,“无效参数”), |
|---|---|
4.3.2 类定义
-
ApUserSearch是对应数据表的POJO对象,放置model模块
-
UserSearchDto封装接口请求数据,放置在model模块
-
ApUserSearchMapper是MybatisMapper文件,放置在model模块
-
ArticleSearchControllerApi是服务接口定义,放置在apis模块
-
ApArticleSearchService、ApArticleSearchServiceImpl、ArticleSearchController是对功能的实现,放置在article模块
4.3.3 Mapper实现
(1)ApUserSearchMapper
定义清空搜索记录方法:
/**
清空用户搜索记录
@param entryId
@return
*/
int clearUserSearch(Integer entryId);
ApUserSearchMapper.xml
<update id="clearUserSearch">
    update ap_user_search
    set status = 0
    where entry_id = #{entryId} and status = 1
</update>
4.3.4 service思路分析
-
根据入参获取entryId,判断是否合法,不合法则返回PARAM_INVALID错误
-
请空entryId对应的搜索记录
-
封装响应DTO返回数据
4.3.5 代码实现
(1)ApArticleSearchService
定义清空搜索记录接口:
/**
清空搜索历史
@param userSearchDto
@return
*/
ResponseResult clearUserSearch(UserSearchDto userSearchDto);
(2)AppArticleInfoServiceImpl
@Override
public ResponseResult clearUserSearch(UserSearchDto dto) {
    ResponseResult ret = getEntryId(dto);
    if(ret.getCode()!=AppHttpCodeEnum.SUCCESS.getCode()){
    	return ret;
    }
    int rows = apUserSearchMapper.clearUserSearch((Integer) ret.getData());
    return ResponseResult.okResult(rows);
}
(3)ArticleSearchControllerApi
此类在apis模块中创建,定义了相关接口,实现如下:
/**
清空搜索历史
@param userSearchDto
@return
*/
ResponseResult clearUserSearch(UserSearchDto userSearchDto);
(4)ArticleSearchController
@PostMapping("/clear_search")
@Override
public ResponseResult clearUserSearch(@RequestBody UserSearchDto userSearchDto) {
    return apArticleSearchService.clearUserSearch(userSearchDto);
}
4.3.6 单元测试
@Test
public void testClearUserSearch() throws Exception {
    UserSearchDto dto = new UserSearchDto();
    dto.setEquipmentId(1);
    MockHttpServletRequestBuilder builder =
        MockMvcRequestBuilders.post("/api/v1/article/search/clear_search")
        .contentType(MediaType.APPLICATION_JSON_VALUE)
        .content(mapper.writeValueAsBytes(dto));
    mvc.perform(builder).andExpect(MockMvcResultMatchers.status().isOk()).andDo(MockMvcResultHandlers.print());
}
4.4 查询今日热词接口
4.4.1 接口定义
(1)基本定义
由于框架封装只对JSON反序列化自增ID,需要请求文章ID需要封装为DTO.
| 参考标准 | 请参考通用接口规范 |
|---|---|
| 接口名称 | /api/v1/article/search/load_hot_keywords |
| 请求DTO | com.heima.model.article.dtos.UserSearchDto |
| 响应DTO | ResponseResult:{List 热词列表} |
(2)CODE定义
| PARAM_INVALID | PARAM_INVALID(501,“无效参数”), |
|---|---|
4.4.2 类定义
类说明:
-
ApUserSearch是对应数据表的POJO对象,放置model模块
-
UserSearchDto封装接口请求数据,放置在model模块
-
ApUserSearchMapper是MybatisMapper文件,放置在model模块
-
ArticleSearchControllerApi是服务接口定义,放置在apis模块
-
ApArticleSearchService、ApArticleSearchServiceImpl、ArticleSearchController是对功能的实现,放置在article模块
4.4.3 Mapper实现
(1)ApHotWords
创建类com.heima.model.article.pojos.ApHotWords
生成的ApHotWords 注释和getter,setter方法可以删除,然后使用lombok @Data注解,优雅的实现pojo方法。
@Data
public class ApHotWords {
    private Integer id;
    private String hotWords;
    private Integer type;
    private String hotDate;
    private Date createdTime;
}
(2)ApUserSearchMapper
创建类com.heima.model.mappers.app.ApHotWordsMapper
定义日期查询热词方法:
public interface ApHotWordsMapper {

/**
查询今日热词
@param hotDate
@return
*/
List<ApHotWords> queryByHotDate(String hotDate);
}
ApHotWordsMapper.xml
<mapper namespace="com.heima.model.mappers.app.ApHotWordsMapper" >
  <resultMap id="BaseResultMap" type="com.heima.model.article.pojos.ApHotWords" >
    <id column="id" property="id"/>
    <result column="hot_words" property="hotWords"/>
    <result column="type" property="type"/>
    <result column="hot_date" property="hotDate"/>
    <result column="created_time" property="createdTime"/>
  </resultMap>

  <sql id="Base_Column_List" >
      id, hot_words, type, hot_date, created_time
  </sql>
  <select id="queryByHotDate" resultMap="BaseResultMap" parameterType="java.lang.String" >
    select
    <include refid="Base_Column_List" />
    from ap_hot_words
    where hot_date = #{hotDate,jdbcType=VARCHAR}
  </select>
</mapper>
4.4.4 service思路分析
-
判断入参hotDate是否合法,不合法则返回PARAM_INVALID错误
-
查询日期对应的ApHotWords配置信息
-
封装响应DTO返回数据
4.4.5 代码实现
(1)ApArticleSearchService
定义获取历史记录接口:
/**
今日热词
@return
*/
ResponseResult hotKeywords(String date);
(2)AppArticleInfoServiceImpl
创建类:com.heima.article.service.ApArticleSearchServiceImpl
@Autowired
private ApHotWordsMapper apHotWordsMapper;

@Override
public ResponseResult hotKeywords(String date) {
    if(StringUtils.isEmpty(date)){
        date = DateFormatUtils.format(new Date(), "yyyy-MM-dd");
    }
    List<ApHotWords> list = apHotWordsMapper.queryByHotDate(date);
    return ResponseResult.okResult(list);
}
(3)ArticleSearchControllerApi
此类在apis模块中创建,定义了相关接口,实现如下:
/**
今日热词
@return
*/
ResponseResult hotKeywords(UserSearchDto userSearchDto);
(4)ArticleSearchController
该类的实现较为简单,引入Service并调用即可:
@PostMapping("/load_hot_keywords")
@Override
public ResponseResult hotKeywords(@RequestBody UserSearchDto userSearchDto) {
    return apArticleSearchService.hotKeywords(userSearchDto.getHotDate());
}
4.4.6 单元测试
创建测试类:com.heima.article.ArticleSearchTest
使用MockMvc进行接口调用测试,代码如下:
@Test
public void testHotKeywords() throws Exception {
    UserSearchDto dto = new UserSearchDto();
    //        dto.setHotDate("2019-07-24");
    MockHttpServletRequestBuilder builder =
        MockMvcRequestBuilders.post("/api/v1/article/search/load_hot_keywords")
        .contentType(MediaType.APPLICATION_JSON_VALUE)
        .content(mapper.writeValueAsBytes(dto));
    mvc.perform(builder).andExpect(MockMvcResultMatchers.status().isOk()).andDo(MockMvcResultHandlers.print());
}
4.5 查询联想词接口
4.5.1 接口定义
(1)基本定义
由于框架封装只对JSON反序列化自增ID,需要请求文章ID需要封装为DTO.
| 参考标准 | 请参考通用接口规范 |
|---|---|
| 接口名称 | /api/v1/article/search/associate_search |
| 请求DTO | com.heima.model.article.dtos.UserSearchDto |
| 响应DTO | ResponseResult:{List 列表} |
(2)CODE定义
| PARAM_INVALID | PARAM_INVALID(501,“无效参数”), |
|---|---|
4.5.2 类定义
类说明:
-
ApUserSearch是对应数据表的POJO对象,放置model模块
-
UserSearchDto封装接口请求数据,放置在model模块
-
ApUserSearchMapper是MybatisMapper文件,放置在model模块
-
ArticleSearchControllerApi是服务接口定义,放置在apis模块
-
ApArticleSearchService、ApArticleSearchServiceImpl、ArticleSearchController是对功能的实现,放置在article模块
4.5.3 Mapper实现
(1)ApAssociateWords
创建类com.heima.model.article.pojos.ApAssociateWords
@Data
public class ApAssociateWords {
private Integer id;
private String associateWords;
private Date createdTime;
}
(2)ApAssociateWordsMapper
创建类com.heima.model.mappers.app.ApAssociateWordsMapper
定义按照关键词查询联想词方法:
public interface ApAssociateWordsMapper {

/**
根据关键词查询联想词
@param searchWords
@return
*/
List<ApAssociateWords> selectByAssociateWords(@Param("searchWords") String searchWords, @Param("limit") int limit);
}
ApAssociateWordsMapper.xml
<mapper namespace="com.heima.model.mappers.app.ApAssociateWordsMapper" >
  <resultMap id="BaseResultMap" type="com.heima.model.article.pojos.ApAssociateWords" >
    <id column="id" property="id"/>
    <result column="associate_words" property="associateWords"/>
    <result column="created_time" property="createdTime"/>
  </resultMap>
  <sql id="Base_Column_List" >
    id, associate_words, created_time
  </sql>

  <select id="selectByAssociateWords" resultMap="BaseResultMap" >
    select
    <include refid="Base_Column_List" />
    from ap_associate_words
    where associate_words like #{searchWords} limit #{limit}
  </select>
</mapper>
4.5.4 service思路分析
-
判断入参关键词searchWords是否合法,不合法则返回PARAM_INVALID错误
-
查询关键词对应的联想词ApAssociateWords 信息
-
封装响应DTO返回数据
4.5.5 代码实现
(1)ApArticleSearchService
定义查询联想词接口:
/**
联想词
@param userSearchDto
@return
*/
ResponseResult searchAssociate(UserSearchDto userSearchDto);
(2)AppArticleInfoServiceImpl
@Autowired
private ApAssociateWordsMapper apAssociateWordsMapper;

@Override
public ResponseResult searchAssociate(UserSearchDto dto) {
    if(dto.getPageSize()>50 || dto.getPageSize() < 1){
        return ResponseResult.errorResult(AppHttpCodeEnum.PARAM_INVALID);
    }
    List<ApAssociateWords> aw = apAssociateWordsMapper.selectByAssociateWords("%"+dto.getSearchWords()+"%", dto.getPageSize());
    return ResponseResult.okResult(aw);
}
(3)ArticleSearchControllerApi
此类在apis模块中创建,定义了相关接口,实现如下:
/**
联想词
@param userSearchDto
@return
*/
ResponseResult searchAssociate(UserSearchDto userSearchDto);
(4)ArticleSearchController
@PostMapping("/associate_search")
@Override
public ResponseResult searchAssociate(@RequestBody UserSearchDto userSearchDto) {
    return apArticleSearchService.searchAssociate(userSearchDto);
}
4.5.6 单元测试
@Test
public void testSearchAssociate() throws Exception {
    UserSearchDto dto = new UserSearchDto();
    dto.setPageSize(20);
    dto.setSearchWords("传智");
    MockHttpServletRequestBuilder builder =
        MockMvcRequestBuilders.post("/api/v1/article/search/associate_search")
        .contentType(MediaType.APPLICATION_JSON_VALUE)
        .content(mapper.writeValueAsBytes(dto));
    mvc.perform(builder).andExpect(MockMvcResultMatchers.status().isOk()).andDo(MockMvcResultHandlers.print());
}
4.6 文章搜索接口
4.6.1 ES配置使用
-
安装配置elasticsearch和kibana的环境,并且需要在elasticsearch中集成ik(中文分词器)插件
-
common中配置ES依赖包,本项目使用JestClient客户端连接ES。
-
common项目pom文件添加如下依赖配置
<!-- ElasticSearch连接 -->
<dependency>
    <groupId>io.searchbox</groupId>
    <artifactId>jest</artifactId>
    <version>6.3.1</version>
    </dependency>
    <dependency>
    <groupId>org.elasticsearch</groupId>
    <artifactId>elasticsearch</artifactId>
    <version>7.2.0</version>
</dependency>
- 创建配置文件
在resource下创建elasticsearch.properties
spring.elasticsearch.jest.url=http://localhost:9200
spring.elasticsearch.jest.read-timeout=20000
spring.elasticsearch.jest.connection-timeout=20000
配置类包名:com.heima.common.elasticsearch
[外链图片转存失败,源站可能有防盗链机制,建议将图片保存下来直接上传(img-caTWpJhR-1668866475217)(E:/heima-leadnews/%E9%BB%91%E9%A9%AC%E5%A4%B4%E6%9D%A1%E8%AF%BE%E4%BB%B6/day04/%E8%AE%B2%E4%B9%89/media/bc76a25841a511837d9e67b0ce1a0945.png)]
配置类:ElasticsearchConfig
@Data
@Configuration
@ConfigurationProperties(prefix="spring.elasticsearch.jest")
@PropertySource("classpath:elasticsearch.properties")
public class ElasticsearchConfig {

    private String url;
    private Integer readTimeout;
    private Integer connectionTimeout;

    @Bean
    public JestClient getJestClient(){
    JestClientFactory factory = new JestClientFactory();
    factory.setHttpClientConfig(new HttpClientConfig
    .Builder(this.url)
    .multiThreaded(true)
    .connTimeout(this.connectionTimeout)
    .readTimeout(this.readTimeout)
    .build());
    return factory.getObject();
    }
}
使用Elasticsearch
如上所述:按照项目使用模块按需加载,我们使用ES只需扫描common配置ES目录
[外链图片转存失败,源站可能有防盗链机制,建议将图片保存下来直接上传(img-oCA1mrAy-1668866475217)(E:/heima-leadnews/%E9%BB%91%E9%A9%AC%E5%A4%B4%E6%9D%A1%E8%AF%BE%E4%BB%B6/day04/%E8%AE%B2%E4%B9%89/media/3f0098bf2e248d05ef7d5d0f22ef464a.png)]
EsConfig文件内容:
@Configuration
@ComponentScan({"com.heima.elasticsearch"})
public class EsConfig {
}
扫描包后就可以注入JestClient类调用ES了。
@Autowired
private JestClient jestClient;
使用kibana创建文章索引
PUT app_info_article
{
  "mappings": {
  	"_doc":{
  		"properties": {
  		  "channelId": {
  			"type": "long"
  		  },
  		  "content": {
  			"type": "text",
  			"fields": {
  			  "keyword": {
  				"type": "keyword",
  				"ignore_above": 256
  			  }
  			},
  			"analyzer": "ik_smart"
  		  },
  		  "id": {
  			"type": "long"
  		  },
  		  "pub_time": {
  			"type": "date"
  		  },
  		  "publishTime": {
  			"type": "date"
  		  },
  		  "query": {
  			"properties": {
  			  "match_all": {
  				"type": "object"
  			  }
  			}
  		  },
  		  "reason": {
  			"type": "text",
  			"fields": {
  			  "keyword": {
  				"type": "keyword",
  				"ignore_above": 256
  			  }
  			}
  		  },
  		  "status": {
  			"type": "long"
  		  },
  		  "tag": {
  			"type": "text",
  			"fields": {
  			  "keyword": {
  				"type": "keyword",
  				"ignore_above": 256
  			  }
  			}
  		  },
  		  "title": {
  			"type": "text",
  			"fields": {
  			  "keyword": {
  				"type": "keyword",
  				"ignore_above": 256
  			  }
  			},
  			"analyzer": "ik_smart"
  		  },
  		  "userId": {
  			"type": "long"
  		  }
  		}
  	}
  }
}
ES索引定义
搜索栏点击搜索之后,结果页分为几大类别:综合、文章、用户、作者等
因为是APP搜索,索引前缀设计为 app_info_,根据以上搜索结果划分和索引前缀设计,ES索引设计如下:
文章索引 app_info_article
用户索引 app_info_user
作者索引 app_info_author
其中文章,用户,作者跟以上搜索结果一一对应,而综合栏目则根据ES的前缀语法,对应 app_info_*
索引名称定义在 com.heima.common.constants.ESIndexConstants类中
public class ESIndexConstants {
    public static final String DEFAULT_DOC ="_doc";
    public static final String ALL_INDEX ="app_info_*";
    public static final String ARTICLE_INDEX ="app_info_article";
    public static final String USER_INDEX ="app_info_user";
    public static final String AUTHOR_INDEX ="app_info_author";
}
注意:
-
为了在综合索引的时候能够根据ES的检索结果去反查对应的文章或者用户信息,在ES索引设计的时候加了 tag字段,用于标识该索引的业务类型。
-
ES7开始,对ES索引类型默认为 _doc。不建议再自己设置。
添加测试数据
在article模块中集成es环境,创建类:com.heima.article.config.EsConfig
@Configuration
@ComponentScan("com.heima.common.elasticsearch")
public class EsConfig {
}
添加50条测试数据,
创建类,用于添加索引的包装类com.heima.common.common.pojo.EsIndexEntity
@Data
public class EsIndexEntity {
    private Long id;
    private String content;
    private Long channelId;
//    private Date pub_time;
    private Date publishTime;
    private Long status;
    private String title;
    private Long userId;
    private String tag;
}
在article模块中编写测试代码com.heima.article.es.test.EsTest,后期审核文章会自动添加到索引库
@SpringBootTest
@RunWith(SpringRunner.class)
public class EsTest {

    @Autowired
    private JestClient jestClient;

    @Autowired
    private ApArticleMapper apArticleMapper;

    @Autowired
    private ApArticleContentMapper apArticleContentMapper;

    @Test
    public void testSave() throws IOException {

        ArticleHomeDto dto = new ArticleHomeDto();
        dto.setSize(50);
        dto.setTag("__all__");
        List<ApArticle> apArticles = apArticleMapper.loadArticleListByLocation(dto, null);
        for (ApArticle apArticle : apArticles) {
            ApArticleContent apArticleContent = apArticleContentMapper.selectByArticleId(apArticle.getId());

            EsIndexEntity esIndexEntity = new EsIndexEntity();
            esIndexEntity.setChannelId(new Long(apArticle.getChannelId()));
            esIndexEntity.setContent(ZipUtils.gunzip(apArticleContent.getContent()));
            esIndexEntity.setPublishTime(apArticle.getPublishTime());
            esIndexEntity.setStatus(new Long(1));
            esIndexEntity.setTag("article");
            esIndexEntity.setTitle(apArticle.getTitle());
            Index.Builder builder = new Index.Builder(esIndexEntity);
            builder.id(apArticle.getId().toString());
            builder.refresh(true);
            Index index = builder.index(ESIndexConstants.ARTICLE_INDEX).type(ESIndexConstants.DEFAULT_DOC).build();
            JestResult result = jestClient.execute(index);
            if (result != null && !result.isSucceeded()) {
                throw new RuntimeException(result.getErrorMessage() + "插入更新索引失败!");
            }
        }
    }
}
4.6.1 接口定义
(1)基本定义
| 参考标准 | 请参考通用接口规范 |
|---|---|
| 接口名称 | /api/v1/article/search/article_search |
| 请求DTO | com.heima.model.article.dtos.UserSearchDto |
| 响应DTO | ResponseResult: { List } |
(2)CODE定义
| PARAM_INVALID | PARAM_INVALID(501,“无效参数”) |
|---|---|
4.6.2 类定义
类说明:
-
ApUserSearch是对应数据表的POJO对象,放置model模块
-
UserSearchDto封装接口请求数据,放置在model模块
-
ApUserSearchMapper是MybatisMapper文件,放置在model模块
-
ArticleSearchControllerApi是服务接口定义,放置在apis模块
-
ApArticleSearchService、ApArticleSearchServiceImpl、ArticleSearchController是对功能的实现,放置在article模块
4.6.3 Mapper实现
(1)ApUserSearchMapper
定义保存历史记录方法:
/**
插入搜索记录
@param record
@return
*/
int insert(ApUserSearch record);
定义检查搜索记录是否存在方法:
/**
查询记录是否存在
@param entryId
@param keyword
@return
*/
int checkExist(@Param("entryId") Integer entryId,@Param("keyword") String keyword);
ApUserSearchMapper.xml
<insert id="insert" parameterType="com.heima.model.user.pojos.ApUserSearch" >
    insert into ap_user_search (entry_id, keyword, status,created_time)
    values (#{entryId}, #{keyword}, #{status},#{createdTime})
</insert>
<select id="checkExist" resultType="java.lang.Integer">
    select
    count(1)
    from ap_user_search
    where entry_id = #{entryId} and keyword = #{keyword} and status = 1
</select>
(2)ApArticleMapper
ApArticle selectById(Long id);
ApArticleMapper.xml
<select id="selectById" parameterType="java.lang.Long" resultMap="resultMap">
    select <include refid="Base_Column_List" />
    from ap_article
    where id = #{id}
</select>
4.6.4 service思路分析
-
判断入参searchWords是否合法,不合法则返回PARAM_INVALID错误
-
查询对应的文章列表
-
如果是第一页访问保存搜索记录,搜索记录关键字根据用户是否存在判断
-
封装响应DTO返回数据
4.6.5 代码实现
(1)ApArticleSearchService
定义查询文章信息接口:
/**
ES文章分页搜索
@return
*/
ResponseResult esArticleSearch(UserSearchDto userSearchDto);
定义保存历史记录接口:
/**
保存搜索记录
@param entryId
@param searchWords
@return
*/
ResponseResult saveUserSearch(Integer entryId, String searchWords);
(2)AppArticleInfoServiceImpl
保存搜索记录
@Override
public ResponseResult saveUserSearch(Integer entryId, String searchWords) {
    //查询生效的记录是否存在
    int count = apUserSearchMapper.checkExist(entryId, searchWords);
    if(count>0){
    return ResponseResult.okResult(1);
    }
    ApUserSearch apUserSearch = new ApUserSearch();
    apUserSearch.setEntryId(entryId);
    apUserSearch.setKeyword(searchWords);
    apUserSearch.setStatus(1);
    apUserSearch.setCreatedTime(new Date());
    int row = apUserSearchMapper.insert(apUserSearch);
    return ResponseResult.okResult(row);
}
搜索文章
@Override
public ResponseResult esArticleSearch(UserSearchDto dto) {
    //搜索词的敏感检查
    //只在第一页进行保存操作
    if(dto.getFromIndex()==0){
        ResponseResult result = getEntryId(dto);
        if(result.getCode()!=AppHttpCodeEnum.SUCCESS.getCode()){
            return result;
        }
        this.saveUserSearch((int)result.getData(),dto.getSearchWords());
    }
    //根据关键字查询索引库
    SearchSourceBuilder searchSourceBuilder = new SearchSourceBuilder();
    searchSourceBuilder.query(QueryBuilders.matchQuery("title",dto.getSearchWords()));
    //设置分页
    searchSourceBuilder.from(dto.getFromIndex());
    searchSourceBuilder.size(dto.getPageSize());
    Search search = new Search.Builder(searchSourceBuilder.toString()).addIndex(ESIndexConstants.ARTICLE_INDEX).addType(ESIndexConstants.DEFAULT_DOC).build();
    try {
        SearchResult searchResult = jestClient.execute(search);
        List<ApArticle> sourceAsObjectList = searchResult.getSourceAsObjectList(ApArticle.class);
        List<ApArticle> resultList = new ArrayList<>();
        for (ApArticle apArticle : sourceAsObjectList) {
            apArticle = apArticleMapper.selectById(Long.valueOf(apArticle.getId()));
            if(apArticle==null){
                continue;
            }
            resultList.add(apArticle);
        }
        return ResponseResult.okResult(resultList);
    } catch (IOException e) {
        e.printStackTrace();
    }

    return ResponseResult.errorResult(AppHttpCodeEnum.PARAM_INVALID);
}
(3)ArticleSearchControllerApi
此类在apis模块中创建,定义了相关接口,实现如下:
/**
ES文章分页搜索
@return
*/
ResponseResult esArticleSearch(UserSearchDto userSearchDto);
(4)ArticleSearchController
该类的实现较为简单,引入Service并调用即可:
@PostMapping("/article_search")
@Override
public ResponseResult esArticleSearch(@RequestBody UserSearchDto userSearchDto) {
	return apArticleSearchService.esArticleSearch(userSearchDto);
}
4.6.6 单元测试
@Test
public void testEsArticleSearch() throws Exception {
    UserSearchDto dto = new UserSearchDto();
    dto.setEquipmentId(1);
    dto.setSearchWords("训练");
    dto.setPageSize(20);
    dto.setPageNum(1);
    MockHttpServletRequestBuilder builder =
        MockMvcRequestBuilders.post("/api/v1/article/search/article_search")
        .contentType(MediaType.APPLICATION_JSON_VALUE)
        .content(mapper.writeValueAsBytes(dto));
    mvc.perform(builder).andExpect(MockMvcResultMatchers.status().isOk()).andDo(MockMvcResultHandlers.print());
}
6 前端需求分析
6.1 搜索页需求

搜索页面常用布局主要分为以下几个模块:
-
输入栏:放置输入框、返回按钮等组件
-
历史栏:放置显示最近5个搜索的关键字
-
热搜栏:放置显示当时热搜的6个
-
推荐栏:放置推荐的话题或者文章
-
提示栏:放置依据实时输入数据给出搜索联想
注:黑马头条课程不实现推荐栏。
6.2 结果页需求

搜索结果页和文章首页大致相同,主要有以下几栏:
- 输入栏:组织返回、取消、输入框等组件的排列
- 分类按:显示搜索到的内容分布的类型,便于切换分类查看搜索结果
- 动态栏:搜索结果,在综合和动态两个分类中或显示
- 文章栏:显示搜索到的文章列表,展示的布局和首页列表项布局一致
7 定义


7.1 组件定义
按照代码重用性的规划,此部分VIEW可抽取以下几个公用组件:
-
搜索输入组件(search_top):实现返回列表,搜索输入功能
-
历史项组件(search_0):实现图标、文字、操作按钮布局
-
通用标题组件(title):实现图标、文字、功能按钮布局
-
图文列表项组件(search_1):实现文字、图片的展示
-
联想词列表项组件(search_2):实现联想词的展现,和快速点击
-
结果搜索输入组件(search_result_top):实现搜索关键字展示、返回、取消等功能
7.2 页面定义
-
搜索页面(search):实现搜索输入页面历史、推荐搜索等功能
-
搜索结果页(search_result):实现搜索结果的展示
7.3 路由定义
-
[/search]:一级路由;指向搜索页面;在首页输入框触发
-
[/search_result]:一级路由,指向搜索结果页,并传递搜索关键字参数,实现搜索功能
7.4 结构定义

8 开发
8.1 搜索页面实现
在首页点击头部输入框,则自动跳转到搜索页面,搜索页面输入框自动获得焦点,以及初始化搜索历史和热搜等信息。
8.1.1 创建文件
- 创建src/pages/search/index.vue文件,用于实现页面功能
8.1.2 Model定义
搜索页面属性主要包括以下三部分:
-
scrollerHeight:辅助实现内容高度的计算
-
showTip:控制是否显示联想词
-
icon:定义页面用到图标
-
data定义页面显示用到的数据集合
data(){
    return {
        scrollerHeight:'500px',
        showTip:false,
        icon : {
        hot : 'uf06d',
        other:'uf17d'
        },
        data : {
        keyword:'',//当前输入的关键字
        history : [],//搜索历史
        tip : [],// 联想词
        hot : []//热搜关键字
        }
    }
}
8.1.3 实现Api
详情页很多接口需要实现,比如:
(1)优化request.js
类似之前文章详情页面的API中,方法的代码显得较为重复,在这里我们先进行优化,把重复的代码定义到request中,增加以下方法:
-
postByEquipmentId方法用于请求带有equipmentId字段的post请求
-
getByEquipmentId方法用于请求带有equipmentId字段的get请求
// 自动设置设备主键
postByEquipmentId : function(url,body){
    return this.store.getEquipmentId().then(equipmentId=>{
        body['equipmentId']=equipmentId
        	return new Promise((resolve, reject) => {
                this.post(url,body).then((d)=>{
                    resolve(d);
                }).catch((e)=>{
                    reject(e);
                })
        	})
        }).catch(e=>{
            return new Promise((resolve, reject) => {
            	reject(e);
            })
    	})
},
// 自动设置设备主键
getByEquipmentId : function(url,body){
    return this.store.getEquipmentId().then(equipmentId=>{
        body['equipmentId']=equipmentId
        return new Promise((resolve, reject) => {
                this.get(url,body).then((d)=>{
                resolve(d);
            }).catch((e)=>{
            	reject(e);
            })
        })
    }).catch(e=>{
        return new Promise((resolve, reject) => {
        	reject(e);
        })
    })
}
(2)api实现
搜索页的Api主要有,其中页面上大家都在搜索在此处不做实现:
-
load_search_history:加载行为实体的搜索记录
-
del_search:删除单个搜索记录
-
associate_search:加载联想词列表
-
load_hot_keywords:加载热搜词语
function Api(){
	this.vue;
}
Api.prototype = {
    setVue : function(vue){
        this.vue = vue;
    },
    // 加载搜索历史
    load_search_history: function(){
        let url = this.vue.$config.urls.get('load_search_history')
        return this.vue.$request.postByEquipmentId(url,{pageSize:5})
    },
    // 删除搜索词
    del_search: function(id){
        let url = this.vue.$config.urls.get('del_search')
        return this.vue.$request.postByEquipmentId(url,{hisList:[{id:id}]})
    },
    // 输入联想
    associate_search: function(searchWords){
        let url = this.vue.$config.urls.get('associate_search')
        return
        this.vue.$request.postByEquipmentId(url,{searchWords:searchWords,pageSize:10})
    },
    // 加载热词
    load_hot_keywords: function(){
        let url = this.vue.$config.urls.get('load_hot_keywords')
        return this.vue.$request.postByEquipmentId(url,{pageSize:6})
    }
}

export default new Api()
8.1.4 实现VIEW
页面包含顶部搜索输入栏、历史搜索栏、热搜栏、推荐栏,视图实现时,需要注意一下几点:
-
除搜索输入栏之外的内容需要使用scroller滚动组件进行包装,并与页面滚动:
-
历史搜索栏需要增加查看全部搜索历史的连接按钮
-
热搜栏的项需要按照grid布局思想布局
-
联想词是一个绝对定位的层,当需要时进行显示
<template>
<div class="art-page">
<div class="art-top"><TopBar @onBlur="onBlur" @onInput="onInput"/></div>
<scroller class="scroller" :style="{'height':scrollerHeight}" show-scrollbar="true">
<template v-for="item in data.history">
<SearchHistory @onClickText="doSearch" @onDeleteHistory="onDeleteHistory" :id="item.id" :title="item.keyword"/>
</template>
<a href="#" class="all-search">
<text class="all-search-text">全部搜索记录</text>
</a>
<Title title="今日热点" :icon="icon.hot"/>
<div class="hot-body">
<template v-for="item in data.hot">
<div class="item">
<template v-for="k in item">
<HotCell @onClick="doSearch" :title="k.hotWords" type="k.type"/>
</template>
</div>
</template>
</div>
<Title title="大家都在搜" :icon="icon.other"/>
<div class="hot-body">
<div class="item">
<HotCell title="长宁4.8级地震" tip="精"/>
<HotCell title="长宁4.8级地震"/>
</div>
<div class="item">
<HotCell title="长宁4.8级地震" tip="荐"/>
<HotCell title="长宁4.8级地震"/>
</div>
<div class="item">
<HotCell title="长宁4.8级地震"/>
<HotCell title="长宁4.8级地震" tip="热"/>
</div>
</div>
</scroller>
<div class="art-tip" v-if="showTip" ref="tip"><SearchTip @onSelect="doSearch" :search="data.keyword" :data="data.tip"/></div>
</div>
</template>
8.1.5 实现VM
VM中实现样式、数据等控制,主要实现的过程如下:
(1)created
在创建方法钩子中初始化Api:
created(){
	Api.setVue(this)
}
(2)mounted
在挂载钩子方法中,进行滚动样式计算,初始化搜索历史、热搜关键字数据方法的调用:
mounted(){
    this.scrollerHeight=(Utils.env.getPageHeight()-180)+'px';
    this.load_search_history()
    this.load_hot_keywords()
}
(3)methods
-
doSearch方法用于跳转到搜索结果页;在点击热搜关键字、历史搜索关键字、联想词关键字时调用
-
load_search_history方法调用,成功后设置到data.history数据中
-
onDeleteHistory方法调用历史关键字删除,成功后重新加载相关数据
-
onInput方法监听用户输入事件,并加载和显示联想词
-
load_hot_keywords方法加载热搜关键词,同时转换数据为一个二维数组,是由于VIEW一行显示两个关键字。
-
onBlur当输入框失去焦点时,隐藏联想词层
doSearch : function(val){
    this.$router.push({name:'search_result',params:{'keyword':val}})
},
// 加载搜索历史
load_search_history : function(){
    Api.load_search_history().then(data=>{
        if(data.code==0){
            this.data.history = data.data
        }else{
            modal.toast({message: data.errorMessage,duration: 3})
        }
    }).catch((e)=>{
        console.log(e)
    })
},
// 删除历史搜搜关键字
onDeleteHistory : function(id){
    let _this = this;
    modal.confirm({message:'确认要删除吗?'},function(button) {
        if(button=='OK') {
            Api.del_search(id).then(data => {
                if (data.code == 0) {
                    modal.toast({message: '删除成功', duration: 3})
                    _this.load_search_history()
                } else {
                    modal.toast({message: data.errorMessage, duration: 3})
                }
            }).catch((e) => {
                console.log(e)
            })
        }
    })
},
//用户输入时,提示联想词
onInput : function(val){
    Api.associate_search(val).then(data => {
        if (data.code == 0) {
            this.data.keyword=val
            this.showTip = true
            this.data.tip=data.data
        }
    })
},
// 加载热搜关键字
load_hot_keywords : function(){
    Api.load_hot_keywords().then(data=>{
        if(data.code==0){
            // 需要转换数据格式
            let newData=[]
            let temp = []
            for(var i=0;i<data.data.length;i++){
                if(i>0&&i%2==0){
                    newData.push(temp)
                    temp = []
                }
                temp.push(data.data[i])
            }
            this.data.hot = newData
        }else{
            modal.toast({message: data.errorMessage,duration: 3})
        }
    }).catch((e)=>{
        console.log(e)
    })
},
// 失去焦点,关闭联想词
onBlur : function(){
    this.showTip=false
}
8.1.6 实现Style
<style scoped>
    .art-page{
        width: 750px;
        flex-direction: column;
        background-color: #ececec;
    }
    .art-tip{
        position: absolute;
        top: 100px;
        width: 750px;
        z-index: 999;
    }
    .art-top{
        top: 0px;
        z-index: 999;
        position: fixed;
        padding: 15px 0px;
        height: 120px;
        background-color: #ffffff;
    }
    .scroller{
        flex: 1;
        flex-direction: column;
        width: 750px;
        margin-top: 120px;
    }
    .all-search{
        font-size: 36px;
        align-items: center;
        padding: 18px 20px;
        background-color: #ffffff;
    }
    .all-search-text{
        color: #bdbdbd;
    }
    .item{
        flex-direction: row;
    }
</style>
8.1.7 路由配置
搜索页面,需要配置路由,以便页面跳入;在这里搜索页面应该配置成一级路由,在src/routers/home.js文件中更改:
// ============ 主页路由MODEL ==================
import Layout from '@/compoents/layouts/layout_main'
import Home from '@/pages/home/index'
import Article from '@/pages/article/index'
import Search from '@/pages/search/index'

let routes = [
{
    path: '/',
    component: Layout,
    children:[
        {
            path:'/home',
            name:'Home',
            component: Home
        }
    ]
    },{
        path:'/article/:id',
        name: 'article-info',
        component:Article
    },{
        path:'/search',
        name: 'search',
        component:Search
    }
]
export default routes;
8.1.8 页面跳转
搜索页的入口是在首页头部的输入框,当输入框获得焦点时就跳到搜索页。之前首页的搜索组件样式实现的效果不是很协调,在这里进行重构,并实现获焦跳转搜索页的功能,代码如下:
8.1.9 效果演示

8.2 搜索结果页面实现
8.2.1 创建文件
-
创建src/pages/search_result/index.vue文件,用于实现页面功能
-
创建src/pages/ search_result /config.js文件,用于封装分类Tab页名称和样式
8.2.2 Model定义
(1)分类Model
export default {
    tabTitles: [{title: '综合',id:'__all__'},
        {title: '文章',id:'article'},
        { title: '图片',id:'image'},
        { title: '动态',id:'dynamic'},
        {title: '用户',id:'user'},
        {title: '作者',id:'author'}
    ],
    tabStyles: {
        bgColor: '#FFFFFF',
        titleColor: '#666666',
        activeTitleColor: '#3D3D3D',
        activeBgColor: '#FFFFFF',
        isActiveTitleBold: true,
        iconWidth: 70,
        iconHeight: 70,
        width: 120,
        height: 80,
        fontSize: 24,
        hasActiveBottom: true,
        activeBottomColor: '#FFC900',
        activeBottomHeight: 6,
        activeBottomWidth: 120,
        textPaddingLeft: 10,
        textPaddingRight: 10,
        normalBottomColor: 'rgba(0,0,0,0.4)',
        normalBottomHeight: 2,
        hasRightIcon: true,
        rightOffset: 100
    }
}
(2)列表Model
列表页的model主要包含列表配置、请求参数、动画控制等三方面的内容,其核心属性如下:
-
keyword:定义在props中,用于接收搜索页传入的搜索关键字
-
tabList:文章列表显示的数据,其结构是一个二维数组,第一维是每个频道的排序下标,第二维是每个频道下的列表数组
-
showmore:上拉刷新更多文章时显示loading动画的控制开关
-
params:用于请求后端文章数据参数封装对象,主要包含数量、最大时间、最小时间、频道标识等
showmore:false,//是否显示loadmore动画
tabTitles: Config.tabTitles,//频道配置
tabStyles: Config.tabStyles,//频道样式
tabList: [],//列表数据集合
tabPageHeight: 1334,//列表总高度
params:{ },//列表数据请求参数
props:{
	keyword:''//当前搜索的关键字
}
(3)参数Model
params:{
    tag:"__all__",
    keyword:'',
    pageNum:1,
    pageSize:20,
    index:0
}
-
keyword:请求搜索的关键字
-
pageNum:数据分页大小
-
pageSize:每页数据的大小
-
tag:分类关键字
-
index:当前分类的下标,用于控制列表数据存储的位置
8.2.3 实现Api
搜索结果页不需要按照时间进行加载,直接使用分页模式加载
function Api(){
	this.vue;
}
Api.prototype = {
    setVue : function(vue){
    	this.vue = vue;
    },
    // 加载
    article_search: function(parms){
        let url = this.vue.$config.urls.get('article_search')
        return this.vue.$request.postByEquipmentId(url,{
            searchWords:parms.keyword,
            pageNum:parms.pageNum,
            tag:parms.tag,
            pageSize:20
    	})
    }
}

export default new Api()
8.2.4 实现VIEW
(1)template
VIEW包含头部功能条和搜索结果列表,这两个组件采用column布局;其中数据列表没有下拉刷新功能;另外数据列表应该包含所有分类的列表项目,比如用户列表项、作者列表项,在这里只做文章列表项的引入,其它列表项不做实现,其代码如下:
<template>
    <div class="wrapper">
        <div class="top-body"><Home_Bar @onSubmit="onSubmit" :value="keyword"/></div>
        <div class="content-body">
            <wxc-tab-page ref="wxc-tab-page" :tab-titles="tabTitles" :tab-styles="tabStyles" title-type="text" :tab-page-height="tabPageHeight" @wxcTabPageCurrentTabSelected="wxcTabPageCurrentTabSelected">
                <list v-for="(v,index) in tabList"  :key="index" class="item-container" :style="{ height: (tabPageHeight - tabStyles.height) + 'px' }">
                    <!-- 列表项,并绑定显示事件 -->
                    <cell v-for="(item,key) in v" class="cell" :key="key">
                        <wxc-pan-item :ext-id="'1-' + (v) + '-' + (key)" @wxcPanItemClicked="wxcPanItemClicked(item)" @wxcPanItemPan="wxcPanItemPan">
                            <Item0 v-if="item.type==0" :data="item"/>
                            <Item1 v-if="item.type==1" :data="item"/>
                            <Item3 v-if="item.type==3" :data="item"/>
                        </wxc-pan-item>
                    </cell>
                    <!-- 上来加载更多 -->
                    <loading @loading="load" :display="showmore?'show':'hide'" class="loading">
                        <loading-indicator class="loading-icon"></loading-indicator>
                        <text class="loading-text">{{load_more_text}}</text>
                    </loading>
                </list>
            </wxc-tab-page>
        </div>
    </div>
</template>
(2)style
<style lang="less" scoped>
    @import '../../styles/article';
    .wrapper{
        background-color: @body-background;
        font-size: @font-size;
        font-family: @font-family;
        flex-direction : column;
        flex-wrap:wrap;
    }
    .top-body{
        position: fixed;
        left: 0;
        top: 0;
    }
    .content-body{
        flex: 1;
        flex-direction : column;
        margin-top: 100px;
    }
    .item-container {
        width: 750px;
        background-color: #f2f3f4;
    }
    .cell {
        background-color: #ffffff;
    }
</style>
8.2.5 实现VM
-
通过computed的缓存功能,渲染国际化资源
-
在mounted钩子方法中,使用setPage方法,设置默认选中的分类
-
在onSubmit方法中,实现本页搜索的功能
-
wxcPanItemClicked方法中实现文章的点击跳转到详情页面
<script>
    import Home_Bar from "@/compoents/bars/search_result_top"
    import { WxcTabPage, Utils, BindEnv,WxcPanItem } from 'weex-ui'
    import Item0 from '../../compoents/cells/article_0.vue'
    import Item1 from '../../compoents/cells/article_1.vue'
    import Item3 from '../../compoents/cells/article_3.vue'
    import Config from './config'
    import Api from '@/apis/search_result/api'

    export default {
        name: 'HeiMa-Home',
        components: {Home_Bar,WxcTabPage, Item0,Item1,Item3,WxcPanItem},
        props:{
            keyword:''//当前搜索的关键字
        },
        data: () => ({
            api:null,// API
            showmore:false,//是否显示loadmore动画
            tabTitles: Config.tabTitles,//频道配置
            tabStyles: Config.tabStyles,//频道样式
            tabList: [],//列表数据集合
            tabPageHeight: 1334,//列表总高度
            params:{
                tag:"__all__",
                keyword:'',
                pageNum:1,
                pageSize:20,
		Index:0
            }
        }),
        computed:{
            // 渲染加载最新和更多的国际化语言
            load_new_text:function(){return this.$lang.load_new_text},
            load_more_text:function(){return this.$lang.load_more_text}
        },
        mounted(){
            // 激活推荐按钮
            this.$refs['wxc-tab-page'].setPage(0,null,false);
        },
        created () {
            // 初始化高度,顶部菜单高度120+顶部bar 90
            this.tabPageHeight = Utils.env.getPageHeight()-110;
            this.tabList = [...Array(this.tabTitles.length).keys()].map(i => []);
            this.params.keyword = this.keyword;
            Api.setVue(this);
        },
        methods: {
            // 上拉加载更多
            loadmore:function(){
                this.showmore=true;
                this.params.pageNum=this.params.pageNum+1
                this.load();
            },
            // 正常加载数据
            load : function(){
                Api.article_search(this.params).then((d)=>{
                    this.tanfer(d.data);
                }).catch((e)=>{
                    console.log(e)
                })
            },
            // 列表数据转换成View需要的Model对象
            tanfer : function(data){
                let arr = []
                for(let i=0;i<data.length;i++){
                    let tmp = {
                        id:data[i].id,
                        title:data[i].title,
                        comment:data[i].comment,
                        source:data[i].authorName,
                        date:data[i].publishTime,
                        type:data[i].layout,
                        image:data[i].images==null?[]:data[i].images.split(','),
                        icon:'\uf06d'
                    }
                    let time = data[i].publishTime;
                    if(this.params.max_behot_time<time){
                        this.params.max_behot_time=time;
                    }
                    if(this.params.min_behot_time>time){
                        this.params.min_behot_time=time;
                    }
                    arr.push(tmp);
                }
                let newList = [...Array(this.tabTitles.length).keys()].map(i => []);
                if(this.params.pageNum==1){
                    arr = this.tabList[this.params.index].concat(arr);
                }else{
                    arr=arr.concat(this.tabList[this.params.index]);
                }
                newList[this.params.index] = arr;
                this.tabList = newList;
                this.showmore=false;
            },
            // 频道页切换事件
            wxcTabPageCurrentTabSelected (e) {
                this.params.pageNum=1
this.params.index=e.page
                this.params.tag = Config.tabTitles[e.page]['id'];
                this.load();
            },
            // 兼容回调
            wxcPanItemPan (e) {
                if (BindEnv.supportsEBForAndroid()) {
                    this.$refs['wxc-tab-page'].bindExp(e.element);
                }
            },
            // 列表项点击事件
            wxcPanItemClicked(item){
                this.$router.push({
                    name:'article-info',
                    params:item
                })
            },
            onSubmit : function(val){
                this.params.keyword = val;
                this.tabList = [...Array(this.tabTitles.length).keys()].map(i => []);
                this.load();
            }
        }
    }
</script>
8.2.6 效果演示
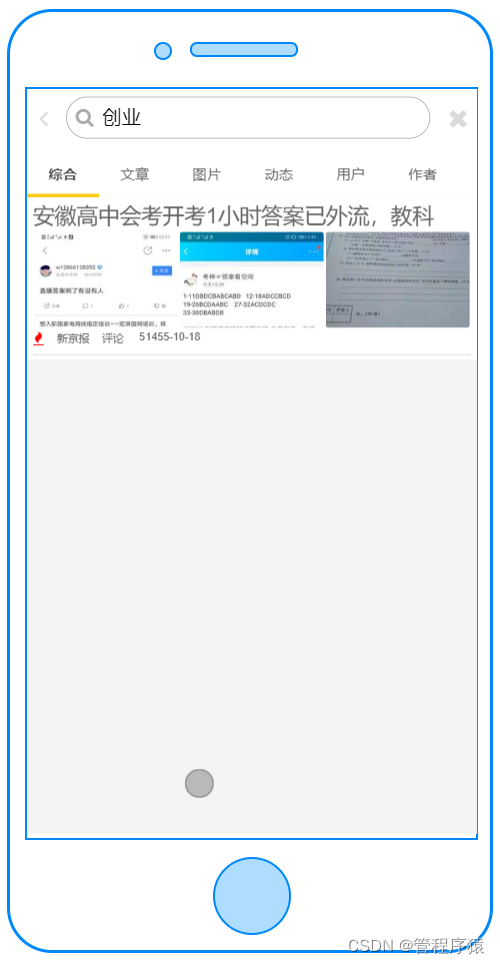
_new_text},
load_more_text:function(){return this.KaTeX parse error: Expected 'EOF', got '}' at position 20: ….load_more_text}̲ }, …refs[‘wxc-tab-page’].setPage(0,null,false);
},
created () {
// 初始化高度,顶部菜单高度120+顶部bar 90
this.tabPageHeight = Utils.env.getPageHeight()-110;
this.tabList = […Array(this.tabTitles.length).keys()].map(i => []);
this.params.keyword = this.keyword;
Api.setVue(this);
},
methods: {
// 上拉加载更多
loadmore:function(){
this.showmore=true;
this.params.pageNum=this.params.pageNum+1
this.load();
},
// 正常加载数据
load : function(){
Api.article_search(this.params).then((d)=>{
this.tanfer(d.data);
}).catch((e)=>{
console.log(e)
})
},
// 列表数据转换成View需要的Model对象
tanfer : function(data){
let arr = []
for(let i=0;i<data.length;i++){
let tmp = {
id:data[i].id,
title:data[i].title,
comment:data[i].comment,
source:data[i].authorName,
date:data[i].publishTime,
type:data[i].layout,
image:data[i].imagesnull?[]:data[i].images.split(‘,’),
icon:‘\uf06d’
}
let time = data[i].publishTime;
if(this.params.max_behot_time<time){
this.params.max_behot_time=time;
}
if(this.params.min_behot_time>time){
this.params.min_behot_time=time;
}
arr.push(tmp);
}
let newList = […Array(this.tabTitles.length).keys()].map(i => []);
if(this.params.pageNum1){
arr = this.tabList[this.params.index].concat(arr);
}else{
arr=arr.concat(this.tabList[this.params.index]);
}
newList[this.params.index] = arr;
this.tabList = newList;
this.showmore=false;
},
// 频道页切换事件
wxcTabPageCurrentTabSelected (e) {
this.params.pageNum=1
this.params.index=e.page
this.params.tag = Config.tabTitles[e.page][‘id’];
this.load();
},
// 兼容回调
wxcPanItemPan (e) {
if (BindEnv.supportsEBForAndroid()) {
this.KaTeX parse error: Expected 'EOF', got '}' at position 58: … }̲ },…router.push({
name:‘article-info’,
params:item
})
},
onSubmit : function(val){
this.params.keyword = val;
this.tabList = […Array(this.tabTitles.length).keys()].map(i => []);
this.load();
}
}
}
### 8.2.6 效果演示

[外链图片转存中...(img-R1CHjSXZ-1668866475220)]


