1 pyinstaller 打包成 exe
参考这个连接, 写的比较全面: https://blog.csdn.net/qq_48979387/article/details/132359366
唯一发现一个错误是增加资源文件时候的分隔符(-add-data SOURCE:DEST), 按照自己环境的实际的情况来:
$ pyinstaller --help
usage: pyinstaller [-h] [-v] [-D] [-F] [--specpath DIR] [-n NAME] [--contents-directory CONTENTS_DIRECTORY] [--add-data SOURCE:DEST] [--add-binary SOURCE:DEST] [-p DIR] [--hidden-import MODULENAME]
                   [--collect-submodules MODULENAME] [--collect-data MODULENAME] [--collect-binaries MODULENAME] [--collect-all MODULENAME] [--copy-metadata PACKAGENAME]
                   [--recursive-copy-metadata PACKAGENAME] [--additional-hooks-dir HOOKSPATH] [--runtime-hook RUNTIME_HOOKS] [--exclude-module EXCLUDES] [--splash IMAGE_FILE]
                   [-d {all,imports,bootloader,noarchive}] [--optimize LEVEL] [--python-option PYTHON_OPTION] [-s] [--noupx] [--upx-exclude FILE] [-c] [-w]
                   [--hide-console {hide-early,minimize-late,hide-late,minimize-early}] [-i <FILE.ico or FILE.exe,ID or FILE.icns or Image or "NONE">] [--disable-windowed-traceback] [--version-file FILE]
                   [-m <FILE or XML>] [-r RESOURCE] [--uac-admin] [--uac-uiaccess] [--argv-emulation] [--osx-bundle-identifier BUNDLE_IDENTIFIER] [--target-architecture ARCH]
                   [--codesign-identity IDENTITY] [--osx-entitlements-file FILENAME] [--runtime-tmpdir PATH] [--bootloader-ignore-signals] [--distpath DIR] [--workpath WORKPATH] [-y] [--upx-dir UPX_DIR]
                   [--clean] [--log-level LEVEL]
                   scriptname [scriptname ...]
如果我们的项目知识纯python 脚本, 没有配置文件, 资源文件等外部依赖, 那么pyinstaller的配置参数相对简洁
pyinstaller -F -w your_main_script
参数 -F的意思是 将所有的文件(python的脚本和如干依赖文件打包成一个 exe), 如果不加这个参数, 会将程序大包围一个exe文件和一个文件夹(里面包含需要的依赖文件)
参数-w 控制是否显示 console, 加上这个参数表示不显示控制台, 去掉表示显示控制台
下面给我我自己实践的一个过程。 我的项目是利用pyqt做了一个应用界面, 其中包含三个python脚本: 一个主程序外加两个绘制Ui python 脚本, 所需要的图片和数据资源, 具体目录如下:
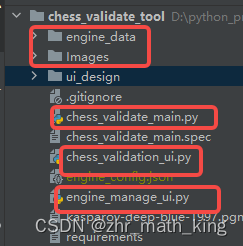
上面的参考文件着重说了, 如果脚本涉及到数据文件引用的情况, 要注意目录路径的使用, 因为打包成exe后, 数据目录相对路径会变化的, 所以给出解决方案是:
def get_path(relative_path):
    try:
        base_path = sys._MEIPASS # pyinstaller打包后的路径
    except AttributeError:
        base_path = os.path.abspath(".") # 当前工作目录的路径

    return os.path.normpath(os.path.join(base_path, relative_path)) # 返回实际路径
具体使用上, 我的数据文件的引用方式:
            engine_config_path = get_path('./engine_config.json')
            engine_config_path = Path(engine_config_path)
当然我的代码还包含图像文件, 使用方式都是类似的。
1.1 执行命令行方式打包
pyinstaller -w --add-data=Images:Images --add-data=engine_data:engine_data chess_validate_main.py
输出如下:
$ pyinstaller  -w --add-data=Images:Images --add-data=engine_data:engine_data  chess_validate_main.py
506 INFO: PyInstaller: 6.6.0, contrib hooks: 2024.6
506 INFO: Python: 3.10.11
543 INFO: Platform: Windows-10-10.0.19045-SP0
545 INFO: wrote D:\python_project_2\chess_validate_tool\chess_validate_main.spec
548 INFO: Extending PYTHONPATH with paths
['D:\\python_project_2\\chess_validate_tool']
1017 INFO: Appending 'datas' from .spec
1019 INFO: checking Analysis
1019 INFO: Building Analysis because Analysis-00.toc is non existent
1019 INFO: Running Analysis Analysis-00.toc


.....


8741 INFO: checking COLLECT
8741 INFO: Building COLLECT because COLLECT-00.toc is non existent
8742 INFO: Building COLLECT COLLECT-00.toc
8977 INFO: Building COLLECT COLLECT-00.toc completed successfully.
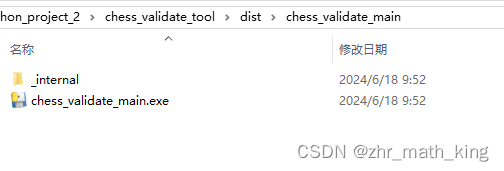
这样dist 目录下会出现 如下的文件
1.2
执行完pyinstaller 命令后, 可以看到在当前目录下有一个 spec文件, 内容如下:
# -*- mode: python ; coding: utf-8 -*-


a = Analysis(
    ['chess_validate_main.py'],
    pathex=[],
    binaries=[],
    datas=[('Images', 'Images'), ('engine_data', 'engine_data')],
    hiddenimports=[],
    hookspath=[],
    hooksconfig={},
    runtime_hooks=[],
    excludes=[],
    noarchive=False,
    optimize=0,
)
pyz = PYZ(a.pure)

exe = EXE(
    pyz,
    a.scripts,
    [],
    exclude_binaries=True,
    name='chess_validate_main',
    debug=False,
    bootloader_ignore_signals=False,
    strip=False,
    upx=True,
    console=False,
    disable_windowed_traceback=False,
    argv_emulation=False,
    target_arch=None,
    codesign_identity=None,
    entitlements_file=None,
)
coll = COLLECT(
    exe,
    a.binaries,
    a.datas,
    strip=False,
    upx=True,
    upx_exclude=[],
    name='chess_validate_main',
)
这个就是我们打包的一个配置文件, 如果需求可以直接修改所需配置, 然后执行:
pyinstaller xx.spec
当然这个文件可以提前用单独的命令来生成:
pyi-makespec.exe chess_validate_main.py
1.3 问题
由于我的程序在运行过程中, 引用了第三方的一个 exe文件, 在打包完成后测试的过程中发现程序运行异常,不是我期望的运行表现,原因为: 上述打包过程禁用了console, 然而程序在打开第三方exe的时候没有禁用console, 导致了冲突, 修改源码在打开第三方程序的时候直接禁用console. 再重新打包, 运行正常。
2 cx_Freeze
直接安装 cx_freeze
pip install cx-freeze
安装成功后, 先看看需要哪些参数:
$ cxfreeze -h
usage: cxfreeze [--script NAME] [--init-script NAME] [--base NAME] [--target-name NAME] [--icon NAME] [--manifest NAME] [--uac-admin] [--uac-uiaccess] [--shortcut-name NAME] [--shortcut-dir DIR]
                [--copyright COPYRIGHT] [--trademarks TRADEMARKS] [--version]
                [COMMAND]

Freeze a Python script and all of its referenced modules to a base executable which can then be distributed without requiring a Python installation.

positional arguments:
  COMMAND               build, build_exe or supported bdist commands (and to be backwards compatible, can replace --script option)

options:
  --script NAME         the name of the file containing the script which is to be frozen
  --init-script NAME    script which will be executed upon startup; if the name of the file is not an absolute file name, the subdirectory initscripts (rooted in the directory in which the cx_Freeze
                        package is found) will be searched for a file matching the name
  --base NAME, --base-name NAME
                        the name of the base executable; the pre-defined values are: "console" (default), "gui" and "service"; a user-defined base is accepted if it is given with an absolute path name
  --target-name NAME    the name of the target executable; the default value is the name of the script; it is recommended NOT to use an extension (automatically added on Windows); target-name with version
                        is supported; if specified a path, raise an error
  --icon NAME           name of icon which should be included in the executable itself on Windows or placed in the target directory for other platforms; it is recommended NOT to use an extension
                        (automatically added ".ico" on Windows, ".icns" on macOS and ".png" or ".svg" on Linux and others)
  --manifest NAME       name of manifest which should be included in the executable itself (Windows only)
  --uac-admin           creates a manifest for an application that will request elevation (Windows only)
  --uac-uiaccess        changes the application manifest to bypass user interface control (Windows only)
  --shortcut-name NAME  the name to give a shortcut for the executable when included in an MSI package (Windows only)
  --shortcut-dir DIR    the directory in which to place the shortcut when being installed by an MSI package; see the MSI Shortcut table documentation for more information on what values can be placed here
                        (Windows only)
  --copyright COPYRIGHT
                        the copyright value to include in the version resource associated with executable (Windows only)
  --trademarks TRADEMARKS
                        the trademarks value to include in the version resource associated with the executable (Windows only)
  --version             show program's version number and exit

Note:
    * Windows only options are ignored by other OS and when used by Python app from Microsoft Store.

Additional help:
    cxfreeze build_exe --help

Linux and similar OS:
    cxfreeze bdist_appimage --help
    cxfreeze bdist_deb --help
    cxfreeze bdist_rpm --help
macOS:
    cxfreeze bdist_dmg --help
    cxfreeze bdist_mac --help
Windows:
    cxfreeze bdist_msi --help
为了快速验证, 直接执行下面的命令
cxfreeze --base-name=gui --script chess_validate_main.py
运行结束后, 可以看到在build 目录有我需要的exe.
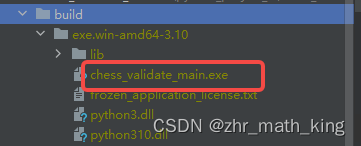
但是没有程序运行需要的资源文件, 需要手动copy Images 和 engine_data 到 exe所在的目录。
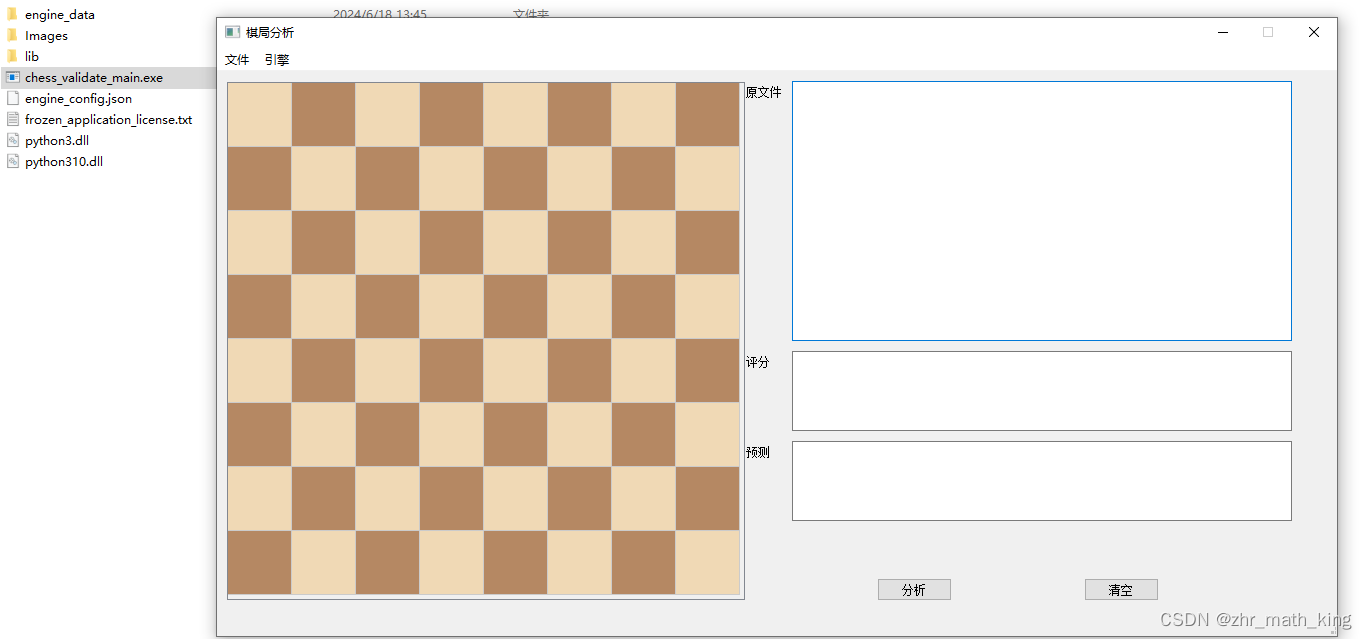
测试, 一下, 完美运行,由于在pyinstaller执行过的例子后实验, 相关坑已经踩过, 本次没有遇到任何问题。
附上运行截图



![springboot学习01-[springboot介绍、配置文件介绍、自动配置读取原理]](https://img-blog.csdnimg.cn/direct/9ea3d0067413417eb7d527b8cfda3f90.png)
