知识总结
【 1 】es6 语法总结

# let 定义变量
# const定义常量
------块级作用域----
# var 以后尽量少用,函数作用域
var在 JavaScript 中是函数作用域或全局作用域。- 而
let和const是块级作用域。
// 使用 var 声明全局变量
var globalVar = "I'm a global variable";

function exampleFunction() {
    // 使用 var 声明函数作用域内的变量
    var functionVar = "I'm a function-scoped variable";

    if (true) {
        // 使用 let 声明块级作用域内的变量
        let blockScopedVar = "I'm a block-scoped variable";

        // 使用 const 声明常量
        const constantVar = "I'm a constant";

        // 常量不能被重新赋值,以下代码会抛出错误
        // constantVar = "I'm trying to change a constant"; // TypeError: Assignment to constant variable.

        console.log(constantVar); // 输出:I'm a constant
    }

    console.log(blockScopedVar); // 报错:blockScopedVar is not defined

    console.log(globalVar); // 输出:I'm a global variable
    console.log(functionVar); // 输出:I'm a function-scoped variable
}

// 在函数外部无法访问函数内部的变量
// console.log(functionVar); // 报错:functionVar is not defined
// console.log(blockScopedVar); // 报错:blockScopedVar is not defined
// console.log(constantVar); // 报错:constantVar is not defined

exampleFunction();
globalVar是一个全局变量,可以在任何地方访问到。functionVar是一个函数作用域变量,只能在exampleFunction函数内部访问。blockScopedVar是一个块级作用域变量,只能在if语句块内部访问。constantVar是一个常量,也是块级作用域,一旦被赋值就不能再修改。
【 2 】箭头函数
【 2.1 】简化代码
原始的函数声明方式:
var f = function(name) {
    console.log(name);
};
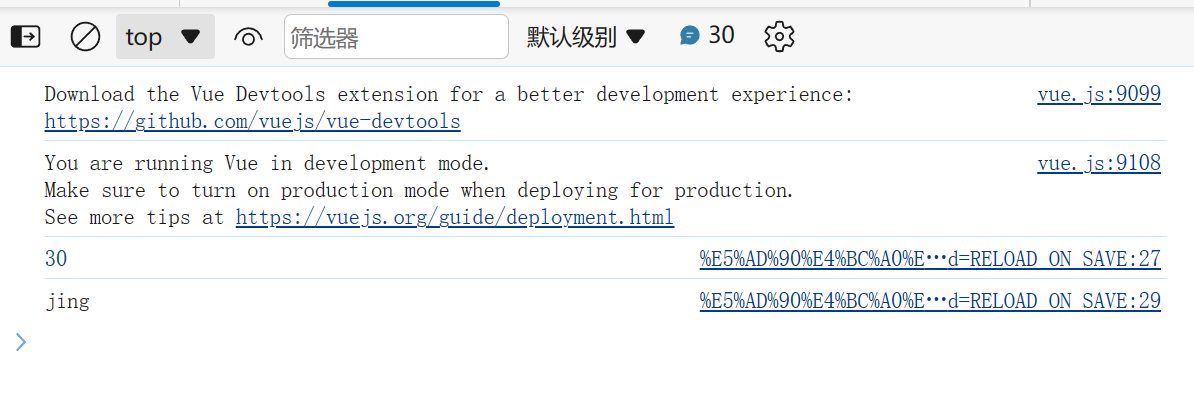
f('jing');
使用箭头函数:
这里function= =>
var f3 = (name) => {
    console.log(name);
};
f3('jing');
let f=()=>{}
【 2.2 】this指向问题

在全局上下文中,this 指向全局对象,在浏览器环境中通常是 window 对象,在 Node.js 中是 global 对象
console.log(this) # window 对象
- 函数调用:
- 1.如果函数作为普通函数调用,
this指向全局对象(在严格模式下为 undefined) - 2.如果函数作为对象的方法调用,
this指向调用该方法的对象。
- 1.如果函数作为普通函数调用,
- 构造函数
- 在构造函数中,
this指向新创建的实例对象。
- 在构造函数中,
- 箭头函数
- 箭头函数的
this指向定义时所在的作用域的this值,而不是调用时的this值。 - 换句话说,箭头函数的
this是词法作用域,而不是动态作用域。
- 箭头函数的
- DOM 事件处理函数
- 在DOM事件处理函数中。
this指向触发时间的DOM元素。
- 在DOM事件处理函数中。
- ES6 类方法
- 在ES6类方法中,this 指向调用该方法的对象实例。
【 3 】解构赋值
// 对象结构赋值
const person = { name: 'John', age: 30 };
const { name, age } = person;
console.log(name); // 输出: John
console.log(age);  // 输出: 30

// 数组结构赋值
const numbers = [1, 2, 3, 4, 5];
const [first, second] = numbers;
console.log(first);  // 输出: 1
console.log(second); // 输出: 2
- 解构赋值允许从数组或对象中提取数据,并将其赋值给变量。
- 解构赋值可以方便地交换变量的值,同时还支持默认值
// 1 解对象
    let user = {name: 'jing', age: 12, hobby: '洗头'}
    // let name=user.name
    // let age=user.age
    let {name,age,hobby,a=10} = user
    console.log(name,age,hobby,a)
// jing 12 洗头 10
    // 2 解数组
    let l=[11,22,33]
    let[a,b]=l
    console.log(a,b)
// 11 22
    //3 结构函数返回值
    function getuserInfo() {
        return {name: 'jing', age: 12, hobby: ['游泳', '睡觉']}
    }

    let {name1='1', hobby} = getuserInfo()
    console.log(name1, hobby)
	// 1 ['游泳', '睡觉']
function demo01(a,...b){
    console.log(a)
    # 1
    # [ 2, 34, 4 ]
    # 44
    # [ 5, 66, 7 ]
    console.log(b)
}
demo01(1,2,34,4)
let l=[44,5,66,7]
demo01(...l)
【 4 】模块化
let name = 'jing';
let age = 30;
function add(a, b) {
    return a + b;
}

// 必须导出,外部才能使用
// 1 默认导出--》只能导出一次
export default {
    name,
    age,
    add
};
<script type="module">
    // 默认导出的导入
    import us from '../js/us.js'
    console.log(us.age)
    let res=us.add(3,4)
    console.log(us.name)
</script>
-
命名导出和导入
-
us.js
export const add = (a, b) => a + b;
export const subtract = (a, b) => a - b;
export const multiply = (a, b) => a * b;
export const divide = (a, b) => a / b;
<script type="module">
    import { add, subtract, multiply, divide } from '../js/us.js';

    console.log(add(2, 3));       // 输出 5
    console.log(subtract(5, 2));  // 输出 3
    console.log(multiply(2, 4));  // 输出 8
    console.log(divide(10, 2));   // 输出 5
    new Vue({
        el: '#app',
        data: {
            age: "6546",
            username: '你啊啥的爱书',
            message: '你失败了'
</script>
-
同级文件夹
-
index.js
export default {
    // 以这个name为this
    name:'yun',
    showAge:function (){
        console.log('age',this.name)
    },
    showName:()=>{
        console.log(this.name)
    },
    showHobby(){
        console.log('hobby',this.name)
    }
}
<script type="module">
    import yun from './index.js';

    console.log('----',yun.name)
    yun.showAge()
    yun.showHobby()
</script>
【 5 】登陆跳转
# 安装
pip3 install django-cors-headers

# app配置
INSTALLED_APPS = [
	...
    'one.apps.OneConfig',
    'rest_framework',
    'corsheaders',
]

 # 中间件中注册
MIDDLEWARE = [
		...
        'corsheaders.middleware.CorsMiddleware',
    ]

# 配置文件中配置
# 允许跨域源
CORS_ORIGIN_ALLOW_ALL = True
# 允许的请求头
CORS_ALLOW_HEADERS = (
    "accept",
    "accept-encoding",
    "authorization",
    "content-type",
    "dnt",
    "origin",
    "user-agent",
    "x-csrftoken",
    "x-requested-with",

    # 额外允许的请求头
    'token',
)

-
后端
-
urls.py
-
这里建议自动配置路由
from django.urls import path
# 登陆接口
from rest_framework_simplejwt.views import token_obtain_pair
# 自动生成路由
from rest_framework.routers import SimpleRouter, DefaultRouter
from one.views import UserView, duobanView

# 2 实例化得到对象
# router = SimpleRouter()
router = DefaultRouter()
# 多方式登陆
router.register('user', UserView, 'user')
# 自定义用户表,手动签发和认证
router.register('duoban', duobanView, 'duoban')

urlpatterns = [
    # 系统自带的登陆接口
    path('login/', token_obtain_pair),

]

# 5 把自动生成的路由,放到 urlpatterns中
urlpatterns += router.urls
import json

from django.shortcuts import render

from rest_framework.viewsets import ViewSet
from rest_framework.response import Response
from rest_framework.decorators import action

# 跨域实战之登陆注册
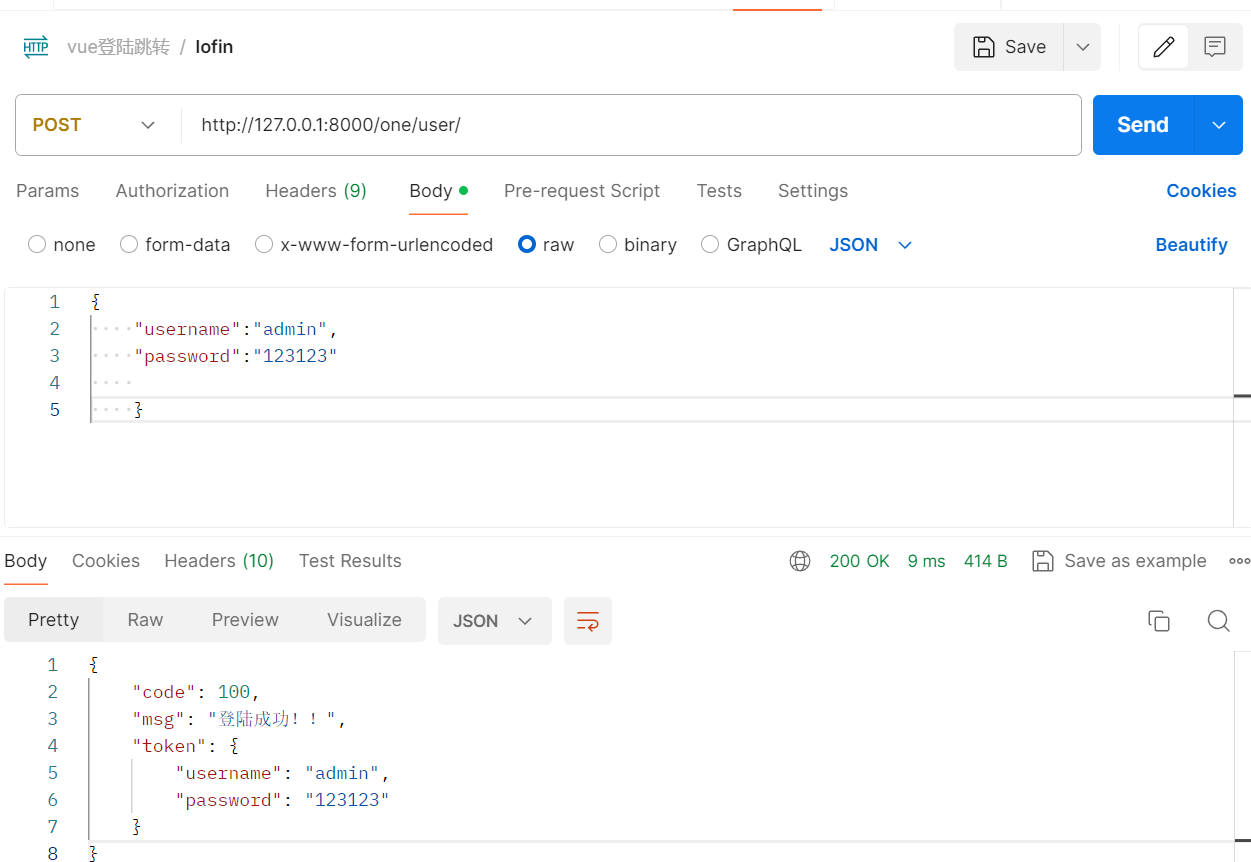
class UserView(ViewSet):
    def create(self, request, *args, **kwargs):
        username = request.data.get('username')
        password = request.data.get('password')
        if username == 'admin' and password == '123123':
            return Response({'code': 100, "msg": "登陆成功!!", "token": request.data})
        else:
            return Response({'code': 101, "msg": "用户名或者密码错误请重新输入!!"})

# 跨域实战之电影
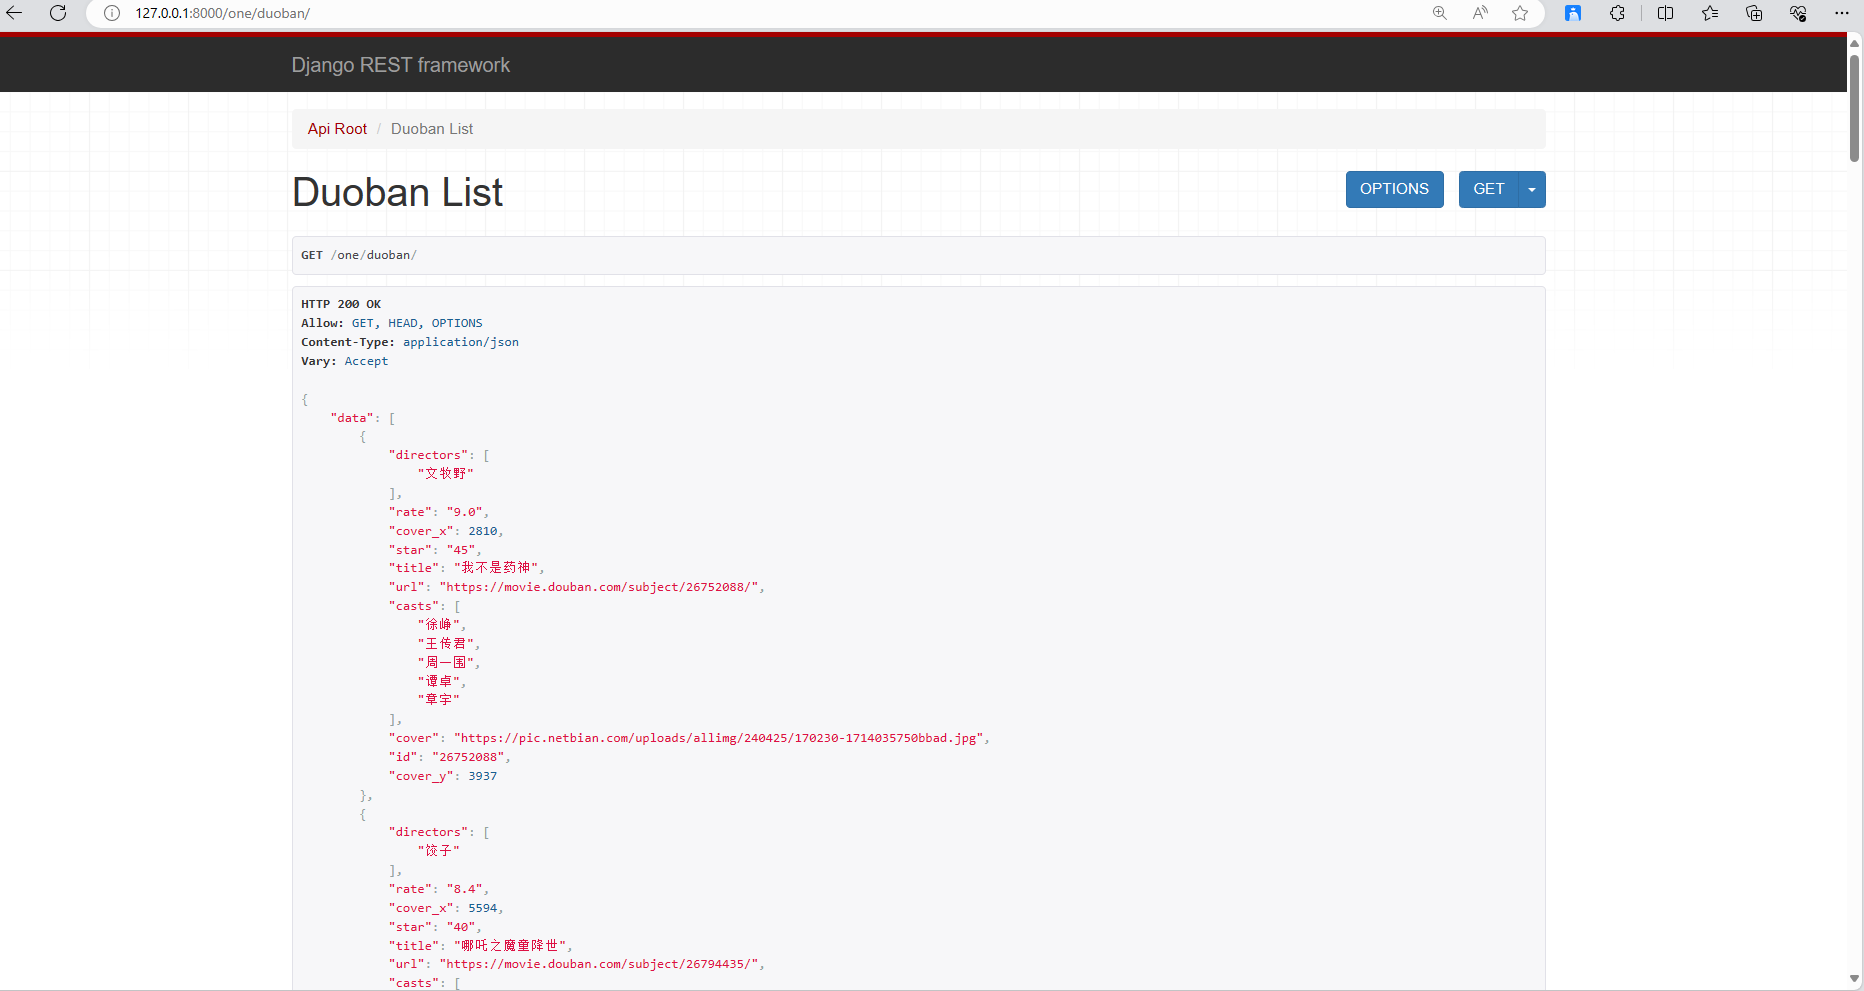
class duobanView(ViewSet):
    def list(self, request, *args, **kwargs):
        with open('./duoban.json', 'r', encoding='utf-8') as f:
            films_data = json.load(f)
        return Response(films_data)
-
前端
-
注意配置路由
-
// 注意引入这两个vue文件 import HomeView from '../views/HomeView.vue' import LoginView from '../views/LoginView.vue' -
const routes = [
  {
    path: '/',
    name: 'home',
    component: HomeView
  },
import Vue from 'vue'
import VueRouter from 'vue-router'
import HomeView from '../views/HomeView.vue'
import LoginView from '../views/LoginView.vue'

Vue.use(VueRouter)
// 这个就类似与路由分发

const routes = [
  {
    path: '/',
    name: 'home',
    component: HomeView
  },
  {
    path: '/about',
    name: 'about',
    // route level code-splitting
    // this generates a separate chunk (about.[hash].js) for this route
    // which is lazy-loaded when the route is visited.
    component: () => import(/* webpackChunkName: "about" */ '../views/AboutView.vue')
  },

  {
    path: '/login',
    name: 'lohin',
    // route level code-splitting
    // this generates a separate chunk (about.[hash].js) for this route
    // which is lazy-loaded when the route is visited.
    component: () => import(/* webpackChunkName: "about" */ '../views/LoginView.vue')
  },


]

const router = new VueRouter({
  mode: 'history',
  base: process.env.BASE_URL,
  routes
})

export default router
-
HomeView.vue
-
# 注意安装 npm install axios
# pip <----> npm
# 在合适的地方引入
import axios from 'axios';
<template>
  <div id="app">
    <nav>
      <router-link to="/">Home</router-link> |
      <router-link to="/about">About</router-link>
    </nav>
    <router-view/>
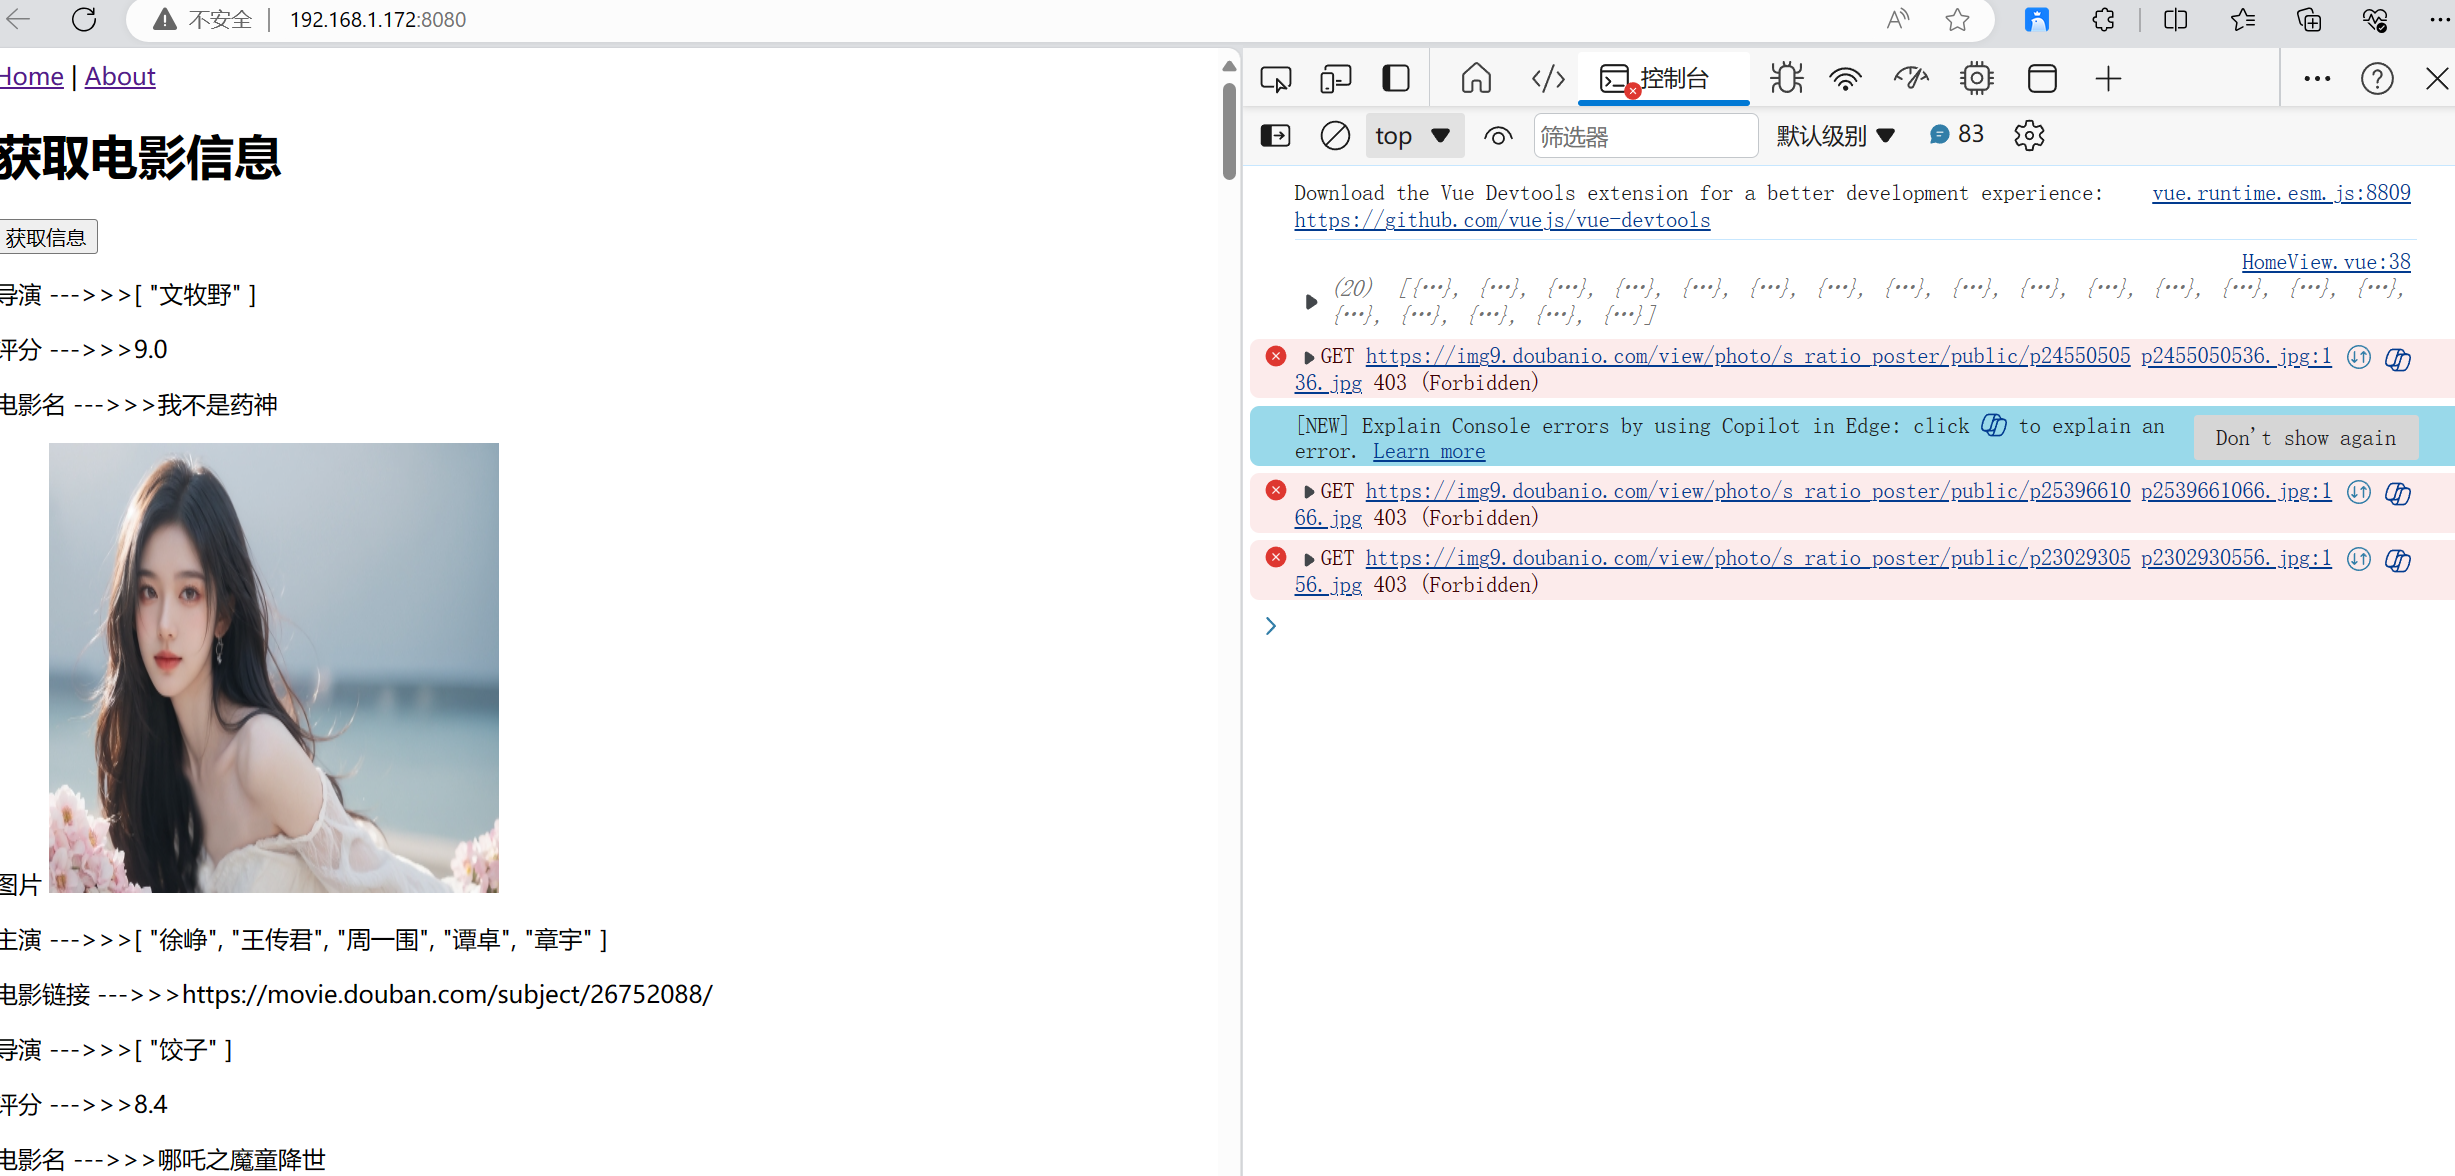
    <h1>获取电影信息</h1>
    <button @click="handload">获取信息</button>

    <div v-for="item in duoban_list">
      <p>导演 --->>>{{ item.directors }}</p>
      <p>评分 --->>>{{ item.rate }}</p>
      <p>电影名 --->>>{{ item.title }}</p>
      <p>图片 <img :src="item.cover" alt="" height="300px" width="300"></p>
      <p>主演 --->>>{{ item.casts }}</p>
      <p>电影链接 --->>>{{ item.url }}</p>
    </div>
  </div>

</template>


<script>
//引入方法二
import axios from 'axios';

export default {
  name:'HomeView',
  data() {
    return {duoban_list: [],}
  },
  methods:{
    handload(){
      axios.get('http://127.0.0.1:8000/one/duoban/')
          .then(res => {
            console.log(res.data.data);
            this.duoban_list = res.data.data;

          }).catch(err => {
        alert('请联系管理员')
        console.log(err)
      })
    },


  },
  //就是钩子函数`created`:组件创建完成后:js就有值了,html还是空的  (向后端发送ajax请求)

}

</script>
- LoginView.vue
<template>
  <div class="about">

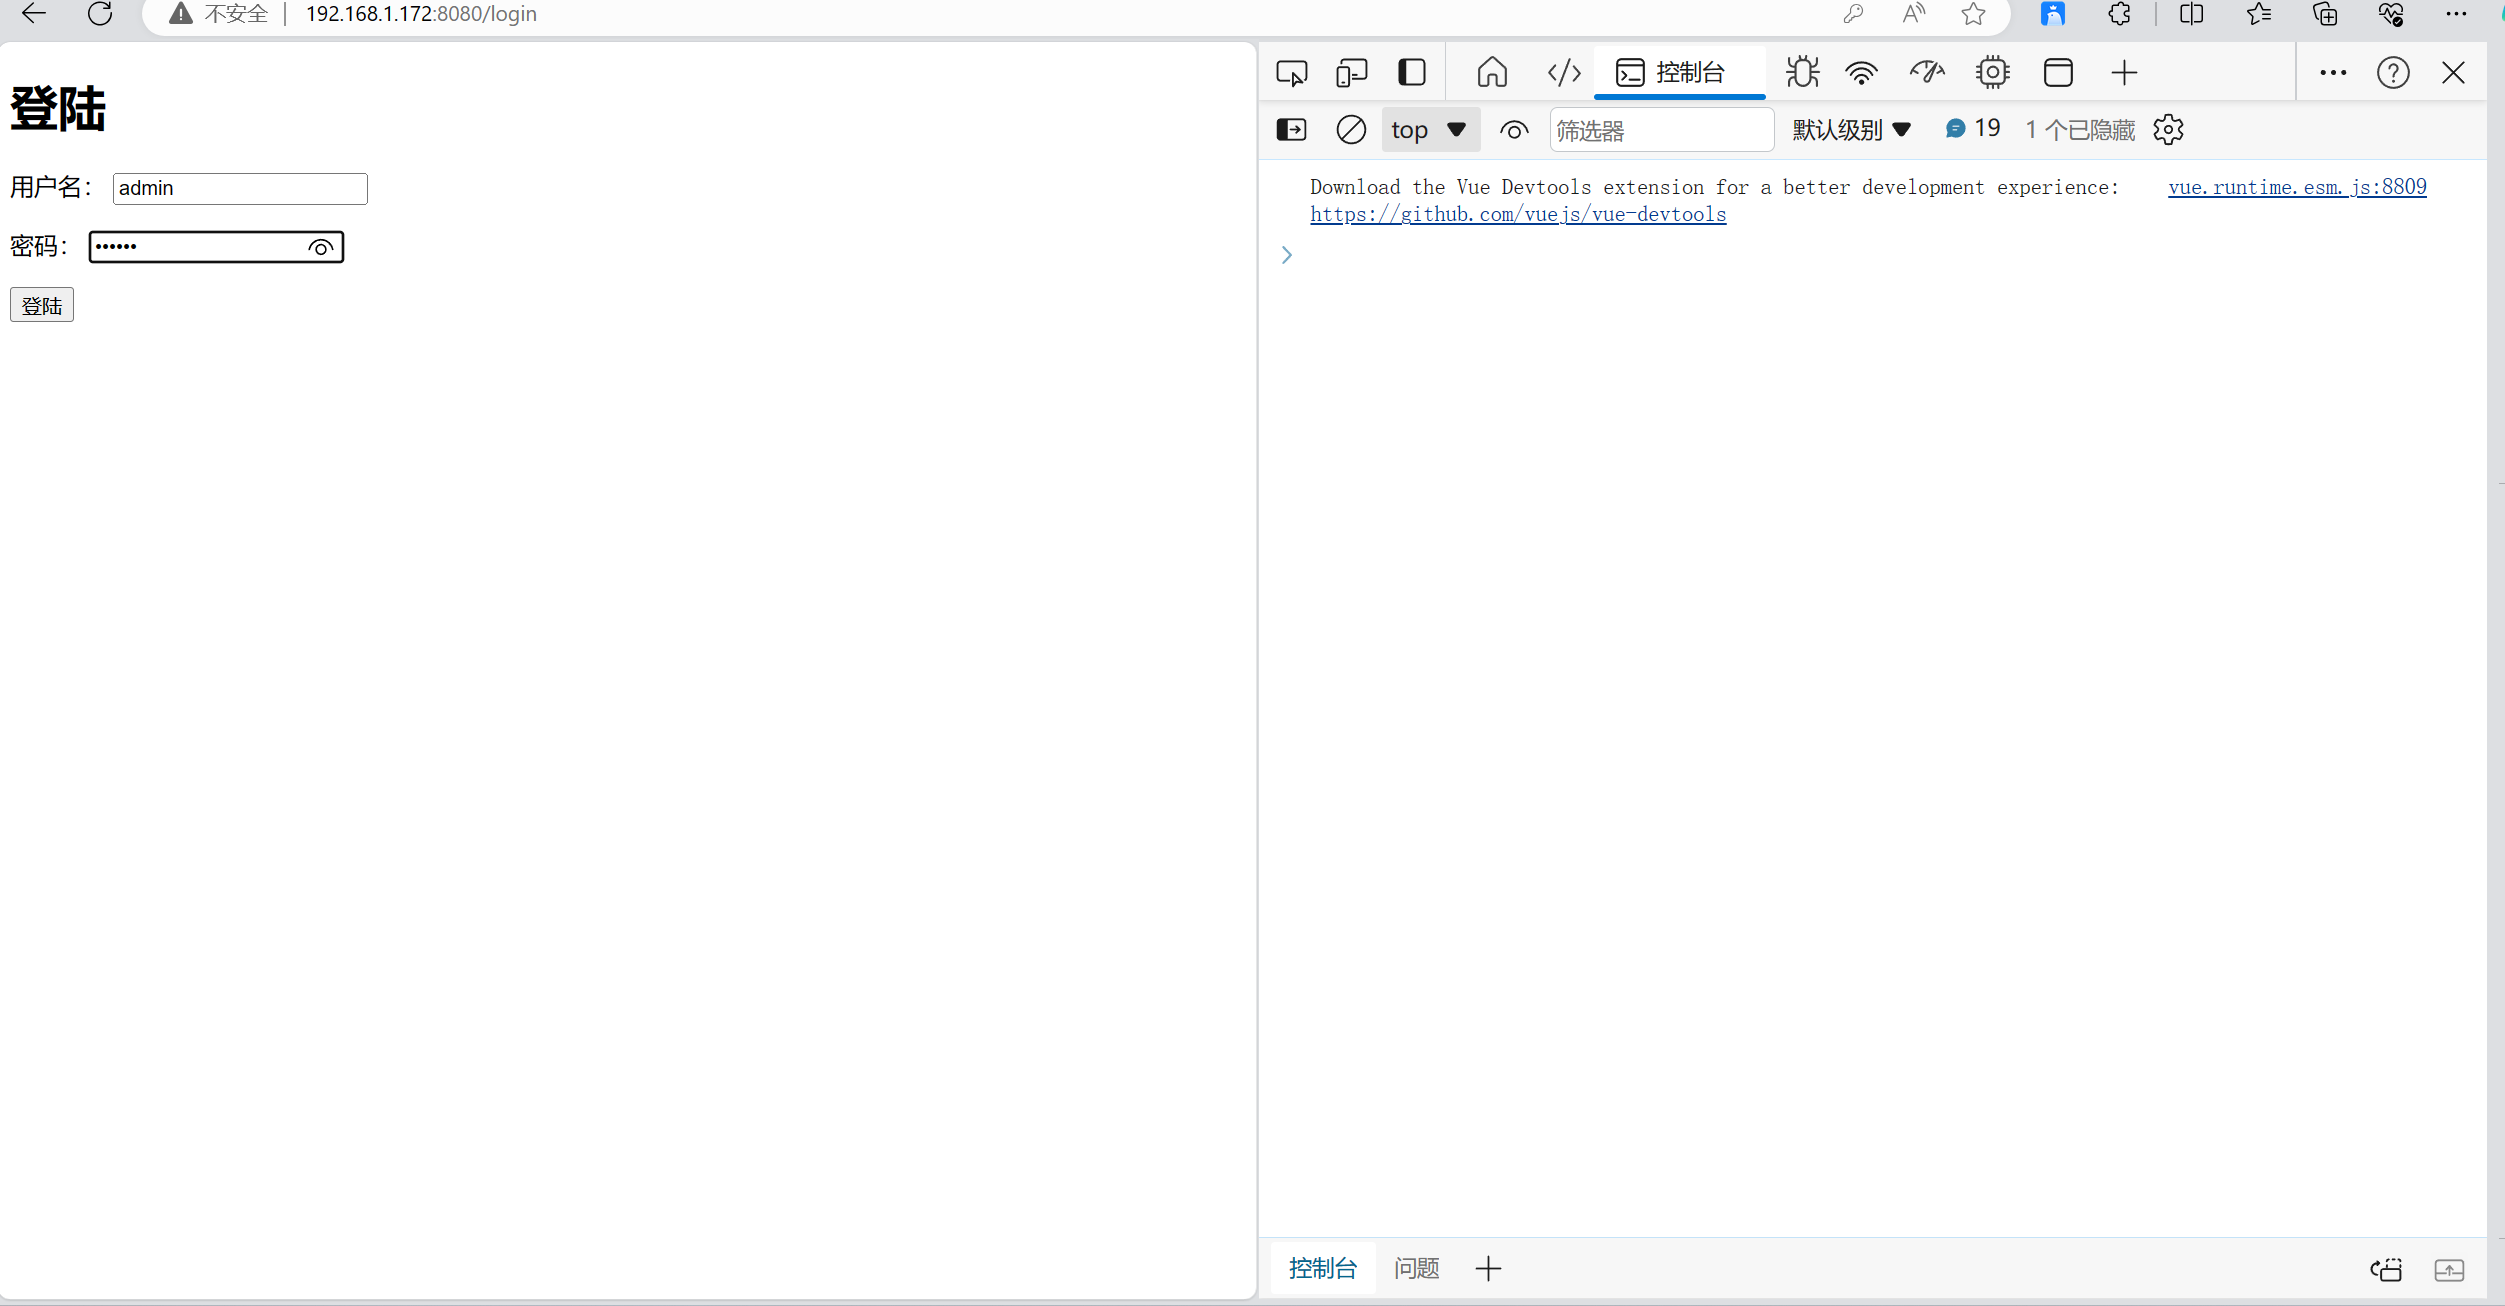
    <h1>登陆</h1>
    <p>用户名: <input type="text" v-model="username"></p>
    <p>密码: <input type="password" v-model="password"></p>
    <p>
      <button @click="handlogin">登陆</button>
    </p>

  </div>

</template>

<script>
import axios from "axios";

export default {
  name: "LoginView",
  data() {
    return {
      username: '',
      password: ''
    }
  },
  methods: {
    handlogin() {
      axios.post(
          'http://127.0.0.1:8000/one/user/',
          {
            username: this.username,
            password: this.password
          },
          {
            headers: {
              "Content-Type": "application/json"
            }
          }
      ).then(res => {
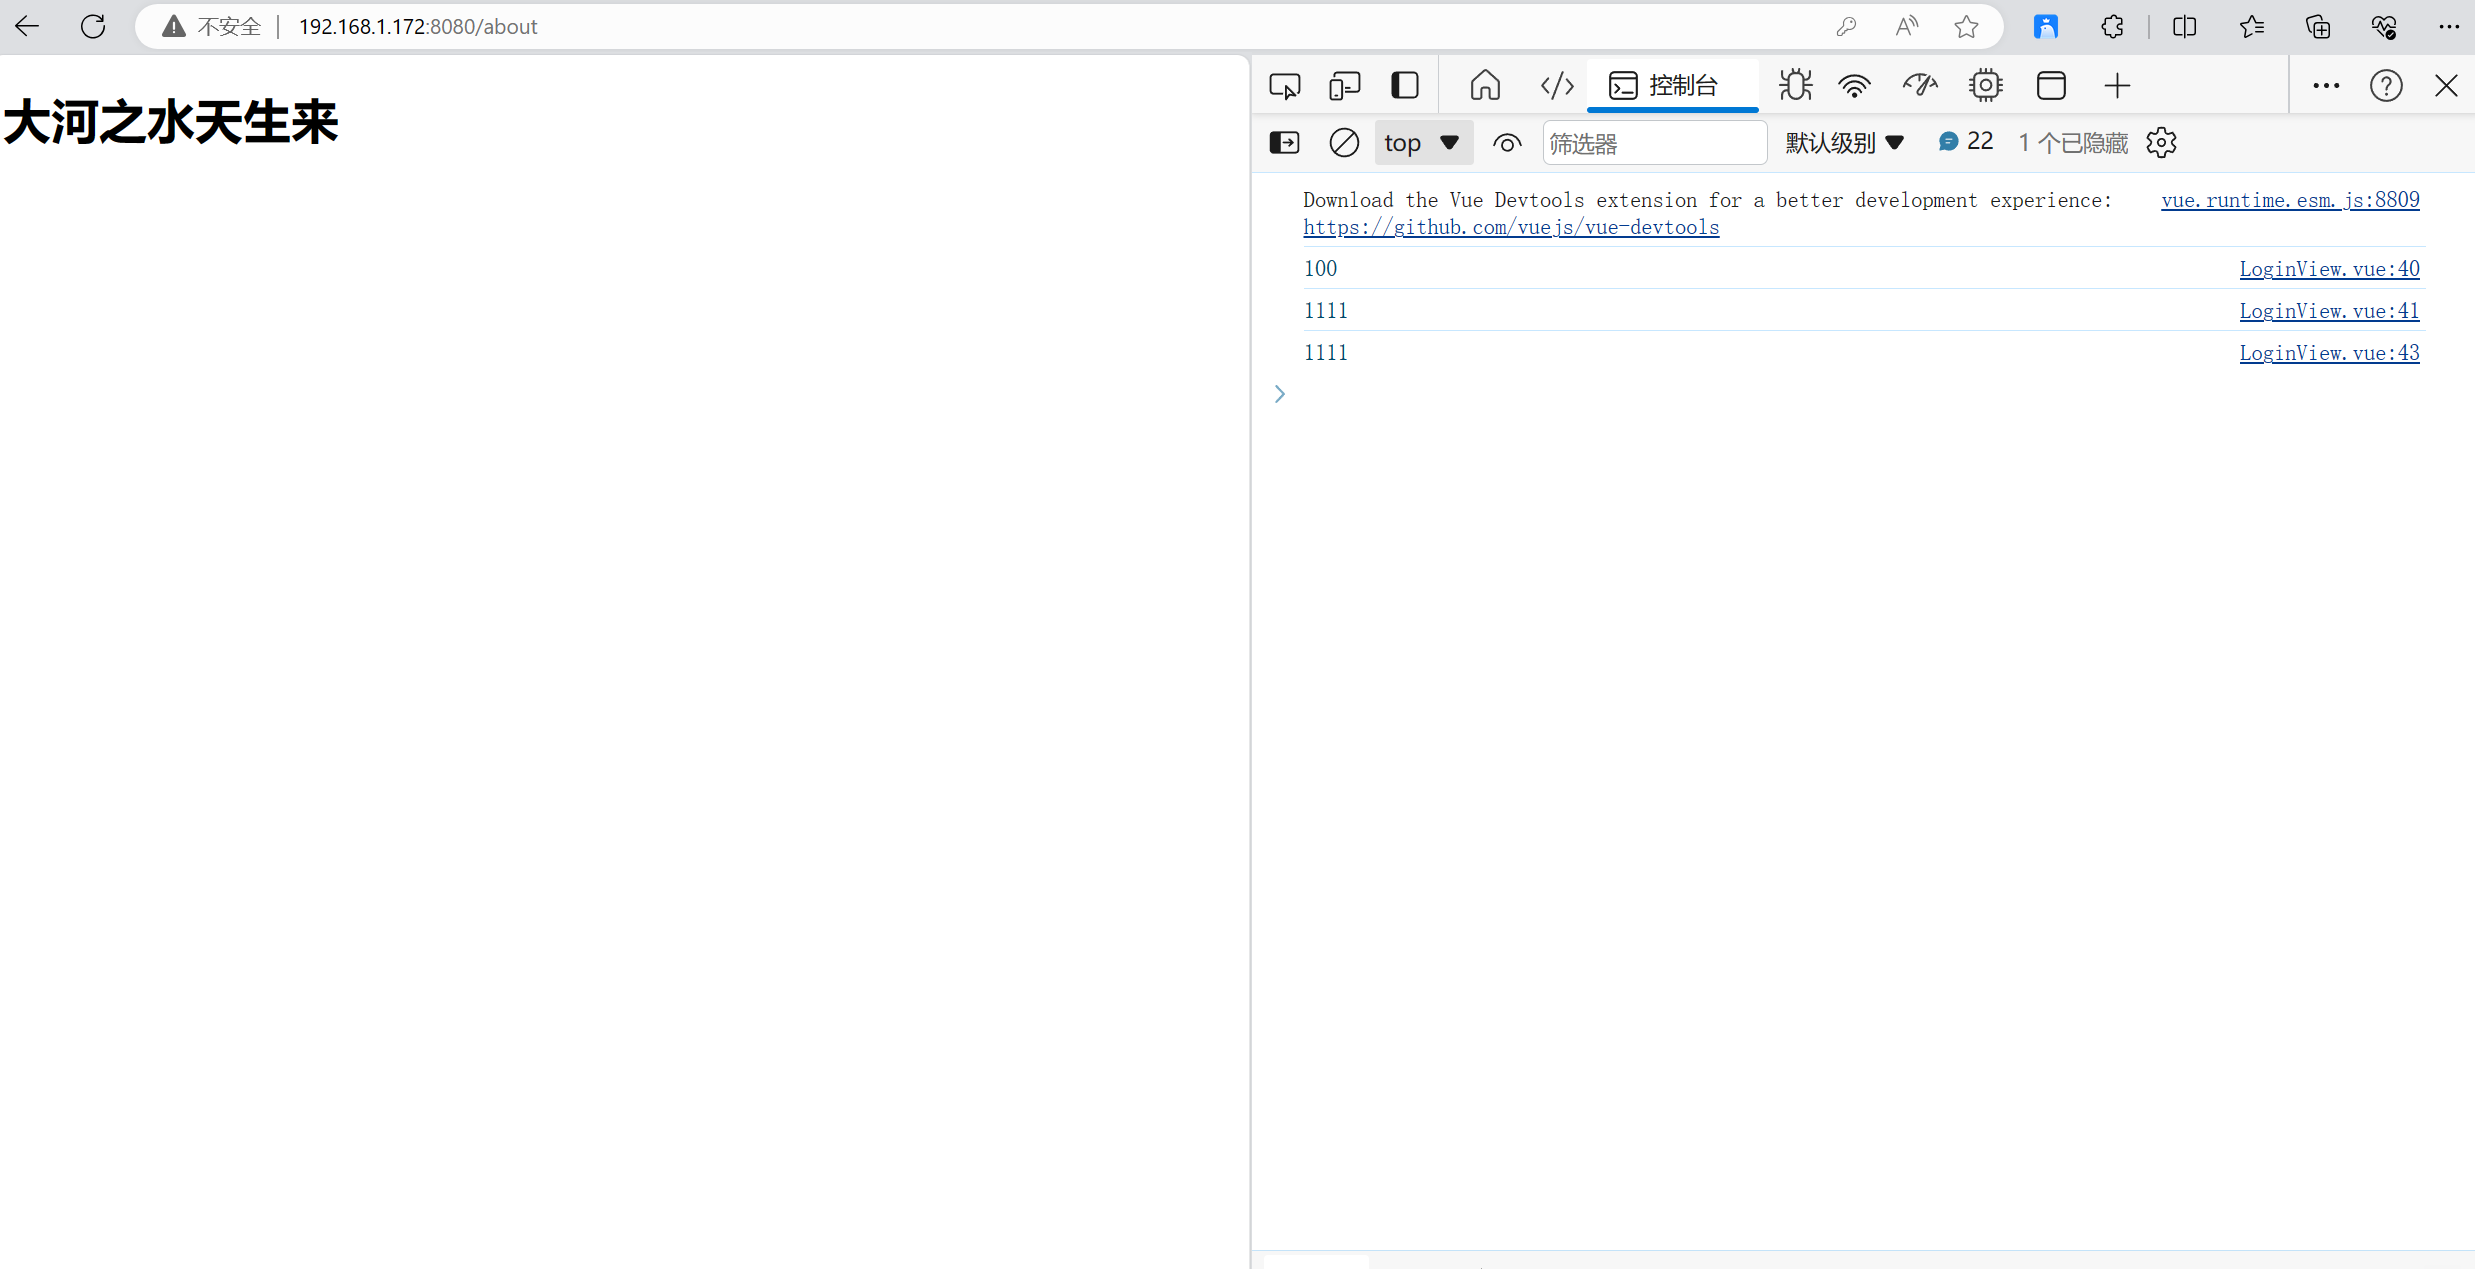
        console.log(res.data.code)
        console.log(1111)
        if (res.data.code === 100) {
        console.log(1111)
          //跳转 到首页
          this.$router.push('/about')
        } else {
          alert(res.data.message)
        }
      })
    }
  }
}

</script>

<style scoped>

</style>
【 6 】element样式
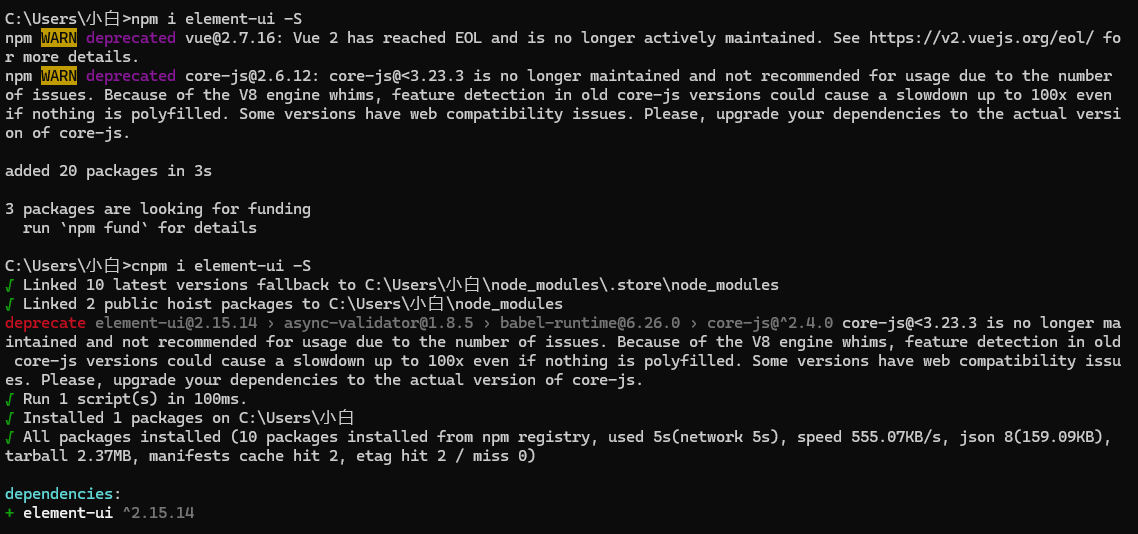
npm 安装
推荐使用 npm 的方式安装,它能更好地和 webpack 打包工具配合使用。
npm i element-ui -S
--或者 看个人的需求
cnpm i element-ui -S
import ElementUI from 'element-ui';
import 'element-ui/lib/theme-chalk/index.css';

Vue.use(ElementUI);
【 7 】vue项目目录结构
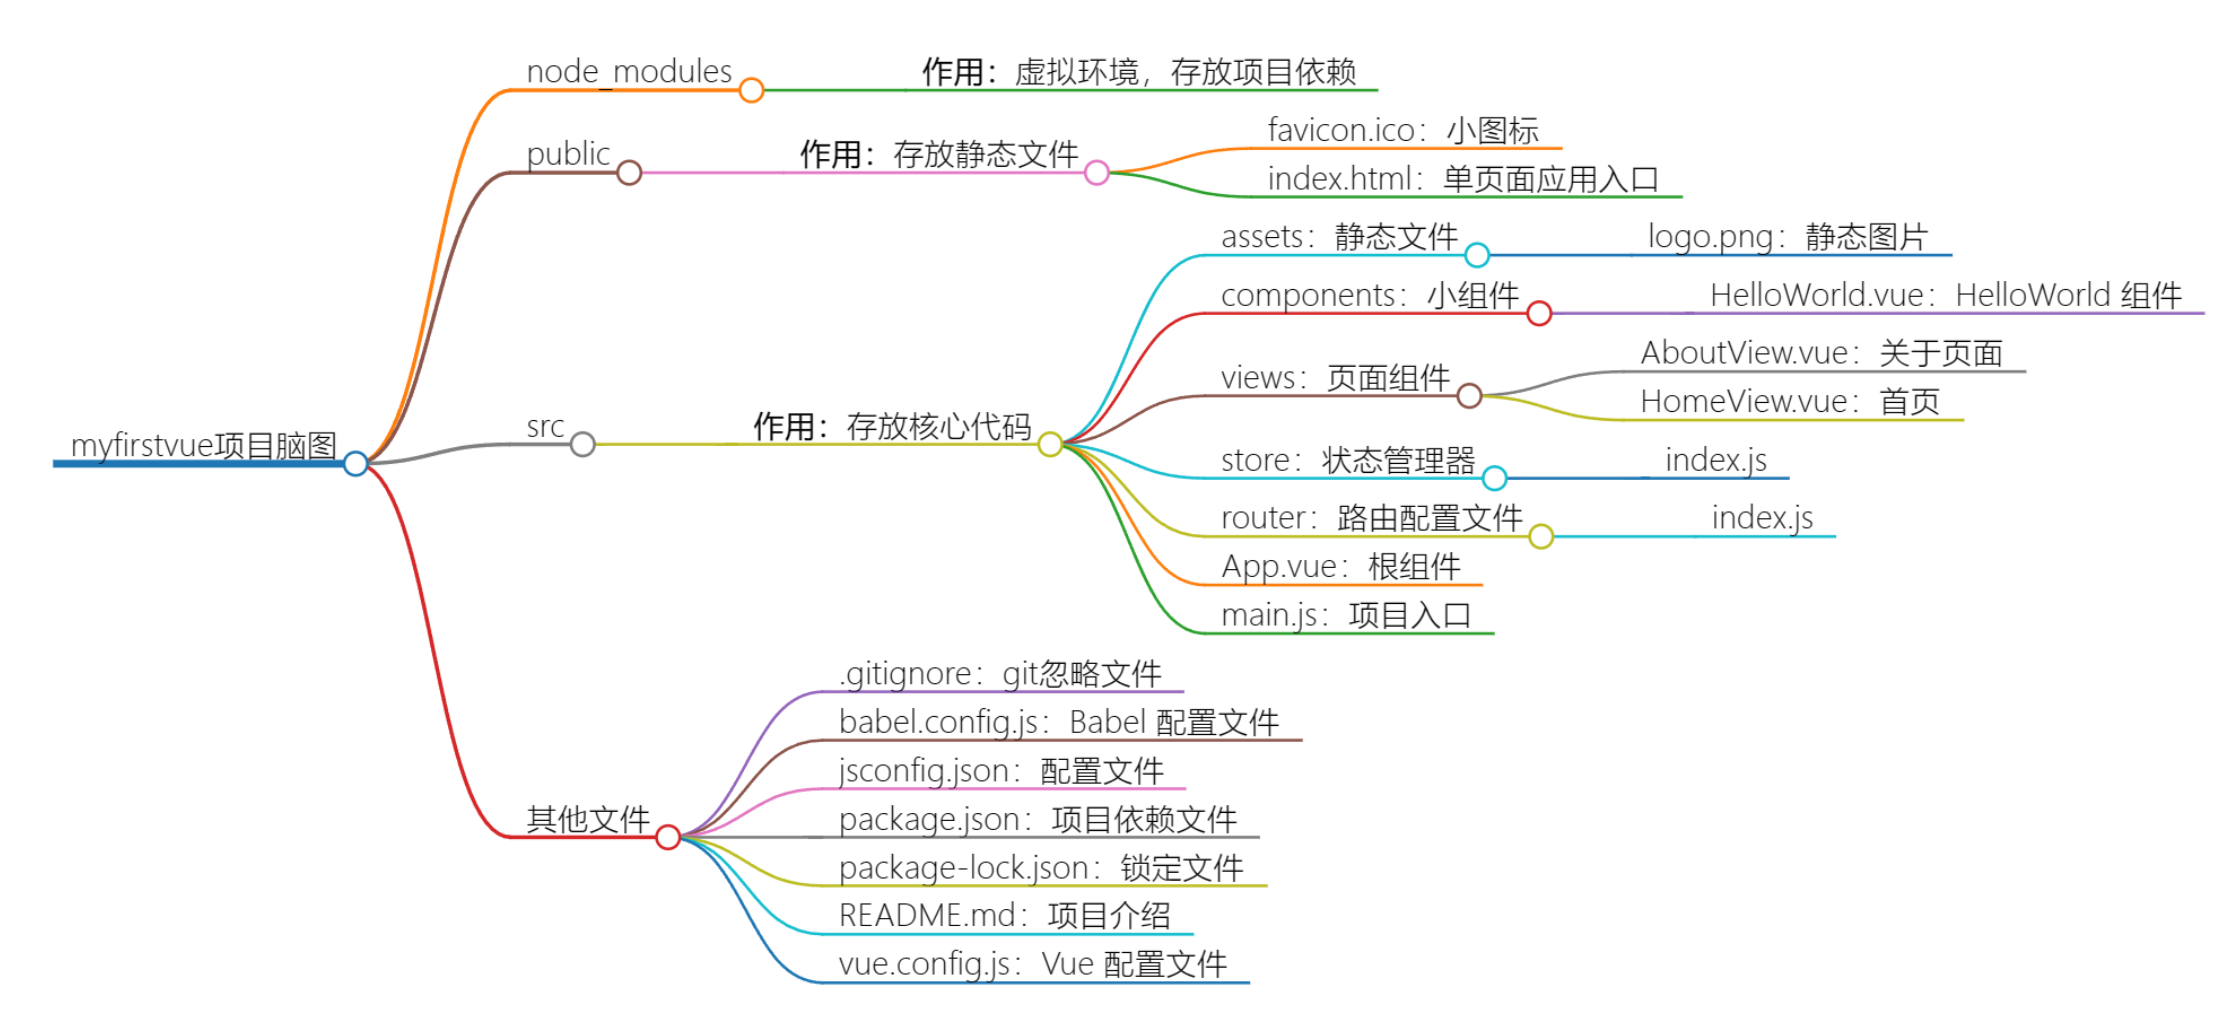
myfirstvue        # 项目名
	-node_modules # 等同于python的venv--》虚拟环境-->里面有很多js,项目的依赖-》可以删除---》项目就不能运行了--》在你本地--》cnpm install--》根据package.json项目的依赖,再重新安装--》又可以运行了
    -public       # 文件夹,一般不动
        -favicon.ico # 小图标
        -index.html  # spa--》单页面应用--》整个vue项目,就只有这一个html-如果禁用了js--》整个vue都用不了

     -src        # 文件夹---》核心代码
        -assets  #文件夹,都放静态文件--》图片,css,js。。。
        	-logo.png # 静态图片
        -components  # 小组件,给页面组件使用
            HelloWorld.vue # HelloWorld 组件
        -views       # 页面组件,页面跳转,实现像 html跳转一样的效果
            AboutView.vue # 关于页面
            HomeView.vue  # 首页
        -store            # vuex--》状态管理器
            index.js
        -router            # vue-router---》路由配置文件
            index.js
        -App.vue           # 根组件
		-main.js           # 整个项目入口

   -.gitignore    # git忽略文件,学了git就会了
   -babel.config.js # 装了bable配置文件--》把高版本es语法转成es5
   -jsconfig.json # 不管
   -package.json  # 项目依赖文件--》项目依赖--》npm install--》根据他装
   -package-lock.json # 锁定文件,之前项目中使用模块版本
   -README.md     # 项目介绍
   -vue.config.js # vue整体配置文件
【 8 】vite创建(推荐)
-
什么是vite? —新一代前端构建工具
-
优势如下:
- 开发环境中,无需打包操作,可快速的冷启动。
- 轻量快速的热重载(HMR)。
- 真正的按需求编译,不再等待整个应用编译完成。
- 传统构建 与 vite 构建对比图。
-
兼容性注意
- Vite 需要 Node.js 版本 18+,20+。然而,有些模板需要依赖更高的 Node 版本才能正常运行,当你的包管理器发出警告时,请注意升级你的 Node 版本
官网:https://cn.vitejs.dev/
- Vite 需要 Node.js 版本 18+,20+。然而,有些模板需要依赖更高的 Node 版本才能正常运行,当你的包管理器发出警告时,请注意升级你的 Node 版本
-
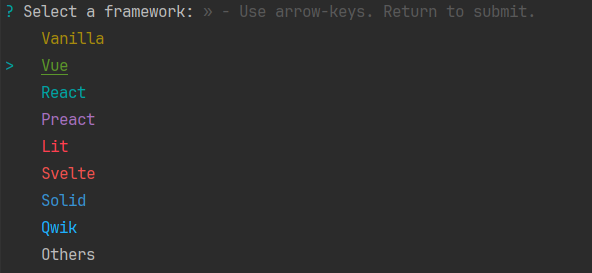
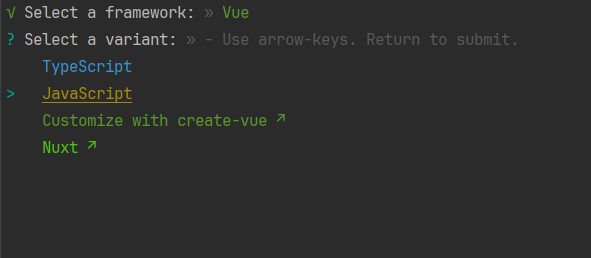
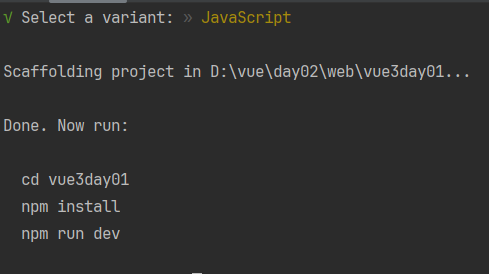
# 指定名字创建
    # 创建项目方式一
    npm create vite@latest
	# 创建项目方式二:指定名字
    npm create vite@latest vue3_demo002
    # 创建项目方式三
    cnpm create vite@latest vue3_demo002
    # 创建项目方式四
    cnpm create vite vue3_demo002


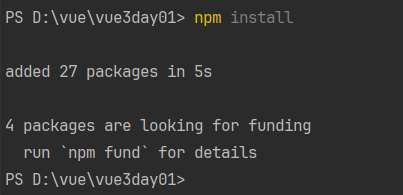
# 4 安装依赖
	npm install
# 5 运行项目
	npm run dev
本地存储
-
登录成功—》token存储
cookie:登录信息放这里,有过期事件,一旦过期,就没了
sessionStorage:当前浏览器生效—》关闭浏览器,数据就没了
localStorage:永久生效,除非代码删除或清空浏览器缓存
-未登录,加购物车 -
Cookie:Cookie是一种存储在用户计算机上的小型文本文件,用于存储特定于用户的信息。它们具有过期时间,一旦过期就会被删除。通常用于存储用户的身份验证令牌(例如JWT)等信息。
-
SessionStorage:SessionStorage是HTML5引入的一种在当前浏览器窗口(或标签页)下存储数据的方式。数据在关闭浏览器窗口后将会丢失,它对于一些临时性的数据存储是很有用的。
-
LocalStorage:LocalStorage也是HTML5引入的一种本地存储数据的方式,与SessionStorage不同的是,LocalStorage存储的数据在浏览器关闭后仍然保留,除非用户显式地删除数据或清空浏览器缓存。
# cookie 需要下载 vue-cookies
cnpm install vue-cookies -S
【 1 】介绍用法
-
localStorage:
-
localStorage提供了在浏览器中存储键值对数据的简单方法。存储的数据没有过期时间,除非显式删除或由用户清除浏览器缓存。 -
用法示例:
// 设置数据
localStorage.setItem('key', 'value');

// localStorage.setItem('token','asdd.dasd.dasd')

// 获取数据
const value = localStorage.getItem('key');

// 删除数据
localStorage.removeItem('key');

// 清空所有数据
localStorage.clear();
-
-
sessionStorage:
-
sessionStorage与localStorage类似,但数据仅在当前会话期间有效。如果用户关闭浏览器标签或窗口,数据将被清除。 -
用法示例:
// 设置数据
sessionStorage.setItem('key', 'value');

// 获取数据
const value = sessionStorage.getItem('key');

// 删除数据
sessionStorage.removeItem('key');

// 清空所有数据
sessionStorage.clear();
-
-
Cookies:
# cookie 需要下载 vue-cookies
cnpm install vue-cookies -S
// 在main.js文件加入插件 import Vue from 'vue'; import VueCookies from 'vue-cookies'; import App from './App.vue'; Vue.use(VueCookies); new Vue({ render: h => h(App), }).$mount('#app');-
Cookies是存储在用户计算机上的小型文本文件,由服务器在每次发送页面时在用户计算机上存储。它们具有过期时间,可以在客户端和服务器之间传输。 -
用法示例:
// 设置 Cookie
document.cookie = 'key=value; expires=Sat, 31 Dec 2022 23:59:59 GMT; path=/';

// 获取 Cookie
const cookies = document.cookie.split(';');
for (let i = 0; i < cookies.length; i++) {
  const cookie = cookies[i].trim();
  // 解析 cookie 并处理数据
}

// 删除 Cookie(通过设置过期时间为过去的时间)
document.cookie = 'key=; expires=Thu, 01 Jan 1970 00:00:00 GMT; path=/';
-
需要注意的是,存储在本地的数据通常是以字符串形式存储的,如果需要存储对象或数组等复杂数据类型,需要先将其转换为字符串(例如使用 JSON.stringify()),在获取时再进行解析(例如使用 JSON.parse())。此外,由于浏览器的安全限制,本地存储是在同一源(同一协议、域名和端口)下共享的,不能跨域使用。
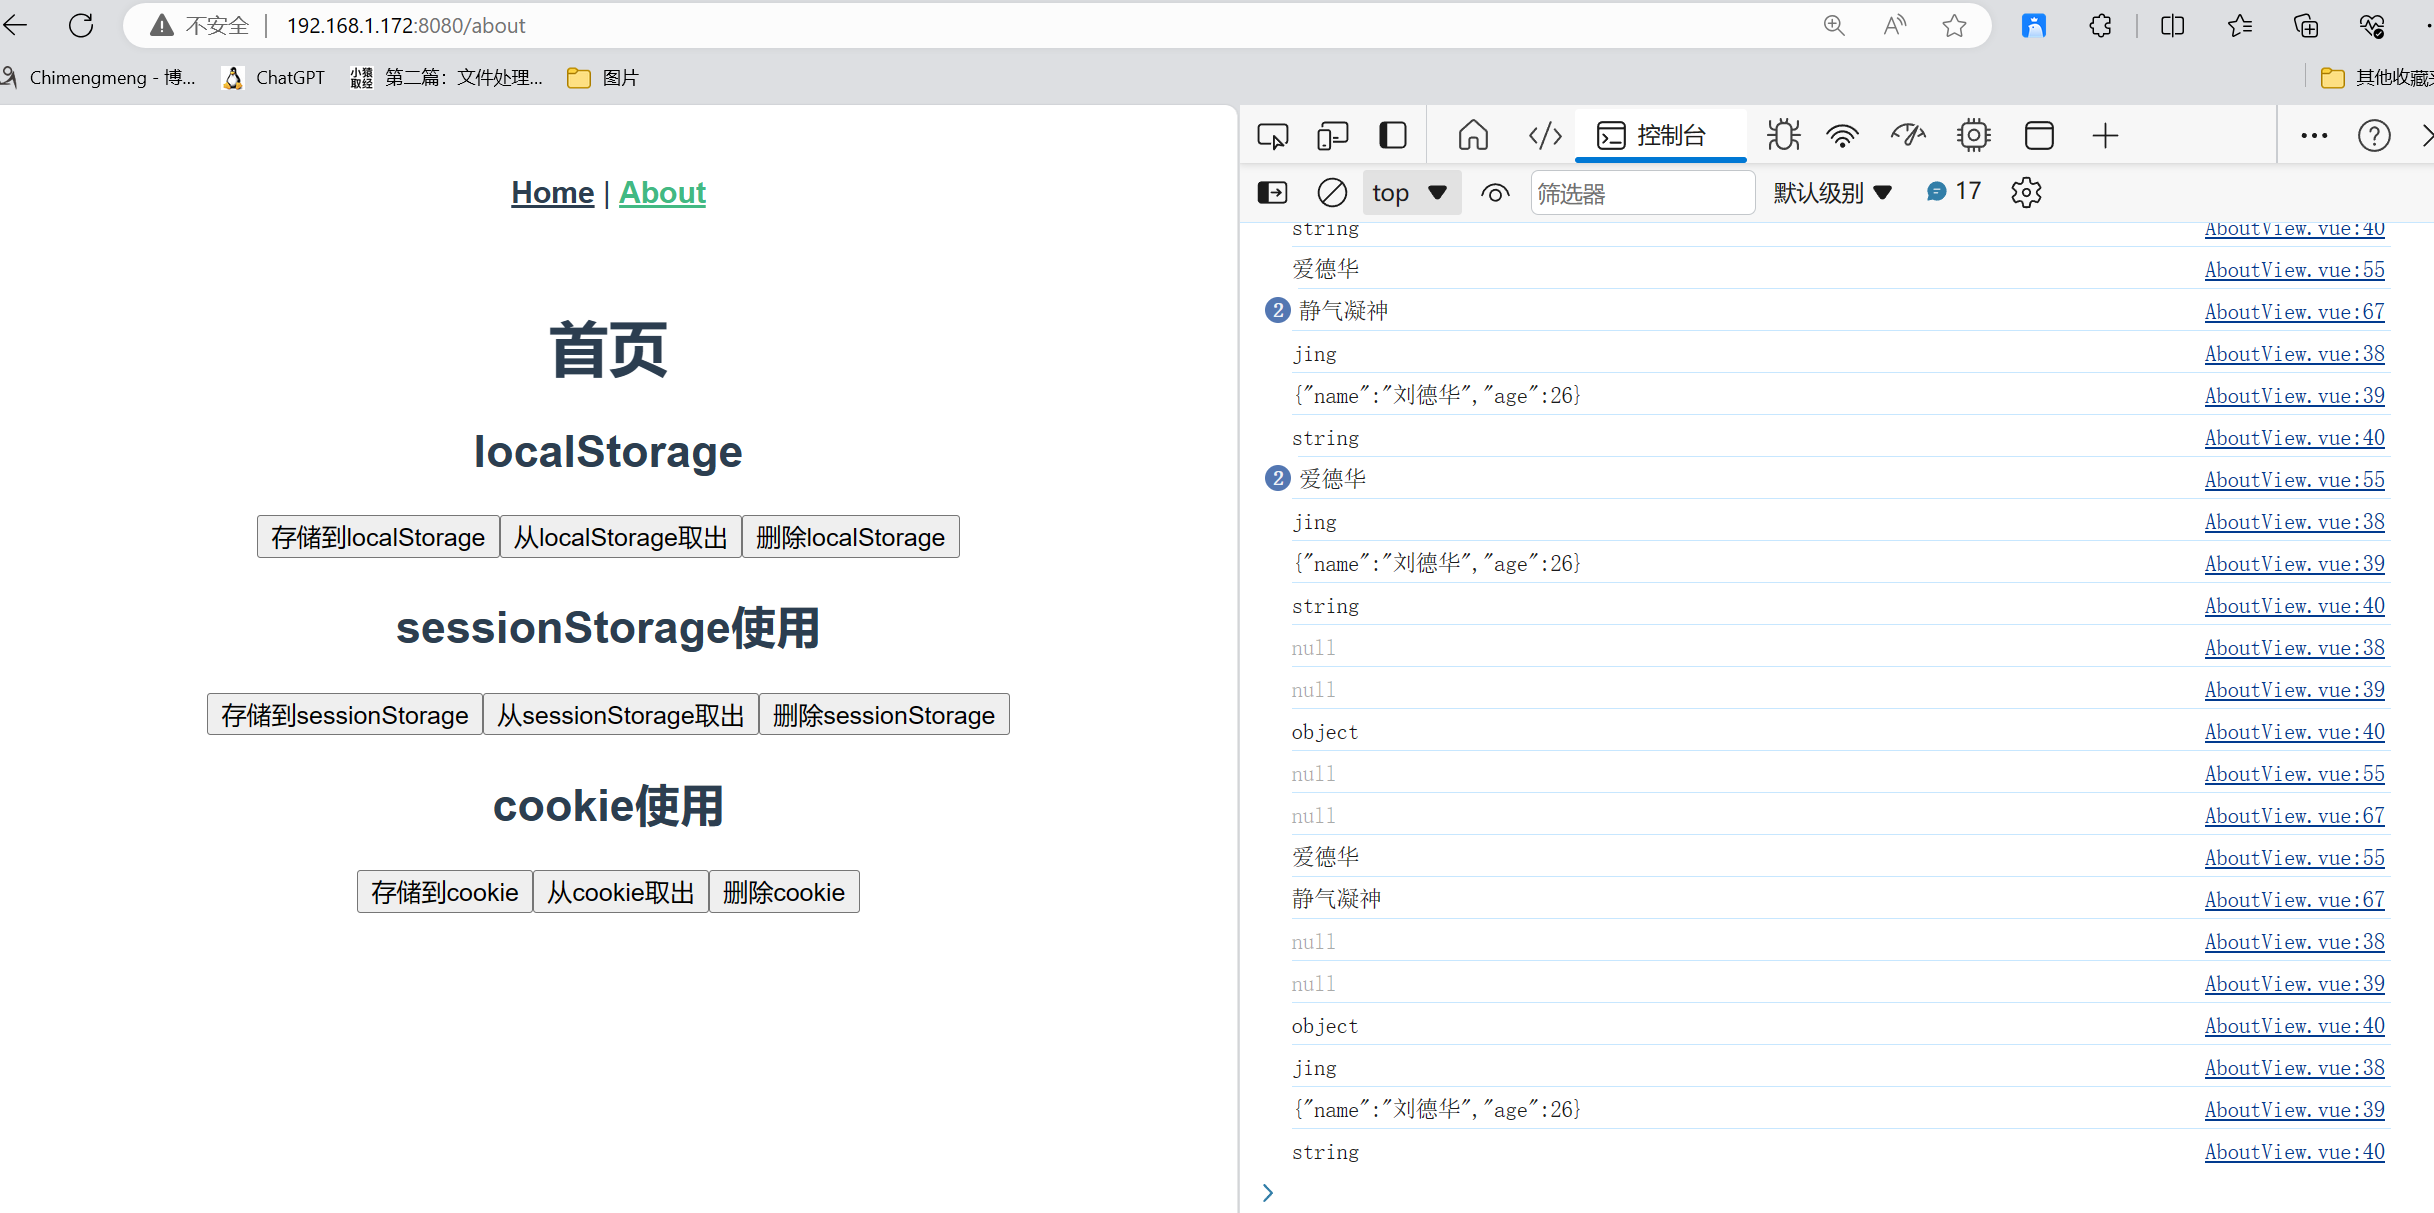
<template>
  <div class="about">
    <h1>首页</h1>
    <h2>localStorage</h2>
    <button @click="handleSaveLocalStorage">存储到localStorage</button>
    <button @click="handleGetLocalStorage">从localStorage取出</button>
    <button @click="handleDeleteLocalStorage">删除localStorage</button>

    <h2>sessionStorage使用</h2>
    <button @click="handleSavesessionStorage">存储到sessionStorage</button>
    <button @click="handleGetsessionStorage">从sessionStorage取出</button>
    <button @click="handleDeletesessionStorage">删除sessionStorage</button>
    <h2>cookie使用</h2>
    <!--    -->
    <button @click="handleSaveCookie">存储到cookie</button>
    <button @click="handleGetCookie">从cookie取出</button>
    <button @click="handleDeleteCookie">删除cookie</button>
  </div>
</template>

<script>

export default {
  name: 'HomeView',
  methods: {
    handleSaveLocalStorage() {
      localStorage.setItem("name", 'jing')
      let user = {
        name: '刘德华',
        age: 26
      }
      localStorage.setItem("user", JSON.stringify(user)) // 不要放对象

    },
    handleGetLocalStorage() {
      let name = localStorage.getItem("name")
      let user = localStorage.getItem('user')
      console.log(name)
      console.log(user)
      console.log(typeof user)

    },
    handleDeleteLocalStorage() {
      localStorage.removeItem('name')
      localStorage.clear()

    },


    handleSavesessionStorage() {
      sessionStorage.setItem("name", '爱德华')
    },
    handleGetsessionStorage() {
      let name = sessionStorage.getItem('name')
      console.log(name)
    },
    handleDeletesessionStorage() {
      sessionStorage.removeItem('name')
      sessionStorage.clear()
    },

    handleSaveCookie() {
      this.$cookies.set('name', '静气凝神', '1m')
    },
    handleGetCookie() {
      let name = this.$cookies.get('name')
      console.log(name)
    },
    handleDeleteCookie() {
      this.$cookies.remove('name')

    },
  }

}

</script>

<style>

</style>
路由跳转
-
安装 Vue Router: 首先,确保已经安装了 Vue Router。可以使用 npm 或 yarn 进行安装:
npm install vue-router # 或 yarn add vue-router -
创建路由配置: 在你的 Vue 项目中创建一个路由配置文件,通常命名为
router.js或index.js。在此文件中,导入 Vue 和 Vue Router,并创建路由实例,定义路由规则。// router.js import Vue from 'vue'; import VueRouter from 'vue-router'; // 导入组件 import Home from './components/Home.vue'; import About from './components/About.vue'; // 使用插件 Vue.use(VueRouter); // 创建路由实例 const router = new VueRouter({ routes: [ { path: '/', component: Home }, { path: '/about', component: About }, ], }); export default router; -
在 Vue 实例中使用路由: 在你的 Vue 实例中,使用创建的路由实例,并将其挂载到 Vue 根实例上。
// main.js import Vue from 'vue'; import App from './App.vue'; import router from './router'; new Vue({ router, render: h => h(App), }).$mount('#app'); -
进行路由跳转: 在 Vue 组件中,可以使用
router-link组件进行声明式的导航,或者使用路由实例的编程式导航方法。-
声明式导航:
<!-- 在模板中使用 router-link 进行声明式导航 --> <router-link to="/">Home</router-link> | <router-link to="/about">About</router-link> <router-link :to="{name:'about'}">About</router-link> <router-link :to="{path:'about'}">About</router-link> -
编程式导航:
-
<button @click="goToAbout">跳转到关于页面</button>// 在方法中使用编程式导航 methods: { goToAbout() { // 使用路径跳转 this.$router.push('/about'); // 使用对象跳转 this.$router.push({name: 'about', query: {name: 'lqz', age: 99}}); this.$router.push({name: 'about', params: {id: 99}}) } }
-
vue - router使用
# 1 vue工程---》单页面应用--》页面跳转--》组件间跳转--》使用vue-router实现

# 2 基本使用
1.1 基本使用(页面组件路径,路由跳转)
# 1 安装
cnpm install -S vue-router
# 2 写router/index.js
import Vue from 'vue'
import VueRouter from 'vue-router'
import HomeView from '../views/HomeView.vue'
Vue.use(VueRouter) # 使用插件
const routes = [
    {
        path: '/',
        name: 'home',
        component: HomeView
    },
]

const router = new VueRouter({
    mode: 'history',
    base: process.env.BASE_URL,
    routes
})

export default router
# 3 main.js 中使用
new Vue({
    router,
    render: h => h(App)
}).$mount('#app')
# 3 使用了vue-router插件后
-html:全局组件:
-<router-view></router-view>  # 显示页面组件
-<router-link></router-link>  # 路由跳转【相当于a标签】
-js中:
this.$router  # 路由对象,路由跳转
this.$route   # 当前路由对象,跳转携带数据,从这里取出来

# 4 如果访问某个路径,显示某个组件
# App.vue中
<div id="app">
<router-view></router-view>
</div>
# router/index.js的routes注册路由
1.2 路由跳转–>携带数据
####### 跳转 #######
	-js跳转
    	this.$router.push(路径)
        this.$router.push(对象)
        	-this.$router.push({name:'路由别名'})
            -this.$router.push({path:'路径'})

    -组件跳转
    	<router-link to="/about">
        <router-link :to="{name:'路由别名'}">
        <router-link :to="{path:'路径'}">


##### 路由跳转,携带数据############
	-请求地址中以  ? 形式携带 ---》 /about?name=数据
    	#####router-link######
    	-router-link 组件携带
            - to="/about?name=lqz"
  			- :to="{name:'about',query:{name:'xxx',age:19}}"
		-在另一个页面组件中取:
        	this.$route.query
        #####js跳转######
        -js跳转 携带数据
        	-this.$router.push('/about?name=lqz&age=19')
            -this.$router.push({name: 'about', query: {name: 'xxx', age: 99}})
        -在另一个页面组件中取:
        	this.$route.query


    -请求地址中携带 --》/about/数据/
    	-必须在路由中写
        	  {
                path: '/about/:id/detail',
                name: 'about',
                component: AboutView
              },
       	-标签跳转
            -to="/about/88"
    		-:to="{name:'about',params:{id:66}}"
    	-js跳转
            this.$router.push('/about/tt')
      		this.$router.push({name: 'about', params: {id: 'xxx'}})
        -另一组件中取
        	this.$route.params
1.3 相关api
1 指的是:this.$router--->方法
2 常用的
this.$router.push(path): 相当于点击路由链接(可以返回到当前路由界面)
this.$router.replace(path): 用新路由替换当前路由(不可以返回到当前路由界面)
this.$router.back(): 请求(返回)上一个记录路由
this.$router.go(-1): 请求(返回)上一个记录路由
this.$router.go(1): 请求下一个记录路由
1.4 多级路由
####1 router/index.js
const routes = [
    {
        path: '/backend',
        name: 'home',
        component: HomeView,
        children: [ //通过children配置子级路由
            {
                path: 'index', //此处一定不要写:/news
                component: IndexView
            },
            {
                path: 'order',
                component: OrderView
            },
            {
                path: 'goods',
                component: GoodsView
            }
        ]
    },
    {
        path: '/about/:id',
        name: 'about',
        component: AboutView
    }


]


### HomeView.vue
<template>
  <div class="home">
    <div class="left">
      <router-link to="/backend/index"><p>首页</p></router-link>
      <router-link to="/backend/order"><p>订单管理</p></router-link>
      <router-link to="/backend/goods"><p>商品管理</p></router-link>
    </div>
    <div class="right">
      <router-view></router-view>
    </div>


  </div>
</template>

<script>


export default {
  name: 'HomeView',
  methods: {}


}
</script>

<style scoped>
.home {
  display: flex;
}

.left {
  height: 500px;
  width: 20%;
  background-color: aquamarine;
}

.right {
  height: 500px;
  width: 80%;
  background-color: gray;
}
</style>


#### IndexView,OrderView,GoodsView####
1.5 useRoute 和 useRouter
在 Vue 3 的项目中,useRoute 和 useRouter 这两个函数通常不会在 main.js 或 index.js(这取决于你的项目结构和命名约定)中直接定义,而是作为 Vue Router 的一部分,在需要使用它们的组件中按需导入。
main.js 或项目的入口文件通常是用来初始化 Vue 应用、配置路由、引入全局的插件或组件等。而 useRoute 和 useRouter 是在组件内部,特别是当使用 Composition API 的 setup() 函数时,用来访问路由信息的。
下面是一个更具体的例子来说明这些概念:
1. 在 main.js 或 index.js 中配置路由
首先,你需要在入口文件中配置 Vue Router。这通常是在 main.js 或 router/index.js 文件中完成的。
// router/index.js
import { createRouter, createWebHistory } from 'vue-router'
import Home from '../views/Home.vue'
import User from '../views/User.vue'

const routes = [
  {
    path: '/',
    name: 'Home',
    component: Home
  },
  {
    path: '/user/:id',
    name: 'User',
    component: User
  },
  // ... 其他路由
]

const router = createRouter({
  history: createWebHistory(process.env.BASE_URL),
  routes
})

export default router
2. 在组件中导入并使用 useRoute
然后,在需要使用路由信息的组件中,你可以导入 useRoute 并使用它。
// User.vue
<template>
  <div>
    <h1>User Page</h1>
    <p>User ID: {{ userId }}</p>
  </div>
</template>

<script>
import { useRoute } from 'vue-router'

export default {
  setup() {
    const route = useRoute()
    const userId = route.params.id // 访问路由参数

    // 返回响应式数据或方法给模板使用
    return {
      userId
    }
  }
}
</script>
在这个例子中,User.vue 组件导入了 useRoute,并在 setup() 函数中使用了它来获取当前路由的实例。然后,通过 route.params.id 访问了路由参数中的 id,并将其作为 userId 返回给模板使用。
总结
main.js或index.js(或其他入口文件)用于配置 Vue Router 和初始化路由。useRoute和useRouter是在组件内部,特别是使用 Composition API 的setup()函数时,用来访问路由信息的函数,它们需要在需要使用它们的组件中按需导入。
1.6 路由守卫
# 全局守卫、独享守卫、组件内守卫

# 是否登录,登录后才能访问,没登录重定向到login
//全局前置路由守卫————初始化的时候被调用、每次路由切换之前被调用
router.beforeEach((to, from, next) => {
    console.log('前置路由守卫', to, from)
    if (localStorage.getItem('name')) { //判断是否需要鉴权
        next()
    } else {
        alert('名不对,无权限查看!')
    }

})
1.7 路由两种工作模式
# 1 对于一个url来说,什么是hash值?—— # 及其后面的内容就是hash值。
# 2 hash值不会包含在 HTTP 请求中,即:hash值不会带给服务器。
# 3 hash模式:
    地址中永远带着#号,不美观 。
    若以后将地址通过第三方手机app分享,若app校验严格,则地址会被标记为不合法。
    兼容性较好。
# 4 history模式:
    地址干净,美观 。
    兼容性和hash模式相比略差。
    应用部署上线时需要后端人员支持,解决刷新页面服务端404的问题


