一、RequestMapping注解
@RequestMapping注解:是Spring MVC框架中的一个控制器映射注解,用于将请求映射到相应的处理方法上,具体来说,他可以将指定URL的请求绑定到一个特定的方法或类上,从而实现对请求的处理和响应。
1.RequestMapping的value属性
package com.pon;
import org.springframework.stereotype.Controller;
import org.springframework.web.bind.annotation.RequestMapping;
@Controller
public class Order {
    @RequestMapping(value = {"/e","/b"})
    public String o(){
        return "index";
    }
}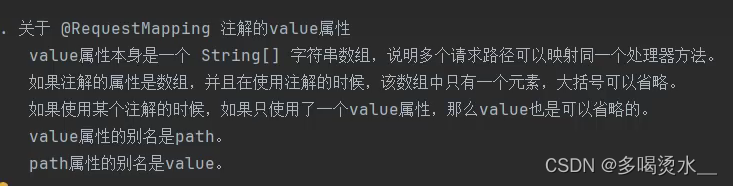
多个vlue属性在同一RequestMapping上,可以作为同一地址·。
控制类:
package com.pon;
import org.springframework.stereotype.Controller;
import org.springframework.web.bind.annotation.RequestMapping;
@Controller
public class Order {
    @RequestMapping(value = {"/e","/b"})
    public String o(){
        return "index";
    }
}
index.html:
<!DOCTYPE html>
<html lang="en">
<head>
    <meta charset="UTF-8">
    <title>Title</title>
</head>
<body>
<h1>你好</h1>
</body>
</html>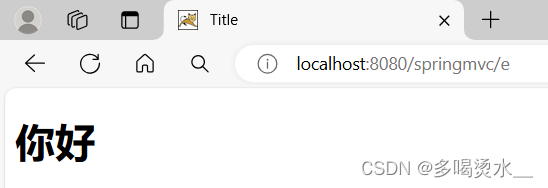

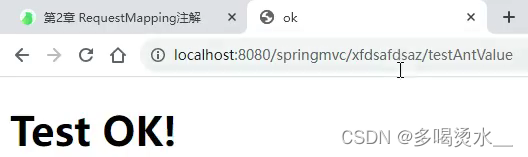
1)Ant风格的value


3)value使用占位符

URL使用RESTFul风格:
package com.pon;
import org.springframework.stereotype.Controller;
import org.springframework.web.bind.annotation.PathVariable;
import org.springframework.web.bind.annotation.RequestMapping;
@Controller
public class Order {
@RequestMapping(value = {"/e","/b"})
public String o(){
return "index";
}
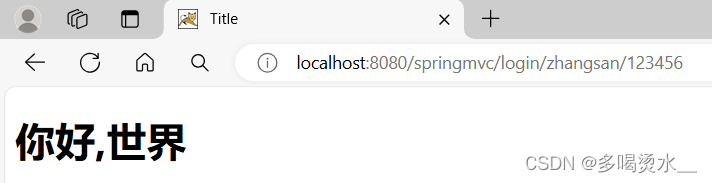
@RequestMapping(value = "/login/{username}/{password}")//value的占位符
public String log(
@PathVariable("username")
String username,
@PathVariable("password")
String password){
System.out.println("用户名"+username+"密码"+password);
return "index";
}
}
处理器端:
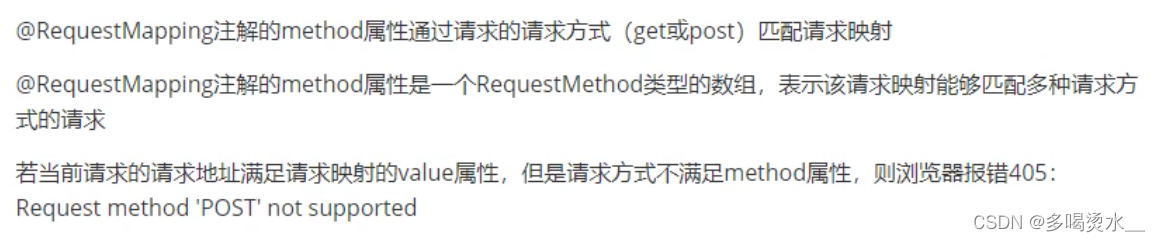
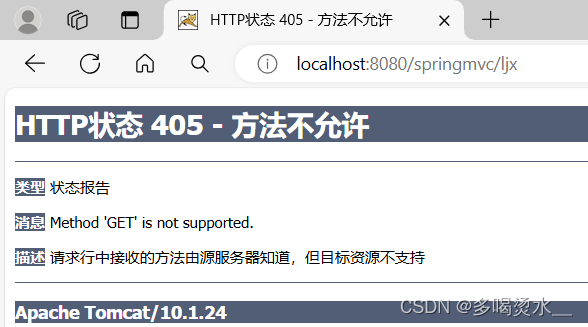
2.RequestMapping的method属性
超链接发送的请求方式为get请求。
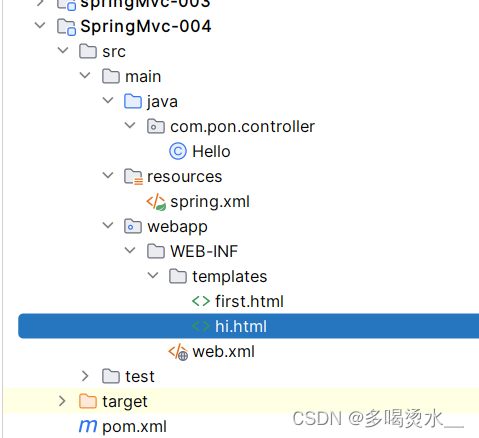
在controller包下的Hello类:
package com.pon.controller;
import org.springframework.stereotype.Controller;
import org.springframework.web.bind.annotation.RequestMapping;
import org.springframework.web.bind.annotation.RequestMethod;

@Controller
public class Hello {
    @RequestMapping("/")
    public String first(){
        return "first";
    }
     //请求映射只支持post请求
    @RequestMapping(value = {"/ljx"},method = {RequestMethod.POST})
    public String hello(){
        return "hi";
    }
}
first.xml:
<!DOCTYPE html>
<html lang="en" xmlns:th="http://www.thymeleaf.org">
<head>
    <meta charset="UTF-8">
    <title>Title</title>
</head>
<body>
<h1>首页</h1>
<a th:href="@{/ljx}">Hello界面</a>
</body>
</html>
hi.xml:
<!DOCTYPE html>
<html lang="en">
<head>
    <meta charset="UTF-8">
    <title>Title</title>
</head>
<body>
<h1>你好 MVC</h1>
</body>
</html>
@RequestMapping的派生注解
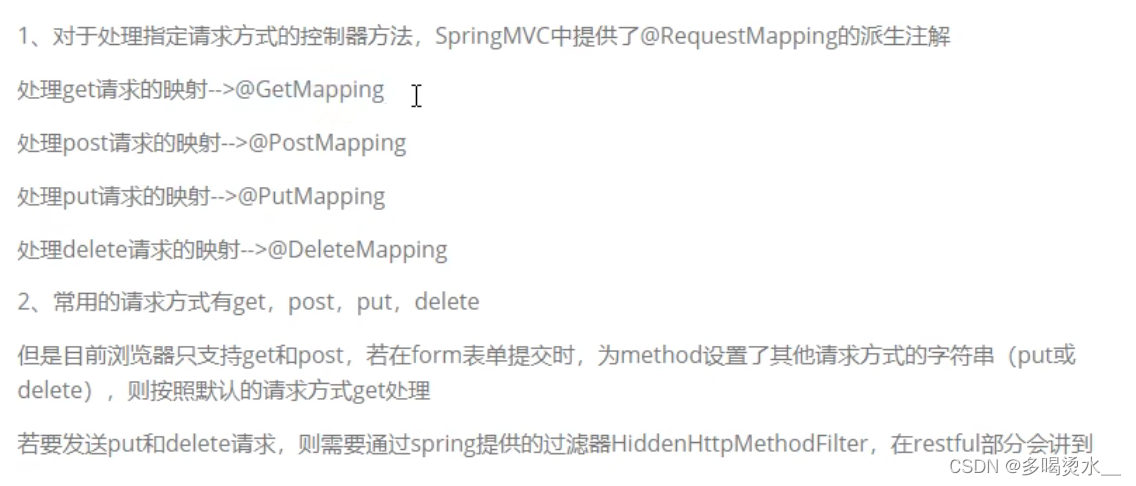
验证GetMapping()
在controller包下的Hello类:
@Controller
public class Hello {
    @RequestMapping("/")
    public String first(){
        return "first";
    }
    @RequestMapping(value = {"/ljx"},method = {RequestMethod.POST})
    public String hello(){
        return "hi";
    }
    @GetMapping("/get")
    public String getMapping(){
        return "hi";
    }
}
first.xml:
<!DOCTYPE html>
<html lang="en" xmlns:th="http://www.thymeleaf.org">
<head>
    <meta charset="UTF-8">
    <title>Title</title>
</head>
<body>
<h1>首页</h1>
<a th:href="@{/lix}">Hello界面</a>
<a th:href="@{/get}">Get界面</a>
</body>
</html>
hi.xml:
<!DOCTYPE html>
<html lang="en">
<head>
    <meta charset="UTF-8">
    <title>Title</title>
</head>
<body>
<h1>你好 MVC</h1>
</body>
</html>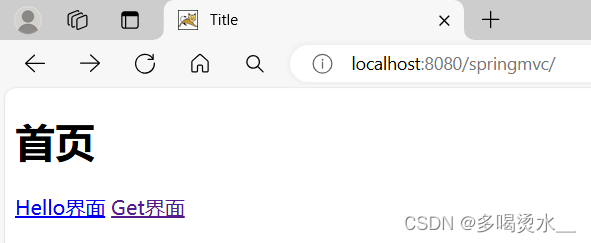

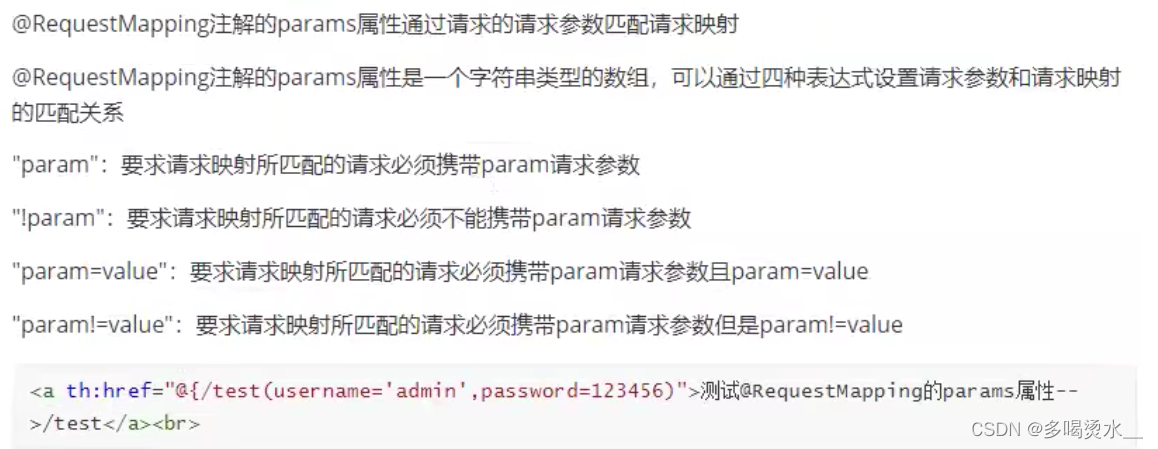
3.RequestMapping的params属性
params在requestmapping中赋值和method在同一位置。
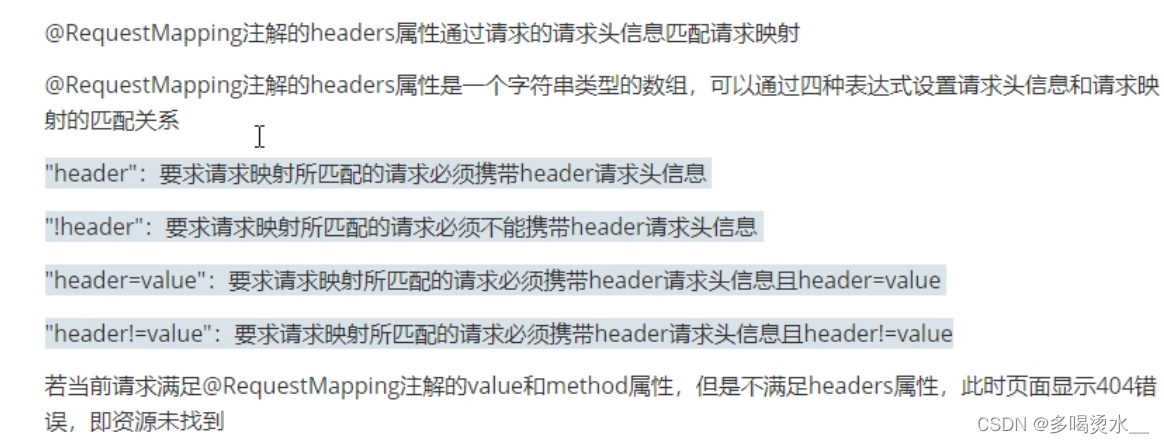
4.RequestMapping的headers属性
 二、SpringMvc获取请求参数
1通过ServletAPI获取

testContorller类下:
package com.pon.controller;
import jakarta.servlet.http.HttpServletRequest;
import org.springframework.stereotype.Controller;
import org.springframework.web.bind.annotation.RequestMapping;
@Controller
public class TestController {
   @RequestMapping("/parama")
    public String test(HttpServletRequest request){
      String s= request.getParameter("username");
      String r= request.getParameter("password");
      System.out.println("name="+s+",password="+r);
      return "test";
   }
}
先访问首页的first.html:
<!DOCTYPE html>
<html lang="en" xmlns:th="http://www.thymeleaf.org">
<head>
<meta charset="UTF-8">
<title>Title</title>
</head>
<body>
<h1>首页</h1>
<form th:action="@{/format}">
<input type="submit" value="表单"><br>
</form>
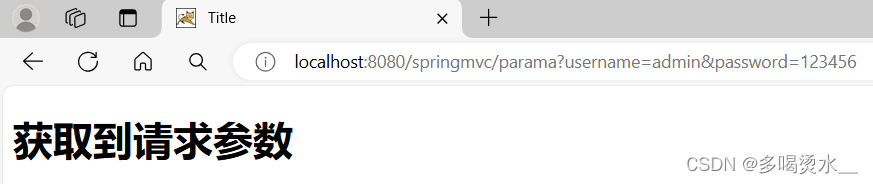
<a th:href="@{/parama(username='admin',password=123456)}">获取请求参数</a>
</body>
</html>test.html:
<!DOCTYPE html>
<html lang="en">
<head>
    <meta charset="UTF-8">
    <title>Title</title>
</head>
<body>
<h1>获取到请求参数</h1>
</body>
</html>

2通过控制器方法的形参获取请求参数
testContorller类下:
@Controller
public class TestController {
@RequestMapping("/testparam")
   public String testparam( String username,  String password){
       System.out.println("username"+username+"password"+password);
       return "hi";
   }
}
first.html页面中调用/testparam路径:
<!DOCTYPE html>
<html lang="en" xmlns:th="http://www.thymeleaf.org">
<head>
    <meta charset="UTF-8">
    <title>Title</title>
</head>
<body>
<h1>首页</h1>
<form th:action="@{/format}">
    <input type="submit" value="表单"><br>
</form>
<a th:href="@{/parama(username='admin',password=123456)}">获取请求参数</a>
<a th:href="@{/testparam(username='adminmm',password=1234)}">控制器方法获取请求参数</a>
</body>
</html>
hi.html:
<!DOCTYPE html>
<html lang="en">
<head>
    <meta charset="UTF-8">
    <title>Title</title>
</head>
<body>
<h1>你好 MVC</h1>
</body>
</html>


3@RequestParam

当HTML中的属性名与获取请求参数中的名字不一样,需要使用@RequestParam。
例如:
在控制器类中:
@Controller
public class TestController {
@RequestMapping("/testparam")
   public String testparam( String username,  String password){
       System.out.println("username:"+username+",password:"+password);
       return "hi";
   }
}
首页first.html界面:
<a th:href="@{/testparam(usern='adminmm',password=1234)}">控制器方法获取请求参数</a><br> 、
、
当参数不一样时,页面可以正常访问,但控制台获取不到参数。
解决方案,在控制类的构造函数上,添加@RequestParam注解,其他参数不变。
@Controller
public class TestController {
@RequestMapping("/testparam")
   public String testparam(@RequestParam("usern")String username, String password){
       System.out.println("username:"+username+",password:"+password);
       return "hi";
   }
}
4@RequsetHeader
请求头信息其实就是:localhost:8080

5@CookieValue

6通过实体类形参获取请求参数
在首页first.html中定义一个表单:
<!DOCTYPE html>
<html lang="en" xmlns:th="http://www.thymeleaf.org">
<head>
    <meta charset="UTF-8">
    <title>Title</title>
</head>
<body>
<h1>首页</h1>
<form th:action="@{/pojo}" method="post">
    用户名:<input type="text" name="username"><br>
    密码  :<input type="password" name="password"><br>
    性别:<input type="radio" name="sex" value="男">男<input type="radio" name="sex" value="女">女<br>
    年龄:<input type="text" name="age"><br>
    <input type="submit" value="实体类请求参数">
</form>
</body>
</html>
根据表单的属性创建一个实体类对象User:
package com.pon.pojo;
public class User {
    private String username;
    private String password;
    private String sex;
    private Integer age;
    public User() {
    }
    public User(String username, String password, String sex, Integer age) {
        this.username = username;
        this.password = password;
        this.sex = sex;
        this.age = age;
    }
    public String getUsername() {
        return username;
    }
    public void setUsername(String username) {
        this.username = username;
    }
    public String getPassword() {
        return password;
    }
    public void setPassword(String password) {
        this.password = password;
    }
    public String getSex() {
        return sex;
    }
    public void setSex(String sex) {
        this.sex = sex;
    }
    public Integer getAge() {
        return age;
    }
    public void setAge(Integer age) {
        this.age = age;
    }
    @Override
    public String toString() {
        return "User{" +
                "username='" + username + '\'' +
                ", password='" + password + '\'' +
                ", sex='" + sex + '\'' +
                ", age=" + age +
                '}';
    }
}
在控制类中写访问页面的路径:
@Controller
public class TestController {
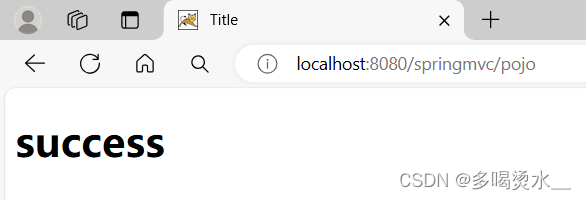
@RequestMapping("/pojo")
public String Pojo(User user){
System.out.println(user);
return "hi";
}
}
hi.xml:
<!DOCTYPE html>
<html lang="en">
<head>
    <meta charset="UTF-8">
    <title>Title</title>
</head>
<body>
<h1>success</h1>
</body>
</html>