1.@State组件介绍
首先定义 @State为鸿蒙开发的一个状态组件,当它修饰的组件发生改变时,UI也会相应的刷新,简单介绍就是这样,下面我们用代码去体会一下。
2.定义DeliverParam类
首先定义一个模型类,类里面定义一个构造函数,即constructor方法,这个方法主要是初始化类的成员变量,给成变量赋值。
class DeliverParam {
  public value: string;

  constructor(value: string) {
    this.value = value;
  }
}
3.自定义MySate组件
用于调用DeliverParam类,并且初始化成员变量value,并且用@state修饰count计数器,通过点击按钮来观察数值的变化。
@Component
struct MySate {
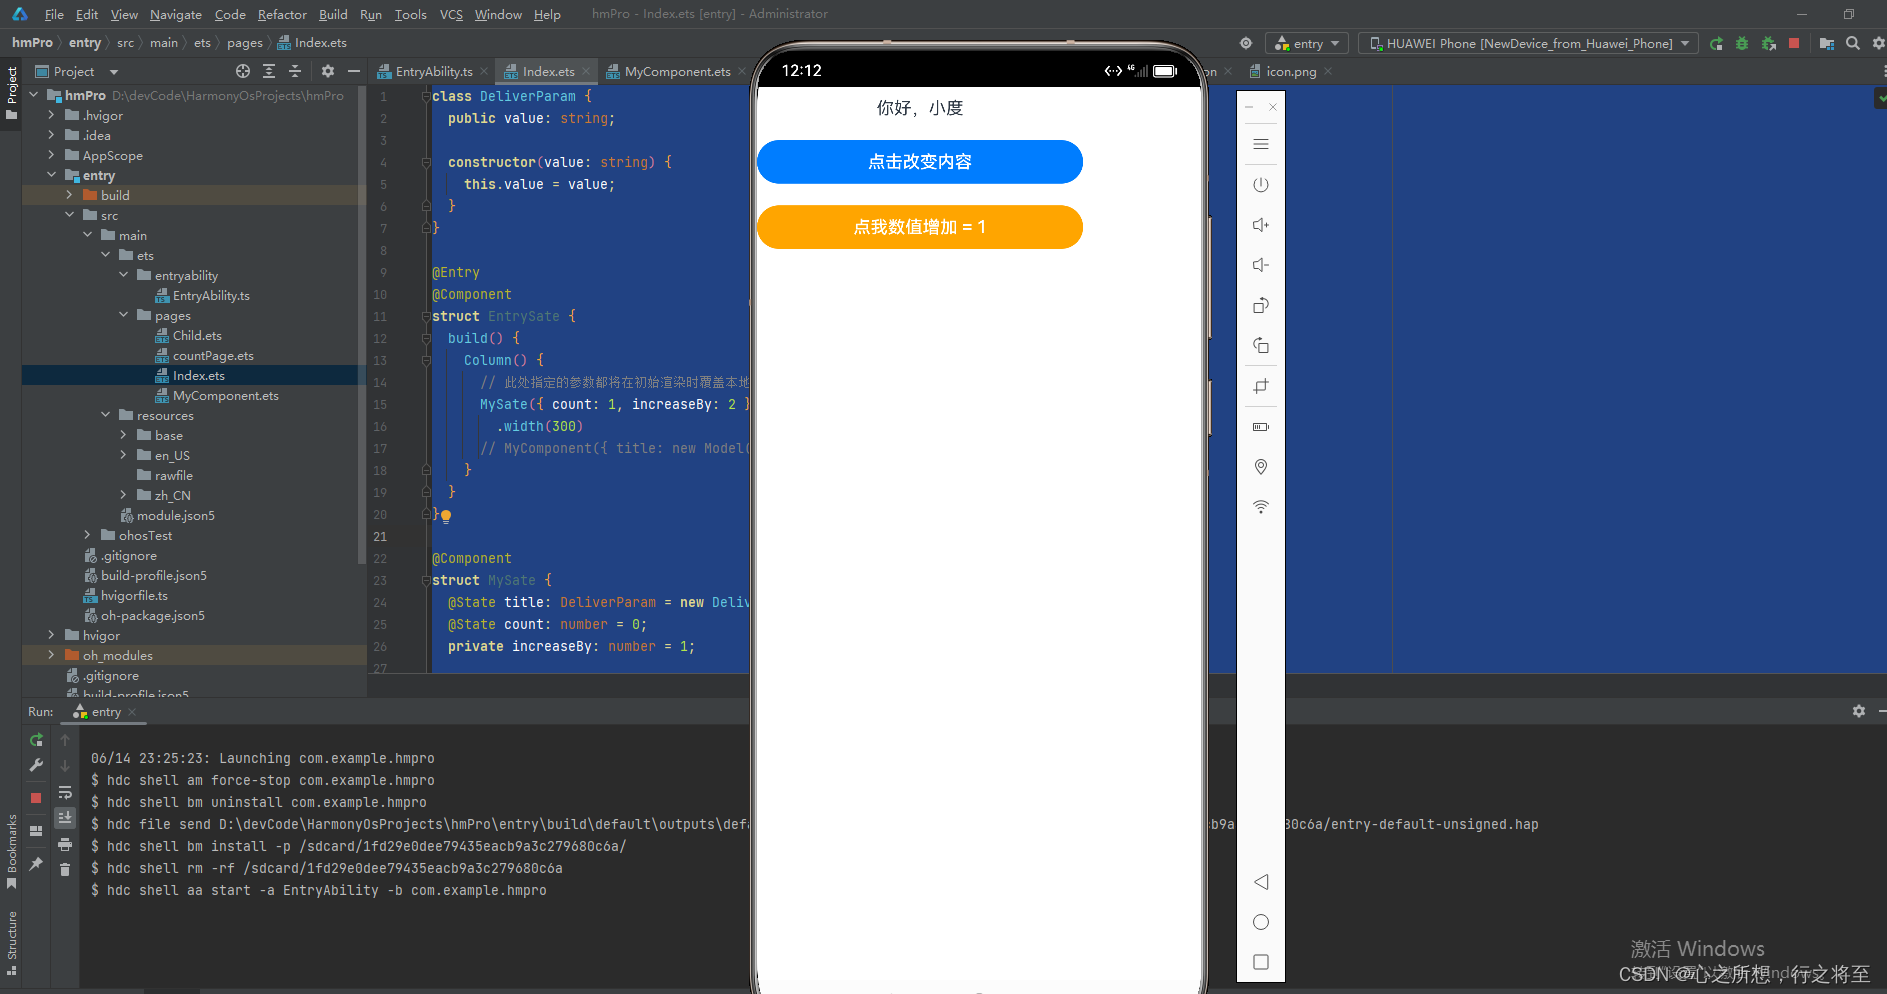
@State title: DeliverParam = new DeliverParam('你好,小度');
@State count: number = 0;
private increaseBy: number = 1;
build() {
Column() {
Text(`${this.title.value}`)
.margin(10)
Button(`点击改变内容`)
.onClick(() => {
// @State变量的更新将触发上面的Text组件内容更新
this.title.value = this.title.value === '你好,小度' ? '我在' : '你好,小度';
})
.width(300)
.margin(10)
Button(`点我数值增加 = ${this.count}`)
.onClick(() => {
// @State变量的更新将触发该Button组件的内容更新
this.count += this.increaseBy;
})
.width(300)
.margin(10)
.backgroundColor( Color.Orange)
}
}
}4.定义入口类,调用MySate组件,监听被修饰的DeliverParam的成员value值和count值的变化。
@Entry
@Component
struct EntrySate {
  build() {
    Column() {
      // 此处指定的参数都将在初始渲染时覆盖本地定义的默认值,并不是所有的参数都需要从父组件初始化
      MySate({ count: 1, increaseBy: 2 })
        .width(300)
      // MyComponent({ title: new Model('Hello World 2'), count: 7 })
    }
  }
}
5.完整代码如下:
class DeliverParam {
  public value: string;

  constructor(value: string) {
    this.value = value;
  }
}

@Entry
@Component
struct EntrySate {
  build() {
    Column() {
      // 此处指定的参数都将在初始渲染时覆盖本地定义的默认值,并不是所有的参数都需要从父组件初始化
      MySate({ count: 1, increaseBy: 2 })
        .width(300)
      // MyComponent({ title: new Model('Hello World 2'), count: 7 })
    }
  }
}

@Component
struct MySate {
  @State title: DeliverParam = new DeliverParam('你好,小度');
  @State count: number = 0;
  private increaseBy: number = 1;

  build() {
    Column() {
      Text(`${this.title.value}`)
        .margin(10)
      Button(`点击改变内容`)
        .onClick(() => {
          // @State变量的更新将触发上面的Text组件内容更新
          this.title.value = this.title.value === '你好,小度' ? '我在' : '你好,小度';
        })
        .width(300)
        .margin(10)

      Button(`点我数值增加 = ${this.count}`)
        .onClick(() => {
          // @State变量的更新将触发该Button组件的内容更新
          this.count += this.increaseBy;
        })
        .width(300)
        .margin(10)
        .backgroundColor( Color.Orange)
    }
  }
}
6.总结:通过上述观察不难发现,@sate既可以绑定某个类,也可以绑定某个值,既可通过父类影响子类,也可以通过子类影响父类的变化。
7.下面是运行效果。