Cesium加载本地影像+地形
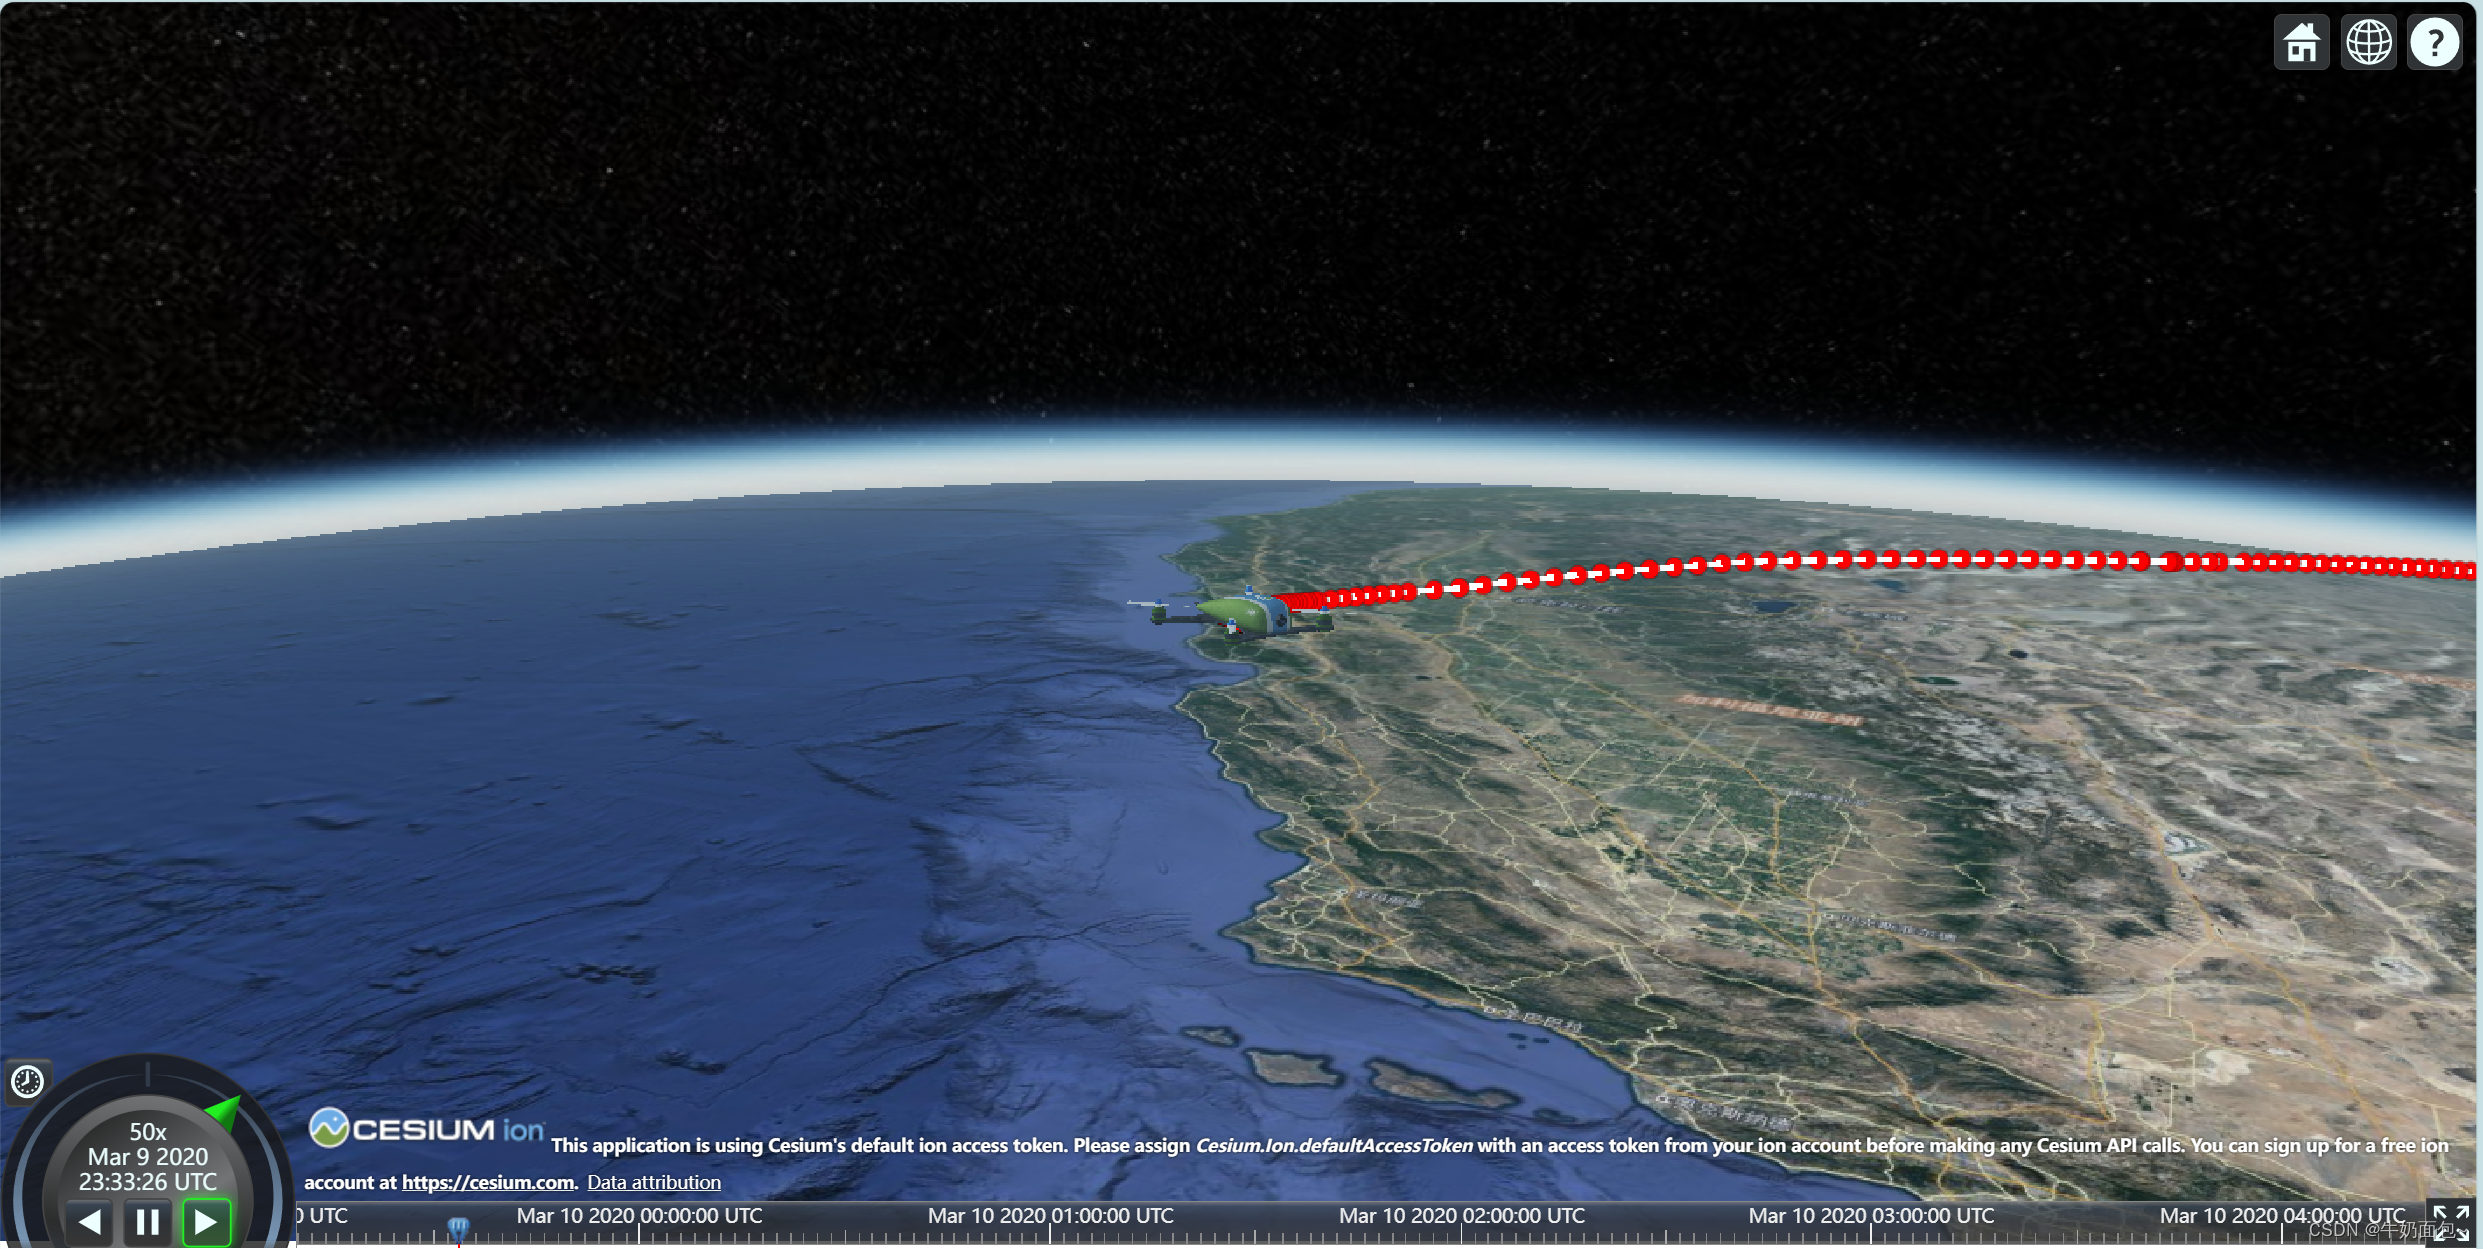
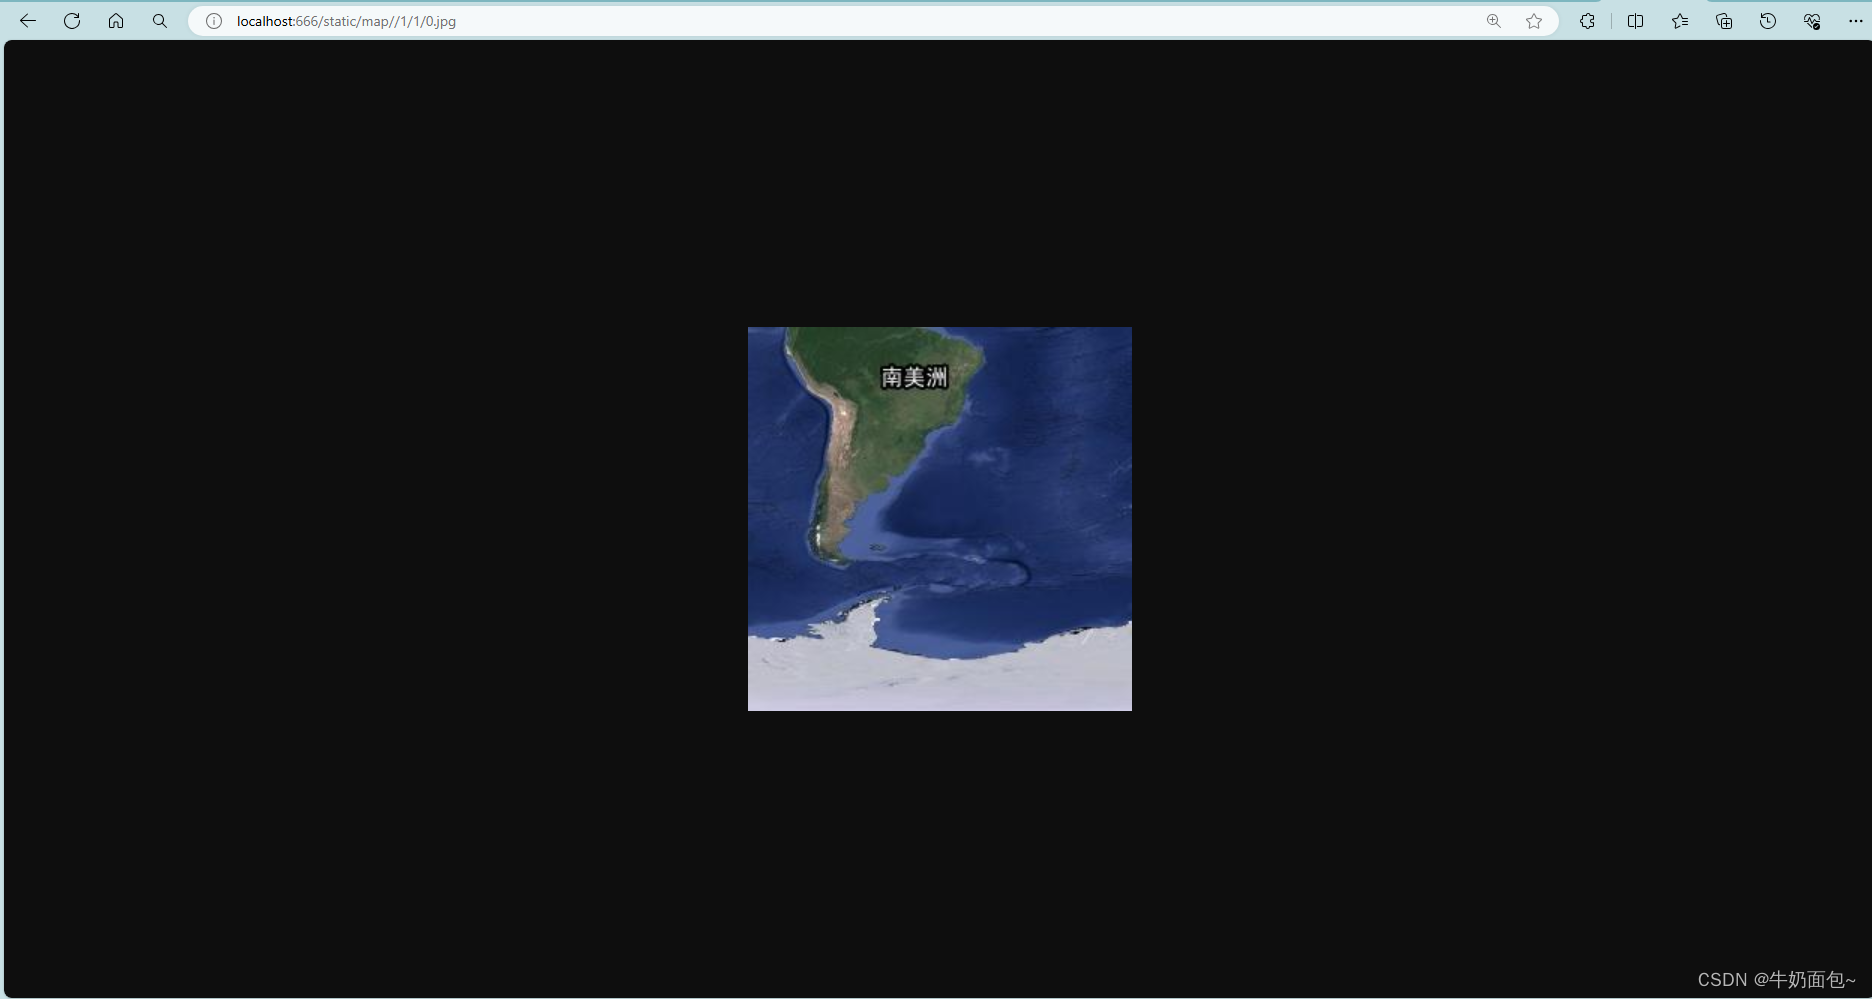
本教程记录的是小白从0-1搭建本地cesium服务的过程,踩的各种坑通过查找资料都一一填补,最终达到的效果是在本地上能够跑官网飞机航线的例子。效果如下:
主要流程如下:
- 1、下载离线地图和地形
- 2、nginx部署静态文件
- 3、cesium调用本地影像和地形
1、下载离线地图和地形
全网各种影像、地形下载器要么是收费,要么不好用,要么下载下来带水印。在github上大海捞针,找到了珍贵的,免费的!!完整的!!全球影像地图!!直接上链接。
感谢这位同性交友网名为sunhongyue4500的博主:影像地形下载链接
2、nginx部署静态文件
官网上下载nginx,然后把下载好的离线影像和地形放在html文件夹里面。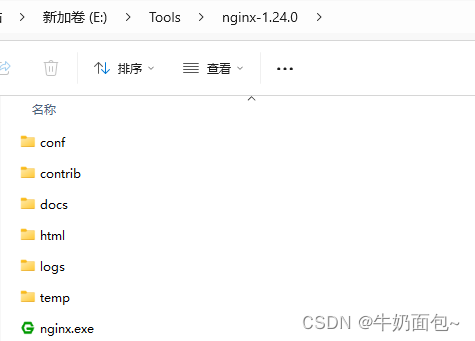
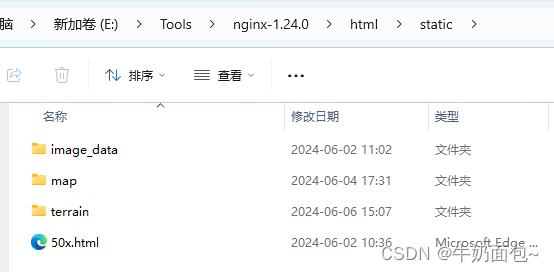
顺着nginx的目录文件,我在html里面新建了一个static文件夹,然后放在里面。
然后配置./nginx/conf/nginx.conf文件
server {
        listen       666;
        server_name  localhost;
        #charset koi8-r;
        #access_log  logs/host.access.log  main;
        location / {
            root   html;
	    	index  index.html index.htm;
        }
		location /static/ {
		alias E:/Tools/nginx-1.24.0/html/static/;
		add_header Access-Control-Allow-Origin *;
		#autoindex on;
        #autoindex_localtime on;
		#index 0.png;
	}
实际上这里不需要配置/static/ 也可以,直接按照文件夹的目录来寻址也可。能按照如下地址访问得到,说明已经发布成功^ ~ ^
3、cesium调用
- cesium支持的坐标系有两个,分别是WGS64(EPSG:4326)和墨卡托(EPSG:3785),而瓦片服务有TMS和TWMS两种,
- 需要注意的是,cesiums默认TWMS服务,默认的是Mercator坐标系切片,至于这两者的切片区别参考:https://blog.csdn.net/weixin_43336525/article/details/134926608WMS
- 在Cesium中,如果你使用的坐标系为EPSG:4326(即WGS84经纬度坐标系),而瓦片服务遵循TMS(Tile Map Service)规范,确实需要注意瓦片的行列坐标与Cesium默认的Web Mercator投影下的瓦片坐标不一致。TMS规范中,y坐标是从南向北递增的,而Web Mercator下是从北向南递增的,这通常会导致瓦片显示混乱。
- 所以需要reverseY,这样就ok了。所以本质上还是要探索坐标系(EPSG:4326、EPSG:3758)、瓦片服务(TMS、WMTS)这两者,就可以对其进行修改。
总之这里使用reverseY而不是y,原因是我的地图瓦片服务是WMS
其次后台我使用了nginx部署静态资源
参考1
参考2
完整代码:
<!DOCTYPE html>
<html lang="en">
  <head>
    <meta charset="UTF-8" />
    <meta name="viewport" content="width=device-width, initial-scale=1.0" />
    <title>cesium第一课</title>
    <script src="../lib/Cesium/Cesium.js"></script>
    <link href="../lib/Cesium/Widgets/widgets.css" rel="stylesheet" />
    <style>
      html,
      body {
        margin: 0px;
        padding: 0px;
      }
    </style>
  </head>
  <body>
    <div id="zk-cesiumContainer"></div>
    <script>
      // 影像图
      const custom = new Cesium.UrlTemplateImageryProvider({
        // url: "http://127.0.0.1:666/static/image_data/{z}/{x}/{y}.png",
        url: "http://127.0.0.1:666/static/map/{z}/{x}/{reverseY}.jpg",

        tilingScheme: new Cesium.GeographicTilingScheme(),
      });
      // 地形
      const terrainLayer = new Cesium.CesiumTerrainProvider({
        url: "http://127.0.0.1:666/static/terrain/",
        requestVertexNormals: true, // 请求照明
        requestWaterMask: true, // 请求水波纹效果
      });

      // 下一步:部署离线地形!!
      var viewer = new Cesium.Viewer("zk-cesiumContainer", {
        // imageryProvider: custom,
        // terrainProvider: terrainLayer,
        baseLayerPicker: false,
        geocoder: false,
      });

      // 整合资源
      viewer.imageryLayers.addImageryProvider(custom);
      // viewer.terrainProvider = terrainLayer
      // viewer.terrainExaggeration = 1

      fetch("../resources/radar_airline.json")
        .then((response) => {
          // 首先检查响应是否成功
          if (!response.ok) {
            throw new Error("Network response was not ok");
          }
          return response.json(); // 解析 JSON 数据
        })
        .then((data) => {
          // 此时 data 就是解析后的 JSON 数据

          const flightData = data;
          console.log(flightData);

          const timeStepInSeconds = 30; // 每隔30s取一个radar点
          const totalSeconds = timeStepInSeconds * (flightData.length - 1);
          const start = Cesium.JulianDate.fromIso8601("2020-03-09T23:10:00Z");
          const stop = Cesium.JulianDate.addSeconds(
            start,
            totalSeconds,
            new Cesium.JulianDate()
          );
          viewer.clock.startTime = start.clone();
          viewer.clock.stopTime = stop.clone();
          viewer.clock.currentTime = start.clone();
          viewer.timeline.zoomTo(start, stop);
          // Speed up the playback speed 50x.
          viewer.clock.multiplier = 50;
          // Start playing the scene.
          viewer.clock.shouldAnimate = true;

          // The SampledPositionedProperty stores the position and timestamp for each sample along the radar sample series.
          const positionProperty = new Cesium.SampledPositionProperty();

          for (let i = 0; i < flightData.length; i++) {
            const dataPoint = flightData[i];

            // Declare the time for this individual sample and store it in a new JulianDate instance.
            const time = Cesium.JulianDate.addSeconds(
              start,
              i * timeStepInSeconds,
              new Cesium.JulianDate()
            );
            const position = Cesium.Cartesian3.fromDegrees(
              dataPoint.longitude,
              dataPoint.latitude,
              dataPoint.height
            );
            // Store the position along with its timestamp.
            // Here we add the positions all upfront, but these can be added at run-time as samples are received from a server.
            positionProperty.addSample(time, position);

            viewer.entities.add({
              description: `Location: (${dataPoint.longitude}, ${dataPoint.latitude}, ${dataPoint.height})`,
              position: position,
              point: { pixelSize: 10, color: Cesium.Color.RED },
            });
          }

          // STEP 4 CODE (green circle entity)
          // Create an entity to both visualize the entire radar sample series with a line and add a point that moves along the samples.
          async function loadModel() {
            // Load the glTF model from Cesium ion.
            const airplaneEntity = viewer.entities.add({
              availability: new Cesium.TimeIntervalCollection([
                new Cesium.TimeInterval({ start: start, stop: stop }),
              ]),
              position: positionProperty,
              // Attach the 3D model instead of the green point.
              model: {
                uri: "../resources/CesiumDrone.glb",
                minimumPixelSize: 128,
                maximumScale: 20000,
              },
              // Automatically compute the orientation from the position.
              orientation: new Cesium.VelocityOrientationProperty(
                positionProperty
              ),
              path: new Cesium.PathGraphics({ width: 3 }),
            });
            viewer.trackedEntity = airplaneEntity;
          }

          loadModel();
        })
        .catch((error) => {
          // 处理任何在请求或解析过程中发生的错误
          console.error(
            "There has been a problem with your fetch operation:",
            error
          );
        });
    </script>
  </body>
</html>


![[office] excel表格中双击鼠标左键有什么快捷作用- #经验分享#媒体](https://img-blog.csdnimg.cn/img_convert/7a4a60abf7bd144b6b85b8a69cba98ab.jpeg)