项目背景
按照istio官网的命令一路安装下来,安装好的istio版本为目前的最新版本,1.22.0。而我的k8s集群的版本并不支持istio_1.22的版本,导致ingress-gate网关安装不上,再仔细查看istio的发布文档,如果用istio_1.22版本,k8s的版本至少也得是1.27。与其升级k8s,我还是换掉istio的版本。
# istioctl version
client version: 1.22.0
control plane version: 1.22.0
data plane version: none

# kubectl version
Client Version: version.Info{Major:"1", Minor:"23", GitVersion:"v1.23.4", GitCommit:"e6c093d87ea4cbb530a7b2ae91e54c0842d8308a", GitTreeState:"clean", BuildDate:"2022-02-16T12:38:05Z", GoVersion:"go1.17.7", Compiler:"gc", Platform:"linux/amd64"}
Server Version: version.Info{Major:"1", Minor:"23", GitVersion:"v1.23.4", GitCommit:"e6c093d87ea4cbb530a7b2ae91e54c0842d8308a", GitTreeState:"clean", BuildDate:"2022-02-16T12:32:02Z", GoVersion:"go1.17.7", Compiler:"gc", Platform:"linux/amd64"}
1.安装istio_1.17.8
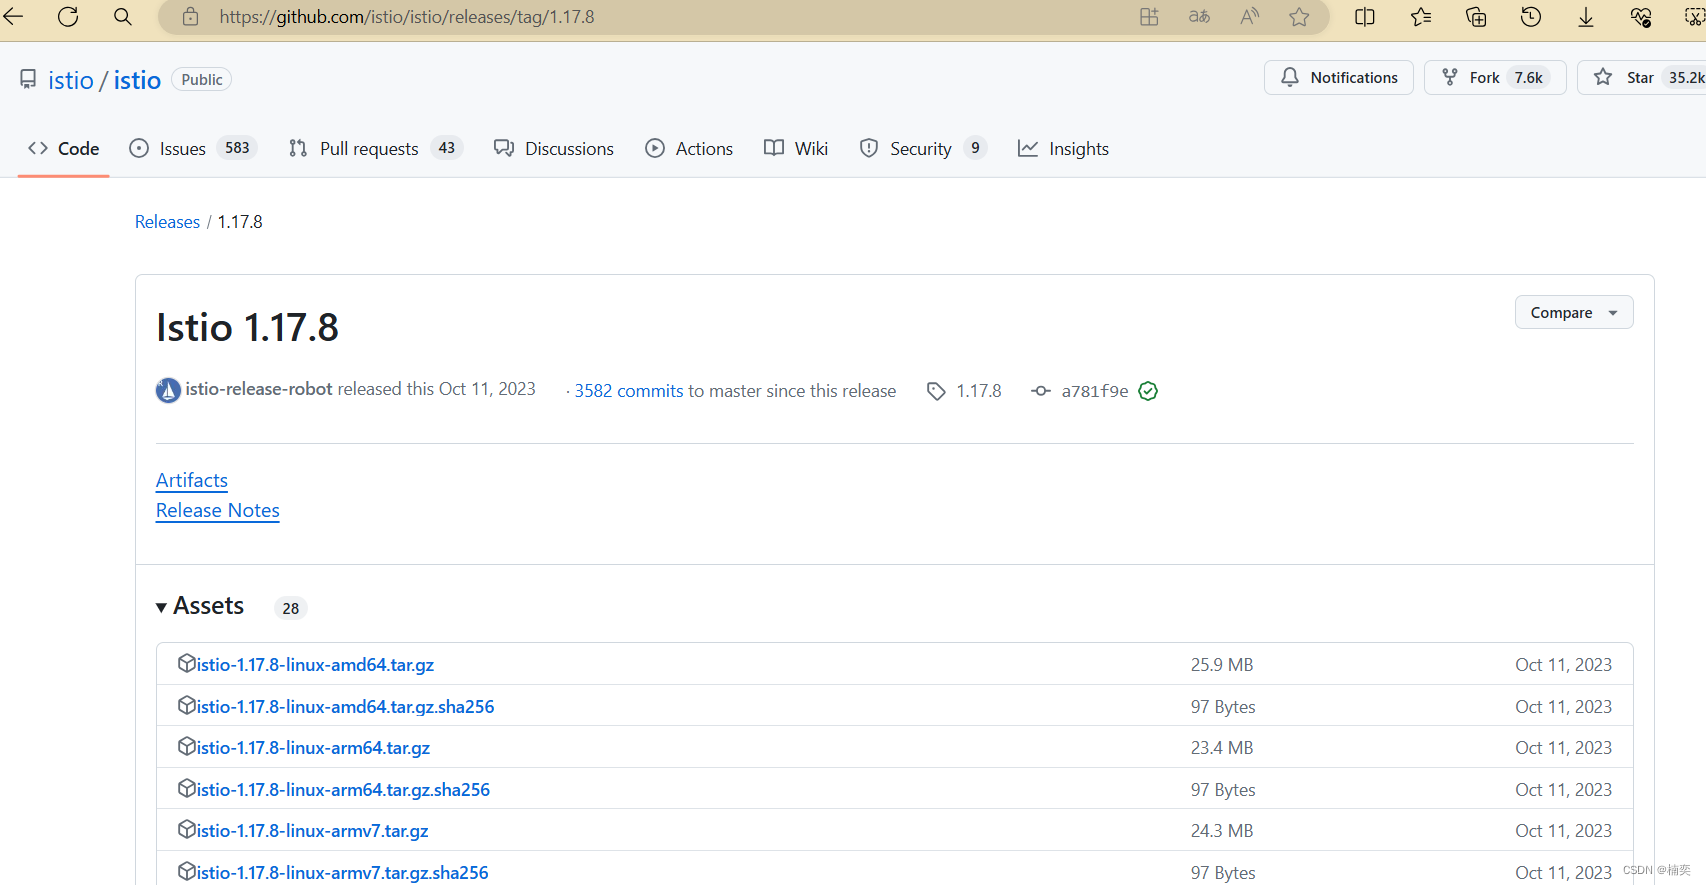
查看istio的支持版本,1.17.8是17版本最后一次更新,也正好适配我目前的k8s版本。
1.1下载地址
Release Istio 1.17.8 · istio/istio · GitHub
1.2上传并解压
# ll
-rw-r--r-- 1 root root 27127663 Jun  5 16:25 istio-1.17.8-linux-amd64.tar.gz
1.3 新增环境变量
# cat /etc/profile
...
export PATH=/usr/local/openssh-8.5p1/sbin:/usr/local/openssh-8.5p1/bin:$PATH
export KUBECONFIG=/etc/kubernetes/admin.conf
export PATH=/home/root/k8s/istio_test/install/istio-1.17.8/bin/:$PATH
#export PATH=/home/root/k8s/istio_test/install/istio-1.22.0/bin:$PATH
source /etc/profile
# istioctl version
client version: 1.17.8
control plane version: 1.22.0
data plane version: 0
1.4 install
# istioctl install --set profile=demo -y
WARNING: Istio control planes installed: 1.22.0.
WARNING: An older installed version of Istio has been detected. Running this command will overwrite it.
✔ Istio core installed
- Processing resources for Istiod. Waiting for Deployment/istio-system/istiod                                                                                    ^C
[foot@host-10-19-83-151 istio-1.17.8]$ istioctl install --set profile=demo -y -n bookinfo
WARNING: Istio control planes installed: 1.22.0.
WARNING: An older installed version of Istio has been detected. Running this command will overwrite it.
✔ Istio core installed
✔ Istiod installed
- Processing resources for Egress gateways, Ingress gateways. Waiting for Deployment/istio-system/istio-egressgateway, Deployment/istio-system/istio-ingressga...
✔ Egress gateways installed
✔ Ingress gateways installed
✔ Installation complete                                                                                                                                          Making this installation the default for injection and validation.

Thank you for installing Istio 1.17.  Please take a few minutes to tell us about your install/upgrade experience!  https://forms.gle/hMHGiwZHPU7UQRWe9
查看pod情况
# kubectl get po -A
NAMESPACE              NAME                                         READY   STATUS    RESTARTS      AGE
ingress-nginx          nginx-deployment-64d5f7665c-56cpz            1/1     Running   0             22d
ingress-nginx          nginx-ingress-controller-7cfc988f46-cszsd    1/1     Running   0             22d
istio-system           istio-egressgateway-85df6b84b7-hjlbx         1/1     Running   0             92s
istio-system           istio-ingressgateway-6bb8fb6549-wcgqq        1/1     Running   0             92s
istio-system           istiod-8d74787f-bckft                        1/1     Running   0             2m37s
再次查看版本
# istioctl version
client version: 1.17.8
control plane version: 1.17.8
data plane version: 1.17.8 (2 proxies)
2.部署demo
2.1.1 准备
给这些示例服务创建一个命名空间。
kubectl create namespace bookinfo给命名空间添加 Istio 的标签,指示 Istio 在部署应用(只对 Pod 起效)的时候,自动注入 Envoy Sidecar Proxy 容器:
kubectl label namespace bookinfo istio-injection=enabled开启让 Istio 注入 Sidecar 有很多种方式,其中一种是给命名空间设置下标签,在此命名空间下部署的 Pod,会被自动注入 Sidecar 。
demo是官方提供的demo,bookinfo
文件位置:https://github.com/whuanle/istio_book/tree/main/3。
仓库拉取后打开 3 目录,执行命令进行部署:
# ll
total 68
-rw-rw-r-- 1 root root 598 Jun  5 15:14 details_deploy.yaml
-rw-rw-r-- 1 root root 108 Jun  5 15:14 details_sa.yaml
-rw-rw-r-- 1 root root 190 Jun  5 15:14 details_svc.yaml
-rw-rw-r-- 1 root root 278 Jun  5 15:14 ingress_gateway.yaml
-rw-rw-r-- 1 root root 754 Jun  5 15:14 productpage_deploy.yaml
-rw-rw-r-- 1 root root 116 Jun  5 15:14 productpage_sa.yaml
-rw-rw-r-- 1 root root 206 Jun  5 15:14 productpage_svc.yaml
-rw-rw-r-- 1 root root 227 Jun  5 15:14 productpage_tmpsvc.yaml
-rw-rw-r-- 1 root root 466 Jun  5 15:14 productpage_vs.yaml
-rw-rw-r-- 1 root root 598 Jun  5 15:14 ratings_deploy.yaml
-rw-rw-r-- 1 root root 108 Jun  5 15:14 ratings_sa.yaml
-rw-rw-r-- 1 root root 190 Jun  5 15:14 ratings_svc.yaml
-rw-rw-r-- 1 root root 108 Jun  5 15:14 reviews_sa.yaml
-rw-rw-r-- 1 root root 190 Jun  5 15:14 reviews_svc.yaml
-rw-rw-r-- 1 root root 913 Jun  5 15:14 reviews_v1_deploy.yaml
-rw-rw-r-- 1 root root 913 Jun  5 15:14 reviews_v2_deploy.yaml
-rw-rw-r-- 1 root root 913 Jun  5 15:14 reviews_v3_deploy.yaml
既然不能一次都执行了,那就一个一个yaml命令执行吧。
2.1.2 detail
Detail:存储了书籍信息的应用。
1.使用 Deployment 部署 details 应用。
2.为 details 服务配置 Kubernetes Service 。
3.为 details 服务创建一个 ServiceAccount。
$ kubectl apply -f *.yaml
error: Unexpected args: [details_sa.yaml details_svc.yaml ingress_gateway.yaml productpage_deploy.yaml productpage_sa.yaml productpage_svc.yaml productpage_tmpsvc.yaml productpage_vs.yaml ratings_deploy.yaml ratings_sa.yaml ratings_svc.yaml reviews_sa.yaml reviews_svc.yaml reviews_v1_deploy.yaml reviews_v2_deploy.yaml reviews_v3_deploy.yaml]
See 'kubectl apply -h' for help and examples

# kubectl apply -f details_*.yaml
error: Unexpected args: [details_sa.yaml details_svc.yaml]
See 'kubectl apply -h' for help and examples

# kubectl apply -f details_deploy.yaml -n bookinfo
deployment.apps/details-v1 created
# kubectl apply -f details_sa.yaml  -n bookinfo
serviceaccount/bookinfo-details created
# kubectl apply -f details_svc.yaml -n bookinfo
service/details created

# kubectl get po  -n bookinfo
NAME                          READY   STATUS    RESTARTS   AGE
details-v1-698b5d8c98-bnd52   1/1     Running   0          2m27s
2.1.3 ratings
提供每条评论的打星数据。
# kubectl apply -f ratings_deploy.yaml -n bookinfo
deployment.apps/ratings-v1 created
# kubectl apply -f ratings_svc.yaml -n bookinfo
service/ratings created
#kubectl apply -f ratings_sa.yaml -n bookinfo
serviceaccount/bookinfo-ratings created

# kubectl get po  -n bookinfo
NAME                          READY   STATUS    RESTARTS   AGE
details-v1-698b5d8c98-bnd52   1/1     Running   0          13m
ratings-v1-5967f59c58-st7xr   1/1     Running   0          4m48s
2.1.4 review
提供书籍的评论信息
# kubectl apply -f reviews_svc.yaml -n bookinfo
service/reviews created
# kubectl apply -f reviews_sa.yaml -n bookinfo
serviceaccount/bookinfo-reviews unchanged
# kubectl apply -f reviews_v1_deploy.yaml -n bookinfo
deployment.apps/reviews-v1 created
[foot@host-10-19-83-151 3]$ kubectl apply -f reviews_v2_deploy.yaml -n bookinfo
deployment.apps/reviews-v2 created
[foot@host-10-19-83-151 3]$ kubectl apply -f reviews_v3_deploy.yaml -n bookinfo
deployment.apps/reviews-v3 created

# kubectl get po  -n bookinfo
NAME                          READY   STATUS    RESTARTS   AGE
details-v1-698b5d8c98-bnd52   1/1     Running   0          22m
ratings-v1-5967f59c58-st7xr   1/1     Running   0          13m
reviews-v1-9c6bb6658-dc5s9    1/1     Running   0          6m15s
reviews-v2-8454bb78d8-fghsh   1/1     Running   0          6m8s
reviews-v3-6dc9897554-zpdl2   1/1     Running   0          6m3s
2.1.5 productpage
页面
# kubectl apply -f productpage_deploy.yaml -n bookinfo
deployment.apps/productpage-v1 created
# kubectl apply -f productpage_svc.yaml -n bookinfo
service/productpage created
# kubectl apply -f productpage_sa.yaml  -n bookinfo
serviceaccount/bookinfo-productpage created

# kubectl get po  -n bookinfo
NAME                             READY   STATUS    RESTARTS   AGE
details-v1-698b5d8c98-bnd52      1/1     Running   0          23m
productpage-v1-bf4b489d8-z9wxp   1/1     Running   0          46s
ratings-v1-5967f59c58-st7xr      1/1     Running   0          15m
reviews-v1-9c6bb6658-dc5s9       1/1     Running   0          7m56s
reviews-v2-8454bb78d8-fghsh      1/1     Running   0          7m49s
reviews-v3-6dc9897554-zpdl2      1/1     Running   0          7m44s
聚合服务,供用户浏览书籍信息。
2.1.6 检查
2.6.1 get all
# kubectl get all -n bookinfo
NAME                                 READY   STATUS    RESTARTS   AGE
pod/details-v1-698b5d8c98-bnd52      1/1     Running   0          25m
pod/productpage-v1-bf4b489d8-z9wxp   1/1     Running   0          2m4s
pod/ratings-v1-5967f59c58-st7xr      1/1     Running   0          16m
pod/reviews-v1-9c6bb6658-dc5s9       1/1     Running   0          9m14s
pod/reviews-v2-8454bb78d8-fghsh      1/1     Running   0          9m7s
pod/reviews-v3-6dc9897554-zpdl2      1/1     Running   0          9m2s

NAME                  TYPE        CLUSTER-IP       EXTERNAL-IP   PORT(S)    AGE
service/details       ClusterIP   10.102.62.72     <none>        9080/TCP   24m
service/productpage   ClusterIP   10.96.210.213    <none>        9080/TCP   117s
service/ratings       ClusterIP   10.103.80.45     <none>        9080/TCP   16m
service/reviews       ClusterIP   10.102.163.207   <none>        9080/TCP   9m40s

NAME                             READY   UP-TO-DATE   AVAILABLE   AGE
deployment.apps/details-v1       1/1     1            1           25m
deployment.apps/productpage-v1   1/1     1            1           2m5s
deployment.apps/ratings-v1       1/1     1            1           16m
deployment.apps/reviews-v1       1/1     1            1           9m14s
deployment.apps/reviews-v2       1/1     1            1           9m7s
deployment.apps/reviews-v3       1/1     1            1           9m2s

NAME                                       DESIRED   CURRENT   READY   AGE
replicaset.apps/details-v1-698b5d8c98      1         1         1       25m
replicaset.apps/productpage-v1-bf4b489d8   1         1         1       2m5s
replicaset.apps/ratings-v1-5967f59c58      1         1         1       16m
replicaset.apps/reviews-v1-9c6bb6658       1         1         1       9m14s
replicaset.apps/reviews-v2-8454bb78d8      1         1         1       9m7s
replicaset.apps/reviews-v3-6dc9897554      1         1         1       9m2s
2.1.6.2 curl productpage
$ curl 10.96.210.213:9080
<!DOCTYPE html>
<html>
  <head>
    <title>Simple Bookstore App</title>
<meta charset="utf-8">
<meta http-equiv="X-UA-Compatible" content="IE=edge">
<meta name="viewport" content="width=device-width, initial-scale=1">

<!-- Latest compiled and minified CSS -->
<link rel="stylesheet" href="static/bootstrap/css/bootstrap.min.css">

<!-- Optional theme -->
<link rel="stylesheet" href="static/bootstrap/css/bootstrap-theme.min.css">

  </head>
  <body>


<p>
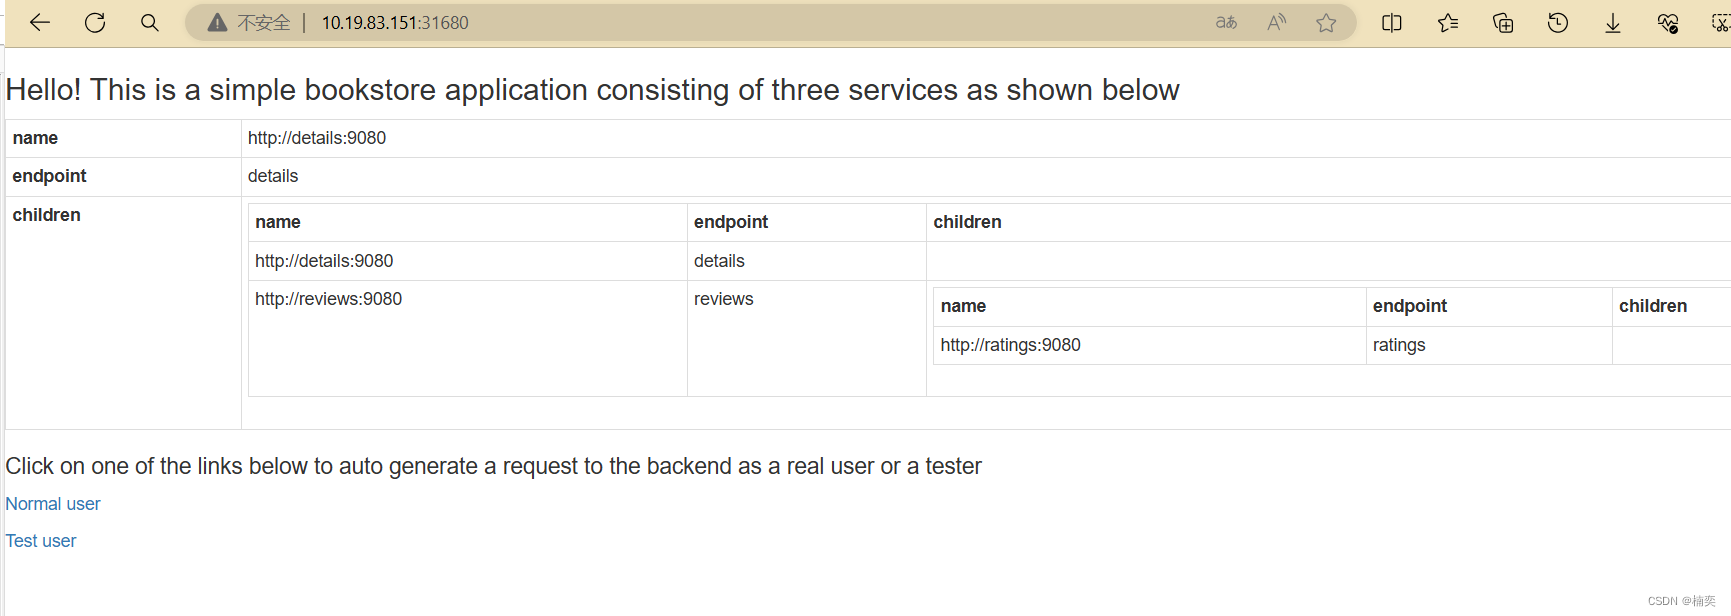
    <h3>Hello! This is a simple bookstore application consisting of three services as shown below</h3>
</p>

<table class="table table-condensed table-bordered table-hover"><tr><th>name</th><td>http://details:9080</td></tr><tr><th>endpoint</th><td>details</td></tr><tr><th>children</th><td><table class="table table-condensed table-bordered table-hover"><tr><th>name</th><th>endpoint</th><th>children</th></tr><tr><td>http://details:9080</td><td>details</td><td></td></tr><tr><td>http://reviews:9080</td><td>reviews</td><td><table class="table table-condensed table-bordered table-hover"><tr><th>name</th><th>endpoint</th><th>children</th></tr><tr><td>http://ratings:9080</td><td>ratings</td><td></td></tr></table></td></tr></table></td></tr></table>

<p>
    <h4>Click on one of the links below to auto generate a request to the backend as a real user or a tester
    </h4>
</p>
<p><a href="/productpage?u=normal">Normal user</a></p>
<p><a href="/productpage?u=test">Test user</a></p>


<!-- Latest compiled and minified JavaScript -->
<script src="static/jquery.min.js"></script>

<!-- Latest compiled and minified JavaScript -->
<script src="static/bootstrap/js/bootstrap.min.js"></script>

  </body>
</html>
有这一串xml文件,就是部署成功了。放到浏览器中访问,无法访问。
2.1.7 临时访问
将ingress-gageway.yaml复制一份
# kubectl apply -f productpage_tmpsvc.yaml -n bookinfo
service/productpagetmp created
# kubectl get svc -n book
No resources found in book namespace.
# kubectl get svc -n bookinfo
NAME             TYPE        CLUSTER-IP       EXTERNAL-IP   PORT(S)          AGE
details          ClusterIP   10.102.62.72     <none>        9080/TCP         30m
productpage      ClusterIP   10.96.210.213    <none>        9080/TCP         7m14s
productpagetmp   NodePort    10.111.122.78    <none>        9080:31680/TCP   17s
ratings          ClusterIP   10.103.80.45     <none>        9080/TCP         21m
reviews          ClusterIP   10.102.163.207   <none>        9080/TCP         14m
页面中输入 虚拟机ip:31680
带上上下文访问
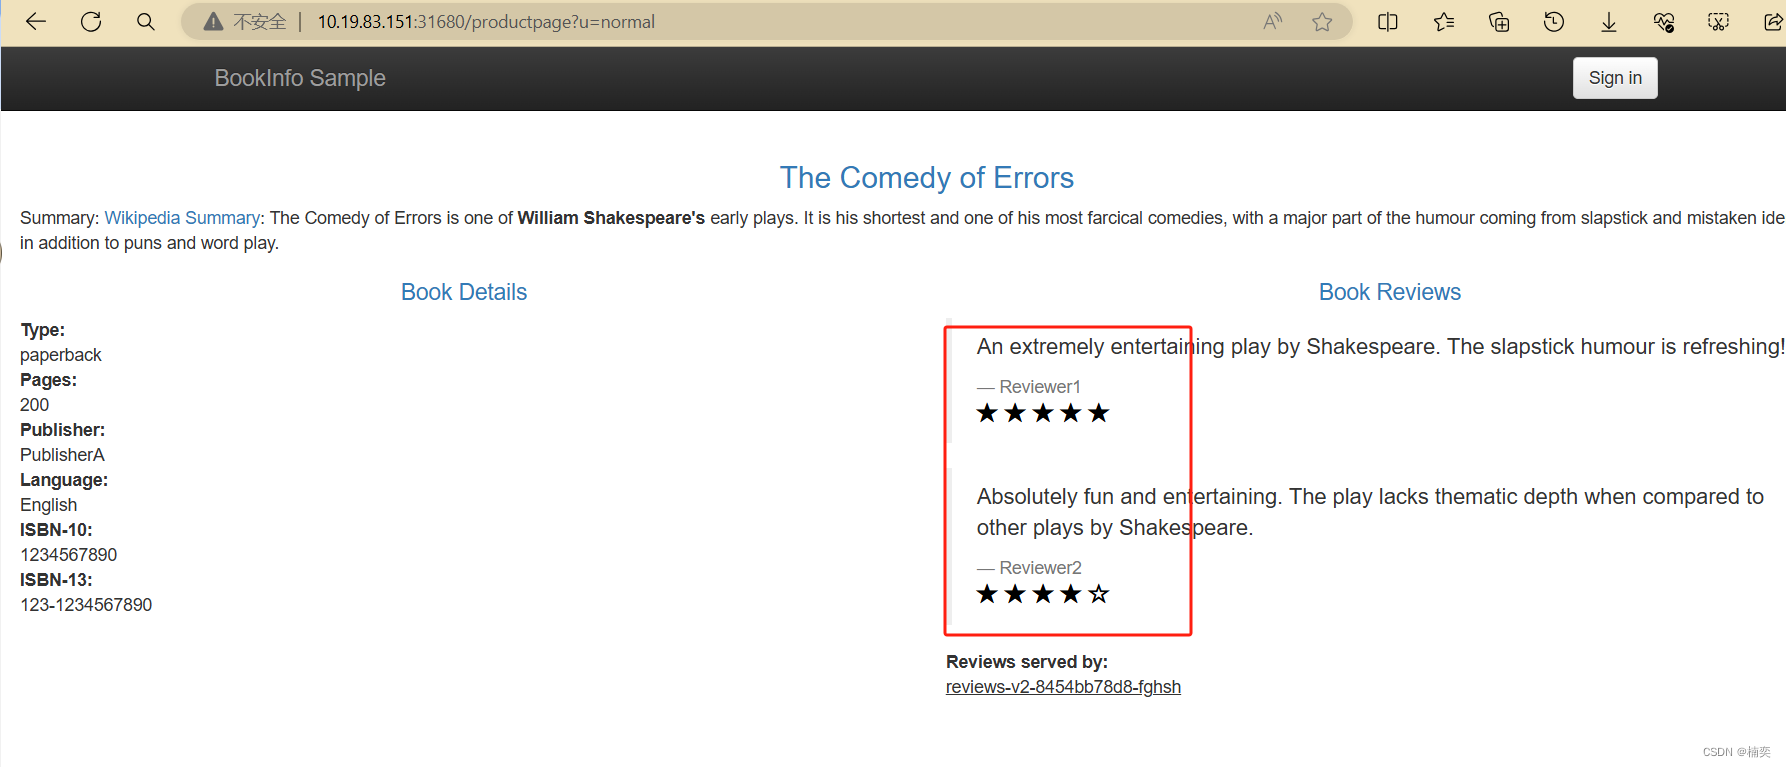
一直刷新就行,会轮寻review的三个版本的pod
2.1.8 配置gateway
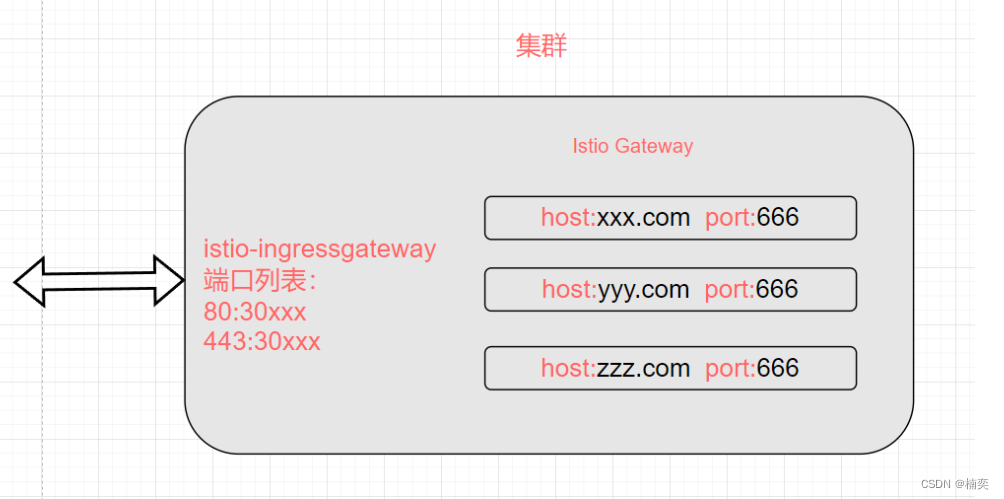
hosts表示对外开放的访问路径,你可以绑定域名、IP 等。这里使用
*,表示所有访问都可以进入此网关。
# kubectl apply -f ingress_gateway.yaml  -n bookinfo
gateway.networking.istio.io/bookinfo-gateway created
模型来到这会
2.1.9 部署VistualService
虽然创建了 Istio Gateway,但是我们还不能直接通过网关访问到前面部署的微服务,我们还需要创建 Istio VirtualService 将 Istio Gateway 跟对应的 Kubernetes Service 绑定起来,然后流量才能正式流向 Pod。

流量实际并不会经过 Service 中,但是 VirtualService 需要通过 Service 来发现 Pod
# kubectl apply -f productpage_vs.yaml
virtualservice.networking.istio.io/bookinfo created
2.1.10 检查,验证是否部署成功
有返回,则bookinfo应用正常
# kubectl exec "$(kubectl get pod -l app=ratings -n bookinfo -o jsonpath='{.items[0].metadata.name}')" -n bookinfo -c ratings -- curl -S productpage:9080/productpage | grep -o "<title>.*</title>"

  % Total    % Received % Xferd  Average Speed   Time    Time     Time  Current
                                 Dload  Upload   Total   Spent    Left  Speed
100  5294  100  5294    0     0   4086      0  0:00:01  0:00:01 --:--:--  4088
<title>Simple Bookstore App</title>
3.对外开放应用程序
3.1 创建istio入站ingress Gateway
不设置namespace时,ingressGageway将运行在默认default命名空间中。添加方式如下,新增namespace属性。
cat bookinfo-gateway.yaml
apiVersion: networking.istio.io/v1alpha3
kind: Gateway
metadata:
  name: bookinfo-gateway
  namespace: bookinfo
spec:
  selector:
    istio: ingressgateway # use istio default controller
  servers:
  - port:
      number: 80
      name: http
      protocol: HTTP
    hosts:
    - "*"
---
apiVersion: networking.istio.io/v1alpha3
kind: VirtualService
metadata:
  name: bookinfo
  namespace: bookinfo
spec:
  hosts:
  - "*"
  gateways:
  - bookinfo-gateway
  http:
  - match:
    - uri:
        exact: /productpage
    - uri:
        prefix: /static
    - uri:
        exact: /login
    - uri:
        exact: /logout
    - uri:
        prefix: /api/v1/products
    route:
    - destination:
        host: productpage
        port:
          number: 9080
3.2 运行安装ingress Gateway
# kubectl apply -f bookinfo-gateway.yaml
gateway.networking.istio.io/bookinfo-gateway created
virtualservice.networking.istio.io/bookinfo created

# istioctl analyze
Info [IST0102] (Namespace default) The namespace is not enabled for Istio injection. Run 'kubectl label namespace default istio-injection=enabled' to enable it, or 'kubectl label namespace default istio-injection=disabled' to explicitly mark it as not needing injection.

# kubectl label namespace default istio-injection=disabled
namespace/default labeled

# kubectl apply -f bookinfo-gateway.yaml
gateway.networking.istio.io/bookinfo-gateway unchanged
virtualservice.networking.istio.io/bookinfo unchanged

# istioctl analyze

✔ No validation issues found when analyzing namespace: default.
3.3 确定入站IP
# kubectl get svc  istio-ingressgateway -n istio-system
NAME                   TYPE           CLUSTER-IP      EXTERNAL-IP   PORT(S)                                                                      AGE
istio-ingressgateway   LoadBalancer   10.104.41.124   <pending>     15021:32515/TCP,80:31183/TCP,443:32582/TCP,31400:30302/TCP,15443:32277/TCP   41h
[foot@host-10-19-83-151 networking]$
设置
EXTERNAL-IP的值之后, 您的环境就有了一个外部的负载均衡器,可以将其用作入站网关。 但如果EXTERNAL-IP的值为<none>(或者一直是<pending>状态), 则您的环境则没有提供可作为入站流量网关的外部负载均衡器。 在这个情况下,您还可以用服务(Service)的节点端口访问网关。如何配置自己的外部负载均衡器,参考
https://www.cnblogs.com/yinzhengjie/p/17811466.html![]() https://www.cnblogs.com/yinzhengjie/p/17811466.html环境中,没有找到外部负载均衡器,就选择一个节点来代替
https://www.cnblogs.com/yinzhengjie/p/17811466.html环境中,没有找到外部负载均衡器,就选择一个节点来代替
# export INGRESS_PORT=$(kubectl -n istio-system get service istio-ingressgateway -o jsonpath='{.spec.ports[?(@.name=="http2")].nodePort}')
# echo $INGRESS_PORT
31183

# export SECURE_INGRESS_PORT=$(kubectl -n istio-system get service istio-ingressgateway -o jsonpath='{.spec.ports[?(@.name=="https")].nodePort}')
# echo $SECURE_INGRESS_PORT
32582

# export INGRESS_HOST=$(kubectl get po -l istio=ingressgateway -n istio-system -o jsonpath='{.items[0].status.hostIP}')

# echo $INGRESS_HOST
xx.xx.xx.xx

# export GATEWAY_URL=$INGRESS_HOST:$INGRESS_PORT
# echo $GATEWAY_URL
xx.xx.xx.xx:31183
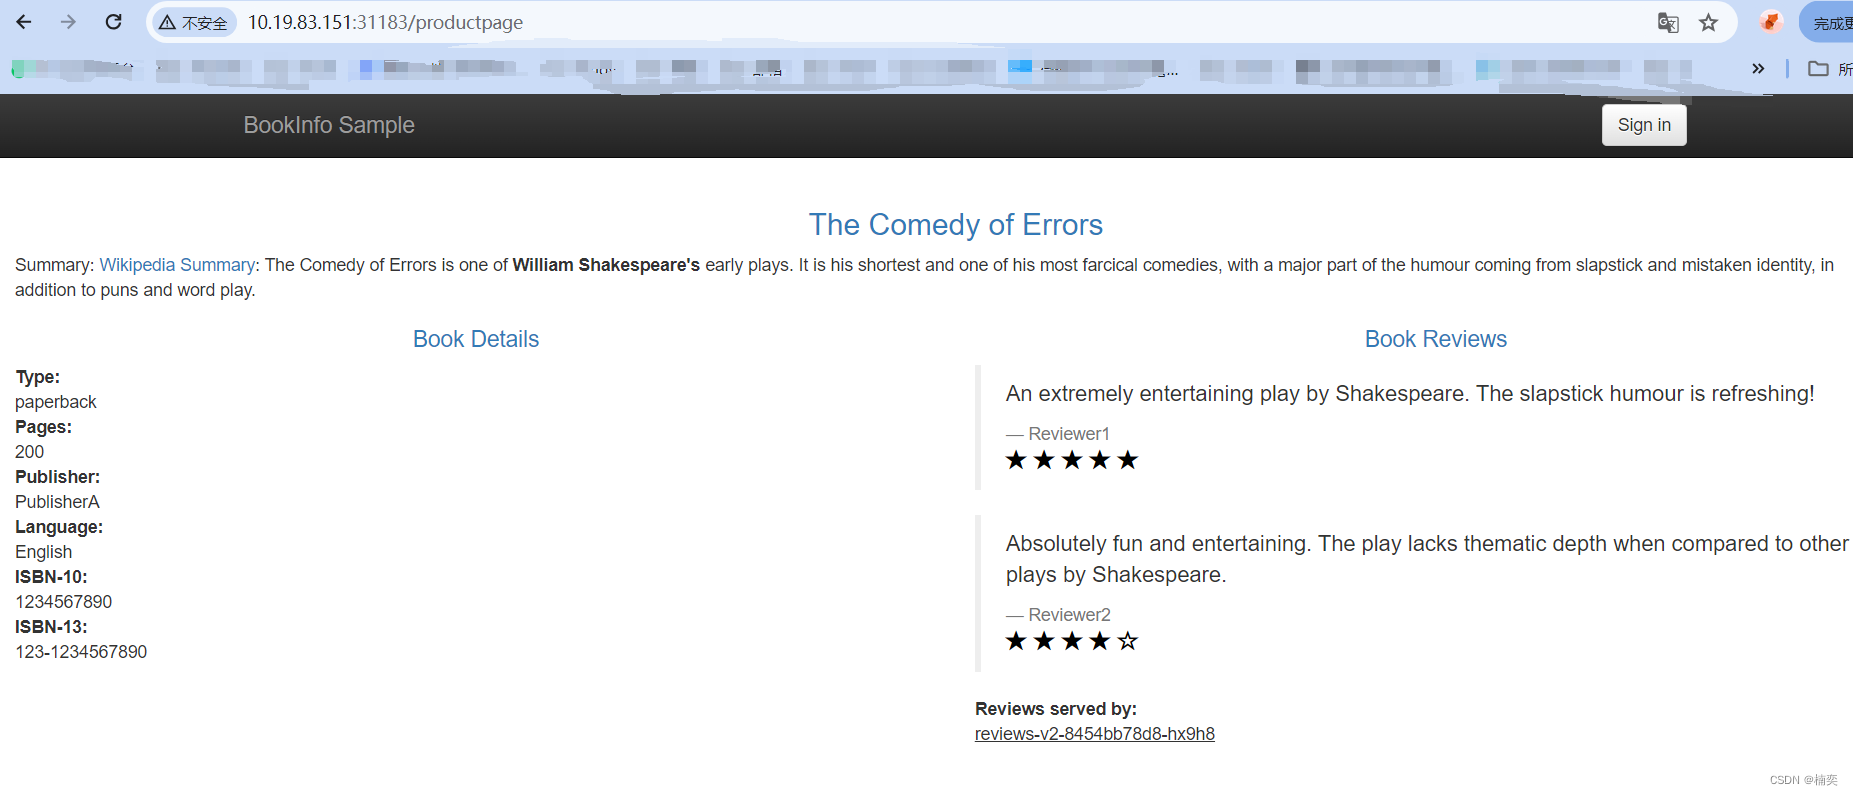
3.4 外部验证
 4 查看仪表盘
Istio 和几个遥测应用做了集成。 遥测能帮您了解服务网格的结构、展示网络的拓扑结构、分析网格的健康状态
4.1 Kiali及其插件
4.1.1 安装Kiali
# kubectl apply -f addons/
serviceaccount/grafana created
configmap/grafana created
service/grafana created
deployment.apps/grafana created
configmap/istio-grafana-dashboards created
configmap/istio-services-grafana-dashboards created
deployment.apps/jaeger created
service/tracing created
service/zipkin created
service/jaeger-collector created
serviceaccount/kiali created
configmap/kiali created
clusterrole.rbac.authorization.k8s.io/kiali-viewer created
clusterrole.rbac.authorization.k8s.io/kiali created
clusterrolebinding.rbac.authorization.k8s.io/kiali created
role.rbac.authorization.k8s.io/kiali-controlplane created
rolebinding.rbac.authorization.k8s.io/kiali-controlplane created
service/kiali created
deployment.apps/kiali created
serviceaccount/prometheus created
configmap/prometheus created
clusterrole.rbac.authorization.k8s.io/prometheus created
clusterrolebinding.rbac.authorization.k8s.io/prometheus created
service/prometheus created
deployment.apps/prometheus created
使用
kubectl rollout status命令可以检查部署的滚动更新进度,直到部署完成或超时。如果部署正在进行滚动更新,该命令将会显示更新的进度情况,直到更新完成或超时。如果部署已经完成更新,命令将会输出 "deployment "kiali" successfully rolled out"。
请注意,这个命令只适用于使用 Deployment 进行部署管理的场景。如果你在其它类型的控制器上进行了部署(例如 StatefulSet),则需要使用相应的命令来检查滚动更新状态。
# kubectl rollout status deployment/kiali -n istio-system
deployment "kiali" successfully rolled out
4.1.2 修改kiali配置NodePort
# kubectl get svc -n istio-system
NAME                   TYPE           CLUSTER-IP       EXTERNAL-IP   PORT(S)                                                                      AGE
grafana                ClusterIP      10.102.208.36    <none>        3000/TCP                                                                     179m
istio-egressgateway    ClusterIP      10.100.225.194   <none>        80/TCP,443/TCP                                                               2d
istio-ingressgateway   LoadBalancer   10.104.41.124    <pending>     15021:32515/TCP,80:31183/TCP,443:32582/TCP,31400:30302/TCP,15443:32277/TCP   2d
istiod                 ClusterIP      10.104.226.207   <none>        15010/TCP,15012/TCP,443/TCP,15014/TCP                                        3d7h
jaeger-collector       ClusterIP      10.96.191.105    <none>        14268/TCP,14250/TCP,9411/TCP                                                 179m
kiali                  ClusterIP      10.98.246.20     <none>        20001/TCP,9090/TCP                                                           179m
prometheus             ClusterIP      10.110.173.109   <none>        9090/TCP                                                                     179m
tracing                ClusterIP      10.106.222.123   <none>        80/TCP,16685/TCP                                                             179m
zipkin                 ClusterIP      10.101.205.116   <none>        9411/TCP                                                                     179m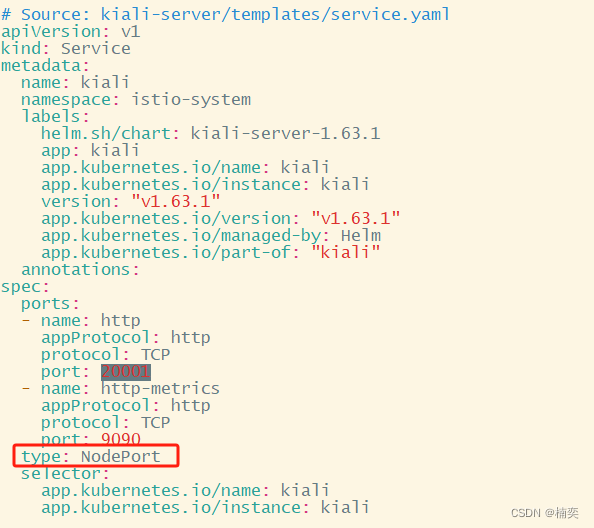
4.1.3 kubectl apply -f kiali.yaml
# kubectl apply -f kiali.yaml
serviceaccount/kiali unchanged
configmap/kiali unchanged
clusterrole.rbac.authorization.k8s.io/kiali-viewer unchanged
clusterrole.rbac.authorization.k8s.io/kiali unchanged
clusterrolebinding.rbac.authorization.k8s.io/kiali unchanged
role.rbac.authorization.k8s.io/kiali-controlplane unchanged
rolebinding.rbac.authorization.k8s.io/kiali-controlplane unchanged
service/kiali configured
deployment.apps/kiali unchanged

# kubectl get svc -n istio-system
NAME                   TYPE           CLUSTER-IP       EXTERNAL-IP   PORT(S)                                                                      AGE
grafana                ClusterIP      10.102.208.36    <none>        3000/TCP                                                                     3h2m
istio-egressgateway    ClusterIP      10.100.225.194   <none>        80/TCP,443/TCP                                                               2d
istio-ingressgateway   LoadBalancer   10.104.41.124    <pending>     15021:32515/TCP,80:31183/TCP,443:32582/TCP,31400:30302/TCP,15443:32277/TCP   2d
istiod                 ClusterIP      10.104.226.207   <none>        15010/TCP,15012/TCP,443/TCP,15014/TCP                                        3d7h
jaeger-collector       ClusterIP      10.96.191.105    <none>        14268/TCP,14250/TCP,9411/TCP                                                 3h2m
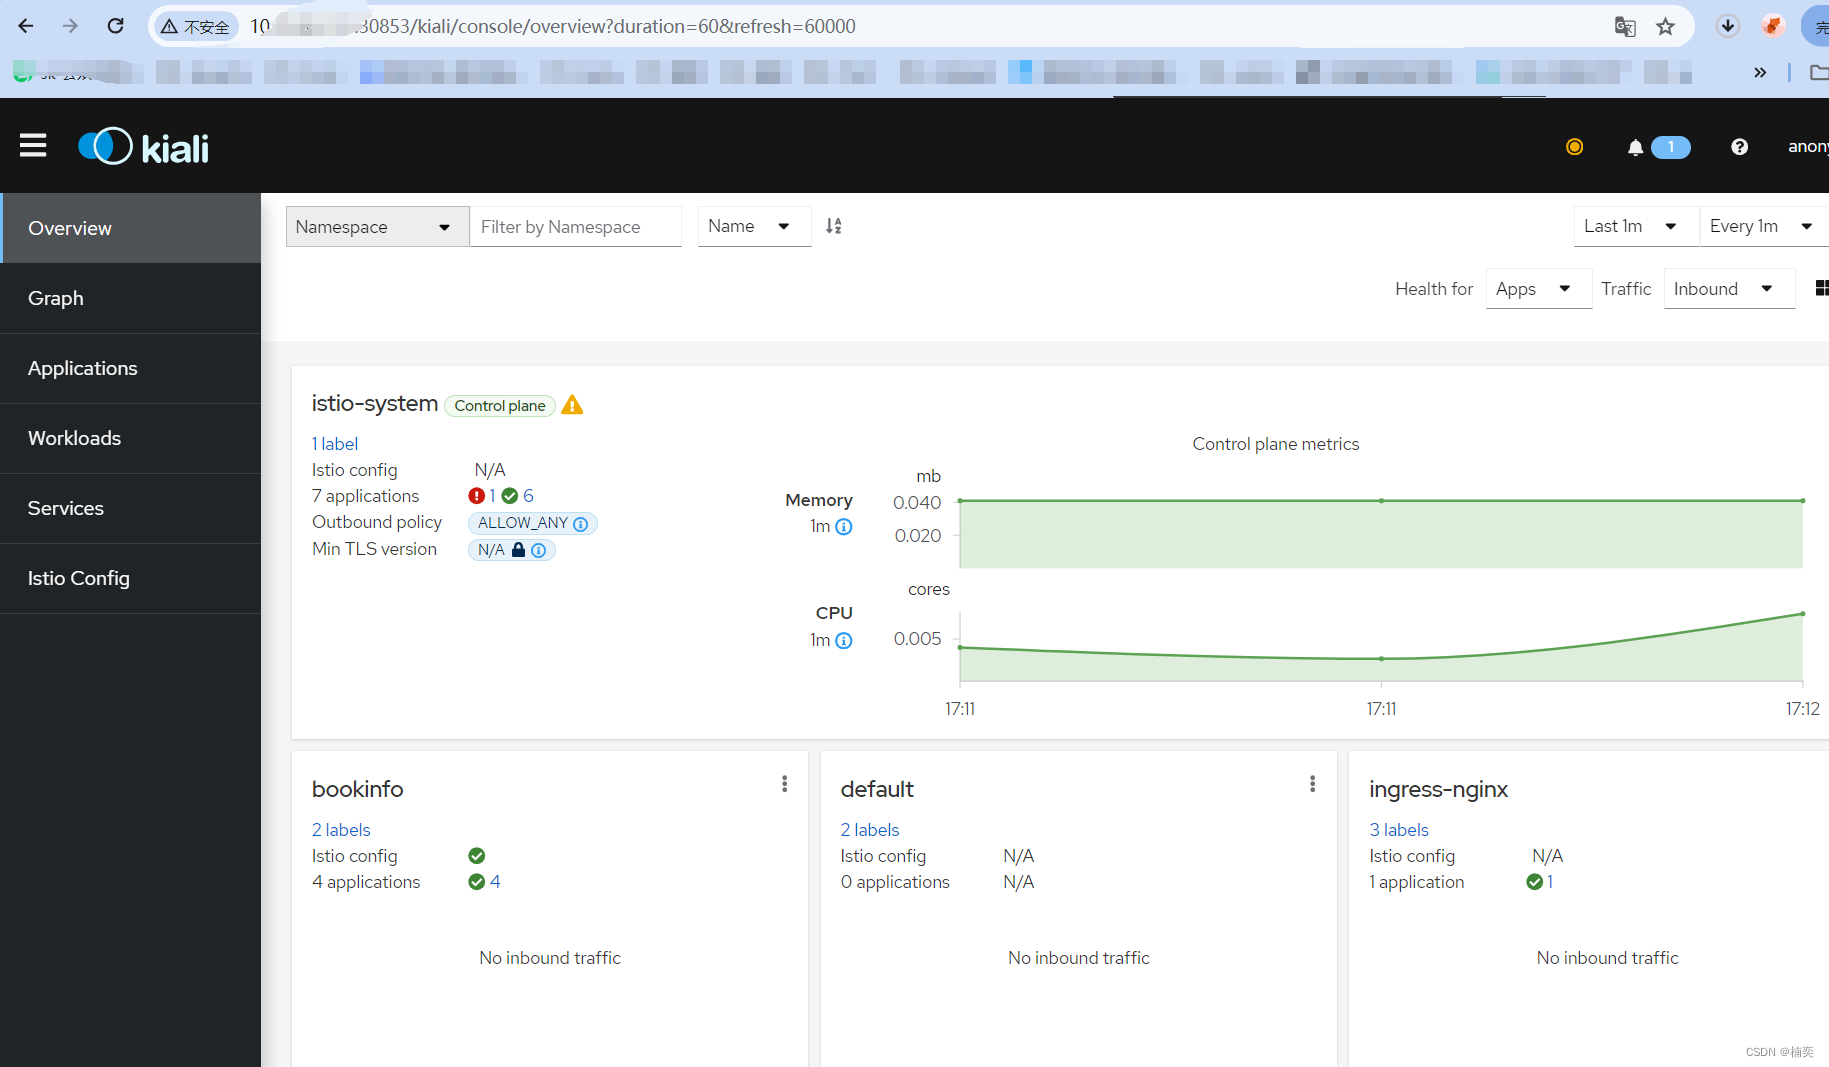
kiali                  NodePort       10.98.246.20     <none>        20001:30853/TCP,9090:32008/TCP                                               3h2m
prometheus             ClusterIP      10.110.173.109   <none>        9090/TCP                                                                     3h2m
tracing                ClusterIP      10.106.222.123   <none>        80/TCP,16685/TCP                                                             3h2m
zipkin                 ClusterIP      10.101.205.116   <none>        9411/TCP
4.1.4 访问kiali页面
4.1.5 造数据
要查看追踪数据,必须向服务发送请求。请求的数量取决于 Istio 的采样率。 采样率在安装 Istio 时设置,默认采样速率为 1%。在第一个跟踪可见之前,您需要发送至少 100 个请求。 使用以下命令向
productpage服务发送 100 个请求:for i in `seq 1 100`; do curl -s -o /dev/null http://$GATEWAY_URL/productpage; done
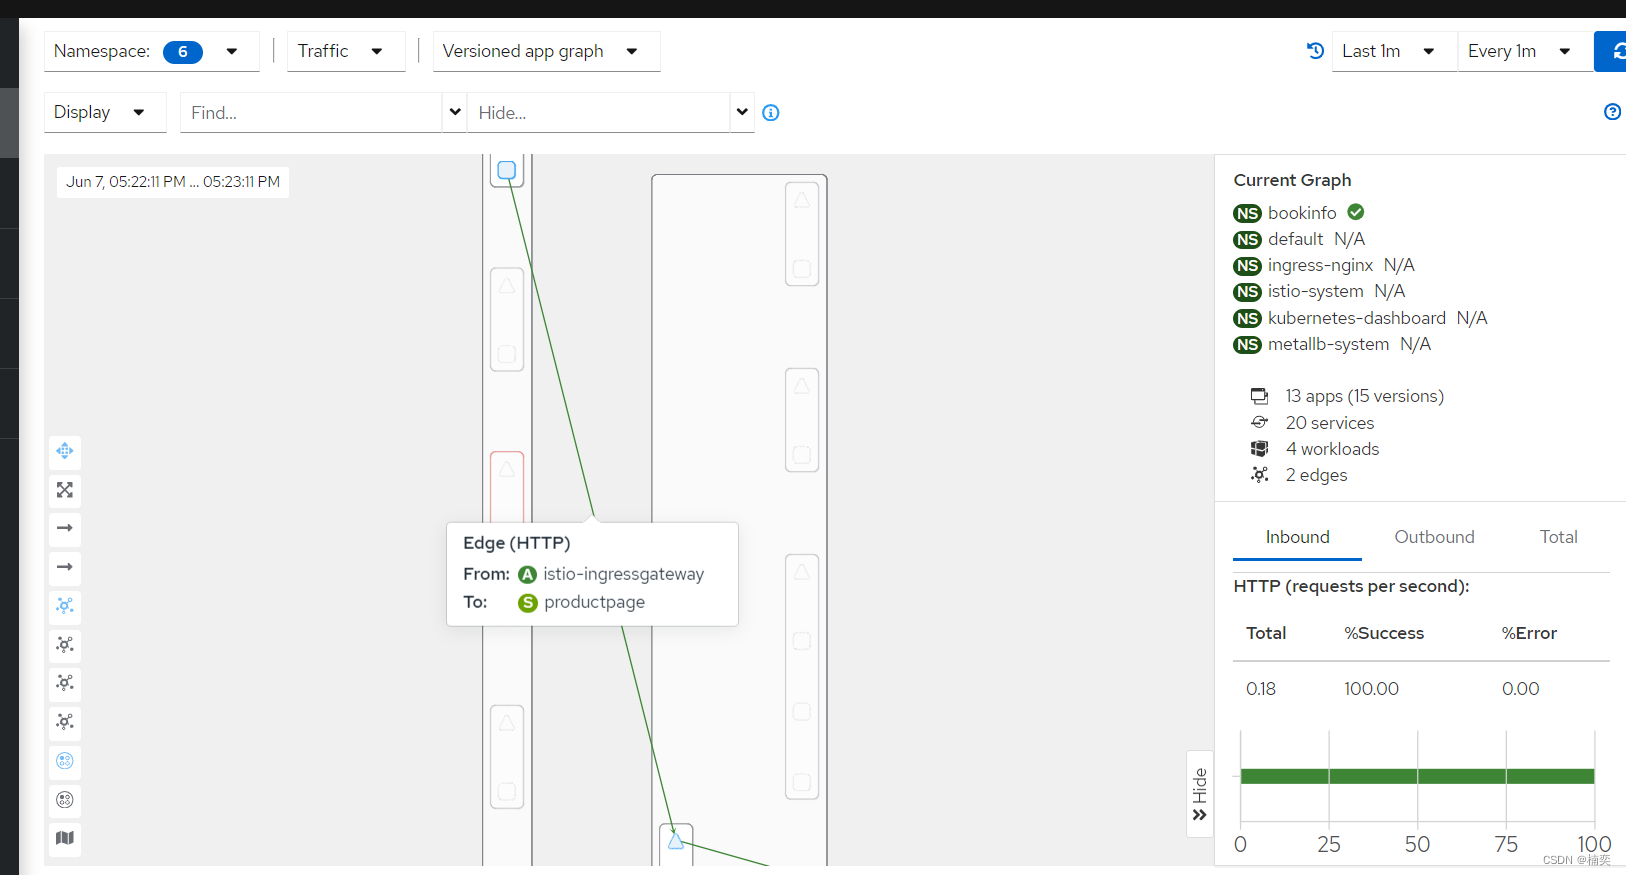
for i in `seq 1 100`; do curl -s -o /dev/null http://10.19.83.151:31183/productpage; done4.1.6 访问kiali页面
5.卸载
删除 Bookinfo 示例应用和配置, 参阅清理 Bookinfo。
Istio 卸载程序按照层次结构逐级的从 istio-system 命令空间中删除 RBAC 权限和所有资源。对于不存在的资源报错,可以安全的忽略掉,毕竟它们已经被分层地删除了。
$ kubectl delete -f samples/addons $ istioctl uninstall -y --purge
命名空间 istio-system 默认情况下并不会被移除。 不需要的时候,使用下面命令移除它:
$ kubectl delete namespace istio-system
指示 Istio 自动注入 Envoy 边车代理的标签默认也不移除。 不需要的时候,使用下面命令移除它。
$ kubectl label namespace default istio-injection-


