目录
- 一、第一个Spring程序
- 二、第一个SpringBoot
- 三、Spring-Mybatis整合
- 四、SpringBoot-Mybatis整合第一个程序
一、第一个Spring程序
- 添加依赖——用以支持spring
    <dependency>
      <groupId>org.springframework</groupId>
      <artifactId>spring-webmvc</artifactId>
      <version>5.2.9.RELEASE</version>
    </dependency>
- 创建一个Hello类作为JavaBean类
public class Hello {
    private String name;
    public String getName() {
        return name;
    }
    public void setName(String name) {
        this.name = name;
    }
    public void show(){
        System.out.println("Hello,"+ name );
    }
}
- 将Hello类装配到Spring容器中
<?xml version="1.0" encoding="UTF-8"?>
<beans xmlns="http://www.springframework.org/schema/beans"
       xmlns:xsi="http://www.w3.org/2001/XMLSchema-instance"
       xsi:schemaLocation="http://www.springframework.org/schema/beans
       http://www.springframework.org/schema/beans/spring-beans.xsd">

    <!--bean就是java对象 , 由Spring创建和管理-->
    <!--使用Spring来创建对象,在Spring这些都称为Bean   -->
    <!--id = 变量名-->
    <!--class = new的对象-->
    <!--property相对于给对象中的属性设置一个值-->
    <bean id="hello" class="com.kuang.pojo.Hello">
        <property name="name" value="Spring"/>
    </bean>
</beans>
- 测试类
//ApplicationContext这里,一旦读取了bean.xml,那么Spring容器中的所有bean都被实例化了,即在bean.xml中的所有bean都被创建了,并且所有bean都执行了无参构造方法
ApplicationContext context = new ClassPathXmlApplicationContext("bean.xml");
//getBean : 参数即为spring配置文件中bean的id;
//就是将容器中“hello”这个JavaBean拿出来,注入到Hello hello中;
Hello hello = (Hello) context.getBean("hello");
hello.show();
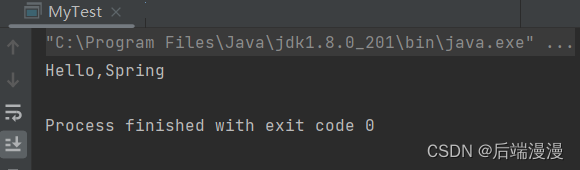
- 测试结果
二、第一个SpringBoot
SpringBoot项目创建官网
- 添加依赖
<!--pom.xml文件依赖-->
		<dependency>
			<groupId>org.springframework.boot</groupId>
			<artifactId>spring-boot-starter</artifactId>
		</dependency>

		<dependency>
			<groupId>org.springframework.boot</groupId>
			<artifactId>spring-boot-starter-test</artifactId>
			<scope>test</scope>
		</dependency>

		<dependency>
			<groupId>org.springframework.boot</groupId>
			<artifactId>spring-boot-starter-web</artifactId>
		</dependency>
- 创建一个Controller类
注意:在启动类的同级目录下,新建一个controller包,一定要在同级目录下,否则识别不到
@RestController
public class HelloController {
   @RequestMapping("/hello")
   public String hello() {
       return "Hello World";
   }
}
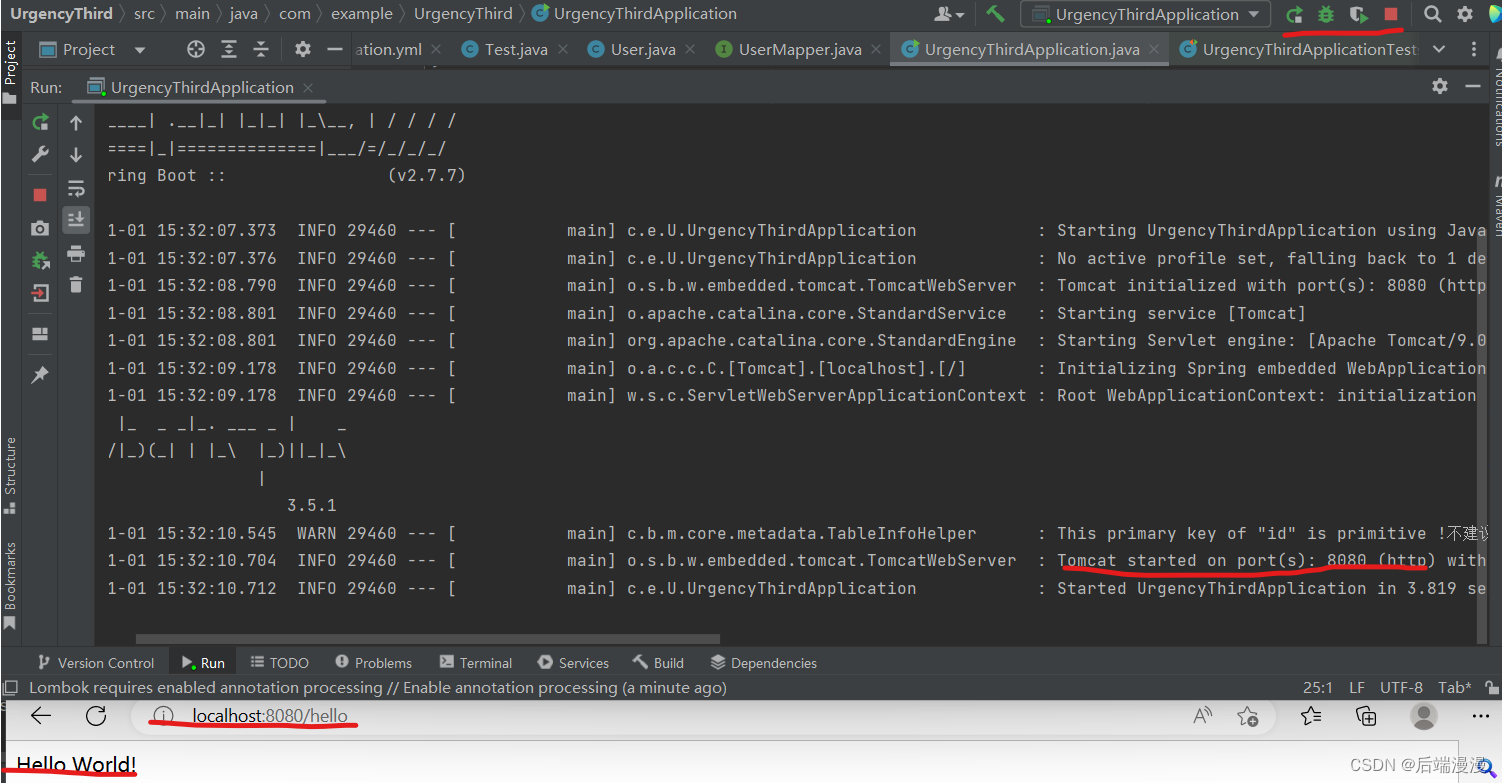
- 从主程序启动项目,浏览器发起请求,看页面返回;控制台输出了 Tomcat 访问的端口号!
- 启动类
//SpringBoot启动类
@SpringBootApplication
public class UrgencyThirdApplication {

	public static void main(String[] args) {
		SpringApplication.run(UrgencyThirdApplication.class, args);
	}

}
- 个人感觉SpringBoot实际上相当于JavaConfig类
1. @SpringBootApplication类中包含了@Configuration和@ComponentScan
	1.1. @Configuration将启动类设为配置类
	1.2. @ComponentScan可以basePackageClasses或basePackages来定义要扫描的特定包。 如果没有定义特定的包,将从声明该注解的类的包开始扫描。
三、Spring-Mybatis整合
- 引入Spring配置文件Spring-dao.xml(以前的beans.xml)
<?xml version="1.0" encoding="GBK"?>
<beans xmlns="http://www.springframework.org/schema/beans"
       xmlns:xsi="http://www.w3.org/2001/XMLSchema-instance"
       xsi:schemaLocation="http://www.springframework.org/schema/beans
        https://www.springframework.org/schema/beans/spring-beans.xsd

</beans>
- 将Mybatis配置的数据源移到Spring-dao.xml
<?xml version="1.0" encoding="GBK"?>
<beans xmlns="http://www.springframework.org/schema/beans"
xmlns:xsi="http://www.w3.org/2001/XMLSchema-instance"
xsi:schemaLocation="http://www.springframework.org/schema/beans
https://www.springframework.org/schema/beans/spring-beans.xsd
<!--DataSource:使用Spring的数据源替换Mybatis的配置 c3p0 dbcp druid
我们这里使用Spring提供的JDBC:-->
<bean id="dataSource" class="org.springframework.jdbc.datasource.DriverManagerDataSource">
<property name="driverClassName" value="com.mysql.jdbc.Driver"/>
<property name="url" value="jdbc:mysql://localhost:3306/mybatis?useSSL=false&useUnicode=true&characterEncoding=UTF-8"/>
<property name="username" value="root"/>
<property name="password" value="123456"/>
</bean>
</beans>
- SqlSessionFactoy,关联MyBatis
<?xml version="1.0" encoding="GBK"?>
<beans xmlns="http://www.springframework.org/schema/beans"
xmlns:xsi="http://www.w3.org/2001/XMLSchema-instance"
xsi:schemaLocation="http://www.springframework.org/schema/beans
https://www.springframework.org/schema/beans/spring-beans.xsd
<!--DataSource:使用Spring的数据源替换Mybatis的配置 c3p0 dbcp druid
我们这里使用Spring提供的JDBC:-->
<bean id="dataSource" class="org.springframework.jdbc.datasource.DriverManagerDataSource">
<property name="driverClassName" value="com.mysql.jdbc.Driver"/>
<property name="url" value="jdbc:mysql://localhost:3306/mybatis?useSSL=false&useUnicode=true&characterEncoding=UTF-8"/>
<property name="username" value="root"/>
<property name="password" value="123456"/>
</bean>
<!--sqlSessionFactory-->
<bean id="sqlSessionFactory" class="org.mybatis.spring.SqlSessionFactoryBean">
<property name="dataSource" ref="dataSource" />
<!--关联mybatis配置文件-->
<property name="configLocation" value="classpath:mybatis-config.xml"/>
<property name="mapperLocations" value="classpath:com/kuang/mapper/*.xml"/>
</bean>
</beans>
- 注册sqlSessionTemplate,关联sqlSessionFactory
<?xml version="1.0" encoding="GBK"?>
<beans xmlns="http://www.springframework.org/schema/beans"
xmlns:xsi="http://www.w3.org/2001/XMLSchema-instance"
xsi:schemaLocation="http://www.springframework.org/schema/beans
https://www.springframework.org/schema/beans/spring-beans.xsd
<!--DataSource:使用Spring的数据源替换Mybatis的配置 c3p0 dbcp druid
我们这里使用Spring提供的JDBC:-->
<bean id="dataSource" class="org.springframework.jdbc.datasource.DriverManagerDataSource">
<property name="driverClassName" value="com.mysql.jdbc.Driver"/>
<property name="url" value="jdbc:mysql://localhost:3306/mybatis?useSSL=false&useUnicode=true&characterEncoding=UTF-8"/>
<property name="username" value="root"/>
<property name="password" value="123456"/>
</bean>
<!--sqlSessionFactory-->
<bean id="sqlSessionFactory" class="org.mybatis.spring.SqlSessionFactoryBean">
<property name="dataSource" ref="dataSource" />
<!--关联mybatis配置文件-->
<property name="configLocation" value="classpath:mybatis-config.xml"/>
<property name="mapperLocations" value="classpath:com/kuang/mapper/*.xml"/>
</bean>
<!--SqlSessionTemplate:就是我们使用的sqlSession-->
<bean id="sqlSession" class="org.mybatis.spring.SqlSessionTemplate">
<!--只能使用构造器注入sqlSessionFactory,因为它没有set方法-->
<constructor-arg index="0" ref="sqlSessionFactory" />
</bean>
</beans>
- 需要UserMapper接口的UserMapperImpl 实现类,私有化sqlSessionTemplate
public class UserMapperImpl implements UserMapper {

    //我们的所有操作,都使用sqlSession来执行,在原来,现在都使用SqlsessionTemplate
    private SqlSessionTemplate sqlSession;

    public void setSqlSession(SqlSessionTemplate sqlSession) {
        this.sqlSession = sqlSession;
    }

    public List<User> selectUser() {
        UserMapper mapper = sqlSession.getMapper(UserMapper.class);
        return mapper.selectUser();
    }
}
- 将自己写的实现类,注入到Spring配置文件
<?xml version="1.0" encoding="GBK"?>
<beans xmlns="http://www.springframework.org/schema/beans"
xmlns:xsi="http://www.w3.org/2001/XMLSchema-instance"
xsi:schemaLocation="http://www.springframework.org/schema/beans
https://www.springframework.org/schema/beans/spring-beans.xsd
<!--DataSource:使用Spring的数据源替换Mybatis的配置 c3p0 dbcp druid
我们这里使用Spring提供的JDBC:-->
<bean id="dataSource" class="org.springframework.jdbc.datasource.DriverManagerDataSource">
<property name="driverClassName" value="com.mysql.jdbc.Driver"/>
<property name="url" value="jdbc:mysql://localhost:3306/mybatis?useSSL=false&useUnicode=true&characterEncoding=UTF-8"/>
<property name="username" value="root"/>
<property name="password" value="123456"/>
</bean>
<!--sqlSessionFactory-->
<bean id="sqlSessionFactory" class="org.mybatis.spring.SqlSessionFactoryBean">
<property name="dataSource" ref="dataSource" />
<!--关联mybatis配置文件-->
<property name="configLocation" value="classpath:mybatis-config.xml"/>
<property name="mapperLocations" value="classpath:com/kuang/mapper/*.xml"/>
</bean>
<!--SqlSessionTemplate:就是我们使用的sqlSession-->
<bean id="sqlSession" class="org.mybatis.spring.SqlSessionTemplate">
<!--只能使用构造器注入sqlSessionFactory,因为它没有set方法-->
<constructor-arg index="0" ref="sqlSessionFactory" />
</bean>
<bean id="userMapper" class="com.kuang.mapper.UserMapperImpl">
<property name="sqlSession" ref="sqlSession"/>
</bean>
</beans>
- 测试
    @Test
    public void test () throws IOException {

        ApplicationContext context = new ClassPathXmlApplicationContext("spring-dao.xml");

        UserMapper userMapper = context.getBean("userMapper", UserMapper.class);
        for (User user : userMapper.selectUser()) {
            System.out.println(user);
        }
    }
四、SpringBoot-Mybatis整合第一个程序
- 导入依赖
<!--Springboot需要的依赖-->
		<dependency>
			<groupId>org.springframework.boot</groupId>
			<artifactId>spring-boot-starter</artifactId>
		</dependency>

		<dependency>
			<groupId>org.springframework.boot</groupId>
			<artifactId>spring-boot-starter-test</artifactId>
			<scope>test</scope>
		</dependency>

		<dependency>
			<groupId>org.springframework.boot</groupId>
			<artifactId>spring-boot-starter-web</artifactId>
		</dependency>

<!--Mybatis项目需要的依赖-->
    <!--mysqlq驱动-->
    <dependency>
        <groupId>mysql</groupId>
        <artifactId>mysql-connector-java</artifactId>
        <version>8.0.12</version>
    </dependency>
    <!--mybatis-->
    <dependency>
        <groupId>org.mybatis</groupId>
        <artifactId>mybatis</artifactId>
        <version>3.5.4</version>
    </dependency>
    <!--junit-->
    <dependency>
        <groupId>junit</groupId>
        <artifactId>junit</artifactId>
        <version>4.12</version>
        <scope>test</scope>
    </dependency>

<!--Springboot-Mybatis整合需要的依赖-->
<dependency>
    <groupId>org.mybatis.spring.boot</groupId>
    <artifactId>mybatis-spring-boot-starter</artifactId>
    <version>2.1.1</version>
</dependency>
- application.yml文件
- 放在Resource文件夹下,SpringBoot会自己扫描到
spring:
  datasource:
    name: pro_man_sys_db
    url: jdbc:mysql://localhost:3306/pro_man_sys_db?serverTimezone=UTC
    username: root
    password: root
    driver-class-name: com.mysql.cj.jdbc.Driver
  resources:
    static-locations: classpath:/static,classpath:/resources,file:/root/uploadFiles

mybatis:
  type-aliases-package: com.shiliuzi.model
  mapper-locations: classpath:mapper/*.xml
- 创建实体类
@Data
@AllArgsConstructor
@NoArgsConstructor
public class User {

    private Integer id;
    private String name;
    private String pwd;

}
- 创建mapper目录以及对应的Mapper接口
@Repository
public interface UserMapper {
    public static final int age=18;
    List<User> queryUserList();
    User queryUserById(Integer id);
    int addUser(User user);
    int updateUser(User user);
    int deleteUserById(Integer id);
}
- 配置mapper.xml文件
- 这里建议创建在resources的目录下
<?xml version="1.0" encoding="UTF-8" ?>
<!DOCTYPE mapper
        PUBLIC "-//mybatis.org//DTD Config 3.0//EN"
        "http://mybatis.org/dtd/mybatis-3-mapper.dtd">
<!--configuration core file-->
<mapper namespace="com.guo.mapper.UserMapper">

    <select id="queryUserList" resultType="User">
    </select>
</mapper>

6. 编译controller调用mapper
@RestController
public class UserController {

    @Autowired
    private UserMapper userMapper;

    @RequestMapping("/list")
    public List<User> List(){

        return userMapper.queryUserList();

    }
}