1. 简介
Verilator 是一个开源的 Verilog 和 SystemVerilog 硬件描述语言 (HDL) 仿真器。它是一个高性能的仿真器,可以将 Verilog 和 SystemVerilog 代码转换为 C++/SystemC 代码,并生成可执行的仿真模型。
Verilator 的主要特点包括:
- 高性能:Verilator 生成的仿真模型具有非常高的性能,可以与商业级仿真器媲美。
- 开源:Verilator 是一个开源项目,可以免费使用和修改。
- 跨平台:Verilator 可以在 Linux、macOS 和 Windows 等多种操作系统上运行。
- 支持多种 HDL:Verilator 不仅支持 Verilog,还支持 SystemVerilog 语言。
- 可扩展性:Verilator 提供了丰富的 API,可以与其他工具和环境集成。
Verilator 的主要应用场景包括:
- 硬件设计和验证:Verilator 可以用于设计和验证各种硬件电路,包括 FPGA、ASIC 和嵌入式系统等。
- 软件开发:Verilator 生成的仿真模型可以用于软件开发和测试,如驱动程序和固件等。
- 教学和研究:Verilator 可以用于教学和研究,帮助学生和研究人员了解和学习 HDL 语言。
2. 安装
Linux下可以通过apt安装Verilator,但是安装的版本较旧,新版本功能更强大,Bug更少,推荐通过代码编译安装最新版本。此处安装gcc-9是为了后续编译gcc-5.2做准备,所以未安装最新版本gcc。Linux使用22.04版本。
sudo apt install -y gcc-9
sudo update-alternatives --install /usr/bin/gcc gcc /usr/bin/gcc-9 10
sudo update-alternatives --install /usr/bin/g++ g++ /usr/bin/g++-9 10

sudo apt-get install -y git help2man perl python3 make cmake autoconf flex bison ccache
sudo apt-get install -y libgoogle-perftools-dev numactl perl-doc
sudo apt-get install -y libfl2
sudo apt-get install -y libfl-dev
sudo apt-get install -y zlibc zlib1g zlib1g-dev

git clone https://github.com/verilator/verilator

cd verilator
unset VERILATOR_ROOT
git checkout -b v5.024 v5.024
autoconf
./configure
make -j `nproc`
sudo make install

sudo apt install -y gtkwave

# SystemC 2.3.3
curl -O https://www.accellera.org/images/downloads/standards/systemc/systemc-2.3.3.tar.gz
tar -xzf systemc-2.3.3.tar.gz
cd systemc-2.3.3
mkdir build
cd build
../configure --prefix=/usr/local/systemc-2.3.3
make -j8
sudo make install
配置SystemC:
在~/.bashrc最后面添加:
export SYSTEMC_INCLUDE=/usr/local/systemc-2.3.3/include
export SYSTEMC_LIBDIR=/usr/local/systemc-2.3.3/lib-linux64
export LD_LIBRARY_PATH=/usr/local/systemc-2.3.3/lib-linux64
在控制台输入:
source ~/.bashrc
3. 测试
3.1. 版本
m@vm-ubuntu22:~$ verilator --version
Verilator 5.024 2024-04-05 rev v5.024
3.2. 示例
Verilator目录下的example目录下有一些示例,其中有_c表示是cpp版本示例,_sc表示是SystemC版本示例。
3.2.1. CPP示例
Verilator将Verilog转为标准C++来进行编译仿真,其仿真速度会更快。这种方式生成的仿真模块也可以更方便地接入QEMU等模块中进行使用。
cd make_tracing_c
make
make会完成Verilog转C++,编译SystemC代码,仿真运行。
3.2.1.1. 编译
verilator -cc --exe --build -j top.v sim_main.cpp
- verilator -cc 表示将top.v生成cpp文件,并保存到OBJ_DIR目录。
- -exe表示生成可执行文件。
- sim_main.cpp表示此为启动文件,也即testbench文件。
- --build指示通过make编译,make中g++的编译过程其实现的过程如下:
ccache g++ -I. -MMD -I/usr/local/share/verilator/include -I/usr/local/share/verilator/include/vltstd -DVM_COVERAGE=0 -DVM_SC=0 -DVM_TRACE=0 -DVM_TRACE_FST=0 -DVM_TRACE_VCD=0 -faligned-new -fcf-protection=none -Wno-bool-operation -Wno-shadow -Wno-sign-compare -Wno-tautological-compare -Wno-uninitialized -Wno-unused-but-set-parameter -Wno-unused-but-set-variable -Wno-unused-parameter -Wno-unused-variable -Os -c -o sim_main.o ../sim_main.cpp ccache g++ -Os -I. -MMD -I/usr/local/share/verilator/include -I/usr/local/share/verilator/include/vltstd -DVM_COVERAGE=0 -DVM_SC=0 -DVM_TRACE=0 -DVM_TRACE_FST=0 -DVM_TRACE_VCD=0 -faligned-new -fcf-protection=none -Wno-bool-operation -Wno-shadow -Wno-sign-compare -Wno-tautological-compare -Wno-uninitialized -Wno-unused-but-set-parameter -Wno-unused-but-set-variable -Wno-unused-parameter -Wno-unused-variable -c -o verilated.o /usr/local/share/verilator/include/verilated.cpp ccache g++ -Os -I. -MMD -I/usr/local/share/verilator/include -I/usr/local/share/verilator/include/vltstd -DVM_COVERAGE=0 -DVM_SC=0 -DVM_TRACE=0 -DVM_TRACE_FST=0 -DVM_TRACE_VCD=0 -faligned-new -fcf-protection=none -Wno-bool-operation -Wno-shadow -Wno-sign-compare -Wno-tautological-compare -Wno-uninitialized -Wno-unused-but-set-parameter -Wno-unused-but-set-variable -Wno-unused-parameter -Wno-unused-variable -c -o verilated_threads.o /usr/local/share/verilator/include/verilated_threads.cpp /usr/bin/python3 /usr/local/share/verilator/bin/verilator_includer -DVL_INCLUDE_OPT=include Vtop.cpp Vtop___024root__DepSet_h84412442__0.cpp Vtop___024root__DepSet_heccd7ead__0.cpp Vtop___024root__Slow.cpp Vtop___024root__DepSet_heccd7ead__0__Slow.cpp Vtop__Syms.cpp > Vtop__ALL.cpp ccache g++ -Os -I. -MMD -I/usr/local/share/verilator/include -I/usr/local/share/verilator/include/vltstd -DVM_COVERAGE=0 -DVM_SC=0 -DVM_TRACE=0 -DVM_TRACE_FST=0 -DVM_TRACE_VCD=0 -faligned-new -fcf-protection=none -Wno-bool-operation -Wno-shadow -Wno-sign-compare -Wno-tautological-compare -Wno-uninitialized -Wno-unused-but-set-parameter -Wno-unused-but-set-variable -Wno-unused-parameter -Wno-unused-variable -c -o Vtop__ALL.o Vtop__ALL.cpp echo "" > Vtop__ALL.verilator_deplist.tmp g++ sim_main.o verilated.o verilated_threads.o Vtop__ALL.a -pthread -lpthread -latomic -o Vtop - ccache是为了缓存加速编译的,可以不用管。
- verilator的main入口函数在sim_main.cpp中。
- verilated.cpp和verilated_threads.cpp是两个verilator文件。
- Python脚本是将top.v生成的C++代码全部合并到Vtop__ALL.cpp,方便编译。
- 最后编译链接生成可执行文件Vtop。
3.2.1.2. 仿真运行
./Vtop
3.2.1.3. testbench代码
int main(int argc, char** argv) {
    // This is a more complicated example, please also see the simpler examples/make_hello_c.

    // Create logs/ directory in case we have traces to put under it
    Verilated::mkdir("logs");

    // Construct a VerilatedContext to hold simulation time, etc.
    // Multiple modules (made later below with Vtop) may share the same
    // context to share time, or modules may have different contexts if
    // they should be independent from each other.

    // Using unique_ptr is similar to
    // "VerilatedContext* contextp = new VerilatedContext" then deleting at end.
    const std::unique_ptr<VerilatedContext> contextp{new VerilatedContext};
    // Do not instead make Vtop as a file-scope static variable, as the
    // "C++ static initialization order fiasco" may cause a crash

    // Set debug level, 0 is off, 9 is highest presently used
    // May be overridden by commandArgs argument parsing
    contextp->debug(0);

    // Randomization reset policy
    // May be overridden by commandArgs argument parsing
    contextp->randReset(2);

    // Verilator must compute traced signals
    contextp->traceEverOn(true);

    // Pass arguments so Verilated code can see them, e.g. $value$plusargs
    // This needs to be called before you create any model
    contextp->commandArgs(argc, argv);

    // Construct the Verilated model, from Vtop.h generated from Verilating "top.v".
    // Using unique_ptr is similar to "Vtop* top = new Vtop" then deleting at end.
    // "TOP" will be the hierarchical name of the module.
    const std::unique_ptr<Vtop> top{new Vtop{contextp.get(), "TOP"}};

    // Set Vtop's input signals
    top->reset_l = !0;
    top->clk = 0;
    top->in_small = 1;
    top->in_quad = 0x1234;
    top->in_wide[0] = 0x11111111;
    top->in_wide[1] = 0x22222222;
    top->in_wide[2] = 0x3;

    // Simulate until $finish
    while (!contextp->gotFinish()) {
        // Historical note, before Verilator 4.200 Verilated::gotFinish()
        // was used above in place of contextp->gotFinish().
        // Most of the contextp-> calls can use Verilated:: calls instead;
        // the Verilated:: versions just assume there's a single context
        // being used (per thread).  It's faster and clearer to use the
        // newer contextp-> versions.

        contextp->timeInc(1);  // 1 timeprecision period passes...
        // Historical note, before Verilator 4.200 a sc_time_stamp()
        // function was required instead of using timeInc.  Once timeInc()
        // is called (with non-zero), the Verilated libraries assume the
        // new API, and sc_time_stamp() will no longer work.

        // Toggle a fast (time/2 period) clock
        top->clk = !top->clk;

        // Toggle control signals on an edge that doesn't correspond
        // to where the controls are sampled; in this example we do
        // this only on a negedge of clk, because we know
        // reset is not sampled there.
        if (!top->clk) {
            if (contextp->time() > 1 && contextp->time() < 10) {
                top->reset_l = !1;  // Assert reset
            } else {
                top->reset_l = !0;  // Deassert reset
            }
            // Assign some other inputs
            top->in_quad += 0x12;
        }

        // Evaluate model
        // (If you have multiple models being simulated in the same
        // timestep then instead of eval(), call eval_step() on each, then
        // eval_end_step() on each. See the manual.)
        top->eval();

        // Read outputs
        VL_PRINTF("[%" PRId64 "] clk=%x rstl=%x iquad=%" PRIx64 " -> oquad=%" PRIx64
                  " owide=%x_%08x_%08x\n",
                  contextp->time(), top->clk, top->reset_l, top->in_quad, top->out_quad,
                  top->out_wide[2], top->out_wide[1], top->out_wide[0]);
    }

    // Final model cleanup
    top->final();

    // Final simulation summary
    contextp->statsPrintSummary();

    // Return good completion status
    // Don't use exit() or destructor won't get called
    return 0;
}
- VerilatedContext模块用来控制控制时钟的,包括运行时间、时间步进、结束等。
- Vtop即对应Verilog中的Top模块,通过Vtop对象可以直接操作Top模块中的信号来完成对Top模块的验证。
3.2.2. SystemC示例
SystemC库提供了更友好的接口,并且可以直接接入SystemC建模的代码来进行仿真,通用性更好。其缺点是仿真速度不如纯C++版本。
cd make_tracing_sc
make
make会完成Verilog转SystemC,编译SystemC代码,仿真运行。
3.2.2.1. 编译
make的主要功能是:
verilator -sc --exe --build -j top.v sc_main.cpp
- -sc指示将top.v转换为SystemC代码。
- --exe指定生成可执行文件。
- sc_main.cpp表示这是一个SystemC的启动文件。
make -j -C obj_dir -f ../Makefile_obj
ccache g++  -I.  -MMD -I/usr/local/share/verilator/include -I/usr/local/share/verilator/include/vltstd -DVM_COVERAGE=1 -DVM_SC=1 -DVM_TRACE=1 -DVM_TRACE_FST=0 -DVM_TRACE_VCD=1 -faligned-new -fcf-protection=none -Wno-bool-operation -Wno-shadow -Wno-sign-compare -Wno-tautological-compare -Wno-uninitialized -Wno-unused-but-set-parameter -Wno-unused-but-set-variable -Wno-unused-parameter -Wno-unused-variable      -I/usr/local/systemc-2.3.2/include  -MMD -MP -DVL_DEBUG=1 -Wno-deprecated -Os -fstrict-aliasing -c -o sc_main.o ../sc_main.cpp
ccache g++ -Os  -I.  -MMD -I/usr/local/share/verilator/include -I/usr/local/share/verilator/include/vltstd -DVM_COVERAGE=1 -DVM_SC=1 -DVM_TRACE=1 -DVM_TRACE_FST=0 -DVM_TRACE_VCD=1 -faligned-new -fcf-protection=none -Wno-bool-operation -Wno-shadow -Wno-sign-compare -Wno-tautological-compare -Wno-uninitialized -Wno-unused-but-set-parameter -Wno-unused-but-set-variable -Wno-unused-parameter -Wno-unused-variable      -I/usr/local/systemc-2.3.2/include  -MMD -MP -DVL_DEBUG=1 -Wno-deprecated -c -o verilated.o /usr/local/share/verilator/include/verilated.cpp
ccache g++ -Os  -I.  -MMD -I/usr/local/share/verilator/include -I/usr/local/share/verilator/include/vltstd -DVM_COVERAGE=1 -DVM_SC=1 -DVM_TRACE=1 -DVM_TRACE_FST=0 -DVM_TRACE_VCD=1 -faligned-new -fcf-protection=none -Wno-bool-operation -Wno-shadow -Wno-sign-compare -Wno-tautological-compare -Wno-uninitialized -Wno-unused-but-set-parameter -Wno-unused-but-set-variable -Wno-unused-parameter -Wno-unused-variable      -I/usr/local/systemc-2.3.2/include  -MMD -MP -DVL_DEBUG=1 -Wno-deprecated -c -o verilated_cov.o /usr/local/share/verilator/include/verilated_cov.cpp
ccache g++ -Os  -I.  -MMD -I/usr/local/share/verilator/include -I/usr/local/share/verilator/include/vltstd -DVM_COVERAGE=1 -DVM_SC=1 -DVM_TRACE=1 -DVM_TRACE_FST=0 -DVM_TRACE_VCD=1 -faligned-new -fcf-protection=none -Wno-bool-operation -Wno-shadow -Wno-sign-compare -Wno-tautological-compare -Wno-uninitialized -Wno-unused-but-set-parameter -Wno-unused-but-set-variable -Wno-unused-parameter -Wno-unused-variable      -I/usr/local/systemc-2.3.2/include  -MMD -MP -DVL_DEBUG=1 -Wno-deprecated -c -o verilated_vcd_c.o /usr/local/share/verilator/include/verilated_vcd_c.cpp
ccache g++ -Os  -I.  -MMD -I/usr/local/share/verilator/include -I/usr/local/share/verilator/include/vltstd -DVM_COVERAGE=1 -DVM_SC=1 -DVM_TRACE=1 -DVM_TRACE_FST=0 -DVM_TRACE_VCD=1 -faligned-new -fcf-protection=none -Wno-bool-operation -Wno-shadow -Wno-sign-compare -Wno-tautological-compare -Wno-uninitialized -Wno-unused-but-set-parameter -Wno-unused-but-set-variable -Wno-unused-parameter -Wno-unused-variable      -I/usr/local/systemc-2.3.2/include  -MMD -MP -DVL_DEBUG=1 -Wno-deprecated -c -o verilated_threads.o /usr/local/share/verilator/include/verilated_threads.cpp
/usr/bin/python3 /usr/local/share/verilator/bin/verilator_includer -DVL_INCLUDE_OPT=include Vtop.cpp Vtop___024root__DepSet_h84412442__0.cpp Vtop___024root__DepSet_heccd7ead__0.cpp Vtop__Trace__0.cpp Vtop___024root__Slow.cpp Vtop___024root__DepSet_h84412442__0__Slow.cpp Vtop___024root__DepSet_heccd7ead__0__Slow.cpp Vtop__Syms.cpp Vtop__Trace__0__Slow.cpp Vtop__TraceDecls__0__Slow.cpp > Vtop__ALL.cpp
echo "" > Vtop__ALL.verilator_deplist.tmp
ccache g++ -Os -fstrict-aliasing  -I.  -MMD -I/usr/local/share/verilator/include -I/usr/local/share/verilator/include/vltstd -DVM_COVERAGE=1 -DVM_SC=1 -DVM_TRACE=1 -DVM_TRACE_FST=0 -DVM_TRACE_VCD=1 -faligned-new -fcf-protection=none -Wno-bool-operation -Wno-shadow -Wno-sign-compare -Wno-tautological-compare -Wno-uninitialized -Wno-unused-but-set-parameter -Wno-unused-but-set-variable -Wno-unused-parameter -Wno-unused-variable      -I/usr/local/systemc-2.3.2/include  -MMD -MP -DVL_DEBUG=1 -Wno-deprecated -c -o Vtop__ALL.o Vtop__ALL.cpp
g++     -L/usr/local/systemc-2.3.2/lib-linux64 sc_main.o verilated.o verilated_cov.o verilated_vcd_c.o verilated_threads.o Vtop__ALL.a    -pthread -lpthread -latomic  -lsystemc -o Vtop
- sc_main.cpp是SystemC的testbench文件。
- verilated.cpp,verilated_cov.cpp,verilated_vcd_c.cpp,verilated_threads.cpp是Verilator的源码,主要提供时钟模块、覆盖率模块、vcd波形生成模块,以及线程并行模块。
- Python脚本是将top.v生成的C++代码全部合并到Vtop__ALL.cpp,方便编译。
- 最后编译链接生成可执行文件Vtop。
3.2.2.2. 仿真运行
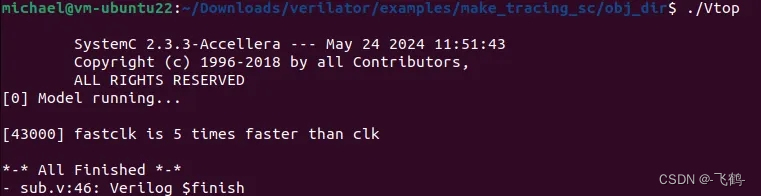
仿真运行会打印SystemC的版本信息。
通过GDB,我们可以看到真实的main入口函数是在SystemC模块中的。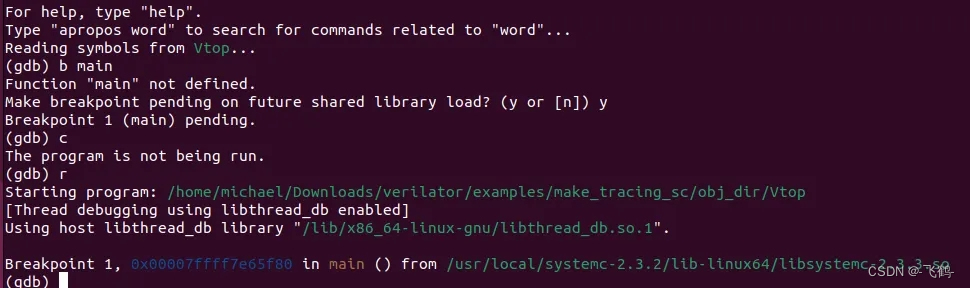
3.2.2.3. testbench代码
int sc_main(int argc, char* argv[]) {
    // This is a more complicated example, please also see the simpler examples/make_hello_c.

    // Create logs/ directory in case we have traces to put under it
    Verilated::mkdir("logs");

    // Set debug level, 0 is off, 9 is highest presently used
    // May be overridden by commandArgs argument parsing
    Verilated::debug(0);

    // Randomization reset policy
    // May be overridden by commandArgs argument parsing
    Verilated::randReset(2);

#if VM_TRACE
    // Before any evaluation, need to know to calculate those signals only used for tracing
    Verilated::traceEverOn(true);
#endif

    // Pass arguments so Verilated code can see them, e.g. $value$plusargs
    // This needs to be called before you create any model
    Verilated::commandArgs(argc, argv);

    // General logfile
    std::ios::sync_with_stdio();

    // Define clocks
    sc_clock clk{"clk", 10, SC_NS, 0.5, 3, SC_NS, true};
    sc_clock fastclk{"fastclk", 2, SC_NS, 0.5, 2, SC_NS, true};

    // Define interconnect
    sc_signal<bool> reset_l;
    sc_signal<uint32_t> in_small;
    sc_signal<uint64_t> in_quad;
    sc_signal<sc_bv<70>> in_wide;
    sc_signal<uint32_t> out_small;
    sc_signal<uint64_t> out_quad;
    sc_signal<sc_bv<70>> out_wide;

    // Construct the Verilated model, from inside Vtop.h
    // Using unique_ptr is similar to "Vtop* top = new Vtop" then deleting at end
    const std::unique_ptr<Vtop> top{new Vtop{"top"}};

    // Attach Vtop's signals to this upper model
    top->clk(clk);
    top->fastclk(fastclk);
    top->reset_l(reset_l);
    top->in_small(in_small);
    top->in_quad(in_quad);
    top->in_wide(in_wide);
    top->out_small(out_small);
    top->out_quad(out_quad);
    top->out_wide(out_wide);

    // You must do one evaluation before enabling waves, in order to allow
    // SystemC to interconnect everything for testing.
    sc_start(SC_ZERO_TIME);

#if VM_TRACE
    // If verilator was invoked with --trace argument,
    // and if at run time passed the +trace argument, turn on tracing
    VerilatedVcdSc* tfp = nullptr;
    const char* flag = Verilated::commandArgsPlusMatch("trace");
    if (flag && 0 == std::strcmp(flag, "+trace")) {
        std::cout << "Enabling waves into logs/vlt_dump.vcd...\n";
        tfp = new VerilatedVcdSc;
        top->trace(tfp, 99);  // Trace 99 levels of hierarchy
        Verilated::mkdir("logs");
        tfp->open("logs/vlt_dump.vcd");
    }
#endif

    // Simulate until $finish
    while (!Verilated::gotFinish()) {
#if VM_TRACE
        // Flush the wave files each cycle so we can immediately see the output
        // Don't do this in "real" programs, do it in an abort() handler instead
        if (tfp) tfp->flush();
#endif

        // Apply inputs
        if (sc_time_stamp() > sc_time(1, SC_NS) && sc_time_stamp() < sc_time(10, SC_NS)) {
            reset_l = !1;  // Assert reset
        } else {
            reset_l = !0;  // Deassert reset
        }

        // Simulate 1ns
        sc_start(1, SC_NS);
    }

    // Final model cleanup
    top->final();

    // Close trace if opened
#if VM_TRACE
    if (tfp) {
        tfp->close();
        tfp = nullptr;
    }
#endif

    // Coverage analysis (calling write only after the test is known to pass)
#if VM_COVERAGE
    Verilated::mkdir("logs");
    VerilatedCov::write("logs/coverage.dat");
#endif

    // Return good completion status
    return 0;
}
- Verilated空间的接口用来控制环境,包括覆盖率、波形、参数处理、环境结束等。
- Vtop对应Verilog的Top模块,可以直接操作Top模块的信号来进行赋值验证。
- Top模块的信号,必须使用SystemC的风格来进行设置修改。
C++版本的代码思路和SystemC版本的思路基本一样,只是代码的操作形式略有差异。SystemC版本可以更方便地直接调用SystemC的建模代码。
3.2.3. 纯verilog示例
如果Top模块不需要传输信号,则可以使用纯verilog模块,即不需要编写C++代码。
Verilator将verilog转换为C++,并生成一个简单的main.cpp文件作为启动文件。其编译过程:
verilator --binary -j 0 top.v
3.2.4. 生成波形
生成波形需要VerilatedVcdSc模块。
    if (flag && 0 == strcmp(flag, "+trace"))
    {
        tfp = new VerilatedVcdSc;
        top->trace(tfp, 0);
        tfp->open("wave.vcd");
    }
在仿真运行时:
./obj_dir/Vtop +trace
3.2.5. 查看波形
gtkwave wave.vcd