vue2的方法
不可以使用箭头函数
<template>
<div>
     <div>{{sum2()}}</div>
     <button @click="add">add</button>
</div>

</template>

<script>
export default {
   data(){
    return{
             name:"张三",
             num:20,
             num2:30,
     }
   },
   methods:{
      sum2(){
        console.log('sum2')
        return this.num+ this.num2
      },
      /**
       * 注意,不应该使用箭头函数来定义 method 函数 (例如 plus: () => this.a++)。
       * 理由是箭头函数绑定了父级作用域的上下文,所以 this 将不会按照期望指向 Vue 实例,this.a 将是 undefined。
       * 这时this其实是methods的this,但是methods没别任何对象调用所以他的this是undefined
       * 函数的this指向调用他的对象
       */
      add:()=>{
        // this.num++
        // console.log(this.num)
        console.log(this)
      }
   },
   computed:{
      sum(){
        console.log('sum')
        return this.num+ this.num2
      }
   },
   watch:{
      num(){
        console.log('num')
        return this.num+ this.num2
      }
   },
   beforeCreate(){
      console.log('beforeCreate')
      }
}
</script>

<style lang="scss" scoped>

</style>
add:()=>{
// this.num++
// console.log(this.num)
console.log(this)
}使用箭头函数时报错,打印一下发现箭头函数功能直接指向父级元素(这里是)methods,所以这里的this是methods的this因为未被调用所以是空的
注意,不应该使用箭头函数来定义 method 函数 (例如 plus: () => this.a++)。
* 理由是箭头函数绑定了父级作用域的上下文,所以 this 将不会按照期望指向 Vue 实例,this.a 将是 undefined。
* 这时this其实是methods的this,但是methods没别任何对象调用所以他的this是undefined
* 函数的this指向调用他的对象
vue2监听
新建文件

修改路由
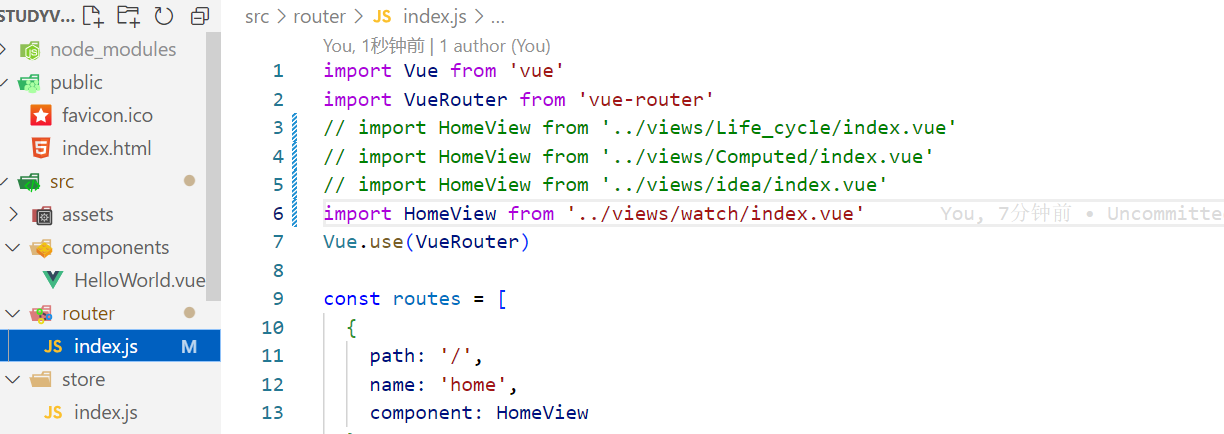
来到watch->index.vue
<template>
    <div>
        <h1>监听</h1>
        <p>{{ num }}</p>
        <button @click="num++">+</button>
        <button @click="dog.name = '小柏'">+</button>

    </div>
</template>

<script>
export default {
    data() {
        return {
            num: 1,
            dog: {
                name: '小狗',
                age: 1
            }
        }
    },
    watch: {
        /**
         * 1.简写,监听属性不依赖其他属性,修改值就会触发,一旦触发了被监听属性的set就会触发
         */
        num(newV, oldV) {
            console.log('新值', newV, '旧值', oldV)
        },
        // dog(newV, oldV) {
        //     console.log('新值', newV, '旧值', oldV)
        // }
        dog: {
            deep: true,// 深度监听,监听对象中的属性变化
            handler(newV, oldV) {
                console.log('新值', newV, '旧值', oldV)
            },
            immediate: true//立即开始监听,页面第一次渲染时或者刷新时就会触发
        },
        'dog.age': {//这样直接监听对象的属性
            handler(newV, oldV) {
                console.log('新值', newV, '旧值', oldV)
            },
            immediate: true

        }
    }
}
</script>
<style scoped lang='scss'></style>

 num(newV, oldV) {
            console.log('新值', newV, '旧值', oldV)
        },
监听对象和对象属性
监听对象俩个方法选择其一,才会触发
immediate: true//立即开始监听,页面第一次渲染时或者刷新时就会触发
deep: true,// 深度监听,监听对象中的属性变化
dog: {
deep: true,// 深度监听,监听对象中的属性变化
handler(newV, oldV) {
console.log('新值', newV, '旧值', oldV)
},
immediate: true//立即开始监听,页面第一次渲染时或者刷新时就会触发
},
'dog.age': {//这样直接监听对象的属性
handler(newV, oldV) {
console.log('新值', newV, '旧值', oldV)
},
immediate: true
}vue2父传子
// 父传子搭配生命周期的理解
新建文件
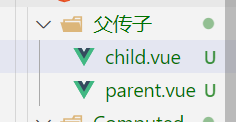
切换路由

生命周期父子组件运行与销毁
parent.vue
引用使用子的文件
import Child from "./child";//定义自己的名字是parent,引用子组件儿子的名字
name: 'parent',
components: { Child },
//在div内使用它
<Child/>定义生命周期并对起销毁,给一个show属性,为true控制开关
return {
            show: true
        }
 beforeCreate() {
        console.log('父组件', 'beforeCreate')
    },
    created() {
        console.log('父组件', 'created')
    },
    beforeMount() {
        console.log('父组件', 'beforeMount')
    },
    mounted() {
        console.log('父组件', 'mounted')
    },
    beforeUpdate() {
        console.log('父组件', 'beforeUpdate')
    },
    updated() {
        console.log('父组件', 'updated')
    },
    beforeDestroy() {
        console.log('父组件', 'beforeDestroy')
    },
    destroyed() {
        console.log('父组件', 'destroyed')
    },
把父里面的值传个子,并使用按钮控制开关
 <Child v-if="show"/>
 <button @click="show = !show">按钮</button>
parent.vue全部代码
<template>
    <div>
        <Child v-if="show"/>
        <button @click="show = !show">按钮</button>
    </div>
</template>

<script>
/**
 * 父传子,通过自定义属性传参,即props
 * 父组件将要传递的参数通过v-bind绑定到自组件上
 * :属性名="参数值"
 */
import Child from "./child";
export default {
    name: 'parent',
    components: { Child },
    data() {
        return {
            show: true
        }
    },
    /**
     * 当父子组件嵌套时
     * 会先将父组件初始化,但不会进行挂载
     * 然后开始进行子组件的初始化以及挂载
     * 子组件挂载完毕时,才会挂载父组件
     * 销毁的时候,先销毁子组件,然后才会触发父组件的updated钩子
     */
    beforeCreate() {
        console.log('父组件', 'beforeCreate')
    },
    created() {
        console.log('父组件', 'created')
    },
    beforeMount() {
        console.log('父组件', 'beforeMount')
    },
    mounted() {
        console.log('父组件', 'mounted')
    },
    beforeUpdate() {
        console.log('父组件', 'beforeUpdate')
    },
    updated() {
        console.log('父组件', 'updated')
    },
    beforeDestroy() {
        console.log('父组件', 'beforeDestroy')
    },
    destroyed() {
        console.log('父组件', 'destroyed')
    },
    methods: {},
    computed: {}
}
</script>
<style scoped lang='scss'></style>
子和父运行生命周期,并对起销毁
child.vue
定义一下自己的名字
name: 'child',在子组件里用生命周期,看看执行顺序
<template>
    <div>
        子组件
    </div>
</template>

<script>
/**
 * 自组件通过props接受父组件传递的值
 * props中的属性被混入了当前的子组件中
 * 可以通过this直接访问到
 * 注意:子组件不允许修改父组件传递的值,否则会破坏vue的单向数据流
 */
export default {
    name: 'child',
    data() {
        return {
        }
    },
    beforeCreate() {
        console.log('子组件beforeCreate')
    },
    created() {
        console.log('子组件created')
    },
    beforeMount() {
        console.log('子组件beforeMount')
    },
    mounted() {
        console.log('子组件mounted')
    },
    beforeUpdate() {
        console.log('子组件beforeUpdate')
    },
    updated() {
        console.log('子组件updated')
    },
    beforeDestroy() {
        console.log('子组件beforeDestroy')
    },
    destroyed() {
        console.log('子组件destroyed')
    },


}
</script>
<style scoped lang='scss'></style>

show 初始值为 true,<Child> 组件在初始渲染时会被显示出来。
当点击show将flase隐藏,对子组件进行销毁

- 当父子组件嵌套时
-
- 会先将父组件初始化,但不会进行挂载
- 然后开始进行子组件的初始化以及挂载
- 子组件挂载完毕时,才会挂载父组件
- 销毁的时候,先销毁子组件,然后才会触发父组件的updated钩子
注意:子组件不允许修改父组件传递的值,否则会破坏vue的单向数据流
<template>
    <div>
        子组件
        <p>{{ age }}</p>
    </div>
</template>

<script>
/**
 * 子组件通过props接受父组件传递的值
 * props中的属性被混入了当前的子组件中
 * 可以通过this直接访问到
 * 注意:子组件不允许修改父组件传递的值,否则会破坏vue的单向数据流
 */
export default {
    /**
     * 1.简写
     * props: ['age'],
     */
    /**
     * 2.完整写法
     */
    props: {
        age: {
            type: Number,//类型
            default: 18,//默认值
            required: true,//是否必须
            validator: (v) => { return true }//校验规则
        }
    },
    name: 'child',
    data() {
        return {
        }
    },
    beforeCreate() {
        console.log('子组件beforeCreate')
    },
    created() {
        console.log('子组件created')
    },
    beforeMount() {
        console.log('子组件beforeMount')
    },
    mounted() {
        console.log('子组件mounted')
        /**
         * $parent
         * 1.获取父组件的实例
         * 2.通过$parent可以访问到父组件的实例,从而访问到父组件中的数据和方法
         */
        setTimeout(() => {
            console.log(this.$parent, '父组件')
        }, 100);
    },
    beforeUpdate() {
        console.log('子组件beforeUpdate')
    },
    updated() {
        console.log('子组件updated')
    },
    beforeDestroy() {
        console.log('子组件beforeDestroy')
    },
    destroyed() {
        console.log('子组件destroyed')
    },
}
</script>
<style scoped lang='scss'></style>

![NSSCTF | [SWPUCTF 2021 新生赛]no_wakeup](https://img-blog.csdnimg.cn/direct/2d5c559b1ca947058c5252bc03051a39.png)
