对已检测到的平面默认的渲染效果显得有些生硬和突兀,有时我们需要更加友好、美观的的平面虚拟界面,这时就需要对已检测到的平面定制个性化的可视方案。为达到更好的视觉效果,处理的思路如下。
视觉效果前后对比!
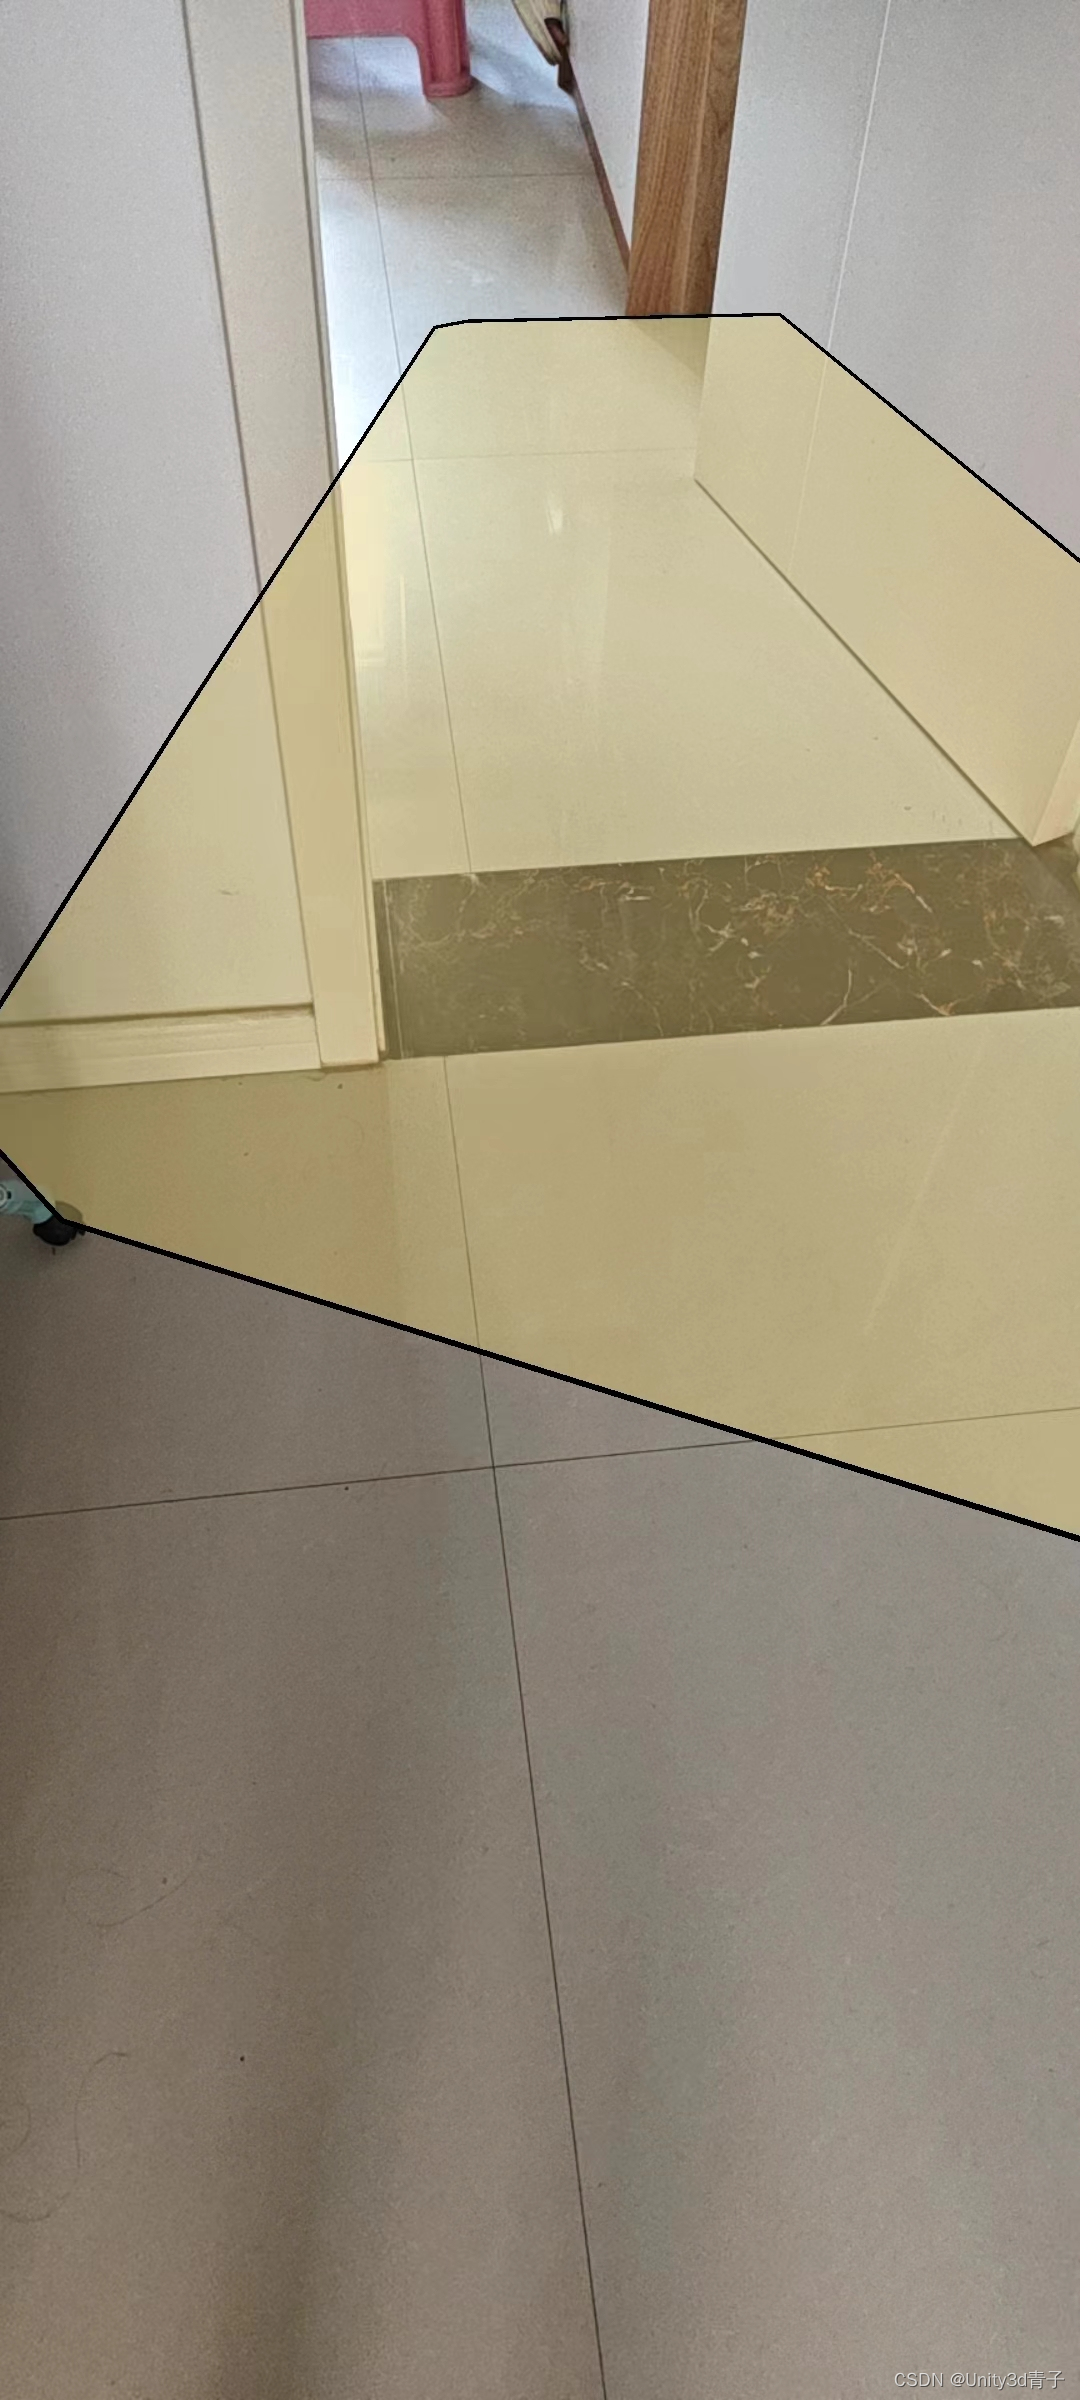
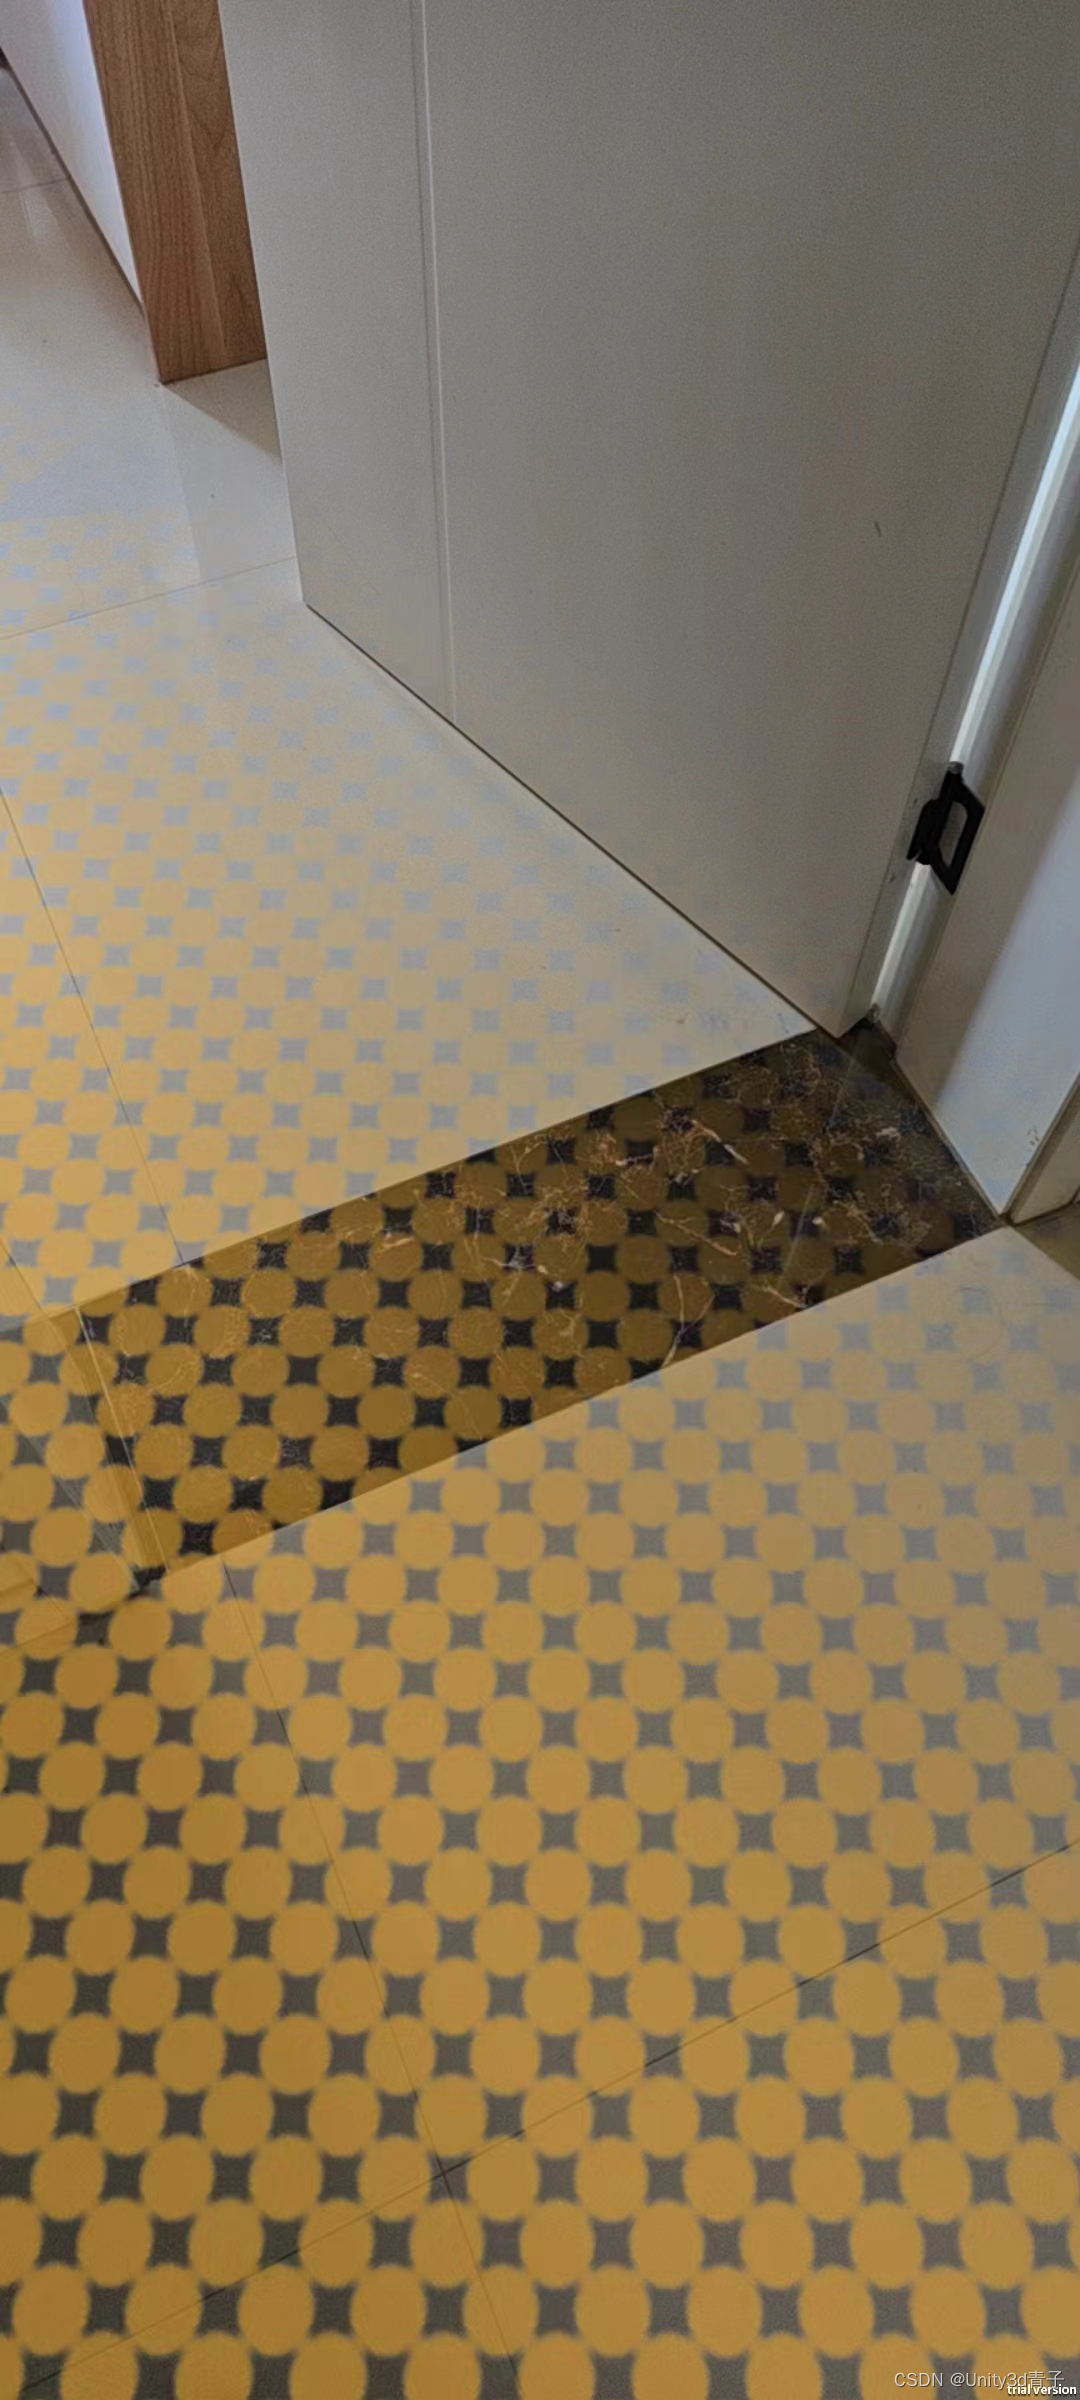
(本节Shader与ARFeatheredPlaneMesh Visualizer.cs脚本来自Untiy官方AR Foudnation参考代码)
在实现本案例前需要先看第一篇,这篇文章搭建了平面检测的框架!本篇是在此基础上进行的升级!【ARFoundation自学01】搭建AR框架+检测平面+点击克隆立方体到地面=自信入门!_ar foundation教程-CSDN博客
一、 修改材质
(1)隐藏掉系统自带的黑色边框。
(2)重新制作一个渲染材质和Shader脚本
使用带Alpha通道半透明的PNG格式伯纹理,通过Shader脚本渲染这个半透明的纹理,将纹理透明区域镂空。
(3)编写一个渐隐的脚本,让边界的纹理渐隐
为了达到更好的视觉过渡。按照以上思路,我们直接对AR Default Plane预制体进行改造即可。
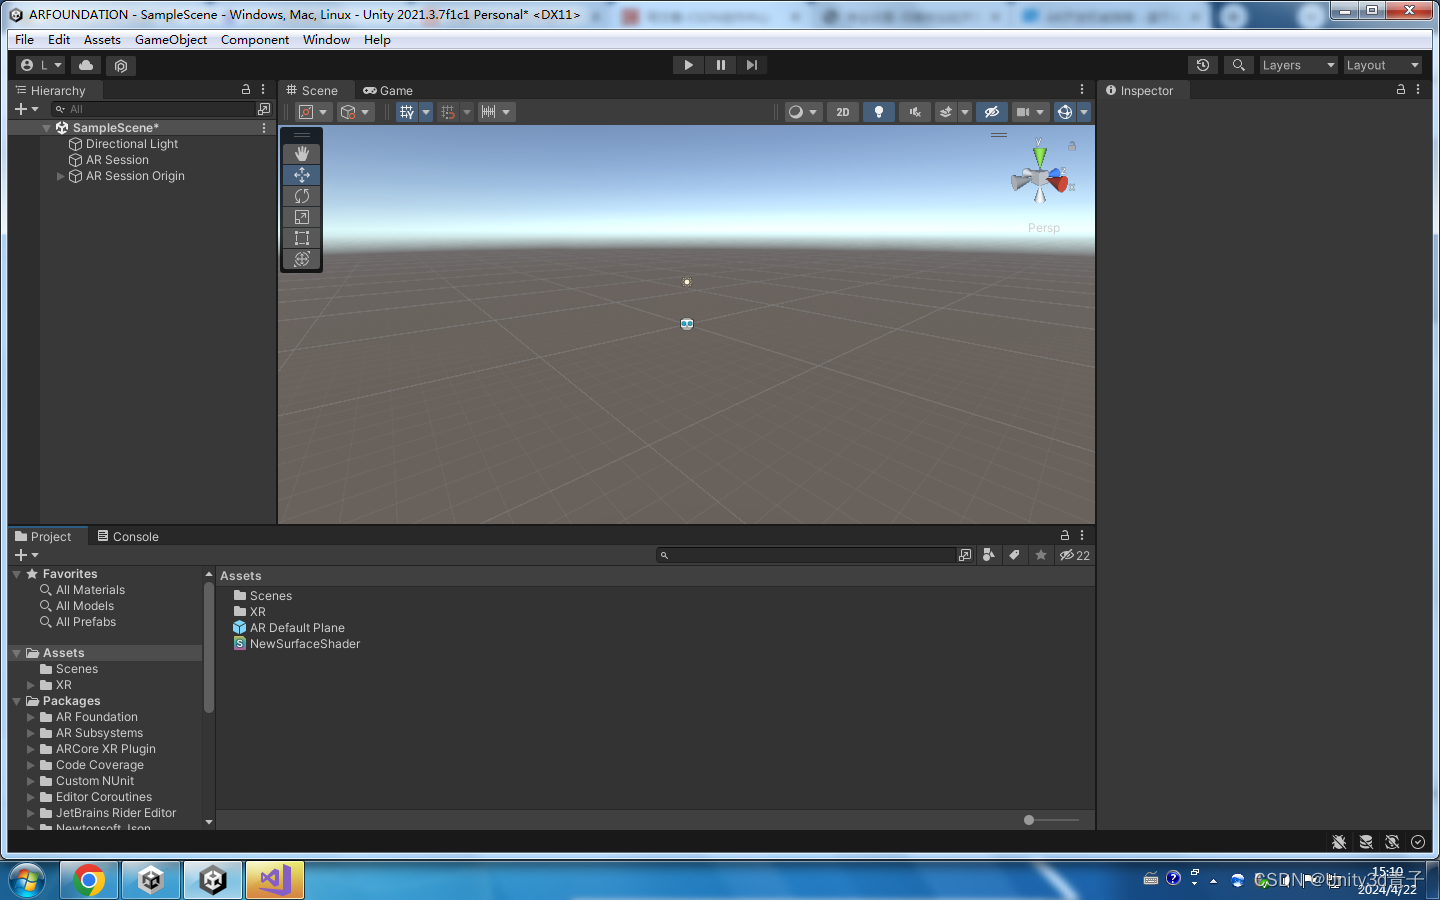
(1)删除AR Default Plane预制体上的Line Renderer组件。(这个是渲染黑色描边框的组件,删除就意味着不要描边)
(2)编写一个Shader代码,制作一张带Alpha通道半透明PNG格式纹理贴图在外部赋值给这个shader 代码!
Shader "Unlit/FeatheredPlaneShader"
{
    Properties
    {
        _MainTex ("Texture", 2D) = "white" {}
        _TexTintColor("Texture Tint Color", Color) = (1,1,1,1)
        _PlaneColor("Plane Color", Color) = (1,1,1,1)
        _ShortestUVMapping("Shortest UV Mapping Value", Range(0, 1)) = 1.0
    }

    SubShader
    {
        Tags { "RenderType"="Transparent" "Queue"="Transparent" }
        LOD 100
        Blend SrcAlpha OneMinusSrcAlpha
        ZWrite Off

        Pass
        {
            CGPROGRAM
            #pragma vertex vert
            #pragma fragment frag
            #include "UnityCG.cginc"

            struct appdata
            {
                float4 vertex : POSITION;
                float2 uv : TEXCOORD0;
                float3 uv2 : TEXCOORD1;
            };

            struct v2f
            {
                float4 vertex : SV_POSITION;
                float2 uv : TEXCOORD0;
                float3 uv2 : TEXCOORD1;
            };

            sampler2D _MainTex;
            float4 _MainTex_ST;
            fixed4 _TexTintColor;
            fixed4 _PlaneColor;
            float _ShortestUVMapping;

            v2f vert (appdata v)
            {
                v2f o;
                o.vertex = UnityObjectToClipPos(v.vertex);
                o.uv = TRANSFORM_TEX(v.uv, _MainTex);
                o.uv2 = v.uv2;
                return o;
            }

            fixed4 frag (v2f i) : SV_Target
            {
                fixed4 col = tex2D(_MainTex, i.uv) * _TexTintColor;
                col = lerp(_PlaneColor, col, col.a);
                col.a *= 1 - smoothstep(1, _ShortestUVMapping, i.uv2.x);
                return col;
            }
            ENDCG
        }
    }
}
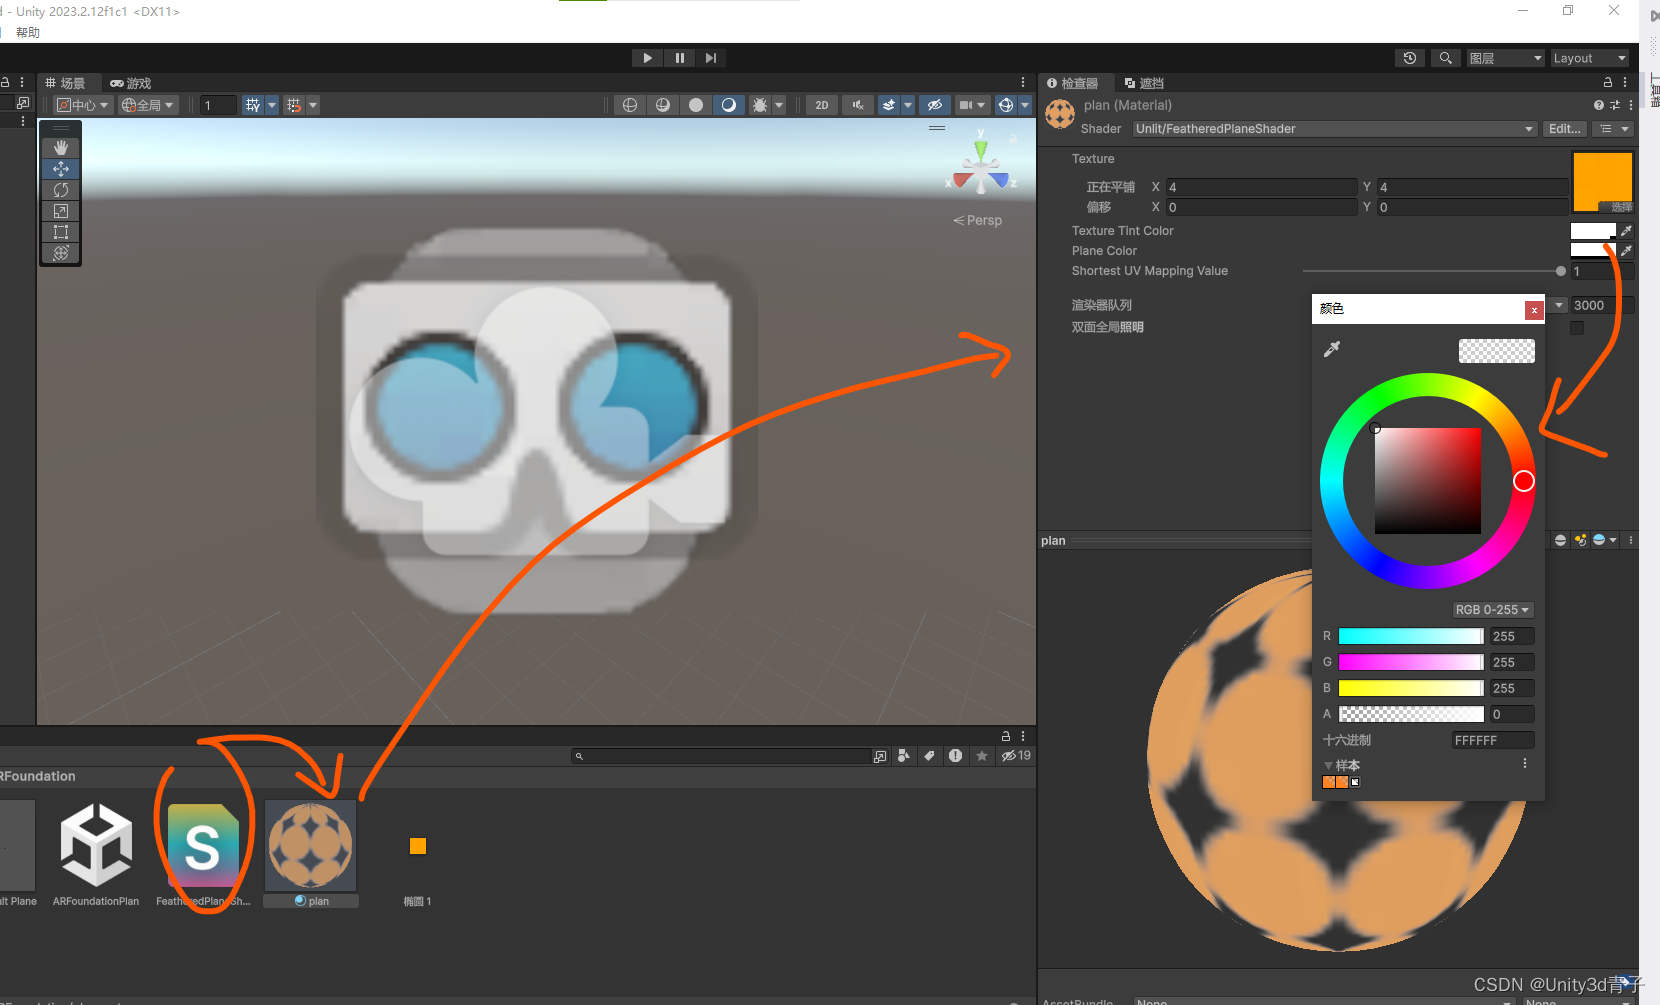
这个是一个材质脚本,我们写好以后创建一个普通材质,把脚本直接拖给材质即可!
调一下参数!Unlit/FeatheredPlaneShader的材质进行如下操作:
- 将在PS里面做好的透明纹理赋值给给
_MainTex属性(Texture)。 - 将
_TexTintColor的Alpha值设置为220,确保十字星的透明部分得以正确显示。 - 将
_PlaneColor的Alpha值设置为0,使平面背景完全透明。
做好的材质赋值给平面预制体AR Default Plane
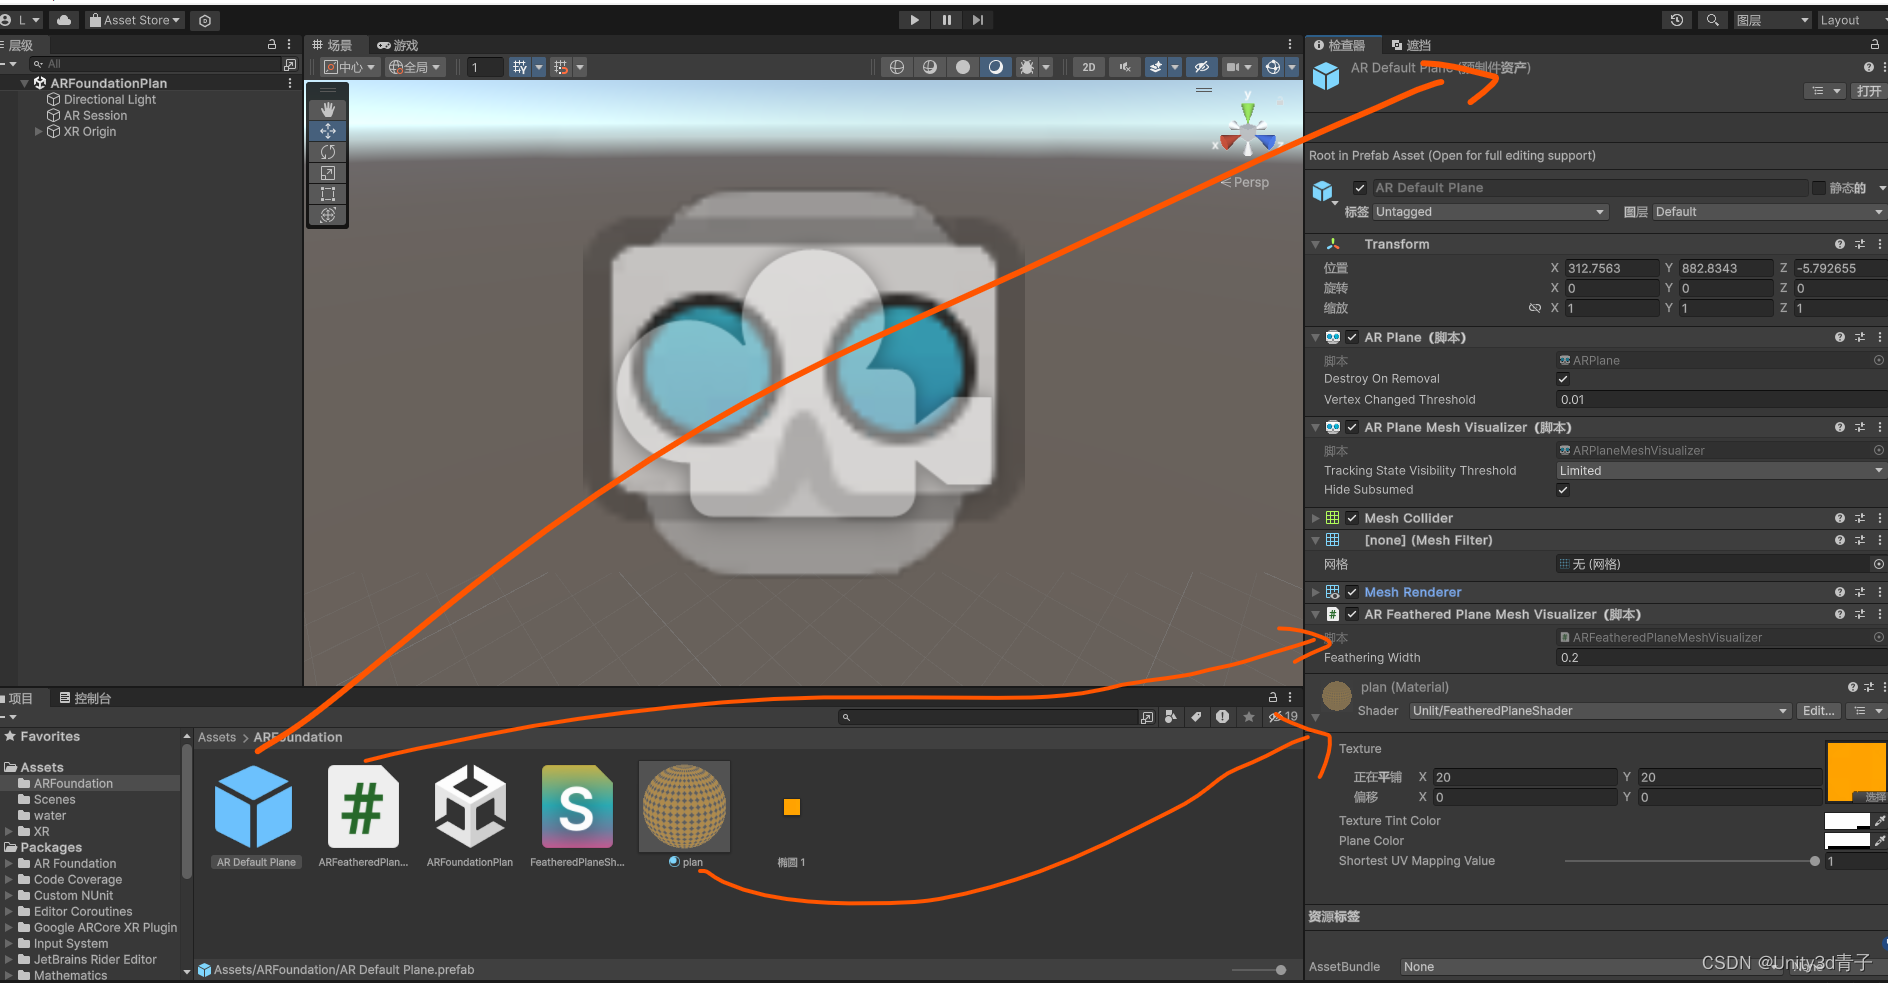
上面基本完成了可视化平面的视觉效果更换!但是还可以进一步优化,让边缘平滑渐隐!
2.创建一个普通C#脚本-边缘平滑渐隐
该脚本主要实现平面的渲染,并处理边界使其平滑渐隐。将AR Feathered Plane Mesh Visualizer挂载到AR Default Plane预制体上!
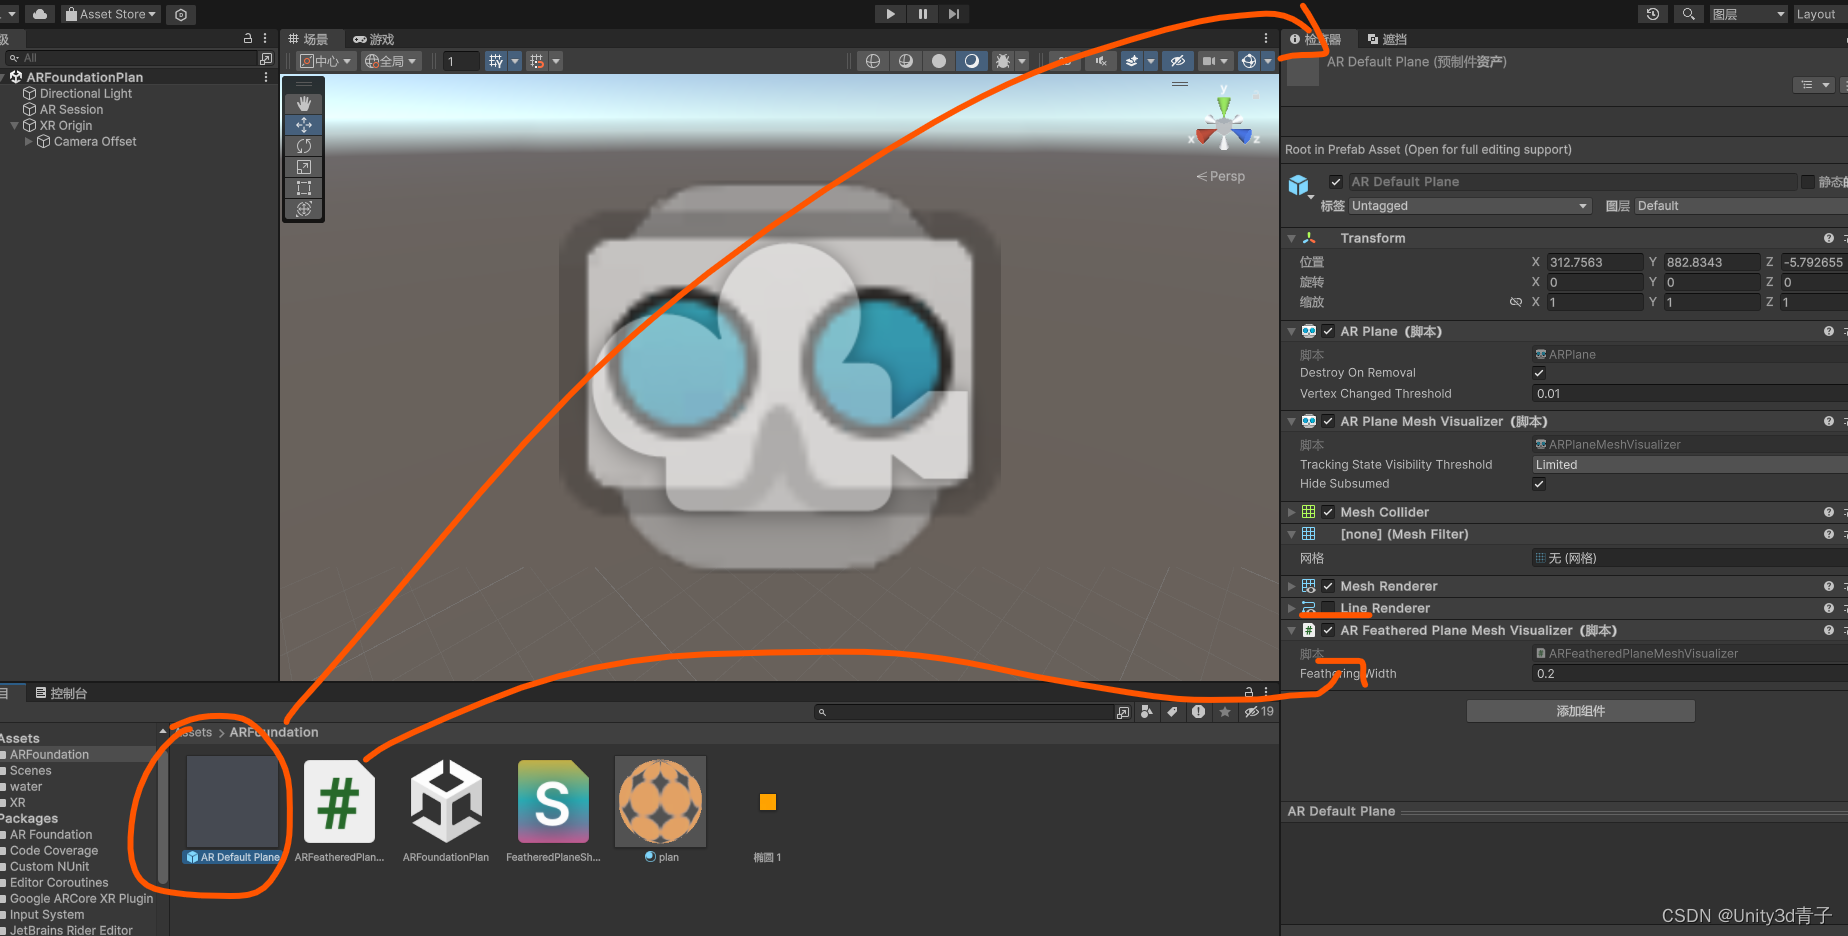
完成之后的预制体组件脚本应该如图3-5所示。编译运行,找一个富纹理平面进行平面检测,效果如图3-6所示。相比AR Foundation自带的平面可视化,个性化后的渲染视觉效果要好很多,而且在平面边界处也有一个渐隐的平滑过渡。
using System.Collections.Generic;
using UnityEngine;
using UnityEngine.XR.ARFoundation;

[RequireComponent(typeof(ARPlaneMeshVisualizer), typeof(MeshRenderer), typeof(ARPlane))]
public class ARFeatheredPlaneMeshVisualizer : MonoBehaviour
{
    [Tooltip("The width of the texture feathering (in world units).")]
    [SerializeField] float m_FeatheringWidth = 0.2f;
    public float featheringWidth
    {
        get { return m_FeatheringWidth; }
        set { m_FeatheringWidth = value; }
    }

    private ARPlaneMeshVisualizer m_PlaneMeshVisualizer;
    private ARPlane m_Plane;
    private MeshRenderer m_Renderer;
    private Material m_FeatheredPlaneMaterial;

    void Awake()
    {
        m_PlaneMeshVisualizer = GetComponent<ARPlaneMeshVisualizer>();
        m_Renderer = GetComponent<MeshRenderer>();
        m_FeatheredPlaneMaterial = m_Renderer.material;
        m_Plane = GetComponent<ARPlane>();
    }

    void OnEnable()
    {
        m_Plane.boundaryChanged += ARPlane_boundaryUpdated;
    }

    void OnDisable()
    {
        m_Plane.boundaryChanged -= ARPlane_boundaryUpdated;
    }

    void ARPlane_boundaryUpdated(ARPlaneBoundaryChangedEventArgs eventArgs)
    {
        GenerateBoundaryUVs(m_PlaneMeshVisualizer.mesh);
    }

    void GenerateBoundaryUVs(Mesh mesh)
    {
        int vertexCount = mesh.vertexCount;
        if (s_FeatheringUVs.Capacity < vertexCount) { s_FeatheringUVs.Capacity = vertexCount; }

        mesh.GetVertices(s_Vertices);

        Vector3 centerInPlaneSpace = Vector3.zero;
        for (int i = 0; i < vertexCount; i++)
        {
            centerInPlaneSpace += s_Vertices[i];
        }
        centerInPlaneSpace /= vertexCount;

        float shortestUVMapping = float.MaxValue;

        for (int i = 0; i < vertexCount; i++)
        {
            float vertexDist = Vector3.Distance(s_Vertices[i], centerInPlaneSpace);
            float uvMapping = vertexDist / Mathf.Max(vertexDist - featheringWidth, 0.001f);
            if (shortestUVMapping > uvMapping) { shortestUVMapping = uvMapping; }

            s_FeatheringUVs.Add(new Vector3(uvMapping, 0, 0));
        }

        m_FeatheredPlaneMaterial.SetFloat("_ShortestUVMapping", shortestUVMapping);

        mesh.SetUVs(1, s_FeatheringUVs);
        mesh.UploadMeshData(false);
    }

    static List<Vector3> s_FeatheringUVs = new List<Vector3>();
    static List<Vector3> s_Vertices = new List<Vector3>();
}
这是一个Unity C#脚本,名为`ARFeatheredPlaneMeshVisualizer`,用于为ARFoundation框架中的ARPlane对象添加一种特殊的视觉效果:根据平面边缘与中心的距离,为平面的顶点生成渐变的UV映射,从而实现类似羽毛边缘的过渡效果。该脚本依赖`ARPlaneMeshVisualizer`、`MeshRenderer`和`ARPlane`组件,并且通过响应ARPlane的边界变化事件来实时更新UV映射。下面为您详细解释脚本各部分的功能:
1. **命名空间和引用**:
using System.Collections.Generic;
using UnityEngine;
using UnityEngine.XR.ARFoundation;
```
引入所需命名空间,包括泛型集合、Unity基础类库以及ARFoundation相关API。
2. **类定义**:
[RequireComponent(typeof(ARPlaneMeshVisualizer), typeof(MeshRenderer), typeof(ARPlane))]
public class ARFeatheredPlaneMeshVisualizer : MonoBehaviour
```
定义一个公共类`ARFeatheredPlaneMeshVisualizer`,继承自`MonoBehaviour`,并使用`[RequireComponent]`特性确保附着此脚本的游戏对象必须同时具有`ARPlaneMeshVisualizer`、`MeshRenderer`和`ARPlane`组件。
3. **属性定义**:
[Tooltip("The width of the texture feathering (in world units).")]
[SerializeField] float m_FeatheringWidth = 0.2f;
public float FeatheringWidth
{
get { return m_FeatheringWidth; }
set { m_FeatheringWidth = value; }
}
定义一个具有工具提示的私有变量`m_FeatheringWidth`,默认值为0.2f。使用`[SerializeField]`使其能在Unity Inspector面板中显示并编辑。同时提供一个公开的只读属性`FeatheringWidth`,用于外部访问和修改该值。`FeatheringWidth`决定了纹理边缘渐变过渡的宽度(以世界单位计)。
4. **成员变量**:
private ARPlaneMeshVisualizer m_PlaneMeshVisualizer;
private ARPlane m_Plane;
private MeshRenderer m_Renderer;
private Material m_FeatheredPlaneMaterial;
```
定义私有变量,分别存储`ARPlaneMeshVisualizer`、`ARPlane`、`MeshRenderer`组件的引用以及关联的`Material`对象。
5. **Awake()**:
void Awake()
{
m_PlaneMeshVisualizer = GetComponent<ARPlaneMeshVisualizer>();
m_Renderer = GetComponent<MeshRenderer>();
m_FeatheredPlaneMaterial = m_Renderer.material;
m_Plane = GetComponent<ARPlane>();
}
`Awake()`方法在游戏对象初始化阶段调用,用于获取并存储所需组件的引用。
6. **生命周期方法**:
void OnEnable()
{
m_Plane.boundaryChanged += ARPlane_boundaryUpdated;
}
void OnDisable()
{
m_Plane.boundaryChanged -= ARPlane_boundaryUpdated;
}
```
当组件启用时,注册`ARPlane.boundaryChanged`事件的处理函数`ARPlane_boundaryUpdated`。当组件禁用时,取消注册该事件,以避免内存泄漏和不必要的性能开销。
7. **ARPlane_boundaryUpdated()**:
```csharp
void ARPlane_boundaryUpdated(ARPlaneBoundaryChangedEventArgs eventArgs)
{
GenerateBoundaryUVs(m_PlaneMeshVisualizer.mesh);
}
```
事件处理函数,当ARPlane的边界发生变化时调用。在此调用`GenerateBoundaryUVs`方法,传入`ARPlaneMeshVisualizer`组件提供的`Mesh`对象,以更新其UV映射。
8. **GenerateBoundaryUVs()**:
```csharp
void GenerateBoundaryUVs(Mesh mesh)
{
// ... (详细解释见下文)
}
```
主要功能方法,负责计算并设置Mesh顶点的UV映射以实现羽毛边缘效果。下面详细解释内部逻辑:
- 获取顶点数量和检查`s_FeatheringUVs`容量。
- 使用`mesh.GetVertices`获取所有顶点坐标并存储在`s_Vertices`列表中。
- 计算顶点集的中心点(质心)。
- 初始化`shortestUVMapping`为最大浮点数,用于记录最小UV映射值。
- 遍历每个顶点,计算其与中心点的距离(`vertexDist`),并据此计算UV映射值(`uvMapping`)。
- UV映射值通过`vertexDist`与`featheringWidth`之差(取最大值为0.001f避免除以零)的比值得到,距离越远,UV映射值越大。
- 如果当前UV映射值小于已记录的最小值,则更新`shortestUVMapping`。
- 将计算得到的UV映射值(仅包含x分量,y和z设为0)添加到`s_FeatheringUVs`列表。
- 将计算得到的最小UV映射值(`shortestUVMapping`)设置到材质的`_ShortestUVMapping`属性。
- 使用`mesh.SetUVs`方法将`s_FeatheringUVs`列表中的UV映射值设置到Mesh的第二个UV通道(索引为1)。
- 调用`mesh.UploadMeshData(false)`更新Mesh数据到GPU,完成UV映射设置。
9. **静态列表**:
```csharp
static List<Vector3> s_FeatheringUVs = new List<Vector3>();
static List<Vector3> s_Vertices = new List<Vector3>();
```
定义两个静态列表,分别用于暂存计算得到的UV映射值和临时存储Mesh顶点坐标。
总结:`ARFeatheredPlaneMeshVisualizer`脚本为ARFoundation中的ARPlane添加了一种基于顶点距离的UV映射渐变效果,实现了类似羽毛边缘的过渡视觉效果。它监听ARPlane边界变化事件,动态更新Mesh的UV映射,确保在AR环境变化时能实时反映到渲染结果中。


