1、菜单栏工具栏状态栏
#include "mainwindow.h"
#include "ui_mainwindow.h"
#pragma execution_character_set("utf-8");
MainWindow::MainWindow(QWidget *parent)
    : QMainWindow(parent)
    , ui(new Ui::MainWindow)
{
    ui->setupUi(this);
    //菜单
    QMenu *editMenu = ui->menubar->addMenu("编辑(&E)");
    QAction*action_copy = editMenu->addAction(QString("复制(&C)"));//前面还可以写个QIcon
    action_copy->setShortcut(QKeySequence("Ctrl + C"));

    //工具栏操作
    ui->toolBar->addAction(action_copy);

    //动作加入分组
    QActionGroup*group = new QActionGroup(this);
    QAction*action_L = group->addAction(("左对齐(&L)"));
    QAction*action_R = group->addAction(("左对齐(&R)"));

    action_L->setCheckable(true);
    action_R->setCheckable(true);

    editMenu->addSeparator();//添加分割线

    //工具栏添加部件
    QToolButton*toolBtn = new QToolButton(this);
    toolBtn->setText("颜色");

    //工具栏设置菜单
    QMenu *colorMenu = new QMenu(this);
    colorMenu->addAction("绿色");
    colorMenu->addAction("红色");
    toolBtn->setMenu(colorMenu);

    toolBtn->setPopupMode(QToolButton::MenuButtonPopup);//弹出的菜单

    ui->toolBar->addWidget(toolBtn);

    QSpinBox*spinBox = new QSpinBox(this);
    ui->toolBar->addWidget(spinBox);

    //状态栏显示信息
    ui->statusbar->showMessage(QString("欢迎。。。"),3000);

    //添加永久的
    QLabel*tag = new QLabel("wcoao");
    ui->statusbar->addPermanentWidget(tag);


}

MainWindow::~MainWindow()
{
    delete ui;
}
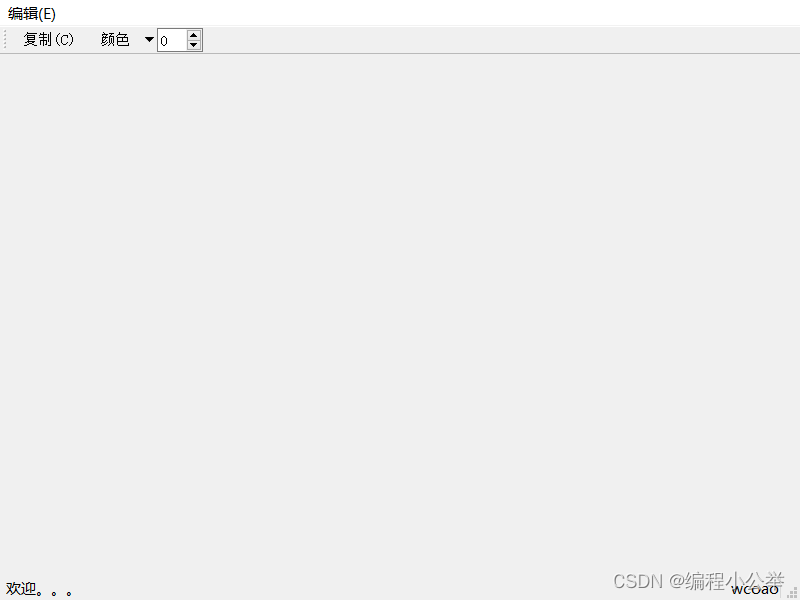
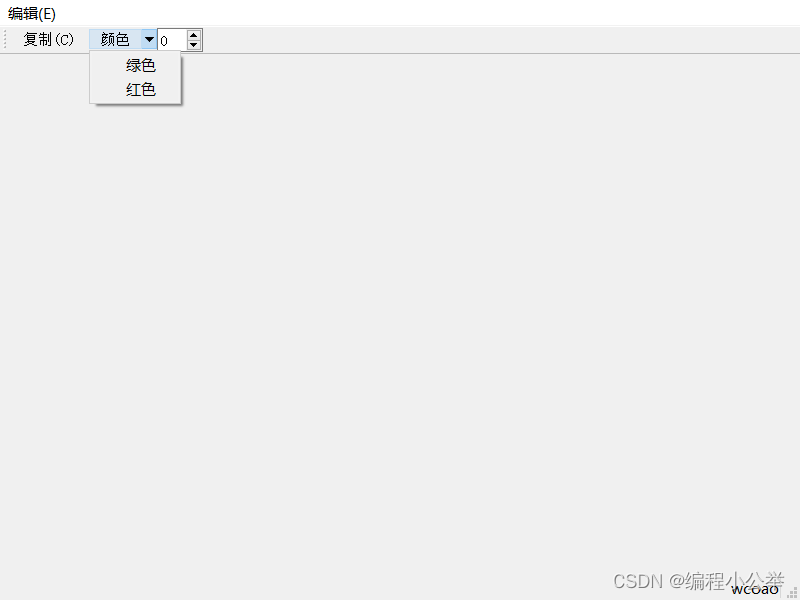
实现效果如下:
2、自定义菜单栏
1、需要继承于QWidgetAction
写一个Myaction类
#ifndef MYACTION_H
#define MYACTION_H

#include <QWidgetAction>
#include <QObject>
#include<QLineEdit>
class Myaction : public QWidgetAction
{
    Q_OBJECT
public:
    explicit Myaction(QObject *parent = nullptr);

protected:
    QWidget*createWidget(QWidget*parent);

signals:
    void getText(const QString&string);

private slots:
    void sendText();

private:
    QLineEdit*lineedit;
};

#endif // MYACTION_H


#include "myaction.h"
#include<QSplitter>
#include<QLabel>
Myaction::Myaction(QObject *parent)
    : QWidgetAction{parent}
{
    lineedit = new QLineEdit;
    connect(lineedit,&QLineEdit::returnPressed,this,&Myaction::sendText);

}

QWidget *Myaction::createWidget(QWidget *parent)
{
    //判断父部件是否继承菜单或者工具栏
    //如果创建部件的子部件并放回子部件
    if(parent->inherits("QMenu")||parent->inherits("QToolBar"))
    {
        QSplitter *splitter = new QSplitter(parent);
        QLabel*label = new QLabel("插入文本");
        splitter->addWidget(label);
        splitter->addWidget(lineedit);
        return splitter;
    }
    return 0;
}

void Myaction::sendText()
{
    emit getText(lineedit->text());
    lineedit->clear();
}

QMainWindow::
    Myaction*action = new Myaction;
    QMenu*menu = ui->menubar->addMenu("编辑(&E)");
    menu->addAction(action);
    connect(action,&Myaction::getText,this,&MainWindow::setText);


void MainWindow::setText(const QString &str)
{
    ui->textEdit->setText(str);
}
3、富文本
#include "mainwindow.h"
#include "ui_mainwindow.h"


#include<QTextFrame> //富文本
MainWindow::MainWindow(QWidget *parent)
    : QMainWindow(parent)
    , ui(new Ui::MainWindow)
{
    ui->setupUi(this);

    //获取文档对象
    QTextDocument *document = ui->textEdit->document();

    //获取根框架
    QTextFrame *rootFrame = document->rootFrame();

    //文档格式框架
    QTextFrameFormat format;
    format.setBorderBrush(Qt::red);
    format.setBorder(3);

    //文档框架设置格式
    rootFrame->setFrameFormat(format);

    //设置文本边框风格
    QTextFrameFormat frameFormat;
    frameFormat.setBackground(Qt::lightGray);
    frameFormat.setMargin(10);
    frameFormat.setPadding(15);
    frameFormat.setBorder(2);
    frameFormat.setBorderStyle(QTextFrameFormat::BorderStyle_DotDash);

    QTextCursor cursor = ui->textEdit->textCursor();
    cursor.insertFrame(frameFormat);
}

MainWindow::~MainWindow()
{
    delete ui;
}
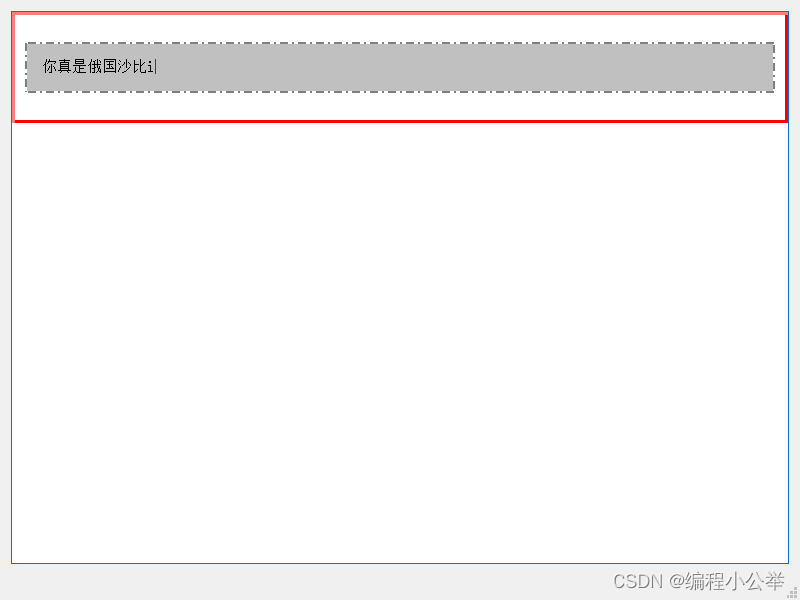
效果:
4、文本框块字符格式
#include "mainwindow.h"
#include "ui_mainwindow.h"
#include<QAction>
#include<QTextDocument>
#include<QTextFrame>
#include<QDebug>
#include<QTextBlockFormat>
#pragma execution_character_set("utf-8");
MainWindow::MainWindow(QWidget *parent)
    : QMainWindow(parent)
    , ui(new Ui::MainWindow)
{
    ui->setupUi(this);
    QAction *action_textFrame = new QAction("框架",this);
    connect(action_textFrame,&QAction::triggered,this,&MainWindow::showtextFrame);

    QAction*action_textBlock = new QAction("文本块",this);
    connect(action_textBlock,&QAction::triggered,this,&MainWindow::showTextBlock);
    QAction*action_setText = new QAction("字体",this);
    connect(action_setText, SIGNAL(triggered(bool)), this, SLOT(setTextFont(bool)));

    ui->toolBar->addAction(action_setText);
    ui->toolBar->addAction(action_textBlock);
    ui->toolBar->addAction(action_textFrame);
}

MainWindow::~MainWindow()
{
    delete ui;
}

void MainWindow::showtextFrame() //文本框架
{
    QTextDocument* document = ui->textEdit->document();
    QTextFrame* frame = document->rootFrame();

    QTextFrame::iterator it;
    for (it = frame->begin(); !it.atEnd(); ++it)
    {
        //获取当前框架的指针
        QTextFrame* childframe = it.currentFrame();

        QTextBlock childBlock = it.currentBlock();
        if (childframe)
        {
            qDebug() << "frame";
        }
        else if (childBlock.isValid())
        {
            qDebug() << "block " << childBlock.text();
        }
    }
}


void MainWindow::setTextFont(bool checked)
{
    if(!checked)
    {
        QTextCursor cursor= ui->textEdit->textCursor();
        //文本块格式
        QTextBlockFormat blockFormat;
        //居中对齐
        blockFormat.setAlignment(Qt::AlignCenter);
        cursor.insertBlock(blockFormat);

        //字符格式
        QTextCharFormat charFormat;
        //字符背景色
        charFormat.setBackground(Qt::lightGray);
        //前景色
        charFormat.setForeground(Qt::blue);

        //字体
        charFormat.setFont(QFont(QString("宋体"),12,QFont::Bold,true));

        //下划线
        charFormat.setFontUnderline(true);
        //设置字符格式
        cursor.setCharFormat(charFormat);
        cursor.insertText("哈哈哈");
    }
    qDebug()<<checked;
}

void MainWindow::showTextBlock()
{
    QTextDocument *document = ui->textEdit->document();
    QTextBlock block = document->firstBlock();

    for(int i = 0;i<document->blockCount();i++)
    {
        qDebug()<<QString("文本块:%1,文本首行行号为: %2,长度为%3,内容为%4").arg(i).arg(block.firstLineNumber()
).arg(block.length()).arg(block.text());
        block = block.next();
    }
}
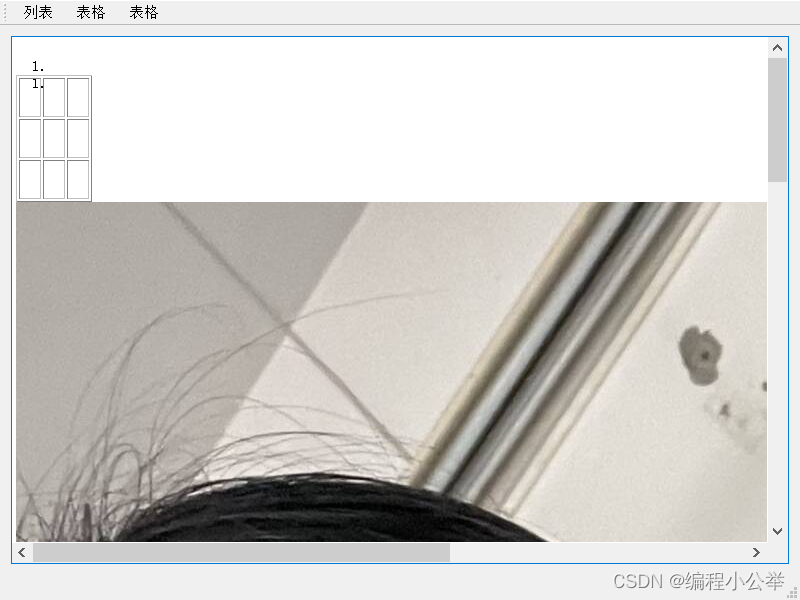
效果如下:
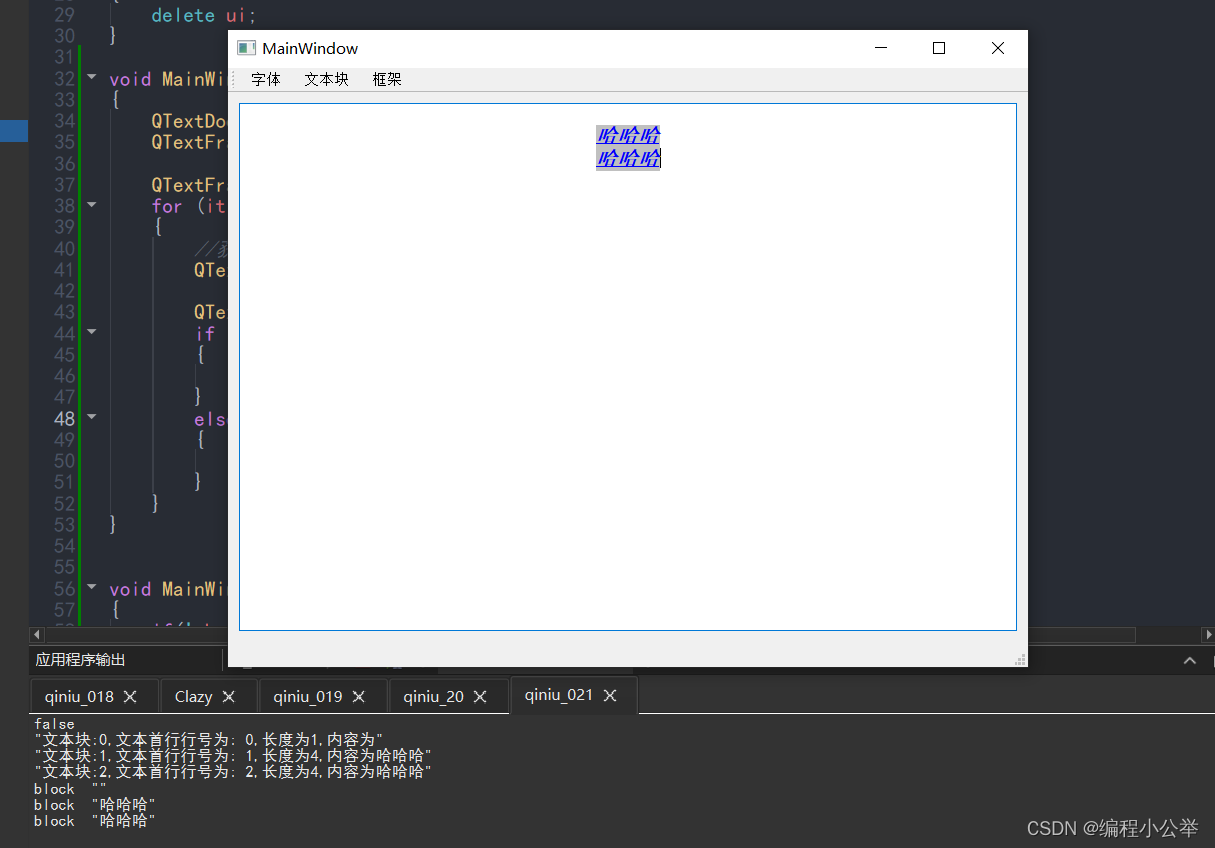
5、文档插入表格列表图片
#include "mainwindow.h"
#include "ui_mainwindow.h"
#include<QAction>
#include<QTextTableFormat>
#include<QTextCursor>
#include<QTextListFormat>
#include<QFileDialog>
#include<QImageReader>
#include<QTextImageFormat>
#pragma execution_character_set("utf-8");
MainWindow::MainWindow(QWidget *parent)
    : QMainWindow(parent)
    , ui(new Ui::MainWindow)
{
    ui->setupUi(this);
    QAction*action_table = new QAction("表格",this);
    connect(action_table,SIGNAL(triggered(bool)),this,SLOT(insertTable()));

    QAction*action_list = new QAction("列表",this);
    connect(action_list,SIGNAL(triggered(bool)),this,SLOT(insertList()));

    QAction*action_pic = new QAction("表格",this);
    connect(action_pic,SIGNAL(triggered(bool)),this,SLOT(insertImage()));

    ui->toolBar->addAction(action_list);
    ui->toolBar->addAction(action_table);
    ui->toolBar->addAction(action_pic);
}

MainWindow::~MainWindow()
{
    delete ui;
}

void MainWindow::insertTable() //插入图
{
    QTextCursor cursor = ui->textEdit->textCursor();
    QTextTableFormat format;//表格格式
    format.setCellSpacing(2);
    format.setCellPadding(10);
    cursor.insertTable(3,3,format);
}

void MainWindow::insertList() //插入列表
{
    QTextListFormat format;//列表格式
    format.setStyle(QTextListFormat::ListDecimal);//数字编号
    ui->textEdit->textCursor().insertList(format);
}

void MainWindow::insertImage()
{
    QString filepath = QFileDialog::getOpenFileName(this,"选择图片",".",
"JPEG(*.jpg *.jpeg);;""GIF(*.gif);;""PNG(*.png)");

    QUrl url(QString("file://%1").arg(filepath));
    QImage image = QImageReader(filepath).read();

    QTextDocument*document = ui->textEdit->document();
    //文档添加图片资源
    document->addResource(QTextDocument::ImageResource,url,QVariant(image));

    QTextCursor cursor = ui->textEdit->textCursor();
    QTextImageFormat imgFormat;
    imgFormat.setWidth(image.width());
    imgFormat.setHeight(image.height());
    imgFormat.setName(url.toString());
    cursor.insertImage(imgFormat);

}
效果展示:
