五分钟解决Springboot整合Mybaties

news2024/11/24 12:19:40

SpringBoot整合Mybaties

    • 创建maven工程
    • 整合mybaties
    • 逆向代码生成

创建maven工程

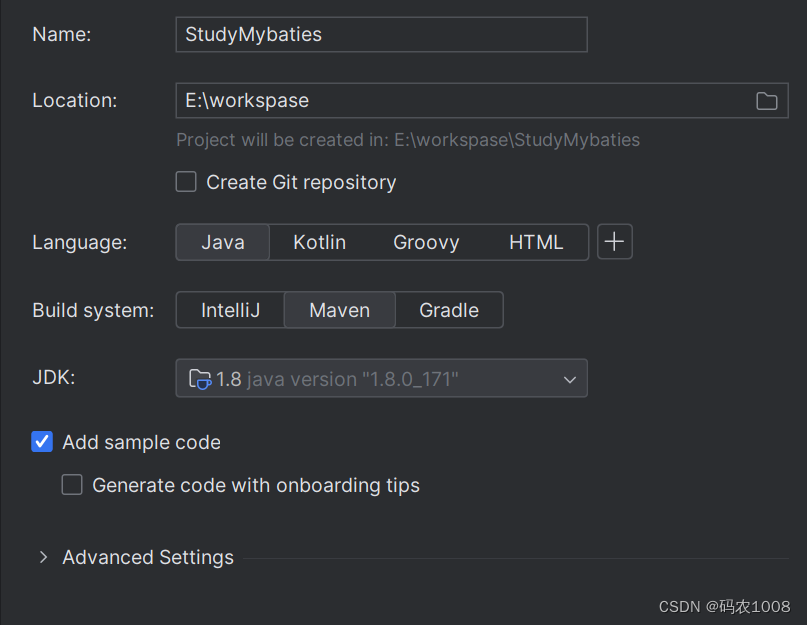
·1.通过idea创建maven工程如下图
在这里插入图片描述
2.生成的工程如下
在这里插入图片描述
以上我们就完成了一个maven工程,接下来我们改造成springboot项目。
这里主要分为三步:添加依赖,增加配置,增加注解
1.添加依赖

<!--添加springboot父依赖-->
    <parent>
        <groupId>org.springframework.boot</groupId>
        <artifactId>spring-boot-starter-parent</artifactId>
        <version>2.5.4</version>
    </parent>
    <dependencies>
        <!--web依赖-->
        <dependency>
            <groupId>org.springframework.boot</groupId>
            <artifactId>spring-boot-starter-web</artifactId>
        </dependency>
        <!--test测试依赖-->
        <dependency>
            <groupId>org.springframework.boot</groupId>
            <artifactId>spring-boot-starter-test</artifactId>
            <scope>test</scope>
        </dependency>
    </dependencies>

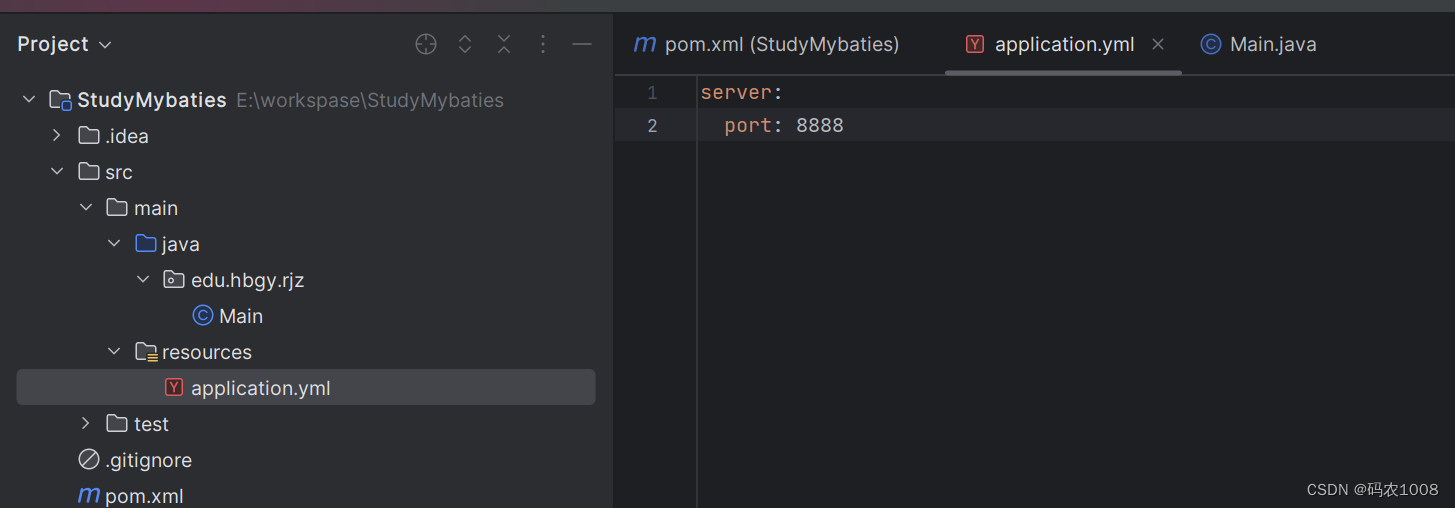
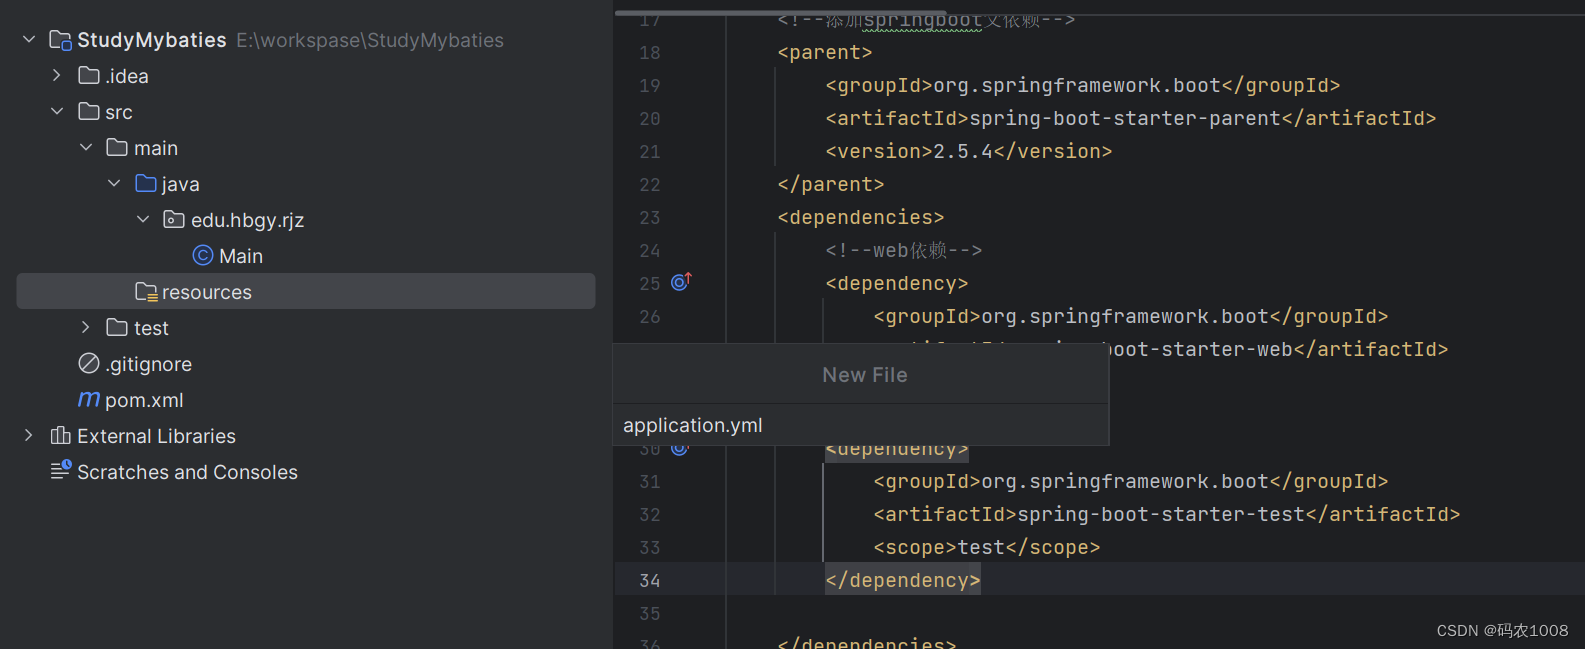
2.添加配置文件application.yml,增加端口号
在这里插入图片描述
在这里插入图片描述

3.修改启动类.增加@SpringBootApplication注解
和修改主类SpringApplication.run(Main.class,args);如下

import org.springframework.boot.SpringApplication;
import org.springframework.boot.autoconfigure.SpringBootApplication;

@SpringBootApplication
public class Main {
    public static void main(String[] args) {
        SpringApplication.run(Main.class,args);
    }
}

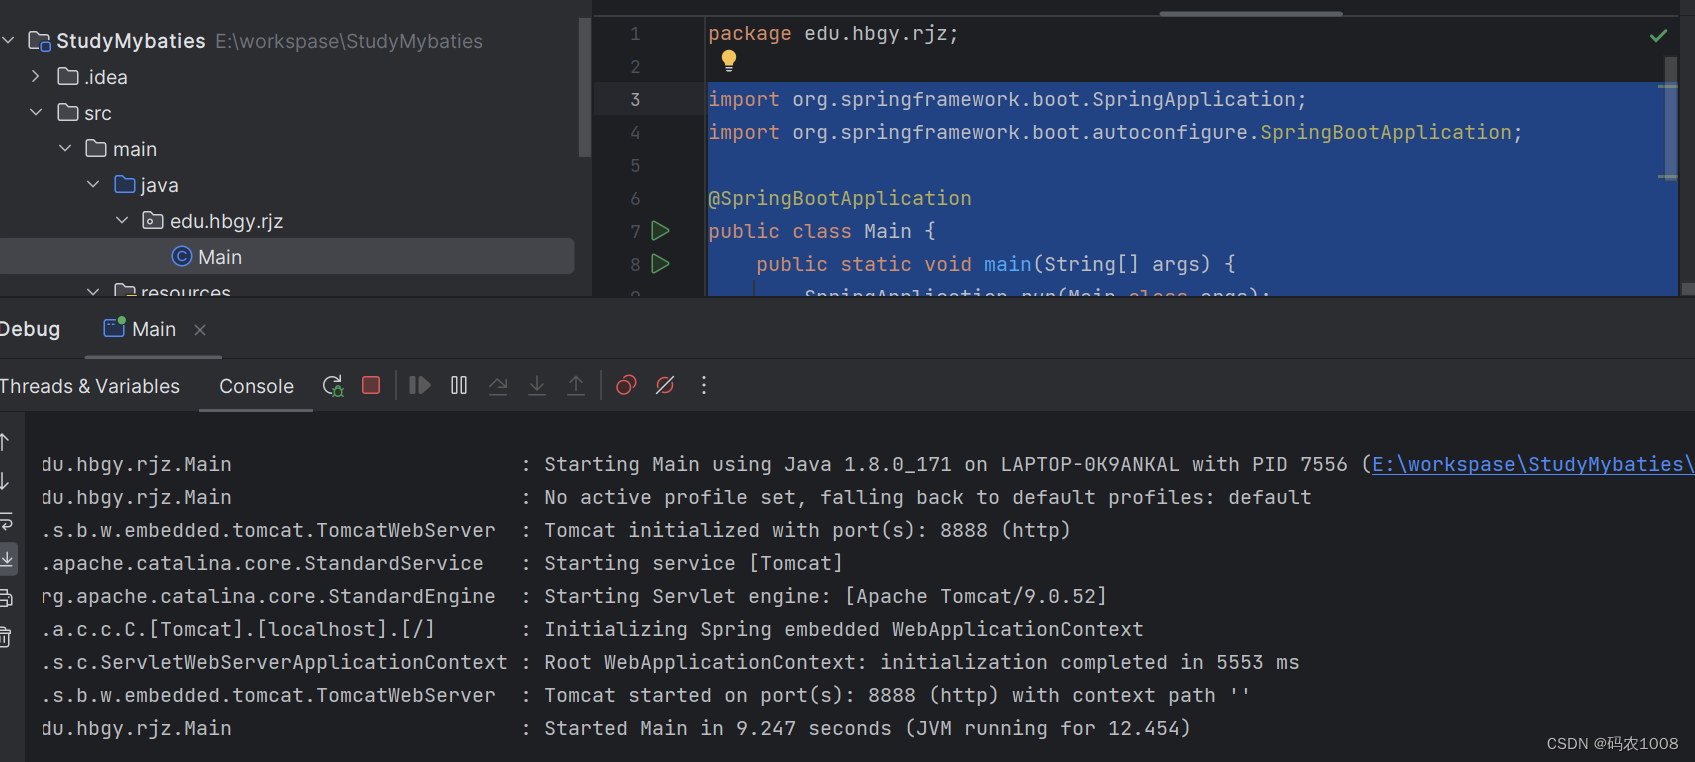
通过以上三步,恭喜springboot项目搭建完成,运行看下效果
在这里插入图片描述

整合mybaties

springboot整合任何中间件都是三步:依赖,配置,注解
1.依赖:

		 <dependency>
            <groupId>org.mybatis</groupId>
            <artifactId>mybatis</artifactId>
            <version>3.5.5</version>
        </dependency>
        <dependency>
            <groupId>org.mybatis.generator</groupId>
            <artifactId>mybatis-generator-core</artifactId>
            <version>1.3.7</version>
        </dependency>
        <dependency>
            <groupId>mysql</groupId>
            <artifactId>mysql-connector-java</artifactId>
            <version>8.0.21</version>
        </dependency>

这里引入了三个依赖:第一个是springboot整合mybaties依赖,后面两个是逆向工程的相关依赖
2.配置增加如下配置到配置文件,根据需要修改用户名密码和数据库,并且注意mapper-locations: classpath:mappers/*.xml的mappers路径

	spring:
  datasource:
    url: jdbc:mysql://localhost:3306/course?useSSL=false&serverTimezone=GMT
    username: root
    password: 565
#指定mybatis映射文件的地址
mybatis:
  mapper-locations: classpath:mappers/*.xml

2.注解
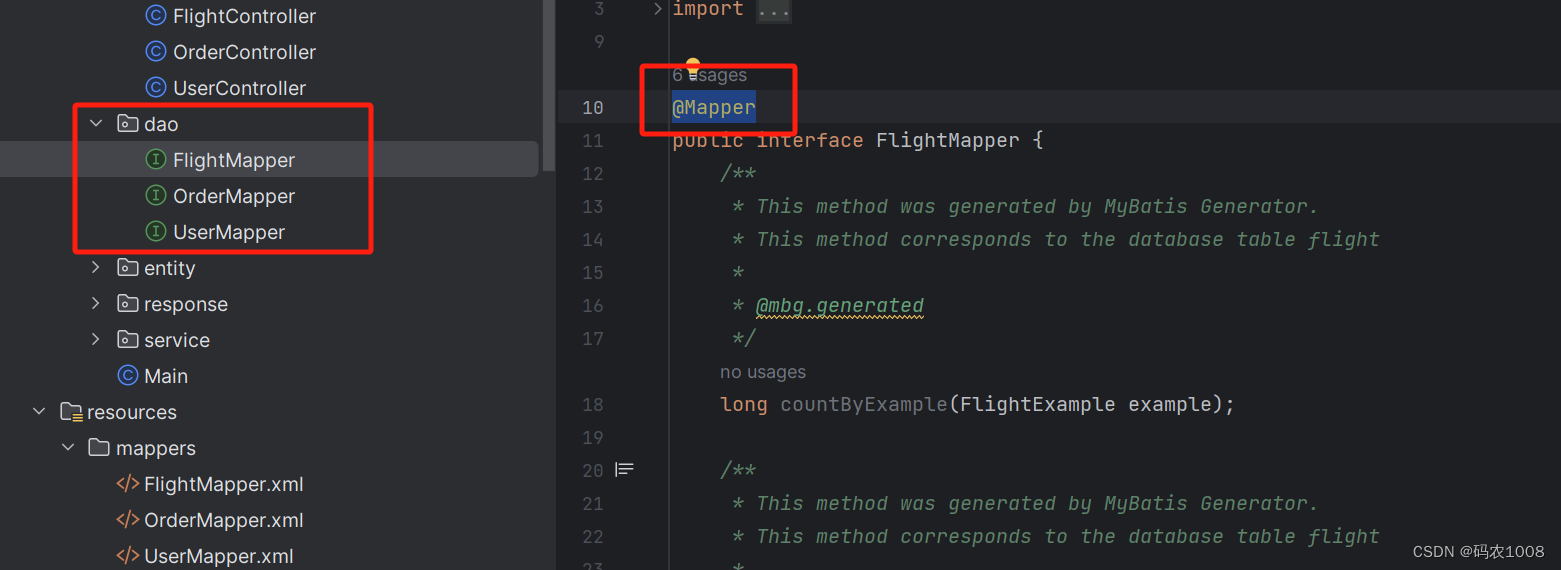
@Mapper,这里先用这个注解,在所有Mapper下的文件都加上该注解如下
在这里插入图片描述

逆向代码生成

增加配置

<?xml version="1.0" encoding="UTF-8"?>
<!DOCTYPE generatorConfiguration
        PUBLIC "-//mybatis.org//DTD MyBatis Generator Configuration 1.0//EN"
        "http://mybatis.org/dtd/mybatis-generator-config_1_0.dtd">

<generatorConfiguration>
    <!-- mysql-connector-java 版本需要与pom中引得版本一致 -->
    <classPathEntry location="E:\repository\mysql\mysql-connector-java\8.0.21\mysql-connector-java-8.0.21.jar" />

    <context id="DB2Tables" targetRuntime="MyBatis3">

        <!-- 不加注释,因为默认注释是英文的 -->
        <commentGenerator>
            <property name="addRemarkComments" value="true"/>
            <property name="suppressDate" value="true"/>
        </commentGenerator>

        <!-- 数据库连接信息 -->
        <jdbcConnection driverClass="com.mysql.jdbc.Driver"
                        connectionURL="jdbc:mysql://localhost:3306/course?characterEncoding=utf-8&amp;useSSL=false&amp;serverTimezone=UTC"
                        userId="root"
                        password="luyao520">
        </jdbcConnection>

        <javaTypeResolver >
            <property name="forceBigDecimals" value="false" />
        </javaTypeResolver>

        <!-- targetPackage 文件生成在指定包下,targetProject 路径-->
        <javaModelGenerator targetPackage="edu.hbgy.rjz.entity" targetProject="src/main/java">
            <property name="enableSubPackages" value="true" />
            <property name="trimStrings" value="true" />
        </javaModelGenerator>

        <sqlMapGenerator targetPackage="mappers"  targetProject="src/main/resources">
            <property name="enableSubPackages" value="true" />
        </sqlMapGenerator>

        <javaClientGenerator type="XMLMAPPER" targetPackage="edu.hbgy.rjz.dao"  targetProject="src/main/java">
            <property name="enableSubPackages" value="true" />
        </javaClientGenerator>

        <!-- domainObjectName 即生成后entity的名字 -->
        <table tableName = "order" domainObjectName="Order" />


    </context>
</generatorConfiguration>

<classPathEntry location="E:\repository\mysql\mysql-connector-java\8.0.21\mysql-connector-java-8.0.21.jar" />这个路径要写自己jar包的路径

2.引入插件
在pom.xml中加入

<build>
        <finalName>${artifactId}</finalName>
        <plugins>
            <plugin>
                <groupId>org.mybatis.generator</groupId>
                <artifactId>mybatis-generator-maven-plugin</artifactId>
                <version>1.3.7</version>
                <configuration>
                    <!-- generator 工具配置文件的位置 -->
                    <configurationFile>src/main/resources/generatorConfig.xml</configurationFile>
                    <verbose>true</verbose>
                    <overwrite>true</overwrite>
                </configuration>


                <!-- 添加这部分的依赖 -->

            </plugin>
            <plugin>
                <groupId>org.springframework.boot</groupId>
                <artifactId>spring-boot-maven-plugin</artifactId>
            </plugin>
        </plugins>


    </build>

如下所示:
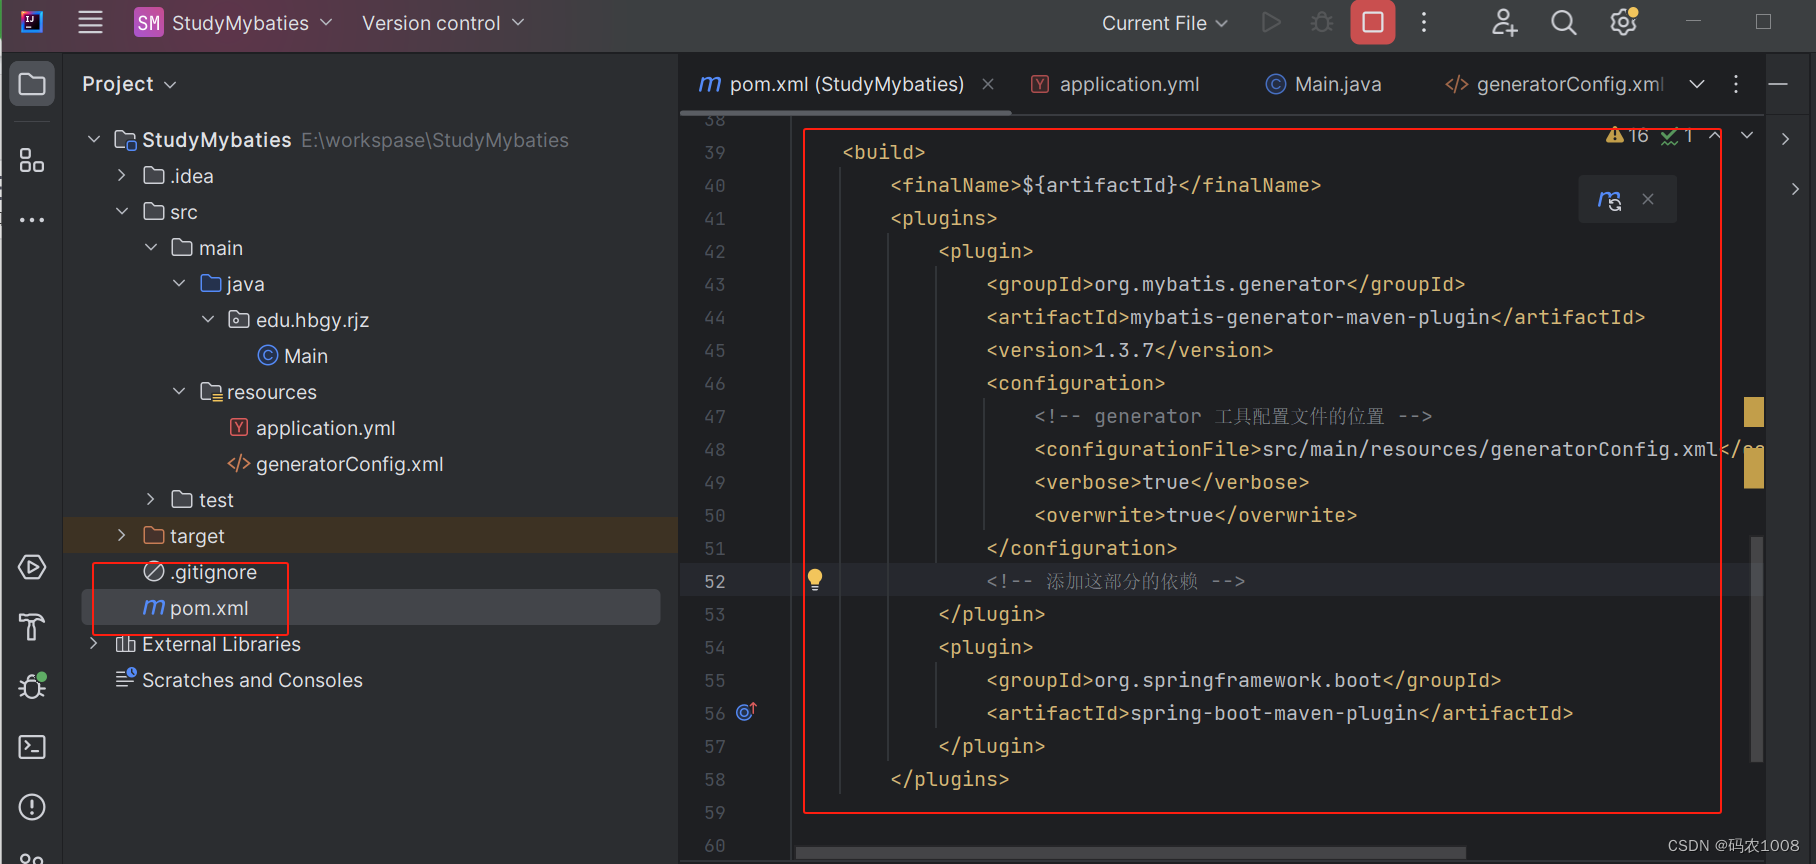
在这里插入图片描述
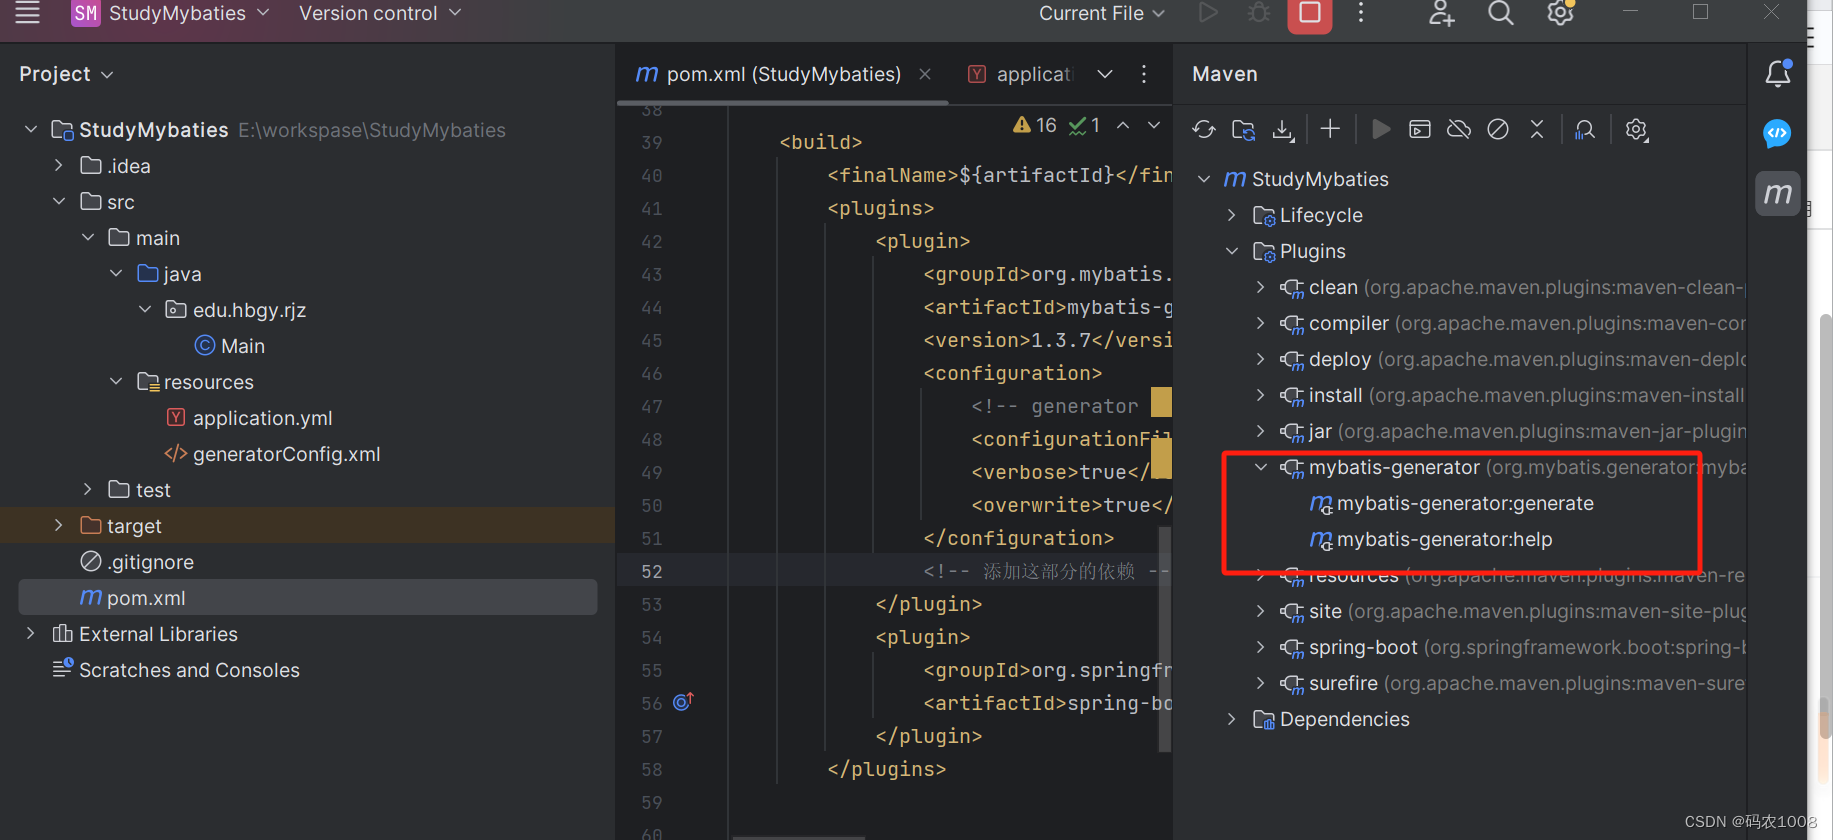
加入之后maven插件如下所示
在这里插入图片描述
运行之后会生成代码,目录结构:
在这里插入图片描述
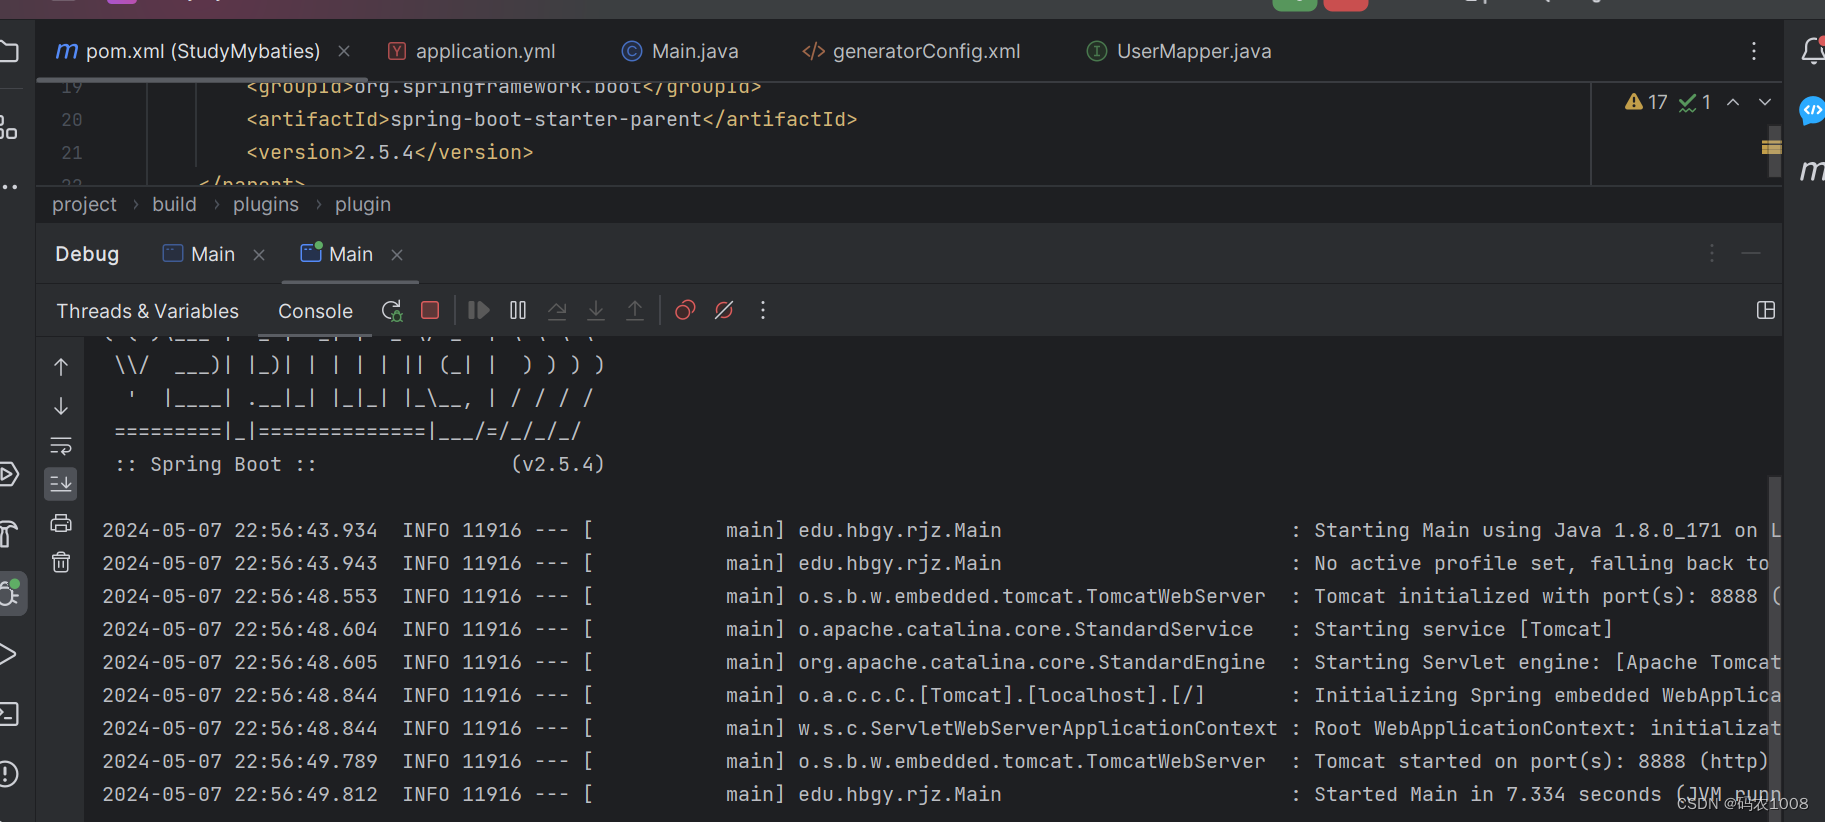
再次启动项目确认启动成功:
在这里插入图片描述

至此我们的整合工作结束

测试一下,创建一个controller包,并创建类UserController

package edu.hbgy.rjz.controller;

import edu.hbgy.rjz.dao.UserMapper;
import edu.hbgy.rjz.entity.User;
import edu.hbgy.rjz.entity.UserExample;
import org.springframework.web.bind.annotation.RequestBody;
import org.springframework.web.bind.annotation.RequestMapping;
import org.springframework.web.bind.annotation.RequestMethod;
import org.springframework.web.bind.annotation.RestController;

import javax.annotation.Resource;
import java.util.List;

@RestController
public class UserController {
    @Resource
    private UserMapper userMapper;

    @RequestMapping(value="user/del", method = RequestMethod.POST)
    public Integer del(@RequestBody User user){
        UserExample example = new UserExample();
        example.createCriteria().andIdEqualTo(user.getId());
        Integer count = userMapper.deleteByExample(example);
        return count;
    }
}

启动运行:
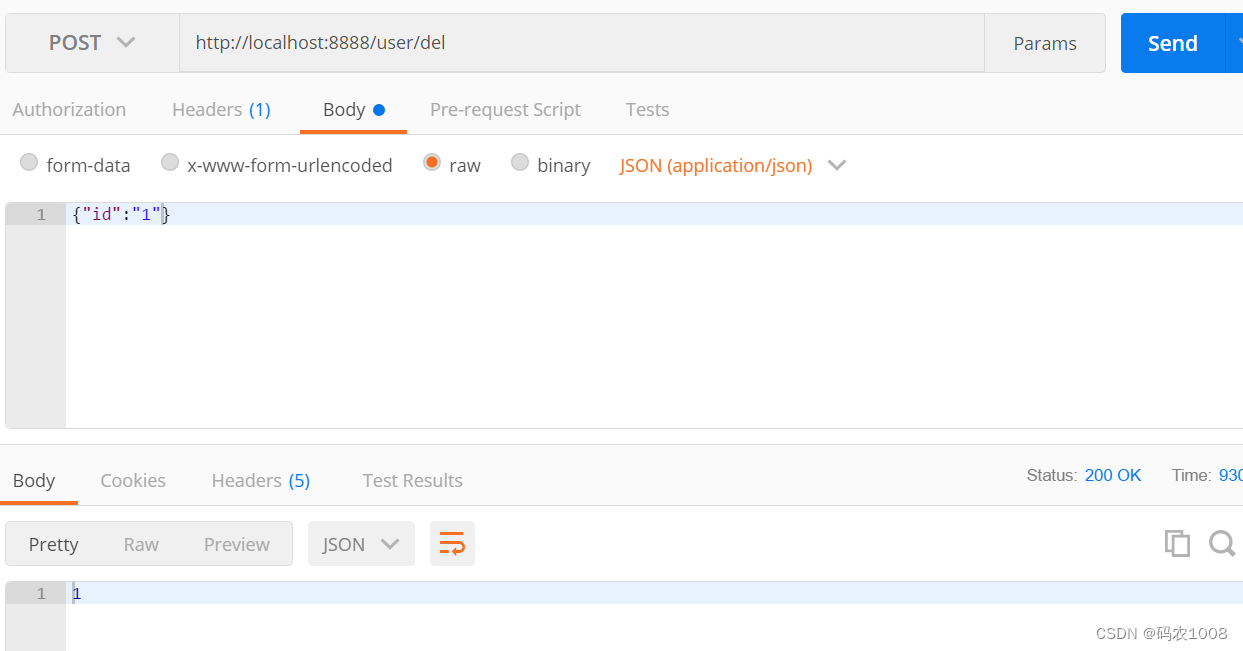
在这里插入图片描述

本文来自互联网用户投稿,该文观点仅代表作者本人,不代表本站立场。本站仅提供信息存储空间服务,不拥有所有权,不承担相关法律责任。如若转载,请注明出处:http://www.coloradmin.cn/o/1651445.html

如若内容造成侵权/违法违规/事实不符,请联系多彩编程网进行投诉反馈,一经查实,立即删除!

相关文章

二叉搜索树相关

二叉搜索树 定义&#xff1a;对二叉搜索树的一些操作基本结构Insert操作Find操作Erase操作 InOrder遍历二叉树操作模拟字典模拟统计次数 定义&#xff1a; 二叉搜索树又称二叉排序树&#xff0c;它或者是一棵空树&#xff0c;或者是具有以下性质的二叉树:若它的左子树不为空&a…

《Decoupled Contrastive Learning for Long-Tailed Recognition》阅读笔记

论文标题 《Decoupled Contrastive Learning for Long-Tailed Recognition》 针对长尾识别的解耦对比学习 作者 Shiyu Xuan 和 Shiliang Zhang 来自北京大学计算机学院多媒体信息处理国家重点实验室 初读 摘要 监督对比损失&#xff08;Supervised Contrastive Loss, SC…

LeetCode //C - 85. Maximal Rectangle

85. Maximal Rectangle Given a rows x cols binary matrix filled with 0’s and 1’s, find the largest rectangle containing only 1’s and return its area. Example 1: Input: matrix [[“1”,“0”,“1”,“0”,“0”],[“1”,“0”,“1”,“1”,“1”],[“1”,“…

Netty HTTP 示例-响应式编程-013

🤗 ApiHug {Postman|Swagger|Api...} = 快↑ 准√ 省↓ GitHub - apihug/apihug.com: All abou the Apihug apihug.com: 有爱,有温度,有质量,有信任ApiHug - API design Copilot - IntelliJ IDEs Plugin | Marketplace The Next Generation API Development Platform…

The provided password or token is incorrect or your account

IDEA使用git技巧 【/n】 01 问题出现场景 我的gitlab上个月生成的token到期了,于是今天推上去的时候报了这个错误 The provided password or token is incorrect or your account has 2FA enabled and you must use a personal access token instead of a password. See ht…

【知识碎片】2024_05_07

今天记录了两个代码和C的几个破碎知识。 第一段代码是基础型的&#xff0c;关于数组。第二段代码是二分的&#xff0c;一开始没通过全部案例&#xff0c;值得再看。 每日代码 1.记负均正 输入一个数组&#xff0c;输出负数的个数&#xff0c;整数的平均值&#xff08;0都不参…

AI伦理和安全风险管理终极指南

人工智能&#xff08;AI&#xff09;正在迅速改变各个领域的软件开发和部署。驱动这一转变的两个关键群体为人工智能开发者和人工智能集成商。开发人员处于创建基础人工智能技术的最前沿&#xff0c;包括生成式人工智能&#xff08;GenAI&#xff09;模型、自然语言处理&#x…

深入探索van Emde Boas树:原理、操作与C语言实现

van Emde Boas (vEB) 树是一种高效的数据结构&#xff0c;用于处理整数集合。它是由荷兰计算机科学家Jan van Emde Boas在1977年提出的。vEB树在处理整数集合的查找、插入、删除和迭代操作时&#xff0c;能够以接近最优的时间复杂度运行。vEB树特别适合于那些元素数量在某个较小…

Jenkins +配置邮件 centos8.5 安装部署 运维系列一

1 jenkins的war包下载地址: Download and deploy 2 xftp 等方式上传到服务器 #安装jdk tar zxvf jdk-11.0.8_linux-x64_bin.tar.gz mv jdk-11.0.8/ /usr/local/jdk vim /etc/profile export JAVA_HOME/usr/local/jdk export PATH$JAVA_HOME/bin:$PATH CLASSPATH.:$JAVA_…

WPF基础学习笔记

目录 基础知识&#xff1a; WPF的特点: WPF的优点 什么是XAML&#xff1f; 布局基础&#xff1a; 样式的应用&#xff1a; 控件模板&#xff08;ControlTemplate&#xff09;&#xff1a; 数据模板&#xff08;DataTemplate&#xff09;&#xff1a; 静态资源StaticRe…

智慧工地,筑牢安全防线:严防塔吊相撞,守护施工安全之巅!

塔吊相撞的事故是一个严重的施工安全问题&#xff0c;而智慧工地则是一种利用现代科技手段提高施工安全性的解决方案。 为了避免类似事故的发生&#xff0c;智慧工地可以采取以下措施&#xff1a; 一、建立全面的监控系统 智慧工地可以建立完善的监控系统&#xff0c;通过安装…

Github 2024-05-08 C开源项目日报 Top8

根据Github Trendings的统计,今日(2024-05-08统计)共有8个项目上榜。根据开发语言中项目的数量,汇总情况如下: 开发语言项目数量C项目8PHP项目1Python项目1C++项目1PHP:流行的Web开发脚本语言 创建周期:4710 天开发语言:C, PHP协议类型:OtherStar数量:37340 个Fork数量…

Layer创建流程

在SurfaceFlinger中&#xff0c;Layer表示一个显示图层&#xff0c;是surfaceflinger合成过程中最重要的基本单元&#xff0c;它提供了一系列属性定义了如何参与合成并与其他Layer交互&#xff0c;包括&#xff1a; 位置&#xff1a;定义Layer出现在屏幕上的位置&#xff0c;包…

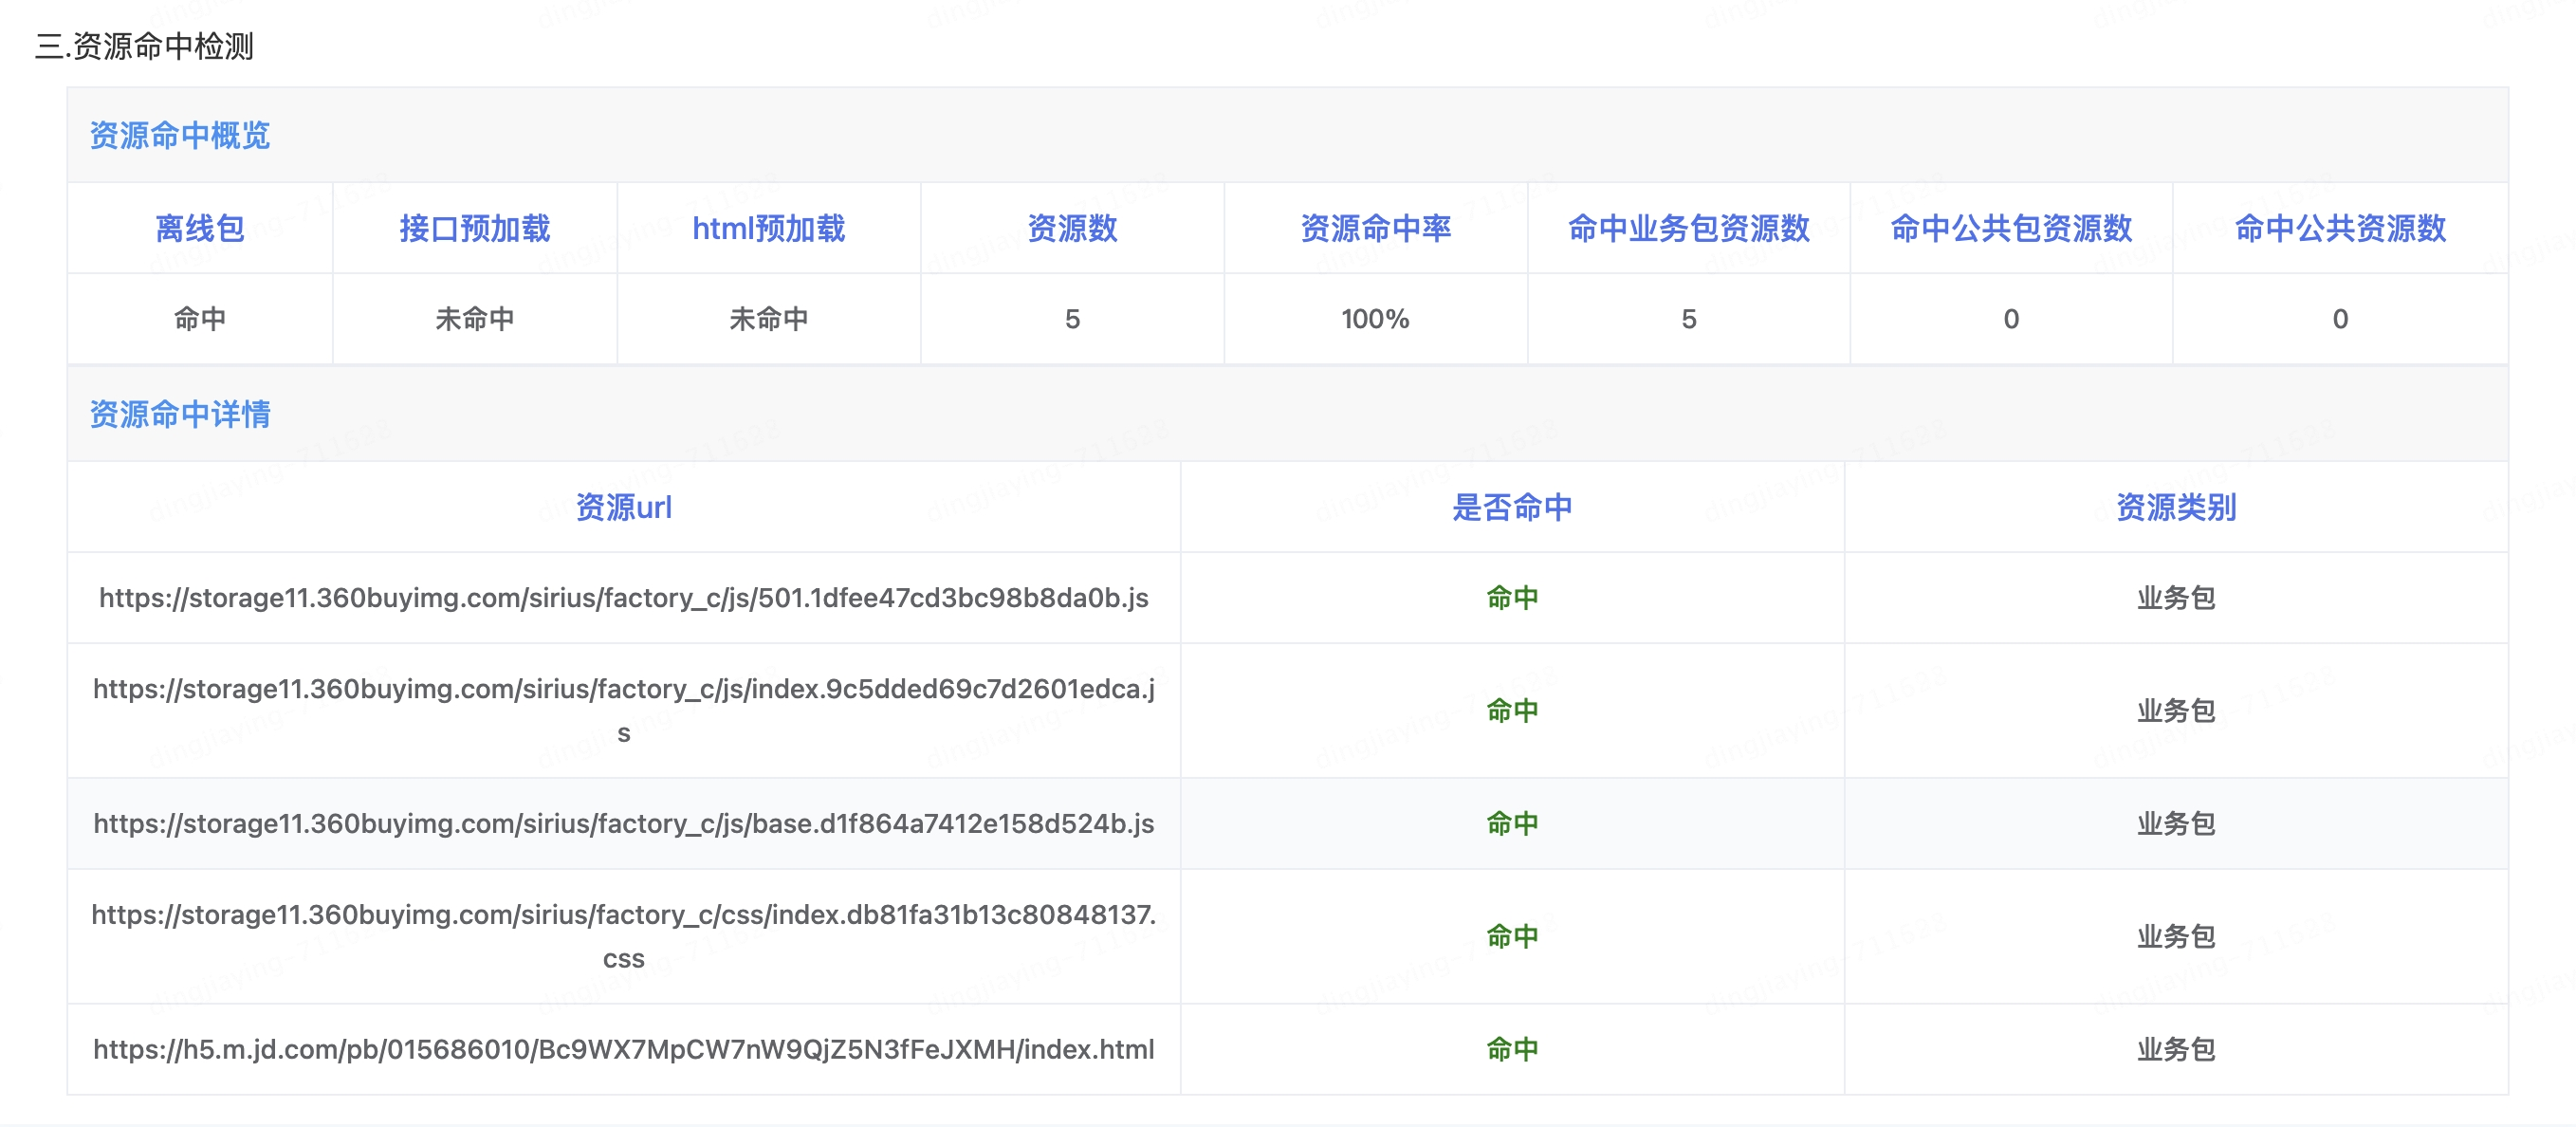
营销H5测试综述

H5页面是营销域最常见的一种运营形式&#xff0c;业务通过H5来提供服务&#xff0c;可以满足用户对于便捷、高效和低成本的需求。H5页面是业务直面用户的端点&#xff0c;其质量保证工作显得尤为重要。各业务的功能实现具有通用性&#xff0c;相应也有共性的测试方法&#xff0…

蓝桥杯13届JAVA A组 国赛

​​​​​​​ package 蓝桥杯国赛; // 贪心选个数最少的进行摆 // 2:1 ,3:1, 4:1,5 : 3,6:3,7:1 // 选 1&#xff0c;7&#xff0c;4&#xff0c;2&#xff0c;3&#xff0c;5&#xff0c;9 // 然后都选满10个 public class 火彩棒数字 {public static void main(String[] a…

人工智能-2024期中考试

前言 人工智能期中考试&#xff0c;认真准备了但是没考好&#xff0c;结果中游偏下水平。 第4题没拿分 &#xff08;遗传算法&#xff1a;知识点在课堂上一笔带过没有细讲&#xff0c;轮盘赌算法在书本上没有提到&#xff0c;考试的时候也没讲清楚&#xff0c;只能靠猜&…

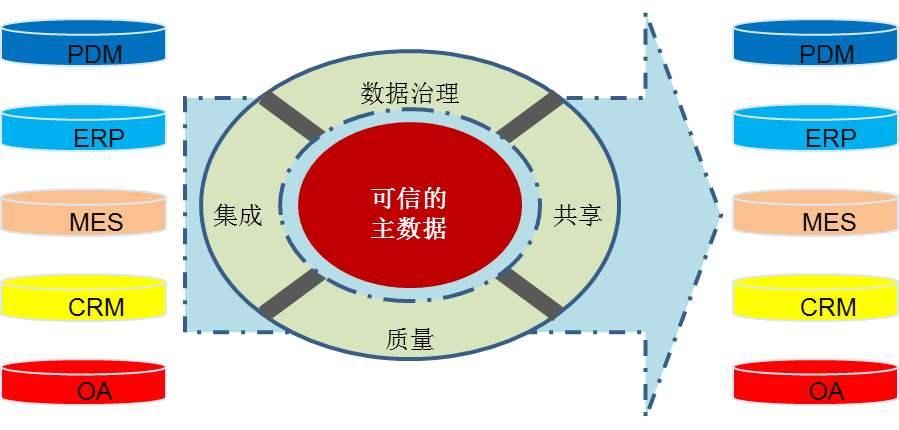
主数据准确性和完整性竟如此重要?确保这两大特性做好这些就够了

主数据是企业运营的心脏&#xff0c;它包含了客户、产品、供应商和员工等关键业务实体的详细信息。这些数据的准确性、一致性和完整性对于确保企业决策的质量、优化业务流程、提高客户满意度、推动数据驱动的创新、遵守法规要求以及维护数据安全至关重要。 主数据的准确性指的…

亚信科技精彩亮相2024中国移动算力网络大会,数智创新共筑“新质生产力”

4月28至29日&#xff0c;江苏省人民政府指导、中国移动通信集团有限公司主办的2024中国移动算力网络大会在苏州举办。大会以“算力网络点亮AI时代”为主题&#xff0c;旨在凝聚生态伙伴合力&#xff0c;共同探索算力网络、云计算等数智能力空间&#xff0c;共促我国算网产业和数…

目标检测实战(八): 使用YOLOv7完成对图像的目标检测任务(从数据准备到训练测试部署的完整流程)

文章目录 一、目标检测介绍二、YOLOv7介绍三、源码/论文获取四、环境搭建4.1 环境检测 五、数据集准备六、 模型训练七、模型验证八、模型测试九、错误总结9.1 错误1-numpy jas mp attribute int9.2 错误2-测试代码未能跑出检测框9.3 错误3- Command git tag returned non-zero…

利用Jenkins完成Android项目打包

问题和思路 目前存在的问题 打包操作由开发人员完成&#xff0c;这样开发进度容易被打断。 解决问题的思路 将打包操作交测试/产品/开发人员来完成&#xff0c;主要是测试/开发。 按照以上的思路&#xff0c;那么JenkinsGradle的解决方案是比较经济的&#xff0c;实现起来…