Spring 当中的Bean 作用域
文章目录
- Spring 当中的Bean 作用域
- 每博一文案
- 1. Spring6 当中的 Bean的作用域
- 1.2 singleton 默认
- 1.3 prototype
- 1.4 Spring 中的 bean 标签当中scope= 属性其他的值说明
- 1.5 自定义作用域,一个线程一个 Bean
- 2. 总结:
- 3. 最后:
每博一文案
青年,青年!无论受怎样的挫折和打击,都要咬着牙关挺住,因为你们完全有机会重建生活;只要不灰心丧气,每一次挫折就只不过是通往新境界的一块普通绊脚石,而绝不会置人于死命
									_____路遥《平凡的世界》
飞机上邻座的姐姐
独自一人坐飞机去见异地的男友
异地恋赤诚的人好像越来越少
我不自觉地问她
如果以后分手了不会觉得可惜么
她一边低头和男友报备自己落座了
一边回答说“我不是确认了不会分手才去爱他的,我恰恰是因为确定了我们有可能会分手才更要
用力去爱他的,更何况,人是用来拥有的,不是吗”
								———————《网友评论》
1. Spring6 当中的 Bean的作用域
1.2 singleton 默认
默认情况下,Spring的IoC容器创建的Bean对象是单例的。
我们来检验一下:
首先,方便大家处理,下面明确出对应相关的 maven配置信息pom.xml
<?xml version="1.0" encoding="UTF-8"?>
<project xmlns="http://maven.apache.org/POM/4.0.0"
         xmlns:xsi="http://www.w3.org/2001/XMLSchema-instance"
         xsi:schemaLocation="http://maven.apache.org/POM/4.0.0 http://maven.apache.org/xsd/maven-4.0.0.xsd">
    <modelVersion>4.0.0</modelVersion>

    <groupId>com.rainbowsea</groupId>
    <artifactId>spring6-007-circular-dependency</artifactId>
    <version>1.0-SNAPSHOT</version>
    <packaging>jar</packaging>

    <properties>
        <maven.compiler.source>17</maven.compiler.source>
        <maven.compiler.target>17</maven.compiler.target>
    </properties>

    <dependencies>
        <dependency>
            <groupId>org.springframework</groupId>
            <artifactId>spring-context</artifactId>
            <version>6.0.11</version>
        </dependency>


        <!-- junit4 -->
        <dependency>
            <groupId>junit</groupId>
            <artifactId>junit</artifactId>
            <version>4.13.2</version>
            <scope>test</scope>
        </dependency>
    </dependencies>

</project>
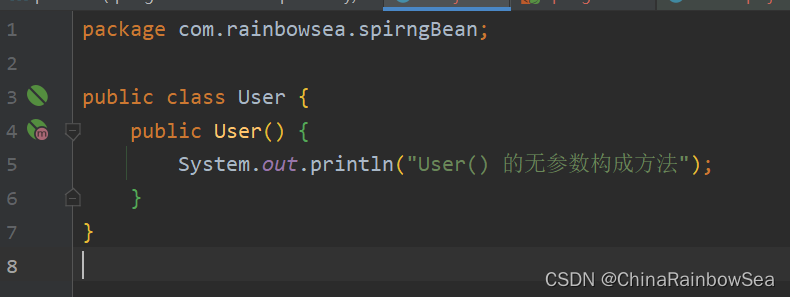
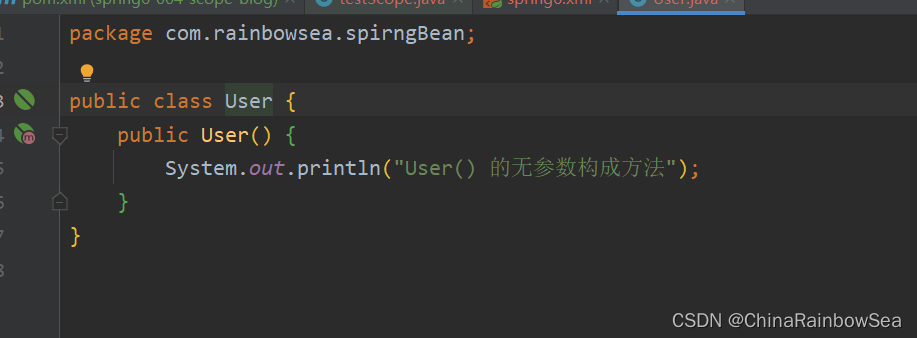
对应配置的 bean 的类是 User 这个类 ,为了方便辨析,简单明了,这个 类,就不设置属性了。就是一个空空的类。
package com.rainbowsea.spirngBean;

public class User {
    public User() {
        System.out.println("User() 的无参数构成方法");
    }
}
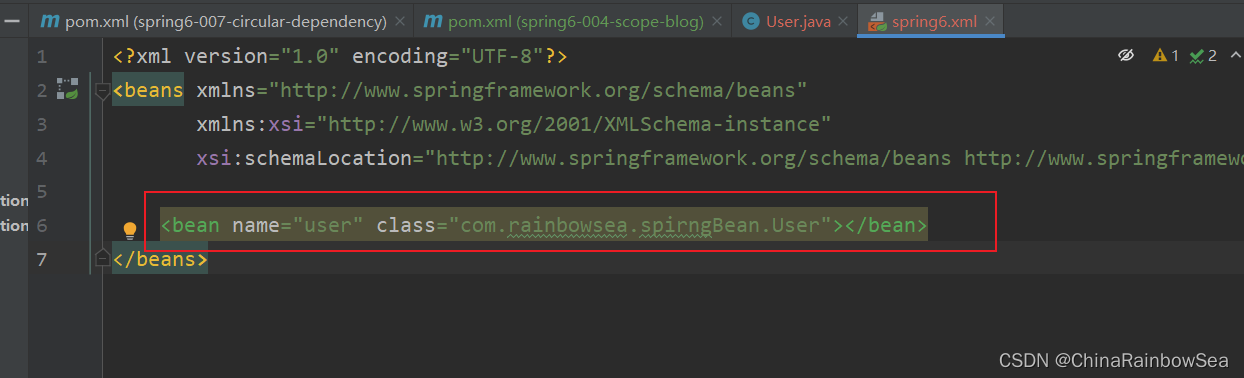
配置 Spring框架当中的xml 配置文件,让 Spring 知道我们的 User 这个类,并进行管理
<?xml version="1.0" encoding="UTF-8"?>
<beans xmlns="http://www.springframework.org/schema/beans"
       xmlns:xsi="http://www.w3.org/2001/XMLSchema-instance"
       xsi:schemaLocation="http://www.springframework.org/schema/beans http://www.springframework.org/schema/beans/spring-beans.xsd">

    <bean name="user" class="com.rainbowsea.spirngBean.User"></bean>
</beans>
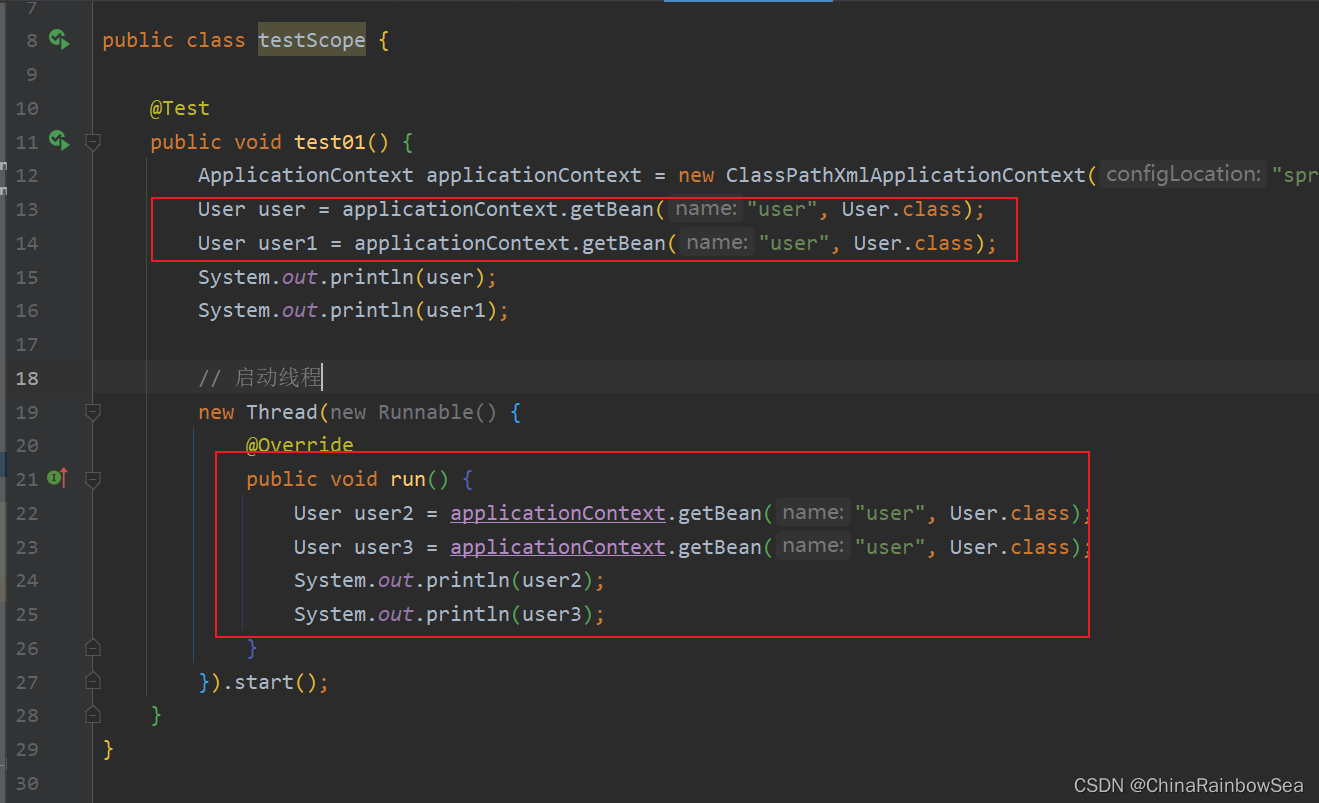
下面编写测试:代码,进行一个测试,验证,Spring 默认是否是 单例的 。这里我们启动多线程,进行一个测试
package com.ranbowsea.test;

import com.rainbowsea.spirngBean.User;
import org.junit.Test;
import org.springframework.context.ApplicationContext;
import org.springframework.context.support.ClassPathXmlApplicationContext;

public class testScope {

    @Test
    public void test01() {
        ApplicationContext applicationContext = new ClassPathXmlApplicationContext("spring6.xml");
        User user = applicationContext.getBean("user", User.class);
        User user1 = applicationContext.getBean("user", User.class);
        System.out.println(user);
        System.out.println(user1);

        // 启动线程
        new Thread(new Runnable() {
            @Override
            public void run() {
                User user2 = applicationContext.getBean("user", User.class);
                User user3 = applicationContext.getBean("user", User.class);
                System.out.println(user2);
                System.out.println(user3);
            }
        }).start();
    }
}
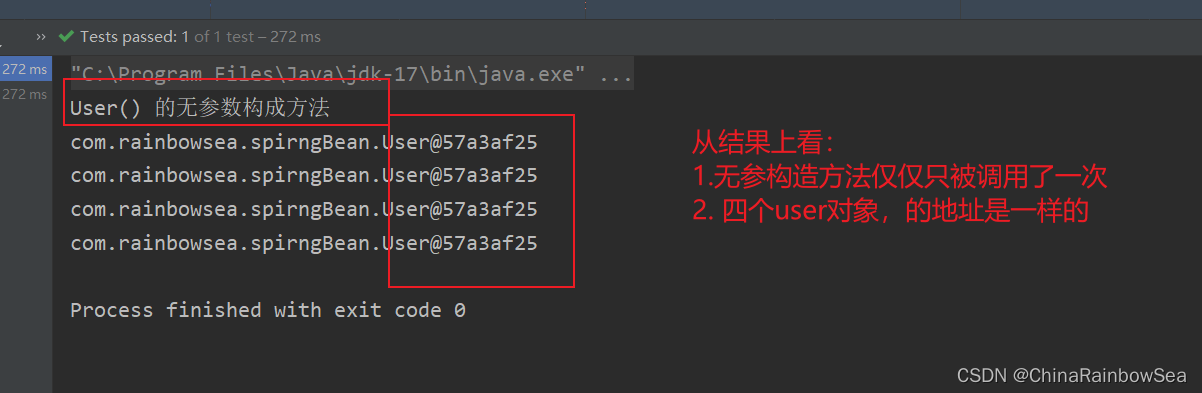
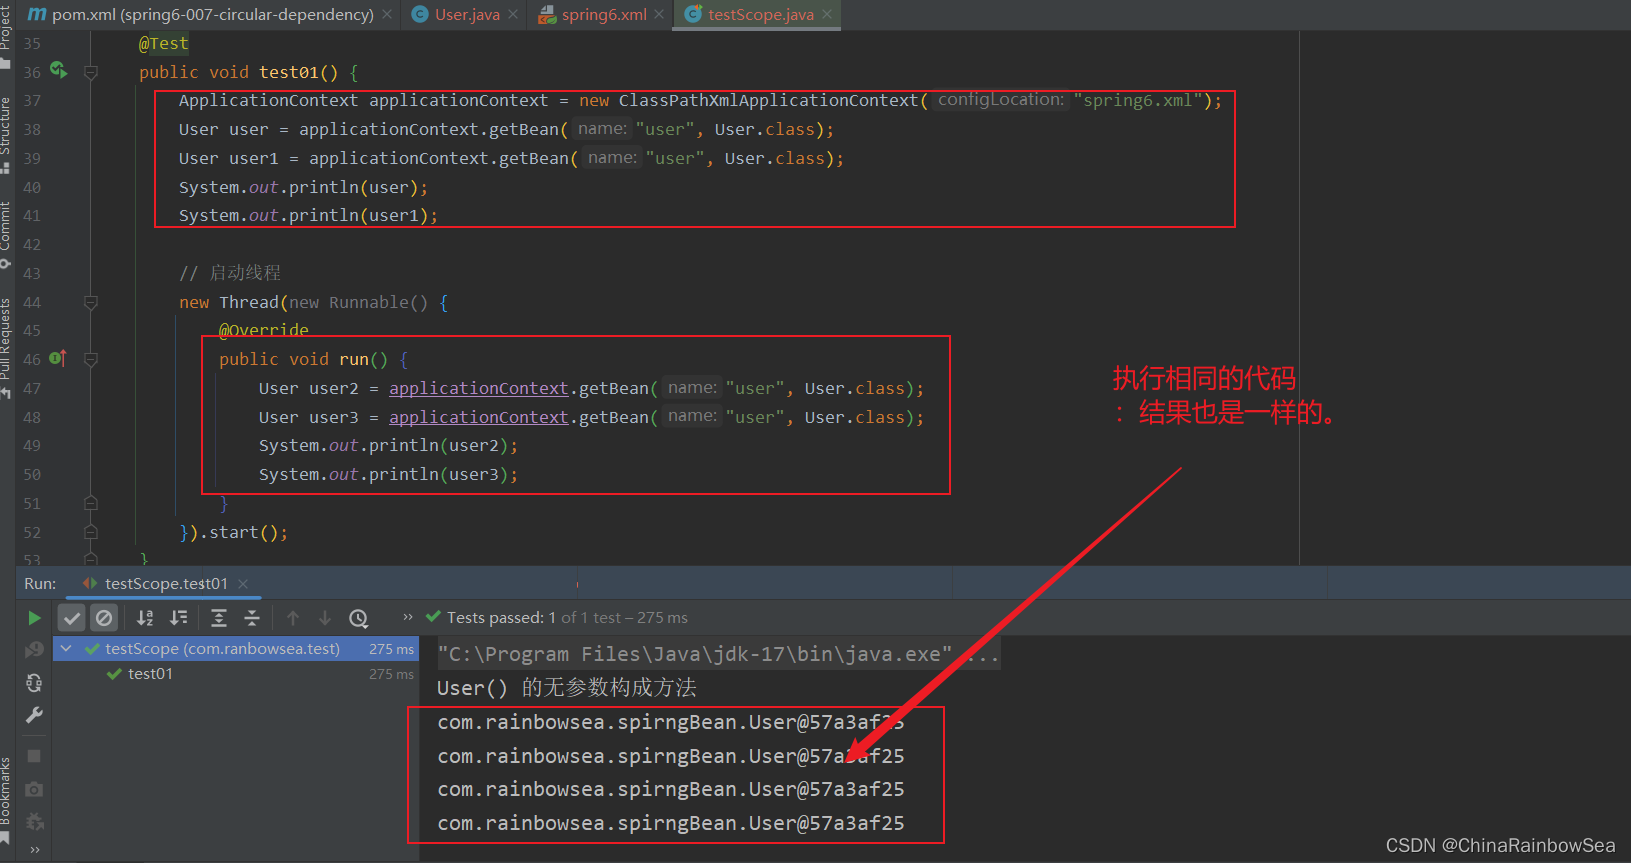
从结果上看:
- 无参构造方法仅仅只被调用了一次
- 四个user对象,的地址是一样的
说明:无论是执行多少次,
applicationContext.getBean,还是启动多个线程,都是同一个User对象. 是单例的
这个对象在什么时候创建的呢?可以为SpringBean提供一个无参数构造方法,测试一下,如下:
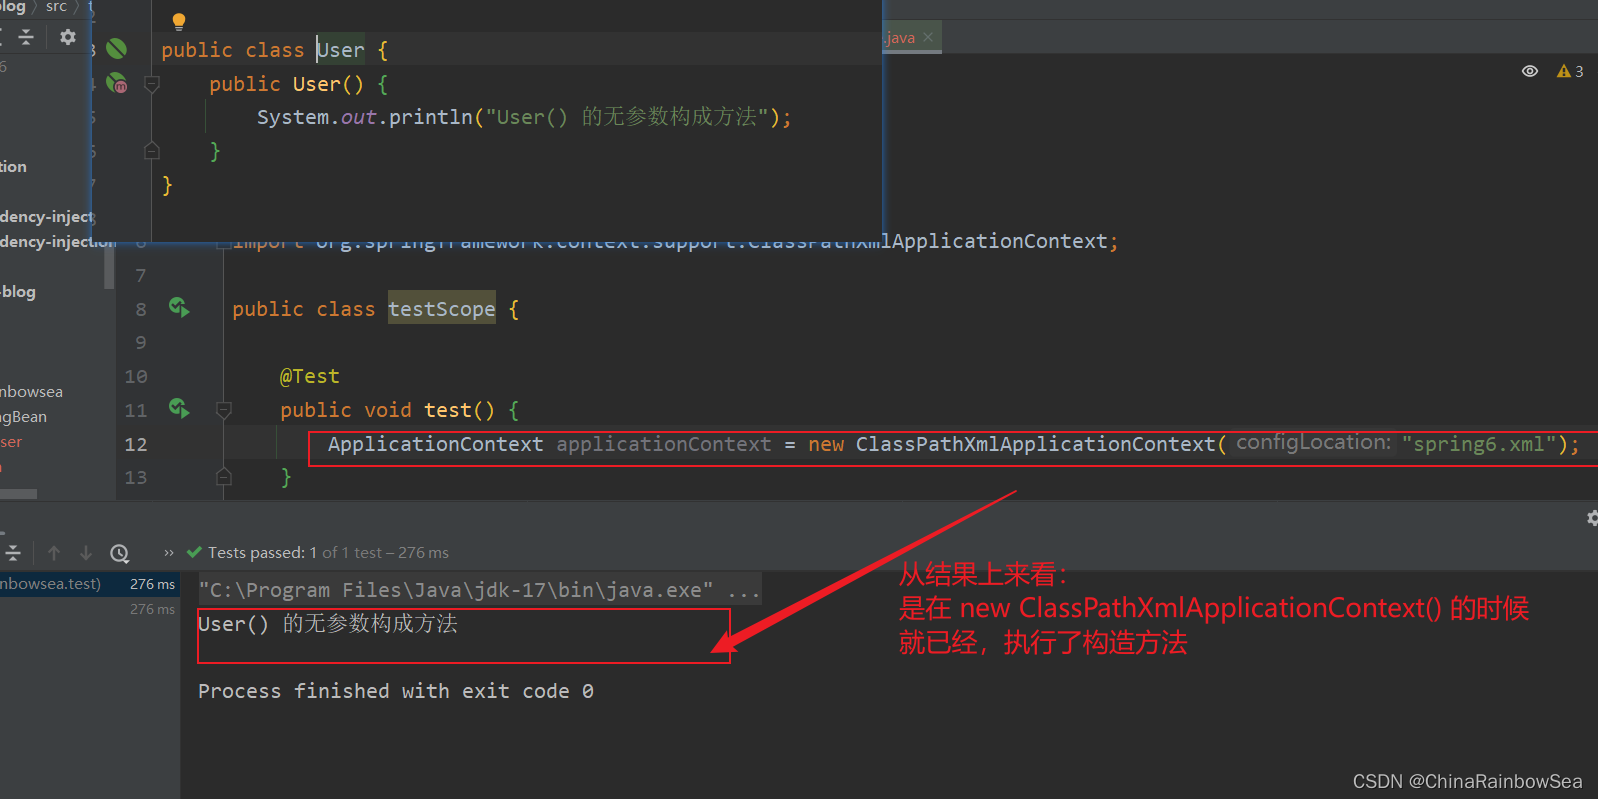
从结果上来看:是在
new ClassPathXmlApplicationContext()的时候就已经,执行了构造方法(Bean对象的创建是在初始化Spring上下文的时候就完成的。)
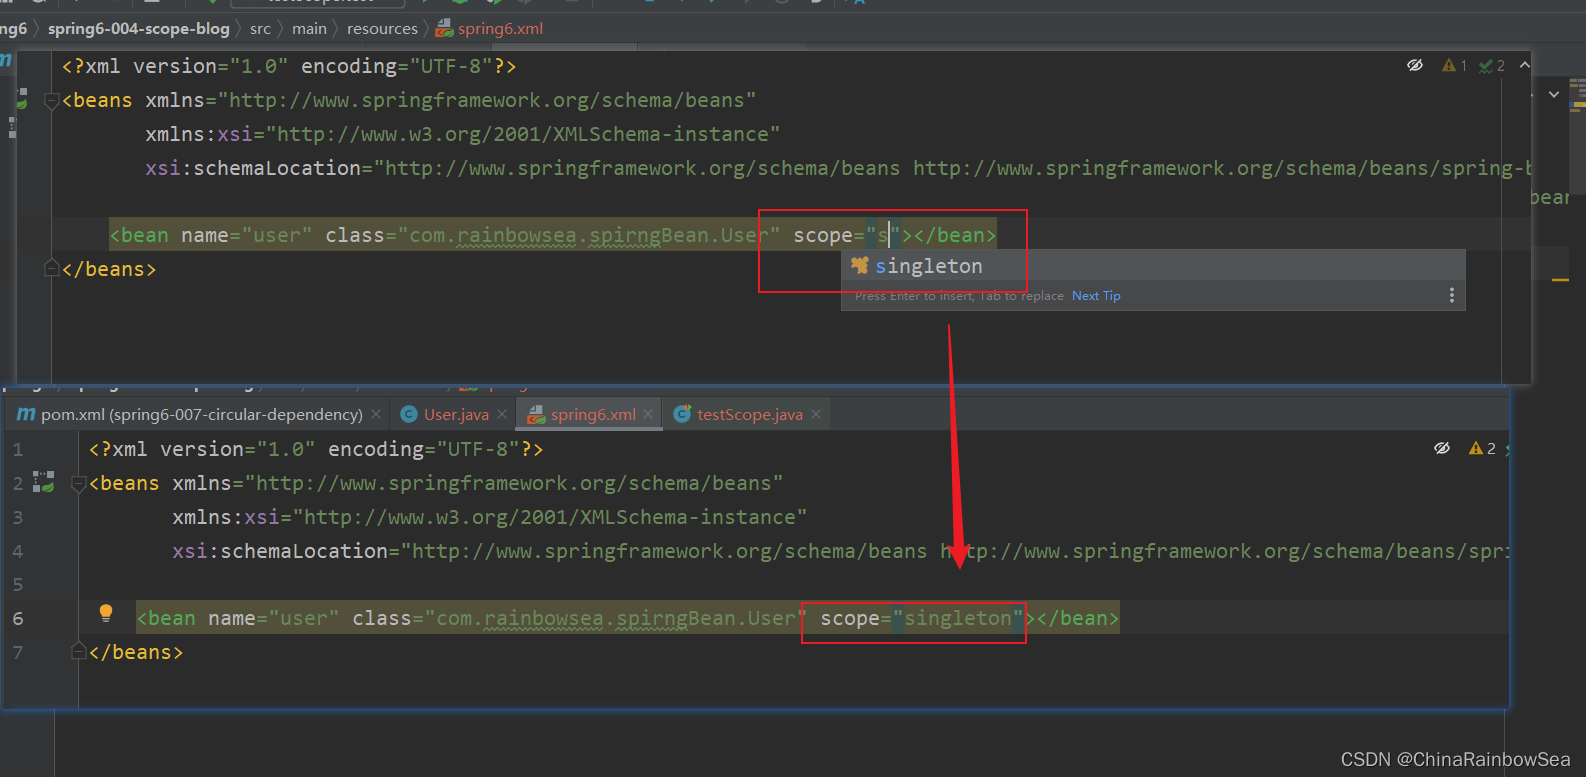
其中: singleton 是Spring框架 默认的,也是单例的。
我们可以使用:可以在bean标签中指定 scope属性的值为 singleton 。我们测试如下。
<?xml version="1.0" encoding="UTF-8"?>
<beans xmlns="http://www.springframework.org/schema/beans"
       xmlns:xsi="http://www.w3.org/2001/XMLSchema-instance"
       xsi:schemaLocation="http://www.springframework.org/schema/beans http://www.springframework.org/schema/beans/spring-beans.xsd">

    <bean name="user" class="com.rainbowsea.spirngBean.User" scope="singleton"></bean>
</beans>
通过测试得知,没有指定scope属性时,默认是
singleton单例的。
1.3 prototype
如果想让Spring的Bean对象以**多例** 的形式存在,可以在bean标签中指定 scope属性的值为:prototype,这样Spring会在每一次执行getBean()方法的时候创建Bean对象,调用几次则创建几次。

<?xml version="1.0" encoding="UTF-8"?>
<beans xmlns="http://www.springframework.org/schema/beans"
       xmlns:xsi="http://www.w3.org/2001/XMLSchema-instance"
       xsi:schemaLocation="http://www.springframework.org/schema/beans http://www.springframework.org/schema/beans/spring-beans.xsd">

    <bean name="user" class="com.rainbowsea.spirngBean.User" scope="prototype"></bean>
</beans>
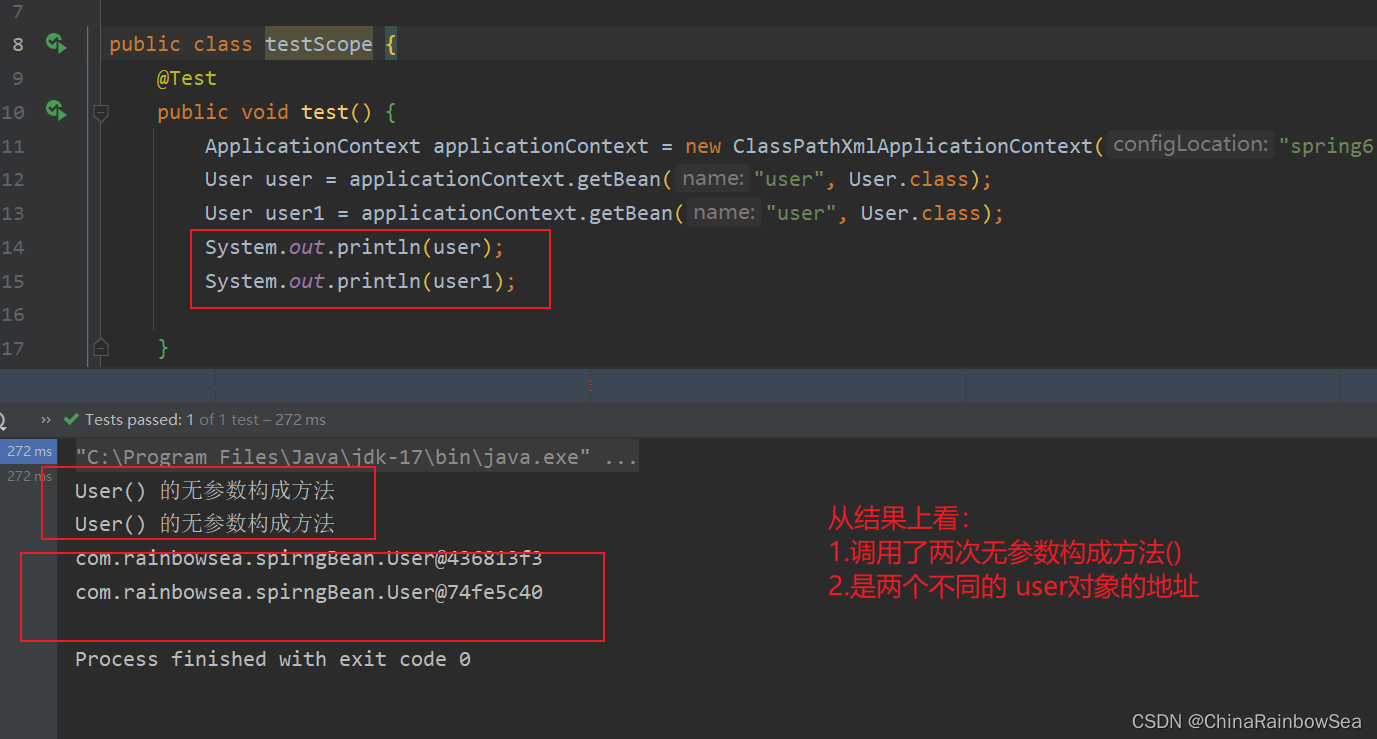
我们来是:用 User 这个类进行测试,使用:
import org.junit.Test;
import org.springframework.context.ApplicationContext;
import org.springframework.context.support.ClassPathXmlApplicationContext;

public class testScope {
    @Test
    public void test() {
        ApplicationContext applicationContext = new ClassPathXmlApplicationContext("spring6.xml");
        User user = applicationContext.getBean("user", User.class);
        User user1 = applicationContext.getBean("user", User.class);
        System.out.println(user);
        System.out.println(user1);

    }
}
从结果上看:
1.调用了两次无参数构成方法()
2.是两个不同的 user对象的地址
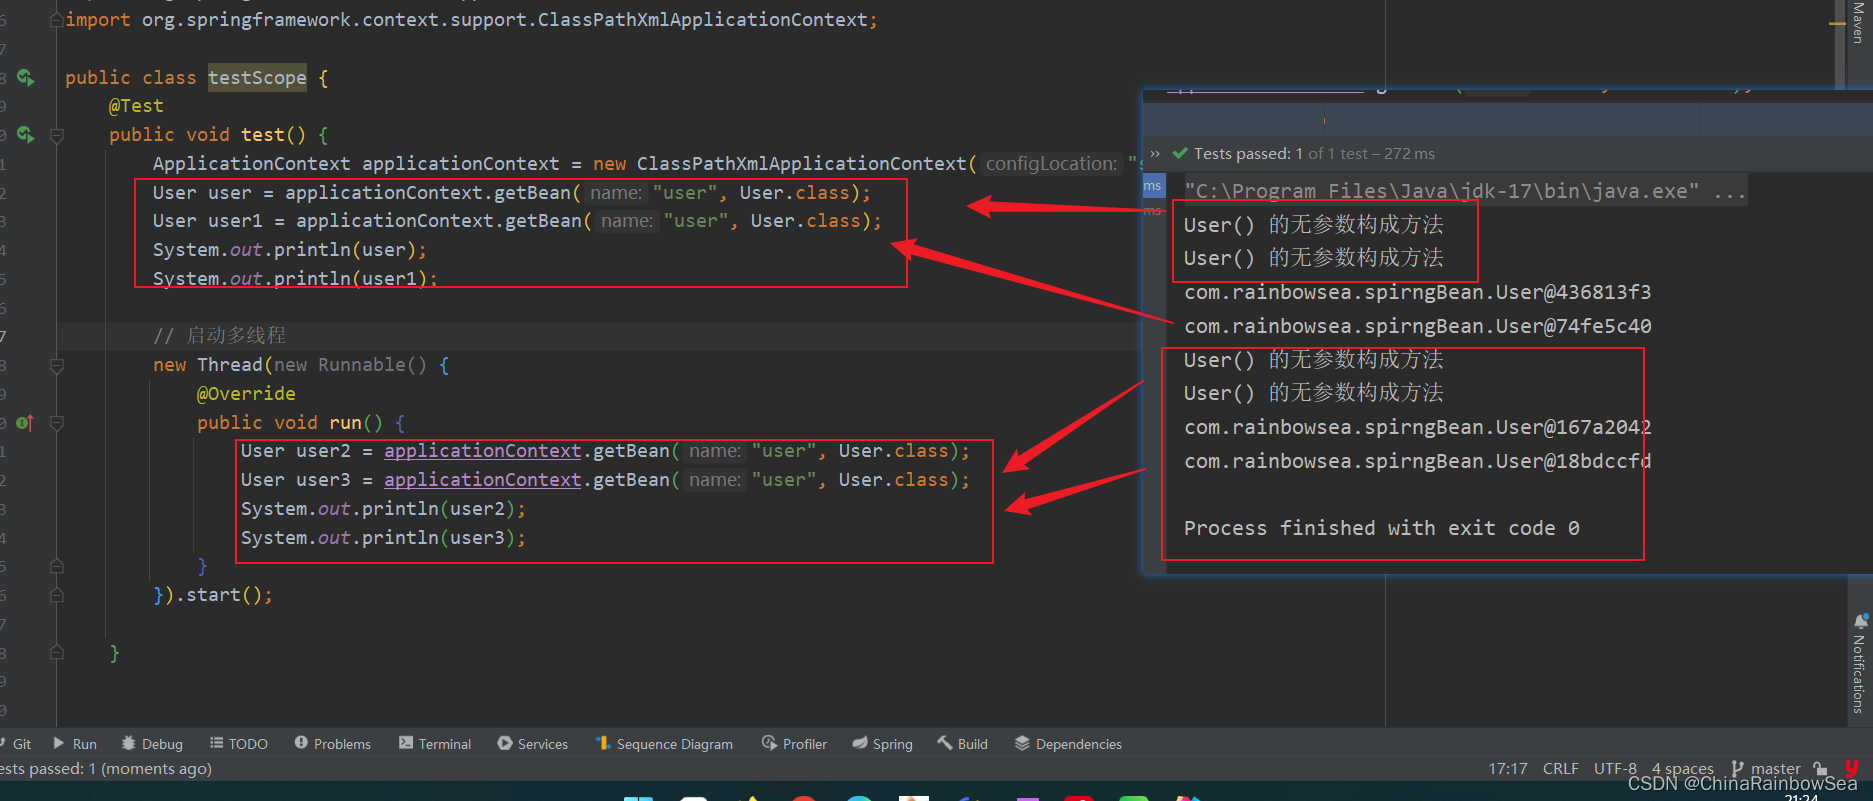
启动多个线程,也是会存在多个,user对象的地址的,同时调用多次无参数构成方法()——> 是多例 的。 不像 singleton(默认)的那样是无论是执行多少次,applicationContext.getBean ,还是启动多个线程,都是同一个User对象单例的。
import org.junit.Test;
import org.springframework.context.ApplicationContext;
import org.springframework.context.support.ClassPathXmlApplicationContext;

public class testScope {
    @Test
    public void test() {
        ApplicationContext applicationContext = new ClassPathXmlApplicationContext("spring6.xml");
        User user = applicationContext.getBean("user", User.class);
        User user1 = applicationContext.getBean("user", User.class);
        System.out.println(user);
        System.out.println(user1);

        // 启动多线程
        new Thread(new Runnable() {
            @Override
            public void run() {
                User user2 = applicationContext.getBean("user", User.class);
                User user3 = applicationContext.getBean("user", User.class);
                System.out.println(user2);
                System.out.println(user3);
            }
        }).start();

    }


}
1.4 Spring 中的 bean 标签当中scope= 属性其他的值说明
scope属性的值不止两个,它一共包括8个选项:
- singleton:默认的,单例。
- prototype:原型。每调用一次getBean()方法则获取一个新的Bean对象。或每次注入的时候都是新对象。
- request:一个请求对应一个Bean。仅限于在WEB应用中使用。
- session:一个会话对应一个Bean。仅限于在WEB应用中使用。
- global session:portlet应用中专用的。如果在Servlet的WEB应用中使用global session的话,和session一个效果。(portlet和servlet都是规范。servlet运行在servlet容器中,例如Tomcat。portlet运行在portlet容器中。)
- application:一个应用对应一个Bean。仅限于在WEB应用中使用。
- websocket:一个websocket生命周期对应一个Bean。仅限于在WEB应用中使用。
- 自定义scope:很少使用。
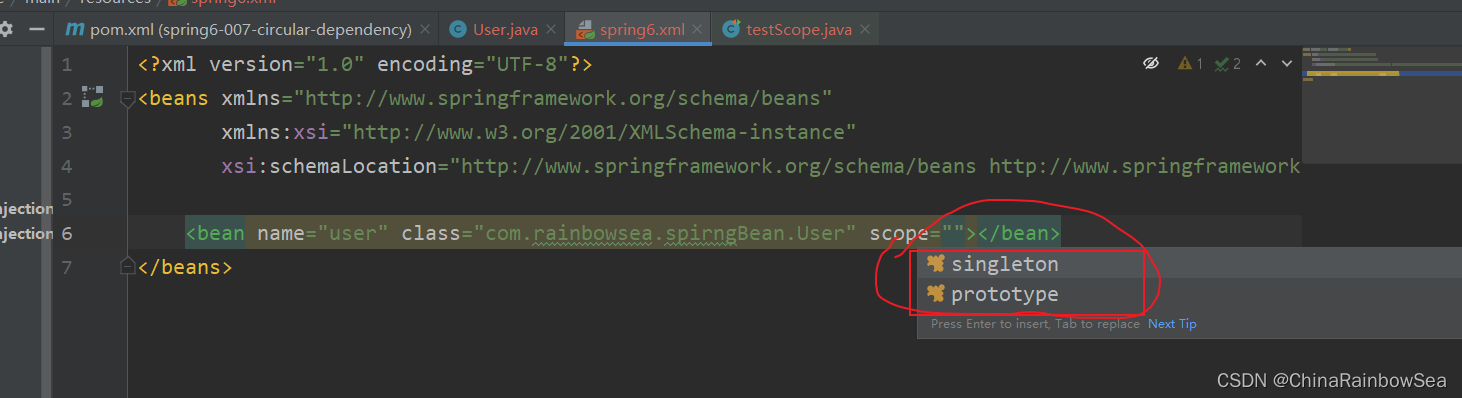
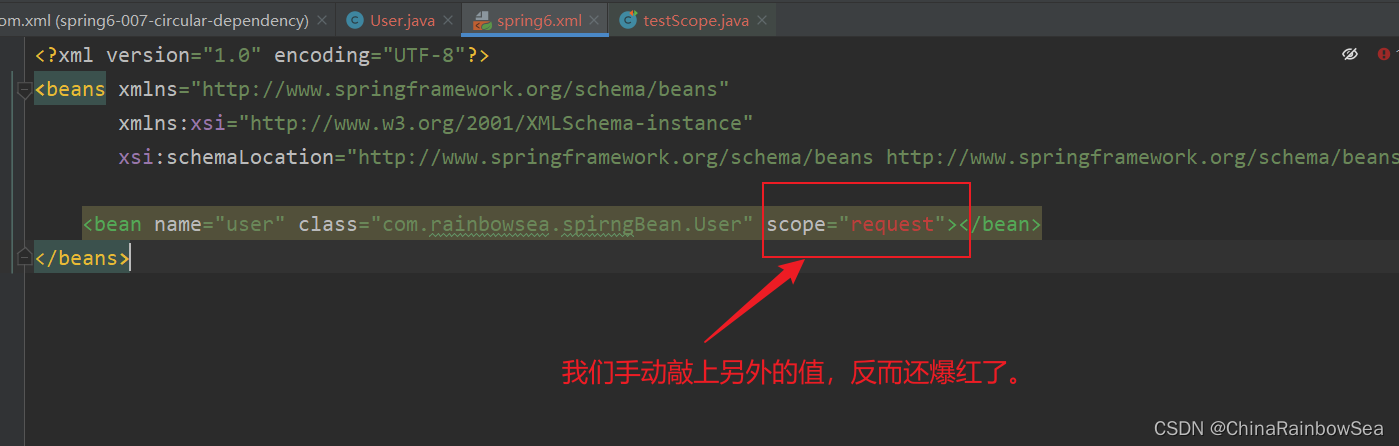
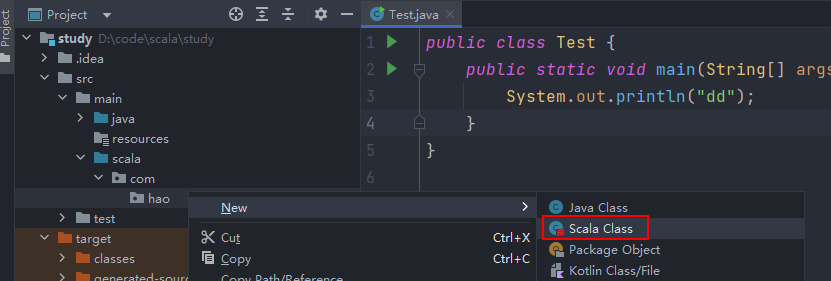
特殊说明: 如果大家,进行了一个实践测试代码,可能会发现,IDE工具,仅仅只提示了 scope属性值的两个值(singleton,prototype)。就算我们自己手动敲出了其他的值,也是会报红 。如下图所示:
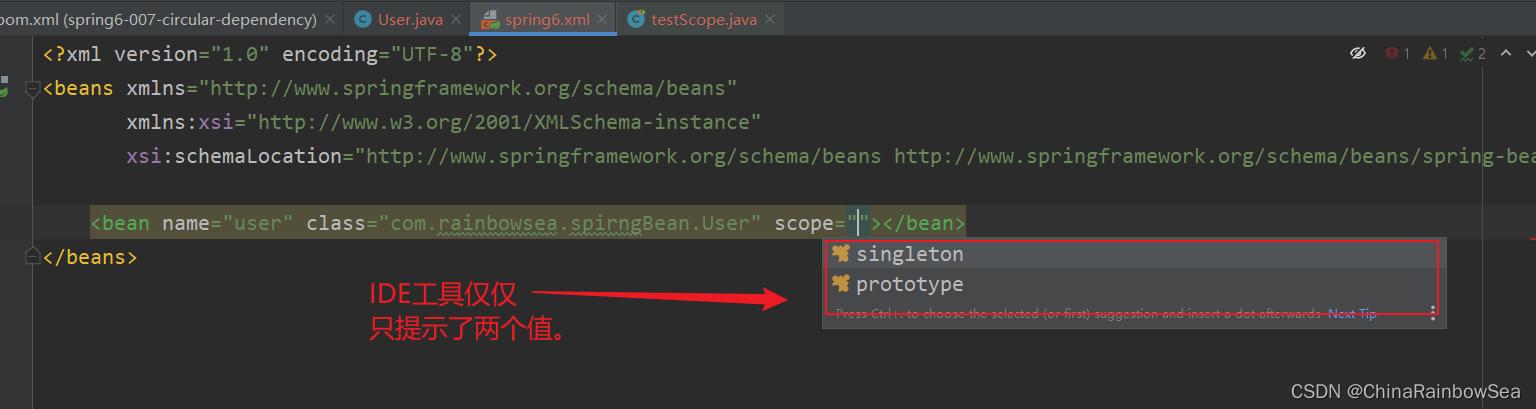
哈哈哈,这个IDE不给我们提示就算了,还给我们报错。
其实这个并不是IDE工具的问题,而是,我们其他的对应的scope其他属性的值,是需要在特定的情况下才有用的。比如:我们这里的
request是需要在web项目当中才是有用的 ,所以 IDE才给我们来了这么一个错误——》爆红了。
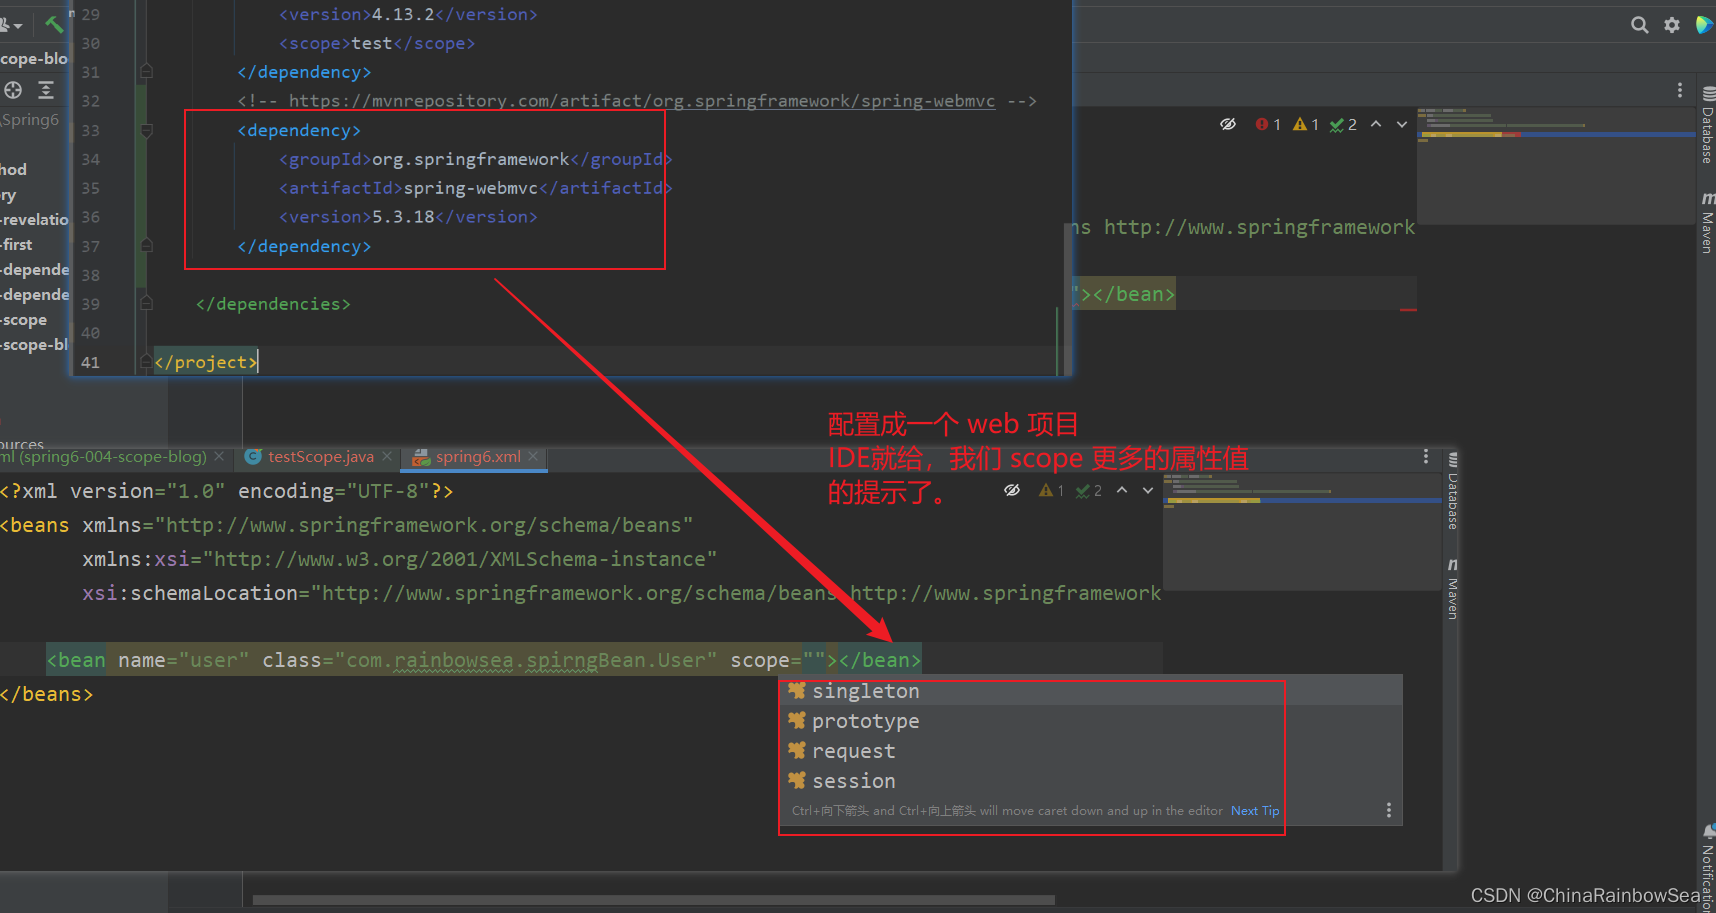
我们可以,在 pom.xml 项目配置文件上,加上一个web 框架,比如:这里我们加上SpringMVC 就可以了。试试
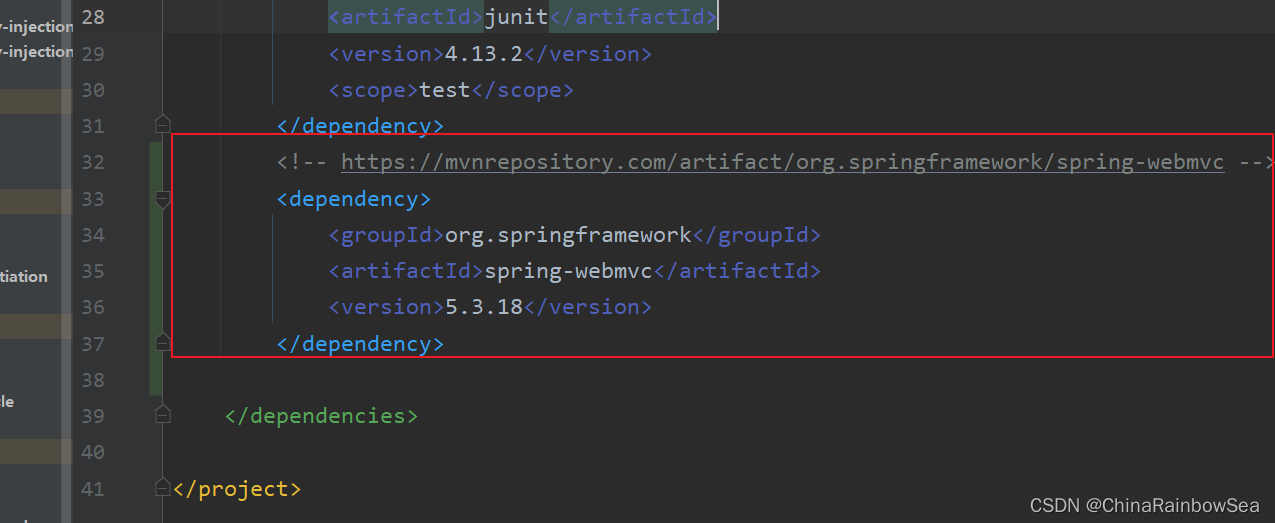
        <!-- https://mvnrepository.com/artifact/org.springframework/spring-webmvc -->
        <dependency>
            <groupId>org.springframework</groupId>
            <artifactId>spring-webmvc</artifactId>
            <version>5.3.18</version>
        </dependency>
<?xml version="1.0" encoding="UTF-8"?>
<project xmlns="http://maven.apache.org/POM/4.0.0"
         xmlns:xsi="http://www.w3.org/2001/XMLSchema-instance"
         xsi:schemaLocation="http://maven.apache.org/POM/4.0.0 http://maven.apache.org/xsd/maven-4.0.0.xsd">
    <modelVersion>4.0.0</modelVersion>

    <groupId>com.rainbowsea</groupId>
    <artifactId>spring6-007-circular-dependency</artifactId>
    <version>1.0-SNAPSHOT</version>
    <packaging>jar</packaging>

    <properties>
        <maven.compiler.source>17</maven.compiler.source>
        <maven.compiler.target>17</maven.compiler.target>
    </properties>

    <dependencies>
        <dependency>
            <groupId>org.springframework</groupId>
            <artifactId>spring-context</artifactId>
            <version>6.0.11</version>
        </dependency>


        <!-- junit4 -->
        <dependency>
            <groupId>junit</groupId>
            <artifactId>junit</artifactId>
            <version>4.13.2</version>
            <scope>test</scope>
        </dependency>
        <!-- https://mvnrepository.com/artifact/org.springframework/spring-webmvc -->
        <dependency>
            <groupId>org.springframework</groupId>
            <artifactId>spring-webmvc</artifactId>
            <version>5.3.18</version>
        </dependency>

    </dependencies>

</project>
1.5 自定义作用域,一个线程一个 Bean
接下来咱们自定义一个Scope,关于线程级别的Scope,
作用:在同一个线程中,获取的Bean都是同一个。跨线程则是不同的对象。
第一步:自定义Scope。(实现Scope接口)
spring内置了线程范围的类:
org.springframework.beans.factory.config.CustomScopeConfigurer,和org.springframework.context.support.SimpleThreadScope可以直接用。
- 第二步:将自定义的Scope注册到Spring容器中。
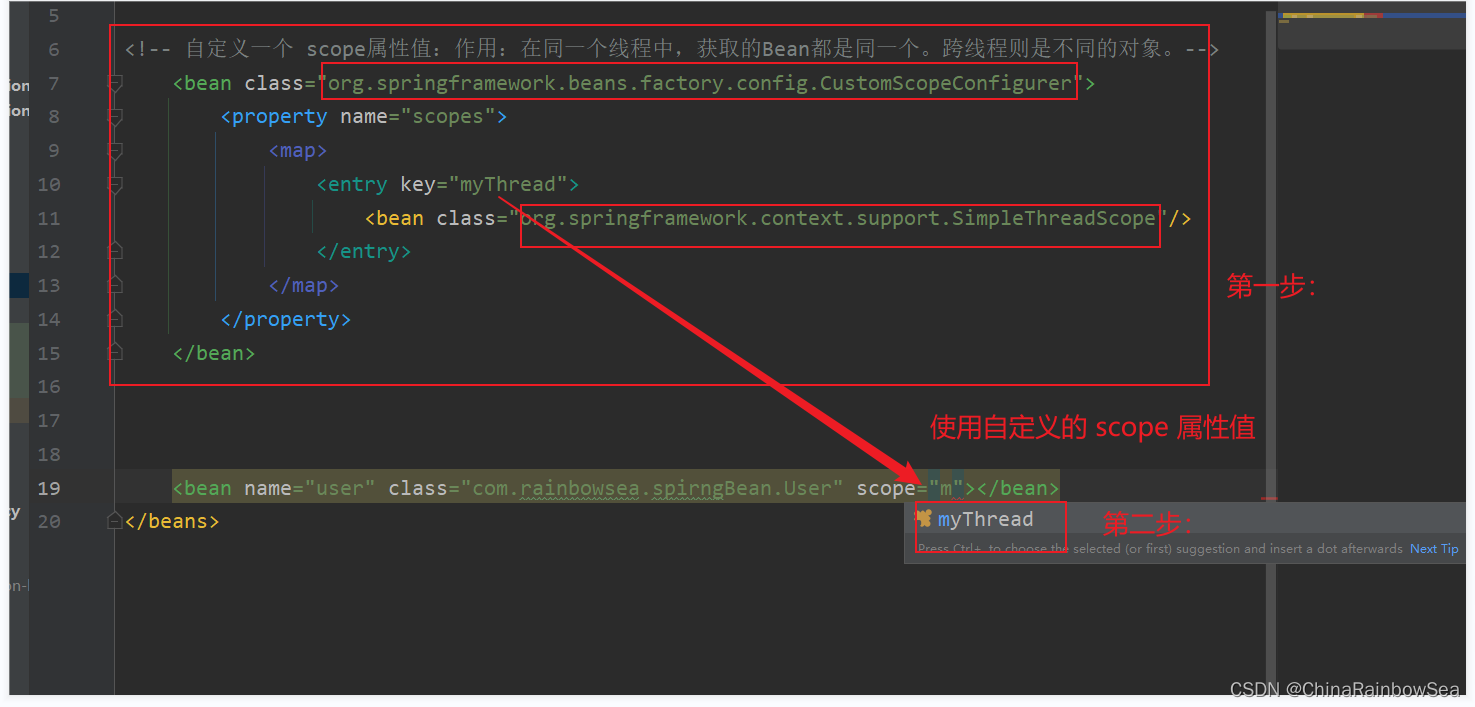
<bean class="org.springframework.beans.factory.config.CustomScopeConfigurer">
  <property name="scopes">
    <map>
      <entry key="myThread">
        <bean class="org.springframework.context.support.SimpleThreadScope"/>
      </entry>
    </map>
  </property>
</bean>
<?xml version="1.0" encoding="UTF-8"?>
<beans xmlns="http://www.springframework.org/schema/beans"
       xmlns:xsi="http://www.w3.org/2001/XMLSchema-instance"
       xsi:schemaLocation="http://www.springframework.org/schema/beans http://www.springframework.org/schema/beans/spring-beans.xsd">

<!-- 自定义一个 scope属性值:作用:在同一个线程中,获取的Bean都是同一个。跨线程则是不同的对象。-->
    <bean class="org.springframework.beans.factory.config.CustomScopeConfigurer">
        <property name="scopes"> <!-- set 注入,为该类当中的 name 属性赋值-->
            <map> <!-- map集合 注入,为该类当中的 key 属性赋值,也就是我们自定义的 scope的属性值的名字-->
                <entry key="myThread">
                    <bean class="org.springframework.context.support.SimpleThreadScope"/>
                </entry>
            </map>
        </property>
    </bean>


    <bean name="user" class="com.rainbowsea.spirngBean.User" scope="myThread"></bean>
</beans>
我们还是使用 User 这个类,作为 Bean 进行一个测试。
启动多个线程,处理。
import org.junit.Test;
import org.springframework.context.ApplicationContext;
import org.springframework.context.support.ClassPathXmlApplicationContext;

public class testScope {
    @Test
    public void test() {
        // 第一个线程
        ApplicationContext applicationContext = new ClassPathXmlApplicationContext("spring6.xml");
        User user = applicationContext.getBean("user", User.class);
        User user1 = applicationContext.getBean("user", User.class);
        System.out.println(user);
        System.out.println(user1);

        // 启动多线程
        // 第二个线程
        new Thread(new Runnable() {
            @Override
            public void run() {
                User user2 = applicationContext.getBean("user", User.class);
                User user3 = applicationContext.getBean("user", User.class);
                System.out.println(user2);
                System.out.println(user3);
            }
        }).start();

    }
}
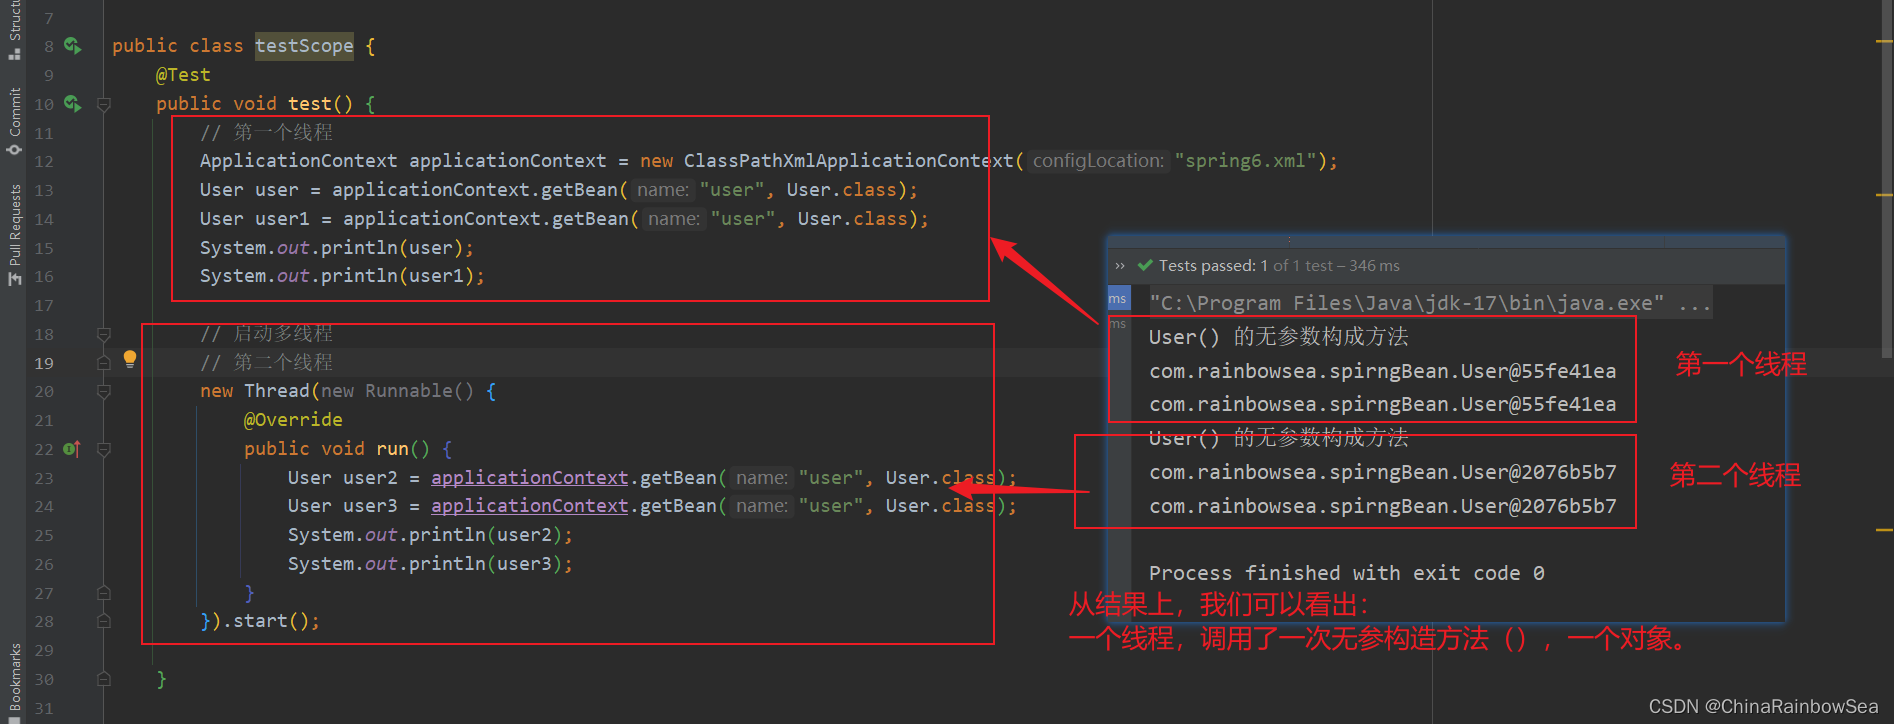
从结果上,我们可以看出:
一个线程,调用了一次无参构造方法(),生产一个对象。
成功实现了。在同一个线程中,获取的Bean都是同一个。跨线程则是不同的对象。
2. 总结:
- 默认情况下,Spring的IoC容器创建的Bean对象是单例的。默认是singleton(单例的)
- 可以在bean标签中指定scope属性的值为:**prototype(多例),默认是singleton(单例的) **
- 同时要注意:scope属性的值不止两个,它一共包括8个选项:,其他的要在特定的配置下,才能使用,例如:request和session 要是在
web框架才可以使用。
3. 最后:
“在这个最后的篇章中,我要表达我对每一位读者的感激之情。你们的关注和回复是我创作的动力源泉,我从你们身上吸取了无尽的灵感与勇气。我会将你们的鼓励留在心底,继续在其他的领域奋斗。感谢你们,我们总会在某个时刻再次相遇。”


![【Osek网络管理测试】[TG3_TC6]等待总线睡眠状态_2](https://img-blog.csdnimg.cn/direct/4d967b0f55cb40799672ff2cef80debb.png)