目录
- 前言
- 一、使用 LayoutParams 设置宽高
- 二、不设置 LayoutParams
- 2.1 TextView 的 LayoutParams
- 2.2 LinearLayout 的 LayoutParams
- 三、getLayoutParams 的使用
- 四、setLayoutParams 的作用
- 五、使用 setWidth/setHeight 设置宽高
前言
先来看一个简单的布局,先用 xml 写
<?xml version="1.0" encoding="utf-8"?>
<LinearLayout xmlns:android="http://schemas.android.com/apk/res/android"
    xmlns:app="http://schemas.android.com/apk/res-auto"
    xmlns:tools="http://schemas.android.com/tools"
    android:layout_width="match_parent"
    android:layout_height="match_parent"
    android:background="#00F5FF"
    android:gravity="center"
    android:orientation="vertical">
    <TextView
        android:layout_width="160dp"
        android:layout_height="160dp"
        android:background="#FFFACD"
        android:text="12345678" />

</LinearLayout>
效果也很简单:
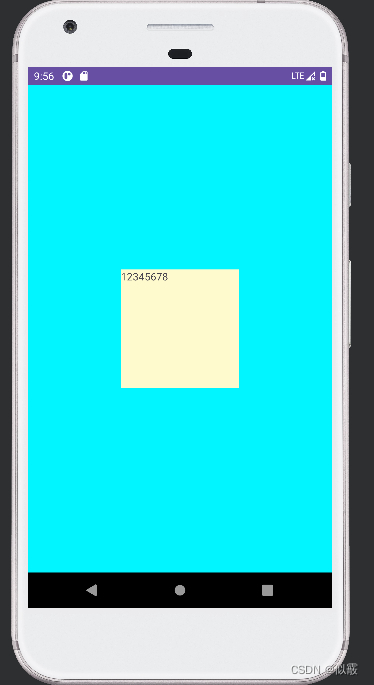
如果想要代码动态写出上面的布局,就需要使用 LayoutParams 这个关键类了,
LayoutParams 是 ViewGroup 的一个内部类,这是一个基类,例如 FrameLayout、LinearLayout 等等,内部都有自己的 LayoutParams。
一、使用 LayoutParams 设置宽高
LayoutParams 的作用是: 子控件告诉父控件,自己要如何布局。
代码实现:
public class LayoutFragment extends Fragment {

    @Nullable
    @Override
    public View onCreateView(@NonNull LayoutInflater inflater, @Nullable ViewGroup container, @Nullable Bundle savedInstanceState) {
        LinearLayout ll = new LinearLayout(getContext());
//11的父容器是MainActivity中的FrameLayout
        ll.setLayoutParams(new FrameLayout.LayoutParams(
                ViewGroup.LayoutParams.MATCH_PARENT, ViewGroup.LayoutParams.MATCH_PARENT));
        ll.setGravity(Gravity.CENTER);
        ll.setBackgroundColor(Color.BLUE);
        TextView tv = new TextView(getContext());
//tv的父容器是LinearLayout
        LinearLayout.LayoutParams layoutParams = new LinearLayout.LayoutParams(160, 160);
        tv.setLayoutParams(layoutParams);//
        tv.setBackgroundColor(Color.RED);
        tv.setText("123145678");
        ll.addView(tv);// c
        return ll;
    }
}
我们对 LinearLayout 和 TextView 的 LayoutParams 都进行了设置,效果图和上面 xml的是一模一样的。
ll.setLayoutParams 设置的是其父布局 FrameLayout 的 LayoutParams,并且告诉父布局,宽高设置为 MATCH_PARENT。
tv.setLayoutParams 设置的也是其父布局 LinearLayout 的 LayoutParams,并且告诉父布局,宽高设置为 160dp。
上面 ①、 ② 两行代码可以简化为一行,替换为 addView(View child, LayoutParamsparams) 这个重载方法,在添加到父布局时,设置 LayoutParams,通知父布局如何摆放自己。
ll.addView(tv, layoutParams);// 子布局添加到父布局
二、不设置 LayoutParams
public class LayoutFragment extends Fragment {

    @Nullable
    @Override
    public View onCreateView(@NonNull LayoutInflater inflater, @Nullable ViewGroup container, @Nullable Bundle savedInstanceState) {
        LinearLayout ll = new LinearLayout(getContext());
        ll.setGravity(Gravity.CENTER);
        ll.setBackgroundColor(Color.BLUE);
        TextView tv = new TextView(getContext());
//tv的父容器是LinearLayout

        tv.setBackgroundColor(Color.RED);
        tv.setText("123145678");
        ll.addView(tv);// c
        return ll;
    }
}
public class MainActivity extends AppCompatActivity {
    private static final String TAG = "henry-----";

    @Override
    protected void onCreate(Bundle savedInstanceState) {
        super.onCreate(savedInstanceState);
        setContentView(R.layout.activity_main);
        FragmentManager fragmentManager = getSupportFragmentManager();
        FragmentTransaction transaction = fragmentManager.beginTransaction();
        LayoutFragment fragment = new LayoutFragment();
        transaction.add(R.id.test, fragment);
        transaction.commit();
    }

}
效果如下:
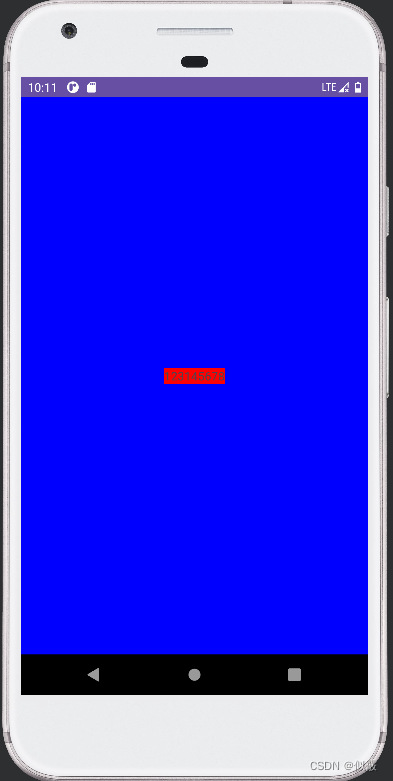
发现在对 LinearLayout 和 TextView 的 都不设置 LayoutParams 的情况下,LinearLayout 使用 MATCH_PARENT,而 TextView 使用 WRAP_CONTENT,至于为什么,要分析一下源码
2.1 TextView 的 LayoutParams
进入 addView 看一下,不存在 LayoutParams 时,会调用generateDefaultLayoutParams() 进行创建。
    public void addView(View child, int index) {
        if (child == null) {
            throw new IllegalArgumentException("Cannot add a null child view to a ViewGroup");
        }
        LayoutParams params = child.getLayoutParams();
        if (params == null) {
            params = generateDefaultLayoutParams();
            if (params == null) {
                throw new IllegalArgumentException(
                        "generateDefaultLayoutParams() cannot return null  ");
            }
        }
        addView(child, index, params);
    }
找到 LinearLayout 中 generateDefaultLayoutParams(),注意不是 ViewGroup 中的
    protected LayoutParams generateDefaultLayoutParams() {
        if (mOrientation == HORIZONTAL) {
            return new LayoutParams(LayoutParams.WRAP_CONTENT, LayoutParams.WRAP_CONTENT);
        } else if (mOrientation == VERTICAL) {
            return new LayoutParams(LayoutParams.MATCH_PARENT, LayoutParams.WRAP_CONTENT);
        }
        return null;
    }
显而易见,由于我们没有指定方向, mOrientation 默认为 0,也就是 HORIZONTAL,所以 TextView 设置为
WRAP_CONTENT,为了证实猜想,我们设置 LinearLayout 的方向为 VERTICAL。
ll.setOrientation(LinearLayout.VERTICAL);
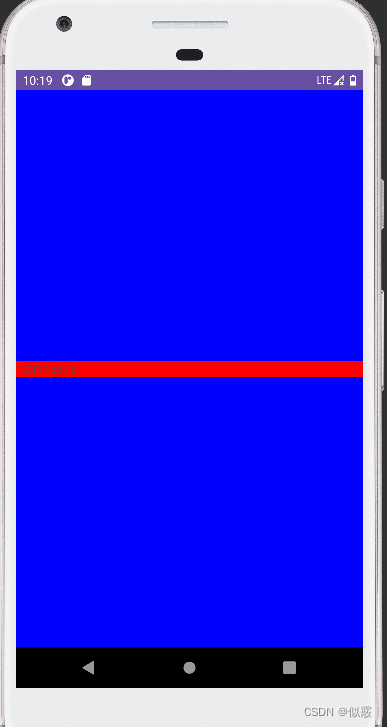
效果跟代码看到的一样,宽度为 MATCH_PARENT,高度为WRAP_CONTENT:
2.2 LinearLayout 的 LayoutParams
和上面 TextView 一样,这个要进入 FrameLayout 中查看 generateDefaultLayoutParams()。
    protected LayoutParams generateDefaultLayoutParams() {
        return new LayoutParams(LayoutParams.MATCH_PARENT, LayoutParams.MATCH_PARENT);
    }
所以,在 FrameLayout 中的 LinearLayout 的宽高就是 MATCH_PARENT。
三、getLayoutParams 的使用
在不使用代码动态布局的情况下,大都是先通过 getLayoutParams() 获取LayoutParams ,然后进行赋值,最后通过 setLayoutParams()设回控件,值得注意的是,获取 LayoutParams 务必要强转为父控件的类型,才会有该父控件特有的方法。
public class LayoutFragment extends Fragment {

    @Nullable
    @Override
    public View onCreateView(@NonNull LayoutInflater inflater, @Nullable ViewGroup container, @Nullable Bundle savedInstanceState) {
        LinearLayout ll = new LinearLayout(getContext());
// ll 的父容器是 MainActivity 中的 FrameLayout
        FrameLayout.LayoutParams fl_params = (FrameLayout.LayoutParams)
                ll.getLayoutParams();// ①
        fl_params.width = ViewGroup.LayoutParams.MATCH_PARENT;
        fl_params.height = ViewGroup.LayoutParams.MATCH_PARENT;
        ll.setLayoutParams(fl_params);
        ll.setGravity(Gravity.CENTER);
        ll.setBackgroundResource(android.R.color.holo_blue_bright);
        TextView tv = new TextView(getContext());
// tv 的父容器是 LinearLayout
        LinearLayout.LayoutParams ll_params = (LinearLayout.LayoutParams)
                tv.getLayoutParams();// ②
        ll_params.width = 160;
        ll_params.height = 160;
        tv.setLayoutParams(ll_params);tv.setBackgroundResource(android.R.color.holo_red_dark);
        tv.setText("12345678");
        ll.addView(tv);
        return ll;

    }
}
运行报错:

上面代码是有问题的, ①、 ②处都会返回 null,导致空指针。
①处:此时还没有将 LinearLayout 作为返回值返回,也就没有添加到布局中,自然不存
在 LayoutParams。
②处:此时还没有将 TextView 添加到 LinearLayout 中,也不存在 LayoutParams。
下面才是正确的示例:
public class LayoutFragment extends Fragment {

    @Nullable
    @Override
    public View onCreateView(@NonNull LayoutInflater inflater, @Nullable ViewGroup container, @Nullable Bundle savedInstanceState) {
        LinearLayout ll = new LinearLayout(getContext());
// ll 的父容器是 MainActivity 中的 FrameLayout
        ll.setLayoutParams(new FrameLayout.LayoutParams(
                ViewGroup.LayoutParams.MATCH_PARENT, ViewGroup.LayoutParams.MATCH_PARENT));
        ll.setGravity(Gravity.CENTER);// 子控件居中
        ll.setBackgroundResource(android.R.color.holo_blue_bright);
        TextView tv = new TextView(getContext());
        ll.addView(tv);// 添加到父控件,此时会构造一个 LayoutParams 出来。
        LinearLayout.LayoutParams ll_params = (LinearLayout.LayoutParams)
                tv.getLayoutParams();
        ll_params.width = 160;
        ll_params.height = 160;
        tv.setLayoutParams(ll_params);
        tv.setBackgroundResource(android.R.color.holo_red_dark);
        tv.setText("12345678");
        return ll;
    }
}
四、setLayoutParams 的作用
这里抛出一个问题:
上面代码中 getLayoutParams() 得到了 LayoutParams 的引用 ll_params,直接对width 和 height 属性赋值,那么 setLayoutParams() 是不是不需要调用了?
这就需要看看 setLayoutParams() 里面干了什么
    public void setLayoutParams(ViewGroup.LayoutParams params) {
        if (params == null) {
            throw new NullPointerException("Layout parameters cannot be null");
        }
        mLayoutParams = params;
        resolveLayoutParams();
        if (mParent instanceof ViewGroup) {
            ((ViewGroup) mParent).onSetLayoutParams(this, params);
        }
        requestLayout();
    }
关键的最后一行 requestLayout() ,这个方法简单来说,就是重新执行 onMeasure() 和onLayout(),而 onDraw() 需要适情况而定,这里就不具体展开说了。
现在就可以回答上面的问题了,在上面 onCreateView() 中的 setLayoutParams() 确实是多余的,因为在 onCreateView() 之后才会进行 View 的绘制。
当然这并不是说 setLayoutParams() 没有用,在自定义控件中,往往需要在 View 绘制后修改 LayoutParams 的值,那么这种场景下,如果不调用 setLayoutParams() 就会出现设置不生效的问题。
总结:
- 在 LayoutParams 赋值后,如果确定还没有完成 View 的绘制,可以省略setLayoutParams() ,在后面绘制期间,会取到前面的赋值,并使之生效。
- 如果已经完成了 View 的绘制,那么必须要调用setLayoutParams() ,重新进行绘制。
- 不确定的情况下就setLayoutParams() ,反正不会出问题。
五、使用 setWidth/setHeight 设置宽高
在设置控件宽高时,有些人为了方便,没有使用 LayoutParams ,直接通过 set 方法设置,
但这种方式并不靠谱!
对 TextView 和 Button 分别设置宽高为 160px
public class LayoutFragment extends Fragment {

    @Nullable
    @Override
    public View onCreateView(@NonNull LayoutInflater inflater, @Nullable ViewGroup container, @Nullable Bundle savedInstanceState) {
        LinearLayout ll = new LinearLayout(getContext());
// ll 的父容器是 MainActivity 中的 FrameLayout
        ll.setLayoutParams(new FrameLayout.LayoutParams(
                ViewGroup.LayoutParams.MATCH_PARENT, ViewGroup.LayoutParams.MATCH_PARENT));
        ll.setGravity(Gravity.CENTER);// 子控件居中
        ll.setBackgroundResource(android.R.color.holo_blue_bright);
        TextView tv = new TextView(getContext());
        tv.setWidth(160);
        tv.setHeight(160);
        tv.setBackgroundResource(android.R.color.holo_red_dark);
        tv.setText("12345678");
        ll.addView(tv);
        Button bt = new Button(getContext());
        bt.setWidth(160);
        bt.setHeight(160);
        bt.setBackgroundResource(android.R.color.holo_green_dark);
        bt.setText("12345678");
        ll.addView(bt);
        return ll;
    }
}
TextView 设置宽高成功, Button 只在高度上生效,效果如下:
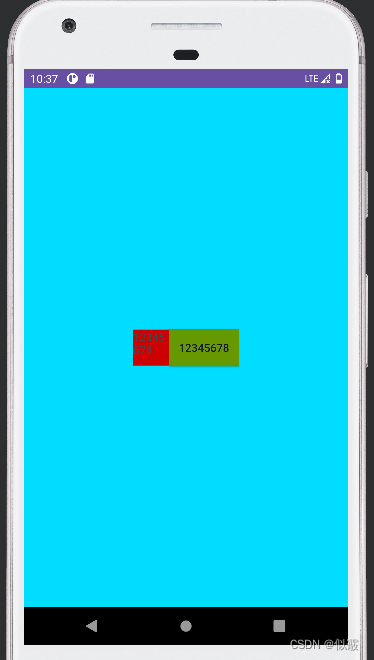
可以打印下控件宽高看下结果:

Button 也是继承 TextView,为什么会出现设置失效?进入 setWidth 方法,看到在这里只是设置了控件的最大值和最小值:
    public void setWidth(int pixels) {
        mMaxWidth = mMinWidth = pixels;
        mMaxWidthMode = mMinWidthMode = PIXELS;

        requestLayout();
        invalidate();
    }
LayoutParams 设置的宽高才是真正的宽高:

再看下 onMeasure 中,这里面设置 width 时,有很多类似下面判断:
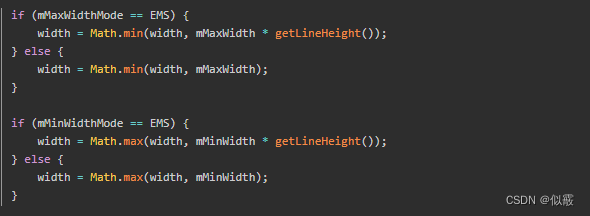
所以 setWidth()/setHeight 只代表想设置的宽高,并不是实际设定值。这就很好理解,
当 set 的值大于 Button 最小宽度/高度时生效,在小于 Button 最小宽度/高度时,不能起到作用。


