先电2.4版本的openstack,前期虚拟机部署参考上一篇2.2版本,基本步骤是一样的,准备两个镜像文件CentOS-7.5-x86_64-DVD-1804.iso,XianDian-IaaS-V2.4.iso
[root@controller ~]# cat /etc/sysconfig/network-scripts/ifcfg-eno16777736
TYPE=Ethernet
BOOTPROTO=static
DEFROUTE=yes
IPV4_FAILURE_FATAL=no
IPV6INIT=yes
IPV6_AUTOCONF=yes
IPV6_DEFROUTE=yes
IPV6_FAILURE_FATAL=no
NAME=eno16777736
UUID=0f71f3b8-13dc-4d79-952d-d8e6157bdc4e
DEVICE=eno16777736
ONBOOT=yes
PEERDNS=yes
PEERROUTES=yes
IPV6_PEERDNS=yes
IPV6_PEERROUTES=yes
IPADDR=192.168.10.10
PREFIX=24
[root@controller ~]# cat /etc/sysconfig/network-scripts/ifcfg-eno33554960
TYPE=Ethernet
BOOTPROTO=dhcp
DEFROUTE=yes
PEERDNS=yes
PEERROUTES=yes
IPV4_FAILURE_FATAL=no
IPV6INIT=yes
IPV6_AUTOCONF=yes
IPV6_DEFROUTE=yes
IPV6_PEERDNS=yes
IPV6_PEERROUTES=yes
IPV6_FAILURE_FATAL=no
NAME=eno33554960
UUID=148dcef1-5450-4120-ab5f-c8ca36b8f827
DEVICE=eno33554960
ONBOOT=yes
PREFIX=24
两边虚拟机在设置开机的时候创建了第二块网卡,这样进入network的目录下,网卡的配置文件就已经存在了
主机模式,static,不要设置网关,NAT模式dhcp这样就可以访问外网
hostnamectl set-hostname controller
ctrl+d 可以退出重新登陆,主机localhost的名字就被修改了,方便分辨两台虚拟机
[root@controller ~]# vi /etc/hosts
127.0.0.1 localhost localhost.localdomain localhost4 localhost4.localdomain4
::1 localhost localhost.localdomain localhost6 localhost6.localdomain6
192.168.10.10 controller
192.168.10.20 compute
控制节点连接fx上传两个dvd,再进行挂载
[root@localhost ~]# mkdir /opt/centos7.2
[root@localhost ~]# mkdir /opt/iaas
[root@localhost ~]# mount /root/CentOS-7.5-x86_64-DVD-1804.iso /opt/centos7.2
mount: /dev/loop0 is write-protected, mounting read-only
[root@localhost ~]# mount /root/XianDian-IaaS-V2.4.iso /opt/iaas/
mount: /dev/loop1 is write-protected, mounting read-only
[root@controller ~]# rm -rf /etc/yum.repos.d/CentOS- *
[root@controller ~]# cat > /etc/yum.repos.d/local.repo <<EOF
[centos]
name=centos
baseurl=file:///opt/centos7.2
gpgcheck=0
enabled=1
[iaas]
baseurl=file:///opt/iaas/iaas-repo
gpgcheck=0
enabled=1
EOF
[root@controller ~]# yum clean all
Loaded plugins: fastestmirror, langpacks
Repository ‘iaas’ is missing name in configuration, using id
Cleaning repos: base centos extras iaas updates
Cleaning up everything
[root@controller ~]# yum repolist
看到repolist: 23,680
在控制节点,安装ftp服务
[root@localhost ~]# yum install vsftpd -y
出现complete以后,修改配置文件(这里如果报错,没有镜像源,则回去检查修改ip的地方dns配置了没有,如果是报错another app,运行下句
rm -f /var/run/yum.pid
)
Complete!
[root@localhost ~]# vi /etc/vsftpd/vsftpd.conf
anon_root=/opt
[root@localhost ~]# systemctl restart vsftpd
两边的节点关闭防火墙
[root@localhost ~]# setenforce 0
[root@localhost ~]# iptables -F
[root@localhost ~]# iptables -X
[root@localhost ~]# iptables -Z
[root@localhost ~]# systemctl stop firewalld
在compute节点也检查一下yum
[root@compute ~]# yum clean all
Loaded plugins: fastestmirror, langpacks
Repository ‘iaas’ is missing name in configuration, using id
Cleaning repos: base centos extras iaas updates
Cleaning up everything
[root@compute ~]# yum repolist
看到repolist: 23,680
安装同步器
[root@controller ~]# yum install -y chrony
[root@controller ~]# vi /etc/chrony.conf
# Use public servers from the pool.ntp.org project.
# Please consider joining the pool (http://www.pool.ntp.org/join.html).
#server 0.centos.pool.ntp.org iburst
#server 1.centos.pool.ntp.org iburst
#server 2.centos.pool.ntp.org iburst
#server 3.centos.pool.ntp.org iburst

server controller iburst
allow 192.168.10.0/24

# Record the rate at which the system clock gains/losses time.
driftfile /var/lib/chrony/drift

# Allow the system clock to be stepped in the first three updates
# if its offset is larger than 1 second.
makestep 1.0 3

# Enable kernel synchronization of the real-time clock (RTC).
rtcsync

# Enable hardware timestamping on all interfaces that support it.
#hwtimestamp *
“/etc/chrony.conf” 41L, 1160C written
[root@controller ~]# systemctl restart chronyd
[root@controller ~]# systemctl enable chronyd
控制节点一样
[root@compute ~]# yum install -y chrony
[root@compute ~]# vi /etc/chrony.conf
# Use public servers from the pool.ntp.org project.
# Please consider joining the pool (http://www.pool.ntp.org/join.html).
#server 0.centos.pool.ntp.org iburst
#server 1.centos.pool.ntp.org iburst
#server 2.centos.pool.ntp.org iburst
#server 3.centos.pool.ntp.org iburst

server controller iburst

# Record the rate at which the system clock gains/losses time.
driftfile /var/lib/chrony/drift

# Allow the system clock to be stepped in the first three updates
# if its offset is larger than 1 second.
makestep 1.0 3

# Enable kernel synchronization of the real-time clock (RTC).
rtcsync

# Enable hardware timestamping on all interfaces that support it.
#hwtimestamp *

# Increase the minimum number of selectable sources required to adjust
"/etc/chrony.conf" 40L, 1138C written
[root@compute ~]# systemctl restart chronyd
[root@compute ~]# systemctl enable chronyd
[root@compute ~]# chronyc sources -v
210 Number of sources = 1

  .-- Source mode  '^' = server, '=' = peer, '#' = local clock.
 / .- Source state '*' = current synced, '+' = combined , '-' = not combined,
| /   '?' = unreachable, 'x' = time may be in error, '~' = time too variable.
||                                                 .- xxxx [ yyyy ] +/- zzzz
||      Reachability register (octal) -.           |  xxxx = adjusted offset,
||      Log2(Polling interval) --.      |          |  yyyy = measured offset,
||                                \     |          |  zzzz = estimated error.
||                                 |    |           \
MS Name/IP address         Stratum Poll Reach LastRx Last sample
===============================================================================
^? controller                    0   6     0     -     +0ns[   +0ns] +/-    0ns
可见已经同步
两边
[root@localhost ~]# yum install iaas-xiandian -y
[root@controller ~]# vi /etc/xiandian/openrc.sh
##--------------------system Config--------------------##
##Controller Server Manager IP. example:x.x.x.x
HOST_IP=192.168.10.10

##Controller HOST Password. example:000000
HOST_PASS=000000

##Controller Server hostname. example:controller
HOST_NAME=controller

##Compute Node Manager IP. example:x.x.x.x
HOST_IP_NODE=192.168.10.20

##Compute HOST Password. example:000000
HOST_PASS_NODE=000000

##Compute Node hostname. example:compute
HOST_NAME_NODE=compute

##--------------------Chrony Config-------------------##
##Controller network segment IP.  example:x.x.0.0/16(x.x.x.0/24)
network_segment_IP=192.168.10.0/24

##--------------------Rabbit Config ------------------##
##user for rabbit. example:openstack
RABBIT_USER=openstack

##Password for rabbit user .example:000000
RABBIT_PASS=000000

##--------------------MySQL Config---------------------##
##Password for MySQL root user . exmaple:000000
DB_PASS=000000

##--------------------Keystone Config------------------##
##Password for Keystore admin user. exmaple:000000
DOMAIN_NAME=demo
ADMIN_PASS=000000
DEMO_PASS=000000

##Password for Mysql keystore user. exmaple:000000
KEYSTONE_DBPASS=000000

##--------------------Glance Config--------------------##
##Password for Mysql glance user. exmaple:000000
GLANCE_DBPASS=000000

##Password for Keystore glance user. exmaple:000000
GLANCE_PASS=000000

##--------------------Nova Config----------------------##
##Password for Mysql nova user. exmaple:000000
NOVA_DBPASS=000000

##Password for Keystore nova user. exmaple:000000
NOVA_PASS=000000

##--------------------Neturon Config-------------------##
##Password for Mysql neutron user. exmaple:000000
NEUTRON_DBPASS=000000

##Password for Keystore neutron user. exmaple:000000
NEUTRON_PASS=000000

##metadata secret for neutron. exmaple:000000
METADATA_SECRET=000000

##Tunnel Network Interface. example:x.x.x.x
INTERFACE_IP=192.168.10.10

##External Network Interface. example:eth1
INTERFACE_NAME=eno33554960

##External Network The Physical Adapter. example:provider
Physical_NAME=provider

##First Vlan ID in VLAN RANGE for VLAN Network. exmaple:101
minvlan=101

##Last Vlan ID in VLAN RANGE for VLAN Network. example:200
maxvlan=200

##--------------------Cinder Config--------------------##
##Password for Mysql cinder user. exmaple:000000
CINDER_DBPASS=000000

##Password for Keystore cinder user. exmaple:000000
CINDER_PASS=000000

##Cinder Block Disk. example:md126p3
BLOCK_DISK=sdb1

##--------------------Swift Config---------------------##
##Password for Keystore swift user. exmaple:000000
SWIFT_PASS=000000

##The NODE Object Disk for Swift. example:md126p4.
OBJECT_DISK=sdb2

##The NODE IP for Swift Storage Network. example:x.x.x.x.
STORAGE_LOCAL_NET_IP=192.168.10.20

##--------------------Heat Config----------------------##
##Password for Mysql heat user. exmaple:000000
HEAT_DBPASS=000000

##Password for Keystore heat user. exmaple:000000
HEAT_PASS=000000

##--------------------Zun Config-----------------------##
##Password for Mysql Zun user. exmaple:000000
ZUN_DBPASS=000000

##Password for Keystore Zun user. exmaple:000000
ZUN_PASS=000000

##Password for Mysql Kuryr user. exmaple:000000
KURYR_DBPASS=000000

##Password for Keystore Kuryr user. exmaple:000000
KURYR_PASS=000000

##--------------------Ceilometer Config----------------##
##Password for Gnocchi ceilometer user. exmaple:000000
CEILOMETER_DBPASS=000000

##Password for Keystore ceilometer user. exmaple:000000
CEILOMETER_PASS=000000

##--------------------AODH Config----------------##
##Password for Mysql AODH user. exmaple:000000
AODH_DBPASS=000000

##Password for Keystore AODH user. exmaple:000000
AODH_PASS=000000

##--------------------Barbican Config----------------##
##Password for Mysql Barbican user. exmaple:000000
BARBICAN_DBPASS=000000

##Password for Keystore Barbican user. exmaple:000000
BARBICAN_PASS=000000
"/etc/xiandian/openrc.sh" 142L, 3877C written
[root@controller ~]# scp /etc/xiandian/openrc.sh compute://etc/xiandian
The authenticity of host ‘compute (192.168.10.20)’ can’t be established.
ECDSA key fingerprint is f7:8d:08:f9:ba:95:6c:a0:6d:62:6d:f8:be🆎6d:80.
Are you sure you want to continue connecting (yes/no)? yes
Warning: Permanently added ‘compute,192.168.10.20’ (ECDSA) to the list of known hosts.
root@compute’s password:
openrc.sh
去计算节点修改tunnel,改成自己节点的IP,其余不用修改
[root@compute ~]# vi /etc/xiandian/openrc.sh
##Tunnel Network Interface. example:x.x.x.x
INTERFACE_IP=192.168.10.20
两边都source一下使文件生效
[root@compute ~]# source /etc/xiandian/openrc.sh
[root@controller ~]# source /etc/xiandian/openrc.sh
两个节点分别运行
[root@localhost ~]# iaas-pre-host.sh
完成以后reboot,两边的提示不同,control节点,reboot 的前面有一句提示然后才是complete
compute的节点reboot的上一句就是complete
重启以后,重新远程连接,再mount一次,如果提示[root@controller ~]# mount /root/CentOS-7.5-x86_64-DVD-1804.iso /opt/centos7.2
mount: special device /root/CentOS-7.5-x86_64-DVD-1804.iso does not exist,则连接fx再上传一次
打开ftp,关闭防火墙
[root@controller ~]# mount /root/CentOS-7.5-x86_64-DVD-1804.iso /opt/centos7.2
mount: /dev/loop0 is write-protected, mounting read-only
[root@controller ~]# mount /root/XianDian-IaaS-V2.4.iso /opt/iaas/
mount: /dev/loop1 is write-protected, mounting read-only
[root@controller~]# systemctl restart vsftpd
两边的节点关闭防火墙
[root@localhost ~]# setenforce 0
[root@localhost ~]# iptables -F
[root@localhost ~]# iptables -X
[root@localhost ~]# iptables -Z
[root@localhost ~]# systemctl stop firewalld
如果关防火墙的时候关不了,提示Failed to stop firewalld.service: Unit firewalld.service not loaded.,需要重新安装yum install firewalld
控制节点
安装数据库
[root@controller ~]# iaas-install-mysql.sh
安装keystone认证服务
[root@controller ~]# iaas-install-keystone.sh
安装Glance镜像服务
[root@controller ~]# iaas-install-glance.sh
安装Nova计算服务
[root@controller ~]# iaas-install-nova-controller.sh
[root@compute ~]# iaas-install-nova-compute.sh
安装Neutron网络服务
[root@controller ~]# iaas-install-neutron-controller.sh
[root@compute ~]# iaas-install-neutron-compute.sh
安装完以后,有的情况是出现complete之后就卡住,再等一会就断连,进入虚拟机发现,第二块网卡的BOOTPROTO=none,将其改成dhcp,ip会恢复,重新连接,新的版本里不需要在这个阶段安装gre的网络配置,所以直接进行下一步
安装Dashboard服务
[root@controller ~]# iaas-install-dashboard.sh
打开浏览器
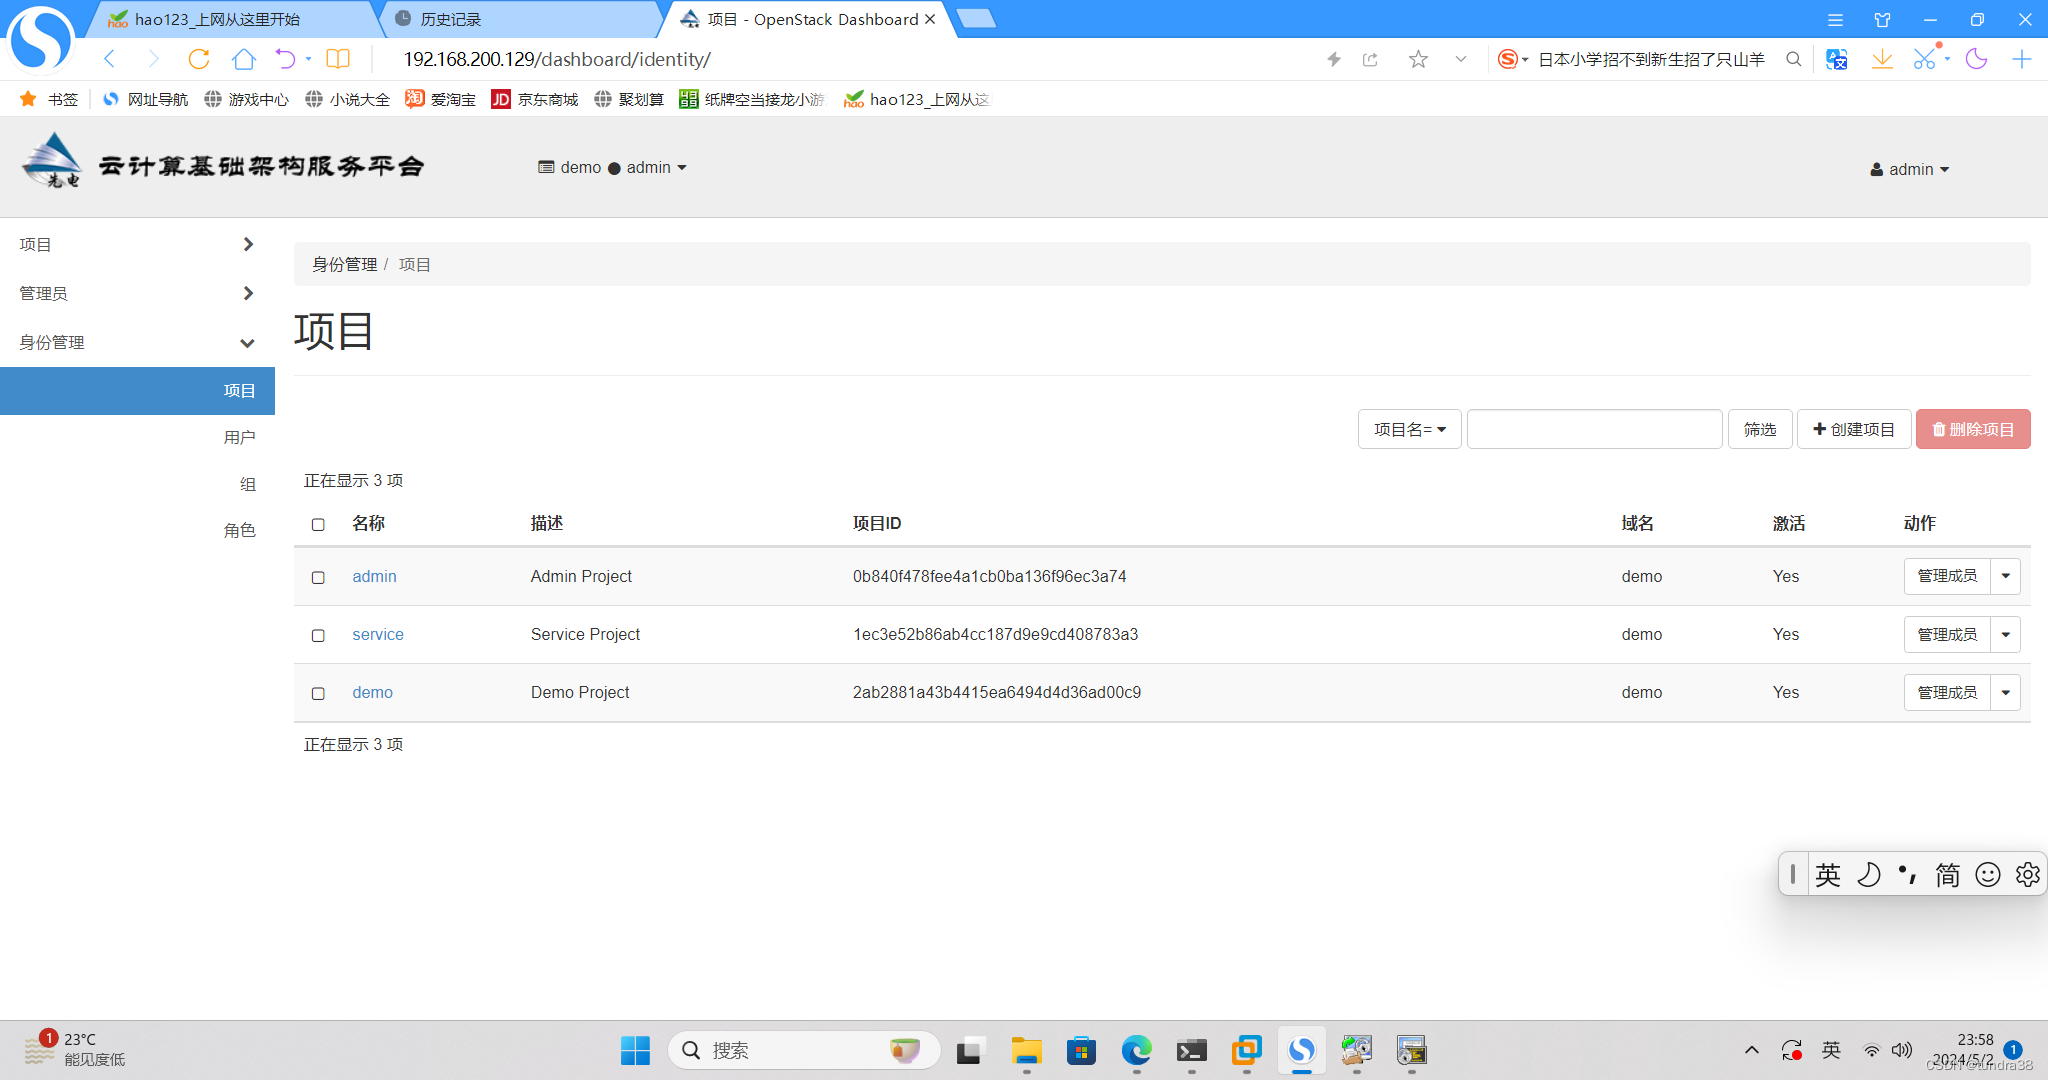
创建云主机,需要源
[root@controller ~]# cd /opt/iaas/images
[root@controller images]# ls
CentOS_6.5_x86_64_XD.qcow2 CentOS_7.2_x86_64_XD.qcow2
CentOS7_1804.tar CentOS_7.5_x86_64_XD.qcow2
[root@controller images]# source /etc/keystone/admin-openrc.sh
[root@controller images]# glance image-create --name “centos7.2” --disk-format qcow2 --container-format bare --progress < CentOS_7.2_x86_64_XD.qcow2
[=============================>] 100%
+------------------+--------------------------------------+
| Property         | Value                                |
+------------------+--------------------------------------+
| checksum         | ea197f4c679b8e1ce34c0aa70ae2a94a     |
| container_format | bare                                 |
| created_at       | 2024-05-02T16:00:36Z                 |
| disk_format      | qcow2                                |
| id               | e01f143d-8da1-4af2-9f6e-c3802beae16b |
| min_disk         | 0                                    |
| min_ram          | 0                                    |
| name             | centos7.2                            |
| owner            | 0b840f478fee4a1cb0ba136f96ec3a74     |
| protected        | False                                |
| size             | 400752640                            |
| status           | active                               |
| tags             | []                                   |
| updated_at       | 2024-05-02T16:00:48Z                 |
| virtual_size     | None                                 |
| visibility       | shared                               |
+------------------+--------------------------------------+
[root@controller images]# glance image-list
+--------------------------------------+-----------+
| ID                                   | Name      |
+--------------------------------------+-----------+
| e01f143d-8da1-4af2-9f6e-c3802beae16b | centos7.2 |
+--------------------------------------+-----------+
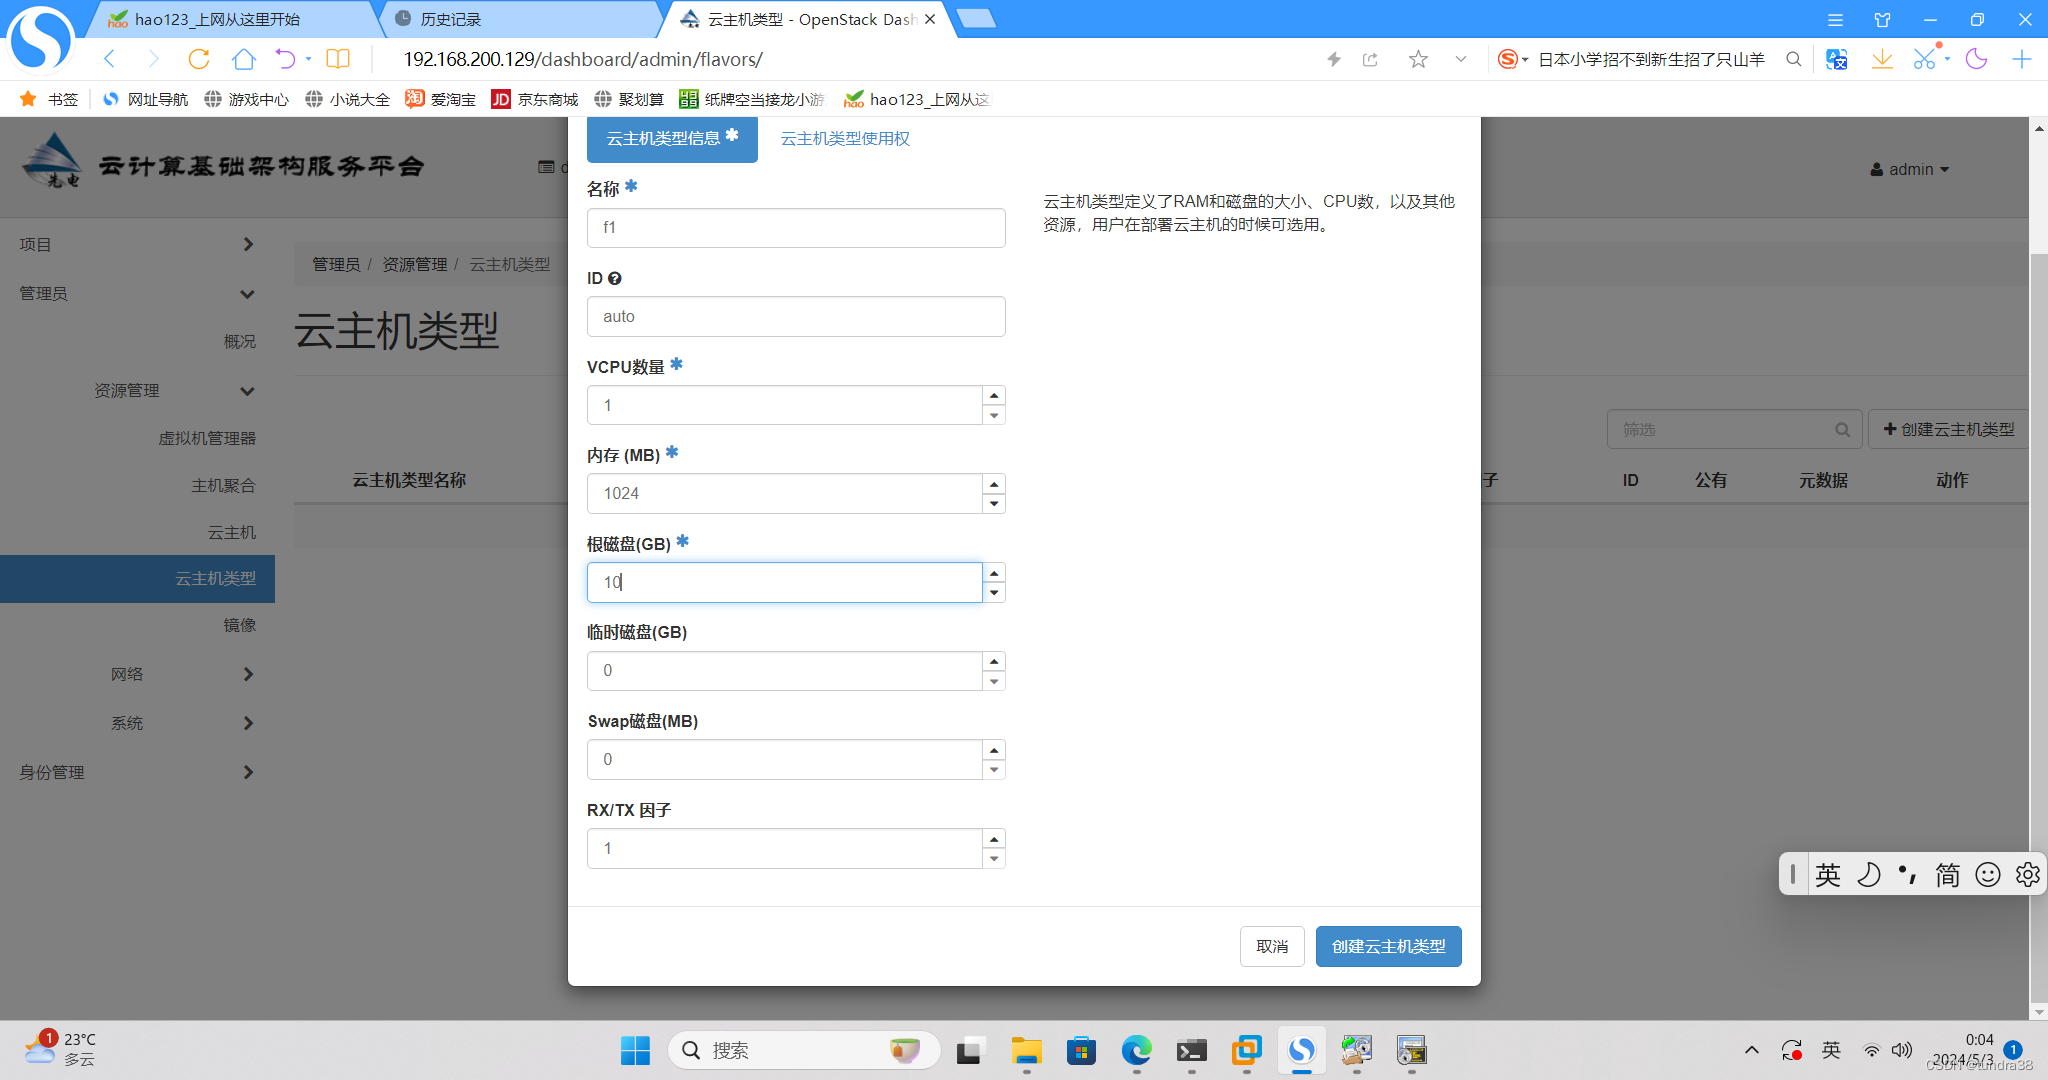
回到浏览器,创建云主机类型
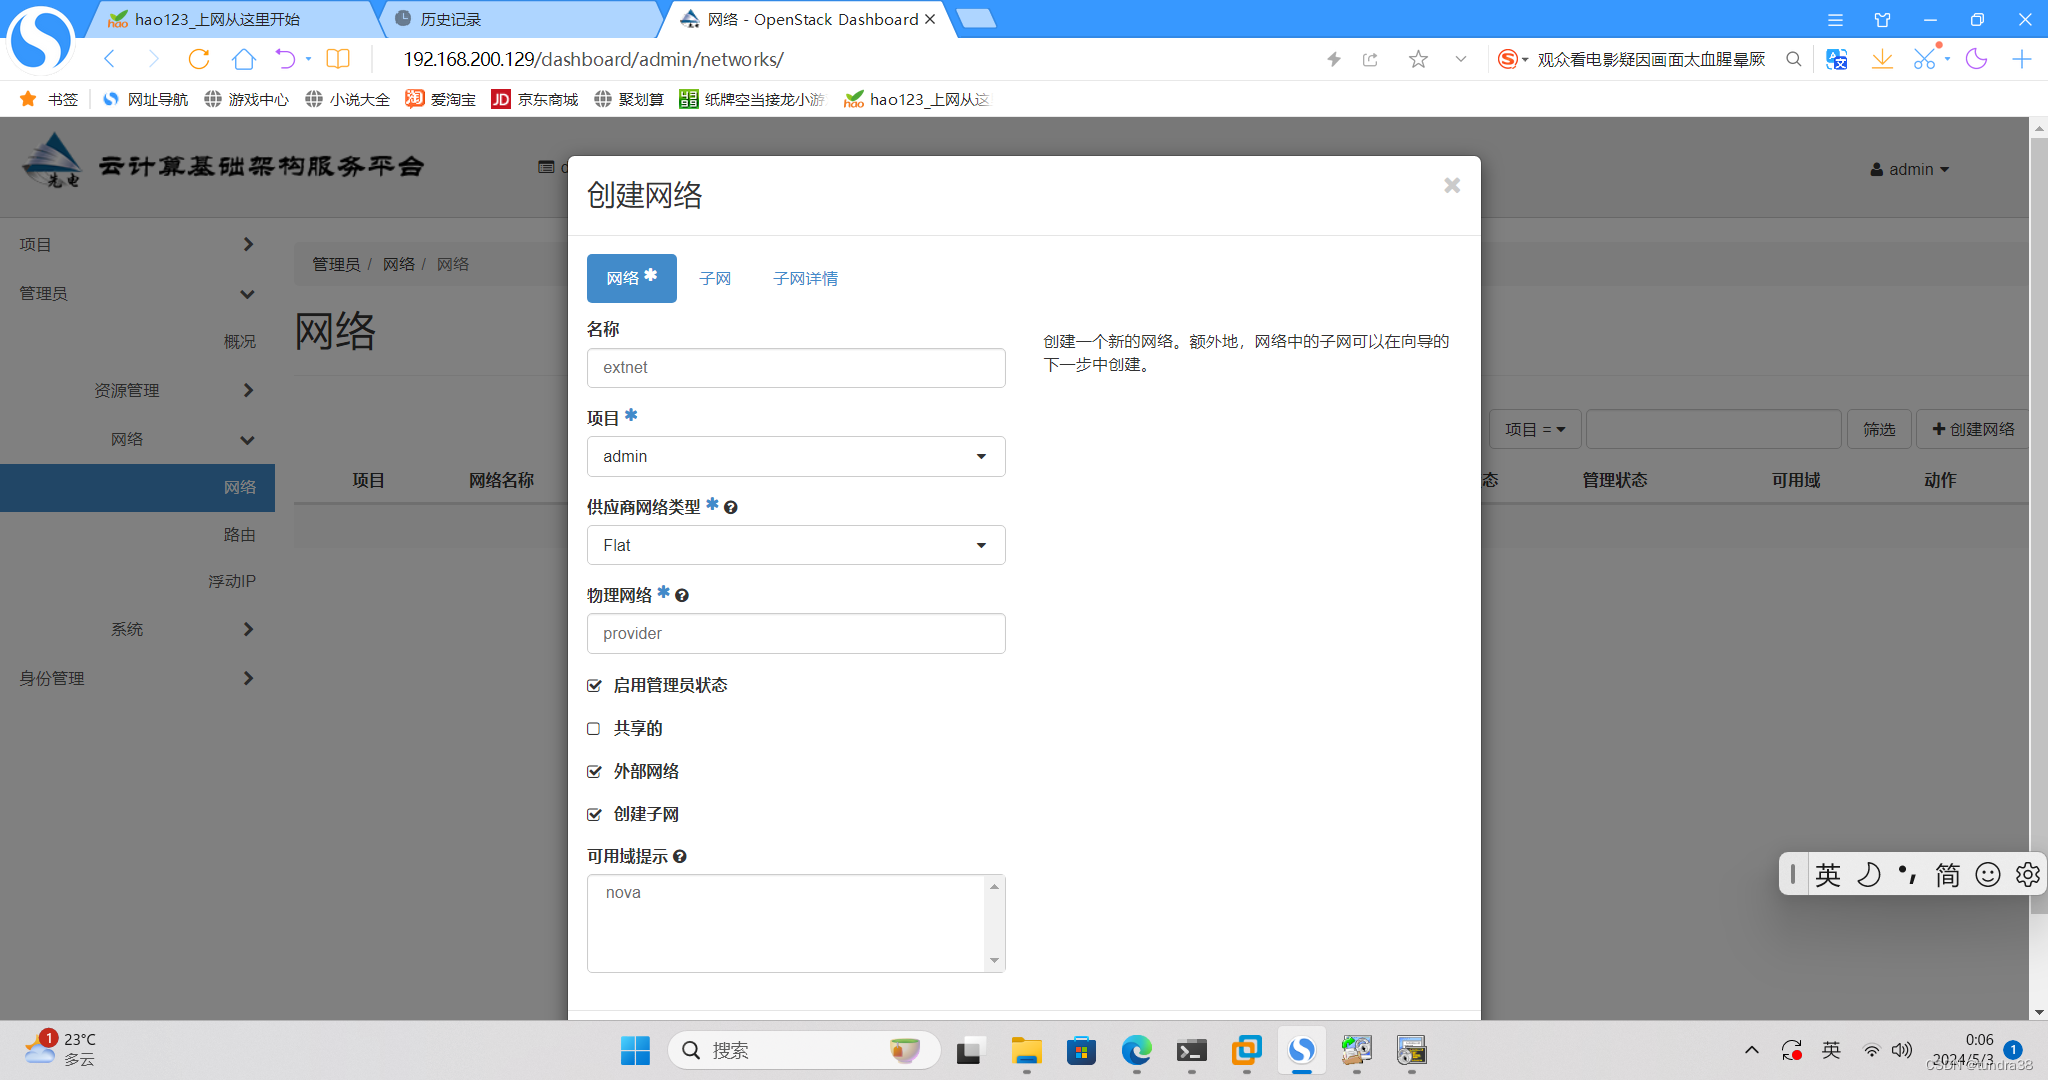
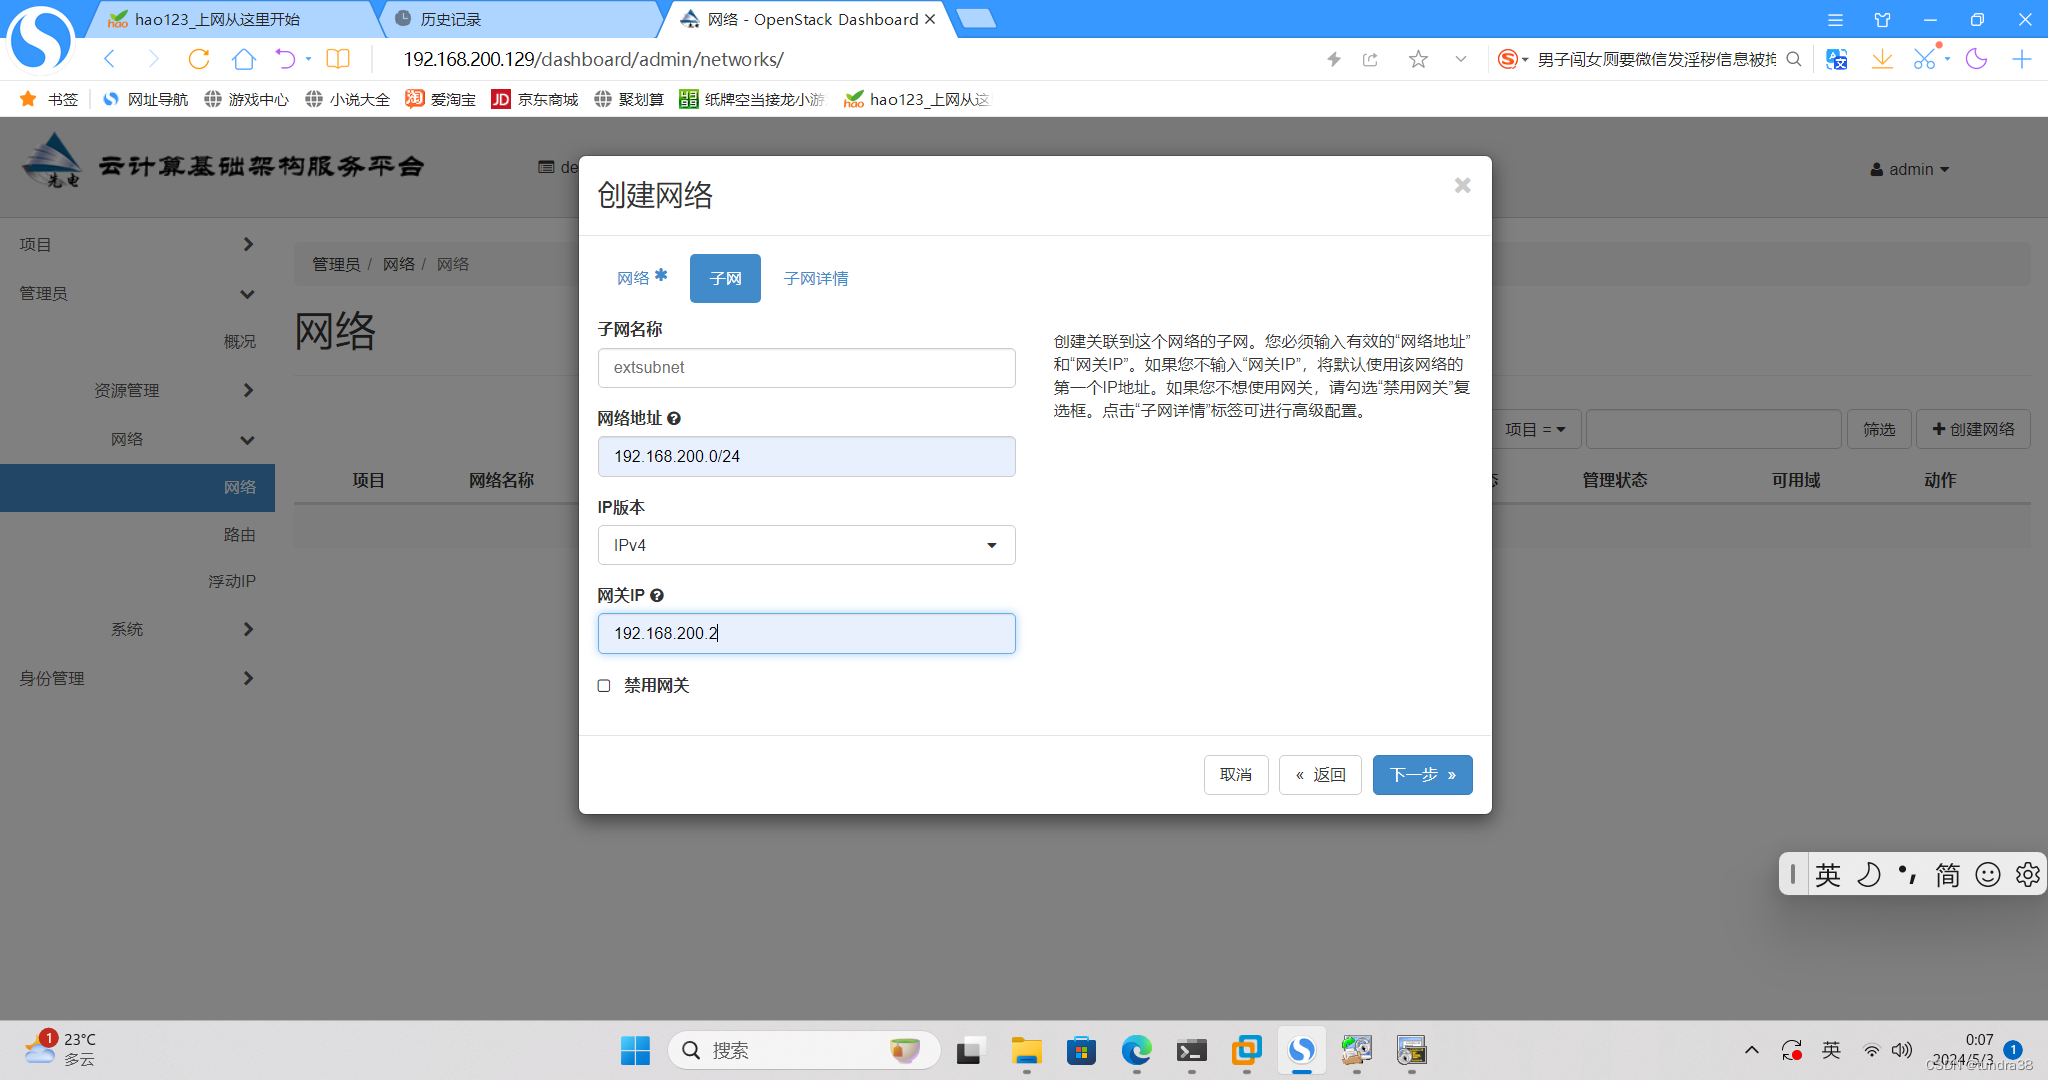
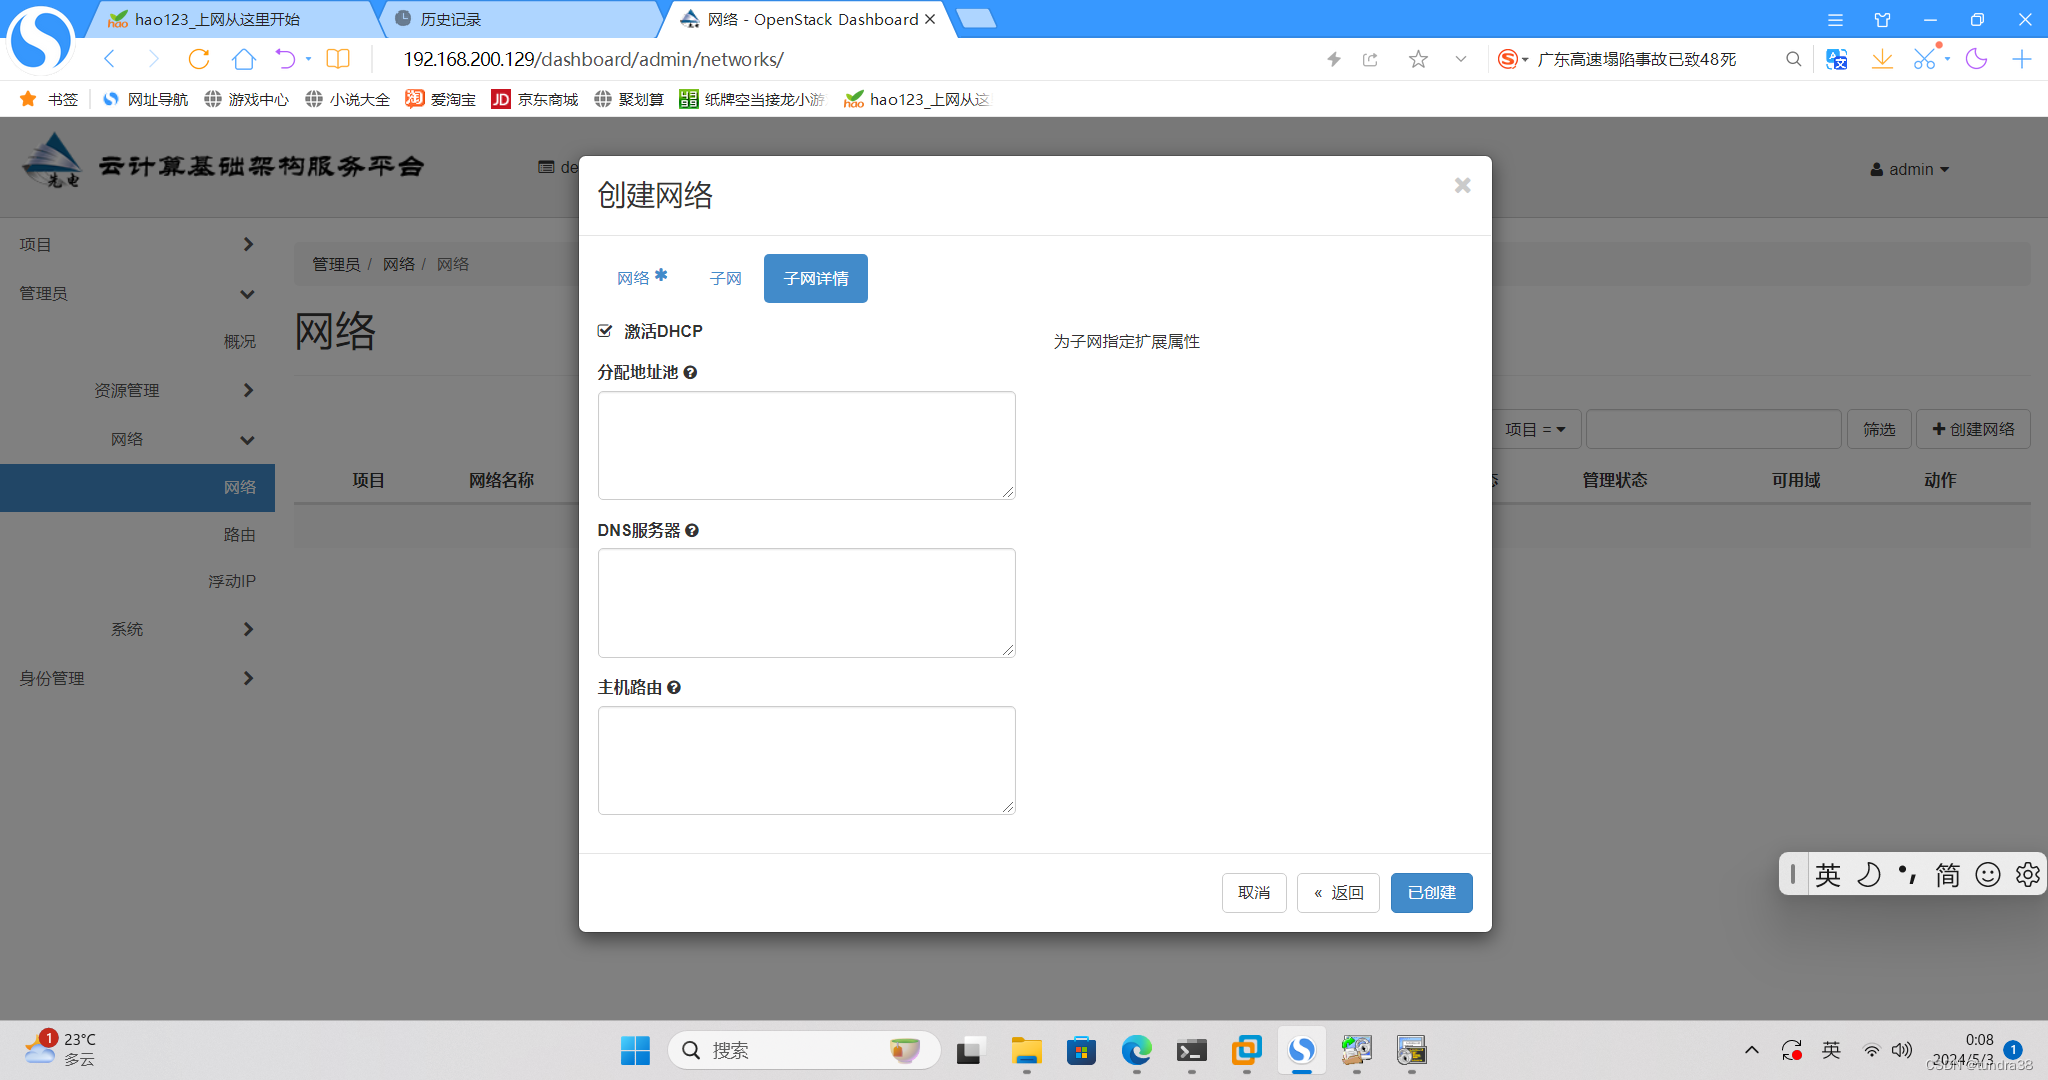
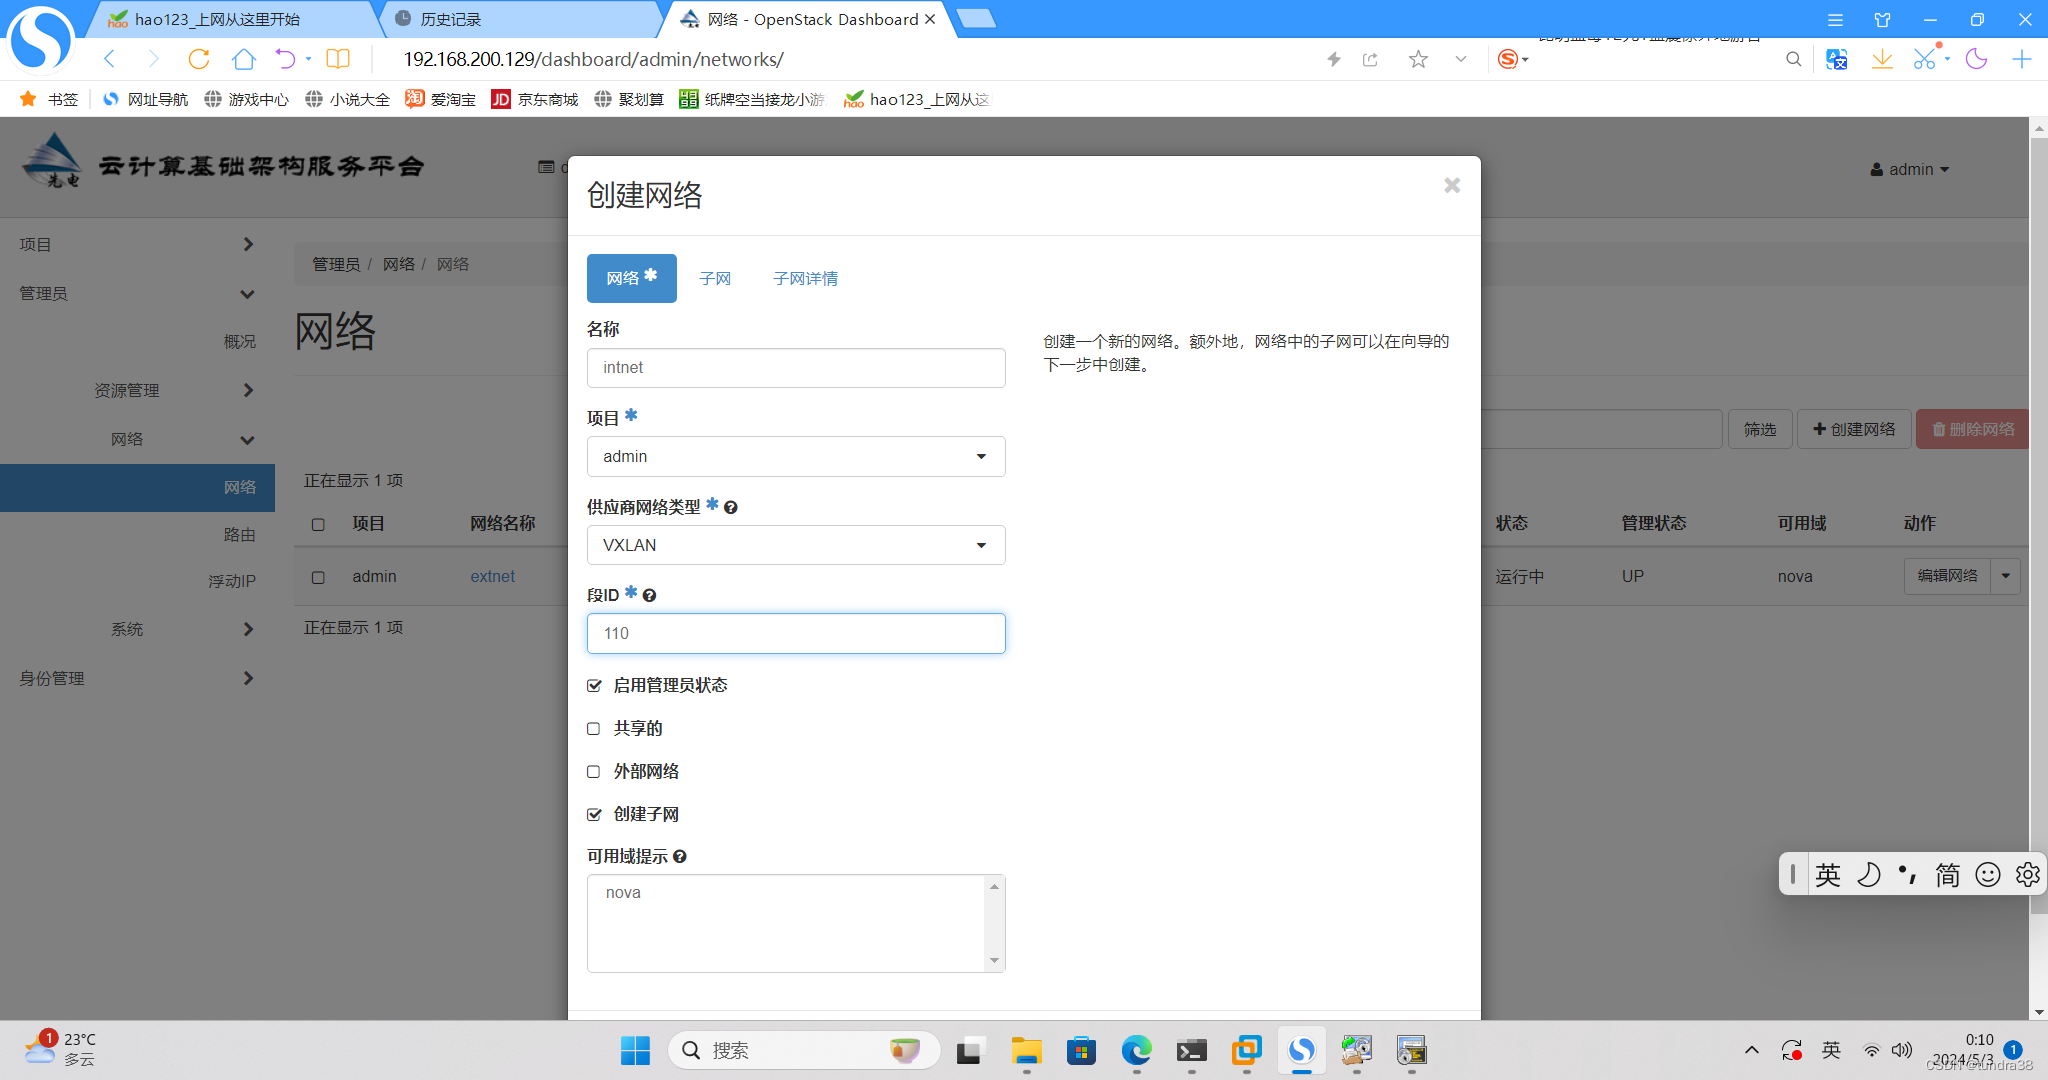
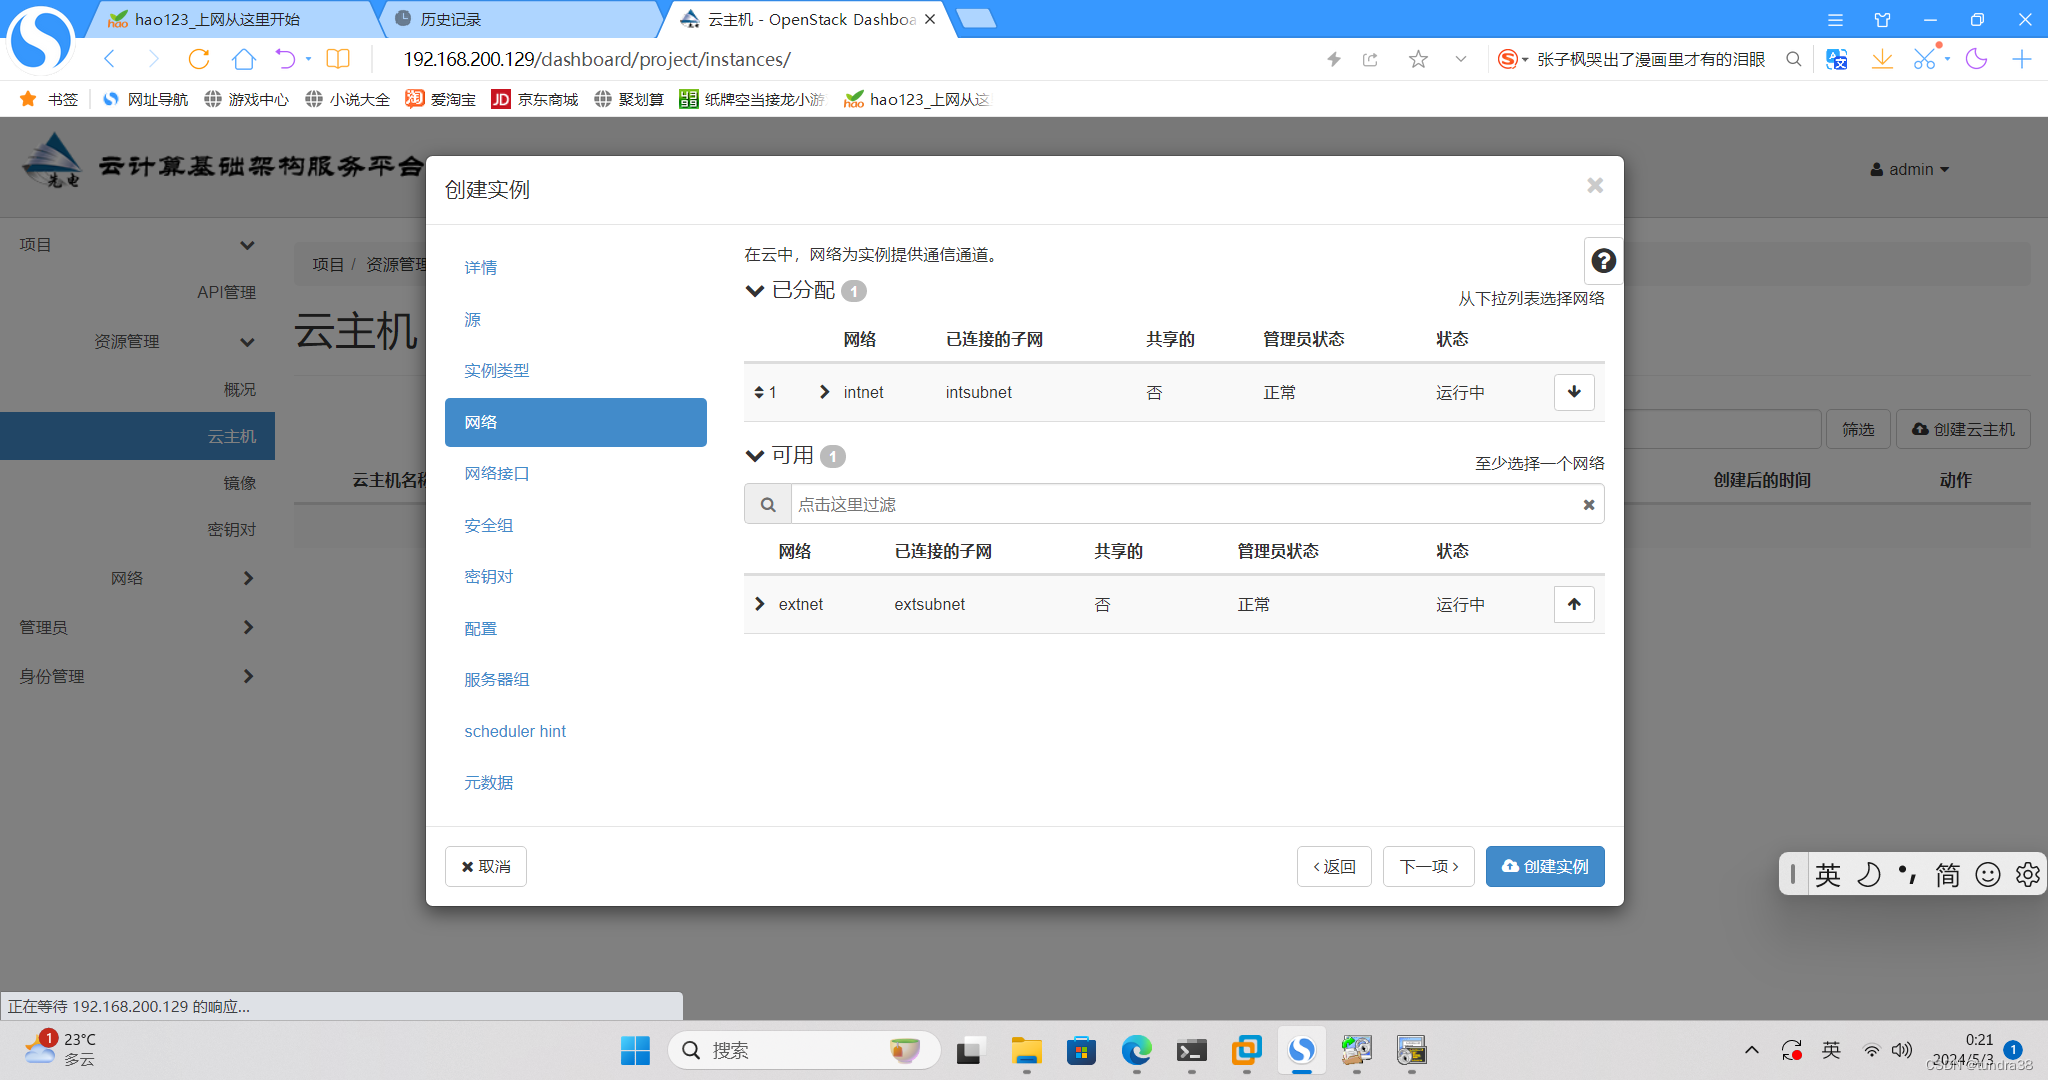
再创建网络,如图填完然后下一步下一步,完成
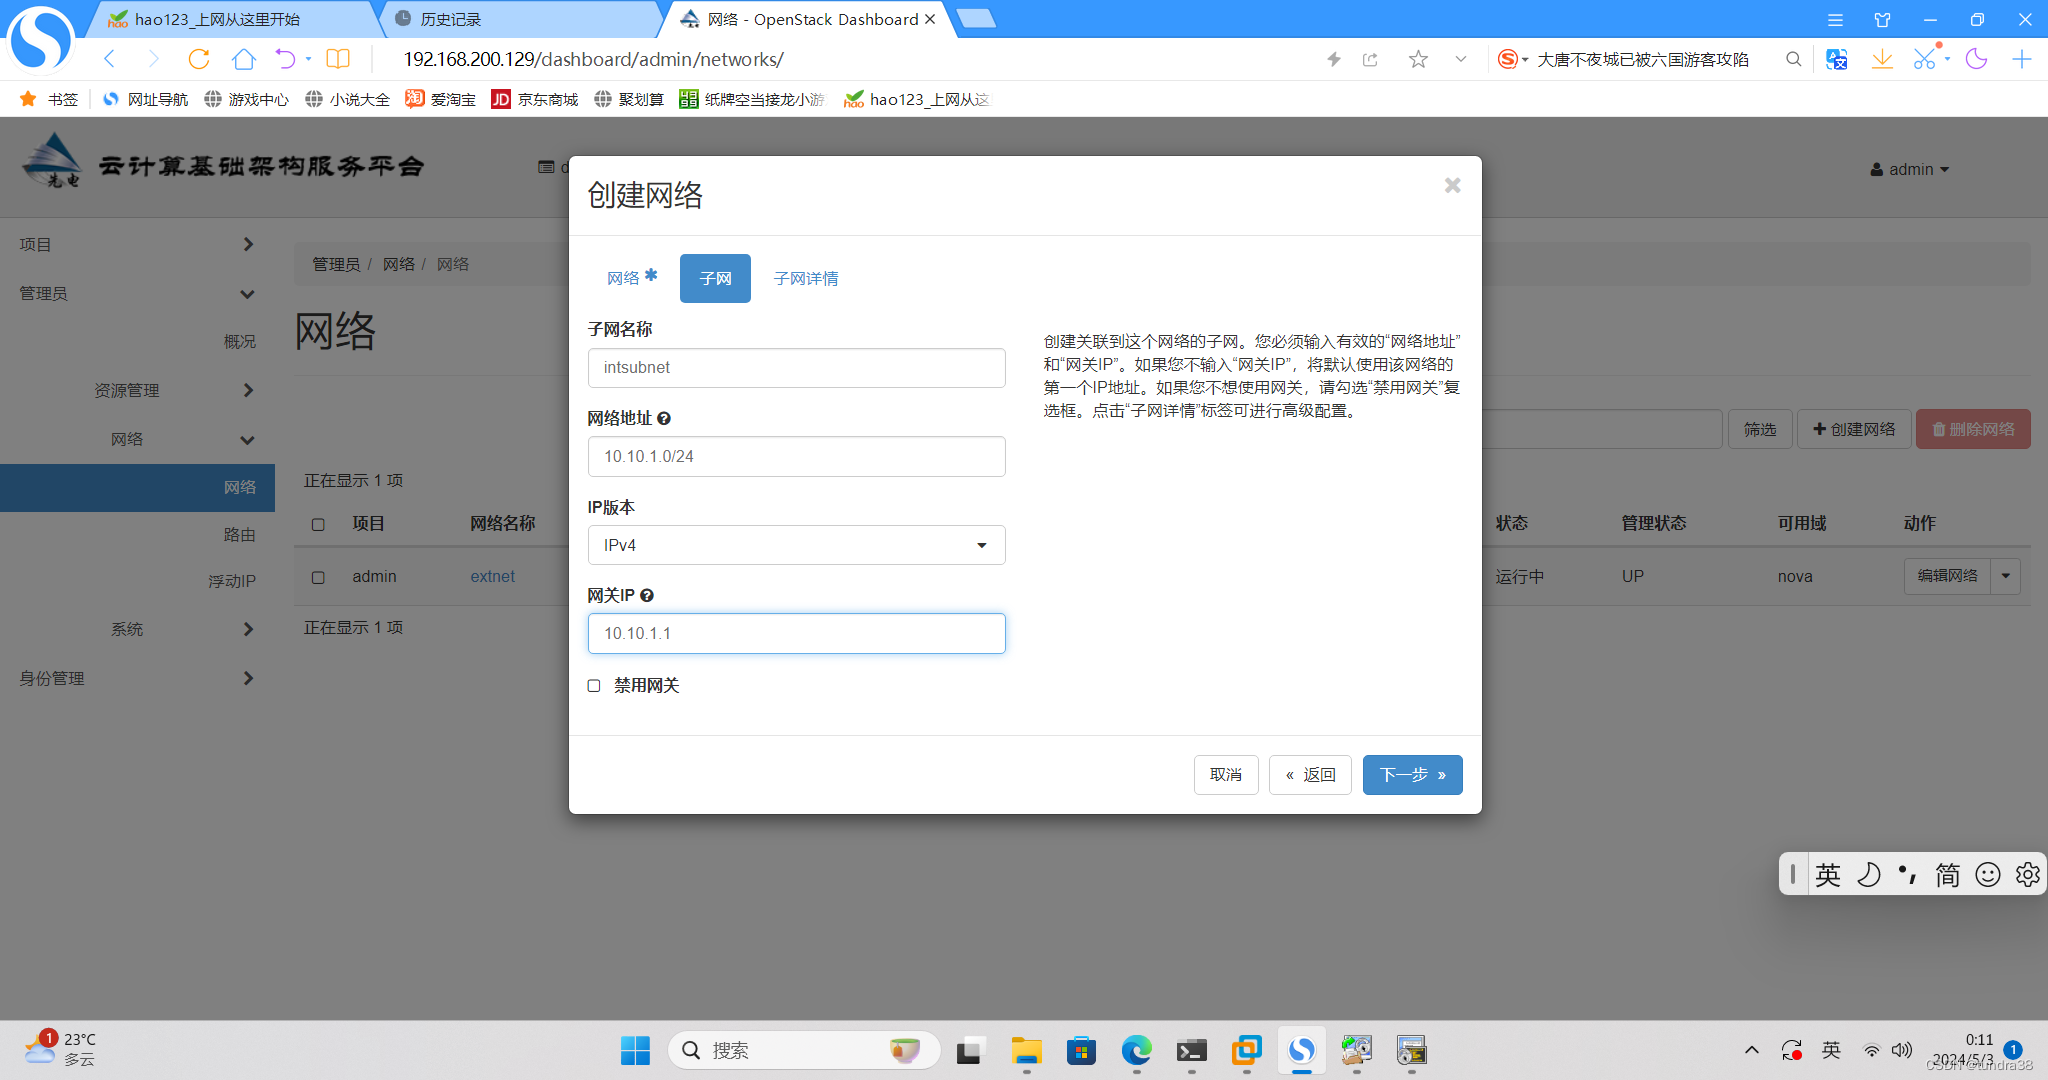
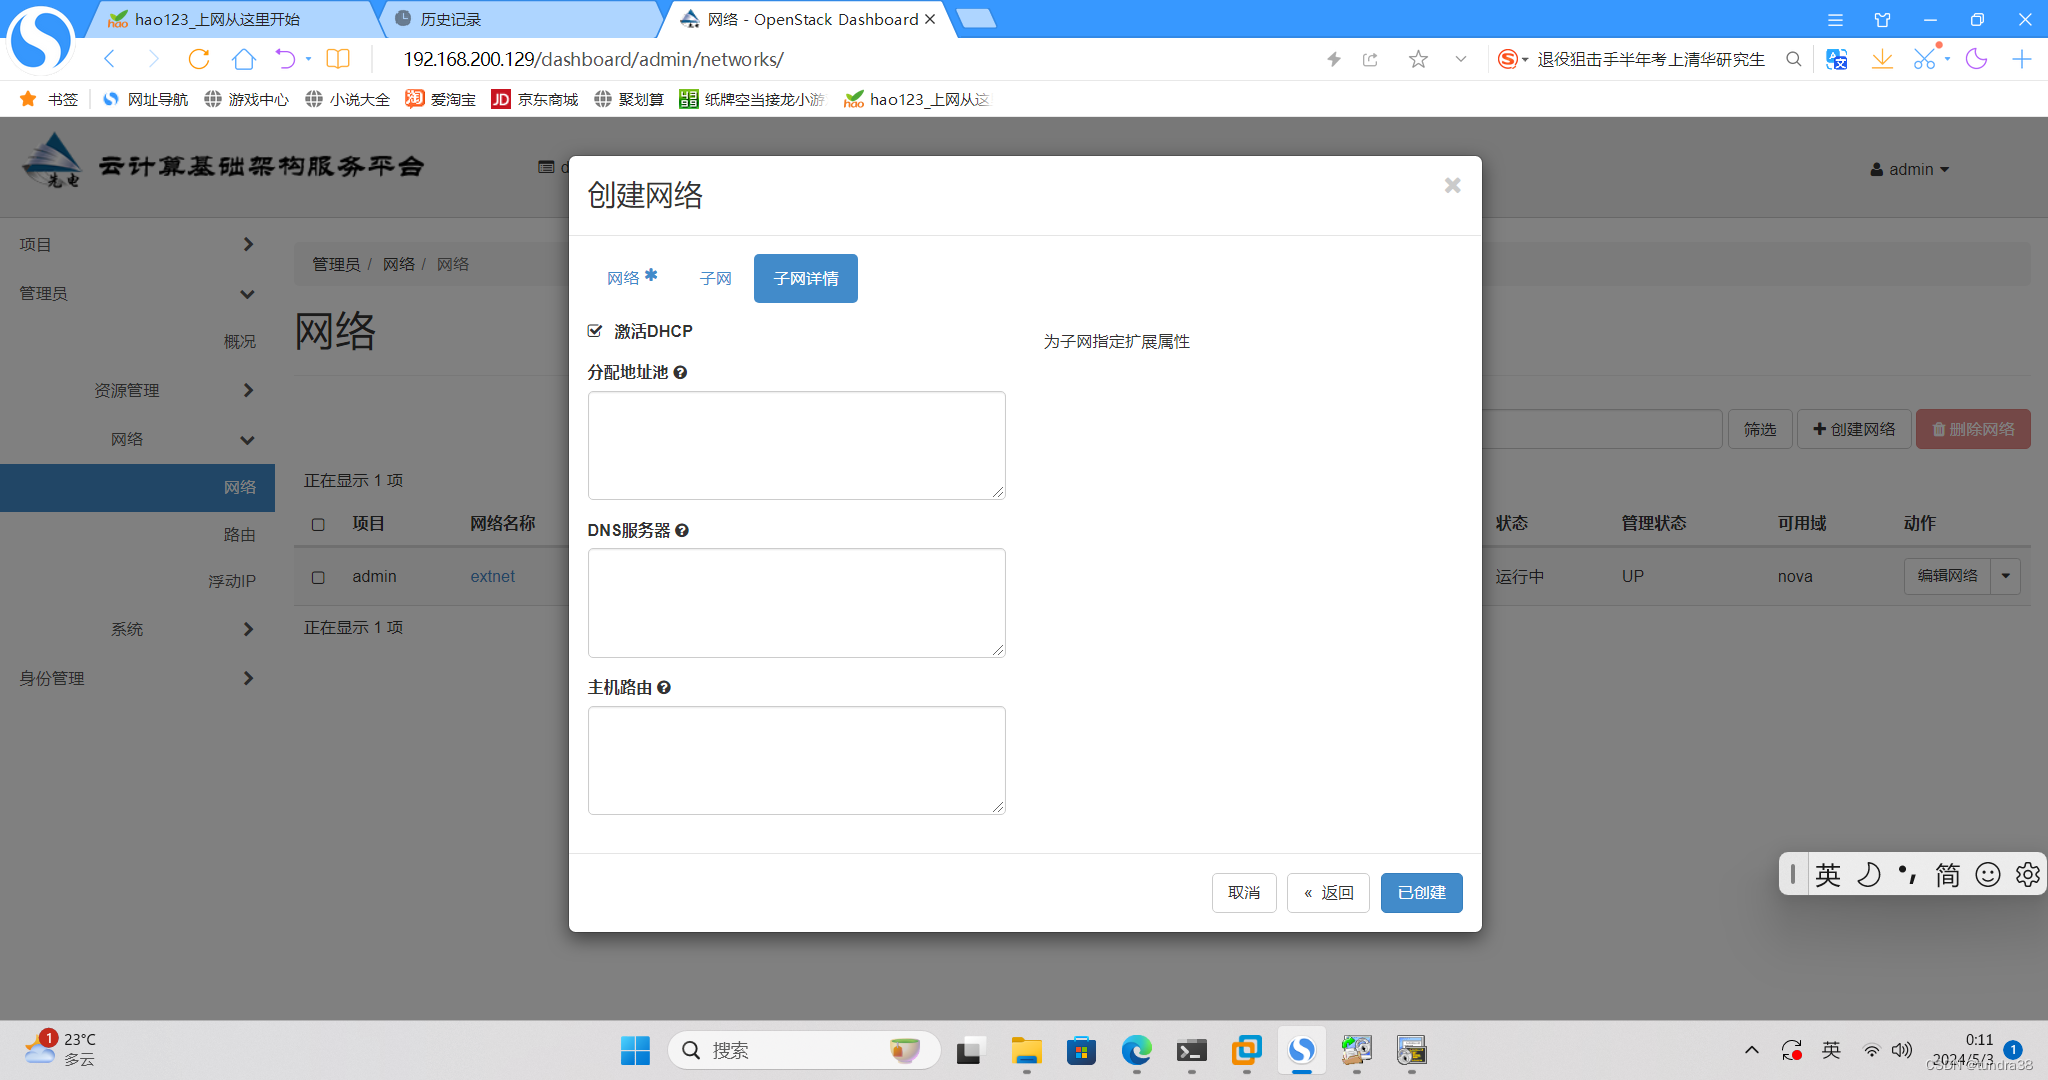
创建内网,下一步下一步创建
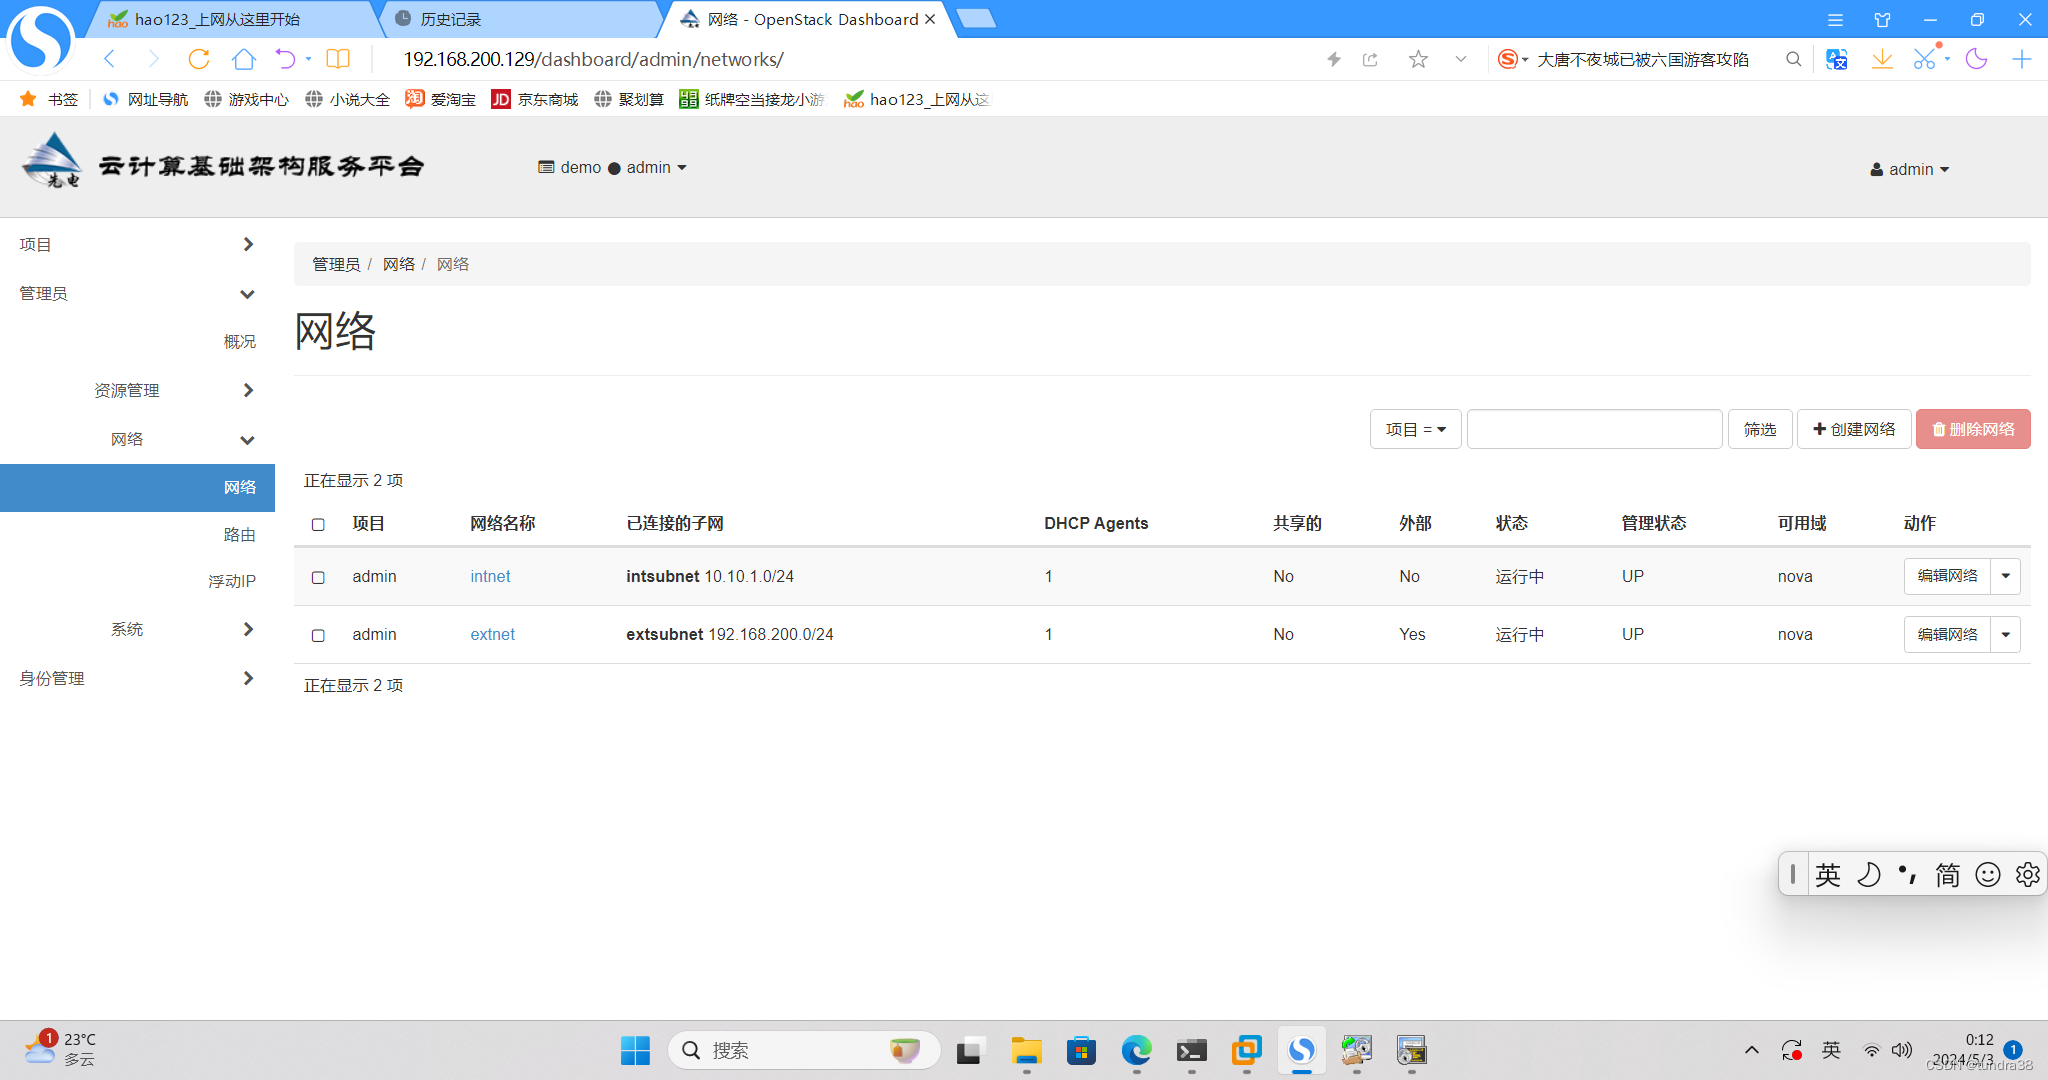
完成后
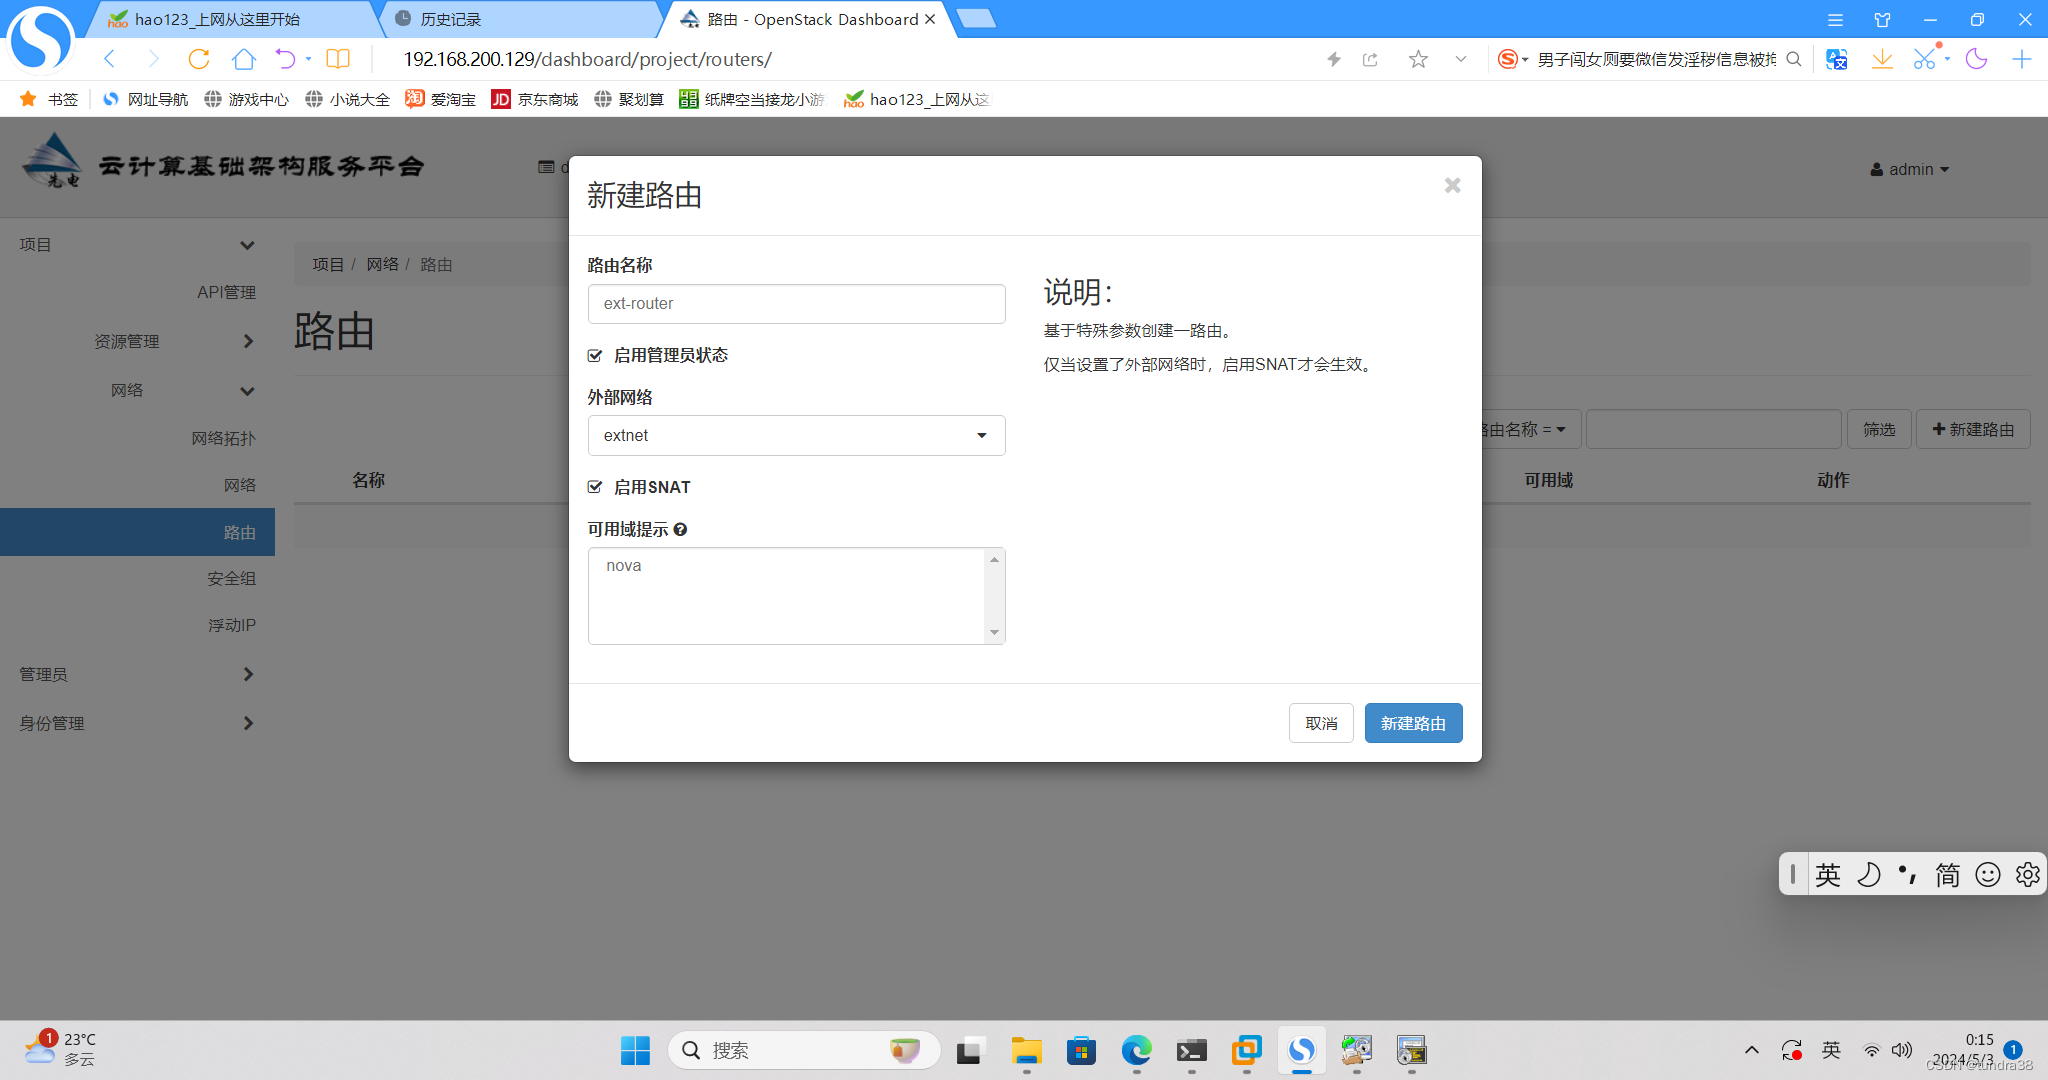
创建路由
创建完成后点击路由的名字进入,选接口,增加接口,点击提交
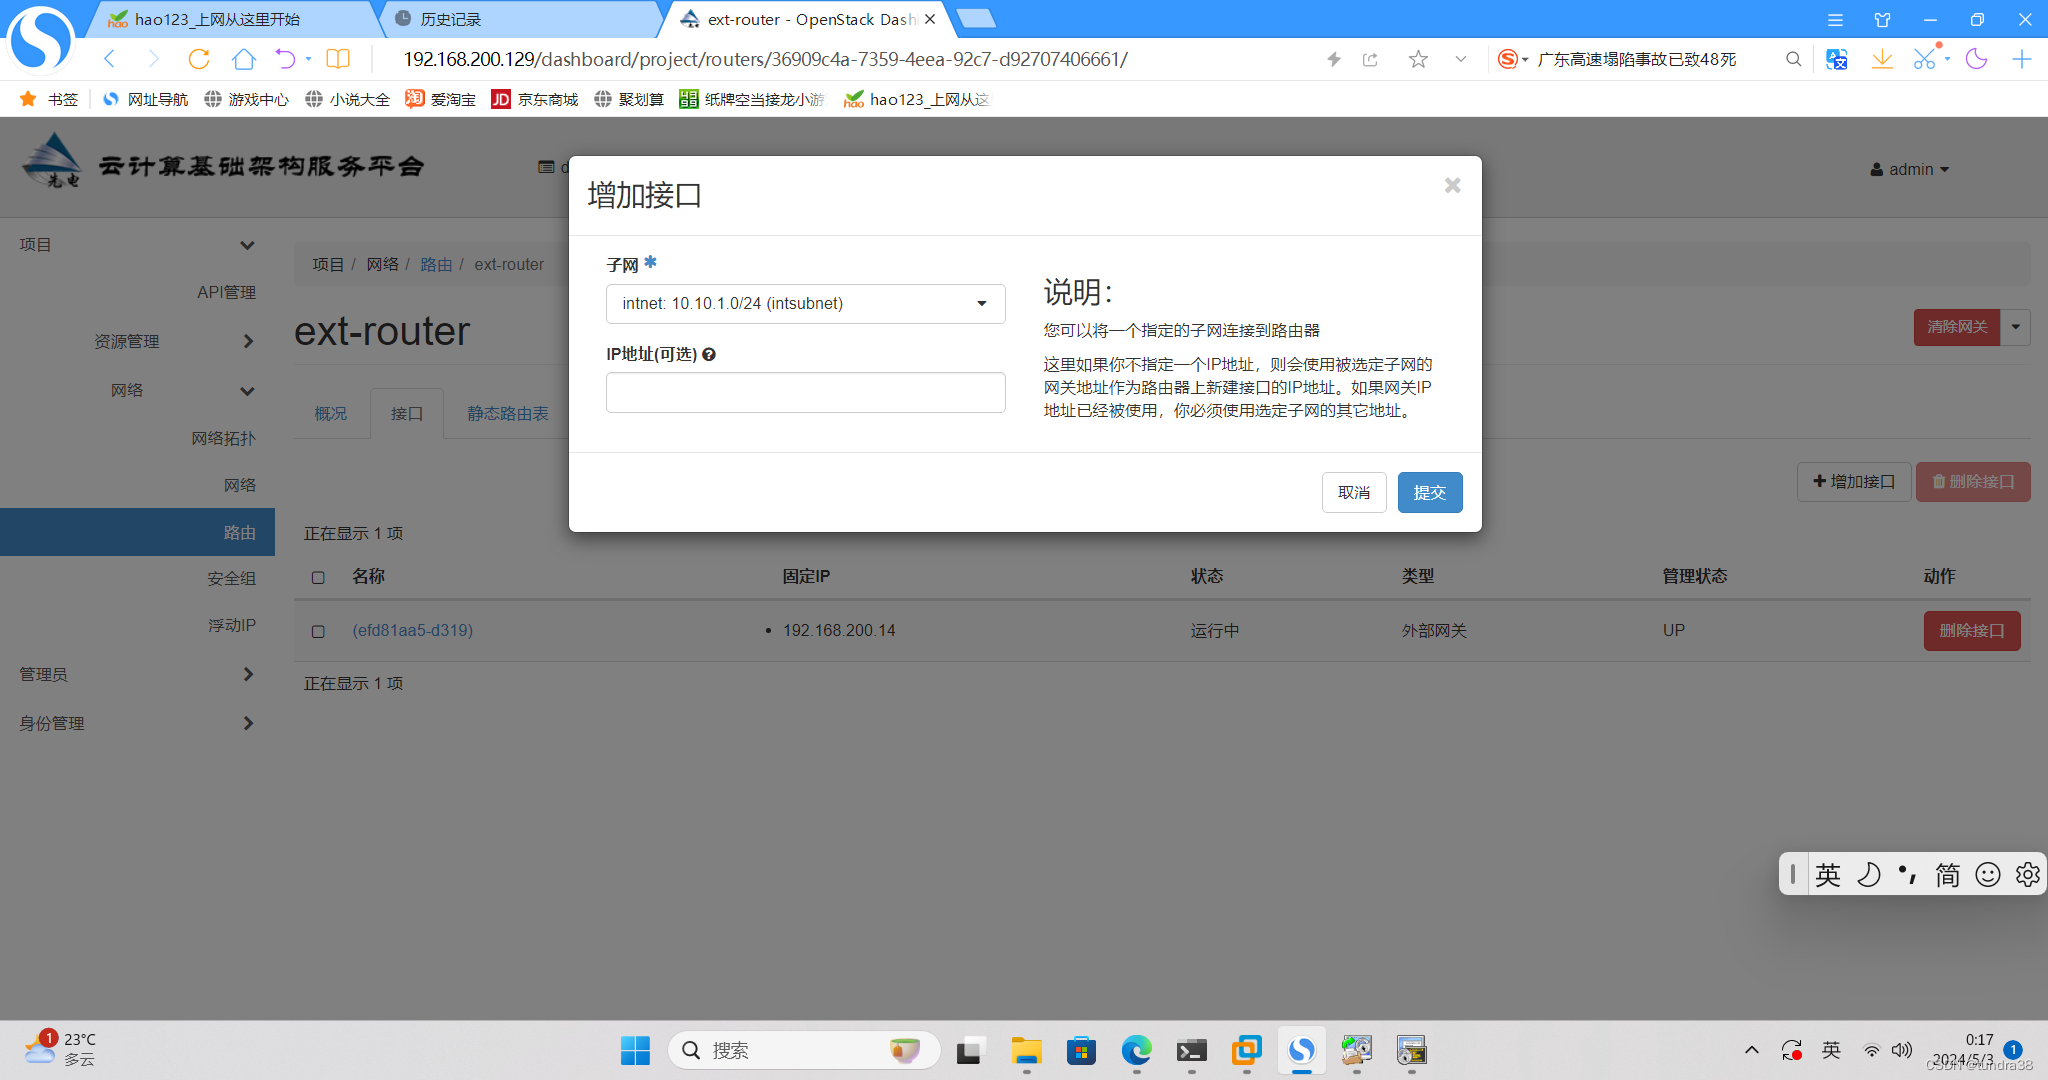
成功后可以查看网络拓扑,两个网络被连接起来
创建云主机
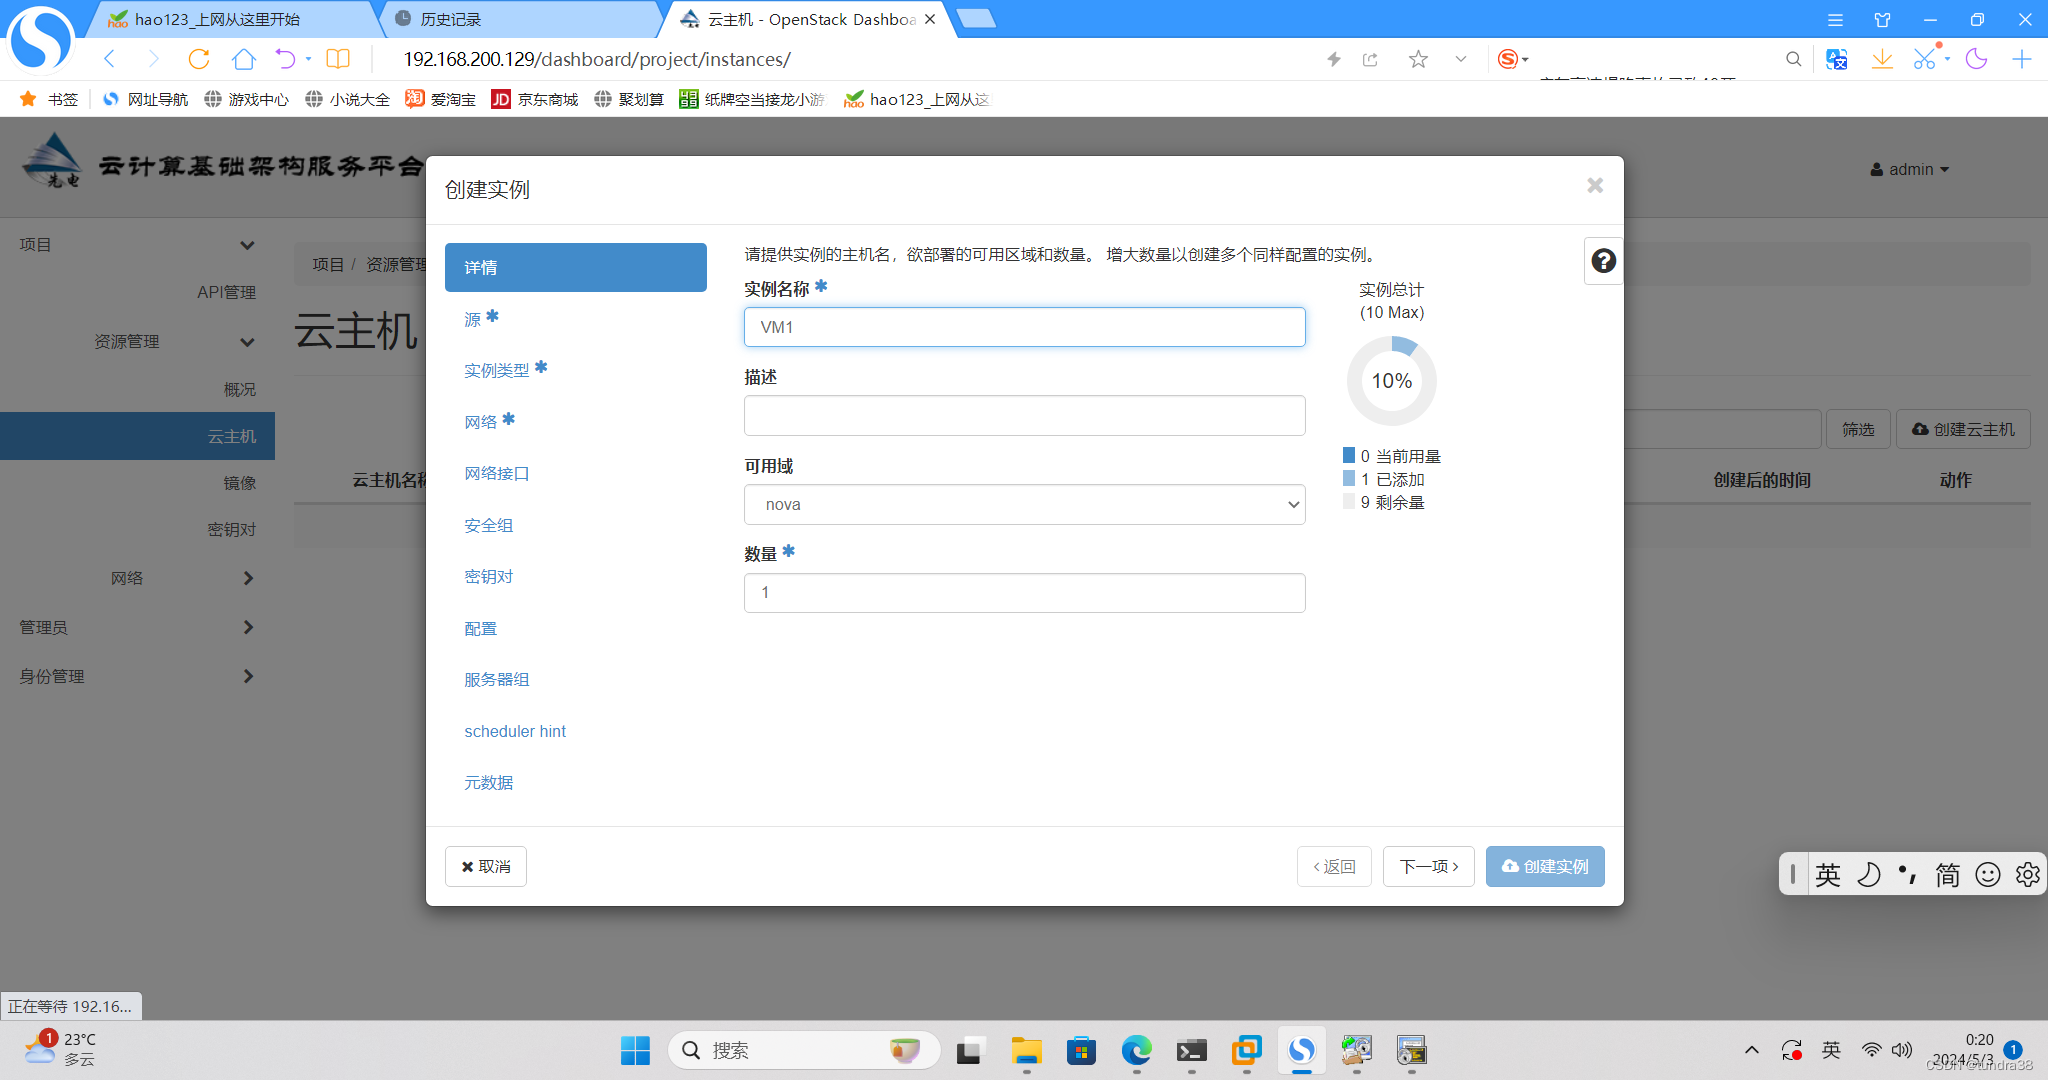
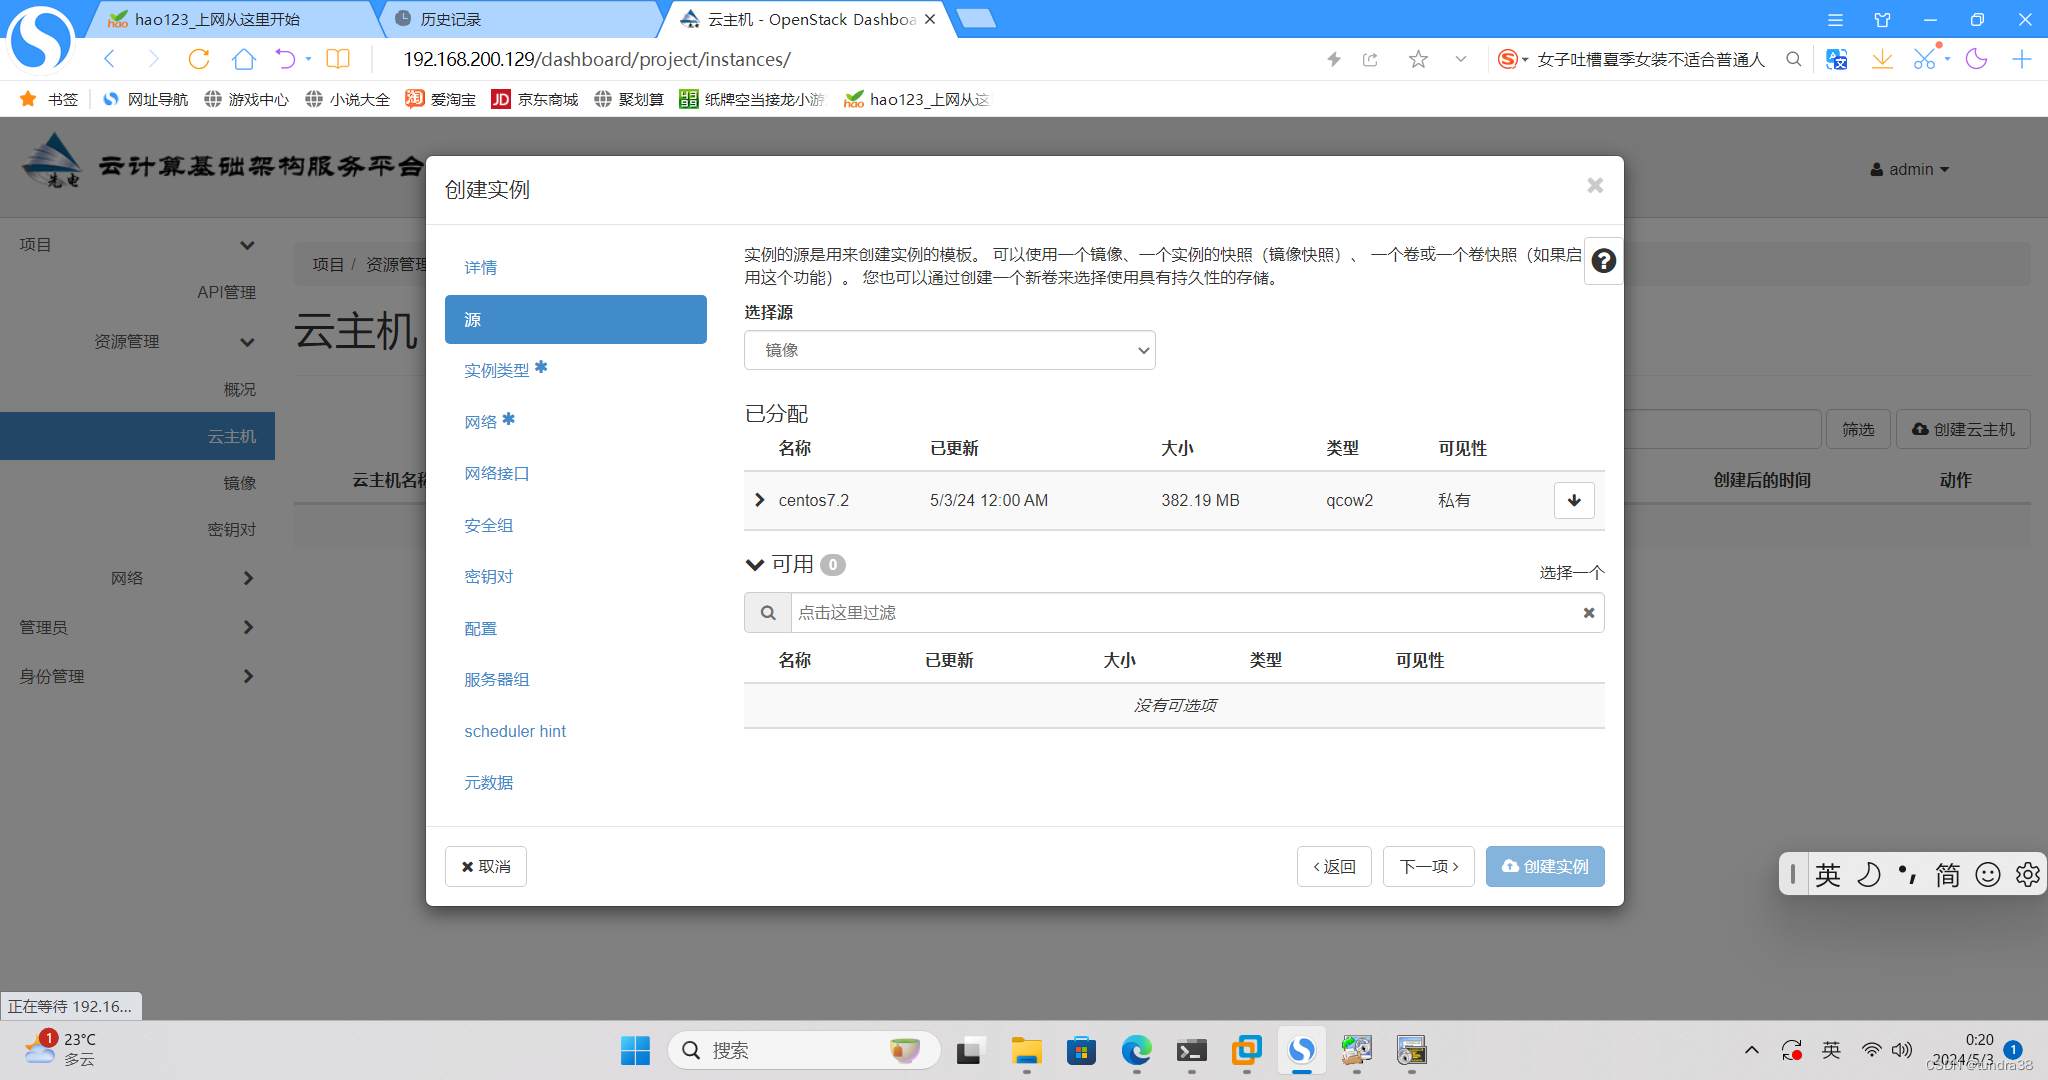
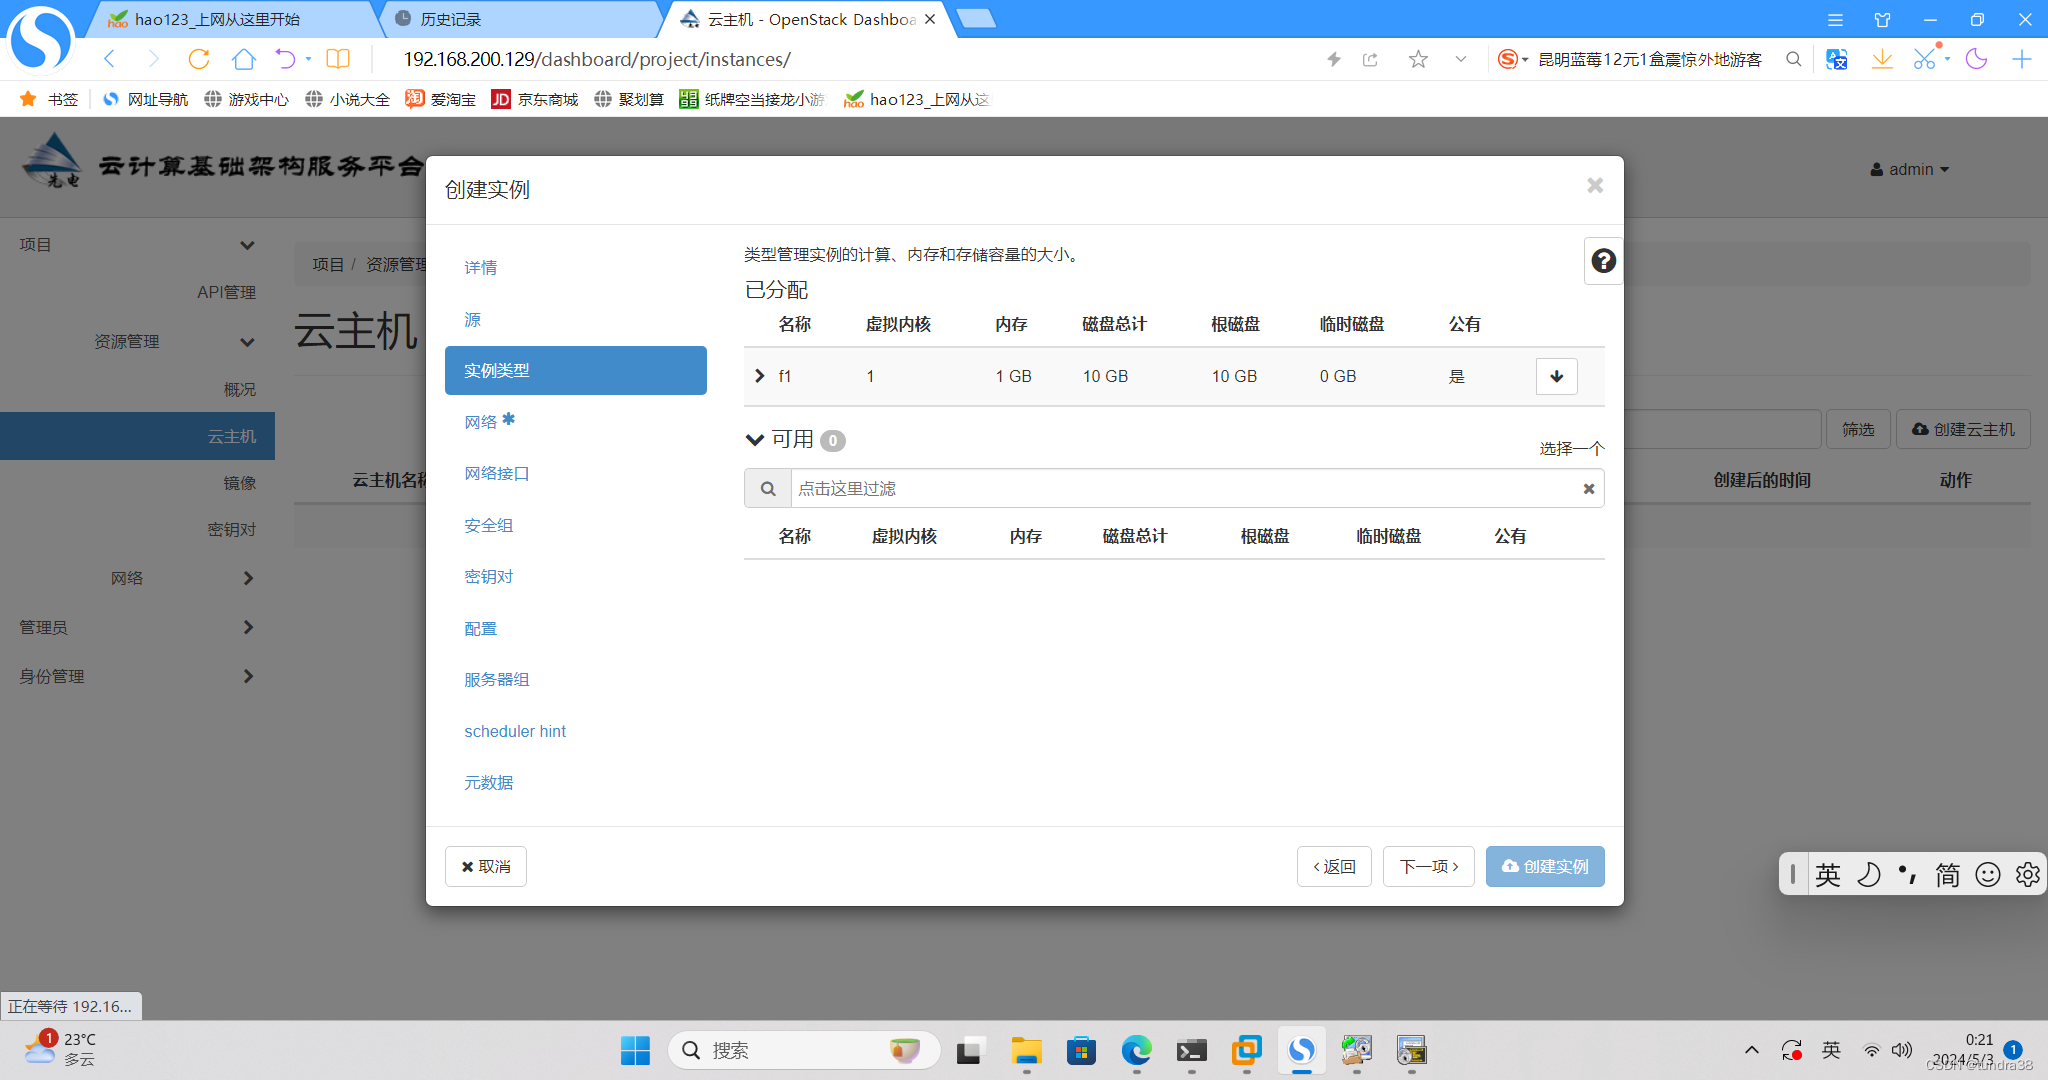
点击创建。第一次创建时间较长,等到看状态是运行
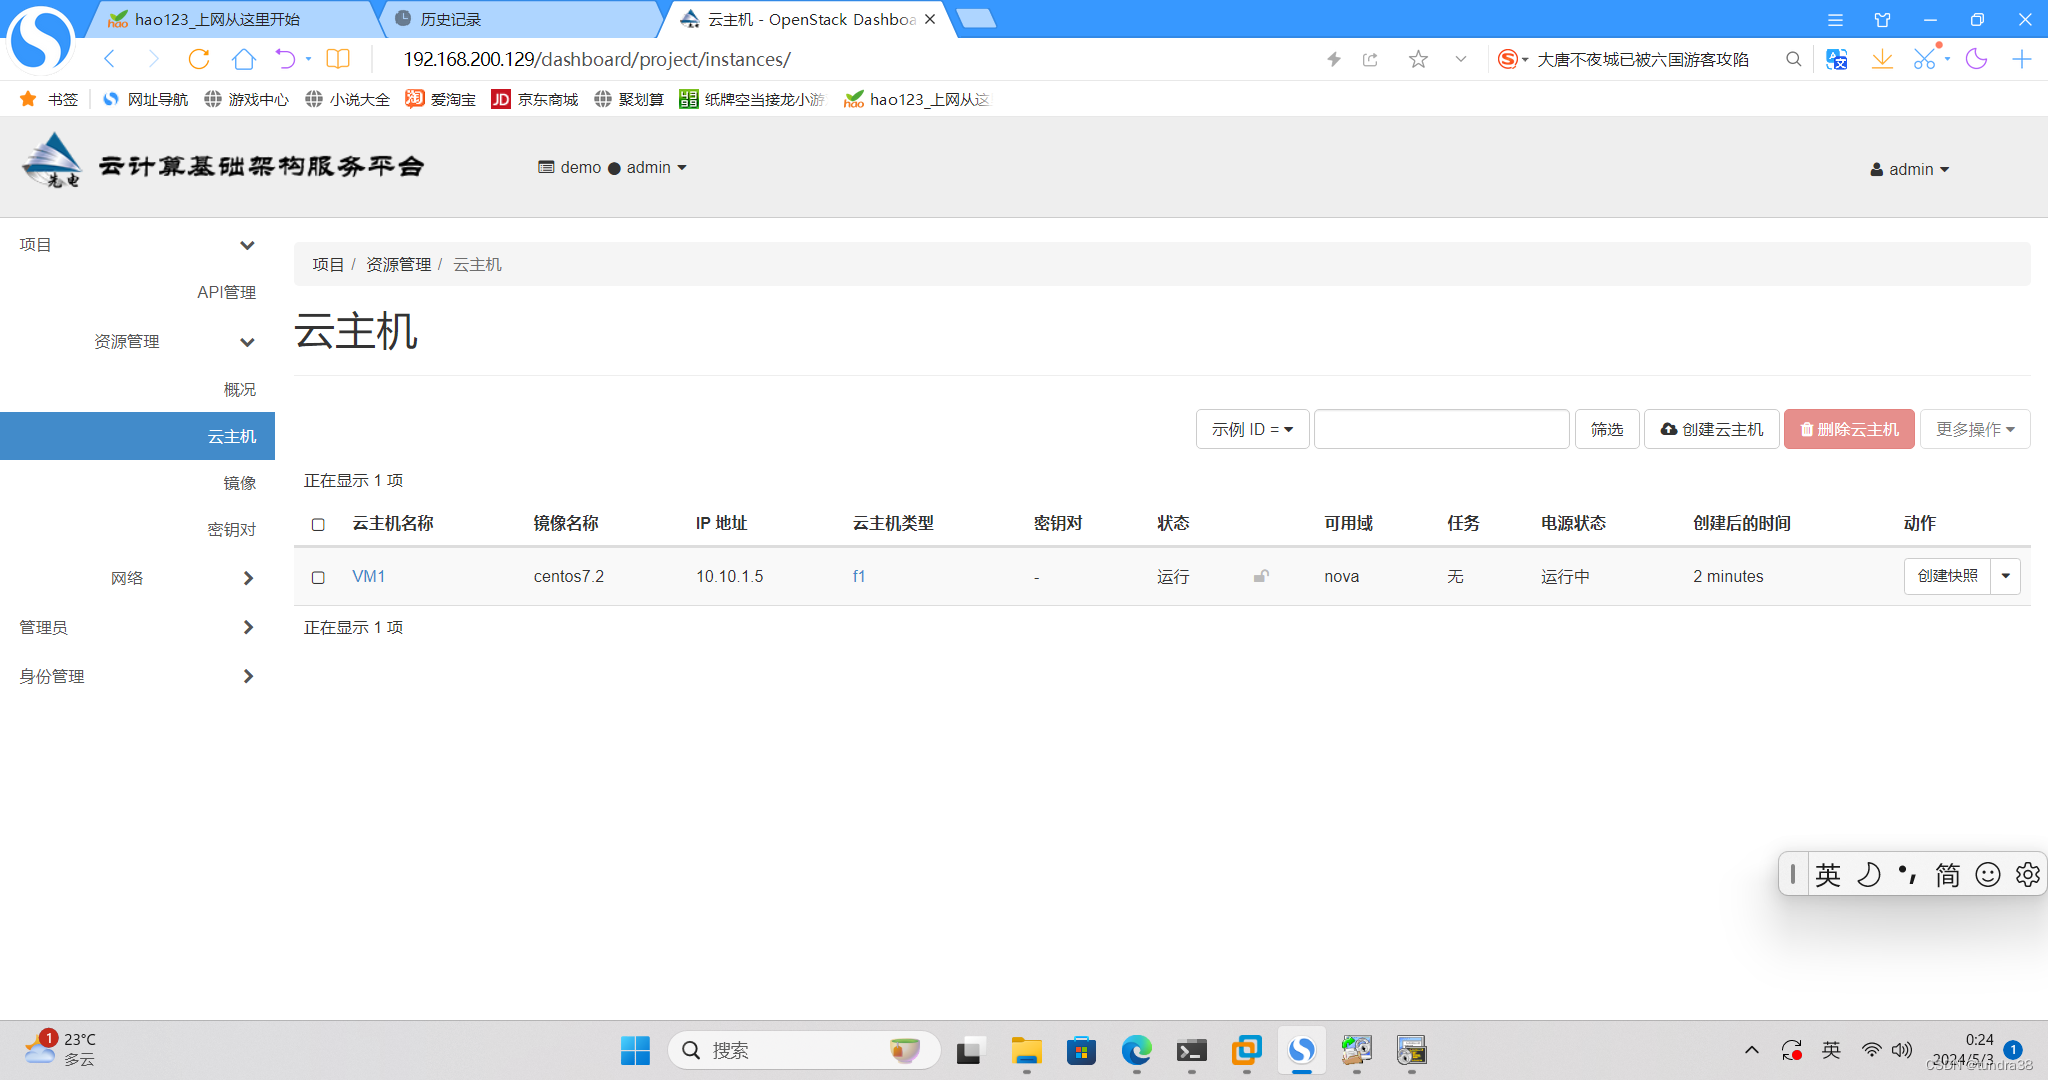
上图可见,云主机已经创建完毕,但是这个时候的云主机只是一台不能访问外网的虚拟机,如果需要与外部相连,需要绑定浮动ip
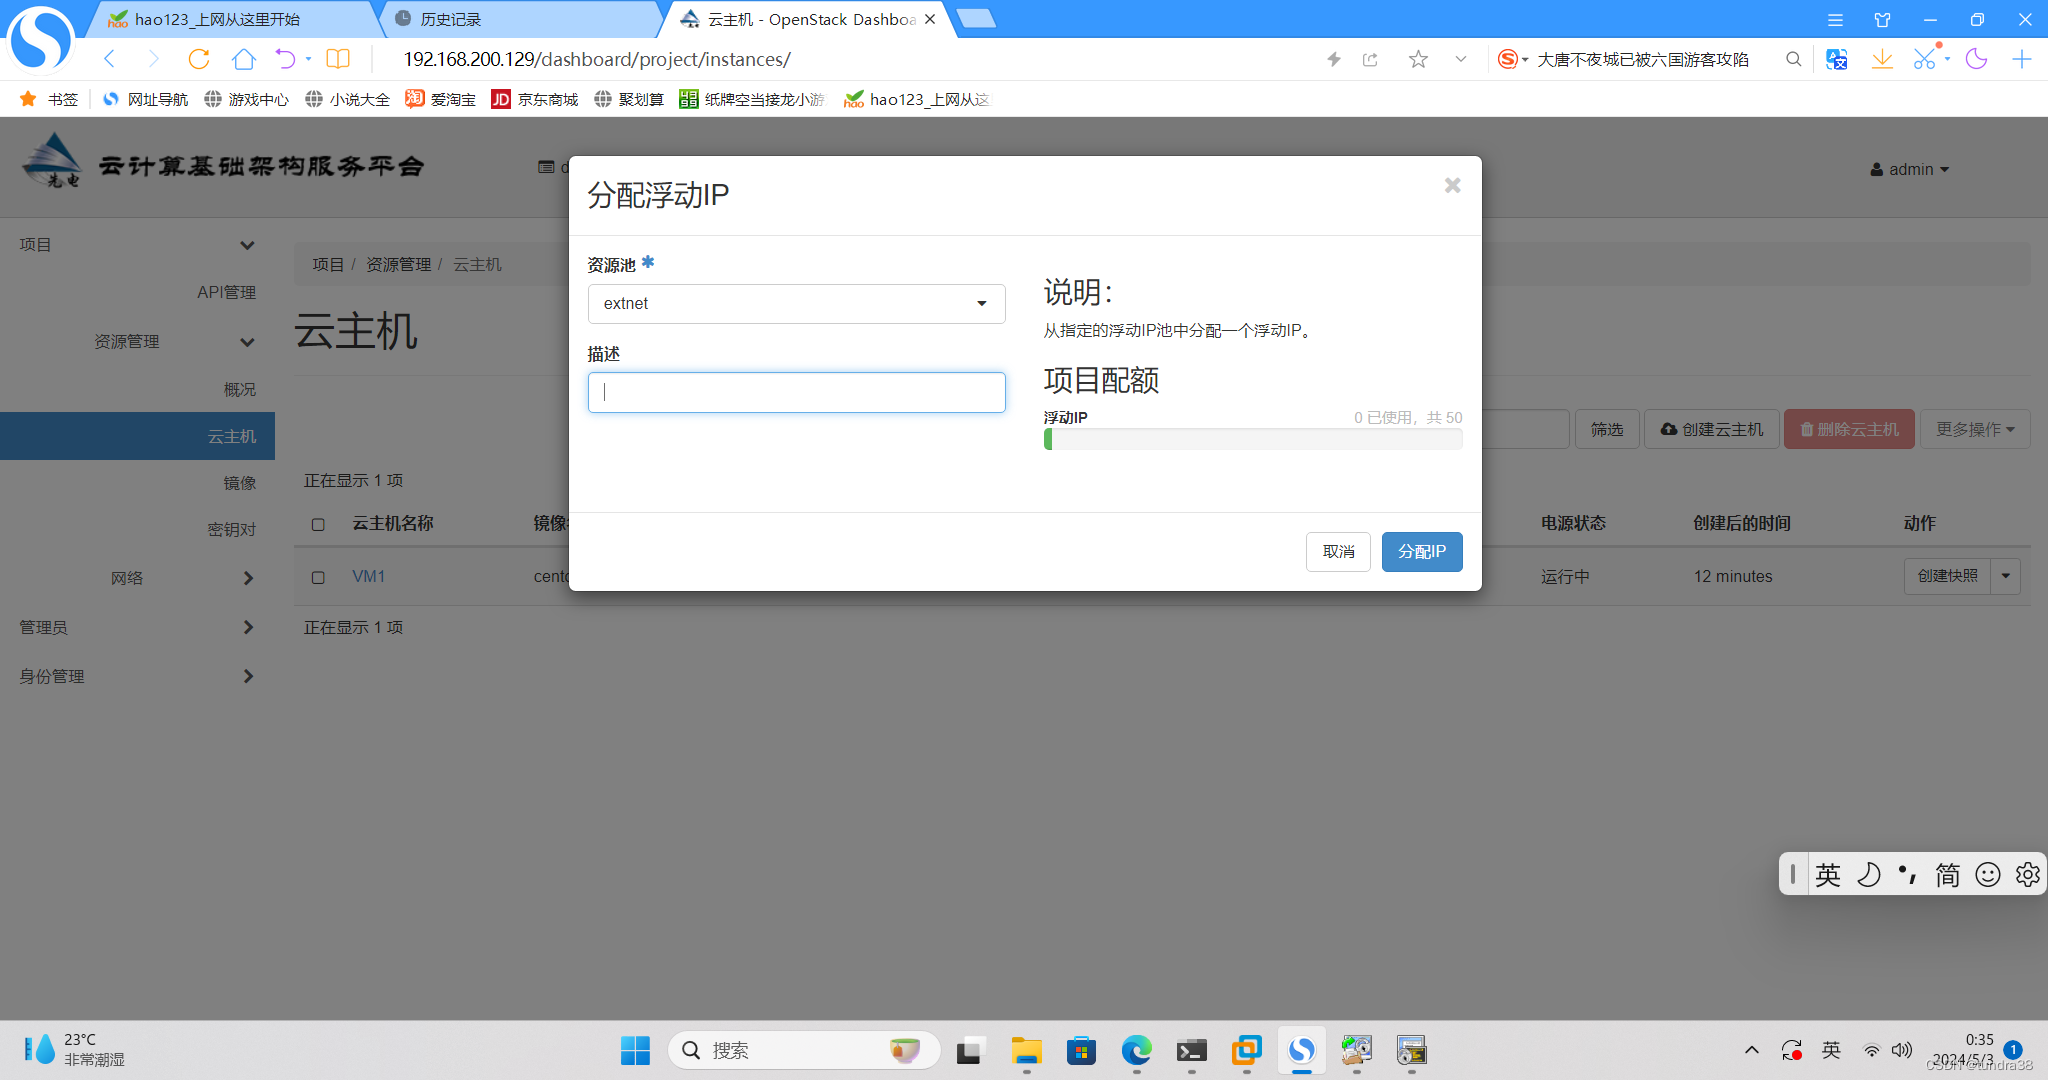
在云主机的动作处,选择绑定浮动ip,
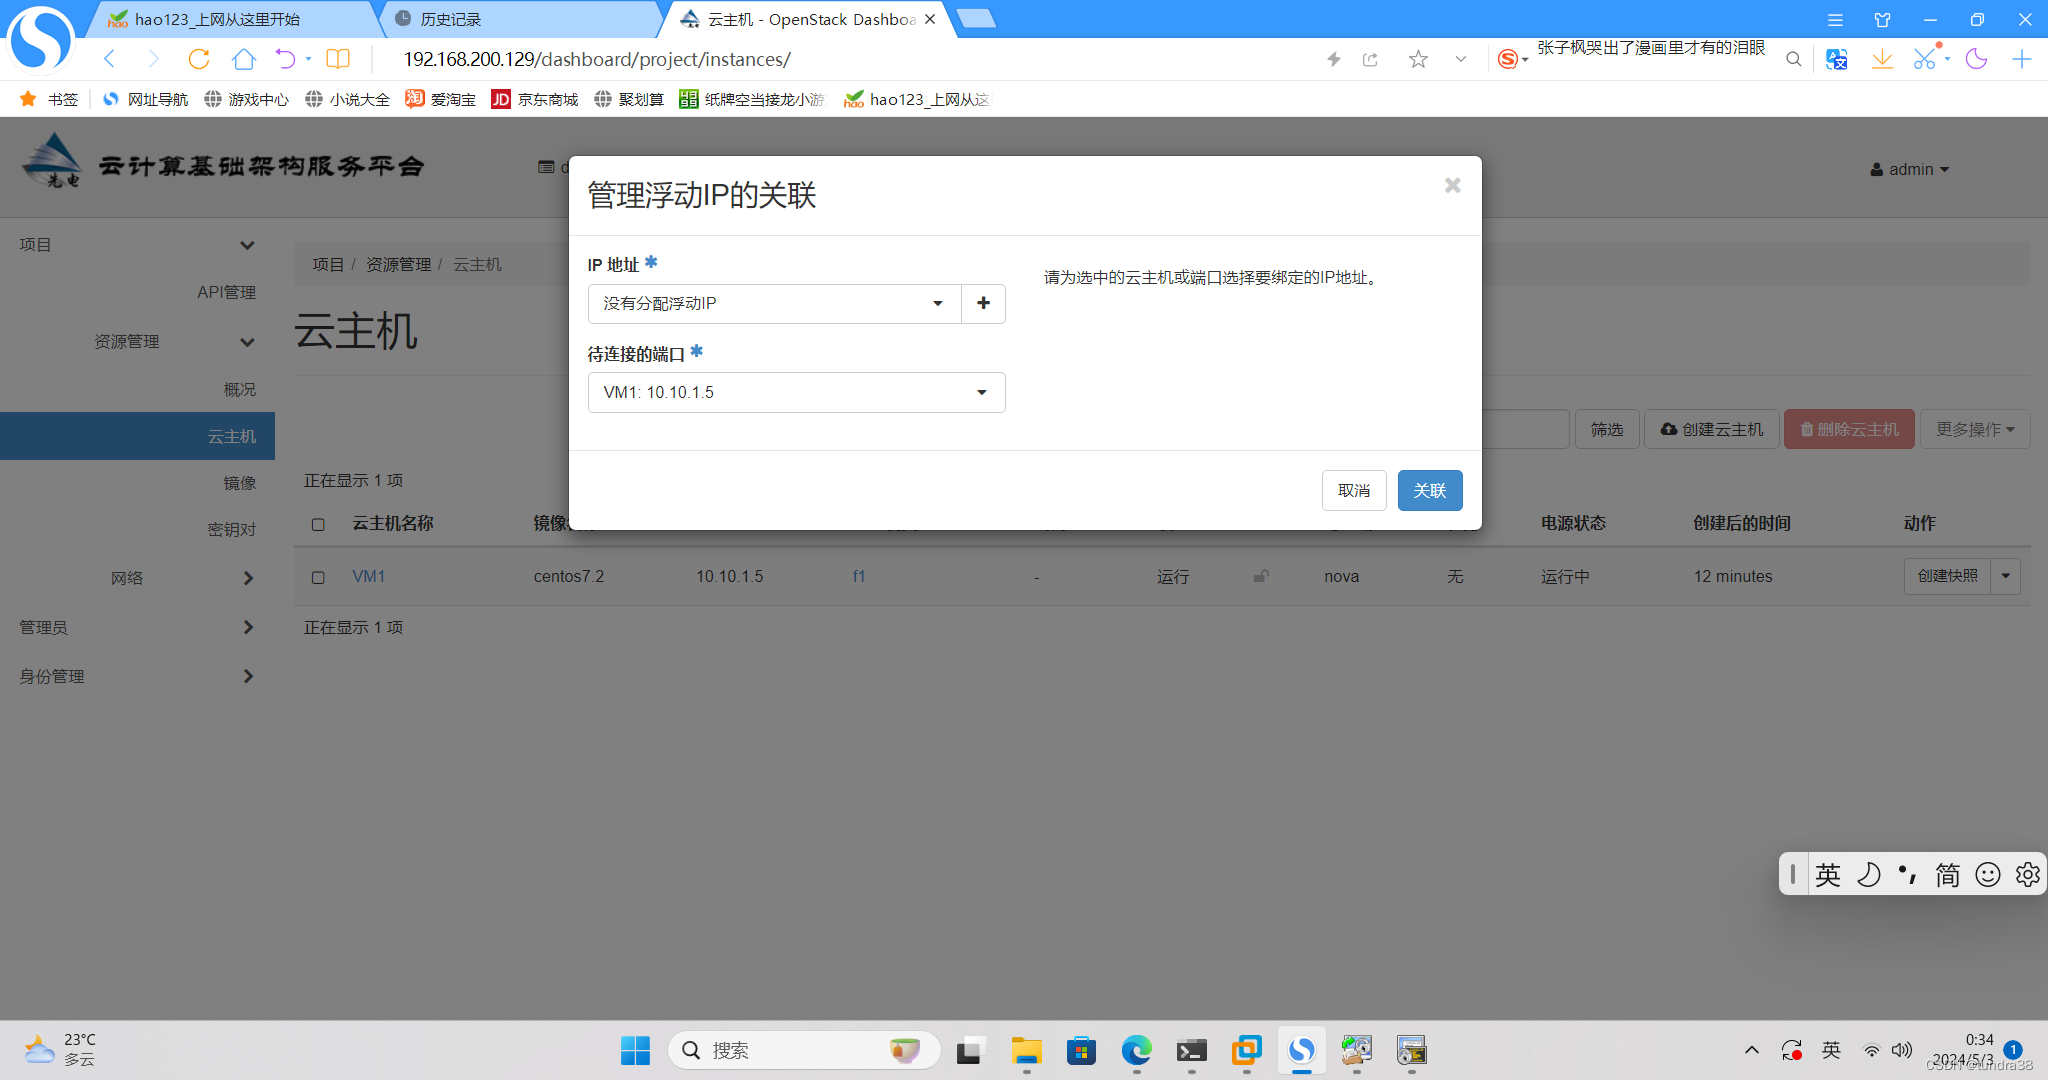
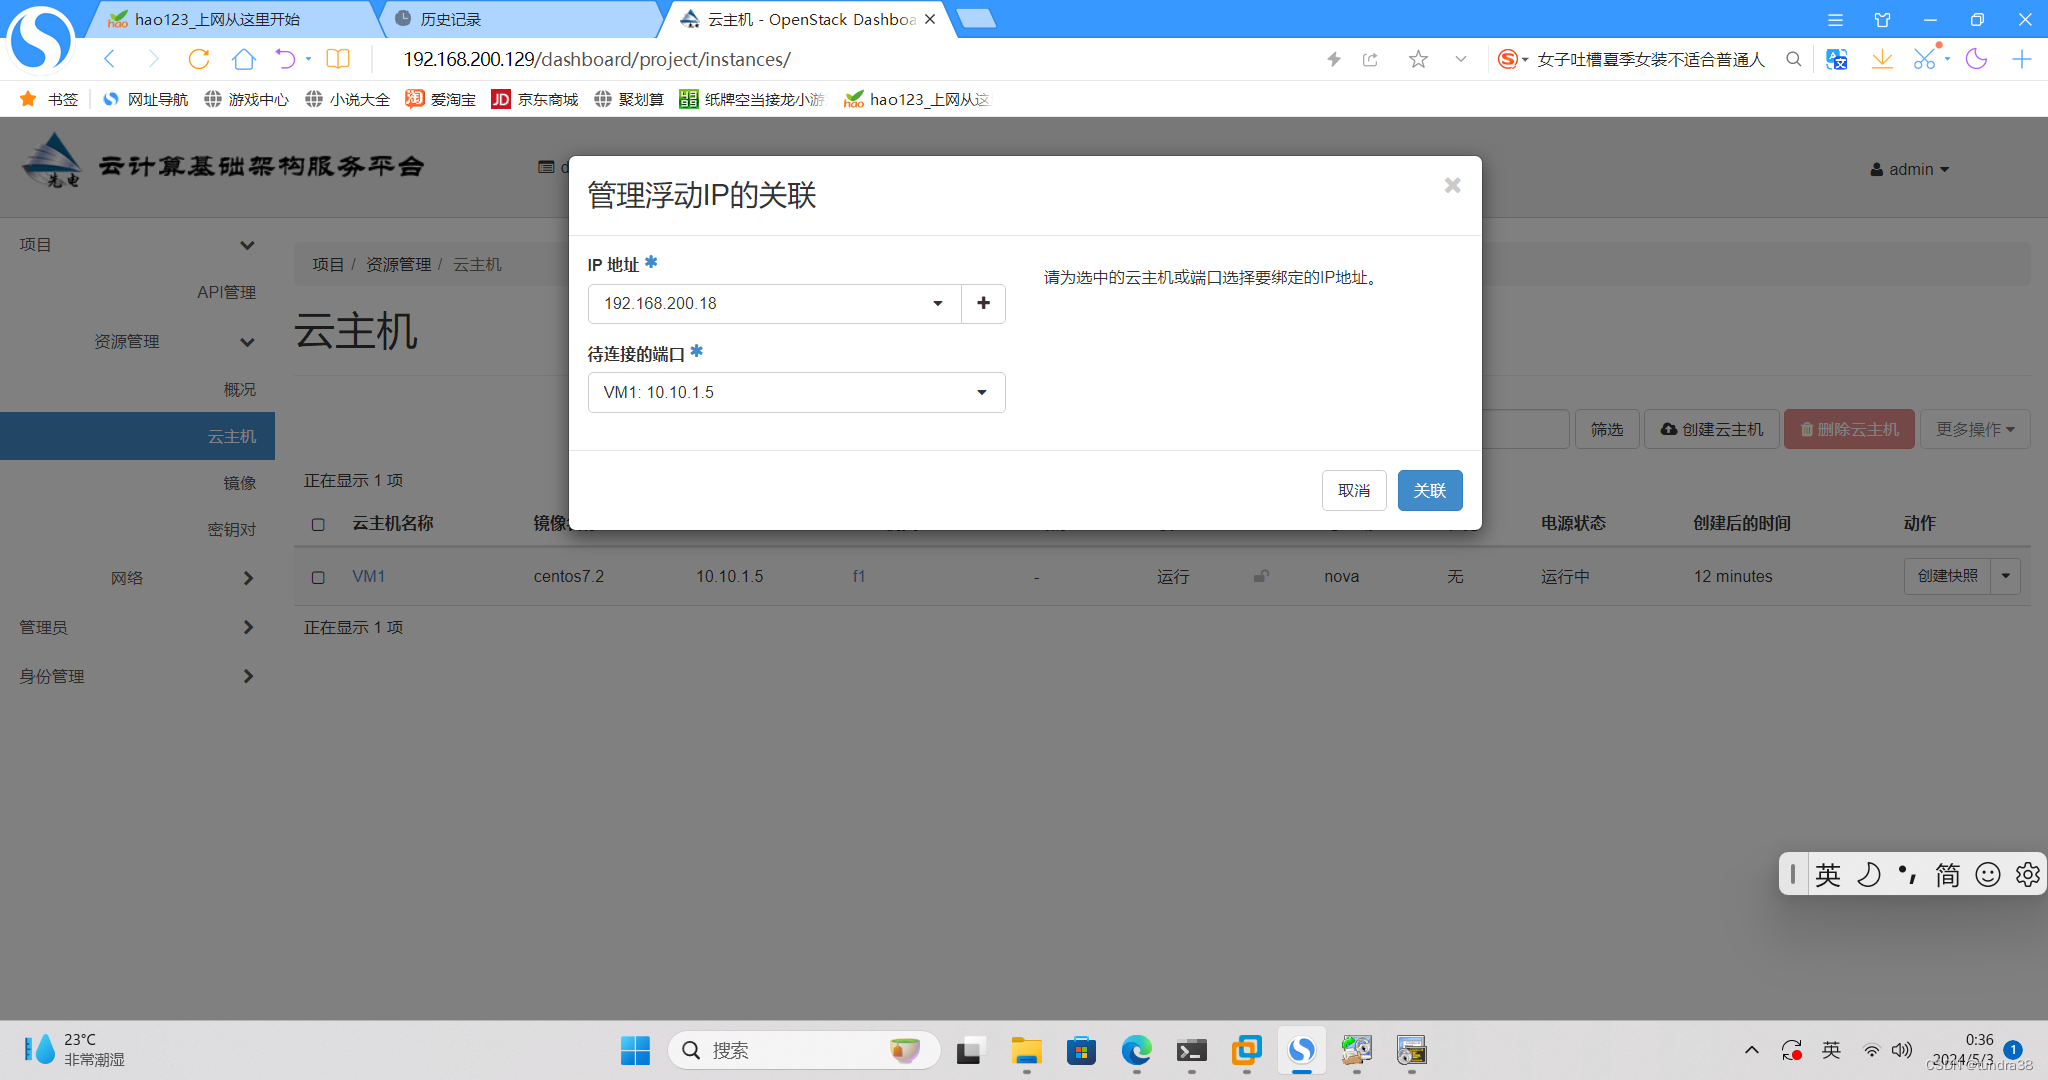
点击+,从外部网络分配,点击分配IP,点击关联
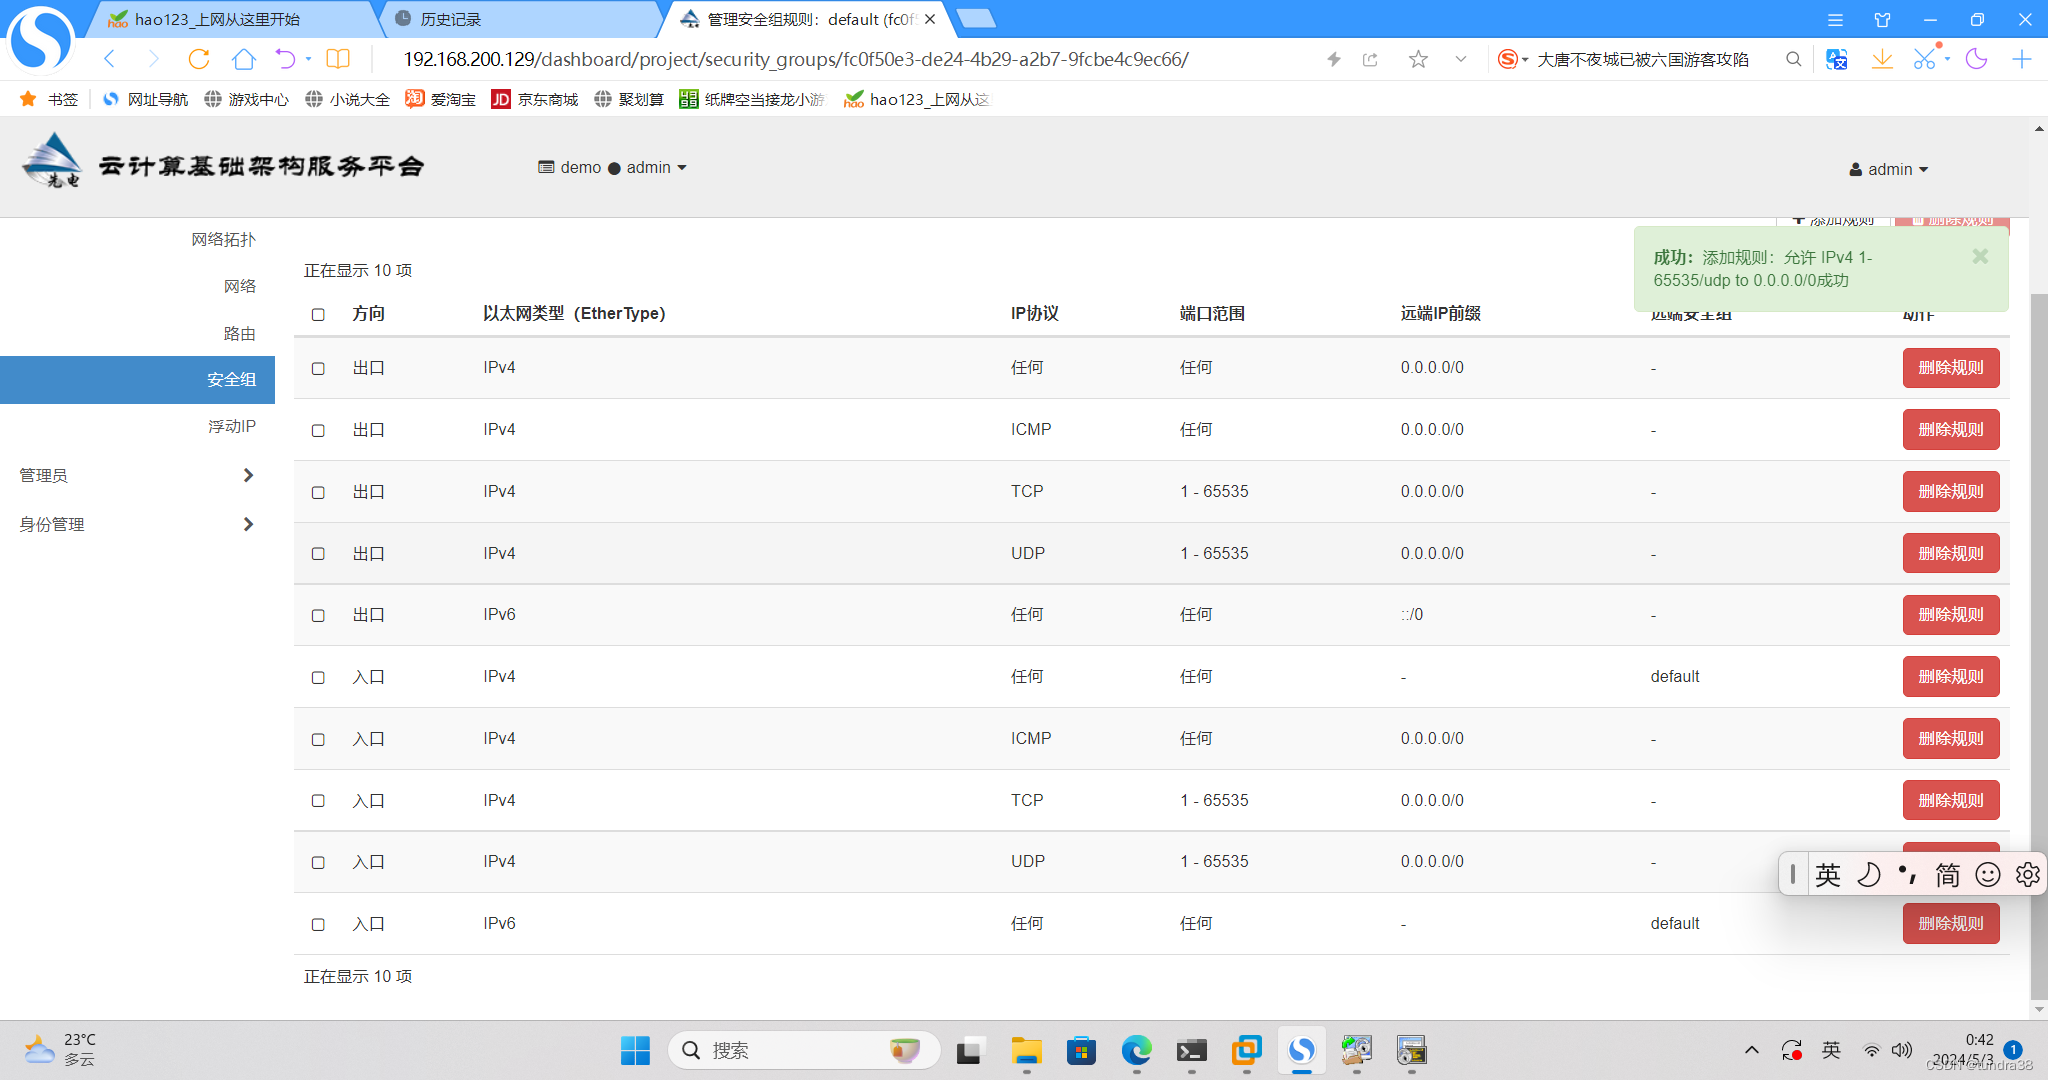
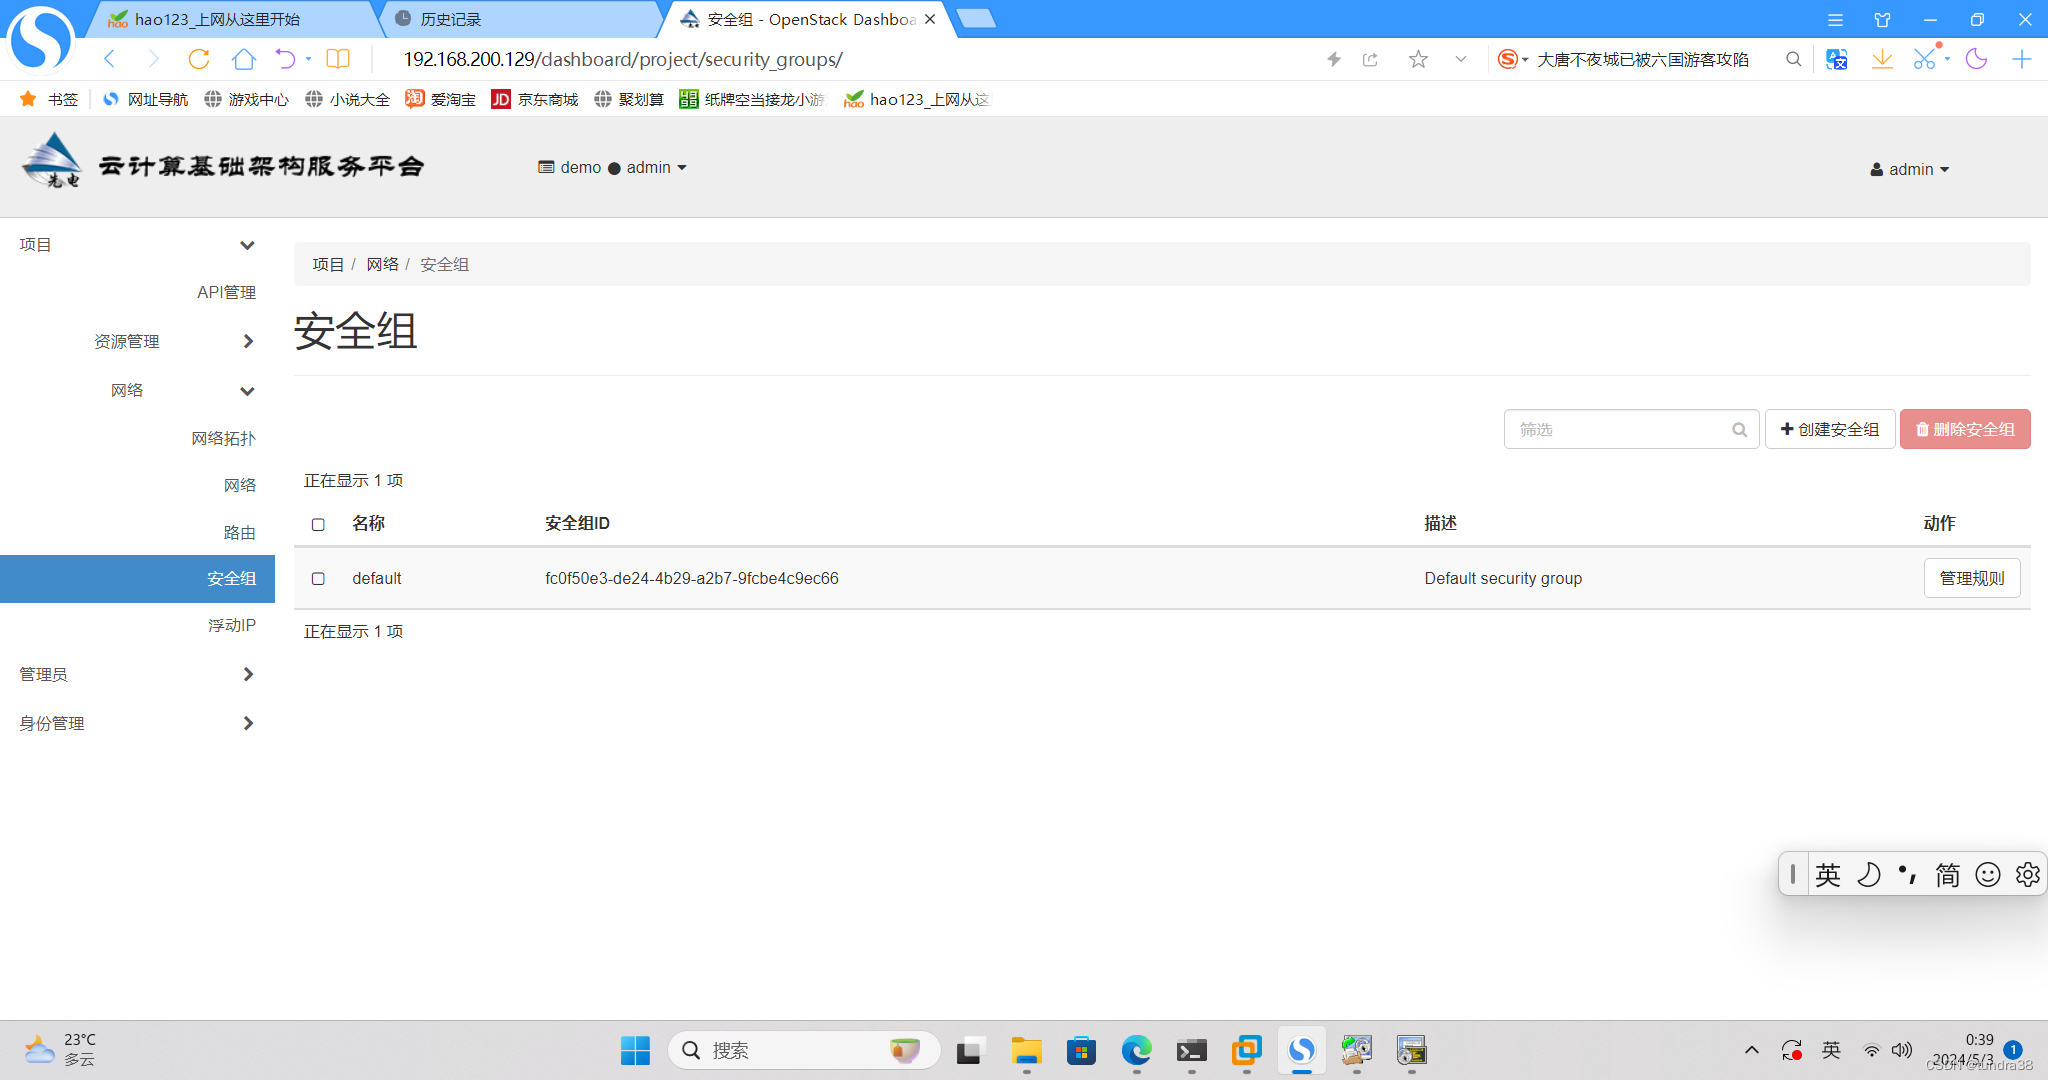
此时绑定的ip在cmd中依然ping不通,更改安全组规则,default管理规则,所有的ICMP,TCP,UDP的入口,出口都添加一共6个
添加规则
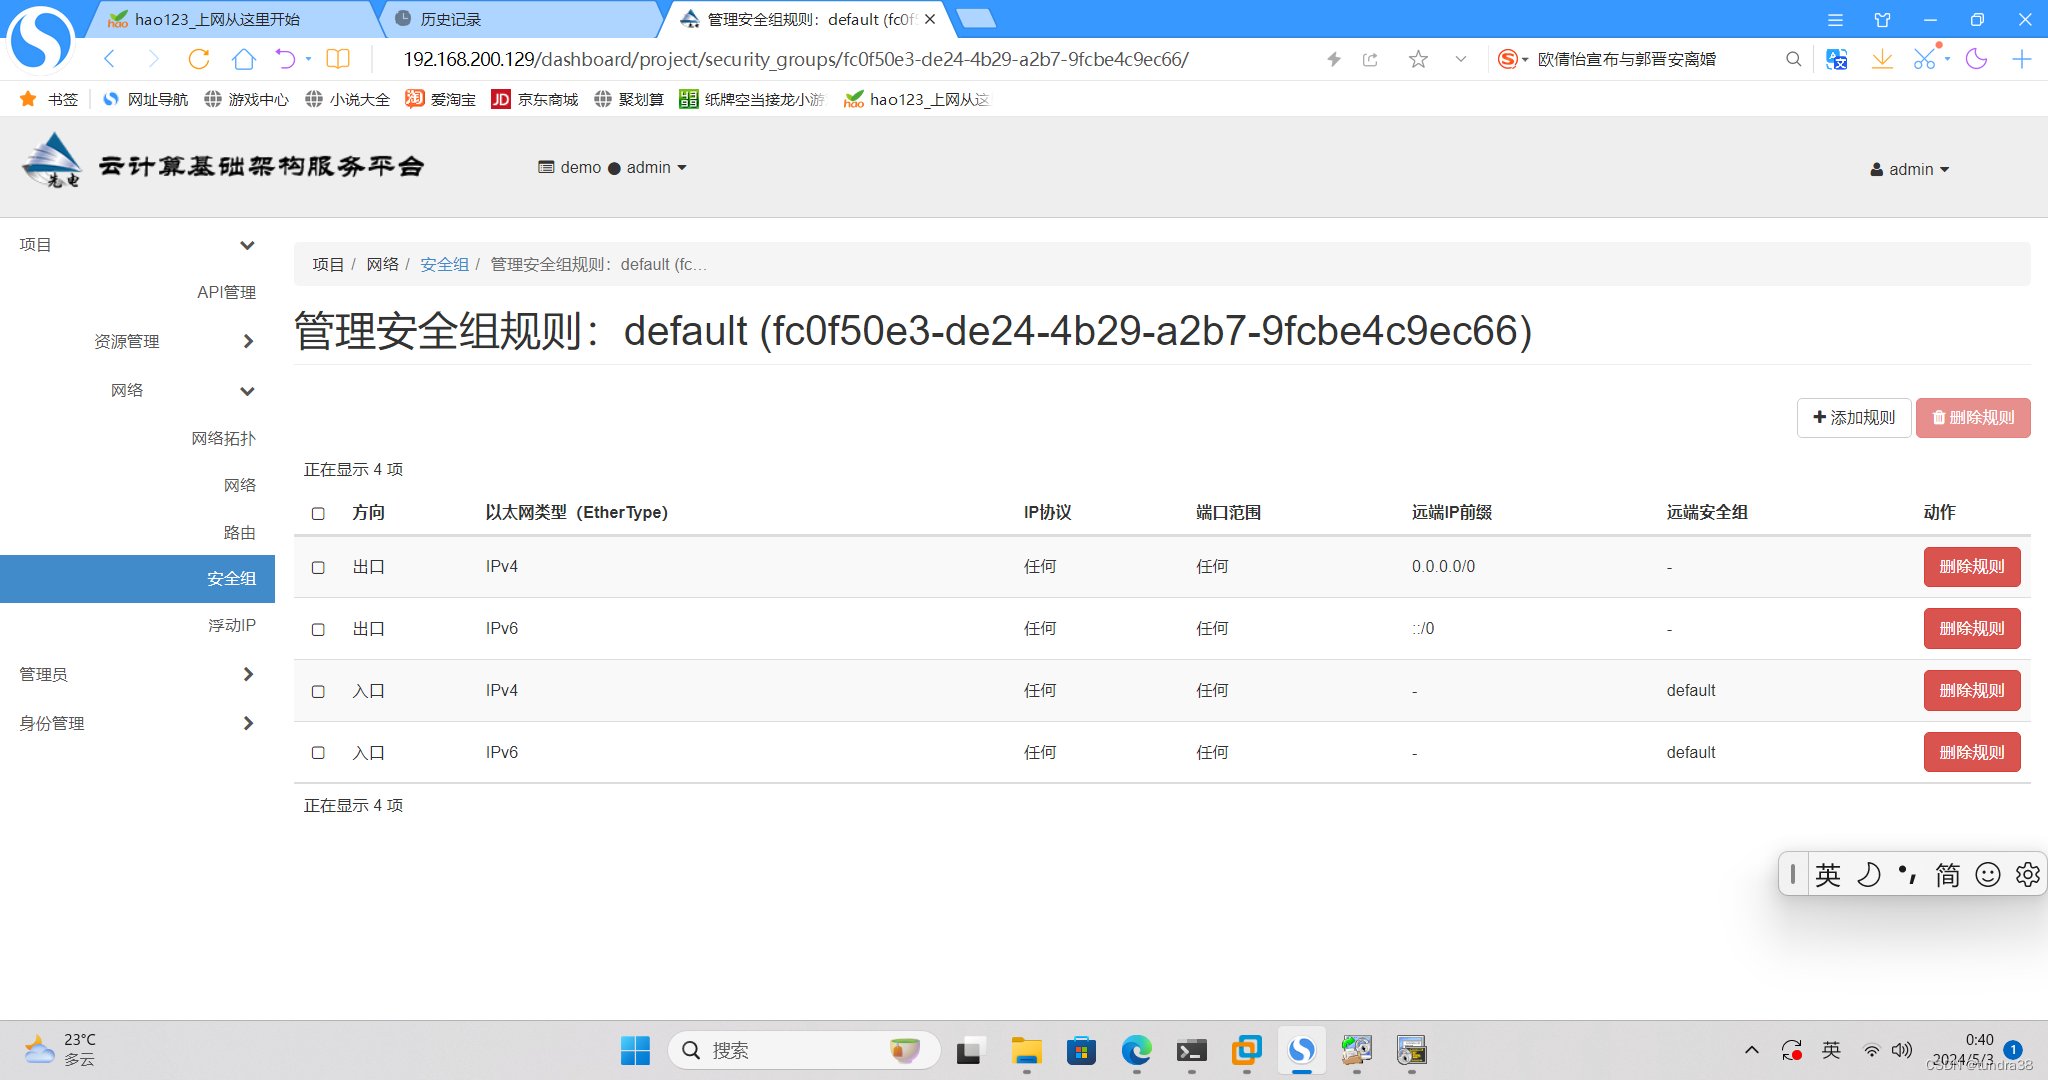

添加之后如图