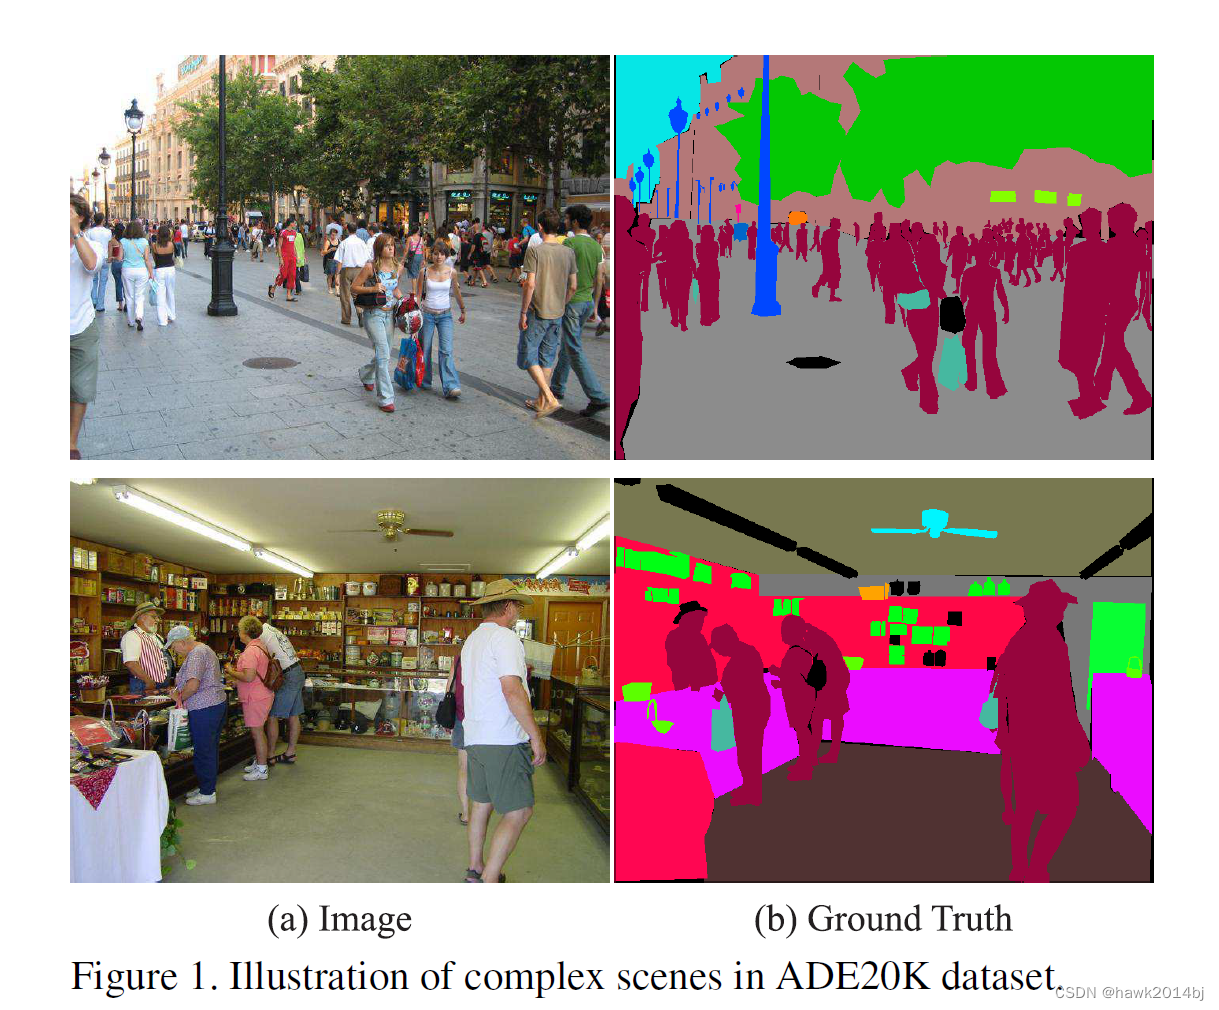
语意分割是指一张图片上包含多个物体,通过语义分割可以识别物体分类、物体名称、像素识别的任务。和物体检测不同,他不会将物体框出来,而是根据像素的归属把物体标注出来。PSPNet 的输入是一张图片,例如300500,那么输出就是一个 300500 数组,数组中的值就是分类索引,如果是 20 中分类,分类索引就是 0-19。
PSPNet 的输入和输出,如下图
PSPNet 物体检测流程
- 预处理:图像调整为 475*475, 对颜色标准化。
- 图像输入神经网络,输出 21 * 475 * 475数据,每个数据就是当前像素分类概率
- 根据概率最高的分类生成图像
- 将图像还原成原有尺寸
数据准备
- 准备数据
- 数据增强
- 创建 Dataset 类
- 创建 Dataloader
准备数据

# 导入软件包
import os.path as osp
from PIL import Image

import torch.utils.data as data


def make_datapath_list(rootpath):
    """
    创建用于学习、验证的图像数据和标注数据的文件路径列表变量

    Parameters
    ----------
    rootpath : str
        指向数据文件夹的路径

    Returns
    -------
    ret : train_img_list, train_anno_list, val_img_list, val_anno_list
        保存了指向数据的路径列表变量
    """

    #创建指向图像文件和标注数据的路径的模板
    imgpath_template = osp.join(rootpath, 'JPEGImages', '%s.jpg')
    annopath_template = osp.join(rootpath, 'SegmentationClass', '%s.png')

    #训练和验证,分别获取相应的文件 ID(文件名)
    train_id_names = osp.join(rootpath + 'ImageSets/Segmentation/train.txt')
    val_id_names = osp.join(rootpath + 'ImageSets/Segmentation/val.txt')

    #创建指向训练数据的图像文件和标注文件的路径列表变量
    train_img_list = list()
    train_anno_list = list()

    for line in open(train_id_names):
        file_id = line.strip()  #删除空格和换行
        img_path = (imgpath_template % file_id)  #图像的路径
        anno_path = (annopath_template % file_id)  #标注数据的路径
        train_img_list.append(img_path)
        train_anno_list.append(anno_path)

    #创建指向验证数据的图像文件和标注文件的路径列表变量
    val_img_list = list()
    val_anno_list = list()

    for line in open(val_id_names):
        file_id = line.strip()  #删除空格和换行符
        img_path = (imgpath_template % file_id)  #图像的路径
        anno_path = (annopath_template % file_id)  #标注数据的路径
        val_img_list.append(img_path)
        val_anno_list.append(anno_path)

    return train_img_list, train_anno_list, val_img_list, val_anno_list


#确认执行结果,获取文件路径列表
rootpath = "./data/VOCdevkit/VOC2012/"

train_img_list, train_anno_list, val_img_list, val_anno_list = make_datapath_list(
    rootpath=rootpath)

print(train_img_list[0])
print(train_anno_list[0])
创建 dataset
#首先导入数据处理类和数据增强类
from utils.data_augumentation import Compose, Scale, RandomRotation, RandomMirror, Resize, Normalize_Tensor


class DataTransform():
    """
    图像和标注的预处理类。训练和验证时分别采取不同的处理方法
    将图像的尺寸调整为input_size x input_size
    训练时进行数据增强处理


    Attributes
    ----------
    input_size : int
        指定调整图像尺寸的大小
    color_mean : (R, G, B)
        指定每个颜色通道的平均值
    color_std : (R, G, B)
        指定每个颜色通道的标准差
    """

    def __init__(self, input_size, color_mean, color_std):
        self.data_transform = {
            'train': Compose([
                Scale(scale=[0.5, 1.5]),  #图像的放大
                RandomRotation(angle=[-10, 10]),  #旋转
                RandomMirror(), #随机镜像
                Resize(input_size),  #调整尺寸(input_size)
                Normalize_Tensor(color_mean, color_std)  #颜色信息的正规化和张量化
            ]),
            'val': Compose([
                Resize(input_size),  #调整图像尺寸(input_size))
                Normalize_Tensor(color_mean, color_std) #颜色信息的正规化和张量化
            ])
        }

    def __call__(self, phase, img, anno_class_img):
        """
        Parameters
        ----------
        phase : 'train' or 'val'
            指定预处理的执行模式。
        """
        return self.data_transform[phase](img, anno_class_img)

class VOCDataset(data.Dataset):
    """
    用于创建VOC2012的Dataset的类,继承自PyTorch的Dataset类

    Attributes
    ----------
    img_list :
        保存了图像路径列表
    anno_list :
        保存了标注路径列表n
    phase : 'train' or 'test'
        保存了标注路径列表
    transform : object
        预处理类的实例
    """

    def __init__(self, img_list, anno_list, phase, transform):
        self.img_list = img_list
        self.anno_list = anno_list
        self.phase = phase
        self.transform = transform

    def __len__(self):
        '''返回图像的张数'''
        return len(self.img_list)

    def __getitem__(self, index):
        '''
        获取经过预处理的图像的张量形式的数据和标注
        '''
        img, anno_class_img = self.pull_item(index)
        return img, anno_class_img

    def pull_item(self, index):
        ''''获取图像的张量形式的数据和标注'''

        # 1.读入图像数据
        image_file_path = self.img_list[index]
        img = Image.open(image_file_path)   #[高度][宽度][颜色RGB]

        # 2.读入标注图像数据
        anno_file_path = self.anno_list[index]
        anno_class_img = Image.open(anno_file_path)   #[ 高度 ][ 宽度 ]

        # 3.进行预处理操作
        img, anno_class_img = self.transform(self.phase, img, anno_class_img)

        return img, anno_class_img

#确认执行结果

#(RGB)颜色的平均值和均方差
color_mean = (0.485, 0.456, 0.406)
color_std = (0.229, 0.224, 0.225)

#(RGB)颜色的平均值和均方差
train_dataset = VOCDataset(train_img_list, train_anno_list, phase="train", transform=DataTransform(
    input_size=475, color_mean=color_mean, color_std=color_std))

val_dataset = VOCDataset(val_img_list, val_anno_list, phase="val", transform=DataTransform(
    input_size=475, color_mean=color_mean, color_std=color_std))

#读取数据的示例
print(val_dataset.__getitem__(0)[0].shape)
print(val_dataset.__getitem__(0)[1].shape)
print(val_dataset.__getitem__(0))
#创建数据加载器

batch_size = 8

train_dataloader = data.DataLoader(
    train_dataset, batch_size=batch_size, shuffle=True)

val_dataloader = data.DataLoader(
    val_dataset, batch_size=batch_size, shuffle=False)

#集中保存到字典型变量中
dataloaders_dict = {"train": train_dataloader, "val": val_dataloader}

#确认执行结果
batch_iterator = iter(dataloaders_dict["val"])  #转换为迭代器
imges, anno_class_imges = next(batch_iterator)  #取出第一个元素
print(imges.size())  # torch.Size([8, 3, 475, 475])
print(anno_class_imges.size())  # torch.Size([8, 3, 475, 475])

import numpy as np
import matplotlib.pyplot as plt
%matplotlib inline

# 每次执行都会改变

# ·读取图像数据
index = 0
imges, anno_class_imges = train_dataset.__getitem__(index)

#图像的显示
img_val = imges
img_val = img_val.numpy().transpose((1, 2, 0))
plt.imshow(img_val)
plt.show()

# 标注图像的显示
anno_file_path = train_anno_list[0]
anno_class_img = Image.open(anno_file_path)   # [高度][宽度][颜色RGB]
p_palette = anno_class_img.getpalette()

anno_class_img_val = anno_class_imges.numpy()
anno_class_img_val = Image.fromarray(np.uint8(anno_class_img_val), mode="P")
anno_class_img_val.putpalette(p_palette)
plt.imshow(anno_class_img_val)
plt.show()

# 读取图像数据
index = 0
imges, anno_class_imges = val_dataset.__getitem__(index)

# 画像的表示
img_val = imges
img_val = img_val.numpy().transpose((1, 2, 0))
plt.imshow(img_val)
plt.show()

# 标注图像的显示
anno_file_path = train_anno_list[0]
anno_class_img = Image.open(anno_file_path)   # [高度][宽度][颜色RGB]
p_palette = anno_class_img.getpalette()

anno_class_img_val = anno_class_imges.numpy()
anno_class_img_val = Image.fromarray(np.uint8(anno_class_img_val), mode="P")
anno_class_img_val.putpalette(p_palette)
plt.imshow(anno_class_img_val)
plt.show()
PSPNet 网络构建
PSPNet网络包括 Feature(Encoder)、Pyramid Pooling、Decoder、AuxLoss 四个模块构成。
# 实现 PSPNet 网络
# 导入软件包
import torch
import torch.nn as nn
import torch.nn.functional as F

class PSPNet(nn.Module):
    def __init__(self, n_classes):
        super(PSPNet, self).__init__()

        #参数设置
        block_config = [3, 4, 6, 3]  # resnet50
        img_size = 475
        img_size_8 = 60  #设为img_size的1/8

        #创建组成子网络的四个模块
        self.feature_conv = FeatureMap_convolution()
        self.feature_res_1 = ResidualBlockPSP(
            n_blocks=block_config[0], in_channels=128, mid_channels=64, out_channels=256, stride=1, dilation=1)
        self.feature_res_2 = ResidualBlockPSP(
            n_blocks=block_config[1], in_channels=256, mid_channels=128, out_channels=512, stride=2, dilation=1)
        self.feature_dilated_res_1 = ResidualBlockPSP(
            n_blocks=block_config[2], in_channels=512, mid_channels=256, out_channels=1024, stride=1, dilation=2)
        self.feature_dilated_res_2 = ResidualBlockPSP(
            n_blocks=block_config[3], in_channels=1024, mid_channels=512, out_channels=2048, stride=1, dilation=4)

        self.pyramid_pooling = PyramidPooling(in_channels=2048, pool_sizes=[
            6, 3, 2, 1], height=img_size_8, width=img_size_8)

        self.decode_feature = DecodePSPFeature(
            height=img_size, width=img_size, n_classes=n_classes)

        self.aux = AuxiliaryPSPlayers(
            in_channels=1024, height=img_size, width=img_size, n_classes=n_classes)

    def forward(self, x):
        x = self.feature_conv(x)
        x = self.feature_res_1(x)
        x = self.feature_res_2(x)
        x = self.feature_dilated_res_1(x)

        output_aux = self.aux(x)  #将Feature模块中转到Aux模块

        x = self.feature_dilated_res_2(x)

        x = self.pyramid_pooling(x)
        output = self.decode_feature(x)

        return (output, output_aux)
Feature 子网络
Feature 包括 5 个子网络,FeatureMap、两个ResidualBlockPSP和两个 dilated 版的 ResidualBlockPSP。
# Feature Map Convolution 子网络
class conv2DBatchNormRelu(nn.Module):
    def __init__(self, in_channels, out_channels, kernel_size, stride, padding, dilation, bias):
        super(conv2DBatchNormRelu, self).__init__()
        self.conv = nn.Conv2d(in_channels, out_channels,
                              kernel_size, stride, padding, dilation, bias=bias)
        self.batchnorm = nn.BatchNorm2d(out_channels)
        self.relu = nn.ReLU(inplace=True)
        #inplase指定不保存输入数据,直接计算输出结果,达到节约内存的目的

    def forward(self, x):
        x = self.conv(x)
        x = self.batchnorm(x)
        outputs = self.relu(x)

        return outputs

class FeatureMap_convolution(nn.Module):
    def __init__(self):
        '''创建网络结构'''
        super(FeatureMap_convolution, self).__init__()

        # #卷积层1
        in_channels, out_channels, kernel_size, stride, padding, dilation, bias = 3, 64, 3, 2, 1, 1, False
        self.cbnr_1 = conv2DBatchNormRelu(
            in_channels, out_channels, kernel_size, stride, padding, dilation, bias)

        #卷积层2
        in_channels, out_channels, kernel_size, stride, padding, dilation, bias = 64, 64, 3, 1, 1, 1, False
        self.cbnr_2 = conv2DBatchNormRelu(
            in_channels, out_channels, kernel_size, stride, padding, dilation, bias)

        #卷积层3
        in_channels, out_channels, kernel_size, stride, padding, dilation, bias = 64, 128, 3, 1, 1, 1, False
        self.cbnr_3 = conv2DBatchNormRelu(
            in_channels, out_channels, kernel_size, stride, padding, dilation, bias)

        #最大池化层
        self.maxpool = nn.MaxPool2d(kernel_size=3, stride=2, padding=1)

    def forward(self, x):
        x = self.cbnr_1(x)
        x = self.cbnr_2(x)
        x = self.cbnr_3(x)
        outputs = self.maxpool(x)
        return outputs


class ResidualBlockPSP(nn.Sequential):
    def __init__(self, n_blocks, in_channels, mid_channels, out_channels, stride, dilation):
        super(ResidualBlockPSP, self).__init__()

        #设置bottleNeckPSP
        self.add_module(
            "block1",
            bottleNeckPSP(in_channels, mid_channels,
                          out_channels, stride, dilation)
        )

        #循环设置bottleNeckIdentifyPSP
        for i in range(n_blocks - 1):
            self.add_module(
                "block" + str(i+2),
                bottleNeckIdentifyPSP(
                    out_channels, mid_channels, stride, dilation)
            )

class conv2DBatchNorm(nn.Module):
    def __init__(self, in_channels, out_channels, kernel_size, stride, padding, dilation, bias):
        super(conv2DBatchNorm, self).__init__()
        self.conv = nn.Conv2d(in_channels, out_channels,
                              kernel_size, stride, padding, dilation, bias=bias)
        self.batchnorm = nn.BatchNorm2d(out_channels)

    def forward(self, x):
        x = self.conv(x)
        outputs = self.batchnorm(x)

        return outputs

class bottleNeckPSP(nn.Module):
    def __init__(self, in_channels, mid_channels, out_channels, stride, dilation):
        super(bottleNeckPSP, self).__init__()

        self.cbr_1 = conv2DBatchNormRelu(
            in_channels, mid_channels, kernel_size=1, stride=1, padding=0, dilation=1, bias=False)
        self.cbr_2 = conv2DBatchNormRelu(
            mid_channels, mid_channels, kernel_size=3, stride=stride, padding=dilation, dilation=dilation, bias=False)
        self.cb_3 = conv2DBatchNorm(
            mid_channels, out_channels, kernel_size=1, stride=1, padding=0, dilation=1, bias=False)

        #跳跃链接
        self.cb_residual = conv2DBatchNorm(
            in_channels, out_channels, kernel_size=1, stride=stride, padding=0, dilation=1, bias=False)

        self.relu = nn.ReLU(inplace=True)

    def forward(self, x):
        conv = self.cb_3(self.cbr_2(self.cbr_1(x)))
        residual = self.cb_residual(x)
        return self.relu(conv + residual)

class bottleNeckIdentifyPSP(nn.Module):
    def __init__(self, in_channels, mid_channels, stride, dilation):
        super(bottleNeckIdentifyPSP, self).__init__()

        self.cbr_1 = conv2DBatchNormRelu(
            in_channels, mid_channels, kernel_size=1, stride=1, padding=0, dilation=1, bias=False)
        self.cbr_2 = conv2DBatchNormRelu(
            mid_channels, mid_channels, kernel_size=3, stride=1, padding=dilation, dilation=dilation, bias=False)
        self.cb_3 = conv2DBatchNorm(
            mid_channels, in_channels, kernel_size=1, stride=1, padding=0, dilation=1, bias=False)
        self.relu = nn.ReLU(inplace=True)

    def forward(self, x):
        conv = self.cb_3(self.cbr_2(self.cbr_1(x)))
        residual = x
        return self.relu(conv + residual)
Pyramid Pooling池化
class PyramidPooling(nn.Module):
    def __init__(self, in_channels, pool_sizes, height, width):
        super(PyramidPooling, self).__init__()

        #在forward中使用的图像尺寸
        self.height = height
        self.width = width

        #各个卷积层输出的通道数
        out_channels = int(in_channels / len(pool_sizes))

       #生成每个卷积层
        # 该实现方法非常“耿直”,虽然笔者很想用 for 循环来编写这段代码,但最后还是决定优先以容易理解的方                     式编写
        # pool_sizes: [6, 3, 2, 1]
        self.avpool_1 = nn.AdaptiveAvgPool2d(output_size=pool_sizes[0])
        self.cbr_1 = conv2DBatchNormRelu(
            in_channels, out_channels, kernel_size=1, stride=1, padding=0, dilation=1, bias=False)

        self.avpool_2 = nn.AdaptiveAvgPool2d(output_size=pool_sizes[1])
        self.cbr_2 = conv2DBatchNormRelu(
            in_channels, out_channels, kernel_size=1, stride=1, padding=0, dilation=1, bias=False)

        self.avpool_3 = nn.AdaptiveAvgPool2d(output_size=pool_sizes[2])
        self.cbr_3 = conv2DBatchNormRelu(
            in_channels, out_channels, kernel_size=1, stride=1, padding=0, dilation=1, bias=False)

        self.avpool_4 = nn.AdaptiveAvgPool2d(output_size=pool_sizes[3])
        self.cbr_4 = conv2DBatchNormRelu(
            in_channels, out_channels, kernel_size=1, stride=1, padding=0, dilation=1, bias=False)

    def forward(self, x):

        out1 = self.cbr_1(self.avpool_1(x))
        out1 = F.interpolate(out1, size=(
            self.height, self.width), mode="bilinear", align_corners=True)

        out2 = self.cbr_2(self.avpool_2(x))
        out2 = F.interpolate(out2, size=(
            self.height, self.width), mode="bilinear", align_corners=True)

        out3 = self.cbr_3(self.avpool_3(x))
        out3 = F.interpolate(out3, size=(
            self.height, self.width), mode="bilinear", align_corners=True)

        out4 = self.cbr_4(self.avpool_4(x))
        out4 = F.interpolate(out4, size=(
            self.height, self.width), mode="bilinear", align_corners=True)

        #最后将结果进行合并,指定dim=1按通道数的维数进行合并
        output = torch.cat([x, out1, out2, out3, out4], dim=1)

        return output
Decoder和 AuxLoss的实现
class DecodePSPFeature(nn.Module):
    def __init__(self, height, width, n_classes):
        super(DecodePSPFeature, self).__init__()

        #在forward中使用的图像尺寸
        self.height = height
        self.width = width

        self.cbr = conv2DBatchNormRelu(
            in_channels=4096, out_channels=512, kernel_size=3, stride=1, padding=1, dilation=1, bias=False)
        self.dropout = nn.Dropout2d(p=0.1)
        self.classification = nn.Conv2d(
            in_channels=512, out_channels=n_classes, kernel_size=1, stride=1, padding=0)

    def forward(self, x):
        x = self.cbr(x)
        x = self.dropout(x)
        x = self.classification(x)
        output = F.interpolate(
            x, size=(self.height, self.width), mode="bilinear", align_corners=True)

        return output

class AuxiliaryPSPlayers(nn.Module):
    def __init__(self, in_channels, height, width, n_classes):
        super(AuxiliaryPSPlayers, self).__init__()

       #在forward中使用的图像尺寸
        self.height = height
        self.width = width

        self.cbr = conv2DBatchNormRelu(
            in_channels=in_channels, out_channels=256, kernel_size=3, stride=1, padding=1, dilation=1, bias=False)
        self.dropout = nn.Dropout2d(p=0.1)
        self.classification = nn.Conv2d(
            in_channels=256, out_channels=n_classes, kernel_size=1, stride=1, padding=0)

    def forward(self, x):
        x = self.cbr(x)
        x = self.dropout(x)
        x = self.classification(x)
        output = F.interpolate(
            x, size=(self.height, self.width), mode="bilinear", align_corners=True)

        return output

# 定义模型
net = PSPNet(n_classes=21)
net
 #生成伪数据
batch_size = 2
dummy_img = torch.rand(batch_size, 3, 475, 475)

#计算
outputs = net(dummy_img)
print(outputs)
训练
# 导入软件包
import random
import math
import time
import pandas as pd
import numpy as np

import torch
import torch.utils.data as data
import torch.nn as nn
import torch.nn.init as init
import torch.nn.functional as F
import torch.optim as optim

# 初始设定
# Setup seeds
torch.manual_seed(1234)
np.random.seed(1234)
random.seed(1234)

from utils.dataloader import make_datapath_list, DataTransform, VOCDataset

# 创建文件路径列表
rootpath = "./data/VOCdevkit/VOC2012/"
train_img_list, train_anno_list, val_img_list, val_anno_list = make_datapath_list(
    rootpath=rootpath)

# Dataset作成
#(RGB) 颜色的平均值和均方差
color_mean = (0.485, 0.456, 0.406)
color_std = (0.229, 0.224, 0.225)

train_dataset = VOCDataset(train_img_list, train_anno_list, phase="train", transform=DataTransform(
    input_size=475, color_mean=color_mean, color_std=color_std))

val_dataset = VOCDataset(val_img_list, val_anno_list, phase="val", transform=DataTransform(
    input_size=475, color_mean=color_mean, color_std=color_std))

#生成DataLoader
batch_size = 8

train_dataloader = data.DataLoader(
    train_dataset, batch_size=batch_size, shuffle=True)

val_dataloader = data.DataLoader(
    val_dataset, batch_size=batch_size, shuffle=False)

#集中保存到字典型变量中
dataloaders_dict = {"train": train_dataloader, "val": val_dataloader}


from utils.pspnet import PSPNet

# 制作网络模型
#使用ADE20K数据集中事先训练好的模型,ADE20K的分类数量是150
net = PSPNet(n_classes=150)

#载入 ADE20K 中事先训练好的参数
state_dict = torch.load("./weights/pspnet50_ADE20K.pth")
net.load_state_dict(state_dict)

#将分类用的卷积层替换为输出数量为21的卷积层
n_classes = 21
net.decode_feature.classification = nn.Conv2d(
    in_channels=512, out_channels=n_classes, kernel_size=1, stride=1, padding=0)

net.aux.classification = nn.Conv2d(
    in_channels=256, out_channels=n_classes, kernel_size=1, stride=1, padding=0)

#对替换的卷积层进行初始化。由于激励函数是Sigmoid,因此使用Xavier进行初始化


def weights_init(m):
    if isinstance(m, nn.Conv2d):
        nn.init.xavier_normal_(m.weight.data)
        if m.bias is not None:  #如果bias存在
            nn.init.constant_(m.bias, 0.0)


net.decode_feature.classification.apply(weights_init)
net.aux.classification.apply(weights_init)


print('网络设置完毕 :成功的载入了事先训练完毕的权重')


#设置损失函数
class PSPLoss(nn.Module):
    """#设置损失函数"""

    def __init__(self, aux_weight=0.4):
        super(PSPLoss, self).__init__()
        self.aux_weight = aux_weight  #aux_loss的权重

    def forward(self, outputs, targets):
        """
        损失函数的计算。

        Parameters
        ----------
        outputs : PSPNet的输出(tuple)
            (output=torch.Size([num_batch, 21, 475, 475]), output_aux=torch.Size([num_batch, 21, 475, 475]))。

        targets : [num_batch, 475, 4755]
            正解的标注信息

        Returns
        -------
        loss :张量
            损失值
        """

        loss = F.cross_entropy(outputs[0], targets, reduction='mean')
        loss_aux = F.cross_entropy(outputs[1], targets, reduction='mean')

        return loss+self.aux_weight*loss_aux


criterion = PSPLoss(aux_weight=0.4)


# #由于使用的是微调,因此要降低学习率く
optimizer = optim.SGD([
    {'params': net.feature_conv.parameters(), 'lr': 1e-3},
    {'params': net.feature_res_1.parameters(), 'lr': 1e-3},
    {'params': net.feature_res_2.parameters(), 'lr': 1e-3},
    {'params': net.feature_dilated_res_1.parameters(), 'lr': 1e-3},
    {'params': net.feature_dilated_res_2.parameters(), 'lr': 1e-3},
    {'params': net.pyramid_pooling.parameters(), 'lr': 1e-3},
    {'params': net.decode_feature.parameters(), 'lr': 1e-2},
    {'params': net.aux.parameters(), 'lr': 1e-2},
], momentum=0.9, weight_decay=0.0001)


# #设置调度器
def lambda_epoch(epoch):
    max_epoch = 30
    return math.pow((1-epoch/max_epoch), 0.9)


scheduler = optim.lr_scheduler.LambdaLR(optimizer, lr_lambda=lambda_epoch)

#创建对模型进行训练的函数


def train_model(net, dataloaders_dict, criterion, scheduler, optimizer, num_epochs):

    #确认GPU是否可用
    device = torch.device("cuda:0" if torch.cuda.is_available() else "cpu")
    print("使用的设备 :", device)

    #将网络载入GPU中
    net.to(device)

    #如果网络相对固定,开启高速处理选项
    torch.backends.cudnn.benchmark = True

    #图像的张数
    num_train_imgs = len(dataloaders_dict["train"].dataset)
    num_val_imgs = len(dataloaders_dict["val"].dataset)
    batch_size = dataloaders_dict["train"].batch_size

    #设置迭代计数器
    iteration = 1
    logs = []

    # multiple minibatch
    batch_multiplier = 3

    # epochのループ
    for epoch in range(num_epochs):

        #epoch的循环
        t_epoch_start = time.time()
        t_iter_start = time.time()
        epoch_train_loss = 0.0  #epoch的损失和
        epoch_val_loss = 0.0  #epoch的损失和

        print('-------------')
        print('Epoch {}/{}'.format(epoch+1, num_epochs))
        print('-------------')

        #对每轮epoch进行训练和验证的循环
        for phase in ['train', 'val']:
            if phase == 'train':
                net.train()  #将模式设置为训练模式
                scheduler.step()  #更新最优化调度器
                optimizer.zero_grad()
                print('(train)')

            else:
                if((epoch+1) % 5 == 0):
                    net.eval()   #将模型设置为验证模式
                    print('-------------')
                    print('(val)')
                else:
                    #每5轮进行1次验证
                    continue

           #从数据加载器中读取每个小批量并进行循环
            count = 0  # multiple minibatch
            for imges, anno_class_imges in dataloaders_dict[phase]:
                #如果小批量的尺寸是1,批量正规化处理会报错,因此需要避免
                if imges.size()[0] == 1:
                    continue

                #如果GPU可用,将数据传输到GPU中
                imges = imges.to(device)
                anno_class_imges = anno_class_imges.to(device)


                #使用multiple minibatch对参数进行更新
                if (phase == 'train') and (count == 0):
                    optimizer.step()
                    optimizer.zero_grad()
                    count = batch_multiplier

                #正向传播计算
                with torch.set_grad_enabled(phase == 'train'):
                    outputs = net(imges)
                    loss = criterion(
                        outputs, anno_class_imges.long()) / batch_multiplier

                    #训练时采用反向传播
                    if phase == 'train':
                        loss.backward() #梯度的计算
                        count -= 1  # multiple minibatch

                        if (iteration % 10 == 0):  #每10次迭代显示一次loss
                            t_iter_finish = time.time()
                            duration = t_iter_finish - t_iter_start
                            print('迭代 {} || Loss: {:.4f} || 10iter: {:.4f} sec.'.format(
                                iteration, loss.item()/batch_size*batch_multiplier, duration))
                            t_iter_start = time.time()

                        epoch_train_loss += loss.item() * batch_multiplier
                        iteration += 1

                    #验证时
                    else:
                        epoch_val_loss += loss.item() * batch_multiplier

        #每个epoch的phase的loss和正解率
        t_epoch_finish = time.time()
        print('-------------')
        print('epoch {} || Epoch_TRAIN_Loss:{:.4f} ||Epoch_VAL_Loss:{:.4f}'.format(
            epoch+1, epoch_train_loss/num_train_imgs, epoch_val_loss/num_val_imgs))
        print('timer:  {:.4f} sec.'.format(t_epoch_finish - t_epoch_start))
        t_epoch_start = time.time()

        #保存日志
        log_epoch = {'epoch': epoch+1, 'train_loss': epoch_train_loss /
                     num_train_imgs, 'val_loss': epoch_val_loss/num_val_imgs}
        logs.append(log_epoch)
        df = pd.DataFrame(logs)
        df.to_csv("log_output.csv")

    #保存最终的网络
    torch.save(net.state_dict(), 'weights/pspnet50_' +
               str(epoch+1) + '.pth')

# 学习和验证的实现
num_epochs = 30
train_model(net, dataloaders_dict, criterion, scheduler, optimizer, num_epochs=num_epochs)
至此, 网络搭建完成,CPU 训练太慢了,5.1 假期找个 GPU 服务器训练试试,然后上结果。