文章目录
- 【Ubuntu】在VMWare虚拟机中安装Ubuntu教程
- 一、安装VMWare
- 二、下载Ubuntu的iso文件
- 三、安装Ubuntu
- Reference
【Ubuntu】在VMWare虚拟机中安装Ubuntu教程
一、安装VMWare
具体的安装方法,可以参考这一篇博客,这里就不详细介绍了
二、下载Ubuntu的iso文件
在指向的链接中,直接下载Ubuntu最新的长期支持版本的.iso文件。下载地址
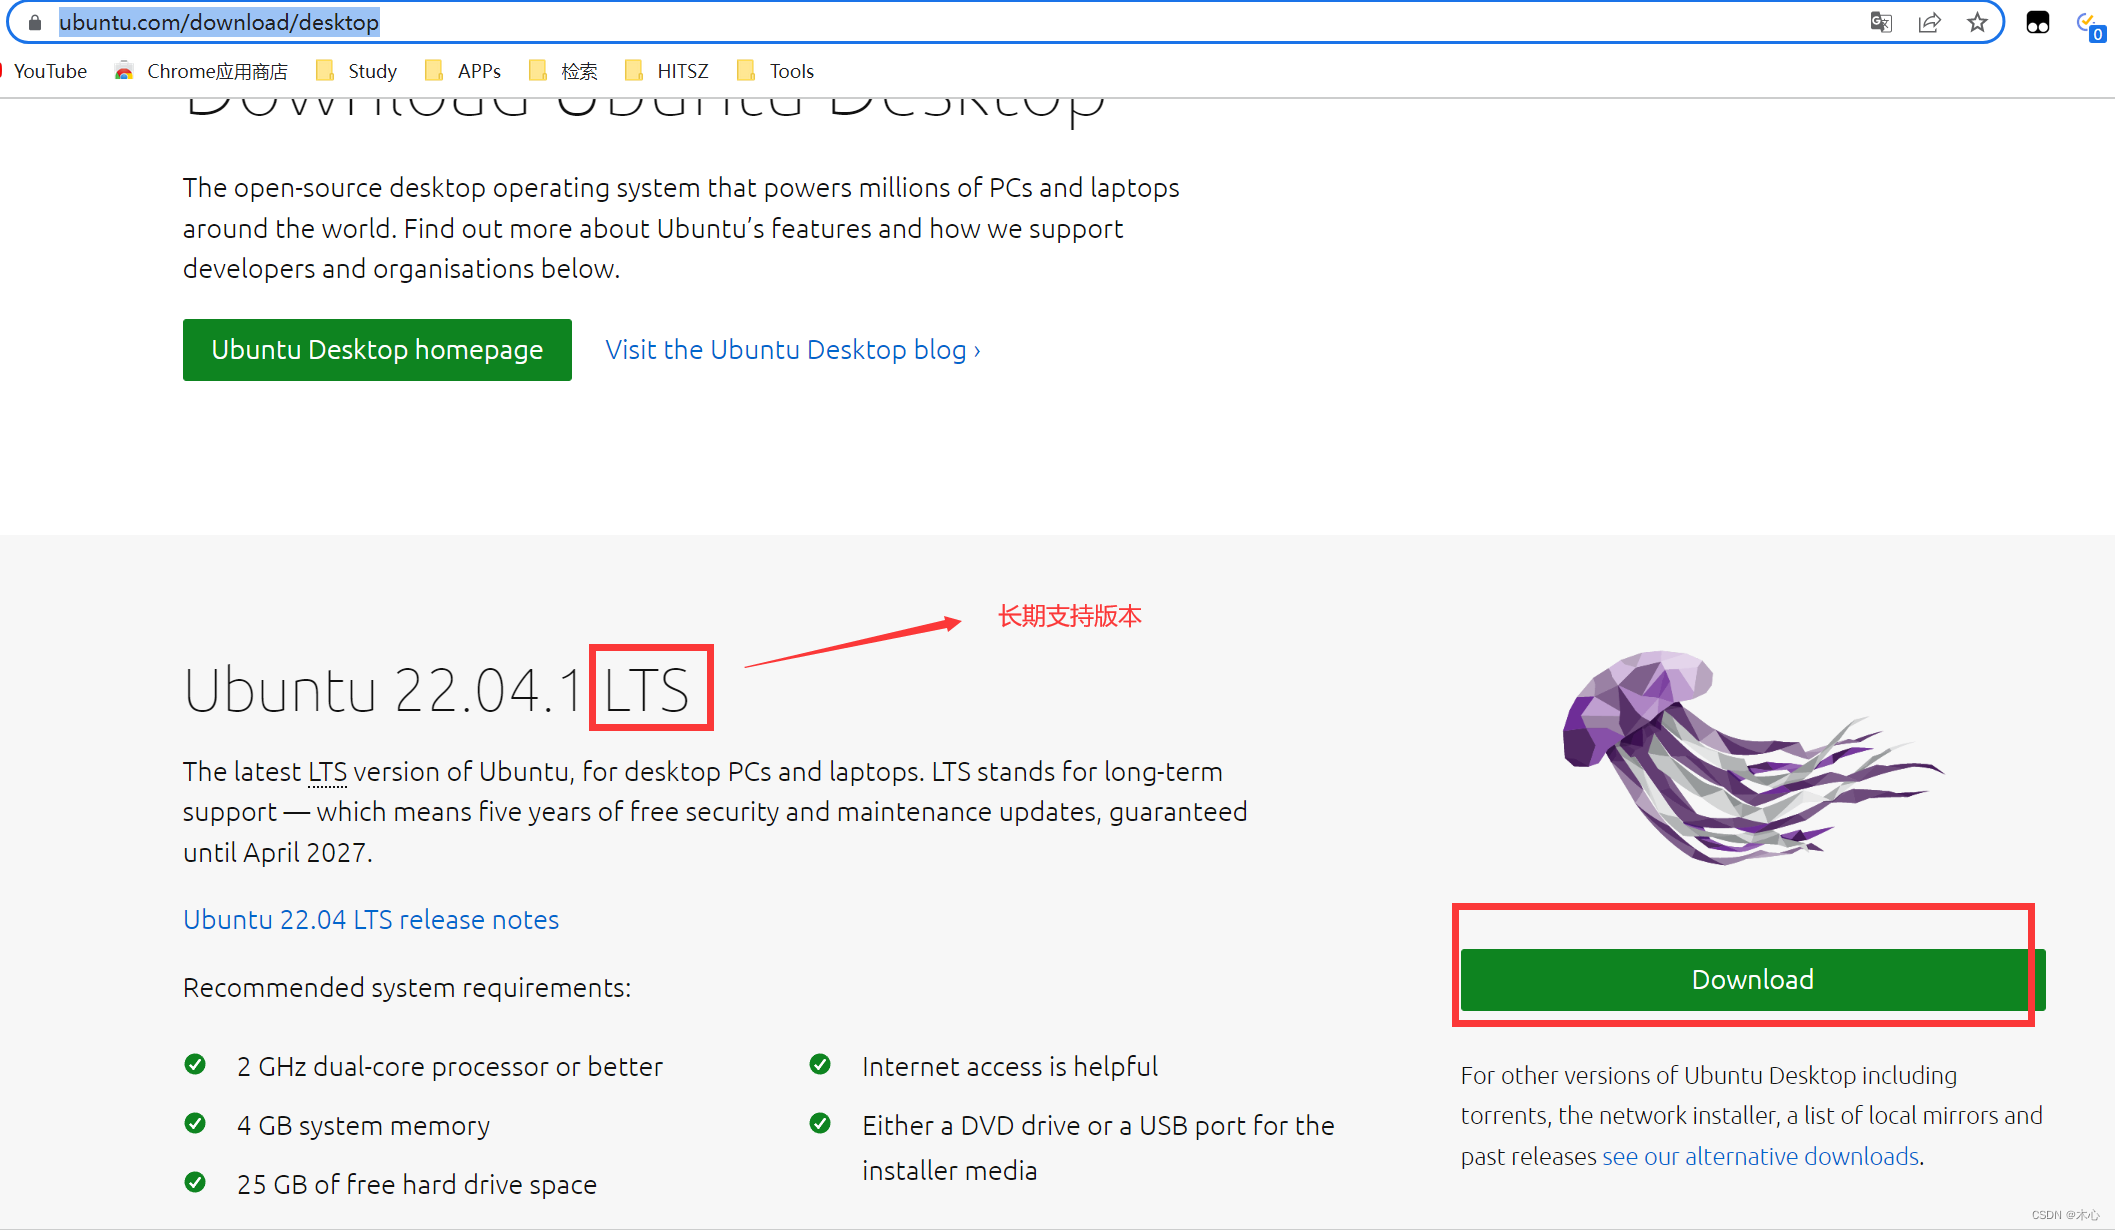 直接选择下载即可,注意一定要保存到一个自己能找到的位置。
三、安装Ubuntu
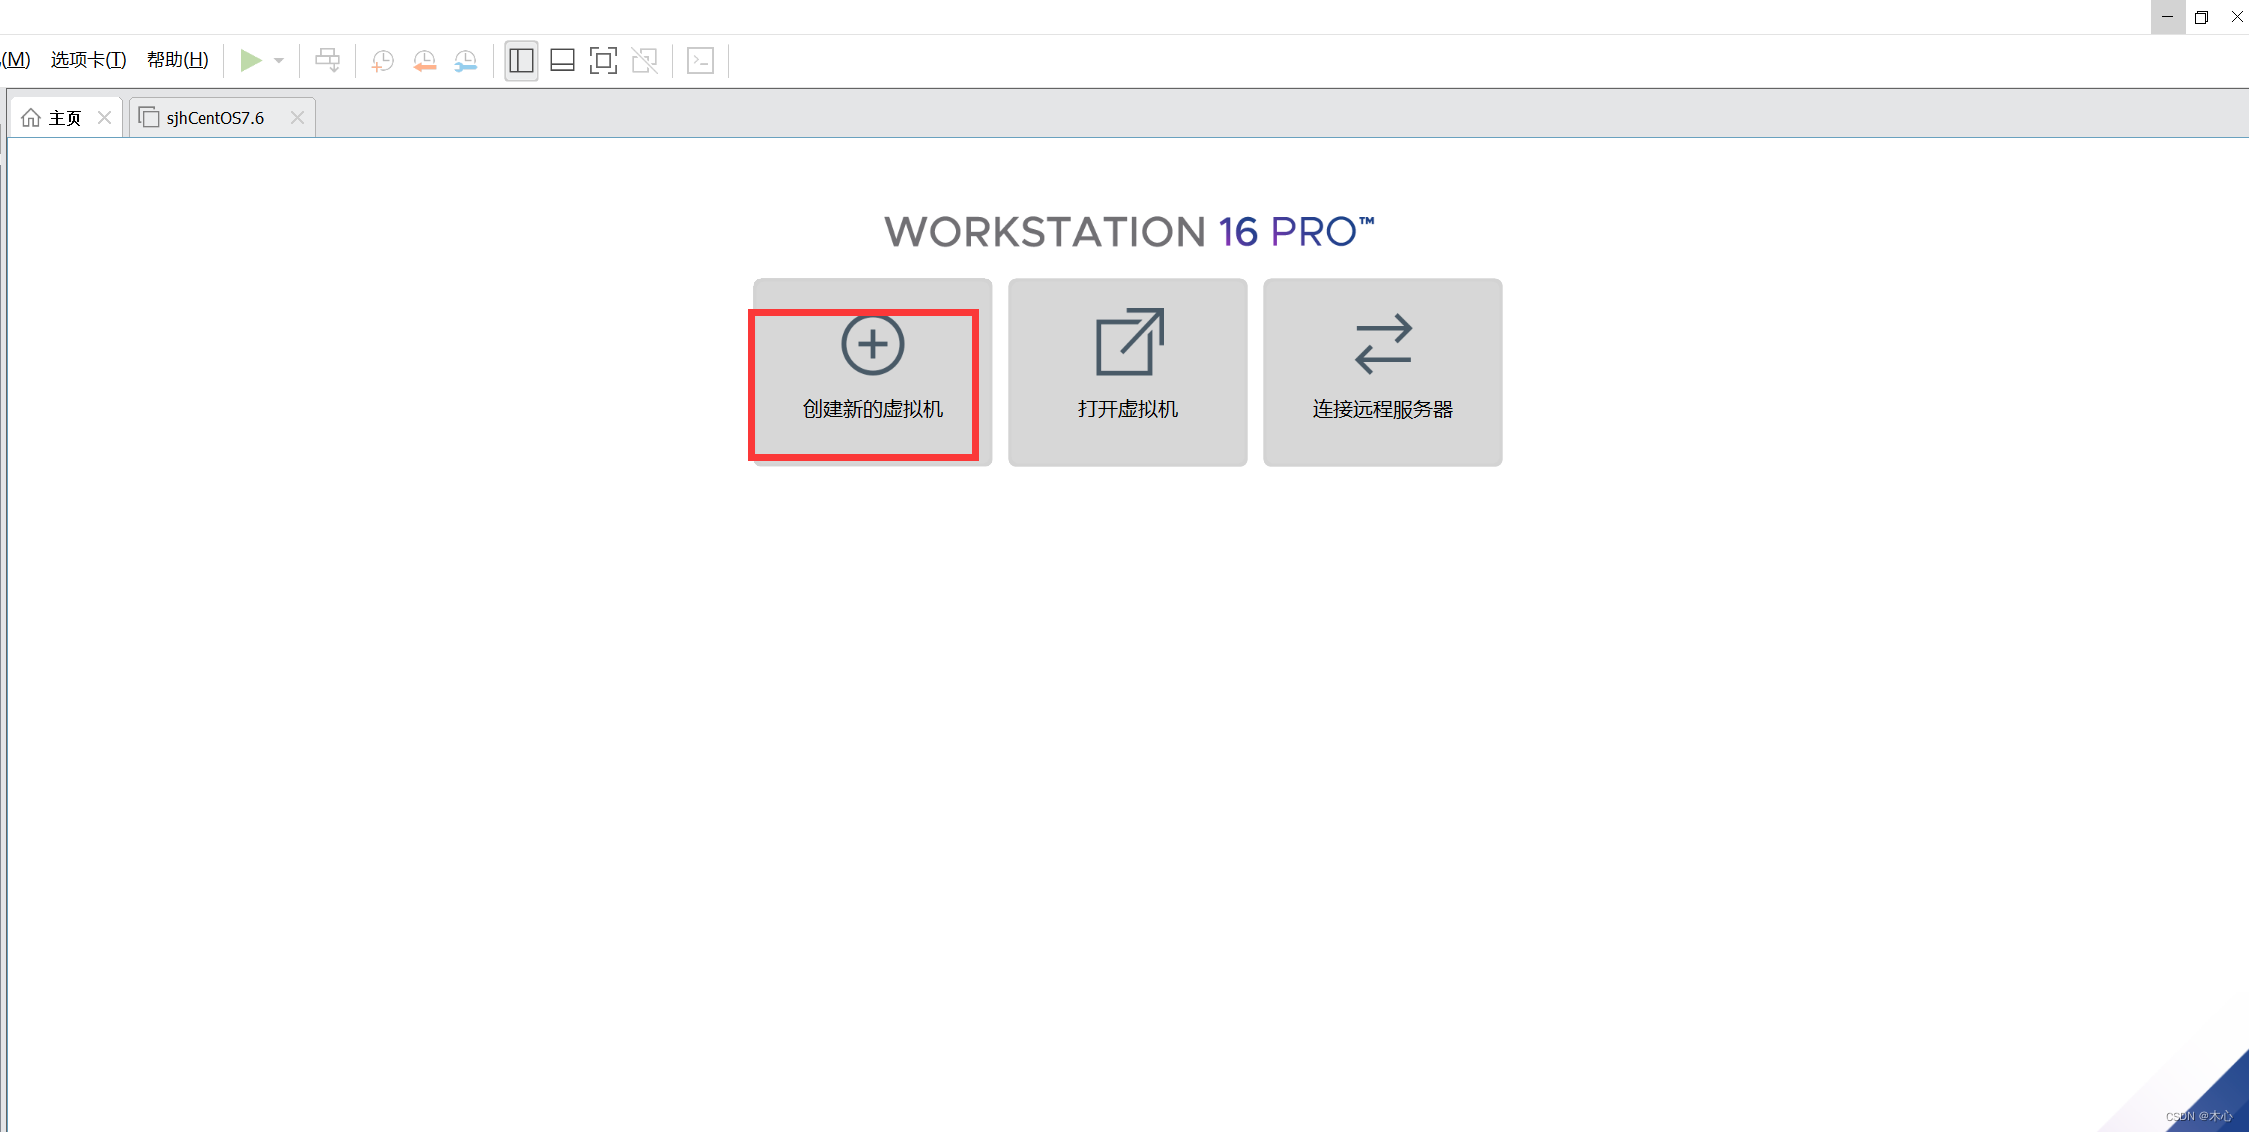
首先,打开安装好的VMWare,点击创建虚拟机
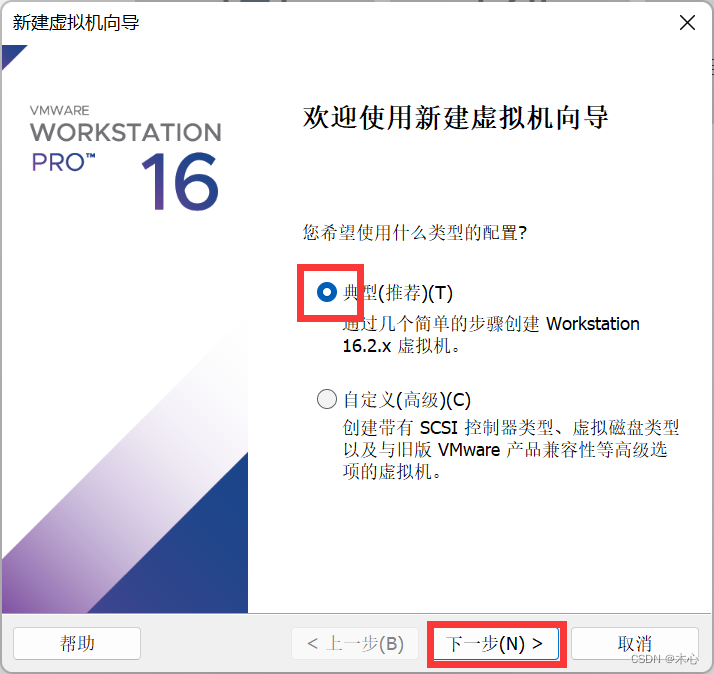
然后,选择典型,进行下一步。
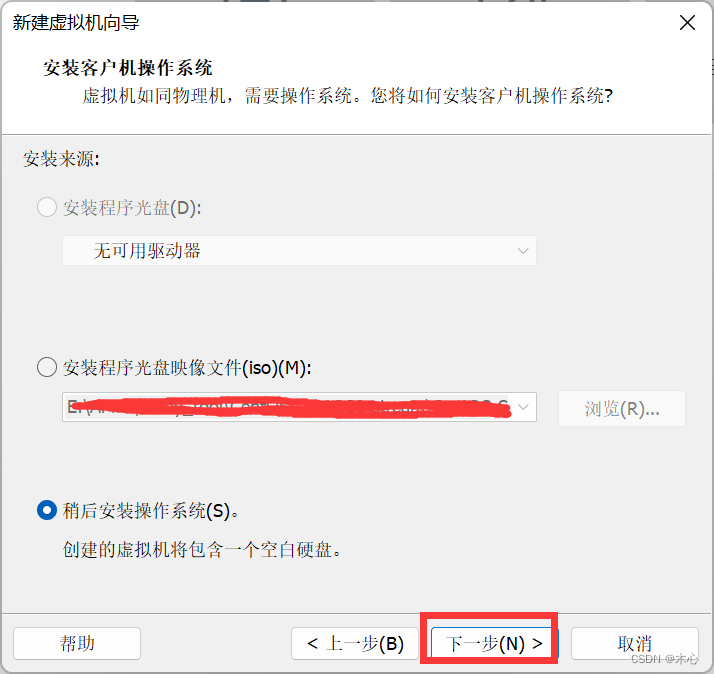
这一步,先不用选择镜像文件,我们在之后再进行选择,直接进行下一步即可。
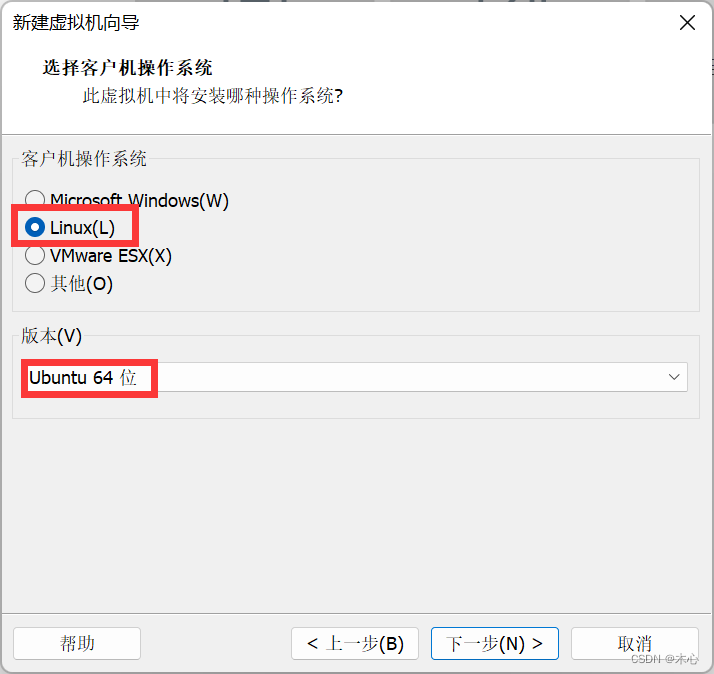
然后,选择安装的系统为Linux,版本为Ubuntu64
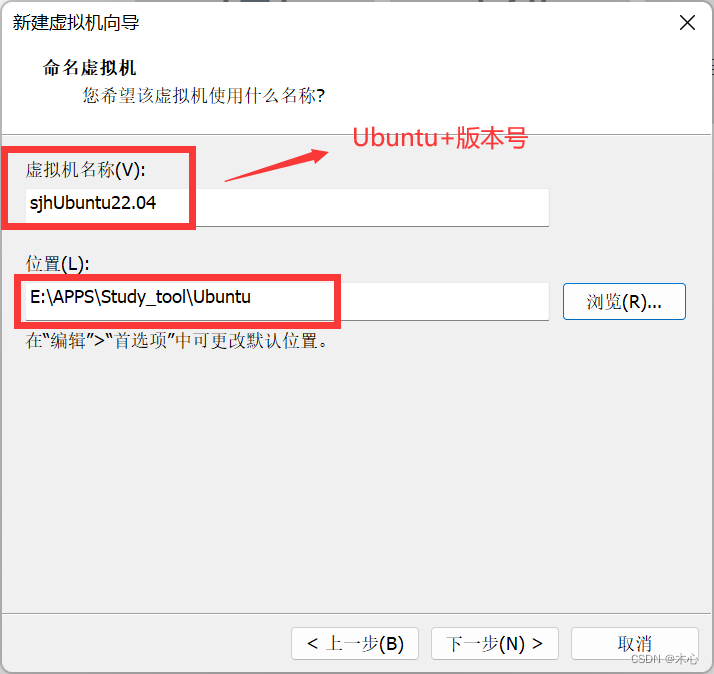
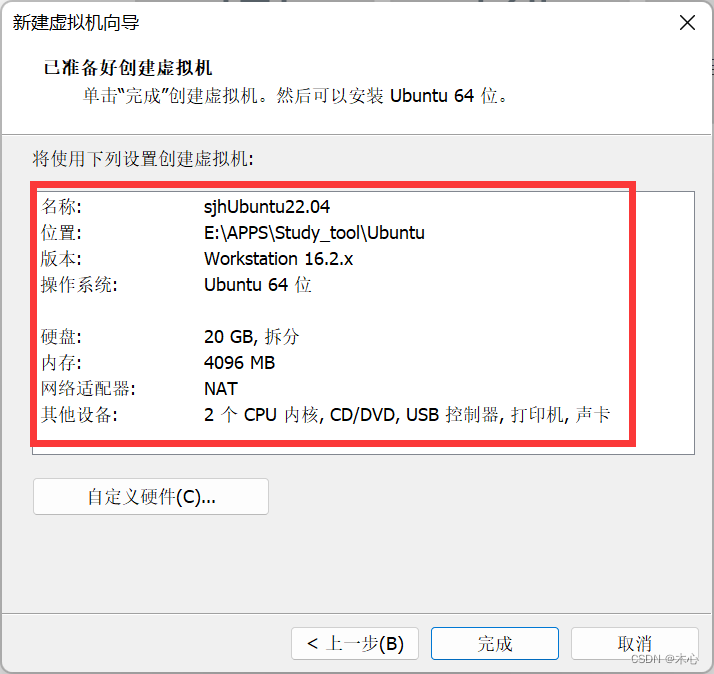
然后对环境进行命名,并且选择环境的存放路径,建议用Ubuntu加版本号的方式进行命名
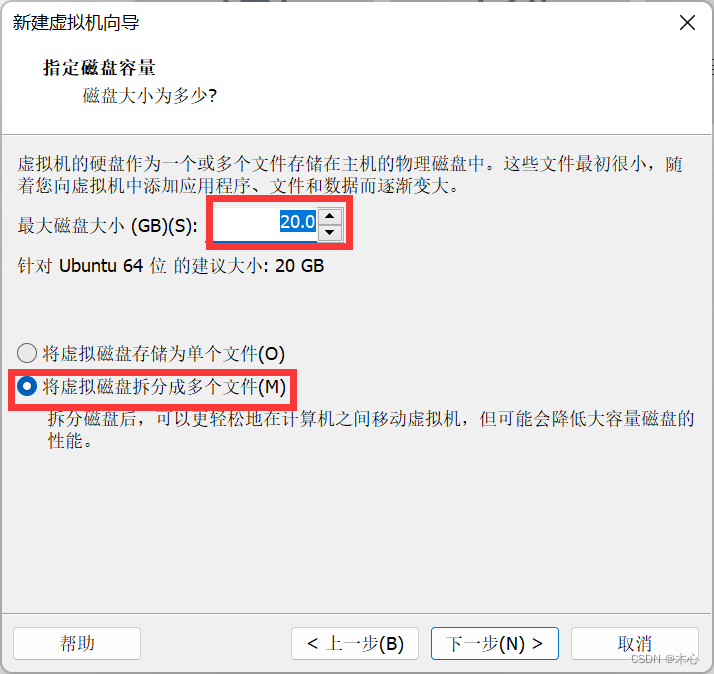
然后,选择Ubuntu系统占用的内存大小,下面的选择选择拆分成多个文件
然后,检查上述的参数配置,如果没问题就进行下一步
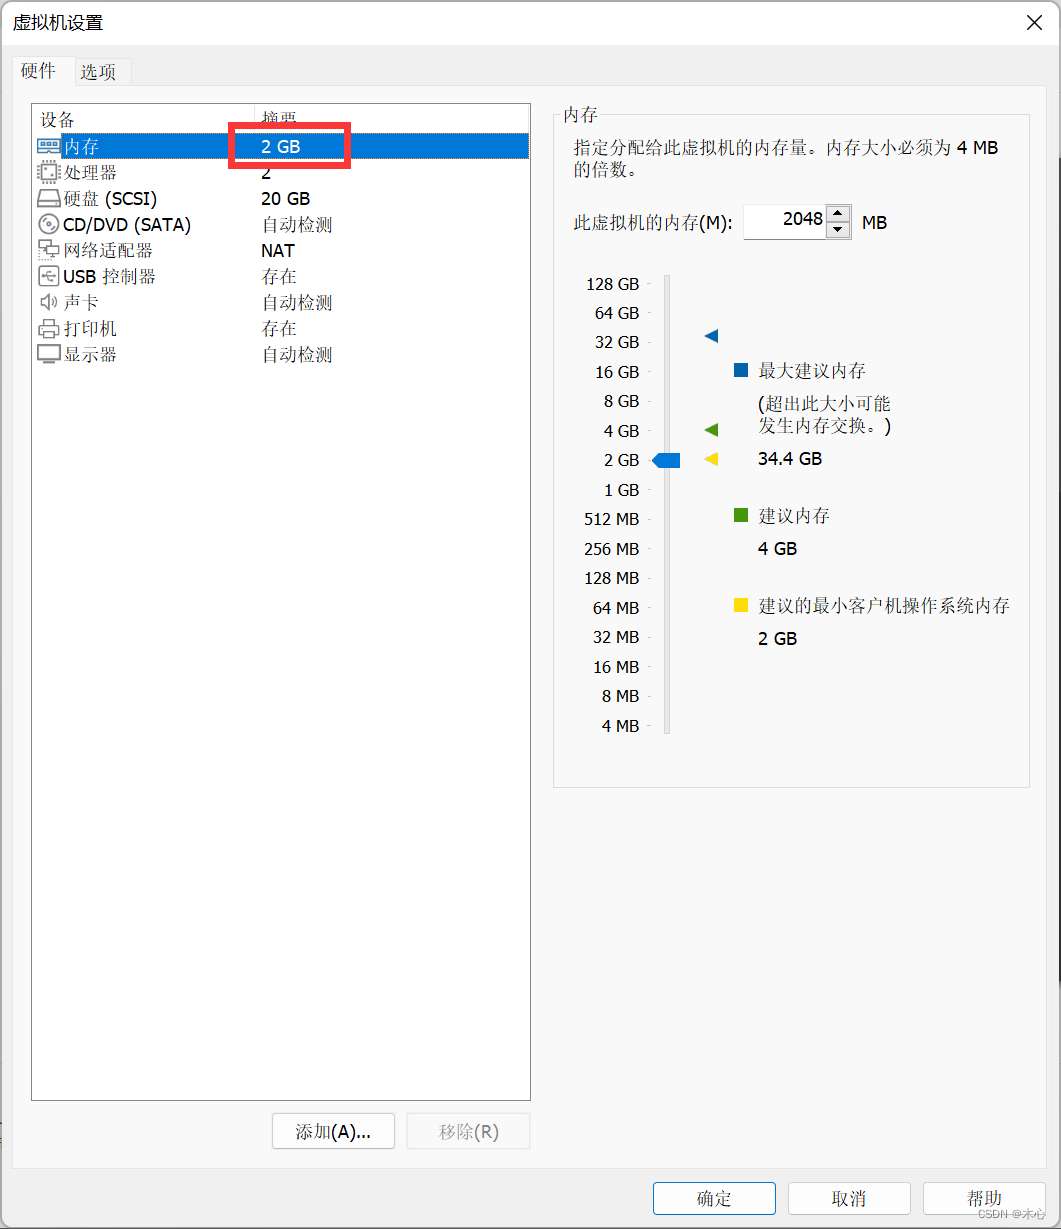
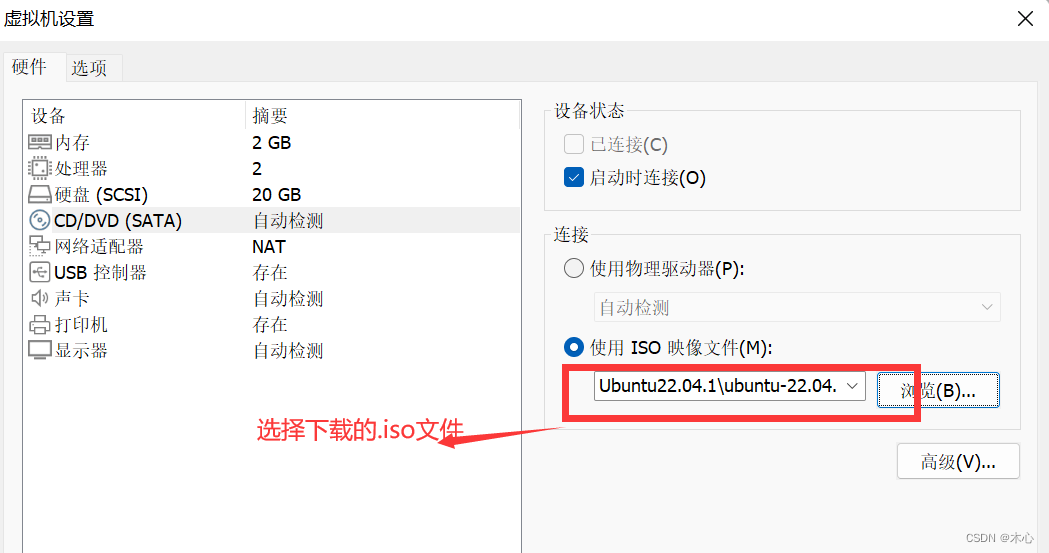
接下来,配置虚拟机镜像

首先,配置内存,默认分配2GB即可
然后,选择镜像的路径,就是之前下载好的.iso文件
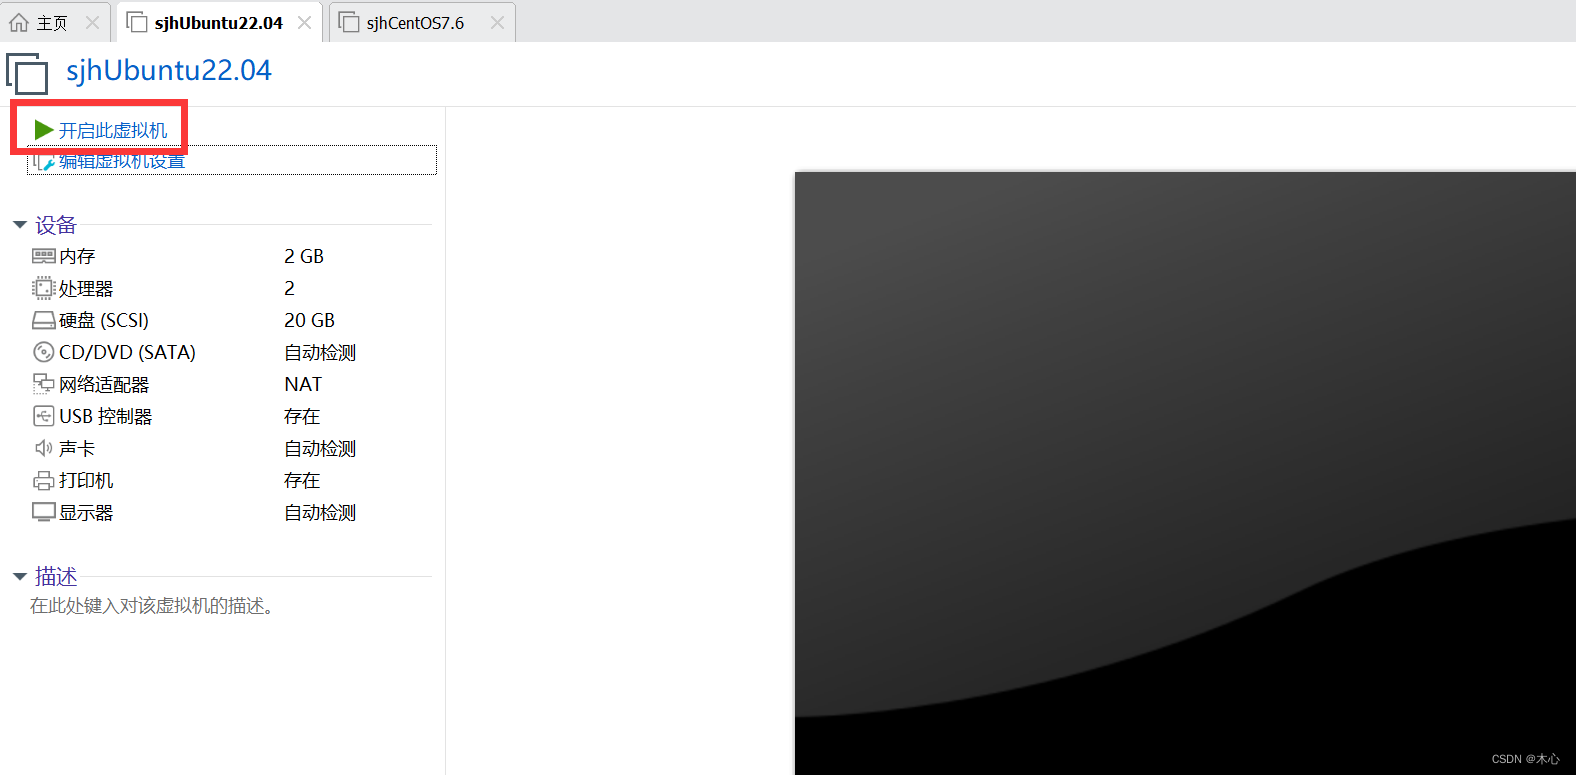
这里的配置就结束了,接下来就可以开启虚拟机,完成虚拟机的安装
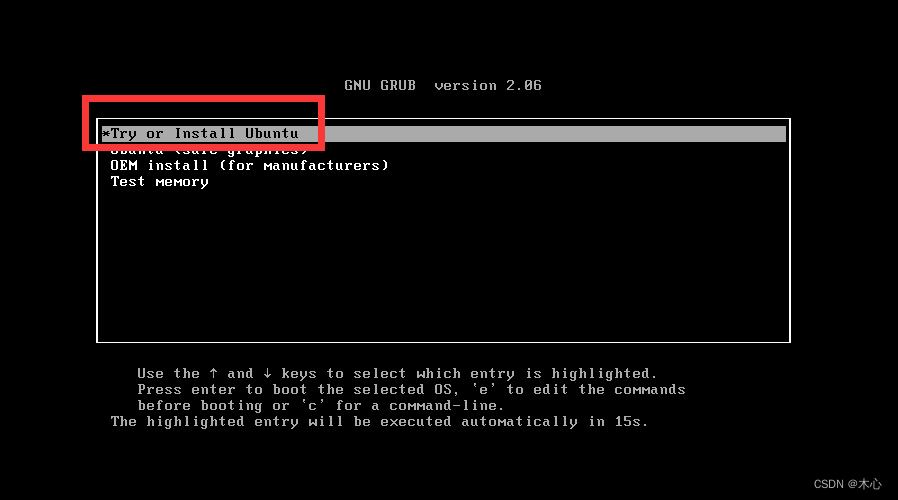
然后,选择第一个,install Ubuntu,用回车键选择
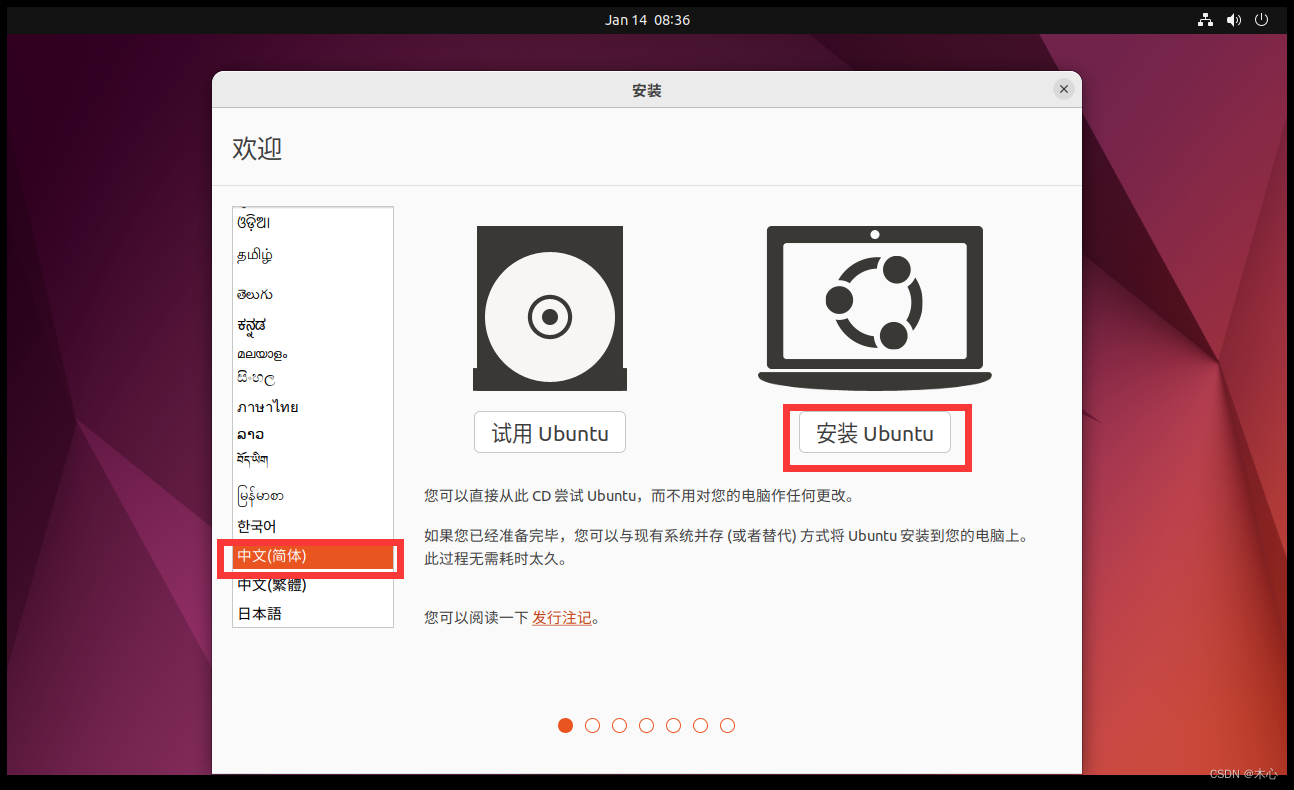
稍等片刻后,会出现下面的界面,选择语言,并继续安装
选择键盘的布局,使用默认的就可以

采用默认并且继续
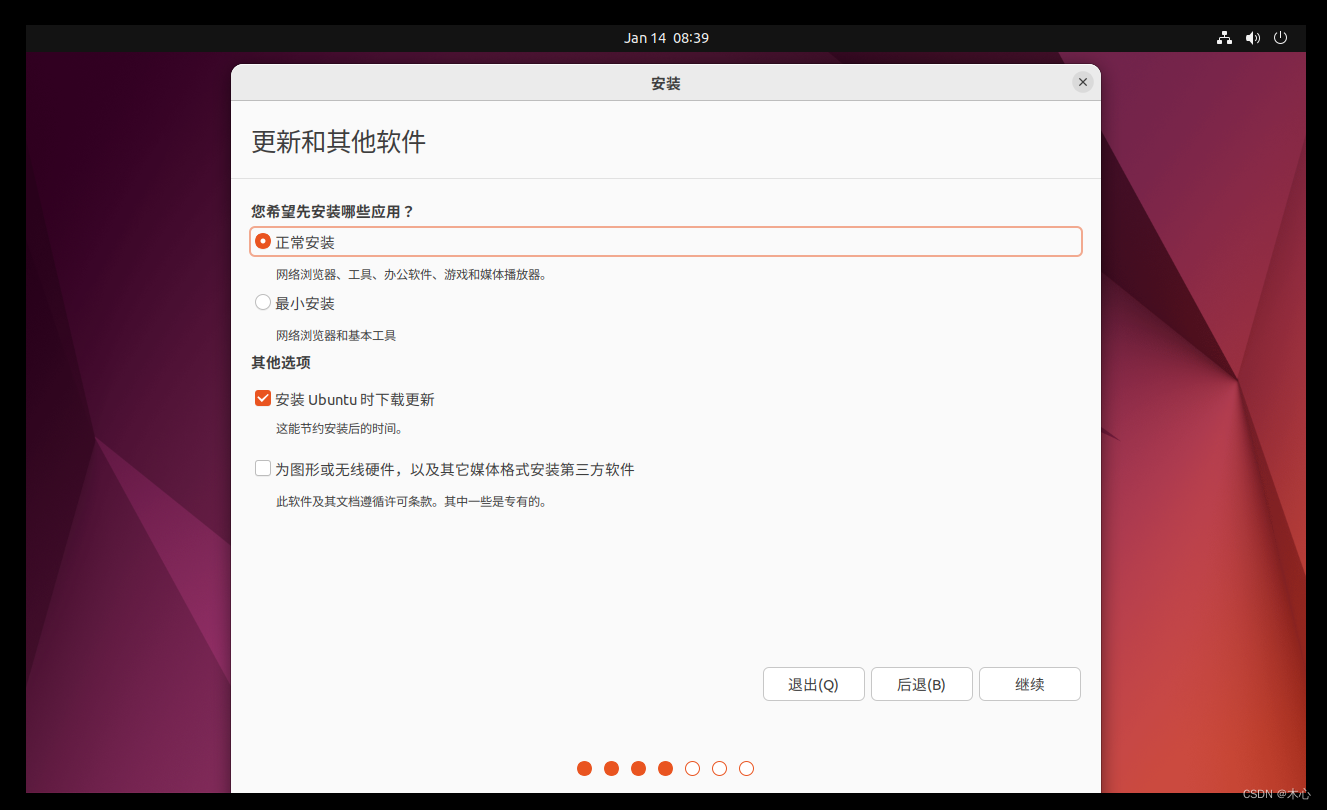
选择安装方式,在虚拟机中安装采用默认的就可以。

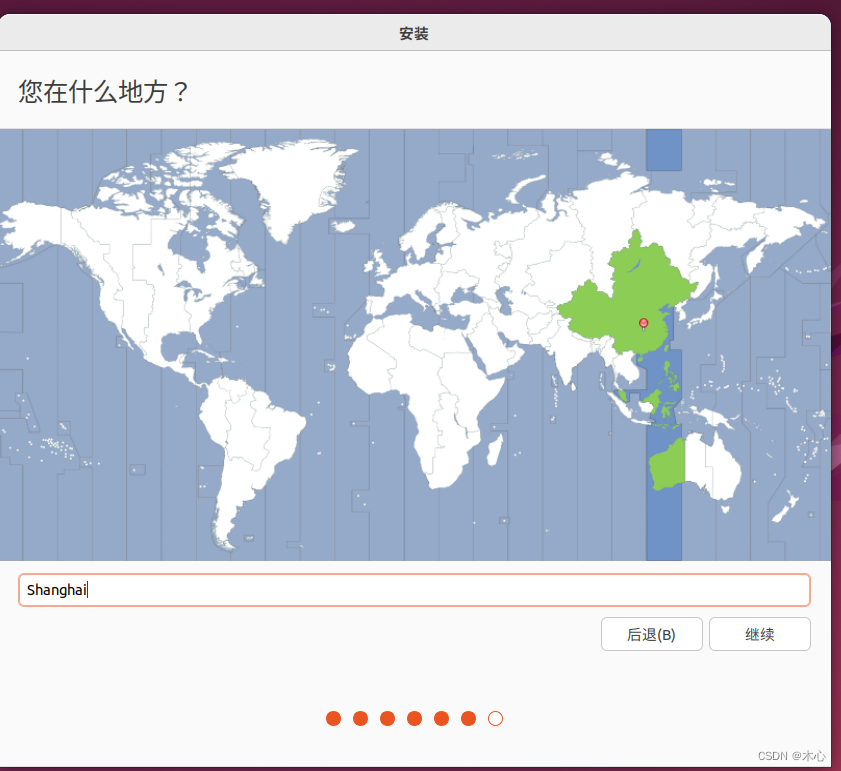
然后进行地区的选择,随便选择就可以了
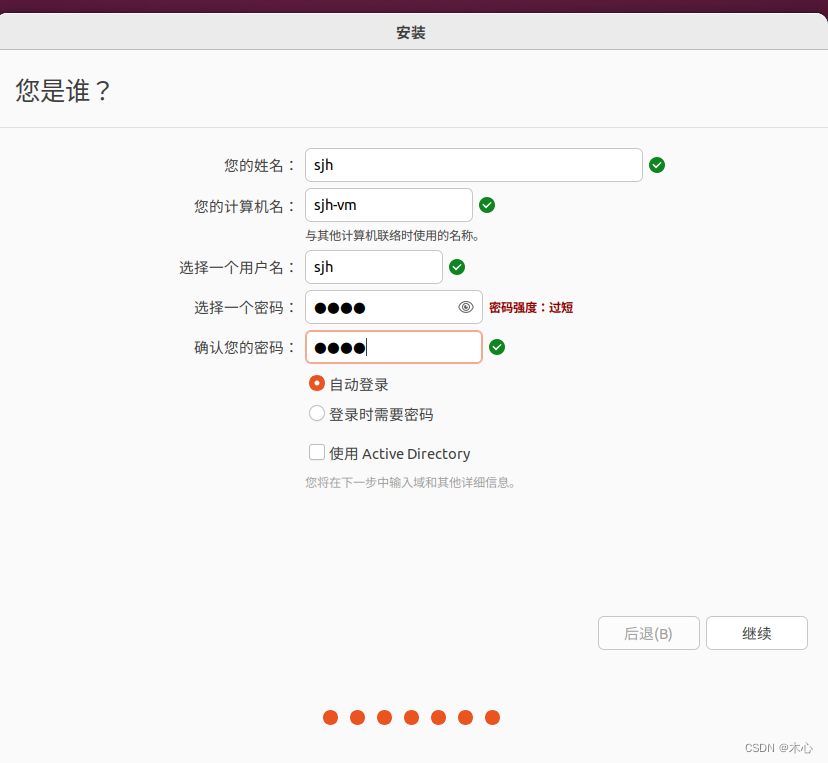
然后设置用户名和密码
接下来就等安装完成即可。
Reference
https://www.bilibili.com/video/BV1zt411G7Vn/?p=3&spm_id_from=pageDriver&vd_source=d02fb26eb2345ac42c054db0bb8d8864